

I had one of those whirlwind days where time seemed to slip right through my fingers.
With barely a moment to spare, my trusty air fryer came to the rescue.
I quickly whipped up some crispy chicken tenders that tasted like they had been slow-cooked all day.
It’s incredible how easily you can turn a hectic evening into a delicious success with just a few ingredients and minimal fuss.
Curious about more quick and tasty wonders to whip up in your air fryer?
Crispy Air Fryer Chicken Tenders

Crispy Air Fryer Chicken Tenders are a delightful and healthier alternative to traditional fried chicken tenders. These tenders are incredibly easy to prepare and offer a crispy, golden exterior with juicy, tender chicken inside. Perfect for a quick family dinner or a snack, these tenders can be paired with your favorite dipping sauces and sides.
The air fryer method cuts down on oil and cleanup time, making it an ideal choice for a busy weeknight meal. This recipe guarantees that the chicken tenders are seasoned perfectly and cooked to perfection, providing a satisfying crunch in every bite.
Using the air fryer not only reduces the amount of oil needed but also guarantees even cooking, resulting in a consistently delicious outcome. Whether you’re serving them to kids or adults, these chicken tenders are sure to be a hit at the dinner table.
Ingredients (Serves 4-6)
- 1 ½ pounds chicken tenderloins
- 1 cup all-purpose flour
- 1 teaspoon salt
- ½ teaspoon black pepper
- 1 teaspoon paprika
- 2 large eggs
- 1 tablespoon water
- 2 cups panko breadcrumbs
- Cooking spray or olive oil spray
Cooking Instructions
- Prepare the Chicken: Start by patting the chicken tenderloins dry with paper towels. This helps the coating adhere better.
- Set Up the Coating Stations: In a shallow dish, mix the flour, salt, black pepper, and paprika. In a second dish, whisk the eggs with water until well combined. In a third dish, add the panko breadcrumbs.
- Coat the Chicken: Dredge each chicken tender in the flour mixture, guaranteeing it’s fully coated. Shake off any excess flour. Next, dip it into the egg mixture, allowing any excess to drip off. Finally, press it into the panko breadcrumbs, guaranteeing an even coat.
- Preheat the Air Fryer: Preheat your air fryer to 400°F (200°C) for about 5 minutes. This guarantees that the chicken tenders start cooking immediately upon being placed in the fryer, helping them get crispy.
- Arrange and Spray: Arrange the coated chicken tenders in a single layer in the air fryer basket. Make sure they aren’t touching to guarantee even cooking. Lightly spray the chicken tenders with cooking spray or olive oil spray to help them crisp up.
- Air Fry the Chicken: Cook the chicken tenders at 400°F (200°C) for 8-10 minutes, flipping them halfway through. They should be golden brown and cooked through, with an internal temperature of 165°F (74°C).
- Serve: Once cooked, remove the chicken tenders from the air fryer and let them rest for a minute. Serve warm with your choice of dipping sauces.
Extra Tips
For extra crispiness, consider doubling the dredging process by repeating the egg and breadcrumb coating steps. If you prefer a spicier kick, add a dash of cayenne pepper to the flour mixture.
To guarantee even cooking, avoid overcrowding the air fryer basket; cook in batches if necessary. Additionally, for a gluten-free option, substitute the all-purpose flour with a gluten-free alternative and use gluten-free breadcrumbs.
Quick Air Fryer Salmon
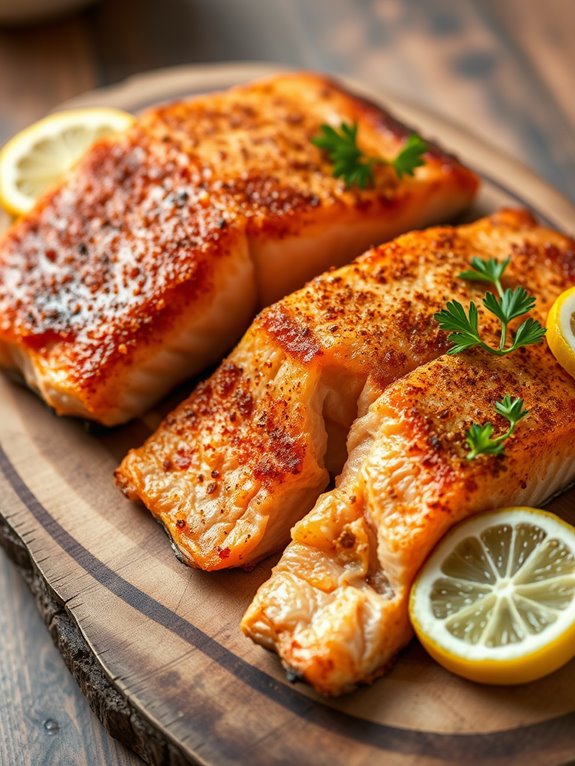
Air fryer salmon is a quick and delicious way to prepare a healthy dinner that can be ready in under 20 minutes. Perfectly cooked salmon with a crispy exterior and a juicy, tender interior is made easy with the air fryer. This method not only cuts down on cooking time but also guarantees an even cook with minimal clean-up.
The air fryer allows the natural flavors of the salmon to shine while providing a crisp texture that’s often difficult to achieve with traditional cooking methods. Whether you’re a busy professional or a home cook looking for a simple yet elegant dish, air fryer salmon is an excellent choice.
This recipe is versatile and can be paired with a variety of sides such as roasted vegetables, quinoa, or a fresh salad. With just a few simple ingredients, you can create a flavorful and nutritious meal that will impress your family or guests. Let’s explore the ingredients and steps needed to make this delightful dish for a serving size of 4-6 people.
Ingredients:
- 4-6 salmon fillets (about 6 oz each)
- 2 tablespoons olive oil
- 1 teaspoon garlic powder
- 1 teaspoon paprika
- 1 teaspoon salt
- 1/2 teaspoon black pepper
- 1 lemon, sliced into wedges
- Fresh parsley for garnish (optional)
Cooking Instructions:
- Preheat the Air Fryer: Begin by preheating your air fryer to 400°F (200°C) for about 5 minutes. This guarantees that the salmon will cook evenly and develop a nice crispy exterior.
- Prepare the Salmon: Pat the salmon fillets dry with paper towels to remove any excess moisture. This step is essential for achieving a crispy texture. Place the fillets on a plate or a cutting board.
- Season the Salmon: In a small bowl, mix together the olive oil, garlic powder, paprika, salt, and black pepper. Brush this mixture evenly over the salmon fillets, making sure to cover all sides.
- Arrange in the Air Fryer: Place the seasoned salmon fillets in a single layer in the air fryer basket. Be careful not to overcrowd the basket to allow for proper air circulation.
- Cook the Salmon: Cook the salmon at 400°F (200°C) for 7-9 minutes, depending on the thickness of the fillets. Check for doneness by ensuring the internal temperature of the salmon reaches 145°F (63°C).
- Rest and Serve: Once cooked, carefully remove the salmon from the air fryer using tongs. Let it rest for a minute or two before serving. Garnish with fresh parsley and serve with lemon wedges on the side for an added burst of flavor.
Extra Tips:
For the best results, choose fillets that are of similar thickness to guarantee even cooking. If your air fryer basket is small, you may need to cook the salmon in batches to prevent overcrowding.
If your salmon has skin, you can leave it on for cooking and remove it after, or enjoy it crispy if you prefer. Keep a close eye on the cooking time as air fryers can vary in performance. Adjust the seasoning to your taste by adding herbs like dill or thyme for extra flavor.
Air Fryer Stuffed Peppers

Air fryer stuffed peppers offer a delightful combination of flavors and textures, making them a perfect choice for an easy and nutritious dinner. This recipe takes the classic stuffed pepper dish to a new level by using the air fryer, which guarantees the peppers are cooked to perfection with a slightly crispy exterior and a tender, juicy interior.
The filling is a savory mix of ground meat, rice, and seasonings, providing a hearty and satisfying meal that’s both delicious and visually appealing. The versatility of this dish allows for plenty of customization based on personal preferences or dietary needs. You can easily swap out the type of meat used or add extra vegetables to the filling.
The air fryer reduces the cooking time considerably compared to the traditional oven method, making it a convenient option for busy weeknights. Whether you’re feeding a family or entertaining friends, these air fryer stuffed peppers are sure to impress and leave everyone feeling satisfied.
Ingredients for 4-6 servings:
- 4-6 large bell peppers
- 1 pound ground beef or turkey
- 1 cup cooked rice
- 1 can (14.5 oz) diced tomatoes, drained
- 1 small onion, finely chopped
- 2 cloves garlic, minced
- 1 teaspoon dried oregano
- 1 teaspoon dried basil
- Salt and pepper to taste
- 1 cup shredded mozzarella or cheddar cheese
- 2 tablespoons olive oil
Cooking Instructions:
- Prepare the Peppers: Wash the bell peppers thoroughly. Cut the tops off and remove the seeds and membranes from inside. Brush the outside of each pepper with olive oil to help them cook evenly in the air fryer.
- Cook the Filling: In a large skillet over medium heat, add a tablespoon of olive oil. Once heated, add the chopped onion and minced garlic, sautéing until the onion becomes translucent. Add the ground beef or turkey, cooking until browned. Drain any excess fat.
- Mix the Filling Ingredients: Add the cooked rice, drained diced tomatoes, oregano, basil, salt, and pepper to the meat mixture. Stir well to combine all ingredients evenly. Cook for an additional 5 minutes to allow flavors to meld.
- Stuff the Peppers: Spoon the filling mixture into each prepared bell pepper, pressing down gently to pack the filling in tightly. Leave a little space at the top for the cheese.
- Air Fry the Peppers: Preheat the air fryer to 360°F (182°C). Place the stuffed peppers in the air fryer basket, making certain they’re upright and not touching each other. Depending on the size of your air fryer, you may need to cook them in batches.
- Add the Cheese: After cooking for 10 minutes, carefully open the air fryer and sprinkle cheese over each pepper. Continue to cook for another 5-7 minutes or until the cheese is melted and bubbly.
- Serve and Enjoy: Carefully remove the peppers from the air fryer using tongs. Let them cool for a minute or two before serving, as they’ll be hot.
Extra Tips:
If you prefer a little more spice, consider adding a pinch of red pepper flakes to the filling for a mild kick. For a vegetarian version, substitute the meat with a mix of black beans and corn.
Additionally, if you find the peppers are falling over in the air fryer, use a small piece of aluminum foil to create a steady base. Finally, feel free to experiment with different types of cheese for varied flavor profiles.
Simple Air Fryer Pork Chops

Discover the ease and flavor of making pork chops using your air fryer with this simple recipe. Air fryers have revolutionized the way we cook, allowing us to prepare meals that are crispy on the outside and tender on the inside without a lot of oil. This recipe for Simple Air Fryer Pork Chops is perfect for a quick dinner, offering a delicious and hassle-free way to enjoy this classic dish.
With just a few ingredients and minimal prep, you’ll have a savory meal ready in no time, ideal for feeding a family or a small gathering. The beauty of this recipe lies in its simplicity and the way the air fryer locks in flavors while maintaining juiciness. By using this method, you’ll achieve perfectly cooked pork chops with a golden-brown crust that’s sure to satisfy.
Whether you’re a beginner or a seasoned cook, these pork chops are sure to become a staple in your culinary repertoire. With a serving size of 4-6 people, this dish is perfect for dinner parties or a cozy family night in.
Ingredients (serving size: 4-6 people):
- 4-6 bone-in or boneless pork chops (1-inch thick)
- 2 tablespoons olive oil
- 1 teaspoon garlic powder
- 1 teaspoon onion powder
- 1 teaspoon smoked paprika
- 1 teaspoon dried thyme
- Salt and pepper to taste
Cooking Instructions:
- Preheat the Air Fryer: Set your air fryer to 380°F (193°C) and allow it to preheat for about 5 minutes. This guarantees that the pork chops cook evenly.
- Prepare the Pork Chops: Pat the pork chops dry with paper towels. This helps the seasoning stick better and promotes a crispy exterior.
- Season the Pork Chops: In a small bowl, mix together olive oil, garlic powder, onion powder, smoked paprika, dried thyme, salt, and pepper. Rub the mixture evenly over both sides of each pork chop, making sure they’re well-coated.
- Arrange in the Air Fryer: Place the seasoned pork chops in the air fryer basket in a single layer, ensuring they don’t overlap. You may need to cook them in batches depending on the size of your air fryer.
- Cook the Pork Chops: Cook the pork chops in the preheated air fryer for 12-15 minutes, flipping them halfway through the cooking time. Check for doneness using a meat thermometer; they should reach an internal temperature of 145°F (63°C).
- Rest and Serve: Once cooked, remove the pork chops from the air fryer and let them rest for 3-5 minutes before serving. This allows the juices to redistribute throughout the meat, guaranteeing tenderness.
Extra Tips:
For added flavor, consider marinating the pork chops for 30 minutes to an hour before air frying. You can experiment with different spices and herbs to suit your taste preferences.
If you prefer a more charred exterior, increase the air fryer temperature to 400°F (204°C) for the last couple of minutes. Always verify that pork chops aren’t overcrowded in the air fryer basket to allow proper air circulation, which results in an even cook.
Enjoy your Simple Air Fryer Pork Chops with your choice of sides for a complete meal.
Air Fryer Shrimp Tacos

Air Fryer Shrimp Tacos are a quick and delicious meal that can easily become a family favorite. The air fryer allows you to cook shrimp to perfection, providing a crispy exterior while keeping the inside tender and juicy. These tacos are vibrant and packed with flavor, as they’re complemented with fresh toppings and a zesty sauce that will delight your taste buds. Perfect for a weeknight dinner, these shrimp tacos aren’t only simple to make but also offer a healthier alternative to traditional frying methods.
The combination of spices used to season the shrimp adds a depth of flavor that pairs wonderfully with the crunchy cabbage slaw and creamy avocado. The air fryer guarantees that the shrimp are cooked evenly in a fraction of the time it would take in the oven or on the stove. With minimal clean-up and prep work involved, this recipe is ideal for busy individuals who crave a homemade meal without spending hours in the kitchen. Serve these tacos with lime wedges and fresh cilantro for an extra burst of freshness.
Ingredients (serving size: 4-6 people):
- 1 1/2 lbs large shrimp, peeled and deveined
- 1 tablespoon olive oil
- 2 teaspoons chili powder
- 1 teaspoon garlic powder
- 1 teaspoon smoked paprika
- 1/2 teaspoon cumin
- Salt and pepper to taste
- 1/2 small red cabbage, thinly sliced
- 1/4 cup fresh cilantro, chopped
- 1 avocado, sliced
- 1 lime, cut into wedges
- 8-12 small corn tortillas
- 1/4 cup mayonnaise
- 1 tablespoon lime juice
- 1 teaspoon hot sauce (optional)
Cooking Instructions:
- Prepare the Shrimp: In a large bowl, combine the shrimp, olive oil, chili powder, garlic powder, smoked paprika, cumin, salt, and pepper. Mix well until the shrimp are evenly coated with the spice mixture.
- Preheat the Air Fryer: Set your air fryer to 400°F (200°C) and let it preheat for about 3 minutes. This will guarantee that the shrimp cook evenly.
- Cook the Shrimp: Place the seasoned shrimp in a single layer in the air fryer basket. Depending on the size of your air fryer, you may need to cook them in batches. Cook for 6-8 minutes, shaking the basket halfway through, until the shrimp are pink and cooked through.
- Prepare the Sauce: In a small bowl, whisk together the mayonnaise, lime juice, and hot sauce (if using). Adjust the seasoning to taste and set aside.
- Assemble the Tacos: Warm the corn tortillas in a dry skillet or microwave. Fill each tortilla with a layer of cabbage slaw, a few cooked shrimp, avocado slices, and a drizzle of the prepared sauce. Garnish with fresh cilantro and serve with lime wedges on the side.
Extra Tips:
For the best flavor, allow the shrimp to marinate in the spice mixture for about 15-30 minutes before cooking. This step is optional but highly recommended if time permits.
If you prefer a spicier kick, increase the amount of chili powder or add a pinch of cayenne pepper to the seasoning mix. Additionally, try switching up the toppings with ingredients like pickled onions or mango salsa to create different variations of these delicious shrimp tacos.
Easy Air Fryer Meatballs

Are you in search of a quick and delicious dinner option that the whole family will love? Seek no further than Easy Air Fryer Meatballs. This recipe combines the classic flavors of Italian-style meatballs with the convenience of modern cooking technology. The air fryer guarantees that your meatballs are perfectly cooked, with a crispy exterior and juicy interior, without the need for excessive oil.
Whether you’re serving them with pasta, in a sub, or as an appetizer, these meatballs are sure to be a hit. Preparing these meatballs is straightforward and requires minimal prep time, making them perfect for a busy weeknight. The ingredients are simple and can be customized to suit your taste preferences.
This recipe yields enough for 4-6 people, so it’s great for a family meal or a small gathering. With just a handful of ingredients and a few easy steps, you’ll have a flavorful dish that’s both satisfying and healthy.
Ingredients (for 4-6 servings):
- 1 pound ground beef
- 1/2 cup breadcrumbs
- 1/4 cup grated Parmesan cheese
- 1/4 cup chopped fresh parsley
- 2 cloves garlic, minced
- 1 large egg
- 1 teaspoon salt
- 1/2 teaspoon black pepper
- 1 teaspoon Italian seasoning
- Olive oil spray
Cooking Instructions:
- Preheat the Air Fryer: Begin by preheating your air fryer to 375°F (190°C). This guarantees that the meatballs cook evenly and start to crisp up right away.
- Prepare the Meatball Mixture: In a large mixing bowl, combine the ground beef, breadcrumbs, Parmesan cheese, parsley, minced garlic, egg, salt, black pepper, and Italian seasoning. Use your hands to mix everything until just combined, being careful not to overwork the meat.
- Shape the Meatballs: Once the mixture is ready, use your hands to form small balls, about 1.5 inches in diameter. You should end up with approximately 16-20 meatballs.
- Arrange in the Air Fryer: Lightly spray the air fryer basket with olive oil to prevent sticking. Place the meatballs in a single layer in the basket, ensuring they don’t touch or overcrowd.
- Cook the Meatballs: Cook the meatballs in the air fryer for 10-12 minutes, shaking the basket halfway through to guarantee even cooking. The meatballs should be golden brown and have an internal temperature of at least 160°F (71°C).
- Serve and Enjoy: Once cooked, remove the meatballs from the air fryer and let them rest for a few minutes. Serve them with your favorite pasta, sauce, or as part of a sub sandwich.
Extra Tips: When making these meatballs, feel free to experiment with different ground meats such as pork, turkey, or a combination for varied flavors.
For an extra kick, add some red pepper flakes to the meat mixture. If your air fryer is small, you may need to cook the meatballs in batches to avoid overcrowding, which can prevent them from crisping up properly.
Finally, if you want to keep the meatballs warm while finishing the rest of your meal, you can place them in a preheated oven at a low temperature.
Air Fryer Vegetable Medley

The Air Fryer Vegetable Medley is a delightful and healthy dish that brings out the natural flavors of fresh vegetables using the magic of air frying. This recipe is perfect for those who want to incorporate more veggies into their diet without compromising on taste or texture. The air fryer makes it easy to achieve a crispy exterior while maintaining a tender interior, enhancing the overall dining experience.
Whether you’re a seasoned cook or a kitchen novice, this recipe is straightforward and quick, making it an excellent choice for a weeknight dinner or a nutritious side dish.
What makes this vegetable medley stand out is its versatility. You can mix and match your favorite vegetables to suit your taste or what you have on hand. The combination of colorful vegetables not only makes it visually appealing but also packs it with a variety of nutrients.
Seasoned with a blend of herbs and spices, this dish comes together in under 30 minutes, making it a go-to option for a healthy, fuss-free meal. Enjoy this as a standalone dish or pair it with your favorite protein for a complete meal.
Ingredients (serving size: 4-6 people):
- 2 cups broccoli florets
- 2 cups cauliflower florets
- 1 red bell pepper, chopped
- 1 yellow bell pepper, chopped
- 1 zucchini, sliced
- 1 red onion, sliced
- 3 tablespoons olive oil
- 1 teaspoon garlic powder
- 1 teaspoon onion powder
- 1 teaspoon dried Italian herbs
- Salt and pepper to taste
- Juice of 1 lemon
Cooking Instructions:
- Prepare the Vegetables: Begin by washing all the vegetables thoroughly under cold running water. Cut the broccoli and cauliflower into bite-sized florets. Chop the bell peppers into small pieces, slice the zucchini into half-inch rounds, and slice the red onion thinly.
- Season the Vegetables: In a large mixing bowl, combine the prepared vegetables. Drizzle the olive oil over the top and sprinkle in the garlic powder, onion powder, dried Italian herbs, salt, and pepper. Toss everything together until the vegetables are evenly coated with the oil and seasonings.
- Preheat the Air Fryer: Set your air fryer to 375°F (190°C) and allow it to preheat for about 3-5 minutes. This guarantees that the vegetables start cooking immediately once placed inside, contributing to a crispy exterior.
- Air Fry the Vegetables: Place the seasoned vegetable mixture into the air fryer basket in a single layer. You may need to cook in batches depending on the size of your air fryer. Cook the vegetables for 15-18 minutes, shaking the basket halfway through to guarantee even cooking.
- Check for Doneness: After 15 minutes, check if the vegetables are cooked to your liking. They should be golden brown and crispy on the outside while tender on the inside. If they need more time, air fry for an additional 2-3 minutes.
- Finish and Serve: Once the vegetables are cooked, remove them from the air fryer and transfer them to a serving dish. Squeeze fresh lemon juice over the top before serving to add a burst of freshness.
Extra Tips:
To guarantee even cooking, try to cut the vegetables into similar sizes. This will help them cook at the same rate and prevent some from being overcooked while others remain underdone.
If you prefer a spicier kick, consider adding a pinch of red pepper flakes to the seasoning mix. Remember not to overcrowd the air fryer basket; cooking in batches allows hot air to circulate more effectively, giving you that perfect crispy texture.
Finally, feel free to experiment with different herbs and spices to customize the flavor to your personal preference.
Air Fryer Garlic Parmesan Wings

Air Fryer Garlic Parmesan Wings are a delicious and easy dinner option that brings together the perfect blend of savory garlic and rich, nutty Parmesan cheese. This dish is perfect for gatherings or a simple family dinner, offering a flavor-packed experience without the mess of traditional frying.
Using an air fryer not only reduces the amount of oil needed but also gives the wings a crispy texture that’s hard to resist. The combination of garlic and Parmesan guarantees that these wings are packed with flavor, making them a surefire hit with both kids and adults alike.
The beauty of this recipe is its simplicity and the quick cooking time, allowing you to have a satisfying meal on the table in about 30 minutes. The air fryer does most of the work, leaving you with more time to relax or prepare accompanying dishes.
With just a handful of ingredients, you can achieve restaurant-quality wings that are both healthier and more cost-effective. Whether you’re a seasoned cook or new to using an air fryer, this recipe is straightforward and easy to follow, guaranteeing that anyone can create these mouthwatering wings with ease.
Ingredients for 4-6 people:
- 2 pounds of chicken wings
- 2 tablespoons olive oil
- 1 teaspoon salt
- 1 teaspoon black pepper
- 1 teaspoon garlic powder
- 1/2 cup grated Parmesan cheese
- 2 tablespoons chopped fresh parsley
- 2 cloves garlic, minced
- 1 tablespoon lemon juice
Cooking Instructions:
- Prepare the Wings: Start by patting the chicken wings dry with paper towels to remove excess moisture. This step is essential for achieving crispy skin.
- Season the Wings: In a large bowl, combine the wings with olive oil, salt, black pepper, and garlic powder. Toss everything together until the wings are evenly coated with the seasoning.
- Preheat the Air Fryer: Set your air fryer to 400°F (200°C) and allow it to preheat for about 5 minutes. Preheating guarantees even cooking of the wings.
- Cook the Wings: Arrange the wings in a single layer in the air fryer basket. You may need to cook them in batches to prevent overcrowding. Cook for 20-25 minutes, flipping halfway through, until the wings are golden brown and crispy.
- Prepare the Garlic Parmesan Mixture: While the wings are cooking, mix together the Parmesan cheese, chopped parsley, minced garlic, and lemon juice in a small bowl.
- Coat the Wings: Once the wings are cooked, transfer them to a large bowl. Add the garlic Parmesan mixture and toss the wings until they’re fully coated with the cheesy, garlicky goodness.
- Serve: Transfer the coated wings to a serving platter and garnish with additional parsley if desired. Serve immediately for the best texture and flavor.
Extra Tips:
For the best results, make sure to space the wings out in the air fryer basket. Overcrowding can lead to uneven cooking and less crispy skin.
If you prefer extra crispy wings, you can increase the cooking time by a few minutes, but be sure to keep an eye on them to avoid burning. Feel free to adjust the seasonings to your taste, adding more or less garlic and Parmesan as desired.
Additionally, serving these wings with a simple side of celery sticks and a dipping sauce like ranch or blue cheese can complement the flavors perfectly.
Air Fryer Fish and Chips
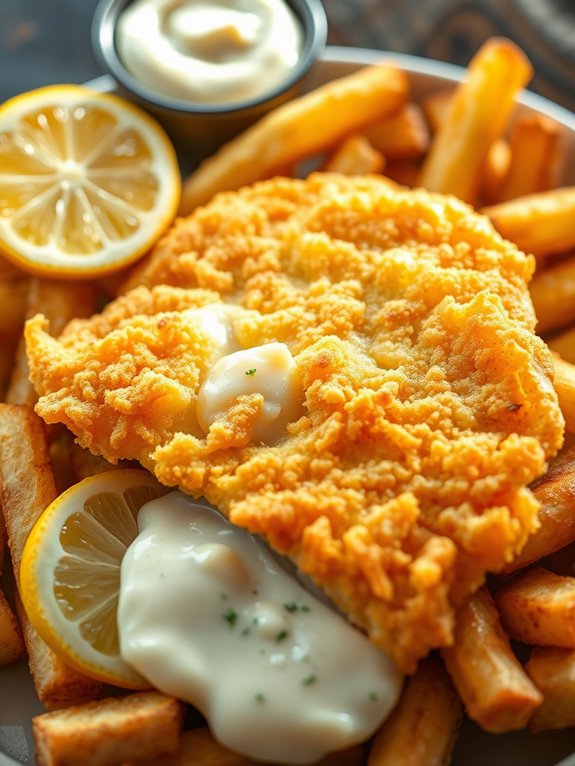
Fish and chips is a classic dish that has been enjoyed for generations. With the advent of the air fryer, you can now prepare this beloved meal with less oil, resulting in a healthier version that still offers the satisfying crunch and flavor of the traditional method.
This recipe combines tender, flaky fish fillets with crispy, golden fries, all cooked to perfection in your air fryer. Perfect for a family dinner, this dish brings the taste of the sea to your table without the added calories from deep frying.
The air fryer not only reduces the amount of oil needed but also speeds up the cooking process, making it a convenient choice for busy weeknights. In this recipe, we’ll use a simple batter for the fish that crisps up beautifully in the air fryer, while the chips are seasoned to perfection.
With a few easy steps, you’ll have a delicious meal that everyone will love. Let’s get started on making air fryer fish and chips for 4-6 people.
Ingredients
- 1.5 pounds of white fish fillets (such as cod or haddock)
- 4 large Russet potatoes
- 1 cup all-purpose flour
- 1 tablespoon baking powder
- 1 teaspoon salt
- 1/2 teaspoon black pepper
- 1 cup cold sparkling water
- 2 tablespoons olive oil
- Lemon wedges (for serving)
- Tartar sauce (for serving)
#
Cooking Instructions
- Prepare the Potatoes: Peel the Russet potatoes and cut them into thick strips to form the chips. Soak the potato strips in cold water for about 30 minutes to remove excess starch, which helps them crisp up better in the fryer.
- Preheat the Air Fryer: Set your air fryer to 400°F (200°C) and let it preheat while you prepare the rest of the ingredients.
- Prepare the Batter: In a large mixing bowl, combine the flour, baking powder, salt, and black pepper. Gradually whisk in the cold sparkling water until a smooth batter forms.
- Coat the Fish: Pat the fish fillets dry with paper towels. Dip each fillet into the batter, ensuring it’s well coated. Allow any excess batter to drip off before placing the fish aside on a plate.
- Cook the Chips: Drain the soaked potato chips and pat them dry with a clean kitchen towel. Toss them with olive oil and a pinch of salt. Place them in the air fryer basket in a single layer and cook for 15-20 minutes, shaking the basket halfway through for even cooking, until they’re golden and crispy.
- Cook the Fish: Place the battered fish fillets in the air fryer basket, ensuring they don’t overlap. Cook for 8-10 minutes, flipping halfway through, until the batter is crispy and the fish is cooked through.
- Serve: Once both the fish and chips are done, serve them immediately with lemon wedges and tartar sauce on the side.
#
Extra Tips
For the crispiest chips, be sure not to overcrowd the air fryer basket. You may need to cook them in batches depending on the size of your air fryer.
Additionally, using cold sparkling water in the batter helps to create a lighter, crisper coating on the fish. If you prefer your chips extra crispy, you can increase the cooking time slightly or use a higher temperature for the last couple of minutes.
Enjoy your healthier version of fish and chips with your favorite dipping sauces!
Air Fryer BBQ Chicken Thighs
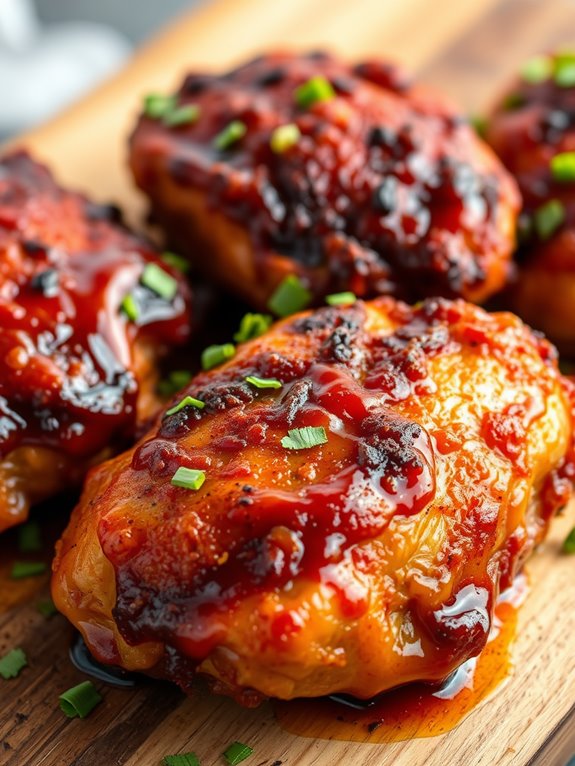
Air Fryer BBQ Chicken Thighs are a delicious and easy dinner option for when you’re craving something savory and satisfying. The air fryer helps to achieve perfectly crispy skin while keeping the meat juicy and tender. This recipe is perfect for busy weeknights or a casual weekend meal, as it requires minimal prep time and delivers maximum flavor with the help of your favorite BBQ sauce.
Whether you’re new to using an air fryer or a seasoned pro, this recipe is straightforward and yields consistent results every time. The chicken thighs are seasoned with a simple spice rub and then cooked to perfection in the air fryer before being coated in a rich BBQ sauce.
Pair these BBQ chicken thighs with your choice of side dishes for a complete meal that will have everyone coming back for seconds.
Ingredients for 4-6 servings:
- 2 lbs chicken thighs (bone-in, skin-on)
- 1 tablespoon olive oil
- 1 teaspoon garlic powder
- 1 teaspoon onion powder
- 1 teaspoon smoked paprika
- 1 teaspoon salt
- 1/2 teaspoon black pepper
- 1 cup BBQ sauce
Cooking Instructions:
- Prepare the Chicken: Pat the chicken thighs dry with paper towels. This helps to achieve a crispy skin. Place them in a large bowl and drizzle with olive oil. Confirm that each piece is evenly coated.
- Season the Chicken: In a small bowl, mix together the garlic powder, onion powder, smoked paprika, salt, and black pepper. Sprinkle this seasoning mixture over the chicken thighs, ensuring they’re well-coated and the seasoning is evenly distributed.
- Preheat the Air Fryer: Set your air fryer to 375°F (190°C) and allow it to preheat for about 5 minutes. This step guarantees even cooking and crispy skin.
- Cook the Chicken: Place the seasoned chicken thighs in the air fryer basket in a single layer, making sure not to overcrowd them. Cook for 20-25 minutes, flipping halfway through, until the internal temperature reaches 165°F (75°C) and the skin is crispy and golden brown.
- Add the BBQ Sauce: Once cooked, remove the chicken thighs from the air fryer and brush them generously with your favorite BBQ sauce. Return them to the air fryer and cook for an additional 5 minutes to caramelize the sauce.
- Serve: Remove the chicken thighs from the air fryer and let them rest for a few minutes before serving. This allows the juices to redistribute and keeps the meat tender and juicy.
Extra Tips:
For extra crispy skin, make sure the chicken thighs are as dry as possible before seasoning. You can prepare the spice rub in advance and store it in an airtight container for future use.
Experiment with different BBQ sauces for varying flavors; a spicy or smoky BBQ sauce can add a different dimension to the dish. If you want to reduce cleanup time, consider lining your air fryer basket with parchment paper.
Finally, always check the internal temperature of the chicken to confirm it’s fully cooked and safe to eat.
Air Fryer Zucchini Fries

Air Fryer Zucchini Fries are a delicious and healthier alternative to traditional fries, providing a crispy texture with a tender inside. Perfect as a side dish, appetizer, or snack, these zucchini fries are incredibly easy to prepare and cook using your air fryer. Not only do they offer a satisfying crunch, but they’re also packed with nutrients, making them a guilt-free indulgence.
The air fryer method minimizes the use of oil, resulting in fewer calories and less mess compared to deep frying, while still delivering that irresistible crispiness.
To make Air Fryer Zucchini Fries, you simply need to coat zucchini sticks in a flavorful breading and pop them in the air fryer. This recipe is perfect for 4-6 people, and it’s a great way to use up any extra zucchini you might have.
With the right balance of seasonings and a simple preparation process, these fries will become a household favorite in no time. The combination of spices, cheese, and breadcrumbs elevates the flavor profile, guaranteeing that every bite is as tasty as it’s healthy.
Ingredients (Serves 4-6)
- 3 medium zucchinis
- 1 cup all-purpose flour
- 3 large eggs
- 1 ½ cups panko breadcrumbs
- 1 cup grated Parmesan cheese
- 1 teaspoon garlic powder
- 1 teaspoon onion powder
- 1 teaspoon smoked paprika
- Salt and black pepper to taste
- Cooking spray or olive oil spray
### Cooking Instructions
- Prepare the Zucchini: Wash and dry the zucchinis thoroughly. Slice off both ends and cut them into sticks resembling the size and shape of traditional fries.
- Set Up Breading Station: In a shallow dish, place the flour. In another shallow dish, whisk the eggs until smooth. In a third dish, combine panko breadcrumbs, Parmesan cheese, garlic powder, onion powder, smoked paprika, salt, and black pepper.
- Coat the Zucchini Fries: Take each zucchini stick and roll it in the flour, making sure it’s evenly coated. Then dip it into the egg mixture, letting any excess drip off. Finally, press it into the breadcrumb mixture, making sure to have an even coat all around.
- Preheat the Air Fryer: Preheat your air fryer to 400°F (200°C) for about 5 minutes. This step guarantees even cooking and a consistent crispy texture.
- Arrange and Cook: Lightly spray the air fryer basket with cooking spray. Arrange the coated zucchini fries in a single layer in the basket, ensuring they don’t overlap. Spray the tops with a little more cooking spray to help with browning.
- Air Fry the Zucchini Fries: Cook the fries at 400°F (200°C) for 10-12 minutes, flipping halfway through, until they’re golden brown and crispy.
- Serve: Once cooked, carefully remove the zucchini fries from the air fryer and serve immediately with your choice of dipping sauce.
### Extra Tips
For best results, avoid overcrowding the air fryer basket as this can lead to uneven cooking. If you have a smaller air fryer, you may need to cook the fries in batches.
To keep the first batch warm while cooking the rest, place them in a preheated oven at a low temperature. Additionally, feel free to experiment with different spices and herbs in the breadcrumb mixture to suit your taste preferences.
If you prefer a gluten-free version, substitute the all-purpose flour and breadcrumbs with gluten-free alternatives.
Air Fryer Beef Stir-Fry
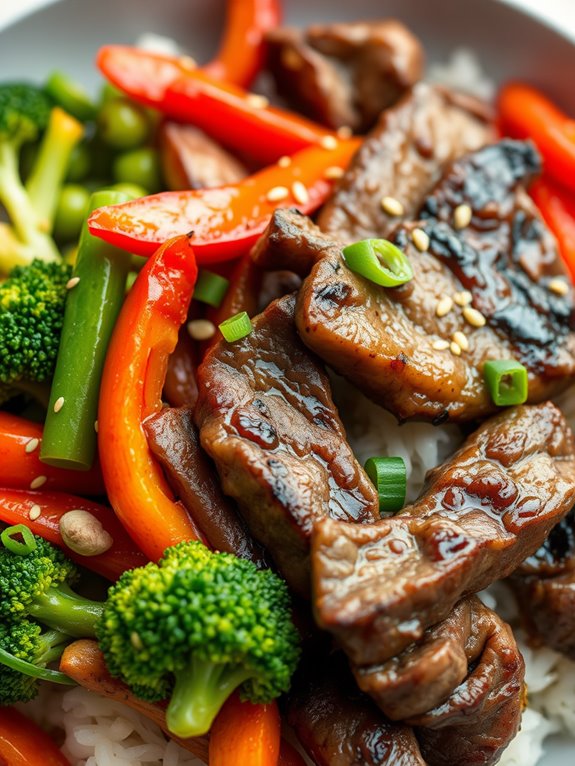
Air Fryer Beef Stir-Fry is a quick and delicious dish that can be whipped up in no time using fresh vegetables and tender strips of beef. This dish is perfect for those busy weeknights when you want something hearty and nutritious without spending hours in the kitchen. The air fryer brings out the flavors beautifully, giving the beef a perfect sear while maintaining its juiciness. The vibrant vegetables add a delightful crunch, making this stir-fry a well-balanced meal that the whole family will enjoy.
The versatility of the Air Fryer Beef Stir-Fry is one of its greatest strengths. You can easily customize it with your favorite vegetables or even add a spicy kick with some chili flakes or hot sauce. By using an air fryer, you’ll cut down on the oil typically needed for stir-frying, resulting in a healthier dish that doesn’t compromise on flavor. Serve it over steamed rice or noodles for a complete and satisfying dinner that can be on the table in less than 30 minutes.
Ingredients for 4-6 people:
- 1 ½ pounds beef sirloin, thinly sliced
- 2 tablespoons soy sauce
- 1 tablespoon oyster sauce
- 1 tablespoon cornstarch
- 1 tablespoon vegetable oil
- 1 red bell pepper, sliced
- 1 green bell pepper, sliced
- 1 cup broccoli florets
- 1 cup snap peas
- 2 cloves garlic, minced
- 1 tablespoon ginger, minced
- 1 tablespoon sesame oil
- Salt and pepper to taste
- Cooked rice or noodles, for serving
- Sesame seeds and sliced green onions, for garnish (optional)
Cooking Instructions:
- Marinate the Beef: In a large bowl, combine the sliced beef with soy sauce, oyster sauce, cornstarch, and a pinch of salt. Mix well to coat the beef evenly. Let it marinate for at least 15 minutes to absorb the flavors.
- Prepare the Air Fryer: Preheat the air fryer to 400°F (200°C) for about 5 minutes. This guarantees that the beef and vegetables cook evenly and quickly.
- Cook the Beef: Place the marinated beef in the air fryer basket in a single layer, being careful not to overcrowd. Cook for 8-10 minutes, shaking the basket halfway through to guarantee even cooking. The beef should be browned and cooked through.
- Cook the Vegetables: While the beef is cooking, toss the bell peppers, broccoli, snap peas, garlic, and ginger with vegetable oil, sesame oil, salt, and pepper. After the beef is done, remove it from the air fryer and set aside. Add the vegetable mixture to the air fryer and cook for 6-8 minutes, shaking the basket halfway through until the vegetables are tender yet crisp.
- Combine and Serve: Once the vegetables are done, return the beef to the air fryer basket and toss everything together. Cook for an additional 2 minutes to heat through. Serve the stir-fry over cooked rice or noodles, garnished with sesame seeds and green onions if desired.
Extra Tips:
For the best results, confirm the beef is thinly sliced to allow for quick and even cooking. If you’re looking for a bit of heat, consider adding a dash of chili flakes or a splash of hot sauce to the marinade. Adjust the cooking time depending on the thickness of your beef slices and the power of your air fryer. Remember to preheat the air fryer to confirm everything cooks at the right temperature. Finally, feel free to customize the vegetables based on what’s in season or your personal preference.