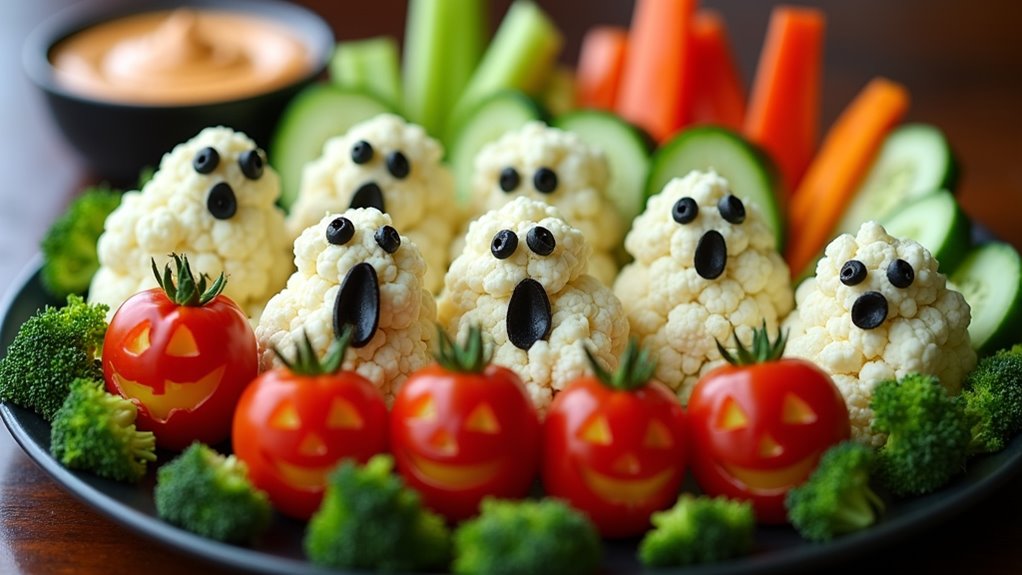
Halloween is just around the corner, and I’ve cooked up some spine-chilling food ideas just perfect for your work party. Picture Spooky Spider Deviled Eggs crawling their way onto your table or a bubbling Witch’s Brew Punch to quench your thirst. These treats are not only delicious but also the ultimate conversation starters. Ready to see your colleagues smile and maybe even gasp? Stick around for some wickedly clever and delicious ideas that’ll make your party the talk of the office.
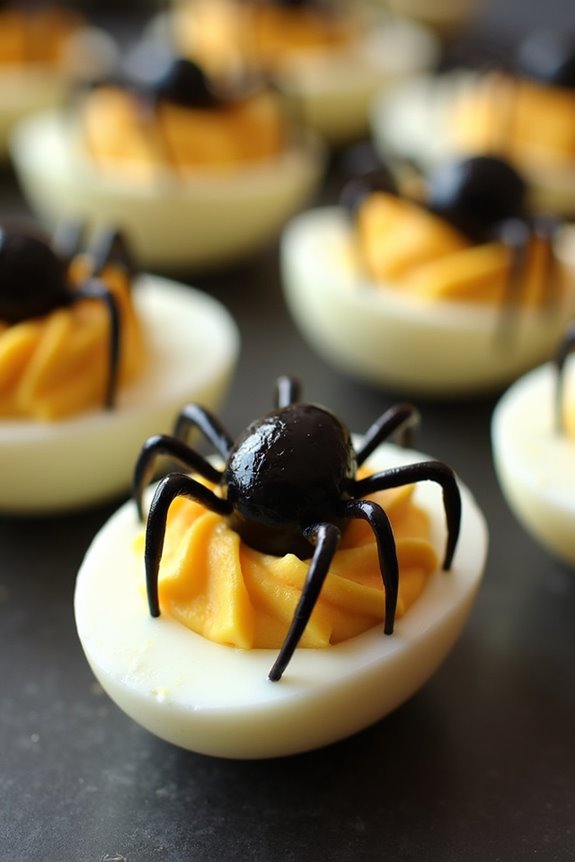
Spooky Spider Deviled Eggs
- 6 large eggs
- 3 tablespoons mayonnaise
- 1 teaspoon yellow mustard
- Salt and pepper to taste
- 12 black olives
Instructions:
- Boil the Eggs: Place the eggs in a saucepan and cover them with cold water. Bring the water to a boil over medium-high heat. Once boiling, cover the saucepan, remove it from the heat, and let the eggs sit for about 10-12 minutes. This results in perfectly hard-boiled eggs.
- Cool and Peel: After the eggs have finished cooking, transfer them to a bowl of ice water to cool for about 5 minutes. Once cooled, gently crack and peel the eggs, making sure that the shells are entirely removed.
- Prepare the Filling: Slice each egg in half lengthwise and carefully scoop out the yolks into a mixing bowl. Add the mayonnaise, mustard, salt, and pepper to the yolks. Use a fork to mash and mix until the filling is smooth and creamy.
- Assemble the Eggs: Spoon or pipe the yolk mixture back into the egg white halves, filling them generously.
- Create the Spiders: Cut the black olives in half. Use one half for the spider’s body and slice the remaining half into thin strips to form the legs. Arrange one olive half on top of each filled egg to form the spider’s body, and place four olive strips on each side to make the legs.
- Chill and Serve: Once all the eggs are decorated, refrigerate them for at least 30 minutes to allow the flavors to meld and the filling to set. Serve chilled and enjoy the spooky presentation.
Extra Tips: For added flavor, consider incorporating a dash of paprika or a splash of vinegar into the yolk mixture for a zesty kick.
If you prefer a creamier texture, adjust the mayonnaise accordingly. Confirm that the olives are well-drained to prevent excess moisture from affecting the filling.
These deviled eggs are best made a few hours before serving to allow ample chilling time, guaranteeing they hold their shape and taste fresh when presented.
Witch’s Brew Punch
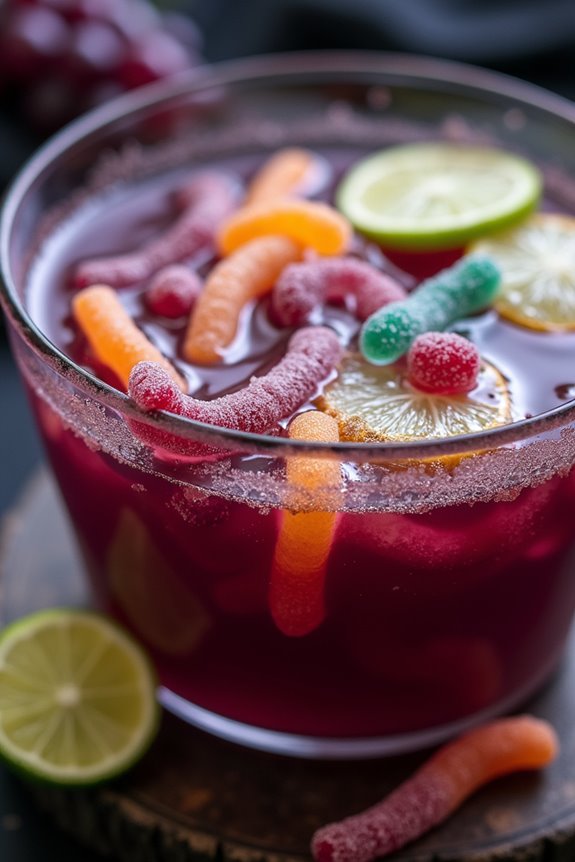
Halloween is the perfect time to get creative with your party refreshments, and a bewitching beverage like Witch’s Brew Punch can be the highlight of your work party. This vibrant and delightful punch isn’t only visually engaging but also deliciously invigorating, making it a hit among both adults and children.
The spell-binding combination of fruity flavors and a touch of fizz will have your colleagues coming back for more. Whether served from a cauldron or a spooky punch bowl, this concoction is sure to set the mood for a fun and festive Halloween celebration.
Witch’s Brew Punch combines the enchanting flavors of grape juice and orange juice with a fizzy twist of lemon-lime soda. This tantalizing blend is then elevated with a dash of pineapple juice and garnished with fun, thematic elements like gummy worms or plastic spiders for an extra Halloween touch.
Easy to prepare, this recipe is ideal for a crowd of 4-6 people and can be quickly scaled up for larger gatherings. Let’s plunge into the ingredients and steps to create this magical potion.
Ingredients for 4-6 servings:
- 2 cups grape juice
- 2 cups orange juice
- 1 cup pineapple juice
- 2 cups lemon-lime soda
- 1 cup ginger ale
- 1 lime, sliced
- Handful of gummy worms (for garnish)
- Ice cubes
Instructions:
- Prepare the Base: Start by pouring the grape juice, orange juice, and pineapple juice into a large punch bowl. Stir the mixture well to guarantee the juices are thoroughly combined, creating a consistent fruity base for the punch.
- Add the Fizz: Slowly add the lemon-lime soda and ginger ale to the juice mixture. Pouring gently will help retain the carbonation, giving your punch its signature fizz which adds to the invigorating taste.
- Garnish and Chill: Add ice cubes to the punch bowl to keep the punch chilled. Next, decorate the punch with lime slices and a handful of gummy worms, giving it a spooky, Halloween-themed appearance.
- Serve: Use a ladle to serve the punch into cups, making sure to include a gummy worm or two in each serving for a fun surprise. Enjoy the invigorating and flavorful Witch’s Brew Punch with your party guests.
Extra Tips:
For an extra spooky effect, consider freezing some gummy worms in ice cube trays with water to create “creepy crawly” ice cubes. This won’t only keep the punch cold but also add a fun, thematic element to each glass as the ice cubes melt and the worms emerge.
If you’re preparing this punch for an adult crowd, a splash of vodka or rum can be added for an alcoholic twist. Remember to adjust the quantities based on your specific needs and always drink responsibly.
Eyeball Truffles
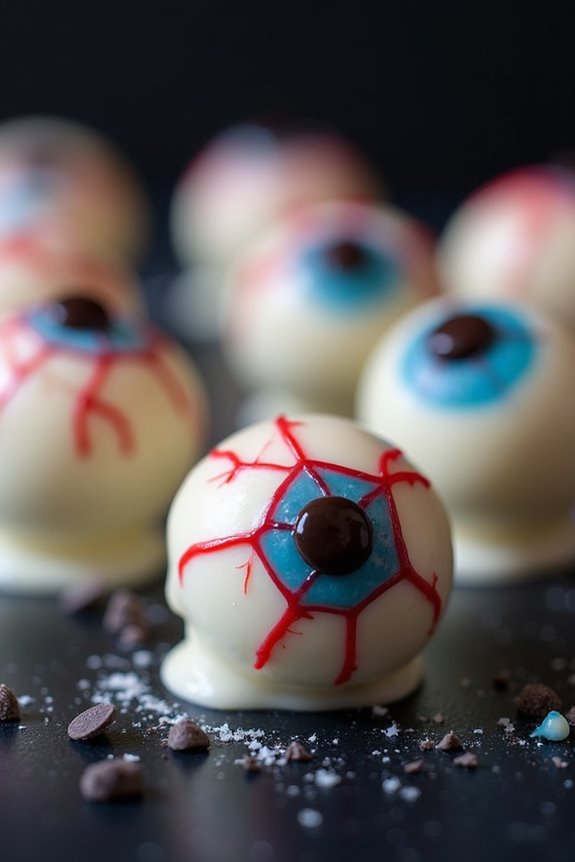
Halloween is the perfect time to get creative with your treats, and these Eyeball Truffles are sure to spook and delight your colleagues at your work party.
These truffles not only look the part but are incredibly delicious, combining rich chocolate with cream cheese for a decadent bite. Whether you’re a seasoned baker or a complete novice, this recipe is straightforward and fun, making it an ideal choice for Halloween festivities.
The creepy eyeball design is achieved with some simple decorative techniques that will have everyone talking. The base of these truffles is a chocolate cream cheese mixture, which is rolled into balls and then coated with a white chocolate shell.
With a few drops of food coloring and some clever piping, you’ll transform these truffles into eerie edible eyeballs. This recipe makes enough for about 4-6 people, perfect for a small group or to complement a larger spread of Halloween goodies.
Ingredients for 4-6 Servings:
- 1 package (8 oz) cream cheese, softened
- 3 cups crushed chocolate sandwich cookies (such as Oreos)
- 2 cups white chocolate chips or candy melts
- 1/4 cup semisweet chocolate chips
- Red and blue food coloring
- 1/4 cup mini chocolate chips (for pupils)
Instructions:
1. Prepare the Filling:
In a large mixing bowl, combine the softened cream cheese and crushed chocolate sandwich cookies. Mix them thoroughly until a smooth and homogeneous dough forms. This will be the base for your truffles.
2. Shape the Truffles:
Using your hands, take small portions of the dough and roll them into balls, approximately 1 to 1.5 inches in diameter. Place them on a baking sheet lined with parchment paper. Once all the balls are formed, refrigerate them for about 30 minutes to firm up.
3. Melt the White Chocolate:
In a microwave-safe bowl, melt the white chocolate chips or candy melts. Heat them in 30-second intervals, stirring in between until completely melted and smooth.
4. Coat the Truffles:
Remove the truffle balls from the fridge. Using a fork or skewer, dip each ball into the melted white chocolate, making sure it’s fully coated. Place them back on the parchment paper. Allow the coating to set slightly but not completely harden.
5. Decorate the Eyeballs:
Use a small amount of red and blue food coloring to tint small portions of the remaining white chocolate. Pipe thin lines on the truffles to mimic veins. Melt the semisweet chocolate chips in the microwave and use a piping bag or a small plastic bag with a corner snipped off to pipe circles around the top of each truffle to create the iris. Press a mini chocolate chip in the center for the pupil.
6. Set the Truffles:
Allow the decorated truffles to set completely at room temperature or in the refrigerator until the chocolate coating is firm.
Extra Tips:
For the best results, verify that the cream cheese is fully softened before mixing with the crushed cookies to achieve a smooth consistency.
If you’re short on time, use pre-colored candy melts to skip the food coloring step. These truffles can be made a day in advance and stored in an airtight container in the refrigerator.
If you want to get creative with colors, try using different colored chocolates or edible glitter for added spooky effects. Enjoy your creepy and delicious Eyeball Truffles at your Halloween work party!
Mummy Hot Dogs
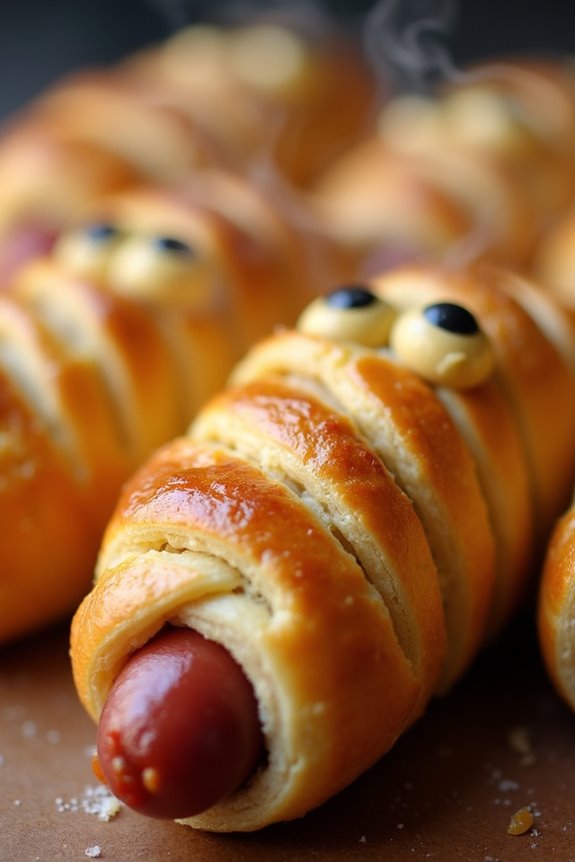
Mummy Hot Dogs are a fun and spooky treat perfect for Halloween work parties. These festive snacks are sure to be a hit with your colleagues, combining the classic taste of hot dogs with an eerie twist. Wrapped in crescent roll dough to resemble mummies, these hot dogs are easy to make and will add a playful element to your party spread. Plus, they’re deliciously savory and warm, making them an ideal choice for a fall gathering.
Creating Mummy Hot Dogs is a simple process that doesn’t require advanced cooking skills, making it a great option for anyone looking to contribute something homemade to a Halloween event. With minimal ingredients and a short preparation time, you’ll have a platter of these creative snacks ready to serve in no time. Whether you’re a seasoned chef or a beginner in the kitchen, this recipe is both accessible and enjoyable to prepare.
Ingredients (Serves 4-6):
- 8 hot dogs
- 1 can of crescent roll dough
- 1 egg
- 1 tablespoon of water
- Mustard or ketchup for decoration
Cooking Instructions:
- Preheat the Oven: Start by preheating your oven to 375°F (190°C) to guarantee it’s hot enough to cook the dough evenly.
- Prepare the Crescent Dough: Open the can of crescent roll dough and unroll it on a clean, flat surface. Use a knife or pizza cutter to slice the dough into thin strips, about 1/4 inch wide. These strips will be used to wrap around the hot dogs to create the mummy appearance.
- Wrap the Hot Dogs: Take each hot dog and wrap the dough strips around it, leaving a small gap near one end to resemble a face. You can overlap the dough slightly to create a bandage effect. Continue wrapping until all hot dogs are covered.
- Beat the Egg: In a small bowl, beat the egg with one tablespoon of water to create an egg wash. This will give the dough a golden, shiny finish when baked.
- Brush the Mummies: Use a pastry brush to apply a light coat of the egg wash over the wrapped hot dogs. This will help the dough brown nicely and give it an appealing texture.
- Bake: Place the wrapped hot dogs on a baking sheet lined with parchment paper. Bake in the preheated oven for 12-15 minutes or until the dough is golden brown and fully cooked.
- Decorate: Once baked, remove the hot dogs from the oven and let them cool slightly. Use mustard or ketchup to add eyes or other facial features to your mummies for a fun and spooky touch.
Extra Tips:
For an extra festive touch, you can use edible candy eyes instead of mustard or ketchup for the mummy faces. If you want to add more flavor, consider using cheese-stuffed hot dogs or adding a slice of cheese between the hot dog and the dough before wrapping.
You can also experiment with different types of sausages, such as chicken or vegetarian options, to cater to different dietary preferences at your party. Finally, serve with a variety of dipping sauces to complement the flavors and provide a more interactive eating experience for your guests.
Ghostly Pretzel Pops
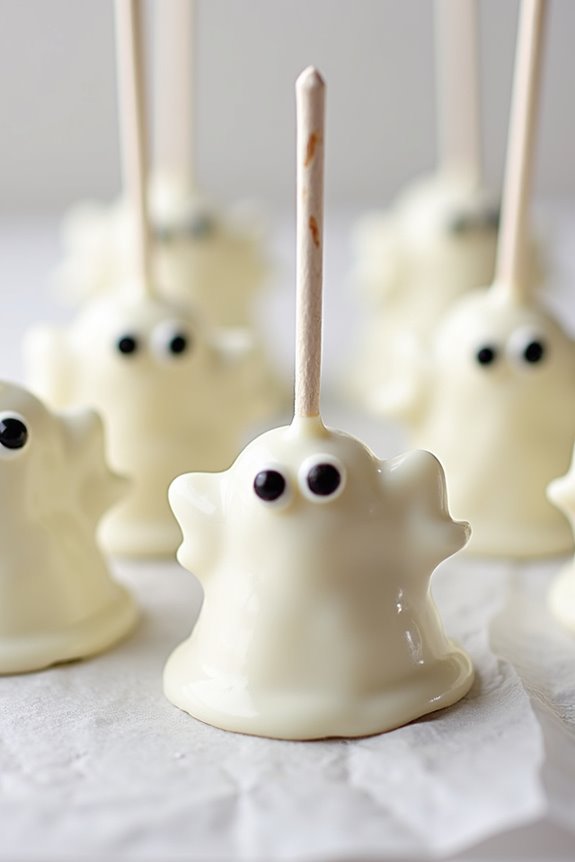
Ghostly Pretzel Pops are a delightful and spooky treat perfect for any Halloween work party. These charming little snacks combine the crunch of pretzels with the sweetness of white chocolate, all brought together in a ghostly design that’s sure to impress your colleagues.
They’re not only delicious but also fun to make, allowing you to get creative with your ghost designs. Whether you want to add a touch of whimsy or a bit of spookiness, these pops are sure to be a hit.
This recipe makes enough Ghostly Pretzel Pops to serve 4-6 people, making it ideal for a small gathering or office celebration. The combination of salty pretzels and creamy white chocolate is irresistible, and the addition of edible eyes will give each pop a playful personality.
With minimal ingredients and straightforward steps, you’ll have a batch of these hauntingly good treats ready in no time.
Ingredients (Serving Size: 4-6 people):
- 12 large pretzel rods
- 12 ounces white chocolate chips or candy melts
- 24-30 mini edible candy eyes
- Black food coloring gel (optional, for details)
- 1 tablespoon vegetable oil (if using chocolate chips)
- Parchment paper
Cooking Instructions:
- Prepare the Pretzels: Lay a sheet of parchment paper on your workspace to prevent sticking. Arrange the pretzel rods on the parchment, leaving enough space between them to work comfortably.
- Melt the White Chocolate: In a microwave-safe bowl, add the white chocolate chips or candy melts. If using chocolate chips, include the vegetable oil to help with melting. Microwave in 20-second intervals, stirring in between, until the chocolate is smooth and fully melted.
- Dip the Pretzels: Holding one end of a pretzel rod, dip it into the melted white chocolate, covering about two-thirds of the pretzel. Let any excess chocolate drip back into the bowl.
- Create the Ghostly Design: While the chocolate is still wet, place two mini edible candy eyes on the chocolate-covered portion of each pretzel rod. If you opt to use black food coloring gel, you can add small dots or lines for mouths or other ghostly features.
- Allow to Set: Place the dipped pretzel rods back on the parchment paper. Let them sit at room temperature or refrigerate for about 15-20 minutes until the chocolate is fully set.
- Decorate (Optional): If desired, use the black food coloring gel to add more detailed features to your ghosts, such as spooky faces or additional embellishments.
Extra Tips:
When melting chocolate, be cautious not to overheat it, as this can cause it to seize and become unusable. If you prefer, you can use a double boiler instead of a microwave to melt the chocolate gently.
For an added touch of flavor, consider using flavored candy melts available in various seasonal colors. If you find the chocolate too thick for dipping, the addition of a small amount of vegetable oil can help achieve a smoother consistency.
Finally, get creative with your ghost designs—adding colored sprinkles or edible glitter can make your Ghostly Pretzel Pops even more festive!
Pumpkin Cheese Ball
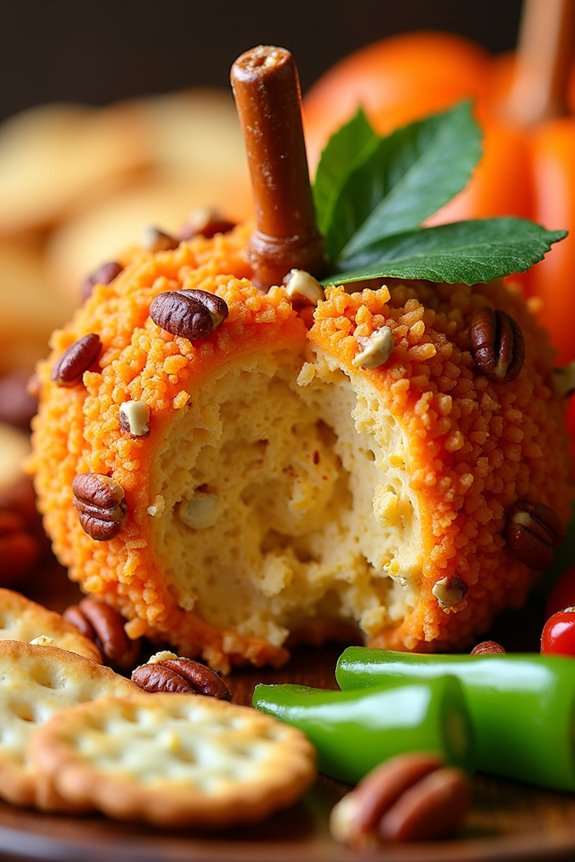
If you’re looking for a festive and savory treat to bring to your work Halloween party, search no more than the Pumpkin Cheese Ball. This delightful appetizer isn’t only delicious but also visually appealing, designed to resemble a mini pumpkin. It’s a fun and easy way to add a touch of Halloween spirit to your party platter. The combination of cream cheese, cheddar, and spices makes for a rich and creamy snack that pairs well with crackers, pretzels, or vegetable sticks.
The Pumpkin Cheese Ball is perfect for serving 4-6 people, making it a great option for small gatherings or work parties. With its vibrant orange color and playful pumpkin shape, it’s sure to be a hit among your coworkers. Best of all, it’s a no-cook recipe, meaning you can whip it up in no time and focus on the rest of your party preparations.
Here’s what you’ll need to create this spooky and savory dish:
Ingredients (Serves 4-6):
- 16 oz cream cheese, softened
- 2 cups shredded sharp cheddar cheese
- 1 teaspoon garlic powder
- 1 teaspoon onion powder
- 1 teaspoon smoked paprika
- 1/2 teaspoon cayenne pepper (optional, for a little heat)
- 1/4 cup chopped green onions
- 1/4 cup finely chopped pecans
- 1/2 cup crushed nacho cheese tortilla chips
- 1 pretzel rod
- 1 green bell pepper
Instructions:
- Prepare the Cheese Mixture: In a large mixing bowl, combine the softened cream cheese, shredded cheddar, garlic powder, onion powder, smoked paprika, cayenne pepper (if using), and chopped green onions. Mix until well combined and smooth.
- Shape the Cheese Ball: Transfer the cheese mixture onto a sheet of plastic wrap. Use the wrap to help shape the mixture into a ball. Once formed, wrap it tightly in the plastic wrap and refrigerate for at least 2 hours to allow the flavors to meld and the ball to firm up.
- Coat the Cheese Ball: After the cheese ball has chilled, remove it from the refrigerator. Roll the ball in the crushed nacho cheese tortilla chips and chopped pecans until evenly coated. This will give it a textured, pumpkin-like surface.
- Create the Pumpkin Stem: Insert the pretzel rod into the top of the cheese ball to mimic a pumpkin stem. For added effect, cut a small piece of green bell pepper to form leaves and place them around the pretzel stem.
- Serve and Enjoy: Place the finished Pumpkin Cheese Ball on a serving platter with an assortment of crackers, pretzels, or veggie sticks. Allow it to sit at room temperature for about 10-15 minutes before serving so it becomes perfectly spreadable.
Extra Tips:
For a more intense flavor, prepare the cheese ball a day in advance to let the spices permeate the cheese. If you want to make it even spookier, consider using black olives or edible eyes to create a jack-o’-lantern face on the cheese ball.
Additionally, if you’re short on time, you can use store-bought shredded cheese, but freshly grated cheese will yield a creamier texture. Remember to soften the cream cheese thoroughly for easier mixing, and feel free to adjust the spice levels to suit your taste.
Monster Mash Popcorn
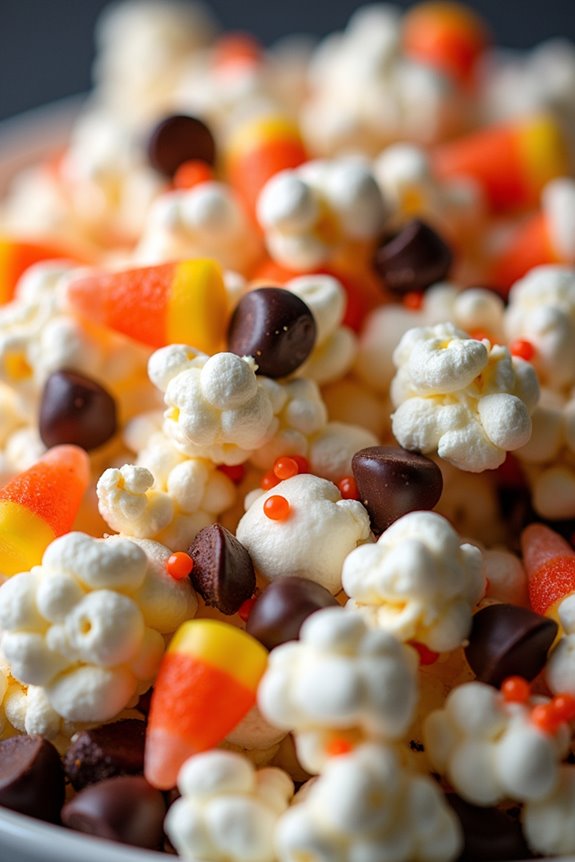
Elevate your Halloween work party with a spooky and delicious treat that will leave your colleagues raving: Monster Mash Popcorn. This fun and easy snack blends the classic buttery flavor of popcorn with a ghoulish mix of colorful candies, chocolate, and festive sprinkles. The perfect combination of salty and sweet, this popcorn mix is certain to become a holiday favorite.
Not only does it look delightfully eerie, but it’s also quick to make, so you can spend less time in the kitchen and more time enjoying the party. Monster Mash Popcorn is perfect for serving a group of 4-6 people, making it an ideal snack for a small office gathering or a cozy team meeting.
With just a few simple ingredients, you can whip up this treat in no time. The vibrant colors and playful textures will capture the Halloween spirit and provide a tasty break from the workday routine. Gather your ingredients and prepare to create a monstrously good snack that will cast a spell of delight over your work party.
Ingredients (serving size: 4-6 people):
- 8 cups of popped popcorn
- 1 cup of mini marshmallows
- 1 cup of Halloween-themed candy (such as candy corn or gummy worms)
- 1/2 cup of chocolate chips (milk or dark, as preferred)
- 1/4 cup of Halloween-themed sprinkles
- 1/4 cup of melted butter
- 1/4 teaspoon of salt
Cooking Instructions:
- Prepare the Popcorn: Start by popping your popcorn using your preferred method, whether it’s using an air popper, stovetop, or microwave. Once popped, measure out 8 cups and place them in a large mixing bowl.
- Melt the Butter: In a small saucepan or microwave-safe bowl, melt the butter over low heat or in 30-second intervals in the microwave. Once melted, pour the butter evenly over the popcorn. Sprinkle the salt over the popcorn and gently toss to guarantee an even coating.
- Add the Marshmallows: Gently fold in the mini marshmallows with the popcorn mixture, ensuring they’re evenly distributed throughout the bowl.
- Mix in the Chocolate Chips: Add the chocolate chips to the popcorn mixture. They’ll melt slightly from the warmth of the freshly popped popcorn, adding a delicious chocolaty touch.
- Include the Candy: Sprinkle the Halloween-themed candy across the popcorn mixture. Use a spatula to gently combine, ensuring the candy is evenly mixed throughout.
- Finish with Sprinkles: Finally, add the Halloween-themed sprinkles to the mixture. These will add a festive and colorful flair to your Monster Mash Popcorn.
- Serve and Enjoy: Transfer the Monster Mash Popcorn to a serving bowl or individual snack bags for easy sharing. Enjoy this spooky treat with your colleagues!
Extra Tips: For an extra touch of Halloween fun, consider serving the Monster Mash Popcorn in themed bowls or bags decorated with ghost or pumpkin motifs.
You can also customize the candies and sprinkles to match any specific Halloween theme or color scheme your work party may have. If you prefer a less sweet version, reduce the amount of candy or opt for more savory additions like nuts or pretzels.
Dracula’s Bloody Cupcakes
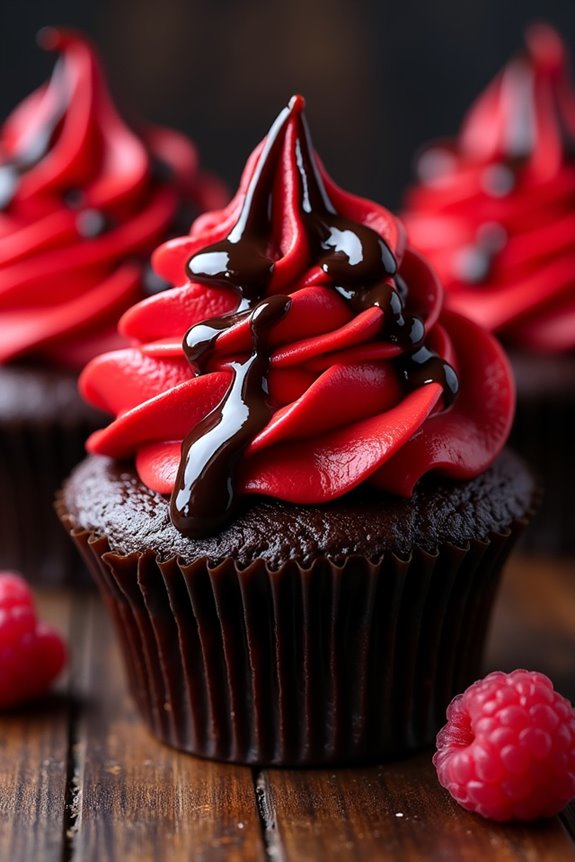
Dracula’s Bloody Cupcakes are a perfect Halloween treat to impress your colleagues at a work party. These sinister-looking delights are both spooky and delicious, combining the classic flavors of chocolate and raspberry with a visually striking finish. The cupcakes are designed to look like they’ve been bitten into by the infamous Count Dracula himself, with a raspberry “blood” filling that oozes out when bitten. The rich chocolate base complements the tart raspberry filling, making every bite a delightful surprise.
Perfect for serving 4-6 people, this recipe guarantees that everyone at the party gets their fill of these creepy confections. The dark chocolate cupcakes provide a deep, rich flavor that pairs beautifully with the sweet and tangy raspberry sauce. Topped with a swirl of blood-red frosting and a drizzle of chocolate “blood,” these cupcakes are assured to be a hit at your Halloween gathering. Whether you’re hosting or simply bringing a dish to share, Dracula’s Bloody Cupcakes are a memorable contribution to any spooky celebration.
Ingredients:
- 1 cup all-purpose flour
- 1 cup granulated sugar
- 1/2 cup unsweetened cocoa powder
- 1 teaspoon baking powder
- 1/2 teaspoon baking soda
- 1/4 teaspoon salt
- 2 large eggs
- 1/2 cup whole milk
- 1/4 cup vegetable oil
- 1 teaspoon vanilla extract
- 1/2 cup boiling water
- 1 cup fresh raspberries (or frozen, thawed)
- 1/4 cup raspberry jam
- 1 tablespoon cornstarch
- Red gel food coloring
- 1 cup unsalted butter, softened
- 3 cups powdered sugar
- 1/4 cup heavy cream
- Chocolate syrup for decoration
Cooking Instructions:
- Preheat the Oven: Preheat your oven to 350°F (175°C) and line a muffin tin with cupcake liners.
- Prepare the Dry Ingredients: In a large mixing bowl, sift together the flour, sugar, cocoa powder, baking powder, baking soda, and salt. Mix until well combined.
- Mix Wet Ingredients: In a separate bowl, beat the eggs, milk, vegetable oil, and vanilla extract together until smooth.
- Combine Wet and Dry Mixtures: Gradually add the wet ingredients to the dry ingredients, mixing on low speed until well combined.
- Add Boiling Water: Carefully stir in the boiling water until the batter is smooth. The batter will be thin, which is normal.
- Fill Cupcake Liners: Pour the batter into the prepared cupcake liners, filling each about 2/3 full.
- Bake: Bake in the preheated oven for 18-22 minutes, or until a toothpick inserted into the center comes out clean. Allow the cupcakes to cool completely on a wire rack.
- Prepare Raspberry Filling: In a small saucepan over medium heat, combine raspberries, raspberry jam, and cornstarch. Stir continuously until the mixture thickens. Remove from heat and add red gel food coloring until the desired bloody shade is achieved. Let it cool.
- Core and Fill Cupcakes: Once the cupcakes are cooled, use a cupcake corer or a small knife to remove the center of each cupcake. Fill each hole with the raspberry filling.
- Make the Frosting: Beat the butter in a large bowl until creamy. Gradually add powdered sugar, mixing on low speed. Add heavy cream and red gel food coloring, mixing until the frosting is fluffy and the desired color is achieved.
- Frost the Cupcakes: Pipe the frosting onto each cupcake. Use a spoon or piping bag to drizzle chocolate syrup over the frosting to resemble blood drips.
Extra Tips:
For the best results, make sure your ingredients are at room temperature before you start baking; this helps the batter mix more evenly. If you don’t have a cupcake corer, a small spoon or knife can work to remove the centers. Additionally, when making the raspberry filling, be sure to stir continuously to prevent burning.
Finally, for an added spooky effect, consider using small plastic vampire teeth as a decorative topper, which guests can take as a fun party favor.
Candy Corn Fruit Parfaits
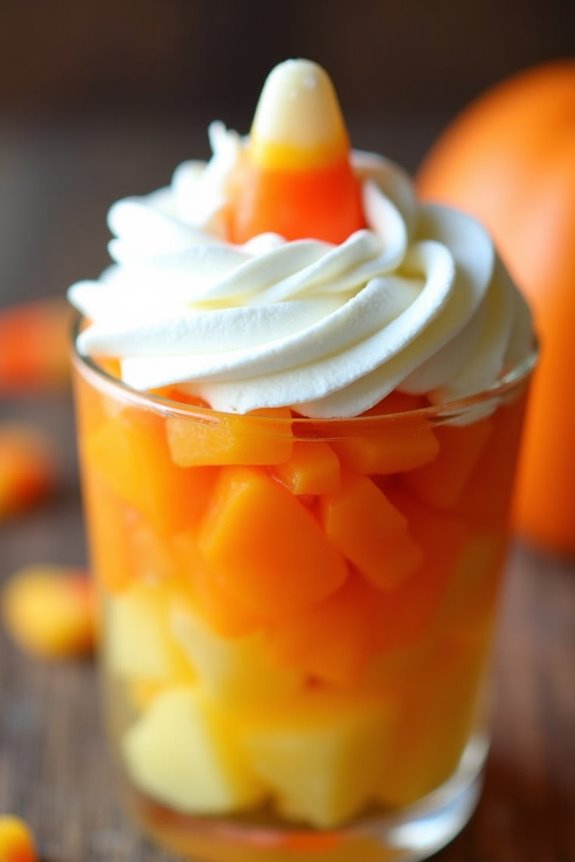
Celebrate Halloween with a festive and healthy treat that’s perfect for work parties – Candy Corn Fruit Parfaits. Inspired by the classic Halloween candy, these parfaits aren’t only visually appealing but also a nutritious dessert option. They combine the vibrant colors of candy corn with layers of pineapple, mandarin oranges, and whipped cream for a delightful and invigorating treat that everyone will enjoy.
These parfaits are quick to assemble and require minimal ingredients, making them an ideal choice for busy schedules. The layers of fruit mimic the iconic yellow, orange, and white stripes of candy corn, creating a fun and seasonal presentation. Serve these at your next office Halloween party, and watch them disappear in no time!
Ingredients (Serves 4-6):
- 2 cups fresh pineapple chunks
- 2 cups canned mandarin oranges, drained
- 1 cup whipped cream or whipped topping
- 1 tablespoon honey or agave syrup (optional)
- Candy corn (for garnish, optional)
- 4-6 clear serving glasses or cups
Cooking Instructions:
- Prepare the Fruit: Begin by preparing the fruit. If you’re using fresh pineapple, peel and core the pineapple, then cut it into bite-sized chunks. Drain the canned mandarin oranges to remove excess juice.
- Assemble the Parfaits: Take your serving glasses or cups and start by adding a layer of pineapple chunks at the bottom. This will represent the yellow base of the candy corn.
- Add the Mandarin Oranges: Next, add a layer of mandarin oranges on top of the pineapple. This orange layer represents the middle section of the candy corn.
- Top with Whipped Cream: Add a generous dollop of whipped cream or whipped topping on top of the mandarin oranges. This will mimic the white tip of the candy corn.
- Drizzle with Sweetener (Optional): If you prefer a sweeter parfait, drizzle a small amount of honey or agave syrup over the whipped cream.
- Garnish: For an extra festive touch, top each parfait with a piece of candy corn.
- Serve Immediately: Serve the parfaits immediately to maintain the freshness and texture of the fruit.
Extra Tips:
For added flavor, consider using flavored whipped cream, such as vanilla or cinnamon, to complement the fruit layers. If preparing these parfaits in advance, keep the whipped cream separate and add it just before serving to maintain its texture.
Additionally, for a healthier alternative, Greek yogurt can be used in place of whipped cream. Adjust the sweetness by choosing fruits at peak ripeness or using natural sweeteners. Enjoy these parfaits chilled for the best taste experience.
Creepy Caramel Apples
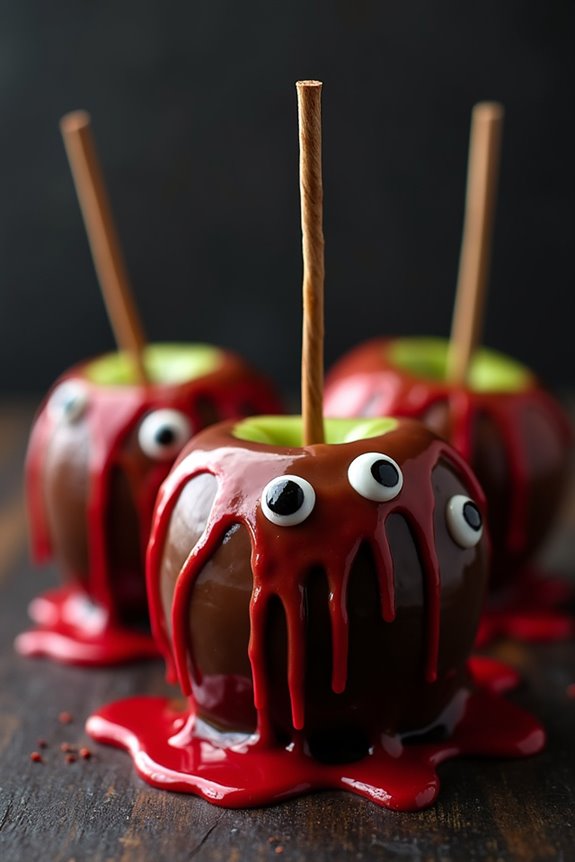
Creepy Caramel Apples are an eerie yet delicious treat that make the perfect addition to any Halloween work party. This recipe adds a spooky twist to the classic caramel apple by incorporating dark chocolate, edible eyes, and red candy drizzle to give the illusion of blood. The combination of tart apples and sweet, gooey caramel covered with a dark chocolate shell is a delightful contrast that will surely impress your colleagues.
With Halloween vibes in mind, the Creepy Caramel Apples aren’t only visually stunning, but they also have a delightful crunch and rich flavor. They’re easy to prepare and can be made ahead of time, making them convenient for busy work schedules. This recipe serves 4-6 people, guaranteeing everyone at the party can enjoy this ghoulishly good treat.
Ingredients for 4-6 people:
- 6 medium-sized tart apples (like Granny Smith)
- 6 wooden sticks or skewers
- 1 package (14 oz) soft caramels
- 2 tablespoons milk
- 1 cup dark chocolate chips
- 1 tablespoon coconut oil
- Edible candy eyes
- Red candy melts or red food coloring gel
Cooking Instructions:
- Prepare the Apples: Wash and dry the apples thoroughly to remove any waxy coating. Insert a wooden stick or skewer into the stem end of each apple and set aside.
- Melt the Caramel: In a medium saucepan, combine the unwrapped caramels and milk. Cook over low heat, stirring constantly, until the caramels have fully melted and the mixture is smooth. This should take about 5-7 minutes.
- Dip Apples in Caramel: Once the caramel is melted, carefully dip each apple into the caramel, turning to coat evenly. Allow excess caramel to drip off, then place the apples on a parchment-lined baking sheet. Let them cool completely.
- Coat with Chocolate: In a microwave-safe bowl, combine dark chocolate chips and coconut oil. Microwave in 30-second intervals, stirring in between, until the chocolate is completely melted.
- Decorate the Apples: Dip the cooled caramel apples into the melted chocolate, guaranteeing an even coat. Before the chocolate sets, press edible candy eyes onto the apples for a spooky effect.
- Add Red Drizzle: Melt red candy melts or mix a few drops of red food coloring gel with a small amount of white chocolate. Drizzle it over the chocolate-coated apples to create a ‘bloody’ effect.
- Set and Serve: Allow the chocolate and red drizzle to set completely at room temperature before serving. You can refrigerate them to speed up the process if needed.
Extra Tips:
To guarantee the caramel sticks well, make sure the apples are completely dry and at room temperature before dipping. If you prefer a more intense apple flavor, you can use a variety like Honeycrisp or Braeburn.
Be creative with the decorations; consider adding crushed nuts or sprinkles for extra texture. If you’re short on time, pre-made caramel sauce can be used in place of melting caramels.
Always have fun and let your imagination run wild with the decorations to make the Creepy Caramel Apples the star of your Halloween work party!
Haunted Veggie Platter
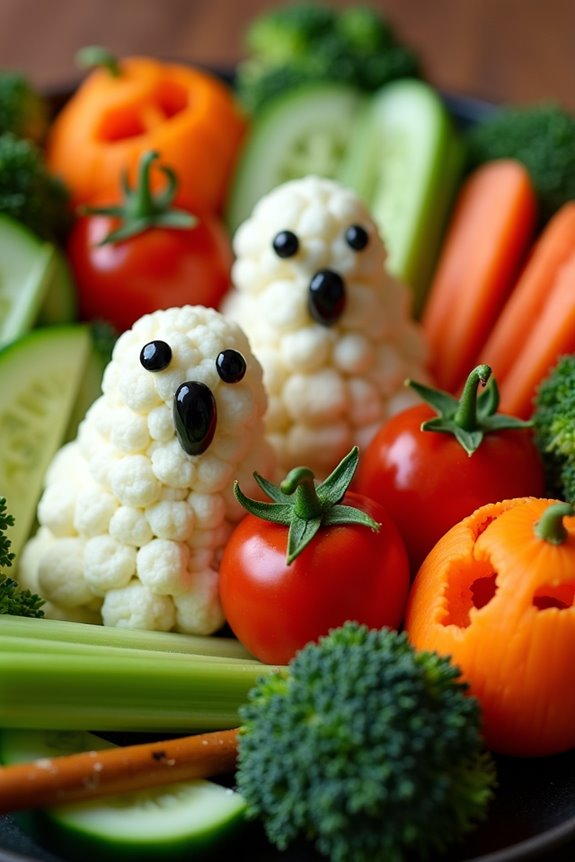
A Haunted Veggie Platter is a perfect spooky yet healthy addition to your Halloween work party spread. This dish combines the crisp freshness of vegetables with the eerie charm of Halloween, making it a crowd-pleaser for both adults and kids. The platter features an assortment of vegetables artfully arranged to resemble ghosts, jack-o’-lanterns, and creepy critters, ensuring it fits the spooky theme perfectly.
Not only is it visually appealing, but it also provides a nutritious snack option amidst all the sugary treats typically found at Halloween gatherings.
The key to creating an impressive Haunted Veggie Platter lies in the creativity of the presentation. Using a variety of colorful vegetables, you can craft an assortment of fun shapes and designs. Carrot sticks can be transformed into jack-o’-lanterns, cauliflower florets into ghost shapes, and cucumber slices into eerie eyes.
This platter serves 4-6 people and can be easily customized to fit any dietary preferences. With a little creativity and some simple tools, you can create a standout Halloween dish that’s both healthy and fun to eat.
Ingredients:
- 1 medium-sized cucumber
- 2-3 large carrots
- 1 red bell pepper
- 1 yellow bell pepper
- 1 head of cauliflower
- 1 pint cherry tomatoes
- 1 small bunch of celery
- 1 small bunch of broccoli
- 1 cup of hummus or ranch dressing (for dipping)
- Black olives (for decoration)
- Pretzel sticks (optional for decoration)
Cooking Instructions:
- Prepare the Vegetables: Wash and dry all the vegetables thoroughly. Peel the carrots and cut them into sticks. Slice the cucumber into thin rounds. Cut the bell peppers into strips, and separate the cauliflower and broccoli into small florets.
- Create the Ghosts: Use the cauliflower florets to create ghost shapes. For added effect, use a small knife to carve little eyes into each “ghost” and place small pieces of black olives in the carvings for eyes.
- Make Jack-o’-Lanterns: Carve small faces into the cherry tomatoes using a paring knife to create mini jack-o’-lanterns. Alternatively, you can use carrot sticks and arrange them in the shape of a pumpkin with the cherry tomato faces.
- Assemble the Platter: On a large serving tray, arrange the vegetables in groups to create a spooky scene. Use the cucumber slices to form the base of your platter, then place the ghostly cauliflower floret ghosts and jack-o’-lanterns. Use the celery and broccoli to create a forest-like backdrop.
- Add Extra Details: Use black olives to add eyes to any vegetable that needs a face, like the ghostly cauliflower florets. You can also use pretzel sticks to create arms or legs for your spooky creations.
- Serve with Dip: Place the hummus or ranch dressing in a small bowl in the middle of the platter for dipping. Arrange the vegetables around the dip to make it easily accessible.
Extra Tips:
To make your Haunted Veggie Platter even more festive, consider using mini cookie cutters to create fun shapes with the vegetables. You can also add other colorful vegetables like purple cabbage or radishes for more contrast and interest.
If you’re short on time, prepare the vegetables the day before and store them in an airtight container in the refrigerator. Remember, the key to a successful platter is in the presentation, so take your time arranging the vegetables to make them as visually appealing as possible.

