

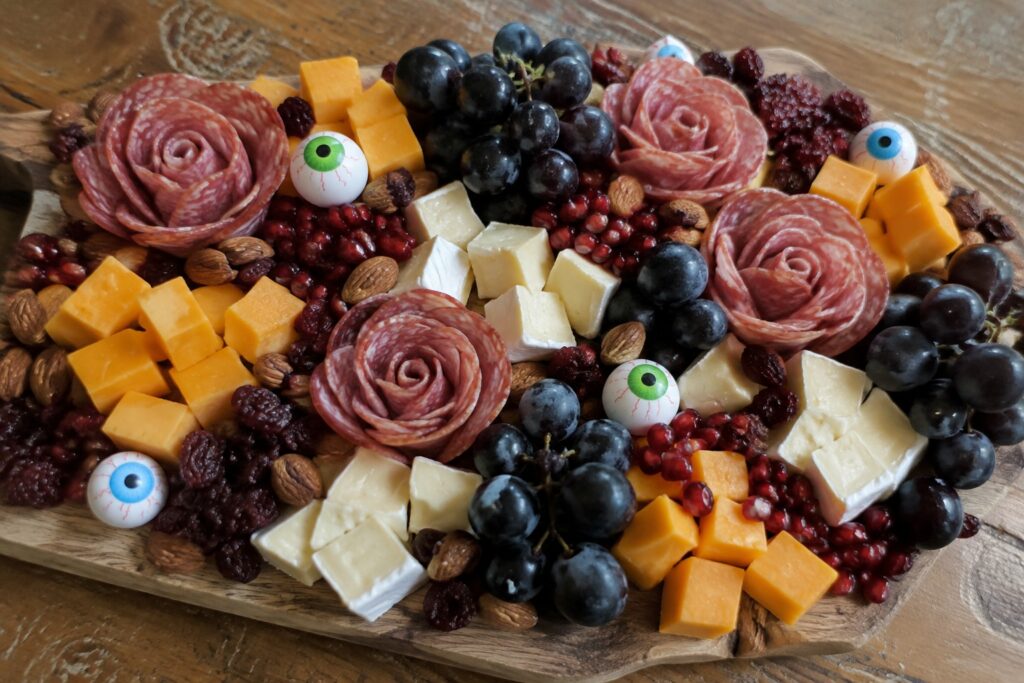
Halloween is a good time to put together a charcuterie board with a seasonal twist. These boards can be made with items you might already have like cheese, crackers, and fruit. The ideas below use basic arrangements that still look put together for guests. You will find 13 options that range from simple to a bit more detailed. Each one includes what to use and how to set it up.
Helpful Tips Before You Start
These tips will help you build Halloween charcuterie boards that look polished and hold up well.
Pick a Large Board
A bigger surface gives you room to spread out items and create clear shapes or patterns without crowding.
Stick to a Color Scheme
Choose cheeses, fruits, and meats in orange, black, and green tones so the board reads as Halloween at first glance.
Prep Everything in Advance
Slice cheeses, wash grapes, and portion crackers the day before so assembly takes less time on the day of the party.
Use Small Cookie Cutters
Cut cheese slices into bats or pumpkins for quick themed details that guests notice right away.
Add a Mix of Textures
Combine crunchy crackers, creamy dips, and firm meats so the board stays interesting to eat as well as to see.
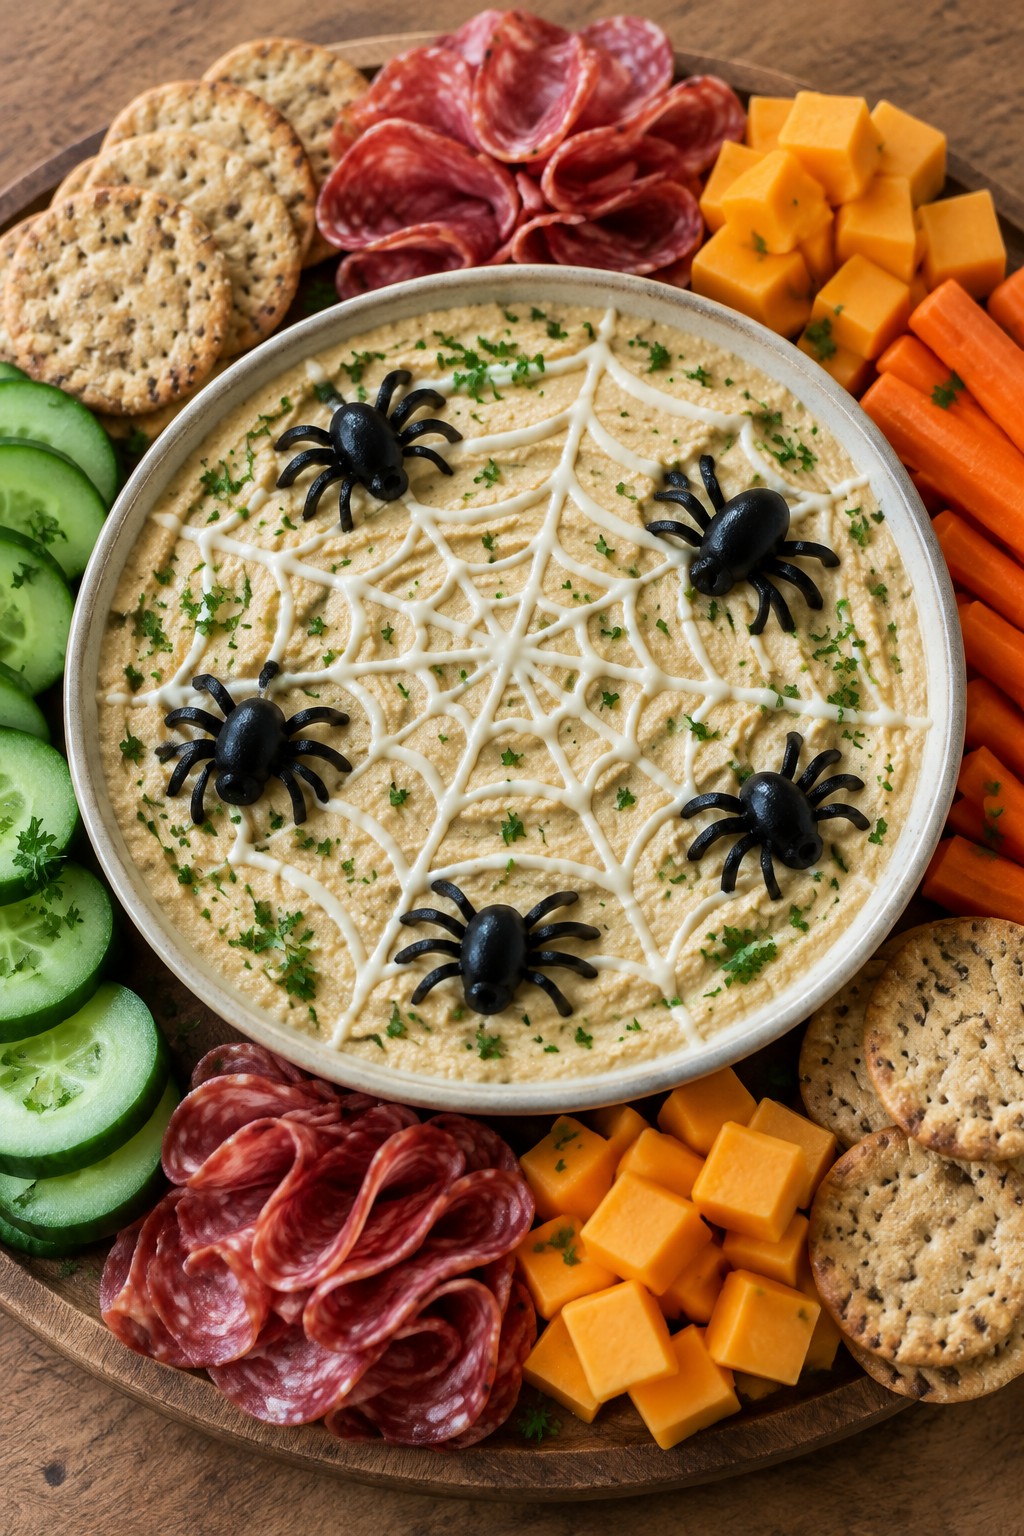
Spooky Spiderweb Hummus Charcuterie Board
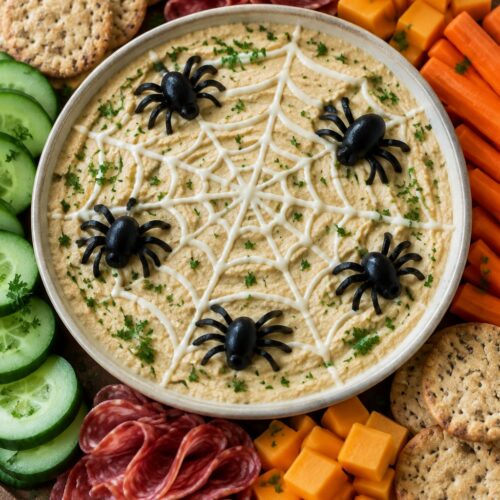
This board turns a simple hummus base into a Halloween centerpiece. The spiderweb design is easy to create and pairs well with savory meats, cheeses, and crisp vegetables. It works for parties or casual gatherings where guests want something fun but not overly sweet.
The flavor leans creamy and garlicky from the hummus, balanced by salty olives and rich cured meats. The textures range from smooth dip to crunchy crackers and fresh vegetables.
Equipment
- Large serving board
- zip-top bag
- knife
Ingredients
- 16 ounces plain hummus
- 1/4 cup tahini
- 1 teaspoon water
- 8 black olives
- 4 ounces sliced salami
- 4 ounces cheddar cheese cubes
- 1 cup carrot sticks
- 1 cup cucumber slices
- 20 round crackers
- 2 tablespoons chopped parsley
Instructions
- Spread the hummus evenly across a large serving board in a thick, round layer.
- Mix the tahini with water in a small bowl until it reaches a pourable consistency.
- Spoon the thinned tahini into a zip-top bag and snip a small corner. Pipe four concentric circles on top of the hummus.
- Drag a toothpick from the center outward through the circles at even intervals to form a web pattern.
- Slice four black olives in half and place them on the web to resemble spiders.
- Arrange the salami slices, cheddar cubes, carrot sticks, cucumber slices, and crackers around the hummus in separate sections.
- Sprinkle the chopped parsley over the vegetables and cheese for color.
Notes
Cuisine: American
Equipment: Large serving board, zip-top bag, knife
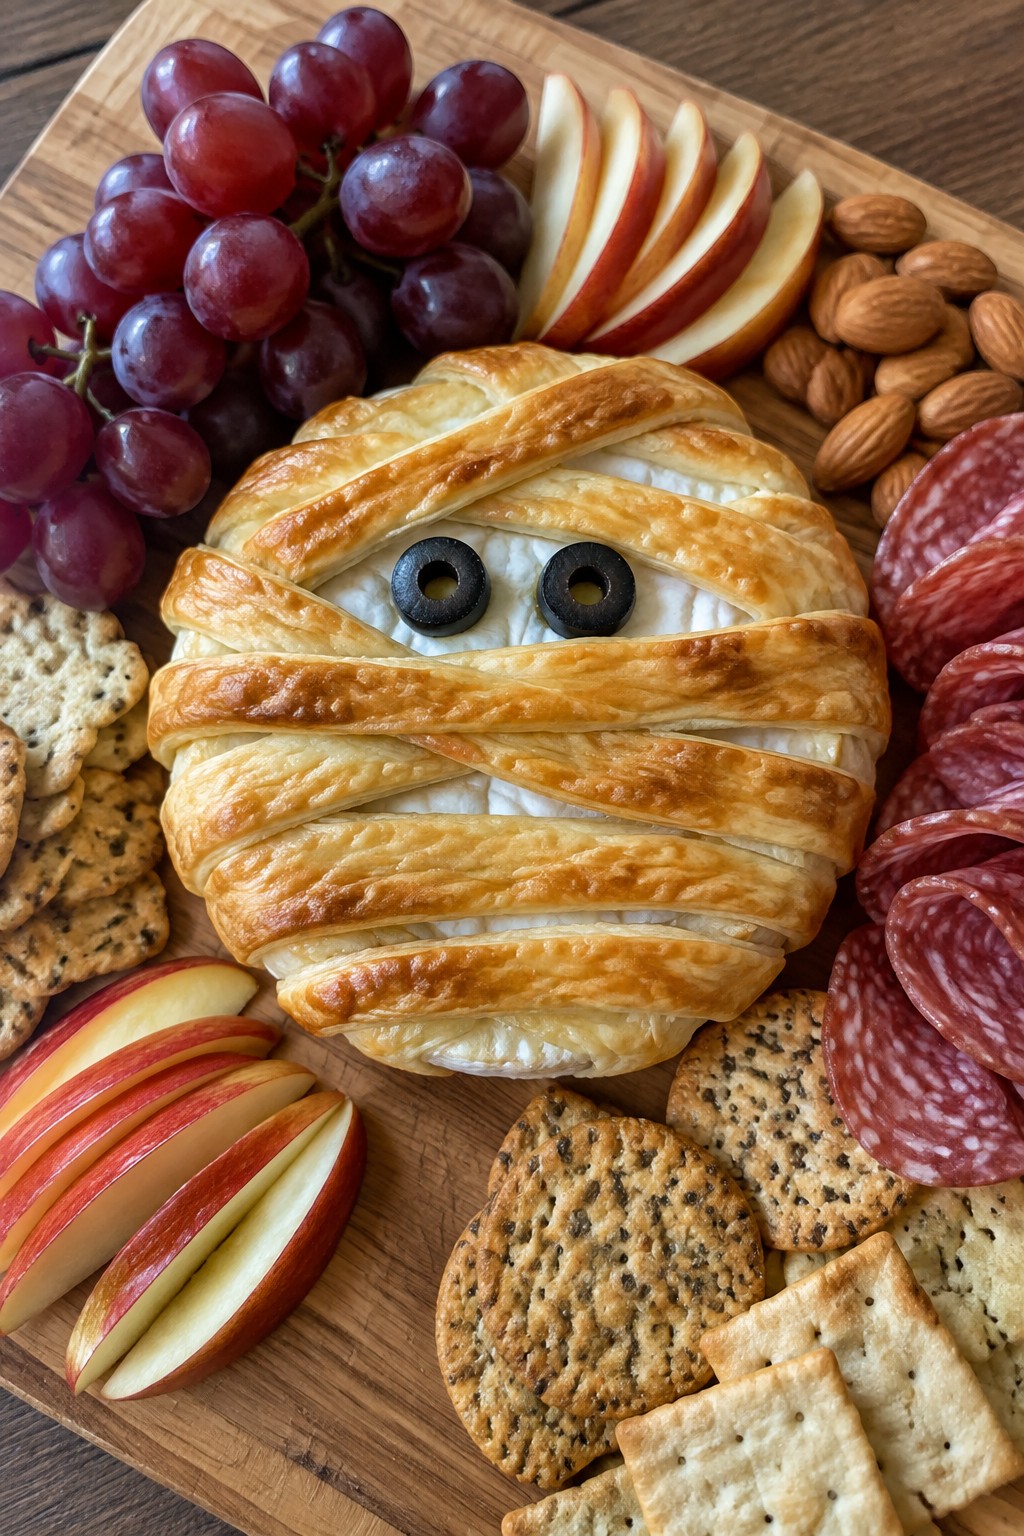
Mummy-Wrapped Brie Grazing Board
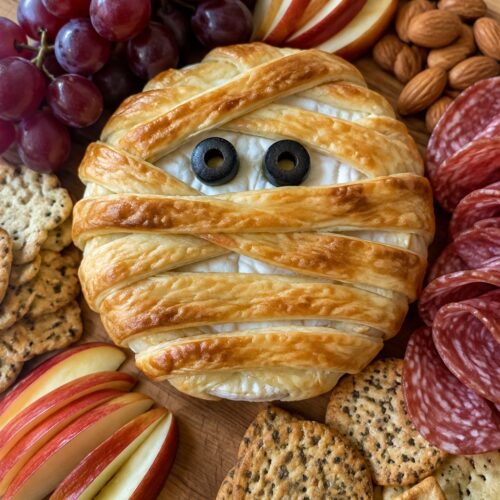
This board turns a simple wheel of brie into a fun Halloween centerpiece. Strips of golden pastry wrap the cheese like bandages, and a pair of olive slices give it a playful mummy face. Guests can tear into the warm, flaky layers to reach the soft cheese inside.
The board pairs the baked brie with crisp crackers, fresh fruit, and salty meats for a mix of creamy, crunchy, and sweet bites. It works well for parties where people want to graze while they mingle.
Equipment
- Baking sheet
- parchment paper
- pastry brush
- serving board
Ingredients
- 8 oz wheel of brie cheese
- 1 sheet puff pastry, thawed
- 1 egg, beaten
- 2 black olives, sliced
- 1 cup red grapes
- 1 apple, sliced
- 1/2 cup whole almonds
- 4 oz salami slices
- Assorted crackers
Instructions
- Preheat the oven to 400 degrees and line a baking sheet with parchment paper.
- Unroll the puff pastry on a lightly floured surface and cut it into thin strips about half an inch wide.
- Place the brie in the center of the baking sheet. Lay the pastry strips across the cheese in overlapping layers to create a wrapped mummy effect, leaving a small space near the top for the face.
- Brush the pastry strips with the beaten egg.
- Bake for 20 minutes until the pastry is golden and puffed.
- Remove from the oven and let cool for 5 minutes. Press the sliced olives into the open space to form eyes.
- Transfer the baked brie to a large serving board. Arrange the grapes, apple slices, almonds, salami, and crackers around the cheese.
Notes
Cuisine: American
Equipment: Baking sheet, parchment paper, pastry brush, serving board
Jack-O’-Lantern Pepperoni Pumpkin Board
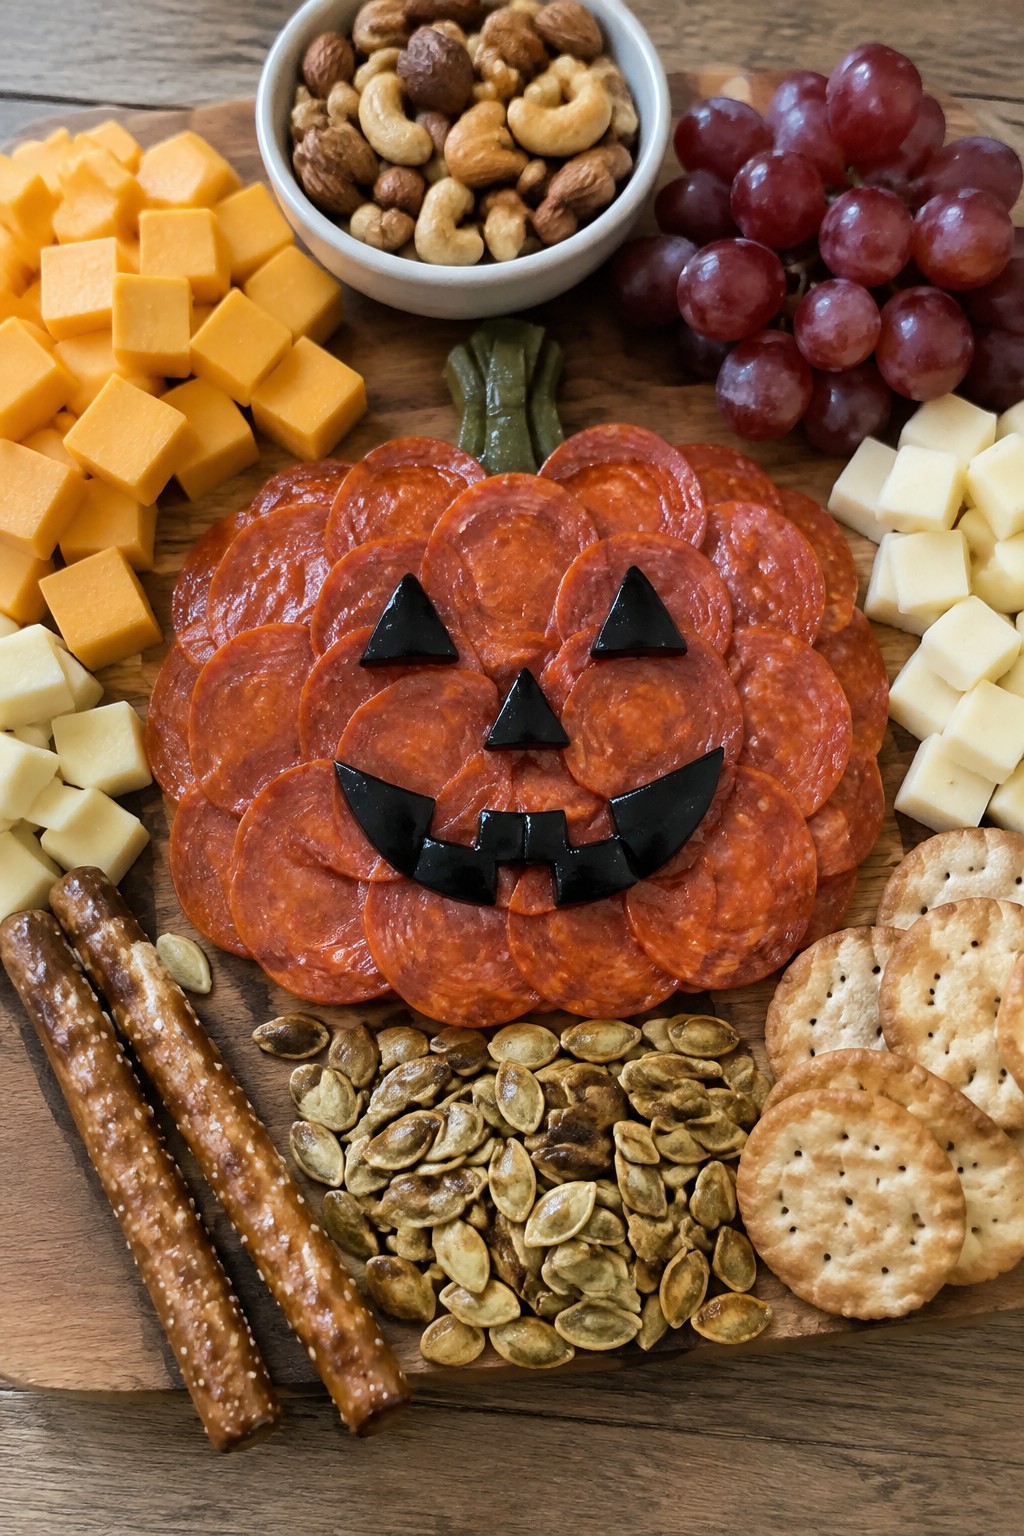
This board turns simple pepperoni slices into a bright orange pumpkin with a classic carved face. It works well for Halloween parties or casual fall gatherings where you want something visual without much cooking. The mix of salty meats, creamy cheeses, and crunchy crackers gives a balanced bite that feels hearty yet easy to share.
Equipment
- Charcuterie board
- Cheese knife
- Small bowls
Ingredients
- 12 oz sliced pepperoni
- 8 oz cheddar cheese block
- 8 oz gouda cheese block
- 1 cup mixed nuts
- 20 round crackers
- 1/4 cup roasted pumpkin seeds
- 6 black olives
- 1 small bunch red grapes
- 2 pretzel rods
Instructions
- Cut the cheddar and gouda into bite-size cubes or thin slices and place them in two separate piles on a large round board.
- Fan the pepperoni slices in overlapping circles to form a large pumpkin shape in the center, leaving space at the top for the stem.
- Slice two black olives in half and arrange them as eyes on the pepperoni pumpkin. Use two more olives cut into thin strips to form a jagged mouth.
- Break one pretzel rod in half and set the pieces at the top of the pepperoni to create the pumpkin stem.
- Fill the remaining spaces with the mixed nuts, roasted pumpkin seeds, round crackers, and small clusters of red grapes.
- Serve the board at room temperature so the cheeses soften slightly and the flavors come through clearly.
Notes
Cuisine: American
Equipment: Charcuterie board, Cheese knife, Small bowls
Graveyard Dirt Dip Charcuterie Board
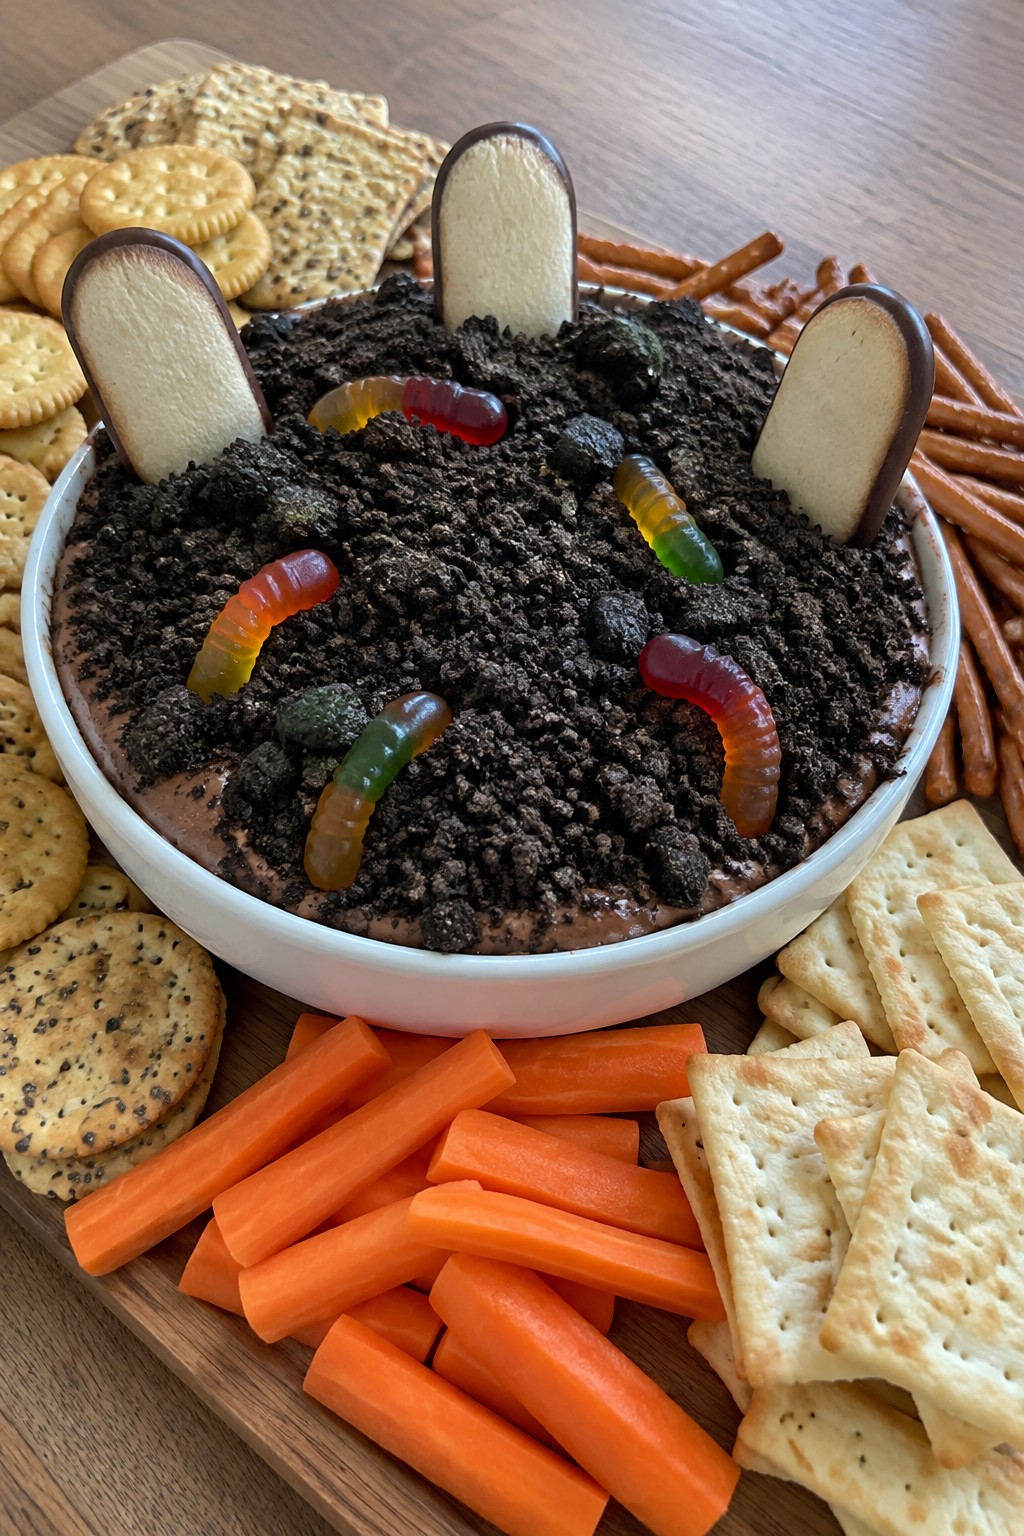
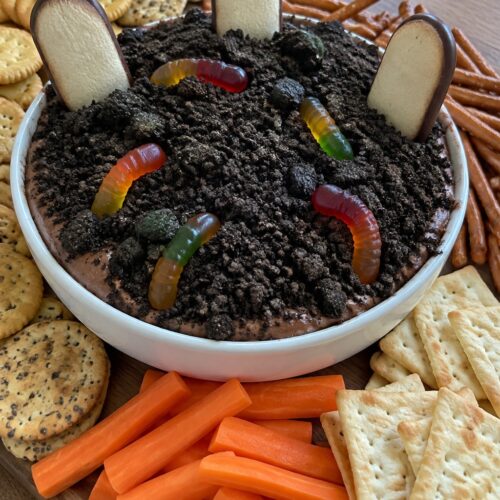
This Graveyard Dirt Dip Charcuterie Board turns a simple chocolate dip into a fun Halloween centerpiece. The creamy dip gets its dark, crumbly look from crushed cookies, while the board around it holds dippers and spooky touches that fit right into a party spread. It works well for gatherings where guests want something sweet but still snackable.
The texture stays thick enough to scoop without running, and the flavor leans rich and chocolatey with a bit of crunch from the cookie pieces mixed in.
Equipment
- Mixing bowl
- Hand mixer
- Serving board
Ingredients
- 8 oz cream cheese, softened
- 3.9 oz box instant chocolate pudding mix
- 1 cup milk
- 8 oz whipped topping, thawed
- 20 Oreo cookies, crushed
- 12 gummy worms
- 4 Milano cookies
- 2 cups assorted crackers and pretzel sticks
- 1 cup carrot sticks
Instructions
- Beat the softened cream cheese in a large bowl until smooth. Add the instant chocolate pudding mix and milk, then beat until the mixture thickens and combines evenly.
- Fold in the whipped topping until no streaks remain. Stir in 1 cup of the crushed Oreo cookies to create the dirt texture.
- Spread the dip across the center of a serving board. Sprinkle the remaining crushed Oreo cookies over the top for extra crunch and color.
- Press the gummy worms into the dip so they look like they are coming out of the ground. Stand the Milano cookies upright along one edge of the dip to act as tombstones.
- Arrange the crackers, pretzel sticks, and carrot sticks around the dip on the board for easy dipping.
Notes
Cuisine: American
Equipment: Mixing bowl, Hand mixer, Serving board
Candy Corn Layered Cheese Board
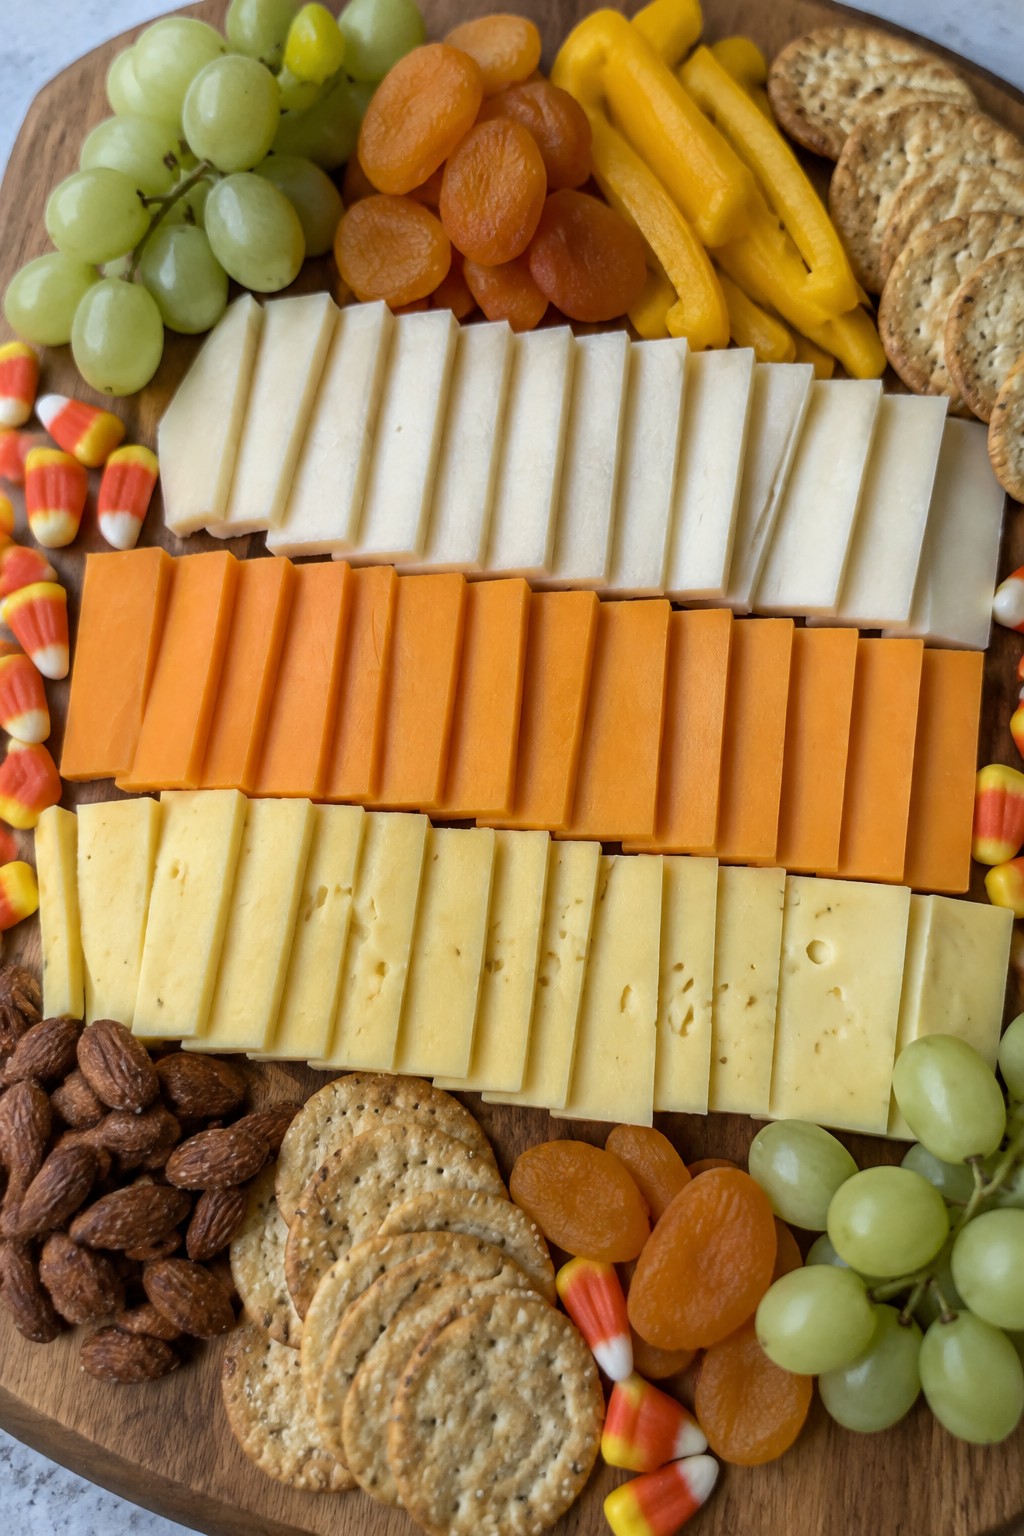
This candy corn layered cheese board turns a simple cheese spread into a fun Halloween display. The colors build in horizontal rows that echo the classic candy, making it easy to spot on a table. It balances creamy white cheese with sharper orange slices and milder yellow options, plus a few sweet and crunchy add-ins.
The board fits small gatherings or a larger spread when you double the amounts. Layers stay distinct so guests can pick what they like while the overall look stays neat.
Equipment
- Large serving board
- Cheese knife
Ingredients
- 4 ounces white cheddar, sliced
- 4 ounces orange cheddar, sliced
- 4 ounces yellow havarti, sliced
- 1 cup white seedless grapes
- 1/2 cup dried apricots
- 1 cup yellow bell pepper strips
- 20 assorted crackers
- 1/2 cup roasted almonds
- Small handful candy corn for garnish
Instructions
- Set a rectangular or oval board on the counter and place the white cheddar slices in a wide row along the bottom edge.
- Lay the orange cheddar slices directly above the white row to form the middle band.
- Position the yellow havarti slices at the top to finish the three-layer candy corn effect.
- Tuck the white grapes into the spaces around the white cheddar layer.
- Add the dried apricots next to the orange cheddar layer and the yellow bell pepper strips beside the yellow havarti.
- Scatter the crackers and almonds around the outer edges of the board.
- Place a few pieces of candy corn on top as a simple garnish.
Notes
Cuisine: American
Equipment: Large serving board, Cheese knife
Witch’s Cauldron Olive and Fig Board
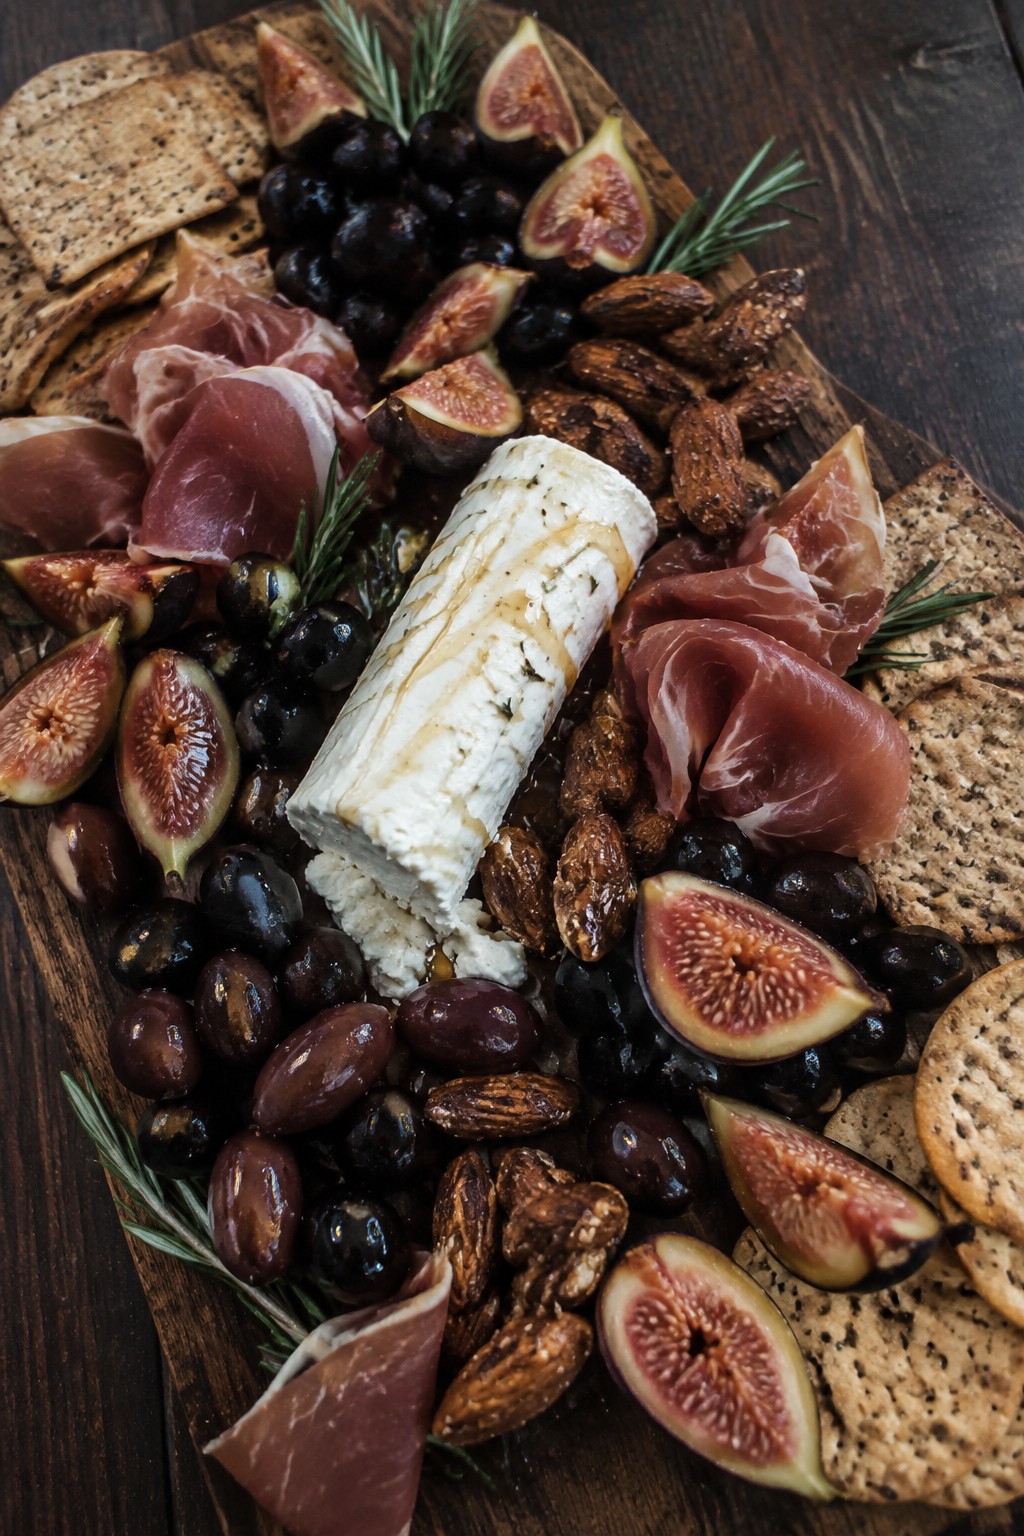
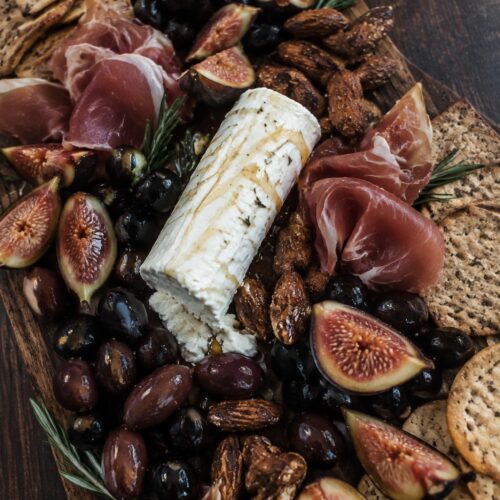
This board uses dark olives and ripe figs to create a striking centerpiece that fits right into a Halloween spread. The mix of briny olives, sweet fruit, and creamy cheese gives it a balance of savory and sweet that guests enjoy without much fuss. It works well for parties where you want something that looks themed but still feels like a regular charcuterie board.
Equipment
- Large round platter
- Cheese knife
- Small serving bowl
Ingredients
- 1 cup black olives
- 1 cup Kalamata olives
- 8 fresh figs, halved
- 4 oz prosciutto slices
- 4 oz goat cheese log
- 1/2 cup roasted almonds
- 2 sprigs fresh rosemary
- 8 oz assorted crackers
- 2 tbsp honey
Instructions
- Choose a large round platter or shallow black bowl to mimic a cauldron shape. Place both the black olives and Kalamata olives in the center to form the base layer.
- Arrange the halved figs around the olives in a loose circle so they frame the dark center.
- Tuck the prosciutto slices into small folds and set them between the figs.
- Slice the goat cheese into rounds and place them near the prosciutto.
- Scatter the roasted almonds in the remaining open spaces on the board.
- Lay the rosemary sprigs on top of the olives so they stand upright like steam rising from the cauldron.
- Drizzle the honey lightly over the figs and goat cheese just before serving.
- Set the crackers in a separate stack or small bowl beside the board.
Notes
Cuisine: Mediterranean
Equipment: Large round platter, Cheese knife, Small serving bowl
Vampire Fang Blood Orange Platter
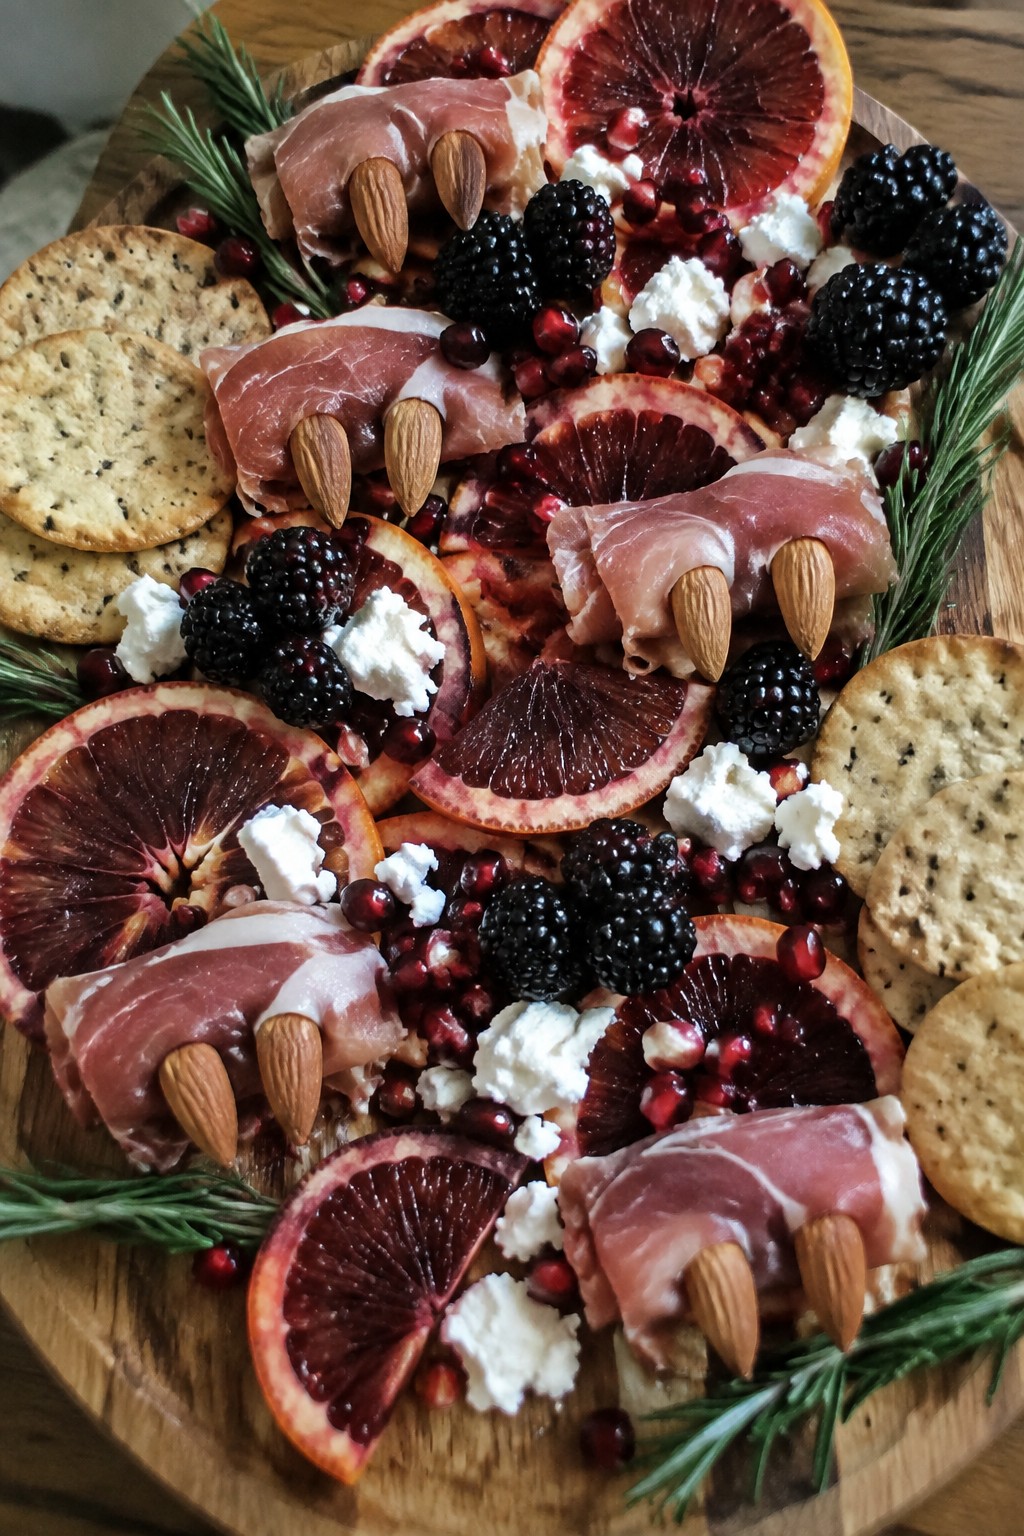
This platter brings a fun Halloween twist to a simple fruit and meat board. Blood oranges provide a deep red color that fits the theme, while almonds create quick vampire fang details on rolled prosciutto. It works well as a starter for a party or a casual gathering with friends.
The flavors balance sweet citrus with salty cured meat and creamy cheese. The textures range from juicy orange slices to crisp crackers and soft cheese.
Equipment
- Large serving platter
- Sharp knife
- Cutting board
Ingredients
- 4 blood oranges
- 1 cup whole almonds
- 8 ounces thinly sliced prosciutto
- 6 ounces soft goat cheese
- 1 cup blackberries
- 1/2 cup pomegranate seeds
- 12-16 crackers
- 2 sprigs fresh rosemary
Instructions
- Slice the blood oranges into rounds and set them aside.
- Lay out each prosciutto slice and place two almonds at one end to form fangs. Roll the prosciutto around the almonds to hold them in place.
- Spread the goat cheese in a small bowl or directly on the platter.
- Arrange the blood orange slices in a single layer on a large serving platter. Place the prosciutto rolls among the orange slices.
- Scatter the blackberries and pomegranate seeds around the other items. Add the crackers to the edges of the platter.
- Tuck the rosemary sprigs in between the oranges for color.
Notes
Cuisine: American
Equipment: Large serving platter, Sharp knife, Cutting board
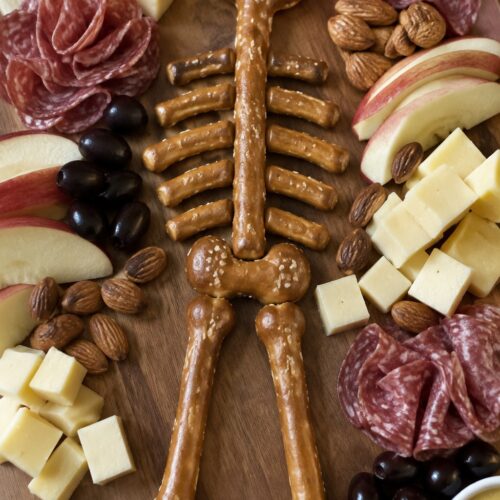
Skeleton Bone Pretzel Charcuterie Board
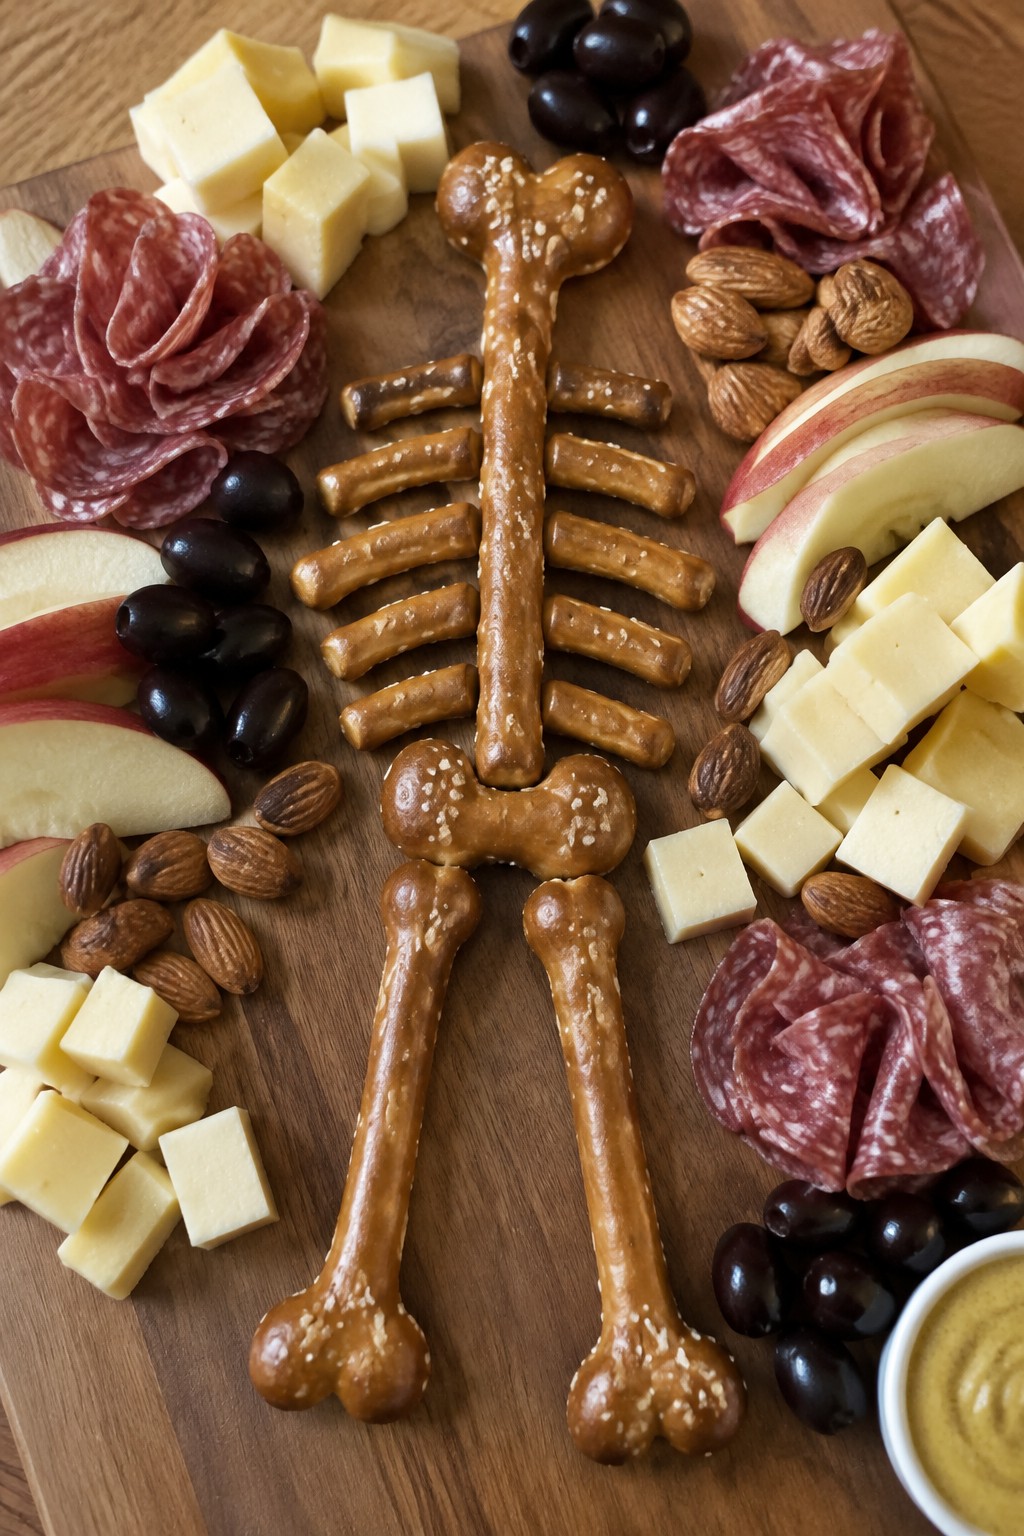
This Skeleton Bone Pretzel Charcuterie Board uses pretzel rods as the main feature to create a simple skeleton design. It works well for Halloween parties or casual get-togethers where you want something quick to assemble. The board combines the salty crunch of pretzels with creamy cheese and savory meats for a balanced bite.
The overall feel stays light and snackable, with a mix of firm, chewy, and crisp textures. It comes together on one board and gives guests plenty of options to build their own portions.
Equipment
- Large serving board
- Cheese knife
- Small bowls
Ingredients
- 20 pretzel rods
- 8 ounces white cheddar cheese, cubed
- 6 ounces salami slices
- 1 cup black olives
- 1 cup apple slices
- 1/2 cup whole almonds
- 1/4 cup honey mustard
Instructions
- Lay a large serving board on a flat surface and place the pretzel rods in the center to form a loose skeleton shape with longer rods for arms and legs.
- Scatter the white cheddar cubes around the pretzel arrangement so they fill in the spaces on both sides.
- Layer the salami slices in small folds near the cheese cubes.
- Add the black olives and apple slices in open areas around the edges of the board.
- Spoon the honey mustard into a small bowl and set it on the board along with the whole almonds in a second bowl.
Notes
Cuisine: American
Equipment: Large serving board, Cheese knife, Small bowls
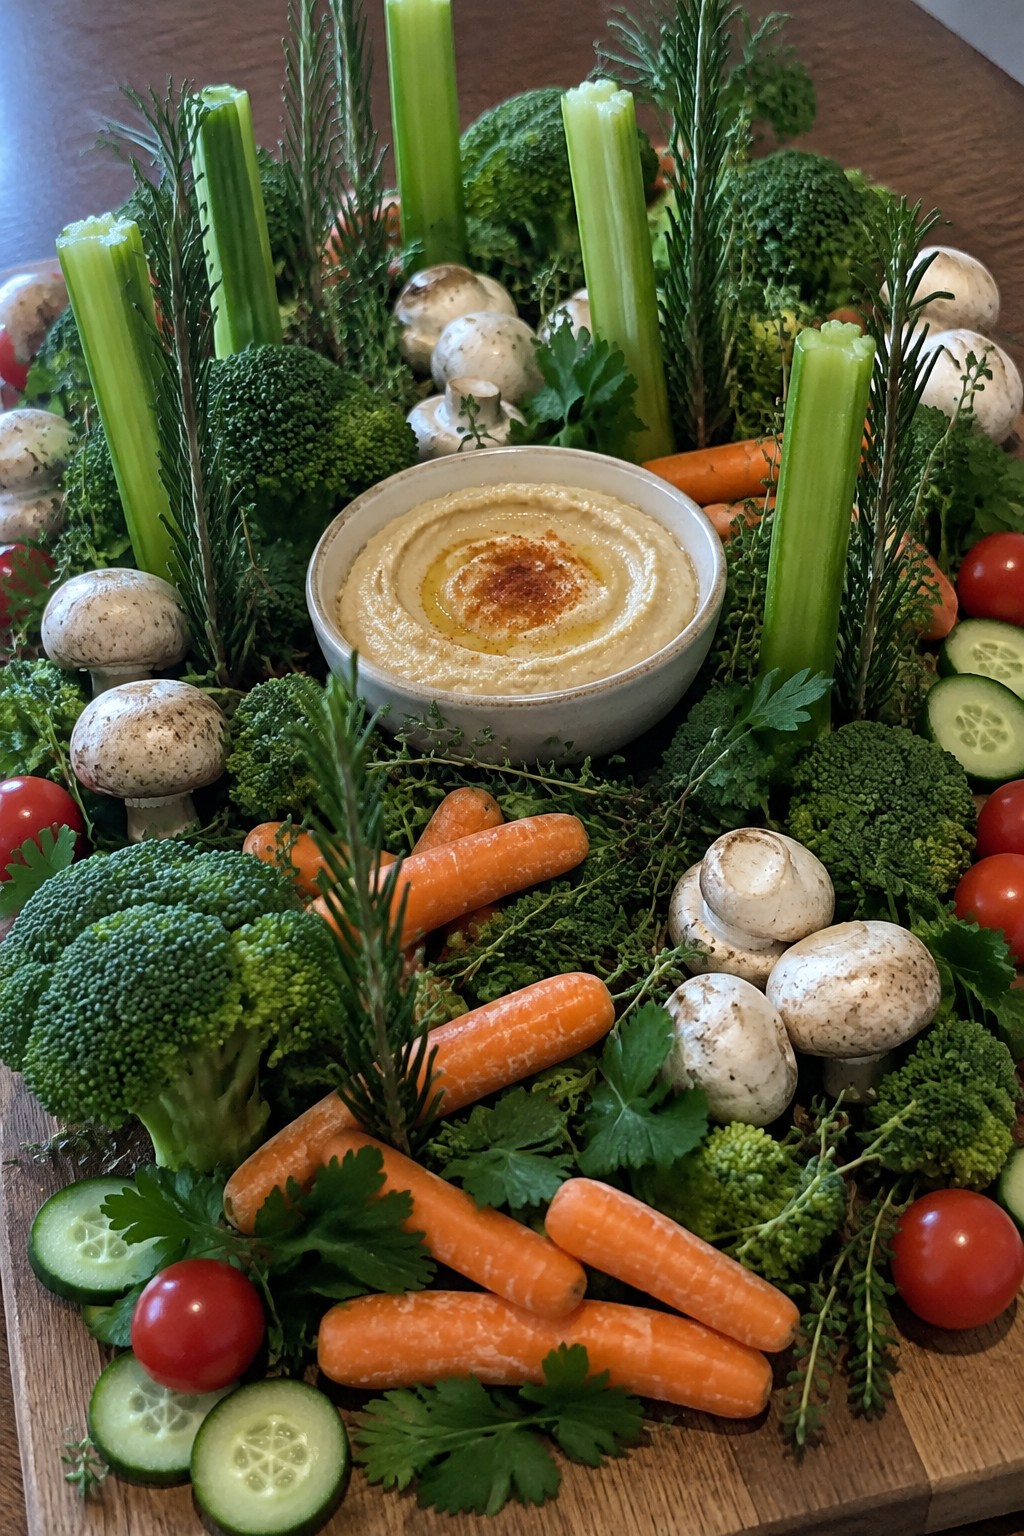
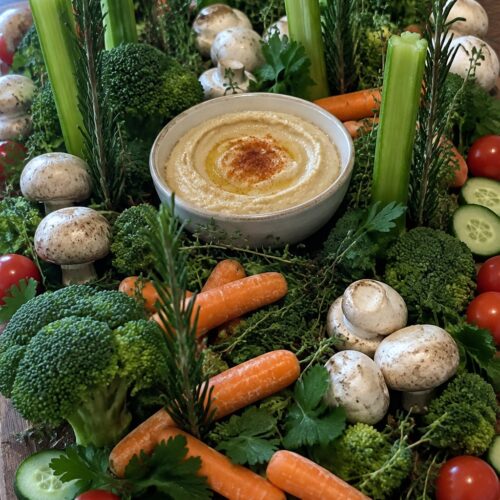
Haunted Forest Veggie and Herb Board
This board turns simple vegetables and fresh herbs into a woodland scene that fits right into a Halloween spread. The mix of crisp textures and earthy flavors gives guests something fresh to balance richer party foods.
It works best at gatherings where people want to graze while they mingle. The herbs bring a bright scent that makes the whole board feel like a walk through the woods.
Equipment
- Knife
- Cutting Board
- Serving Platter
Ingredients
- 1 cup baby carrots
- 4 celery stalks, cut into sticks
- 1 cucumber, sliced into rounds
- 1 cup broccoli florets
- 1 cup cherry tomatoes
- 8 ounces whole white mushrooms
- 6 rosemary sprigs
- 1/4 cup fresh thyme sprigs
- 1/4 cup fresh parsley leaves
- 1 cup hummus
Instructions
- Rinse all vegetables under cold water and pat them dry with a clean towel.
- Cut the celery into sticks and the cucumber into rounds if not already prepared.
- Place the hummus in a small bowl and set it in the center of a large wooden board.
- Arrange the broccoli florets and rosemary sprigs around the hummus to form tree-like shapes.
- Add the baby carrots, celery sticks, and mushroom caps in clusters to fill out the forest base.
- Tuck the thyme sprigs and parsley leaves between the vegetables for added greenery.
- Place the cherry tomatoes and cucumber rounds in open spaces to complete the arrangement.
Notes
Cuisine: American
Equipment: Knife, Cutting Board, Serving Platter
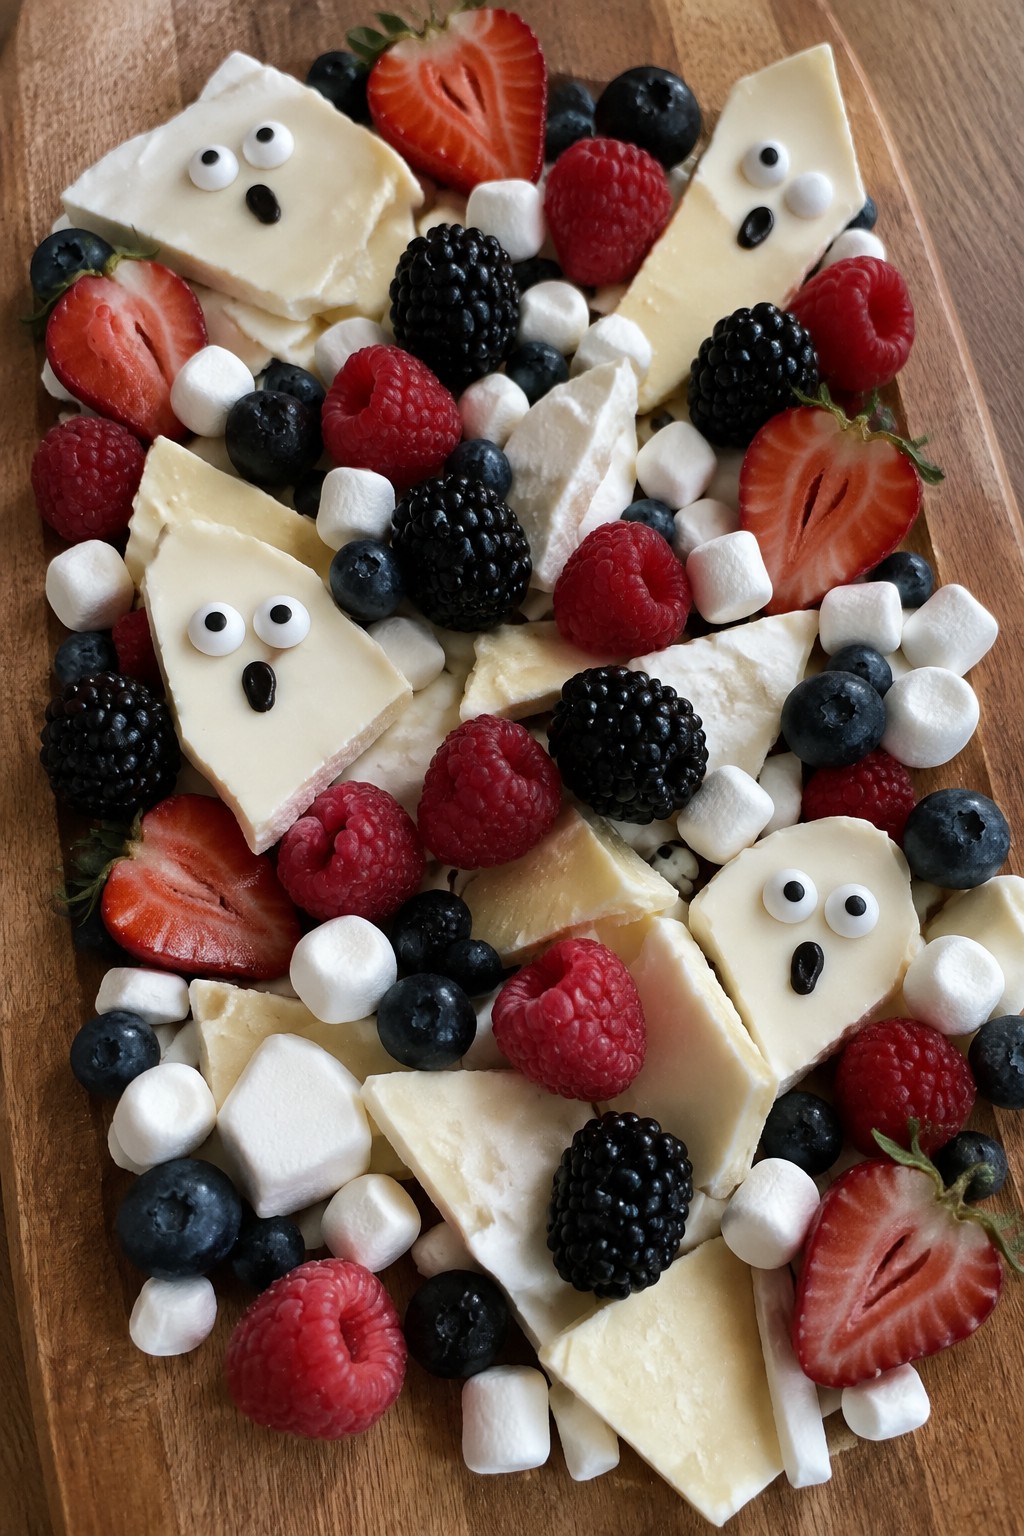
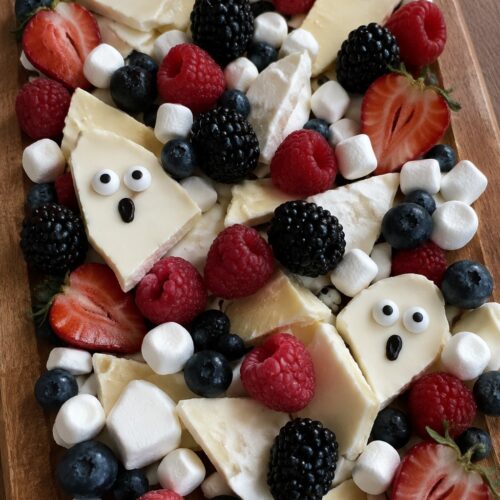
Ghostly White Chocolate and Berry Board
This white chocolate and berry board gives a light, sweet finish to a Halloween table. The pale chocolate base stands out against bright berries, and the simple arrangement comes together fast for family nights or small gatherings. It offers a mild, creamy taste with bursts of fresh fruit.
The board keeps things balanced by mixing smooth chocolate with juicy berries and a few soft marshmallows. You can place it out as a dessert option that appeals to both kids and adults.
Equipment
- Microwave-safe bowl
- Serving board
- Parchment paper
Ingredients
- 8 ounces white chocolate, broken into pieces
- 1 cup strawberries, hulled and halved
- 1 cup raspberries
- 1/2 cup blueberries
- 1/2 cup blackberries
- 1/2 cup mini marshmallows
- 12 candy eyes
Instructions
- Place the white chocolate pieces in a microwave-safe bowl and heat in 30-second bursts, stirring after each, until fully melted and smooth.
- Spread the melted white chocolate in a thin, even layer across a serving board or a sheet of parchment paper set on the board.
- While the chocolate is still soft, press the mini marshmallows into it in small clusters to form ghost shapes.
- Add the candy eyes to the tops of the marshmallows to finish the ghosts.
- Scatter the strawberries, raspberries, blueberries, and blackberries around the chocolate and marshmallows, leaving some white chocolate visible between the fruit.
Notes
Cuisine: American
Equipment: Microwave-safe bowl, Serving board, Parchment paper
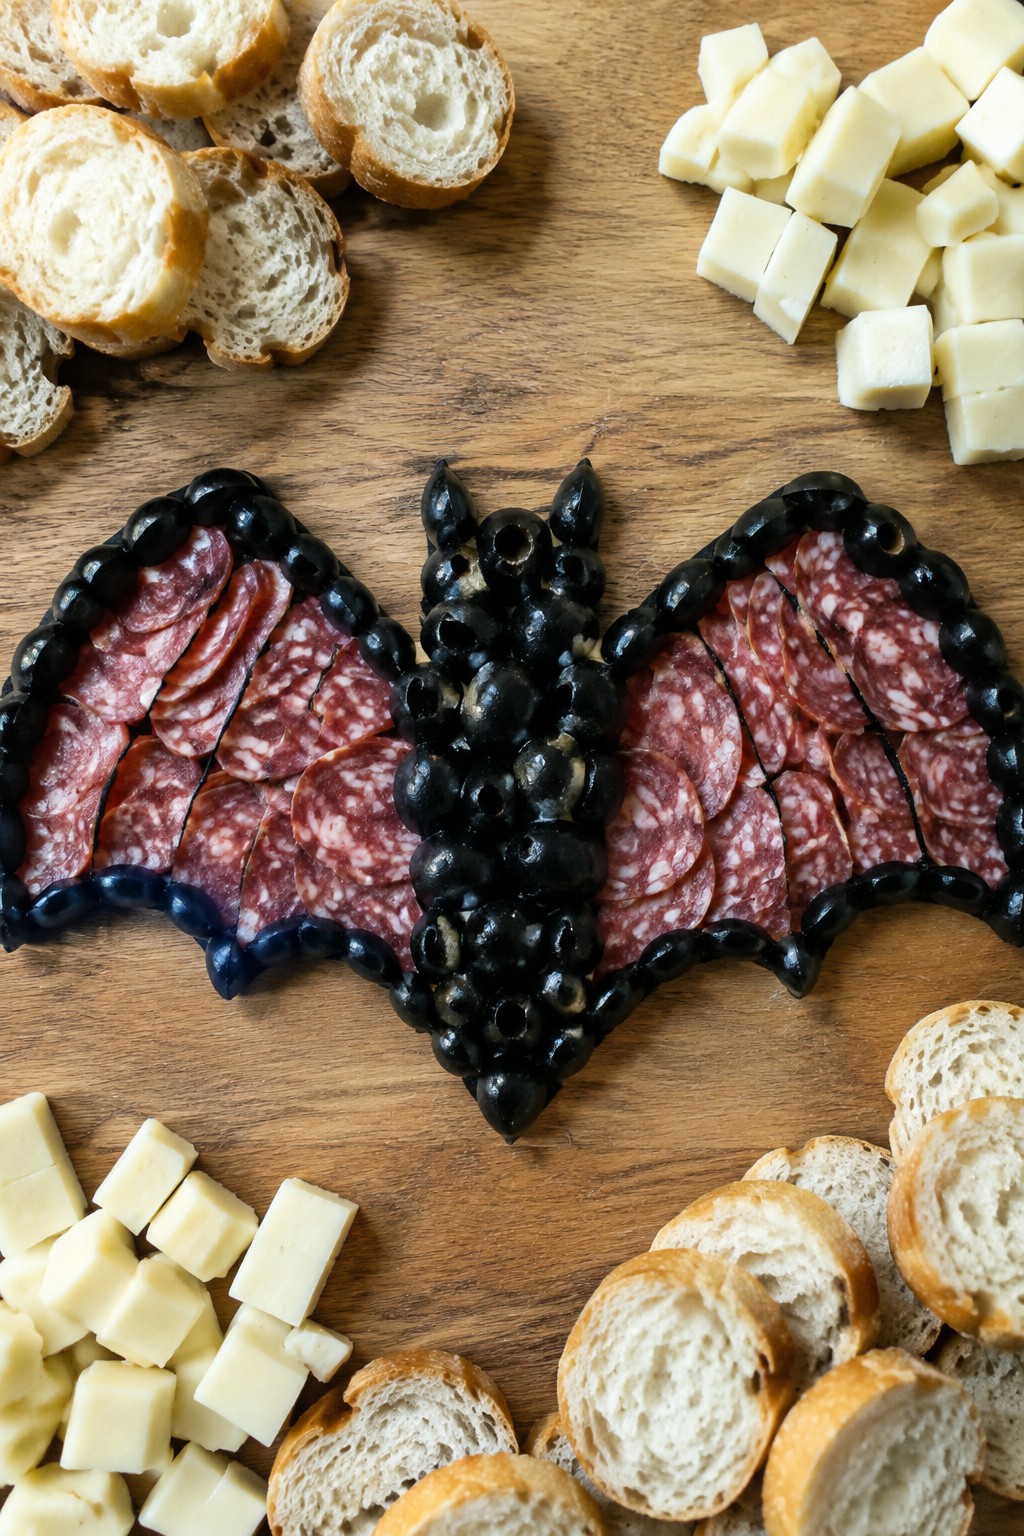
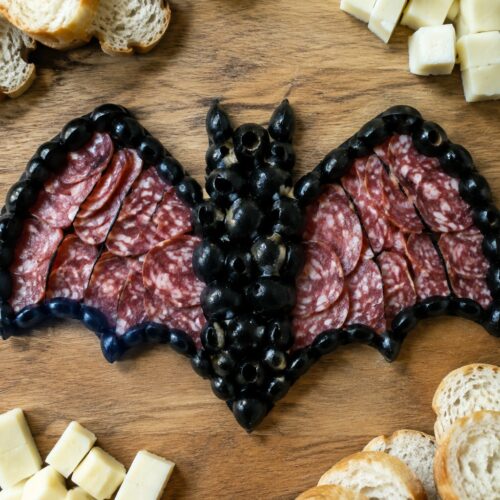
Bat Wing Black Olive and Salami Board
This board turns simple salami slices and black olives into a striking bat wing display that fits right into a Halloween spread. The arrangement creates a dark, winged shape that draws attention without needing fancy tools. It brings salty, savory flavors with a mix of chewy salami and briny olives.
It works well for parties or casual get-togethers where guests graze while chatting. The texture stays balanced between the firm meat and the softer olives, making it easy to pair with crackers.
Equipment
- Serving board
- Knife
Ingredients
- 12 ounces thinly sliced salami
- 1 cup pitted black olives
- 1 baguette, sliced into rounds
- 8 ounces white cheddar, cubed
Instructions
- Place a large wooden board on your counter and begin by laying the salami slices in two curved fan shapes on opposite sides to form the bat wings.
- Cluster the black olives in the center where the wings meet to create the body of the bat.
- Arrange the baguette rounds along the bottom edge of the board for easy serving.
- Scatter the white cheddar cubes around the edges of the board to fill empty spaces and complete the layout.
Notes
Cuisine: American
Equipment: Serving board, Knife
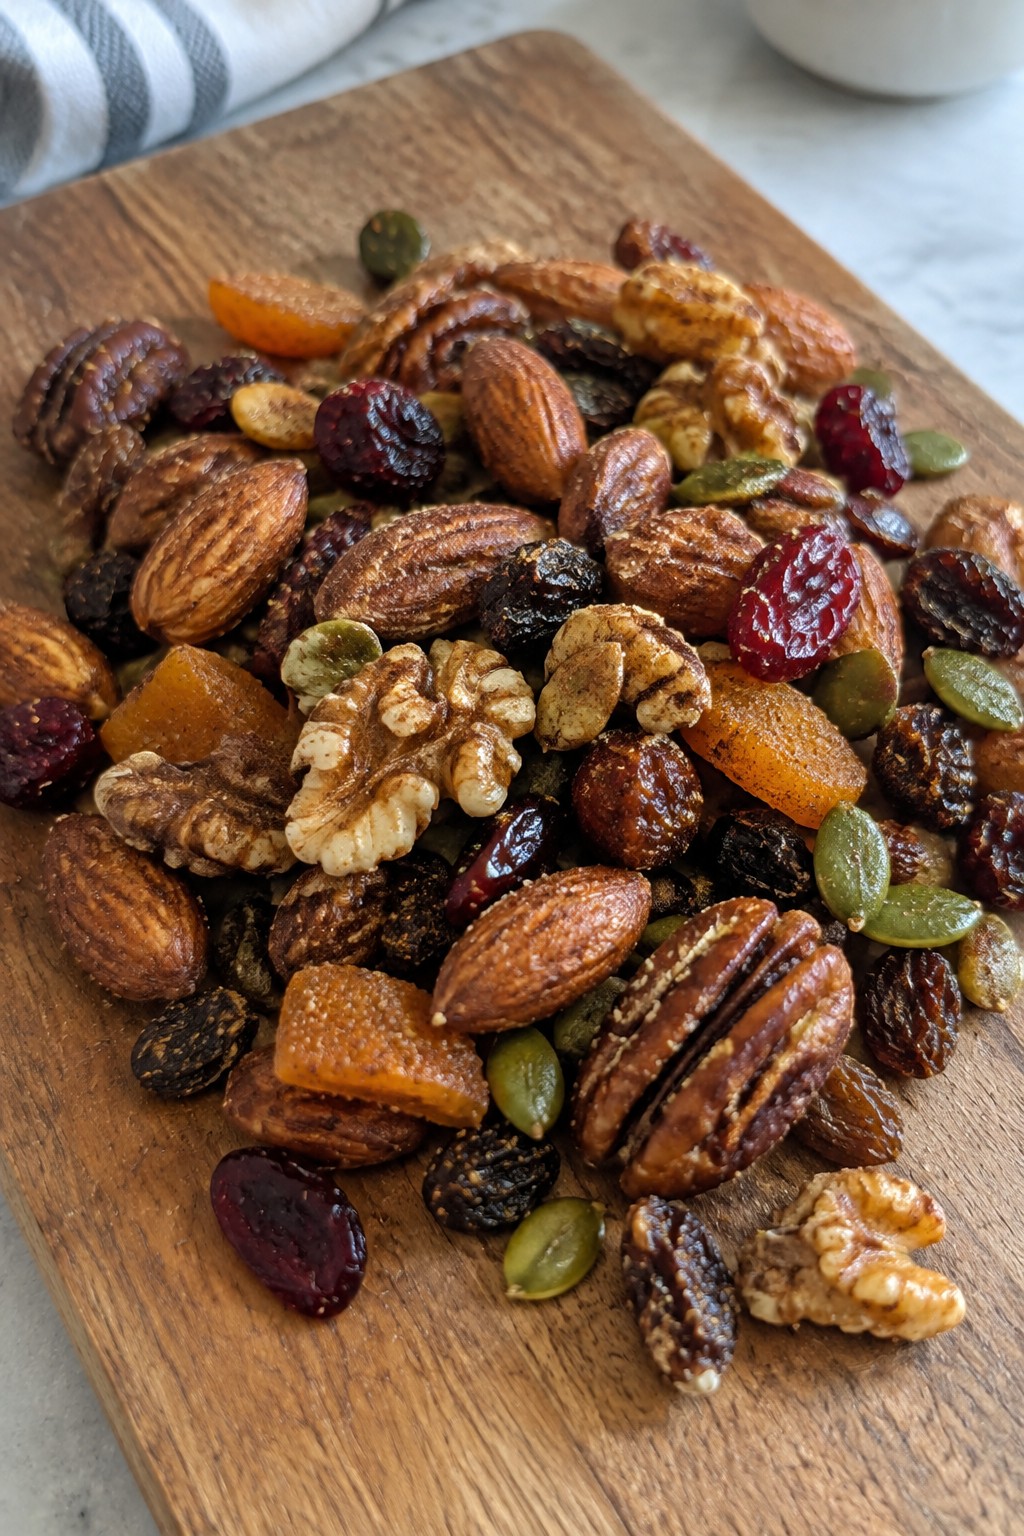
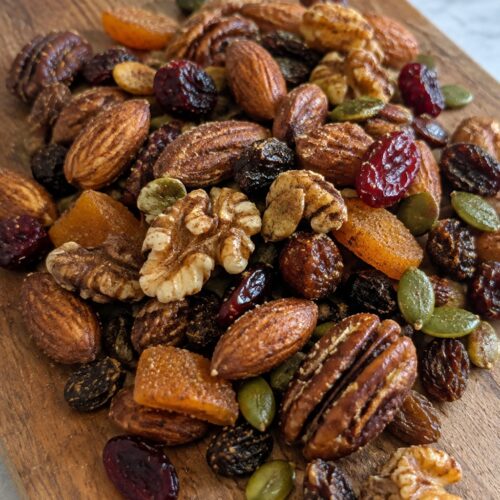
Pumpkin Spice Nut and Dried Fruit Board
This board brings together toasted nuts coated in warm pumpkin spice with chewy dried fruits for a simple fall snack. It works well for Halloween parties or cozy gatherings where guests want something sweet and savory to nibble on. The result gives crunchy and chewy textures with spiced, lightly sweet flavors.
Equipment
- Baking sheet
- Mixing bowl
- Serving board
Ingredients
- 2 cups mixed nuts (almonds, walnuts, and pecans)
- 1/2 cup pumpkin seeds
- 2 tablespoons pumpkin pie spice
- 2 tablespoons maple syrup
- 1/2 cup dried cranberries
- 1/2 cup dried apricots
- 1/4 cup raisins
Instructions
- Preheat the oven to 325 degrees and line a baking sheet with parchment paper.
- In a mixing bowl, combine the mixed nuts and pumpkin seeds. Drizzle with maple syrup and sprinkle with pumpkin pie spice. Stir until the nuts and seeds are evenly coated.
- Spread the mixture in a single layer on the prepared baking sheet. Bake for 15 minutes, stirring once halfway through, until the nuts are lightly toasted and fragrant.
- Remove the baking sheet from the oven and let the nut mixture cool completely on the sheet.
- Arrange the cooled nuts and seeds on a serving board. Scatter the dried cranberries, dried apricots, and raisins around and over the nuts to fill out the board.
Notes
Cuisine: American
Equipment: Baking sheet, Mixing bowl, Serving board
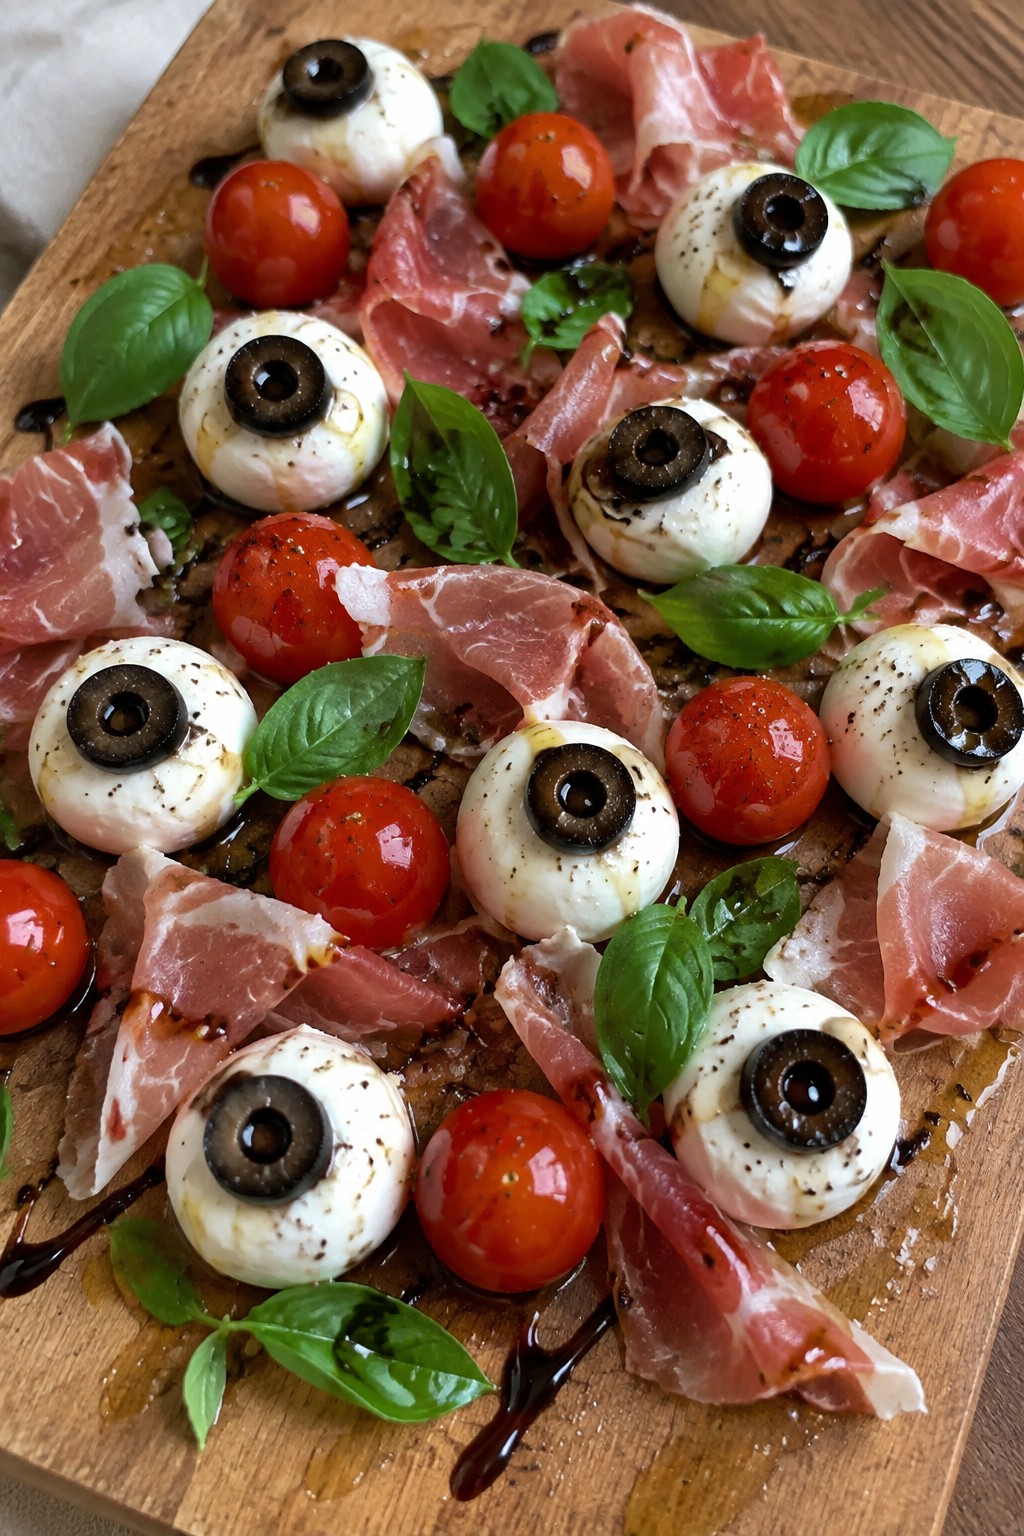
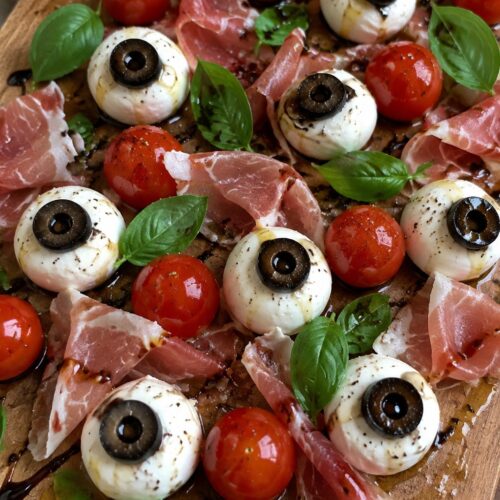
Monster Eyeball Mozzarella and Tomato Board
This board turns a simple caprese style combination into a fun Halloween display. Small mozzarella balls become eyeballs with olive centers, while cherry tomatoes add color and freshness. It works well for parties or casual gatherings where guests want something light but themed.
The flavors stay bright and classic with creamy cheese, juicy tomatoes, and a light olive oil drizzle. The board offers a mix of soft and firm textures that pair nicely with crackers or bread.
Equipment
- Serving board
- Sharp knife
- Paper towels
Ingredients
- 12 oz fresh mozzarella balls (ciliegine size)
- 1 pint cherry tomatoes
- 1/2 cup pitted black olives
- 2 tablespoons olive oil
- 1 tablespoon balsamic vinegar
- 1/4 teaspoon salt
- 1/4 teaspoon black pepper
- 8 fresh basil leaves
- 4 slices prosciutto, torn into strips
Instructions
- Drain the mozzarella balls and pat them dry with a paper towel. Place them on a large serving board in small clusters.
- Slice each black olive into thin rounds. Press one olive slice gently onto the top of each mozzarella ball to create the pupil.
- Cut the cherry tomatoes in half. Tuck the tomato halves around the mozzarella clusters on the board.
- Tear the basil leaves into smaller pieces and scatter them over the tomatoes and mozzarella.
- Drizzle the olive oil and balsamic vinegar evenly across the board. Sprinkle with salt and black pepper.
- Add the torn prosciutto strips in between the cheese and tomato sections to fill out the board.
Notes
Cuisine: Italian
Equipment: Serving board, Sharp knife, Paper towels
