

Hey there, fellow Halloween enthusiasts! As the season of spooks draws near, I’ve been on a quest to find the most bewitching brownie recipes that will enchant your taste buds and wow your guests. This year, I stumbled upon 15 ghoulishly delightful recipes that are perfect for your Halloween bash. From enchanting spider webs to creepy graveyard bites, these brownies are not just scrumptious—they are a visual treat too. Let’s uncover the magic behind each of these spellbinding delights!
Spider Web Brownies
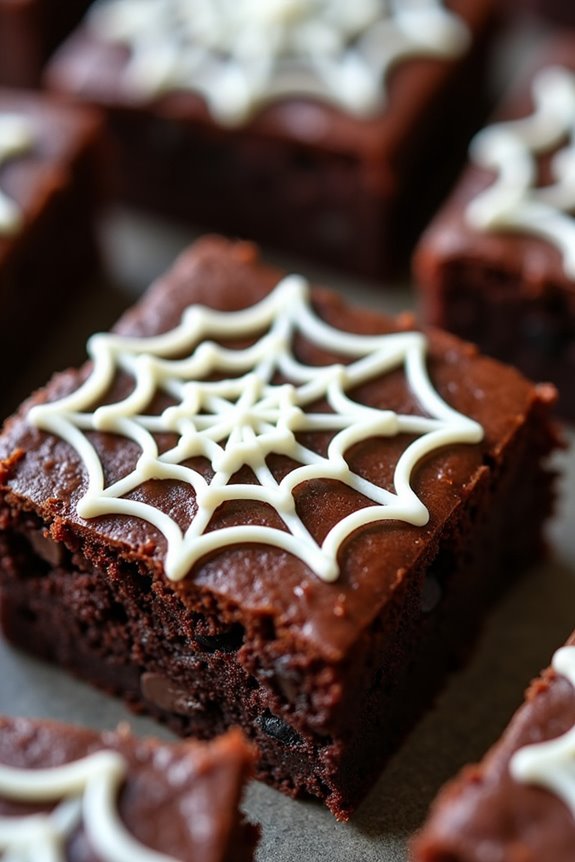
Spider Web Brownies are the perfect treat for a spooky Halloween celebration. These delightful brownies aren’t only delicious but also bring a touch of creativity and fun to your dessert table. With a rich, fudgy base and a hauntingly beautiful spider web design on top, these brownies will surely capture the attention of both children and adults alike.
Whether you’re hosting a Halloween party or just looking for a fun baking activity, these Spider Web Brownies are bound to be a hit.
The key to creating the perfect Spider Web Brownies lies in the careful balance of flavors and the striking visual appeal of the spider web pattern. The brownie base is made from rich cocoa and chocolate, providing a deep and satisfying chocolate flavor.
The spider web design is created using a simple cream cheese mixture that’s piped onto the brownie surface and gently dragged with a toothpick to form the web pattern. This recipe serves 4-6 people, making it ideal for a small gathering or family treat.
Ingredients:
- 1 cup unsalted butter
- 1 cup granulated sugar
- 1 cup packed light brown sugar
- 4 large eggs
- 1 teaspoon vanilla extract
- 1 cup all-purpose flour
- 1 cup unsweetened cocoa powder
- 1/2 teaspoon salt
- 1 cup semi-sweet chocolate chips
- 4 ounces cream cheese, softened
- 1/4 cup powdered sugar
- 1 tablespoon milk
Cooking Instructions:
1. Preheat the Oven: Preheat your oven to 350°F (175°C). Grease a 9×13 inch baking dish or line it with parchment paper to prevent sticking.
2. Prepare the Brownie Batter: In a large saucepan, melt the butter over medium heat. Once melted, remove from heat and stir in the granulated sugar and brown sugar until well combined.
Allow the mixture to cool slightly, then whisk in the eggs and vanilla extract until smooth.
3. Mix Dry Ingredients: In a separate bowl, sift together the flour, cocoa powder, and salt. Gradually add the dry ingredients to the wet mixture, stirring until just combined. Fold in the chocolate chips.
4. Pour and Level: Pour the brownie batter into the prepared baking dish, spreading it evenly with a spatula.
5. Prepare the Cream Cheese Mixture: In a small bowl, beat the cream cheese until smooth. Add the powdered sugar and milk, mixing until the mixture is creamy and smooth.
6. Create the Spider Web: Transfer the cream cheese mixture to a piping bag or a small resealable plastic bag with a tiny corner snipped off. Pipe concentric circles on top of the brownie batter.
Using a toothpick or a skewer, gently drag lines from the center to the edge of the dish to create a spider web pattern.
7. Bake the Brownies: Place the baking dish in the preheated oven and bake for 25-30 minutes, or until a toothpick inserted into the center comes out with a few moist crumbs.
Avoid overbaking to keep the brownies fudgy.
8. Cool and Serve: Allow the brownies to cool in the pan on a wire rack. Once cooled, cut into squares and serve your spooky Spider Web Brownies.
Extra Tips:
For a more intense chocolate flavor, consider using a mix of dark and semi-sweet chocolate chips. If you don’t have a piping bag, you can improvise by using a small zip-top bag with one corner snipped off.
To guarantee the cream cheese mixture forms a neat spider web pattern, make sure it’s smooth and not too runny. If you’re making these ahead of time, store them in an airtight container at room temperature for up to two days.
Enjoy the process and have fun experimenting with different designs for a truly unique Halloween treat!
Graveyard Brownie Bites
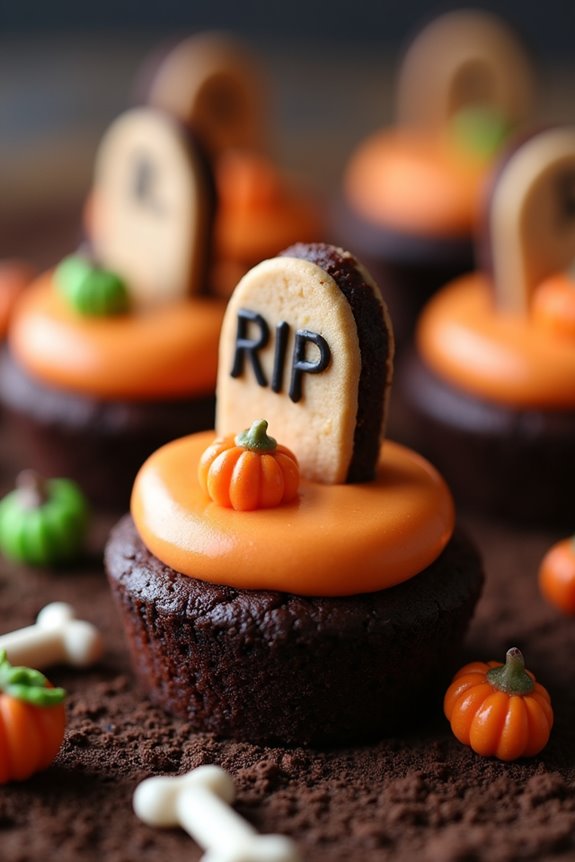
Graveyard Brownie Bites are a spooky and delicious treat perfect for Halloween festivities. These miniature desserts aren’t only fun to make but also a delightful combination of rich chocolate brownie and creative decoration. Imagine a tray of bite-sized brownies topped with scrumptious frosting and adorned with tombstone cookies and candy embellishments to mimic a haunted graveyard.
Perfect for parties or a family night in, Graveyard Brownie Bites will enchant both kids and adults with their sweet and eerie charm.
The base of this dessert is a classic chocolate brownie, baked to chewy perfection. Once cooled, each brownie bite is topped with a layer of creamy frosting to serve as the “earth” and decorated with cookie tombstones and candy bones to complete the graveyard scene. This recipe yields about 24 brownie bites, making it an ideal serving size for 4-6 people.
Whether you’re an experienced baker or just looking for a fun project, this recipe is straightforward and rewarding, resulting in a spooky treat that tastes just as good as it looks.
Ingredients:
- 1 cup unsalted butter
- 2 cups granulated sugar
- 1 cup all-purpose flour
- 1 cup unsweetened cocoa powder
- 1/2 teaspoon baking powder
- 1/4 teaspoon salt
- 4 large eggs
- 1 teaspoon vanilla extract
- 1 cup semi-sweet chocolate chips
- 1 tub chocolate frosting
- 12 oval-shaped cookies (like Milano or shortbread)
- Black decorating gel or icing
- Candy bones and/or pumpkins for decoration
Instructions:
- Preheat and Prepare: Preheat your oven to 350°F (175°C). Line a 9×13 inch baking pan with parchment paper or grease it lightly to prevent sticking.
- Melt and Mix: In a medium saucepan, melt the butter over low heat. Once melted, remove from heat and stir in the sugar, followed by the eggs and vanilla extract. Mix until well combined.
- Combine Dry Ingredients: In a separate bowl, whisk together the flour, cocoa powder, baking powder, and salt. Gradually add this dry mixture to the wet ingredients, stirring until just combined. Be careful not to overmix.
- Add Chocolate Chips: Fold in the chocolate chips to the brownie batter, ensuring they’re evenly distributed.
- Bake the Brownies: Pour the batter into the prepared baking pan and spread it evenly. Bake in the preheated oven for about 25-30 minutes or until a toothpick inserted into the center comes out with a few moist crumbs.
- Cool and Cut: Allow the brownies to cool completely in the pan on a wire rack. Once cooled, cut the brownies into bite-sized squares.
- Decorate the Brownies: Spread a thin layer of chocolate frosting on top of each brownie square. Use the black decorating gel or icing to write “RIP” on each oval-shaped cookie and insert one into each brownie to represent a tombstone.
- Final Touches: Add candy bones or pumpkins around each tombstone to enhance the graveyard effect.
Extra Tips:
For best results, verify the brownies are completely cooled before attempting to cut and decorate them. This will help maintain their shape and prevent the frosting from melting.
If you’re making these treats in advance, store them in an airtight container to keep them fresh. For a more personalized touch, you can use different types of cookies or candies to decorate your graveyard scene.
Mummy Brownies

Halloween is the perfect time for festive treats, and Mummy Brownies are a spooky, delicious addition to any celebration. These delightful confections combine the rich, fudgy goodness of brownies with fun, Halloween-themed decorations that transform them into charming mummies. Perfect for a party or a family gathering, Mummy Brownies are bound to impress both kids and adults alike.
This recipe provides an opportunity to get creative in the kitchen while enjoying a classic dessert with a playful twist. The key to great Mummy Brownies lies in the balance between a moist, chewy brownie base and the whimsical, eye-catching mummy decoration. The brownie batter is made from scratch for that homemade taste, but you can also use a brownie mix if you’re short on time.
Once baked, the brownies are adorned with white chocolate drizzle to mimic mummy bandages and finished with candy eyes to give them personality. This recipe makes enough to serve 4-6 people, making it ideal for a small gathering or a family night in.
Ingredients:
- 1 cup unsalted butter
- 2 cups granulated sugar
- 4 large eggs
- 1 teaspoon vanilla extract
- 1 cup all-purpose flour
- 1 cup unsweetened cocoa powder
- 1/2 teaspoon salt
- 1/2 teaspoon baking powder
- 1 cup white chocolate chips
- Candy eyes
Cooking Instructions:
- Preheat and Prepare: Preheat your oven to 350°F (175°C). Grease a 9×13 inch baking dish or line it with parchment paper for easy removal of the brownies.
- Melt Butter: In a medium saucepan over low heat, melt the butter. Once melted, remove from heat and stir in the granulated sugar until well combined.
- Mix Wet Ingredients: Add the eggs one at a time to the butter and sugar mixture, beating well after each addition. Stir in the vanilla extract.
- Combine Dry Ingredients: In a separate bowl, whisk together the flour, cocoa powder, salt, and baking powder.
- Create Batter: Gradually add the dry mixture to the wet ingredients, stirring until just combined. Be careful not to overmix, as this can lead to dense brownies.
- Bake: Pour the batter into the prepared baking dish and spread it evenly. Bake in the preheated oven for 25-30 minutes or until a toothpick inserted into the center comes out mostly clean (a few moist crumbs are okay).
- Cool: Allow the brownies to cool completely in the pan on a wire rack before decorating.
- Decorate: Melt the white chocolate chips in a microwave-safe bowl, stirring every 20 seconds until smooth. Transfer the melted chocolate to a piping bag or a small plastic bag with a tiny corner snipped off.
- Add Mummy Bandages: Drizzle the white chocolate over the cooled brownies in a zigzag pattern to create the look of mummy bandages.
- Add Eyes: Place candy eyes on the brownies while the white chocolate is still tacky so they adhere properly.
- Slice and Serve: Once the chocolate has set, slice the brownies into squares or rectangles and serve.
Extra Tips:
To guarantee your Mummy Brownies have the best texture, avoid overbaking them. They should be set around the edges with a slightly soft center for that perfect fudgy consistency.
If you prefer a darker chocolate flavor, consider using dark cocoa powder. For added fun, you can experiment with different colored candy eyes or use edible food coloring to tint the white chocolate.
Don’t forget to let the brownies cool completely before decorating to guarantee the white chocolate drizzles neatly without melting.
Witch’s Brew Brownies
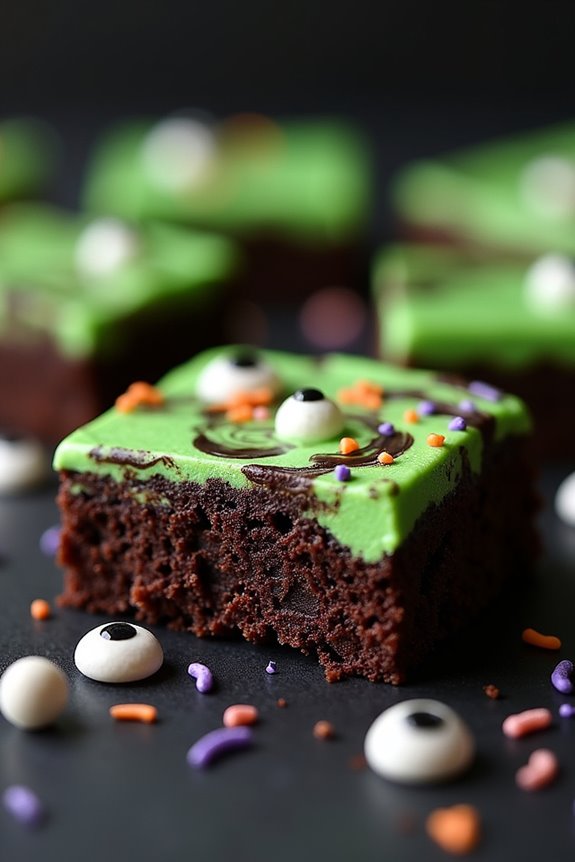
Witch’s Brew Brownies are a perfect Halloween treat, combining the rich, fudgy taste of classic brownies with a spooky twist. These brownies aren’t only delicious but also a fun and creative way to get into the Halloween spirit. Imagine serving a platter of chocolatey goodness adorned with ghostly decorations and hints of eerie green swirls that resemble a witch’s bubbling cauldron.
Whether you’re hosting a Halloween party or just looking to add a touch of magic to your dessert table, Witch’s Brew Brownies are sure to enchant your guests.
The secret to these brownies lies in their ghoulish decorations and the subtle use of mint extract to give that ‘brew’ effect. The mint flavor adds an unexpected yet delightful twist to the traditional brownie taste. The green marbling effect is achieved by swirling green-tinted cream cheese into the brownie batter before baking.
When these brownies emerge from the oven, they not only taste delightful but also look like they were concocted in a witch’s kitchen. This recipe serves 4-6 people, making it ideal for small gatherings or a family treat.
Ingredients:
- 1/2 cup unsalted butter
- 1 cup granulated sugar
- 2 large eggs
- 1 teaspoon vanilla extract
- 1/2 teaspoon mint extract
- 1/3 cup unsweetened cocoa powder
- 1/2 cup all-purpose flour
- 1/4 teaspoon salt
- 1/4 teaspoon baking powder
- 4 ounces cream cheese, softened
- 1/4 cup powdered sugar
- Green food coloring
- Halloween-themed sprinkles (optional)
Instructions:
- Preheat the Oven: Preheat your oven to 350°F (175°C). Grease an 8×8 inch baking pan with butter or non-stick spray and set aside.
- Prepare the Brownie Batter: In a medium saucepan, melt the butter over low heat. Once melted, remove from heat and stir in the granulated sugar, eggs, vanilla extract, and mint extract. Mix until well combined. Gradually add the cocoa powder, flour, salt, and baking powder, stirring until the batter is smooth and free of lumps.
- Make the Cream Cheese Mixture: In a separate bowl, beat the softened cream cheese with powdered sugar until smooth. Add a few drops of green food coloring to achieve a vibrant green hue, and mix until the color is evenly distributed.
- Combine Batters: Pour the brownie batter into the prepared baking pan, spreading it evenly. Drop spoonfuls of the green cream cheese mixture on top of the brownie batter. Use a knife or skewer to swirl the green mixture into the brownie batter, creating a marbled effect.
- Bake: Place the pan in the preheated oven and bake for 25-30 minutes, or until a toothpick inserted into the center comes out with a few moist crumbs. The edges should be firm while the center remains slightly gooey.
- Cool and Decorate: Allow the brownies to cool completely in the pan on a wire rack. Once cool, cut into squares and, if desired, sprinkle with Halloween-themed sprinkles for extra festivity.
Extra Tips:
For a more intense green color, you can adjust the amount of food coloring in the cream cheese mixture. If you prefer your brownies less sweet, reduce the amount of granulated sugar slightly.
Be careful not to overbake the brownies, as this will result in a dry texture; they should be fudgy and moist. For an additional spooky touch, consider adding edible eyes or small chocolate witch hats as decorations.
Enjoy your Witch’s Brew Brownies with a glass of milk or a scoop of vanilla ice cream for the ultimate Halloween indulgence.
Bloody Eyeball Brownies

Halloween is the perfect time to indulge in both spooky and delicious treats, and Bloody Eyeball Brownies are the ideal dish to add a creepy yet delightful touch to your Halloween celebrations.
These brownies aren’t only rich and fudgy but also topped with a gory decoration that will leave your guests both impressed and slightly spooked. The combination of gooey chocolate with the eerie eyeball decoration makes these brownies a hit at any Halloween party.
The recipe is designed to serve 4-6 people, making it perfect for a small gathering or a family treat. The brownies feature a classic chocolate base, while the eyeball decorations are made from a white chocolate ganache and edible candy eyes, with red gel icing to give that bloody effect.
These brownies are as fun to make as they’re to eat, and they’re sure to delight both children and adults alike.
Ingredients:
- 1 cup unsalted butter
- 1 cup granulated sugar
- 1 cup packed brown sugar
- 4 large eggs
- 1 teaspoon vanilla extract
- 1 cup all-purpose flour
- 1 cup unsweetened cocoa powder
- 1/2 teaspoon salt
- 1/2 teaspoon baking powder
- 1 cup white chocolate chips
- Edible candy eyes
- Red gel icing
Instructions:
- Preheat and Prepare: Preheat your oven to 350°F (175°C) and grease a 9×13-inch baking pan or line it with parchment paper for easy removal of the brownies.
- Melt and Mix: In a medium saucepan over low heat, melt the butter. Remove from heat and stir in the granulated sugar and brown sugar until well combined. Allow the mixture to cool slightly.
- Combine Wet Ingredients: Add the eggs one at a time to the cooled butter and sugar mixture, beating well after each addition. Stir in the vanilla extract until fully incorporated.
- Mix Dry Ingredients: In a separate bowl, sift together the flour, cocoa powder, salt, and baking powder. Gradually add the dry ingredients to the wet mixture, stirring until just combined. Be careful not to over-mix.
- Bake the Brownies: Pour the brownie batter into the prepared baking pan, spreading it evenly. Bake in the preheated oven for 25-30 minutes, or until a toothpick inserted into the center comes out mostly clean with a few moist crumbs.
- Prepare White Chocolate Ganache: While the brownies are baking, melt the white chocolate chips in a heatproof bowl over a pot of simmering water, stirring until smooth. Allow it to cool slightly.
- Decorate the Brownies: Once the brownies are baked and cooled, spread the white chocolate ganache over the top. Place candy eyes randomly on the surface, pressing them gently into the ganache. Using the red gel icing, draw lines radiating from the candy eyes to mimic blood vessels.
- Serve and Enjoy: Allow the ganache to set slightly before slicing the brownies into squares. Serve immediately for best results.
Extra Tips:
When making Bloody Eyeball Brownies, make certain the brownies are completely cooled before applying the white chocolate ganache to prevent it from melting.
If you don’t have red gel icing, you can make a simple icing with powdered sugar, a few drops of red food coloring, and a bit of water. Adjust the amount of food coloring to achieve the desired blood-red color.
These brownies can be made a day in advance, allowing the flavors to meld together, and they can be stored in an airtight container for up to three days.
Pumpkin Patch Brownies
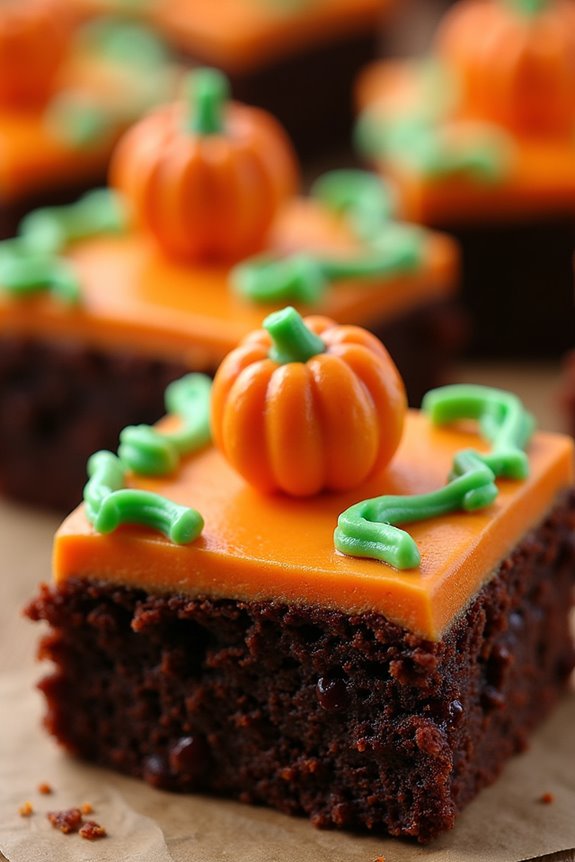
Pumpkin Patch Brownies are the perfect treat to celebrate the Halloween season. These delightful brownies combine the rich, fudgy texture of traditional brownies with the festive touch of a pumpkin patch theme. They aren’t only delicious but also visually appealing, making them a great addition to any Halloween party or fall gathering.
With a hint of pumpkin spice and the cuteness of little pumpkin candies on top, these brownies are guaranteed to be a hit with both kids and adults alike. Creating these Halloween Brownies is a fun culinary project that can be enjoyed by bakers of all skill levels. The process involves preparing a classic brownie batter, enhancing it with fall flavors, and then decorating the baked brownies to resemble a pumpkin patch.
The end result is a batch of brownies that are as delightful to look at as they’re to eat. This recipe serves 4-6 people, making it perfect for a small get-together or a family dessert night.
Ingredients:
- 1 cup unsalted butter
- 1 cup granulated sugar
- 1 cup packed light brown sugar
- 4 large eggs
- 1 teaspoon vanilla extract
- 1 cup all-purpose flour
- 1 cup unsweetened cocoa powder
- 1 teaspoon baking powder
- 1/2 teaspoon salt
- 1 teaspoon pumpkin pie spice
- 1/2 cup semisweet chocolate chips
- 1/2 cup chopped walnuts (optional)
- 1/2 cup orange frosting
- 1/4 cup green frosting
- Pumpkin candy decorations (such as candy corn pumpkins)
Instructions:
- Preheat and Prepare: Preheat your oven to 350°F (175°C). Line a 9×13 inch baking pan with parchment paper or lightly grease it with butter.
- Melt Butter and Mix Sugars: In a medium saucepan, melt the butter over low heat. Once melted, remove from heat and stir in the granulated sugar and brown sugar until well combined and smooth.
- Add Eggs and Vanilla: Add the eggs, one at a time, to the butter-sugar mixture, stirring well after each addition. Then, add the vanilla extract and mix until the mixture is smooth and glossy.
- Combine Dry Ingredients: In a separate bowl, whisk together the flour, cocoa powder, baking powder, salt, and pumpkin pie spice.
- Mix Wet and Dry Ingredients: Gradually add the dry ingredients to the wet mixture, stirring gently until just combined. Be careful not to overmix. Fold in the chocolate chips and walnuts, if using.
- Bake the Brownies: Pour the batter into the prepared baking pan, spreading it evenly. Bake in the preheated oven for 25-30 minutes or until a toothpick inserted into the center comes out with a few moist crumbs.
- Cool and Decorate: Allow the brownies to cool in the pan for about 10 minutes, then transfer to a wire rack to cool completely. Once cooled, spread the orange frosting over the top of the brownies. Use the green frosting to create vines and leaves, and place pumpkin candy decorations on top to resemble a pumpkin patch.
Extra Tips:
For a richer flavor, consider using high-quality cocoa powder and chocolate chips. If you prefer a different nut, pecans can be used instead of walnuts.
If you want to add an extra layer of flavor, you can incorporate a tablespoon of espresso powder into the dry ingredients. When spreading the frosting, be certain the brownies are completely cool to prevent the frosting from melting.
For a more personalized touch, you can pipe the frosting into specific shapes or designs, making each brownie unique.
Ghostly Brownie Bars
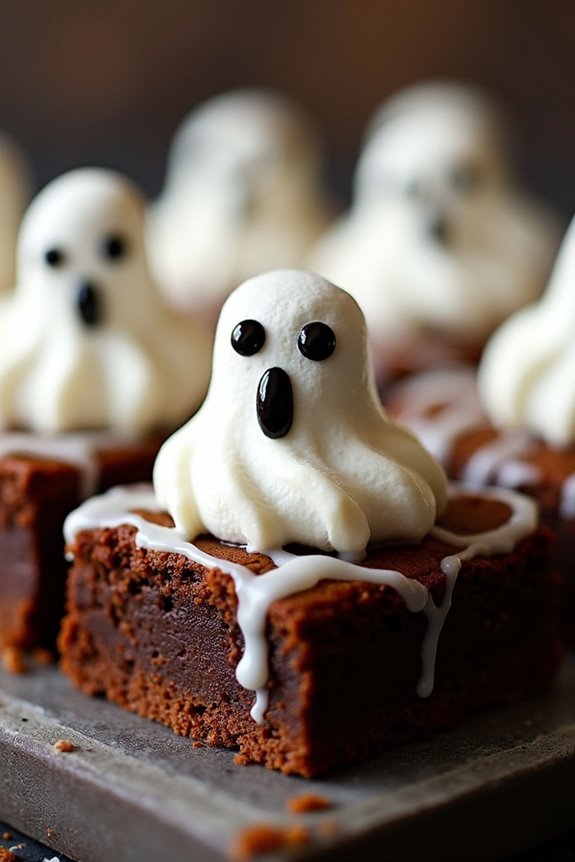
Halloween is the perfect time to indulge in sweet treats with a spooky twist, and Ghostly Brownie Bars are the ultimate festive dessert for this occasion. These fudgy brownies are topped with adorable ghost decorations that are sure to delight both kids and adults at any Halloween gathering.
Whether you’re hosting a party or just enjoying a cozy night in, these brownies will add a touch of spooky fun to your dessert table. The rich, chocolatey base of these brownies is perfectly complemented by the sweet and creamy ghost decorations made from marshmallow and white chocolate.
With a serving size of 4-6 people, this recipe is perfect for sharing with family and friends. Follow the easy steps below to create these deliciously eerie Ghostly Brownie Bars at home.
Ingredients (Serves 4-6):
- 1/2 cup unsalted butter
- 1 cup granulated sugar
- 2 large eggs
- 1 teaspoon vanilla extract
- 1/3 cup unsweetened cocoa powder
- 1/2 cup all-purpose flour
- 1/4 teaspoon salt
- 1/4 teaspoon baking powder
- 1 cup mini marshmallows
- 1/2 cup white chocolate chips
- Black gel icing for decoration
Cooking Instructions:
- Preheat and Prepare: Preheat your oven to 350°F (175°C). Grease and line an 8×8 inch baking pan with parchment paper, leaving some overhang on the sides to easily lift the brownies out later.
- Melt Butter and Mix: In a medium saucepan over low heat, melt the butter. Remove from heat and stir in the sugar, followed by the eggs and vanilla extract. Mix until smooth.
- Combine Dry Ingredients: In a separate bowl, whisk together cocoa powder, flour, salt, and baking powder. Gradually add the dry mixture to the wet mixture, stirring until just combined to form a smooth batter.
- Pour and Bake: Pour the brownie batter into the prepared pan, spreading it evenly with a spatula. Bake in the preheated oven for 20-25 minutes, or until a toothpick inserted into the center comes out with a few moist crumbs.
- Add Marshmallows: Immediately after removing the brownies from the oven, sprinkle the mini marshmallows evenly over the top. Return to the oven for an additional 2-3 minutes, until the marshmallows are puffed and just starting to melt.
- Melt Chocolate and Decorate: While the marshmallows are melting, melt the white chocolate chips in a microwave-safe bowl in 30-second intervals, stirring in between until smooth. Drizzle the melted chocolate over the marshmallows to create ghost shapes. Use the black gel icing to add eyes and mouths to the ghosts.
- Cool and Serve: Allow the brownies to cool completely in the pan before lifting them out using the parchment overhang. Cut into squares and serve your Ghostly Brownie Bars for a spooky Halloween treat.
Extra Tips:
For an extra spooky effect, you can use different colored gel icings to add details to your ghostly decorations. If you prefer chewier brownies, reduce the baking time by a couple of minutes.
Additionally, if you find the marshmallows browning too quickly, you can cover the pan loosely with aluminum foil during the last few minutes of baking. Enjoy your Halloween festivities with these delightful Ghostly Brownie Bars!
Frankenstein Brownies

To make Frankenstein Brownies, you’ll start with a rich and fudgy brownie base, enhanced with a few drops of green food coloring to achieve that signature Frankenstein hue.
Once baked and cooled, the brownies are cut into rectangles and adorned with various decorations to bring your edible monster to life. This recipe serves 4-6 people, making it ideal for a small Halloween party or family gathering.
Ingredients:
- 1 cup unsalted butter
- 2 cups granulated sugar
- 1 cup all-purpose flour
- 1 cup unsweetened cocoa powder
- 1 teaspoon baking powder
- 1/2 teaspoon salt
- 4 large eggs
- 1 teaspoon vanilla extract
- Green food coloring
- 1/2 cup chocolate chips
- Candy eyes
- Black decorating gel
- Pretzel sticks
Instructions:
- Preheat the Oven: Start by preheating your oven to 350°F (175°C). Line a 9×13 inch baking pan with parchment paper, allowing the edges to overhang for easy removal.
- Prepare the Batter: In a large saucepan, melt the butter over low heat. Once melted, remove from heat and stir in the sugar until well combined. Let it cool slightly.
- Mix Dry Ingredients: In a separate bowl, whisk together the flour, cocoa powder, baking powder, and salt.
- Combine Ingredients: Add the eggs one at a time to the butter mixture, beating well after each addition. Stir in the vanilla extract. Gradually add the dry ingredients to the wet ingredients, mixing until just combined.
- Add Coloring and Chocolate Chips: Stir in green food coloring until the batter reaches your desired shade of green. Fold in the chocolate chips.
- Bake the Brownies: Pour the batter into the prepared baking pan, smoothing the top with a spatula. Bake for 25-30 minutes, or until a toothpick inserted into the center comes out clean.
- Cool and Cut: Allow the brownies to cool completely in the pan on a wire rack. Once cooled, lift the brownies out using the parchment paper and cut them into rectangles.
- Decorate: Use black decorating gel to draw Frankenstein’s hair and mouth on each brownie. Stick candy eyes onto the brownies using a dot of gel. Break pretzel sticks into small pieces and insert them into the sides of each brownie to resemble Frankenstein’s bolts.
Extra Tips:
For an even more monstrous effect, consider using different colored gels or candies to create unique facial expressions for each Frankenstein brownie.
If you want to avoid artificial colors, try using natural food coloring alternatives like matcha powder or spinach juice for the green tint.
Remember to store any leftovers in an airtight container to keep them fresh. Enjoy your creepy creations!
Vampire Bite Brownies
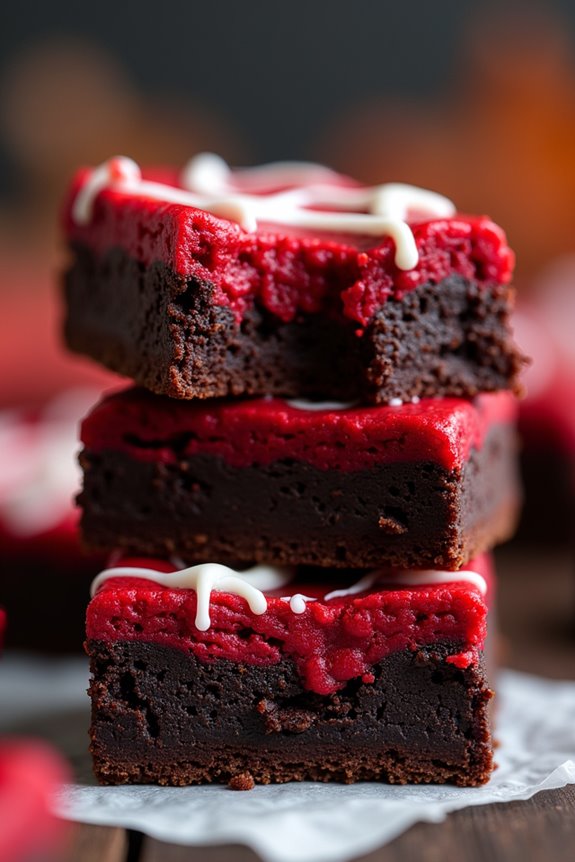
Looking to add a spooky twist to your Halloween treats this year? Vampire Bite Brownies are the perfect way to delight both kids and adults with their eerie yet delicious appeal.
These brownies aren’t only rich and fudgy but also come with an added surprise: a “bite” of red velvet that resembles the bite of a vampire. This clever combination of flavors and colors makes them an irresistible addition to any Halloween celebration.
The secret to these Vampire Bite Brownies lies in their layered design. A classic brownie base is topped with a vibrant red velvet layer, which is then drizzled with a sweet cream cheese glaze. The contrasting colors create a striking effect, while the harmonious blend of chocolate and red velvet flavors satisfies any sweet tooth.
Perfect for a gathering of 4-6 people, these brownies are sure to be the highlight of your Halloween festivities.
Ingredients (serving size: 4-6 people):
- 1 cup unsalted butter
- 2 cups granulated sugar
- 4 large eggs
- 1 teaspoon vanilla extract
- 1 cup all-purpose flour
- 1/2 cup unsweetened cocoa powder
- 1/2 teaspoon baking powder
- 1/4 teaspoon salt
- 1 tablespoon red food coloring
- 1 teaspoon white vinegar
- 4 ounces cream cheese, softened
- 1 cup powdered sugar
- 1 tablespoon milk
Cooking Instructions:
- Preheat and Prepare: Preheat your oven to 350°F (175°C). Grease a 9×13 inch baking pan or line it with parchment paper for easy removal.
- Make Brownie Batter: In a large saucepan, melt the butter over low heat. Remove from heat and mix in the granulated sugar, eggs, and vanilla extract. Stir in the flour, cocoa powder, baking powder, and salt until the mixture is smooth and well combined.
- Divide and Color: Pour about 3/4 of the brownie batter into the prepared baking pan. To the remaining batter, add the red food coloring and white vinegar, mixing until you achieve a vibrant red color.
- Layer the Batter: Carefully spread the red velvet layer over the brownie layer in the pan, making sure to cover the entire surface evenly.
- Bake: Place the pan in the preheated oven and bake for 25-30 minutes, or until a toothpick inserted into the center comes out with only a few moist crumbs.
- Prepare Cream Cheese Glaze: While the brownies are baking, prepare the cream cheese glaze. In a small bowl, beat the softened cream cheese until smooth. Gradually add the powdered sugar and milk, mixing until the glaze is smooth and pourable.
- Cool and Decorate: Once the brownies are baked, allow them to cool in the pan for about 10 minutes. Drizzle the cream cheese glaze over the top, creating a “vampire bite” effect.
- Serve: Once the glaze has set, cut the brownies into squares and serve. Enjoy the spooky and delicious treat!
Extra Tips:
For a little extra flair, consider adding some decorative edible blood drops on top of the glaze using red gel icing. This will enhance the vampire theme and make your brownies even more festive.
Additionally, if you prefer a deeper red color, you can adjust the amount of red food coloring to your liking. Remember, these brownies can be made a day in advance, making them an ideal treat for a Halloween party.
Candy Corn Brownie Squares

Halloween Brownies are a delightful treat that bring the spooky spirit to your dessert table. These fudgy brownies are a wonderful base for a variety of Halloween-themed toppings, and they’re perfect for parties, potlucks, or just a fun night in. One of the standout variations is the Candy Corn Brownie Squares, which combine the rich, chocolatey goodness of brownies with the sweet, colorful pop of candy corn.
These squares aren’t only delicious but also visually appealing, making them an ideal choice for your Halloween festivities. Crafting Candy Corn Brownie Squares involves creating a batch of rich, chocolate brownies, then topping them with a layer of fluffy frosting and a generous sprinkle of candy corn. The contrast between the dark brownies, white frosting, and bright candy corn creates a festive look that’s sure to impress.
This recipe serves 4-6 people, making it great for a small gathering or a family treat. The process is straightforward and can be done in less than an hour, allowing you to spend more time enjoying the holiday.
Ingredients:
- 1 cup unsalted butter
- 2 cups granulated sugar
- 4 large eggs
- 2 teaspoons vanilla extract
- 1 cup all-purpose flour
- 1 cup unsweetened cocoa powder
- ½ teaspoon baking powder
- ¼ teaspoon salt
- 1 cup chocolate chips
- 1 cup white frosting
- 1 cup candy corn
Instructions:
- Preheat the Oven: Start by preheating your oven to 350°F (175°C). This guarantees it’s hot enough to bake the brownies evenly.
- Melt the Butter: In a medium saucepan, melt the unsalted butter over low heat. Once melted, remove from the heat and stir in the granulated sugar until well combined.
- Mix Wet Ingredients: Add the eggs one at a time to the butter and sugar mixture, beating well after each addition. Stir in the vanilla extract. This guarantees the mixture is smooth and well combined.
- Combine Dry Ingredients: In a separate bowl, sift together the all-purpose flour, unsweetened cocoa powder, baking powder, and salt. This helps to distribute the baking powder evenly and removes any lumps from the cocoa powder.
- Create Brownie Batter: Gradually add the dry ingredients to the wet ingredients, stirring until just combined. Don’t overmix. Fold in the chocolate chips to add extra chocolate flavor and texture.
- Bake the Brownies: Pour the batter into a greased 9×13 inch baking pan. Spread it evenly and bake in the preheated oven for 25-30 minutes, or until a toothpick inserted in the center comes out with a few moist crumbs.
- Cool and Frost: Allow the brownies to cool completely in the pan on a wire rack. Once cooled, spread an even layer of white frosting over the top of the brownies.
- Add Candy Corn: Evenly sprinkle the candy corn over the frosted brownies, pressing down gently to guarantee they stick.
- Cut and Serve: Cut the brownies into squares and serve. Enjoy the festive treat!
Extra Tips:
For the best results, make sure not to overbake the brownies; they should be fudgy and moist. If you prefer a less sweet taste, reduce the amount of candy corn, or use a mix of candy corn and other Halloween-themed candies.
For a more personalized touch, consider adding a dash of cinnamon or espresso powder to the brownie batter for an extra depth of flavor. Be creative with your frosting designs, maybe adding some Halloween-themed sprinkles or edible glitter for an additional festive flair.
Zombie Hand Brownies
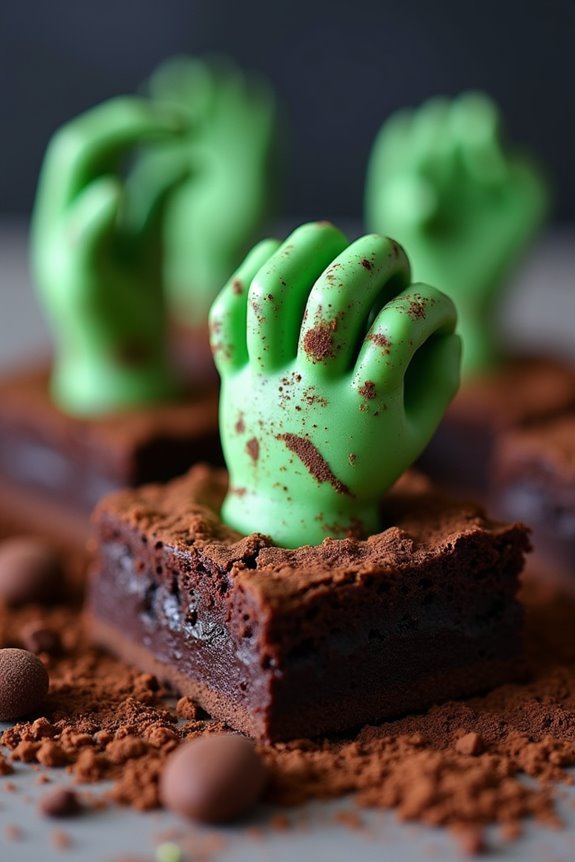
Halloween is the perfect time to release your culinary creativity, and what better way to do that than with a spooktacular treat like Zombie Hand Brownies? These eerie yet delicious brownies are bound to be a hit at any Halloween gathering. Imagine a graveyard scene complete with zombie hands reaching out of the ground, all made edible with rich, chocolatey brownies and some clever decoration.
Not only do they satisfy your sweet tooth, but they also add a fun and slightly creepy element to your Halloween dessert table. The Zombie Hand Brownies are easy to make and require only a few simple ingredients. They serve 4-6 people, making them ideal for a small party or family gathering.
The base is a classic fudgy brownie recipe, while the decoration includes edible zombie hands crafted with fondant or candy. With a bit of food coloring and creativity, you’ll have an impressive dessert that looks like it belongs in a horror movie, yet tastes like a dream.
Ingredients for Zombie Hand Brownies (serving size: 4-6 people):
- 1 cup unsalted butter
- 2 cups granulated sugar
- 4 large eggs
- 1 teaspoon vanilla extract
- 1 cup all-purpose flour
- 1 cup cocoa powder
- 1/2 teaspoon salt
- 1/2 teaspoon baking powder
- Green food coloring
- Edible fondant or candy for zombie hands
- Optional: chocolate chips or nuts for additional texture
Cooking Instructions:
- Prepare the Oven and Pan: Preheat your oven to 350°F (175°C). Grease a 9×13 inch baking pan and line it with parchment paper, leaving some overhang on the sides for easy removal after baking.
- Mix the Wet Ingredients: In a large mixing bowl, melt the butter and let it cool slightly. Add the granulated sugar and whisk until well combined. Incorporate the eggs one at a time, mixing thoroughly after each addition. Stir in the vanilla extract.
- Combine the Dry Ingredients: In a separate bowl, sift together the flour, cocoa powder, salt, and baking powder. Gradually add the dry ingredients to the wet mixture, folding gently until just combined. Be careful not to overmix, as this can make the brownies dense.
- Add Color and Extras: If desired, add a few drops of green food coloring to give your brownies an eerie tint. Stir in any optional ingredients like chocolate chips or nuts at this stage.
- Bake the Brownies: Pour the brownie batter into the prepared pan, spreading it evenly. Bake in the preheated oven for 25-30 minutes, or until a toothpick inserted into the center comes out with a few moist crumbs. Allow the brownies to cool completely in the pan.
- Prepare the Zombie Hands: While the brownies are cooling, shape the edible fondant or candy into small zombie hands. Use green food coloring to give them a ghoulish appearance. You can add details like knuckles and nails using a toothpick or small knife.
- Decorate the Brownies: Once the brownies are cool, cut them into desired shapes. Arrange the zombie hands on top, as if they’re emerging from the brownies. You can also dust a little cocoa powder around the hands for a more realistic graveyard effect.
Extra Tips:
For a more authentic look, you can use crushed chocolate cookies or graham crackers as “dirt” around the zombie hands. You can also personalize the decorations by adding edible tombstones made from cookies or chocolate pieces.
If you’re in a hurry, pre-made fondant or candy decorations from the baking aisle can save time. Remember, the key to a good Zombie Hand Brownie is in the details, so take your time with the decorations to really make them stand out!
Batty Brownies

Batty Brownies are a spooktacular treat perfect for Halloween celebrations. These brownies are rich, fudgy, and adorned with bat-shaped decorations that add a playful touch to your dessert table. With a deep chocolate flavor and a hint of spooky charm, they’re sure to be a hit with both kids and adults alike.
Whether you’re hosting a Halloween party or enjoying a cozy night in, these brownies are a fun and festive way to celebrate the season. The secret to these Batty Brownies lies in their moist and dense texture, combined with a smooth chocolate ganache topping that makes them irresistibly indulgent.
The bat decorations, made from chocolate or fondant, not only add to the Halloween theme but also offer a delightful contrast of textures. Simple to make, yet impressive to serve, these brownies will quickly become a favorite Halloween dessert. Let’s plunge into the recipe and create these deliciously spooky treats for 4-6 people.
Ingredients:
- 1 cup unsalted butter
- 8 oz bittersweet chocolate, chopped
- 1 1/2 cups granulated sugar
- 1 cup all-purpose flour
- 1/4 cup unsweetened cocoa powder
- 1/4 teaspoon salt
- 4 large eggs
- 1 teaspoon vanilla extract
- 1/2 cup chocolate chips
- 1/2 cup heavy cream
- Bat-shaped chocolate or fondant decorations
Cooking Instructions:
- Preheat and Prepare: Preheat your oven to 350°F (175°C). Line an 8×8-inch baking pan with parchment paper, leaving some overhang on the sides for easy removal.
- Melt Chocolate and Butter: In a medium saucepan over low heat, melt the butter and chopped bittersweet chocolate together, stirring occasionally until smooth. Remove from heat and allow to cool slightly.
- Mix Dry Ingredients: In a large bowl, whisk together the sugar, flour, cocoa powder, and salt until well combined.
- Combine Wet Ingredients: In a separate bowl, beat the eggs and vanilla extract until combined. Gradually add the slightly cooled chocolate mixture to the eggs, stirring constantly to prevent the eggs from cooking.
- Combine Mixtures: Pour the wet ingredients into the dry ingredients and stir until just combined. Be careful not to overmix. Fold in the chocolate chips.
- Bake the Brownies: Pour the brownie batter into the prepared baking pan, spreading it evenly. Bake in the preheated oven for 25-30 minutes, or until a toothpick inserted into the center comes out with a few moist crumbs.
- Prepare Ganache: While the brownies are baking, heat the heavy cream in a small saucepan over medium heat until it begins to simmer. Remove from heat and pour over the remaining chocolate chips in a heatproof bowl. Let sit for 2-3 minutes, then stir until smooth and glossy.
- Cool and Decorate: Allow the baked brownies to cool in the pan for about 10 minutes, then lift them out using the parchment paper. Spread the chocolate ganache evenly over the cooled brownies. Once the ganache has set slightly, add the bat-shaped decorations on top.
- Serve: Cut the Batty Brownies into squares and serve them as part of your Halloween festivities.
Extra Tips:
For an extra touch of Halloween fun, consider using edible glitter or colored sprinkles on top of the ganache to enhance the batty theme.
Be sure to allow the brownies to cool completely before cutting to guarantee clean edges. If you want to make the bat decorations yourself, you can use a bat-shaped cookie cutter to cut shapes from chocolate fondant or use melted chocolate to pipe bat shapes onto parchment paper.
Store any leftover brownies in an airtight container at room temperature for up to three days. Enjoy these brownies with a glass of milk or a cup of hot cocoa for a perfect Halloween treat!
Haunted House Brownies
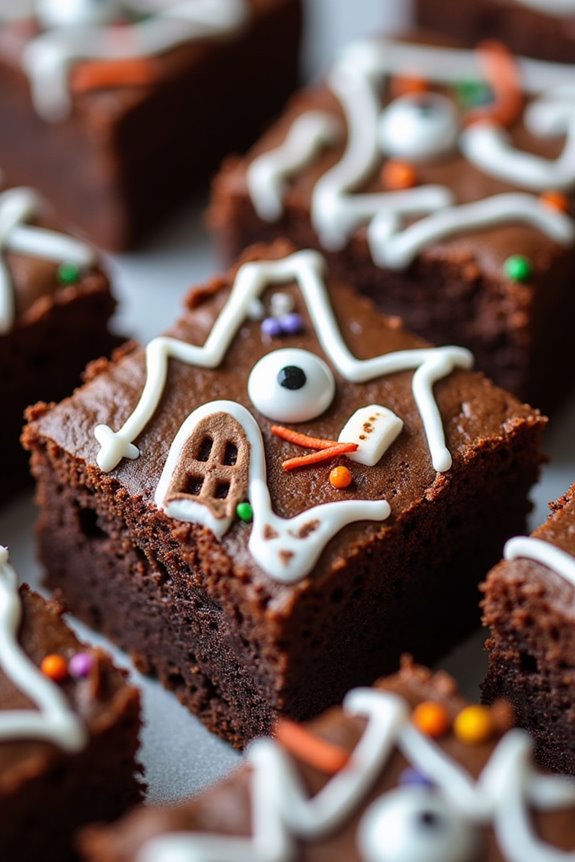
Haunted House Brownies are a spooky twist on the classic brownie, perfect for adding a touch of Halloween fun to your dessert table. These brownies aren’t only deliciously fudgy but also creatively decorated to resemble a haunted house, making them a hit with both kids and adults alike.
Whether you’re hosting a Halloween party or simply want a festive treat, these Haunted House Brownies are sure to delight your guests with their hauntingly good taste and eerie appearance.
This recipe is designed to serve 4-6 people, making it ideal for small gatherings or family treats. The brownies are rich and chocolaty, providing a perfect canvas for your Halloween-themed decorations.
Gather your ingredients, follow the instructions, and let your imagination run wild as you transform these brownies into your very own haunted masterpiece.
Ingredients:
- 1 cup all-purpose flour
- 1 cup granulated sugar
- 1/2 cup unsalted butter, melted
- 2 large eggs
- 1/3 cup cocoa powder
- 1 teaspoon vanilla extract
- 1/4 teaspoon baking powder
- 1/4 teaspoon salt
- Black food coloring (optional)
- Halloween-themed sprinkles
- White icing or frosting
- Chocolate chips or candy eyes
Instructions:
1. Preheat and Prepare: Preheat your oven to 350°F (175°C). Grease an 8×8-inch baking pan with butter or line it with parchment paper to prevent sticking.
2. Mix Dry Ingredients: In a medium-sized bowl, combine the flour, sugar, cocoa powder, baking powder, and salt. Whisk together until well blended.
3. Combine Wet Ingredients: In a separate large bowl, whisk together the melted butter, eggs, and vanilla extract until smooth. If you want a deeper color for the haunted house, add a few drops of black food coloring at this stage.
4. Create the Batter: Gradually add the dry ingredients to the wet ingredients, stirring gently with a spatula or wooden spoon until just combined. Be careful not to overmix the batter.
5. Bake the Brownies: Pour the batter into the prepared baking pan, spreading it evenly with a spatula. Bake in the preheated oven for 25-30 minutes, or until a toothpick inserted into the center comes out with a few moist crumbs. Avoid overbaking to keep the brownies fudgy.
6. Cool and Decorate: Allow the brownies to cool completely in the pan on a wire rack. Once cooled, use the white icing or frosting to draw the outline of a haunted house on the surface.
Arrange the chocolate chips or candy eyes to create windows and doors. Sprinkle Halloween-themed sprinkles for added spooky effect.
7. Serve and Enjoy: Cut the decorated brownies into squares or rectangles, and serve to your guests. Enjoy the spooky, sweet treat!
Extra Tips:
For an extra touch of spookiness, consider using edible glitter or colored sugar to add a shimmering effect to your haunted house design.
If you’re short on time, you can use a store-bought brownie mix as the base and focus on the creative decorations. Remember, the key to a great Haunted House Brownie is in the details, so take your time with the decorations and let your creativity shine.
Additionally, if you have leftover decorations like candy bats or gummy worms, feel free to incorporate them into your design for even more Halloween fun.
Skeleton Brownie Pops

Halloween is the perfect time to indulge in festive treats, and Skeleton Brownie Pops are a fun and spooky addition to any celebration.
These delicious brownie pops combine rich, chocolatey goodness with a playful skeleton design that’s bound to impress both kids and adults. Whether you’re hosting a Halloween party or simply looking for a creative dessert project, these treats are both delightful to make and to eat.
To create these charming Halloween Brownies, you’ll start by baking a batch of your favorite brownies. Once cooled, the brownies are cut into bite-sized portions, skewered on sticks, and then decorated with white chocolate to mimic the appearance of a skeleton. This recipe serves 4-6 people, offering enough pops for everyone to enjoy.
Ingredients:
- 1 box of brownie mix (or homemade brownie recipe of choice)
- 2 large eggs
- 1/2 cup vegetable oil
- 1/4 cup water
- 12 oz white chocolate chips
- 20-24 lollipop sticks
- Black food coloring pen (optional, for extra detail)
Cooking Instructions:
- Prepare the Brownie Mix: Preheat your oven according to the brownie mix instructions. In a large bowl, combine the brownie mix with eggs, vegetable oil, and water. Stir until the mixture is well combined and smooth.
- Bake the Brownies: Pour the brownie batter into a greased baking pan. Bake according to the package instructions or until a toothpick inserted into the center comes out clean. Allow the brownies to cool completely in the pan.
- Cut and Skewer Brownies: Once cooled, cut the brownies into small squares, approximately 2 inches in size. Carefully insert a lollipop stick into each brownie square, guaranteeing it’s secure.
- Melt White Chocolate: In a microwave-safe bowl, melt the white chocolate chips in 30-second intervals, stirring in between, until completely smooth.
- Decorate the Brownie Pops: Dip each brownie pop into the melted white chocolate, ensuring the entire brownie is coated. Place the coated pops on a piece of parchment paper to set. Before the chocolate hardens, use a toothpick or a piping bag to draw skeleton faces and bones directly onto the white chocolate, adding details with a black food coloring pen if desired.
- Set and Serve: Allow the decorated brownie pops to set completely at room temperature, or speed up the process by placing them in the fridge. Serve the Skeleton Brownie Pops at room temperature for the best flavor and texture.
Extra Tips:
When preparing Skeleton Brownie Pops, be sure to let the brownies cool completely before cutting to prevent them from crumbling.
If you don’t have a food coloring pen, you can use a tiny brush or toothpick dipped in black food coloring gel for additional detailing.
For a smoother coating, guarantee the white chocolate is fully melted and not too thick. If it starts to harden while you’re working, gently reheat it in the microwave.
Get creative with your skeleton designs, and have fun bringing these spooky treats to life!
Black Cat Brownies
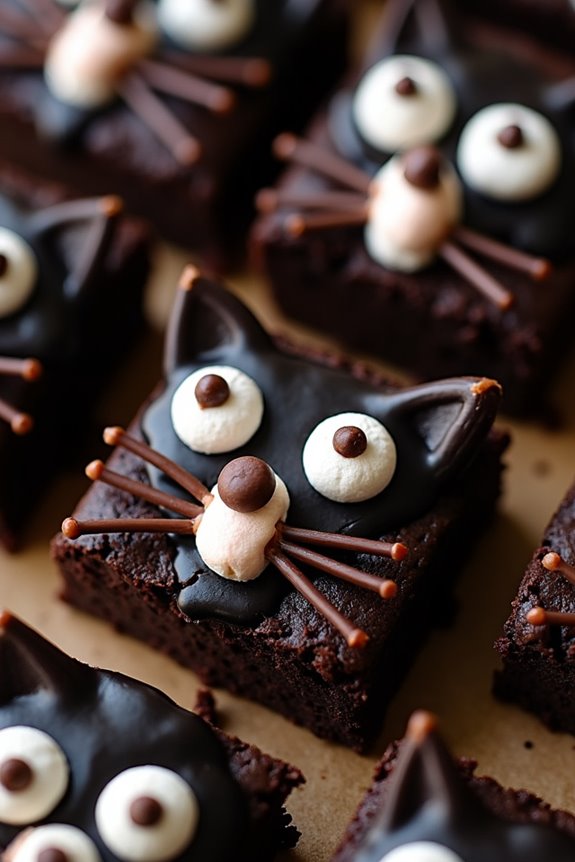
Halloween is a time of year that calls for creative treats, and what better way to celebrate than with Black Cat Brownies? These adorable and delicious brownies are perfect for any Halloween party or to enjoy as a spooky treat at home. The combination of rich, fudgy brownie base topped with decorations to resemble a black cat won’t only delight your taste buds but also impress your guests with their festive appearance.
Making Black Cat Brownies involves crafting the perfect brownie base and then adding a creative twist with some simple decorations. This recipe yields enough to serve 4-6 people, making it ideal for small gatherings. The key to achieving the right texture and flavor lies in using high-quality cocoa powder and chocolate, while the decorations can be customized to suit your style or the preferences of your guests.
Ingredients (Serves 4-6):
- 1 cup (2 sticks) unsalted butter
- 1 cup granulated sugar
- 1 cup brown sugar, packed
- 4 large eggs
- 1 teaspoon vanilla extract
- 1 cup all-purpose flour
- 1 cup unsweetened cocoa powder
- 1/2 teaspoon salt
- 1/2 teaspoon baking powder
- 1 cup semi-sweet chocolate chips
For Decoration:
- Black icing or frosting
- Candy eyes
- Black licorice strings
- Mini marshmallows
- Mini chocolate chips
Cooking Instructions:
- Preheat the Oven: Preheat your oven to 350°F (175°C). This guarantees the oven is at the right temperature when the brownies are ready to be baked.
- Prepare the Baking Pan: Line a 9×13 inch baking pan with parchment paper or lightly grease it to prevent the brownies from sticking.
- Melt the Butter: In a medium saucepan, melt the butter over low heat. Remove from heat and let it cool slightly.
- Mix Sugars and Eggs: In a large bowl, combine the granulated sugar, brown sugar, and melted butter. Beat in the eggs one at a time, then stir in the vanilla extract.
- Combine Dry Ingredients: In a separate bowl, whisk together the flour, cocoa powder, salt, and baking powder.
- Make the Batter: Gradually add the dry ingredients to the wet mixture, stirring until just combined. Fold in the chocolate chips.
- Bake the Brownies: Pour the batter into the prepared baking pan and spread evenly. Bake for 25-30 minutes or until a toothpick inserted into the center comes out with a few moist crumbs.
- Cool and Decorate: Allow the brownies to cool completely in the pan. Once cooled, cut into squares. Use black icing to create the cat face and ears, attach candy eyes, place mini marshmallows for the snout, use mini chocolate chips for the nose, and add licorice strings for whiskers.
Extra Tips:
When making Black Cat Brownies, verify your brownies are completely cooled before attempting to decorate them. This helps the icing and toppings adhere better.
If you want to get creative, experiment with different types of chocolate or add a pinch of cinnamon or espresso powder for a flavor twist. Additionally, using a piping bag for the icing can provide more control over your designs, making your black cats more precise and charming. Enjoy your spooky and tasty creation!