

As a fellow busy baker, I know how quickly the holiday season can creep up on us, leaving us scrambling for time to create festive treats. That’s why I’ve curated a collection of 13 easy Christmas dessert recipes that are both delightful and simple to prepare. Picture serving classic sugar cookies or no-bake Christmas tree brownies, all with ease. Each recipe is designed to save time while still spreading festive cheer. Ready to discover some effortless treats you can whip up?
Classic Sugar Cookies

There’s something undeniably magical about the aroma of freshly baked sugar cookies wafting through the house during the holiday season. Classic Sugar Cookies are a staple in Christmas dessert recipes, beloved for their sweet vanilla flavor and crisp yet tender texture.
These cookies are perfect for decorating and make a delightful treat for both children and adults alike. Whether you enjoy them plain, dusted with sugar, or adorned with colorful icing and sprinkles, sugar cookies are a timeless addition to any festive gathering.
To achieve the perfect Classic Sugar Cookie, it’s vital to start with high-quality ingredients and follow the recipe with care. This recipe will yield approximately 24 cookies, perfect for serving 4-6 people. The dough is easy to work with, allowing you to use your favorite cookie cutters to create festive shapes.
Once baked, these cookies can be decorated to your heart’s content, making them a fun and creative activity for the whole family.
Ingredients:
- 2 ¾ cups all-purpose flour
- 1 teaspoon baking powder
- ½ teaspoon salt
- 1 cup unsalted butter, softened
- 1 ½ cups granulated sugar
- 1 large egg
- 1 ½ teaspoons vanilla extract
- Optional: colored sugar or sprinkles for decoration
Cooking Instructions:
- Preheat the Oven: Preheat your oven to 350°F (175°C) and line two baking sheets with parchment paper.
- Mix Dry Ingredients: In a medium bowl, whisk together the flour, baking powder, and salt. Set aside.
- Cream Butter and Sugar: In a large mixing bowl, use an electric mixer to cream the softened butter and granulated sugar together until light and fluffy, about 2-3 minutes.
- Add Egg and Vanilla: Beat in the egg and vanilla extract to the creamed mixture until fully incorporated.
- Combine Ingredients: Gradually add the dry ingredients to the wet ingredients, mixing on low speed until the dough comes together.
- Roll Out Dough: Divide the dough into two portions. Roll out each portion on a lightly floured surface to about ¼ inch thickness.
- Cut Out Shapes: Use cookie cutters to cut out desired shapes and place them on the prepared baking sheets, leaving about 1 inch of space between each cookie.
- Bake the Cookies: Bake in the preheated oven for 8-10 minutes, or until the edges are lightly golden. Rotate the baking sheets halfway through for even baking.
- Cool and Decorate: Allow the cookies to cool on the baking sheets for 5 minutes before transferring them to a wire rack to cool completely. Once cooled, decorate with colored sugar or sprinkles if desired.
Extra Tips:
For the best results, make sure your butter is at room temperature before starting the recipe; this guarantees that it creams properly with the sugar.
If you find the dough is too sticky to work with, chilling it in the refrigerator for 15-30 minutes can make it easier to handle.
Additionally, make sure not to overbake the cookies; they should be just set and slightly golden around the edges to maintain their soft center. Enjoy the process of decorating and let your creativity shine!
No-Bake Christmas Tree Brownies
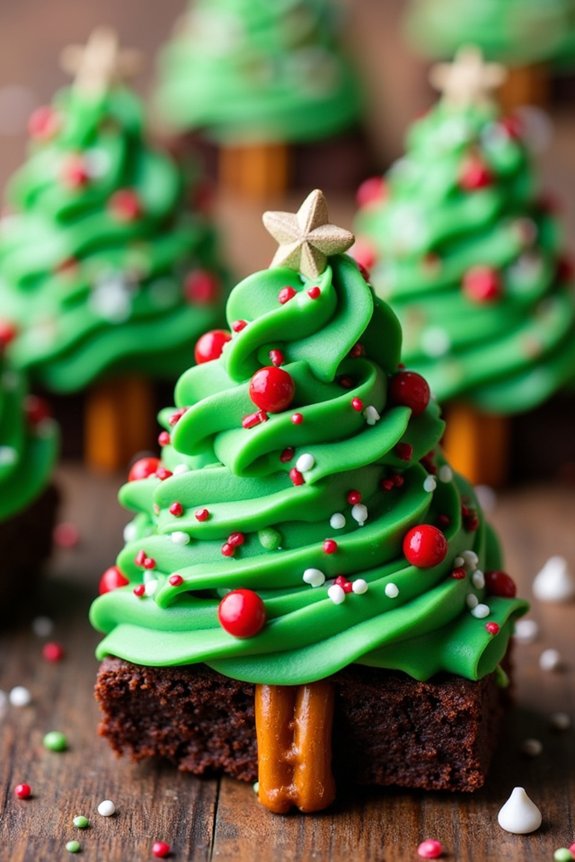
No-Bake Christmas Tree Brownies are a festive and easy treat perfect for the holiday season. These delightful desserts are shaped like Christmas trees and require no baking, making them an ideal choice for those who want to whip up a quick and impressive dessert.
With a combination of rich chocolate flavors and vibrant green decorations, these brownies are sure to be a hit at any Christmas gathering. They’re perfect for involving the whole family in the preparation, especially children who’ll enjoy decorating their own edible Christmas trees.
The beauty of No-Bake Christmas Tree Brownies lies in their simplicity and the ability to customize them according to personal tastes. You can use store-bought brownies or bake your own if you prefer a homemade touch.
The key is in the decorations, which can be as elaborate or as simple as you like. Using green icing and colorful candies, you can create a winter wonderland of brownies that will wow your guests. The following recipe is designed to serve 4-6 people, providing just the right amount to share during a cozy holiday evening.
Ingredients (serving size: 4-6 people):
- 1 box of brownie mix (or homemade brownie recipe)
- 1/2 cup of butter
- 1 cup of semi-sweet chocolate chips
- 1/2 cup of heavy cream
- Green food coloring
- 1 cup of powdered sugar
- 1 teaspoon of vanilla extract
- Assorted Christmas sprinkles or candies
- Pretzel sticks (for tree trunks)
Instructions:
- Prepare the Brownies:
- If using a boxed brownie mix or a homemade recipe, prepare the brownies according to the package or recipe instructions. Once cooked, allow them to cool completely before proceeding to the next step.
- Create the Chocolate Ganache:
- In a small saucepan, heat the heavy cream over medium heat until it begins to simmer. Remove from heat and pour over the semi-sweet chocolate chips in a heat-proof bowl. Let it sit for a minute, then stir until smooth and glossy.
- Cut the Brownies:
- Once the brownies have cooled, cut them into triangles to resemble Christmas trees. You can use a sharp knife or a triangular cookie cutter for uniformity. Each triangle should be about 3-4 inches tall.
- Make the Green Icing:
- In a bowl, mix the powdered sugar with a few drops of green food coloring, butter, and vanilla extract. Stir until you achieve a smooth, thick icing. You can adjust the color intensity by adding more food coloring if desired.
- Decorate the Trees:
- Spread a layer of chocolate ganache on each brownie triangle for a base. Then, drizzle or pipe the green icing over the brownies to resemble tree branches. Be creative with the design.
- Add the Finishing Touches:
- Press a pretzel stick into the bottom of each brownie triangle to create a tree trunk. Decorate the trees with Christmas sprinkles or candies to add a festive touch.
Extra Tips:
To make the decorating process easier, set up a decorating station with all the toppings and tools you need beforehand. This way, you can focus on the fun part—getting creative with your designs!
If you don’t have a piping bag for the icing, you can use a ziplock bag with a small corner snipped off. Remember, these brownies can be stored in an airtight container at room temperature for a couple of days, making them a great make-ahead option for a busy holiday schedule. Enjoy your festive creations with a warm cup of cocoa or coffee!
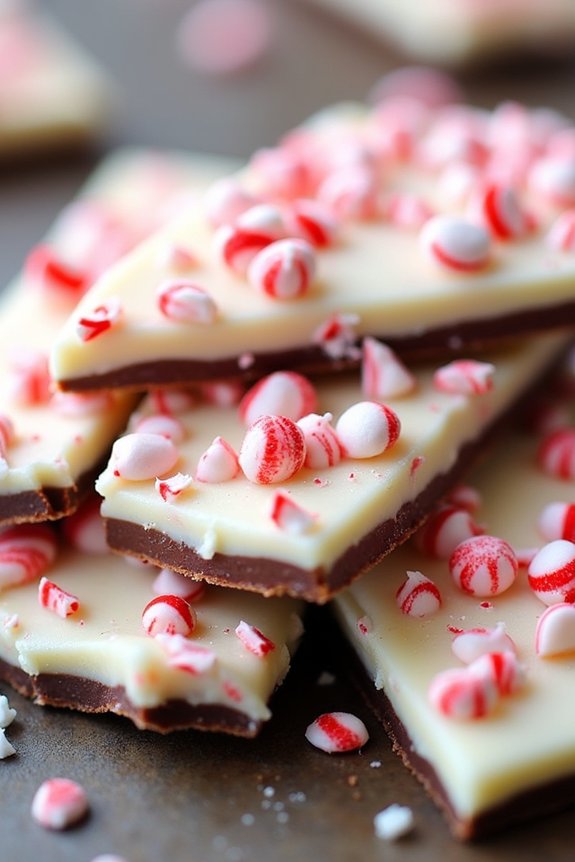
Peppermint Bark
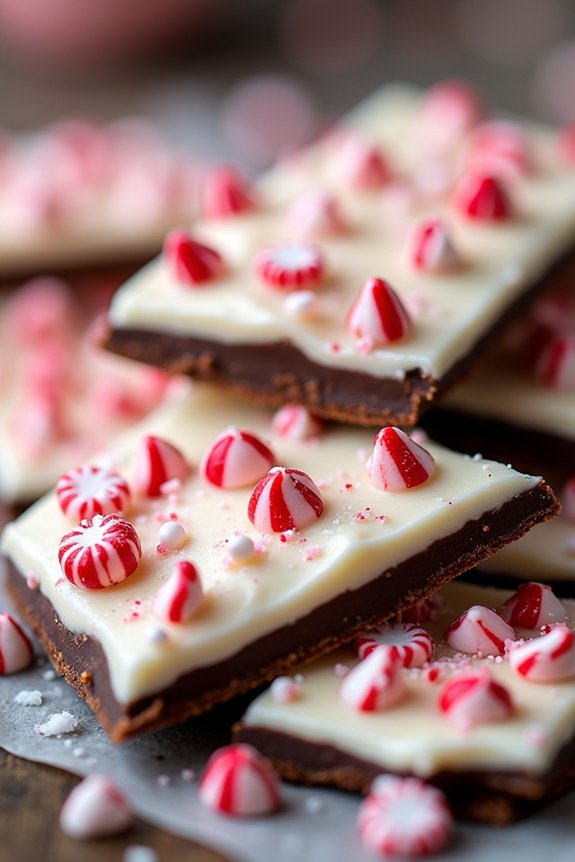
Peppermint bark is a festive and delicious treat that combines the rich flavors of chocolate with the revitalizing taste of peppermint. It’s a perfect dessert for the holiday season, bringing a delightful crunch and a burst of minty freshness to your table.
This easy-to-make dessert is loved by both kids and adults, making it a wonderful addition to any Christmas dessert spread. Not only is it delightful to eat, but its beautiful layers also make it an attractive gift option for friends and family.
The simplicity of peppermint bark allows you to prepare it quickly, even amid the holiday hustle and bustle. Using just a few ingredients, you can create a dessert that looks impressive and tastes divine. The combination of dark and white chocolate, topped with crushed peppermint candies, creates a harmonious blend of flavors and textures.
Follow this recipe to make a serving size suitable for 4-6 people, leaving everyone satisfied and craving more.
Ingredients (serves 4-6 people):
- 8 ounces of high-quality dark chocolate, chopped
- 8 ounces of high-quality white chocolate, chopped
- 1/2 teaspoon peppermint extract
- 1 cup crushed peppermint candies or candy canes
- Parchment paper
Instructions:
- Prepare the Baking Sheet: Line a baking sheet with parchment paper. This will prevent the bark from sticking and make it easier to remove once set.
- Melt the Dark Chocolate: Using a double boiler or a microwave, melt the dark chocolate. If using a microwave, heat it in intervals of 30 seconds, stirring in between, until smooth. Be careful not to overheat the chocolate.
- Spread the Dark Chocolate Layer: Pour the melted dark chocolate onto the prepared baking sheet and spread it into an even layer using a spatula. Aim for a thickness of about 1/4 inch. Place the baking sheet in the refrigerator for about 15 minutes to set.
- Melt the White Chocolate: While the dark chocolate is setting, melt the white chocolate using the same method. Once melted, stir in the peppermint extract until evenly combined.
- Spread the White Chocolate Layer: Remove the baking sheet with the dark chocolate from the refrigerator. Pour the melted white chocolate over the dark chocolate layer, spreading it evenly.
- Add the Peppermint Topping: Quickly sprinkle the crushed peppermint candies over the white chocolate layer before it sets. Press down gently to guarantee they stick to the chocolate.
- Cool and Set: Place the baking sheet back in the refrigerator for at least 30 minutes, or until the chocolate is completely set.
- Break into Pieces: Once set, lift the parchment paper from the baking sheet and use your hands to break the bark into pieces of your desired size.
Extra Tips:
To achieve the best results, use high-quality chocolate, as it greatly affects the flavor and texture of the bark.
When melting chocolate, avoid any contact with water, as this can cause the chocolate to seize. If you prefer a less sweet bark, you can substitute semi-sweet chocolate for the dark chocolate.
For an added twist, try incorporating different types of nuts or dried fruits into the bark for additional texture and flavor. Store the peppermint bark in an airtight container at room temperature or in the refrigerator to keep it fresh and crunchy.
Quick Gingerbread Truffles
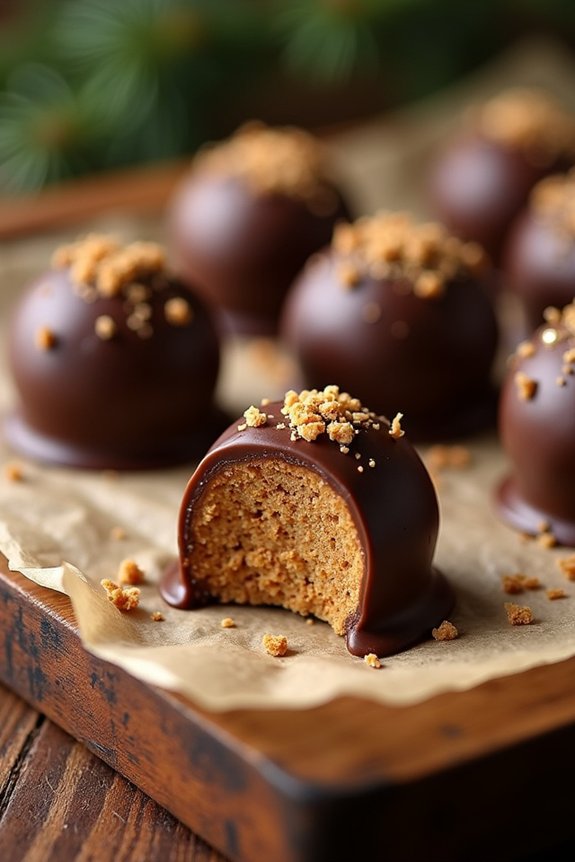
Gingerbread truffles are the perfect holiday treat that brings together the warm, spicy flavors of gingerbread in a convenient, bite-sized form. These truffles are incredibly simple to make and require no baking, making them an excellent choice for a last-minute Christmas dessert. With a soft, creamy center and a rich chocolate coating, they’re sure to impress your family and friends at any festive gathering.
The beauty of these Quick Gingerbread Truffles lies in their versatility and ease of preparation. You can whip them up in under an hour, leaving you more time to enjoy the holiday festivities. Not only are they delicious, but they also make for a beautiful presentation on any dessert table. Designed to serve 4-6 people, this recipe is perfect for intimate gatherings or as an addition to a larger spread of Christmas desserts.
Ingredients for Quick Gingerbread Truffles (serves 4-6):
- 1 cup of gingerbread cookie crumbs
- 4 ounces of cream cheese, softened
- 1 tablespoon of molasses
- 1 teaspoon of ground ginger
- 1 teaspoon of ground cinnamon
- 1/2 teaspoon of ground nutmeg
- 8 ounces of dark chocolate, chopped
- 1 tablespoon of vegetable oil
- Decorative sprinkles or crushed gingerbread cookies (optional)
Cooking Instructions:
- Prepare the Cookie Mixture: In a medium-sized mixing bowl, combine the gingerbread cookie crumbs, cream cheese, molasses, ground ginger, ground cinnamon, and ground nutmeg. Mix thoroughly until the ingredients are well combined and a dough-like consistency is achieved.
- Shape the Truffles: Using a small cookie scoop or your hands, shape the mixture into 1-inch balls. Place the balls on a baking sheet lined with parchment paper. Once all truffles are shaped, refrigerate them for at least 20 minutes to firm up.
- Melt the Chocolate: While the truffles are chilling, melt the dark chocolate. Place the chopped chocolate and vegetable oil in a microwave-safe bowl. Microwave in 30-second intervals, stirring after each, until the chocolate is completely melted and smooth.
- Coat the Truffles: Remove the truffles from the refrigerator. Using a fork or a skewer, dip each truffle into the melted chocolate, making sure it’s completely covered. Allow any excess chocolate to drip off before placing the truffle back on the parchment-lined baking sheet.
- Decorate and Set: Before the chocolate sets, sprinkle each truffle with decorative sprinkles or crushed gingerbread cookies for an extra festive touch. Allow the chocolate to harden completely, either at room temperature or by placing the tray back in the refrigerator for 10-15 minutes.
Extra Tips:
To guarantee the best flavor and texture, use high-quality dark chocolate for the coating. If you prefer a sweeter truffle, you can substitute milk chocolate for the dark chocolate.
For a more intense gingerbread flavor, consider adding a pinch of cloves or allspice to the cookie mixture. These truffles can be made a day in advance and stored in an airtight container in the refrigerator, making them a convenient option for holiday preparation.
Enjoy these delightful treats with a cup of hot cocoa or coffee for the ultimate Christmas indulgence.
Holiday Spice Cake
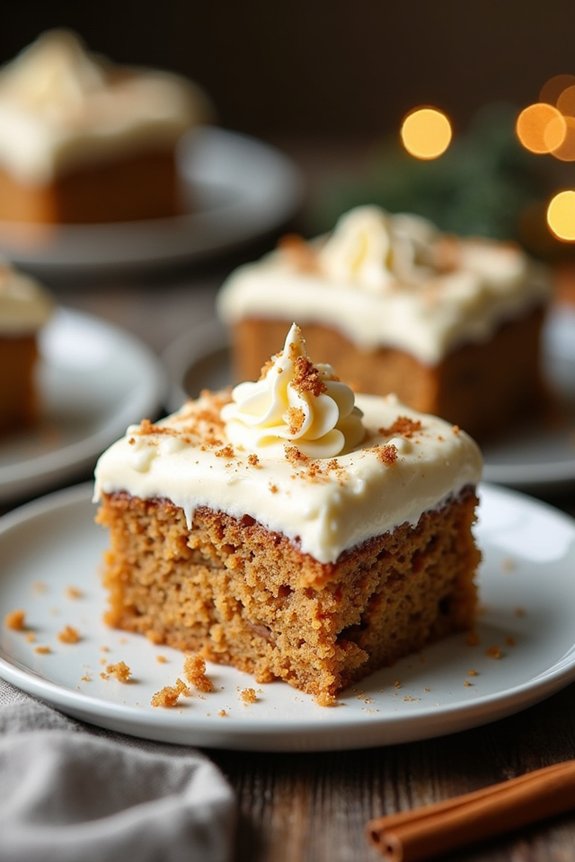
Holiday Spice Cake is the perfect dessert to bring warmth and festive cheer to your Christmas celebrations. This cake embodies the rich and inviting flavors of the holiday season with a combination of spices that evoke the comfort of a cozy winter evening.
Its tender crumb and fragrant aroma make it a delightful centerpiece for any holiday feast, and it’s sure to be a hit with family and friends alike. Whether served after dinner with a cup of coffee or enjoyed as a sweet afternoon treat, this cake will quickly become a holiday favorite.
This particular recipe is designed to serve 4-6 people, making it an ideal choice for an intimate gathering or a smaller family celebration. The cake combines the earthy sweetness of brown sugar with the warmth of spices like cinnamon, nutmeg, and cloves, all balanced by the subtle tang of buttermilk.
A simple cream cheese frosting adds a creamy and slightly tangy finish, complementing the complexity of the spices. Follow the steps below to create this delicious and aromatic Holiday Spice Cake from scratch.
Ingredients for Holiday Spice Cake (Serves 4-6):
- 1 1/2 cups all-purpose flour
- 1/2 teaspoon baking powder
- 1/4 teaspoon baking soda
- 1/2 teaspoon salt
- 1 teaspoon ground cinnamon
- 1/2 teaspoon ground nutmeg
- 1/4 teaspoon ground cloves
- 1/2 cup unsalted butter, softened
- 1 cup brown sugar, packed
- 2 large eggs
- 1 teaspoon vanilla extract
- 1/2 cup buttermilk
For the Cream Cheese Frosting:
- 4 ounces cream cheese, softened
- 2 tablespoons unsalted butter, softened
- 1 cup powdered sugar
- 1/2 teaspoon vanilla extract
Cooking Instructions:
- Preheat the Oven: Begin by preheating your oven to 350°F (175°C). Grease and flour a 9-inch round cake pan to prevent the cake from sticking.
- Mix Dry Ingredients: In a medium bowl, whisk together the flour, baking powder, baking soda, salt, cinnamon, nutmeg, and cloves. This guarantees the spices are evenly distributed throughout the cake.
- Cream Butter and Sugar: In a large mixing bowl, cream together the softened butter and brown sugar until light and fluffy, about 3 minutes. This step is essential for incorporating air into the batter, which helps the cake rise.
- Add Eggs and Vanilla: Beat in the eggs one at a time, ensuring each is fully incorporated before adding the next. Stir in the vanilla extract for flavor.
- Combine Wet and Dry Ingredients: Gradually add the dry ingredients to the butter mixture, alternating with the buttermilk, beginning and ending with the dry ingredients. Mix until just combined to avoid overmixing, which can result in a dense cake.
- Bake the Cake: Pour the batter into the prepared cake pan and smooth the top. Bake in the preheated oven for 25-30 minutes, or until a toothpick inserted into the center of the cake comes out clean.
- Cool and Frost: Allow the cake to cool in the pan for 10 minutes before transferring it to a wire rack to cool completely. While the cake cools, prepare the frosting by beating together the cream cheese and butter until smooth, then gradually adding the powdered sugar and vanilla extract. Spread the frosting over the cooled cake.
Extra Tips:
To elevate the flavor, consider adding a sprinkle of chopped nuts, such as pecans or walnuts, to the cake batter for added texture. You can also dust the frosted cake with a little ground cinnamon for a decorative touch.
If you prefer a thicker layer of frosting, simply double the frosting recipe. When storing the cake, keep it in an airtight container in the refrigerator to maintain its freshness, and bring it to room temperature before serving for the best texture and flavor.
Easy Chocolate Fudge
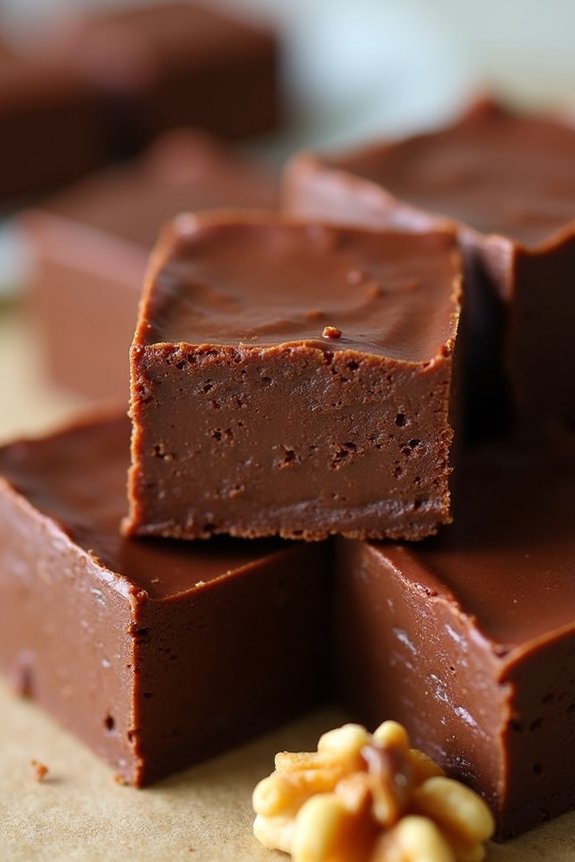
Indulge in the decadent taste of homemade chocolate fudge with this simple and delicious recipe, perfect for your Christmas dessert spread. Easy Chocolate Fudge is an ideal sweet treat for those who crave a rich, creamy dessert but don’t want to spend hours in the kitchen. This recipe is straightforward and requires only a few ingredients, yet delivers a luxurious texture and flavor that will impress your family and guests alike.
Whether you’re a seasoned baker or a beginner looking to try your hand at homemade confections, this fudge will quickly become a holiday favorite. This Easy Chocolate Fudge recipe yields enough for 4-6 people, making it a great choice for a small gathering or as a delightful addition to a larger dessert table.
The process is simplified by using sweetened condensed milk, which helps achieve a smooth consistency without the need for a candy thermometer or complex techniques. With just a few steps, you can create a batch of irresistible fudge that’s perfect for gifting or enjoying with a hot cup of cocoa on a chilly winter evening.
Ingredients (serves 4-6):
- 2 cups semi-sweet chocolate chips
- 1 can (14 ounces) sweetened condensed milk
- 1 teaspoon vanilla extract
- 1/4 teaspoon salt
- 1/2 cup chopped walnuts (optional)
- Cooking spray or parchment paper
Cooking Instructions:
- Prepare the Pan: Line an 8-inch square baking pan with parchment paper or lightly coat it with cooking spray. This will prevent the fudge from sticking and make it easier to remove from the pan once set.
- Melt the Chocolate: In a medium-sized saucepan, combine the semi-sweet chocolate chips and sweetened condensed milk. Cook over low heat, stirring constantly with a spatula or wooden spoon until the chocolate is fully melted and the mixture is smooth and well-blended.
- Add Flavorings: Remove the saucepan from the heat. Stir in the vanilla extract and salt, mixing thoroughly. If you’re using walnuts, fold them into the mixture at this stage to guarantee even distribution throughout the fudge.
- Pour and Set: Pour the chocolate mixture into the prepared baking pan, spreading it evenly with the spatula. Take care to smooth the top for a uniform appearance. Allow the fudge to cool at room temperature for about 2 hours, or until it’s firm enough to cut.
- Cut and Serve: Once the fudge has set, lift it out of the pan using the parchment paper. Place it on a cutting board and use a sharp knife to cut the fudge into squares. Serve immediately or store in an airtight container for up to a week.
Extra Tips:
For best results, make sure to use high-quality chocolate chips, as the flavor and texture of your fudge depend heavily on the quality of the chocolate. You can customize this recipe by adding different mix-ins such as crushed candy canes for a festive touch or dried fruits for added sweetness.
If you prefer a softer fudge, reduce the amount of chocolate chips slightly. Additionally, to keep the fudge from becoming too hard, avoid refrigerating it unless necessary, as the chocolate can become brittle and lose its creamy texture.
Festive Rice Krispie Treats
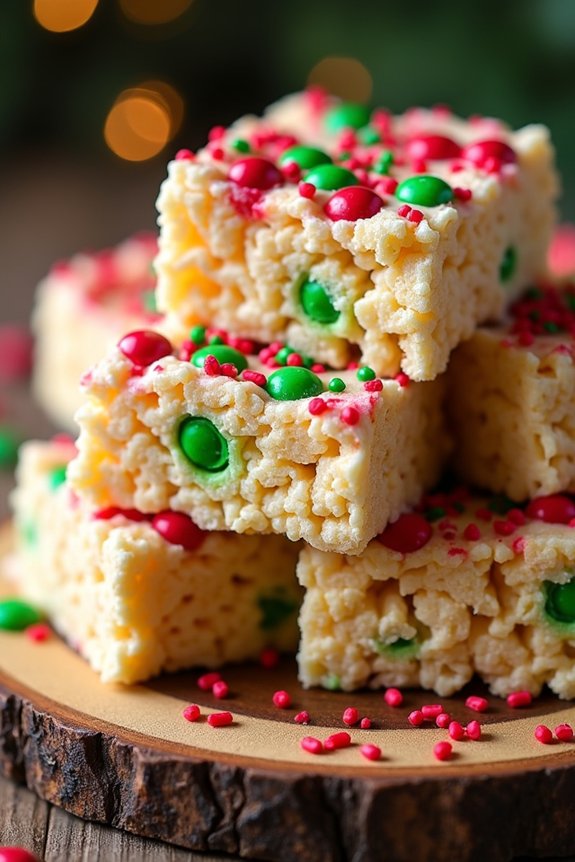
Rice Krispie Treats are a classic favorite, loved by both kids and adults alike. To add a festive twist for the holiday season, this recipe incorporates colorful sprinkles and red and green candies that won’t only delight the taste buds but also please the eyes.
These Festive Rice Krispie Treats are perfect for Christmas gatherings or as a fun holiday activity with family and friends. The light and crispy texture of these treats combined with the gooey sweetness of melted marshmallows makes them an irresistible dessert.
Not only are they quick and easy to make, but they also require minimal ingredients, making them a convenient choice during the busy holiday season. Whether you’re making them for a party or just to have a sweet treat on hand, these Festive Rice Krispie Treats are sure to be a hit.
Ingredients (serving size: 4-6 people):
- 6 cups Rice Krispies cereal
- 1 package (10 oz) mini marshmallows
- 3 tablespoons unsalted butter
- 1/2 teaspoon vanilla extract
- 1/4 cup red and green sprinkles
- 1/2 cup mini red and green chocolate candies
Cooking Instructions:
- Prepare the Baking Dish: Lightly grease a 9×13-inch baking dish with butter or non-stick spray to prevent the treats from sticking. Set it aside.
- Melt the Butter: In a large saucepan, melt the butter over low heat. Stir occasionally to guarantee it melts evenly without burning.
- Add Marshmallows: Once the butter is fully melted, add the mini marshmallows to the saucepan. Stir continuously over low heat until the marshmallows are completely melted and smooth.
- Incorporate Vanilla: Remove the saucepan from heat and quickly stir in the vanilla extract. Mix well to combine the flavors.
- Mix in Cereal: Add the Rice Krispies cereal to the marshmallow mixture. Stir gently until the cereal is fully coated with the marshmallow blend.
- Add Festive Touches: Gently fold in the red and green sprinkles and mini chocolate candies, ensuring they’re evenly distributed throughout the mixture.
- Transfer to Dish: Pour the mixture into the prepared baking dish. Use a buttered spatula or wax paper to press the mixture evenly into the dish, ensuring an even surface.
- Cool and Set: Allow the mixture to cool and set at room temperature for at least 30 minutes before cutting them into squares or desired shapes.
Extra Tips: For an extra festive touch, consider using cookie cutters to shape the treats into holiday-themed figures like stars or Christmas trees. To prevent sticking, lightly grease the cutters before using them.
If you prefer a richer flavor, you can brown the butter before adding the marshmallows. Keep the treats stored in an airtight container to maintain freshness and crispness for up to a week.
Simple Eggnog Cheesecake Bars

Simple Eggnog Cheesecake Bars are a delightful addition to any Christmas dessert spread, combining the creamy texture of cheesecake with the rich, spicy flavors of traditional eggnog. These bars are designed to be not only delicious but also easy to make, allowing you to focus on enjoying the holiday season with your loved ones rather than spending all your time in the kitchen.
The harmonious blend of nutmeg, cinnamon, and a hint of rum extract in the filling brings out the festive spirit, making these bars a treat that captures the essence of Christmas.
These cheesecake bars start with a buttery graham cracker crust, topped with a luscious eggnog-infused cheesecake layer that’s as smooth as it’s indulgent. Perfect for serving at holiday parties or as a sweet end to a family dinner, this recipe makes enough to satisfy a small crowd.
The bars are best served chilled, allowing the flavors to meld together beautifully. Whether you’re an experienced baker or a novice in the kitchen, these Simple Eggnog Cheesecake Bars are sure to impress your guests and become a staple in your holiday dessert lineup.
Ingredients (serves 4-6):
- 1 1/2 cups graham cracker crumbs
- 1/4 cup granulated sugar
- 1/2 cup unsalted butter, melted
- 16 oz cream cheese, softened
- 3/4 cup granulated sugar
- 1/2 cup eggnog
- 2 large eggs
- 1 tablespoon all-purpose flour
- 1 teaspoon vanilla extract
- 1/4 teaspoon rum extract
- 1/2 teaspoon ground nutmeg
- 1/4 teaspoon ground cinnamon
- Whipped cream (optional, for serving)
- Additional ground nutmeg (optional, for garnish)
Instructions:
- Preheat the Oven: Start by preheating your oven to 325°F (163°C). This will guarantee that your cheesecake bars bake evenly.
- Prepare the Crust: In a medium bowl, combine the graham cracker crumbs and 1/4 cup granulated sugar. Pour in the melted butter and mix until the crumbs are evenly coated. Press the mixture firmly into the bottom of a greased 9×9-inch baking pan, creating an even layer.
- Bake the Crust: Place the crust in the preheated oven and bake for about 10 minutes. This step helps to set the crust and adds a slight crispness. Remove from oven and let it cool slightly while you prepare the filling.
- Mix the Cheesecake Filling: In a large mixing bowl, beat the softened cream cheese and 3/4 cup granulated sugar until smooth and creamy. Gradually add the eggnog, mixing well. Incorporate the eggs one at a time, beating after each addition. Stir in the flour, vanilla extract, rum extract, nutmeg, and cinnamon until everything is well combined.
- Assemble and Bake: Pour the cheesecake mixture over the cooled crust, spreading it into an even layer. Bake in the preheated oven for 30-35 minutes, or until the center is set and the edges are lightly golden.
- Cool and Chill: Remove the cheesecake bars from the oven and allow them to cool to room temperature. Once cooled, refrigerate for at least 2 hours, or until they’re fully chilled and firm.
- Serve: Before serving, slice the bars into squares. Optionally, top each piece with a dollop of whipped cream and a sprinkle of nutmeg for an extra festive touch.
Extra Tips:
For best results, verify that the cream cheese is fully softened before mixing to prevent lumps in your filling. If you don’t have a 9×9-inch baking pan, an 8×8-inch pan can be used, but you may need to adjust the baking time slightly.
When pressing the crust into the pan, use the bottom of a measuring cup or glass to create an even surface. Finally, remember to chill the bars thoroughly before serving to allow the flavors to develop fully.
Chocolate-Dipped Pretzel Rods

Chocolate-Dipped Pretzel Rods are an easy and delightful treat that adds a touch of elegance to any holiday dessert table. These sweet and salty snacks are perfect for Christmas gatherings, offering a simple combination of crunchy pretzels and smooth, rich chocolate.
Whether you serve them at a party or gift them to loved ones, these pretzel rods are sure to be a hit with both kids and adults alike.
The beauty of this recipe lies in its simplicity and versatility. You can customize the chocolate-dipped pretzel rods with various toppings such as crushed nuts, sprinkles, or even a drizzle of contrasting chocolate.
With just a few ingredients and minimal effort, you’ll have a festive and delicious dessert that’s perfect for celebrating the holiday season.
Ingredients for 4-6 servings:
- 12 large pretzel rods
- 1 cup semisweet chocolate chips
- 1 cup white chocolate chips
- 1 tablespoon vegetable oil (divided)
- Assorted toppings (e.g., holiday sprinkles, crushed nuts, mini chocolate chips)
Cooking Instructions:
1. Prepare the workspace: Line a baking sheet with parchment paper or wax paper. This will prevent the chocolate-dipped pretzels from sticking and make for easy cleanup.
2. Melt the chocolate: In a microwave-safe bowl, combine the semisweet chocolate chips with 1/2 tablespoon of vegetable oil. Microwave in 30-second intervals, stirring in between, until the chocolate is fully melted and smooth.
Repeat this step with the white chocolate chips and the remaining 1/2 tablespoon of vegetable oil in a separate bowl.
3. Dip the pretzels: Hold a pretzel rod at one end and dip it into the melted chocolate, covering about two-thirds of its length. Allow any excess chocolate to drip off, then place the coated pretzel on the prepared baking sheet.
Repeat the process with the remaining pretzel rods, alternating between semisweet and white chocolate as desired.
4. Add toppings: While the chocolate is still wet, sprinkle your chosen toppings over the chocolate-dipped portion of each pretzel rod. Be creative and mix different toppings for a more festive look.
5. Set the chocolate: Once all the pretzels are coated and topped, place the baking sheet in the refrigerator for about 30 minutes or until the chocolate has fully set.
6. Serve and enjoy: Once the chocolate is firm, arrange the pretzel rods on a serving platter or package them in festive bags as gifts.
Extra Tips:
For best results, confirm that the pretzel rods are completely dry before dipping them in chocolate, as any moisture can cause the chocolate to seize.
If you prefer a more polished finish, you can drizzle the opposite chocolate over the dipped pretzels using a fork or a piping bag with a small tip.
Additionally, if you’re working in a warm environment, consider chilling the pretzel rods briefly before dipping them to help the chocolate set faster.
5-Ingredient Peanut Butter Blossoms
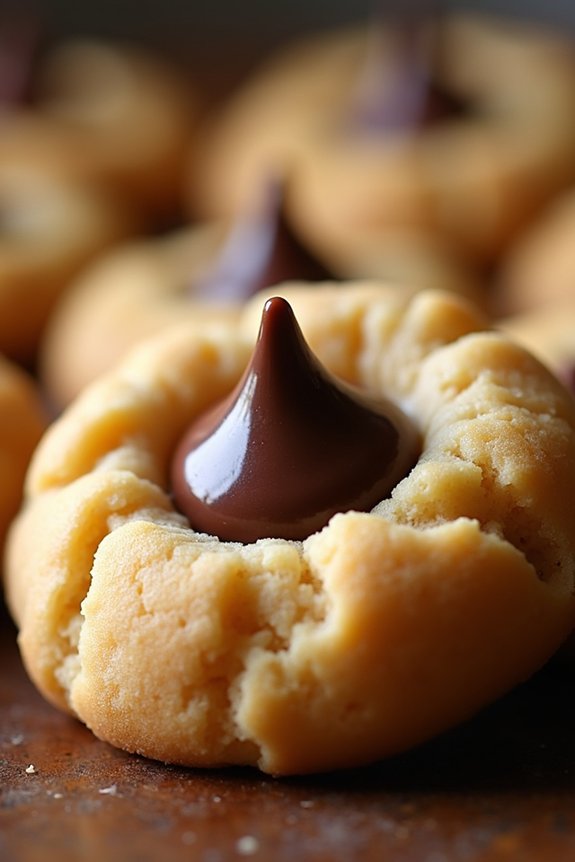
Peanut Butter Blossoms are a delightful holiday treat that combines the nutty richness of peanut butter with the sweet decadence of chocolate. These cookies are a staple during the Christmas season, often enjoyed by both kids and adults alike. They’re known for their distinctive appearance, with a central chocolate kiss nestled atop a soft, chewy peanut butter cookie. This recipe will guide you through creating a batch that’s perfect for sharing and sure to be a hit at any festive gathering.
The beauty of Peanut Butter Blossoms lies not only in their taste but also in their simplicity. With just a handful of ingredients, you can whip up a batch in no time. The recipe is straightforward and easy to follow, making it an ideal choice for those who may not be seasoned bakers but still want to contribute something delicious to the holiday dessert table.
Here’s how to make enough Peanut Butter Blossoms to serve 4-6 people.
Ingredients:
- 1/2 cup granulated sugar
- 1/2 cup packed brown sugar
- 1/2 cup creamy peanut butter
- 1/2 cup butter, softened
- 1 large egg
- 1 1/2 cups all-purpose flour
- 1 teaspoon baking soda
- 1/2 teaspoon baking powder
- 1/4 teaspoon salt
- Granulated sugar for rolling
- 24 chocolate kisses, unwrapped
Cooking Instructions:
- Preheat the Oven: Start by preheating your oven to 375°F (190°C). This guarantees that it’s ready for baking once your cookies are prepared.
- Mix the Sugars and Butter: In a large mixing bowl, combine the granulated sugar, brown sugar, peanut butter, butter, and egg. Beat the mixture with an electric mixer on medium speed until it’s well blended and creamy.
- Combine Dry Ingredients: In a separate bowl, whisk together the flour, baking soda, baking powder, and salt. This assures that the leavening agents are evenly distributed throughout the flour.
- Make the Dough: Gradually add the dry ingredient mixture to the wet ingredients, beating on low speed until the dough comes together and is smooth.
- Shape the Cookies: Roll the dough into 1-inch balls. Roll each ball in additional granulated sugar until fully coated.
- Bake the Cookies: Place the sugar-coated dough balls about 2 inches apart on ungreased baking sheets. Bake in the preheated oven for 8-10 minutes, or until the edges are lightly browned.
- Add the Chocolate Kiss: Immediately after removing the cookies from the oven, gently press a chocolate kiss into the center of each cookie. The cookie will crack slightly around the edges, which is perfectly normal.
- Cool the Cookies: Let the cookies cool on the baking sheet for about 2 minutes, then transfer them to a wire rack to cool completely.
Extra Tips: When pressing the chocolate kiss into the hot cookie, be gentle to avoid pushing the kiss all the way through. The residual heat from the cookie will slightly melt the chocolate, helping it adhere to the cookie as it cools.
If you find the dough too sticky to handle, refrigerate it for about 30 minutes before forming the balls. This can make shaping the cookies much easier. Finally, confirm your chocolate kisses are unwrapped and ready before you start baking, as you’ll need to work quickly when adding them to the hot cookies.
Instant Pot Christmas Pudding
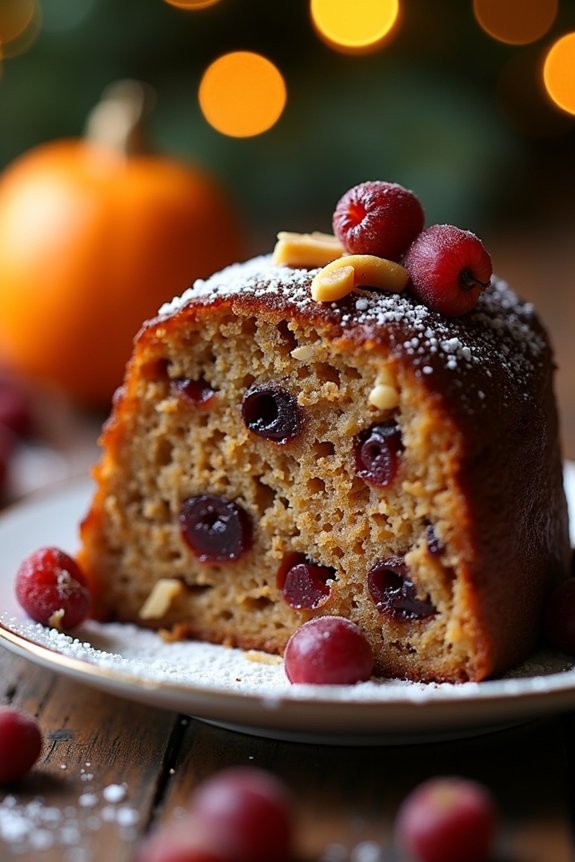
Christmas pudding is a traditional festive dessert that brings warmth and joy to the holiday table. It’s a rich, dense dessert made with a variety of dried fruits, nuts, and spices, all bound together with suet or butter, flour, and eggs. Traditionally steamed for several hours, this Instant Pot version allows you to enjoy the same deep flavors and moist texture in a fraction of the time, making it perfect for any holiday gathering.
This Instant Pot Christmas Pudding recipe serves 4-6 people and retains all the classic flavors associated with this beloved dessert. You’ll find that the pressure cooking method helps to meld the flavors beautifully, creating a pudding that’s moist and fragrant. The use of the Instant Pot not only speeds up the process but also simplifies it, allowing you to focus on enjoying your time with family and friends during the holiday season.
Ingredients:
- 1 cup of mixed dried fruits (raisins, sultanas, currants)
- 1/2 cup of chopped mixed nuts
- 1/4 cup of brandy or rum
- 1/2 cup of grated suet or butter
- 1/2 cup of dark brown sugar
- 1 cup of all-purpose flour
- 1 teaspoon of baking powder
- 1 teaspoon of ground cinnamon
- 1/2 teaspoon of ground nutmeg
- 1/4 teaspoon of ground cloves
- 2 large eggs
- Zest of 1 orange
- Zest of 1 lemon
- 1/4 cup of milk
Instructions:
- Prepare the Fruit Mixture: In a bowl, combine the mixed dried fruits and chopped nuts. Pour the brandy or rum over the mixture and let it soak for at least 30 minutes. This will allow the fruits to absorb the alcohol and become plump.
- Mix the Dry Ingredients: In a separate large mixing bowl, combine the grated suet or butter, dark brown sugar, flour, baking powder, ground cinnamon, nutmeg, and cloves. Stir well to confirm that all dry ingredients are evenly distributed.
- Combine Wet Ingredients: Add the eggs, orange zest, lemon zest, and milk to the soaked fruit mixture. Mix until the ingredients are well combined.
- Combine and Mix: Gradually add the wet fruit mixture to the dry ingredients, stirring continuously to confirm a smooth consistency. The batter should be thick and well blended.
- Prepare the Instant Pot: Pour 1 cup of water into the Instant Pot inner pot. Place a metal trivet inside the pot to hold the pudding basin.
- Transfer to Pudding Basin: Grease a pudding basin or a heatproof bowl with butter, then pour in the pudding mixture. Cover the basin with aluminum foil, securing it tightly around the edges to create a seal.
- Cook the Pudding: Place the pudding basin on the trivet in the Instant Pot. Secure the lid, confirming the valve is set to the sealing position. Select the Pressure Cook setting on High and set the timer for 60 minutes.
- Natural Release: Once the cooking time is complete, allow the pressure to release naturally for about 10 minutes, then carefully open the valve to release any remaining pressure.
- Cool and Serve: Carefully remove the pudding basin from the Instant Pot using oven mitts. Allow the pudding to cool slightly before serving. Slice and serve warm, optionally with custard or brandy sauce.
Extra Tips:
For a richer flavor, consider soaking the dried fruits in the brandy or rum overnight. This will enhance the depth of flavor in the final pudding.
Additionally, if you prefer a non-alcoholic version, you can substitute the brandy or rum with orange juice. Remember to grease the pudding basin thoroughly to prevent sticking, and confirm the aluminum foil is tightly sealed to avoid any water entering the pudding.
Enjoy your Instant Pot Christmas Pudding with a dollop of whipped cream or a drizzle of custard for an extra indulgent treat.
Quick Chocolate Peppermint Bark
Quick Chocolate Peppermint Bark is a festive and delightful treat that combines the rich, smooth taste of chocolate with the invigorating zing of peppermint. This dessert is perfect for the holiday season, offering a balance of sweetness and minty freshness that will surely please your family and friends.
It isn’t only delicious but also incredibly easy to make, requiring minimal ingredients and time. Whether you’re hosting a Christmas gathering or looking for a quick homemade gift, this peppermint bark is sure to impress.
This recipe yields enough for a serving size of 4-6 people, making it ideal for sharing at a small holiday get-together or as a sweet indulgence for your family. The simplicity of this dish means you can whip it up in no time, even during the busiest of holiday schedules. Plus, it’s a fun recipe to make with kids, letting them help crush the candy canes or spread the chocolate.
Ingredients:
- 12 ounces semisweet chocolate chips
- 12 ounces white chocolate chips
- 1 teaspoon peppermint extract
- 8 candy canes, crushed
- Parchment paper
Instructions:
- Prepare the Ingredients: Begin by lining a baking sheet with parchment paper. This will prevent the chocolate from sticking and make it easier to break apart the bark once it’s set.
- Melt the Semisweet Chocolate: In a microwave-safe bowl, melt the semisweet chocolate chips in 30-second intervals, stirring in between, until smooth. Confirm it’s fully melted but not overheated as this can cause the chocolate to seize.
- Spread the Semisweet Chocolate: Pour the melted semisweet chocolate onto the prepared baking sheet. Use a spatula to spread it evenly into a thin layer, approximately 1/4 inch thick. Place the baking sheet in the refrigerator to cool for about 10 minutes or until the chocolate is firm.
- Melt the White Chocolate: While the semisweet layer is cooling, melt the white chocolate chips in a separate bowl using the same method. Once melted, stir in the peppermint extract until well combined.
- Spread the White Chocolate: Remove the baking sheet from the refrigerator and pour the melted white chocolate over the semisweet layer. Spread it evenly using a spatula.
- Add the Crushed Candy Canes: Immediately sprinkle the crushed candy canes over the top of the white chocolate layer, pressing them lightly into the chocolate to confirm they stick.
- Set the Bark: Return the baking sheet to the refrigerator and allow the bark to set for at least 20 minutes or until completely firm.
- Break into Pieces: Once set, remove the bark from the refrigerator and break it into pieces of your desired size. Serve immediately or store in an airtight container.
Extra Tips:
When melting chocolate, confirm that your bowl and utensils are completely dry, as moisture can cause the chocolate to seize.
For a more intense peppermint flavor, consider adding a few drops of peppermint extract to the semisweet chocolate layer as well. If you prefer, you can substitute the candy canes with peppermint candies or add a sprinkle of crushed nuts for extra texture.
Be creative with your toppings to customize the bark to your taste.
Snickerdoodle Cookie Bars
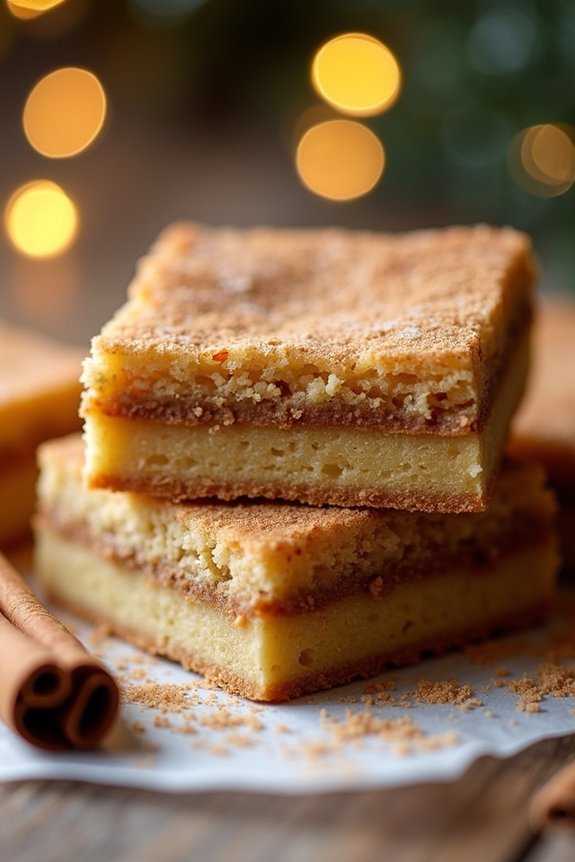
Snickerdoodle Cookie Bars are a delightful twist on the classic snickerdoodle cookies, offering the same beloved flavors of cinnamon and sugar in a chewy, bar form. Perfect for holiday gatherings or a cozy night in, these bars are easy to make and serve, saving you the hassle of rolling out individual cookies.
With their buttery, cinnamon-sugary goodness, they’re certain to become a family favorite during the holiday season. These bars are perfect for serving a group, making them an ideal addition to your Christmas dessert spread.
With a serving size of 4-6 people, you can easily satisfy a small gathering or double the recipe for larger crowds. These Snickerdoodle Cookie Bars can be made with ingredients commonly found in your pantry, guaranteeing you can whip them up whenever the craving strikes.
Ingredients (serving size: 4-6 people):
- 1 cup unsalted butter, melted
- 1 1/4 cups granulated sugar
- 1/2 cup packed light brown sugar
- 2 large eggs
- 1 1/2 teaspoons vanilla extract
- 2 3/4 cups all-purpose flour
- 2 teaspoons cream of tartar
- 1 teaspoon baking soda
- 1/2 teaspoon salt
- 1 tablespoon ground cinnamon
- 1/4 cup granulated sugar (for topping)
- 2 teaspoons ground cinnamon (for topping)
Cooking Instructions:
- Prepare the Pan and Preheat Oven: Preheat your oven to 350°F (175°C). Line a 9×13-inch baking pan with parchment paper or lightly grease it to prevent sticking.
- Mix the Wet Ingredients: In a large mixing bowl, combine the melted butter, 1 1/4 cups granulated sugar, and the brown sugar. Mix until well combined. Add in the eggs one at a time, beating well after each addition, and then stir in the vanilla extract.
- Combine Dry Ingredients: In a separate bowl, whisk together the flour, cream of tartar, baking soda, and salt. Gradually add the dry ingredients to the wet ingredients, mixing until just combined.
- Spread the Dough: Spread the dough evenly into the prepared baking pan using a spatula or your hands. Make sure it’s evenly distributed to guarantee uniform baking.
- Prepare the Cinnamon Sugar Topping: In a small bowl, mix together 1/4 cup granulated sugar and 2 teaspoons of ground cinnamon. Sprinkle this mixture evenly over the top of the dough.
- Bake: Place the pan in the preheated oven and bake for 25-30 minutes, or until the edges are golden brown and a toothpick inserted into the center comes out clean.
- Cool and Cut: Allow the bars to cool in the pan for at least 20 minutes before lifting them out using the parchment paper. Cut into squares and serve.
Extra Tips:
For an extra buttery flavor, try browning the butter before mixing it with the sugars. This will add a nutty, rich taste to your cookie bars.
If you prefer a slightly softer bar, reduce the baking time by a few minutes, but be sure the center is set before removing from the oven. Additionally, these bars can be stored in an airtight container at room temperature for up to a week, maintaining their chewy texture.
For a festive touch, consider drizzling a simple icing over the top before serving.