

As the holiday season approaches, the thought of fresh-baked pies fills my heart with joy. There’s something so comforting about a classic Christmas pie that makes our gatherings extra special. From rich, fruity mincemeat to spiced pumpkin topped with maple whipped cream, each pie has its own festive charm. With so many flavors to explore, let’s start this delicious adventure together. Which pie will be your favorite this year?
Traditional Mincemeat Pie
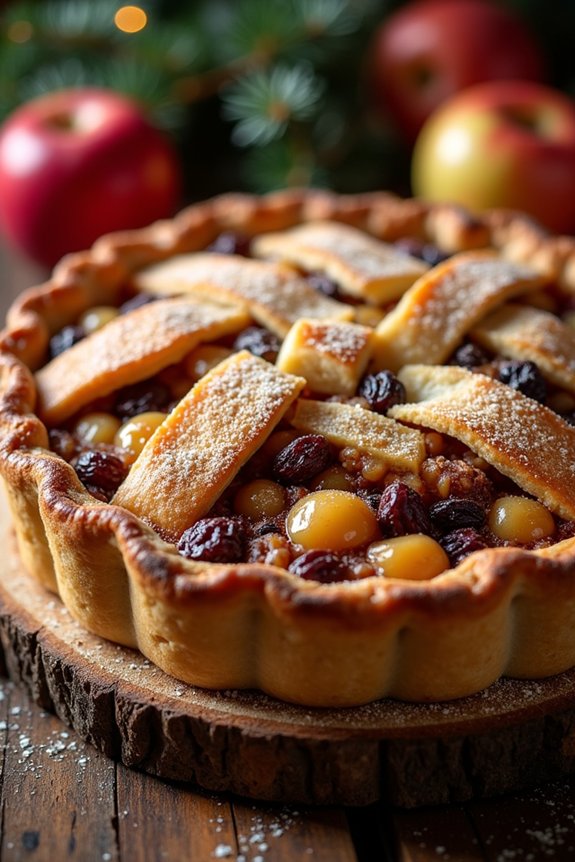
Mincemeat pie is a cherished holiday classic that brings warmth and nostalgia to the festive season. This rich and flavorful pie is a blend of dried fruits, spices, and a hint of brandy or rum, creating a sweetly spiced filling that’s truly comforting.
Mincemeat pie has its roots in medieval England, where it was originally made with minced meat and dried fruits. Over the centuries, it evolved into the sweet dessert we recognize today, often served during Christmas celebrations.
To make a traditional mincemeat pie, you’ll need to prepare a buttery pastry crust to encase the luscious filling. The filling itself is a delightful mixture of apples, raisins, currants, and spices, all simmered together to create a harmonious blend of flavors.
This pie isn’t only delicious but also a wonderful way to make your home smell like the holidays, as the aromas of cinnamon, nutmeg, and cloves waft through the air. Perfect for sharing with family and friends, this mincemeat pie is sure to become a centerpiece of your holiday gatherings.
Ingredients (serves 4-6):
- 2 1/2 cups all-purpose flour
- 1 cup unsalted butter, chilled and cubed
- 1/4 cup granulated sugar
- 1/4 teaspoon salt
- 1/4 cup ice water
- 2 cups prepared mincemeat (store-bought or homemade)
- 1 large egg, beaten
- 1 tablespoon milk
- 1 tablespoon granulated sugar (for sprinkling)
Cooking Instructions:
1. Prepare the Pastry Dough: In a large mixing bowl, combine the flour, sugar, and salt. Add the chilled, cubed butter and, using a pastry cutter or your fingers, work it into the flour until the mixture resembles coarse crumbs. Gradually add the ice water, one tablespoon at a time, mixing until the dough comes together.
Form the dough into two disks, wrap them in plastic wrap, and refrigerate for at least 30 minutes.
2. Preheat the Oven: Preheat your oven to 400°F (200°C).
3. Roll Out the Dough: On a lightly floured surface, roll out one disk of dough to fit a 9-inch pie plate. Gently press it into the bottom and up the sides of the pie plate, trimming any excess dough.
4. Add the Filling: Spoon the prepared mincemeat filling evenly into the pastry-lined pie plate.
5. Prepare the Top Crust: Roll out the second disk of dough to cover the pie. Place it over the filling, and trim the edges, leaving about a 1-inch overhang. Tuck the overhang under the bottom crust edge, pressing to seal. Crimp the edges decoratively.
6. Egg Wash and Vent: In a small bowl, mix the beaten egg with the milk. Brush this mixture over the top crust. Sprinkle with the tablespoon of sugar. Using a sharp knife, make several small slits in the top crust to allow steam to escape.
7. Bake the Pie: Place the pie on a baking sheet to catch any drips and bake in the preheated oven for 30-35 minutes, or until the crust is golden brown and the filling is bubbly.
8. Cool and Serve: Allow the pie to cool on a wire rack for at least 1 hour before serving. This will give the filling time to set.
Extra Tips:
When making the pastry, make certain that your butter is very cold, as this will help create a flaky crust. If you prefer a more robust flavor, consider adding a tablespoon of brandy or rum to the mincemeat filling.
For those who enjoy a decorative touch, you can use pastry cutters to create festive shapes from the extra dough and place them on top of the pie before baking. If your crust starts to brown too quickly, cover the edges with foil to prevent burning.
Enjoy your mincemeat pie with a dollop of whipped cream or a scoop of vanilla ice cream for an extra special treat.
Classic Apple Pie With a Holiday Twist
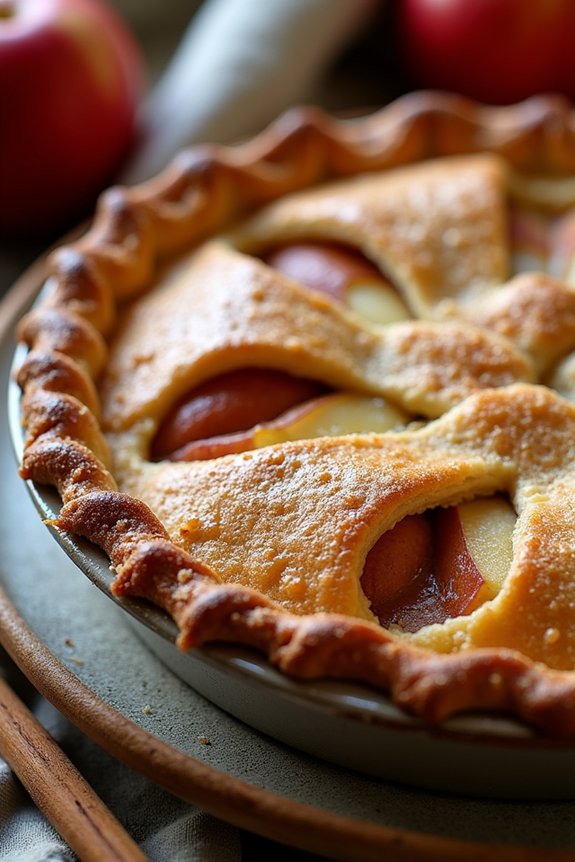
The Classic Apple Pie with a Holiday Twist is a delightful variation on the traditional apple pie, infusing festive flavors into a beloved dessert. This recipe combines the tartness of Granny Smith apples with the warmth of holiday spices like cinnamon, nutmeg, and cloves. A hint of orange zest adds a revitalizing note that complements the richness of the buttery crust.
Perfect for serving at holiday gatherings, this pie is sure to become a seasonal favorite with its harmonious blend of traditional and seasonal flavors. This pie is best enjoyed fresh out of the oven, with a scoop of vanilla ice cream or a dollop of whipped cream to enhance its comforting appeal.
The recipe yields a pie that serves 4-6 people, making it an ideal choice for a family dinner or small holiday party. Whether you’re a seasoned baker or a novice in the kitchen, this recipe is straightforward and rewarding, promising a delicious centerpiece for your holiday table.
Ingredients:
- 2 1/2 cups all-purpose flour
- 1 teaspoon salt
- 1 tablespoon granulated sugar
- 1 cup unsalted butter, chilled and diced
- 6 to 8 tablespoons ice water
- 6 Granny Smith apples, peeled, cored, and sliced
- 1 tablespoon lemon juice
- 1/2 cup granulated sugar
- 1/4 cup brown sugar
- 1 teaspoon ground cinnamon
- 1/4 teaspoon ground nutmeg
- 1/4 teaspoon ground cloves
- 2 tablespoons all-purpose flour
- 1 teaspoon grated orange zest
- 1 tablespoon unsalted butter, cut into small pieces
- 1 egg, beaten (for egg wash)
- 1 tablespoon coarse sugar (optional, for topping)
Instructions:
- Prepare the Pie Crust:
- In a large bowl, combine the flour, salt, and granulated sugar. Add the diced butter and, using a pastry cutter or your fingers, mix until the mixture resembles coarse crumbs.
- Gradually add the ice water, one tablespoon at a time, mixing just until the dough comes together. Divide the dough in half, shape into discs, wrap in plastic wrap, and refrigerate for at least 1 hour.
- Preheat the Oven:
- Preheat your oven to 425°F (220°C). Place a baking sheet in the oven to preheat as well, which will help bake the bottom of the pie more evenly.
- Prepare the Filling:
- In a large bowl, toss the sliced apples with lemon juice to prevent browning. Add the granulated sugar, brown sugar, cinnamon, nutmeg, cloves, flour, and orange zest. Mix until the apples are well-coated with the spice mixture.
- Assemble the Pie:
- Roll out one disc of dough on a lightly floured surface to fit your pie dish. Transfer the dough to the dish, allowing the excess to hang over the edges.
- Fill the pie shell with the apple mixture, making sure to pack the apples tightly. Dot with pieces of butter.
- Roll out the second disc of dough and place it over the apples. Trim the excess dough and crimp the edges to seal. Cut slits in the top crust to allow steam to escape.
- Bake the Pie:
- Brush the top crust with the beaten egg. Sprinkle with coarse sugar if desired.
- Place the pie on the preheated baking sheet and bake for 20 minutes. Reduce the temperature to 375°F (190°C) and continue baking for 35-40 minutes, or until the crust is golden brown and the filling is bubbling.
- Cool and Serve:
- Allow the pie to cool for at least 30 minutes before serving to let the filling set. Serve warm with ice cream or whipped cream if desired.
Extra Tips:
To guarantee a beautifully browned crust, be sure your butter is very cold before mixing it into the flour. If the edges of your pie begin to brown too quickly while baking, cover them with strips of aluminum foil to prevent burning.
Additionally, for a more pronounced holiday flavor, consider adding a splash of vanilla extract or a pinch of allspice to the apple filling.
Decadent Chocolate Peppermint Pie
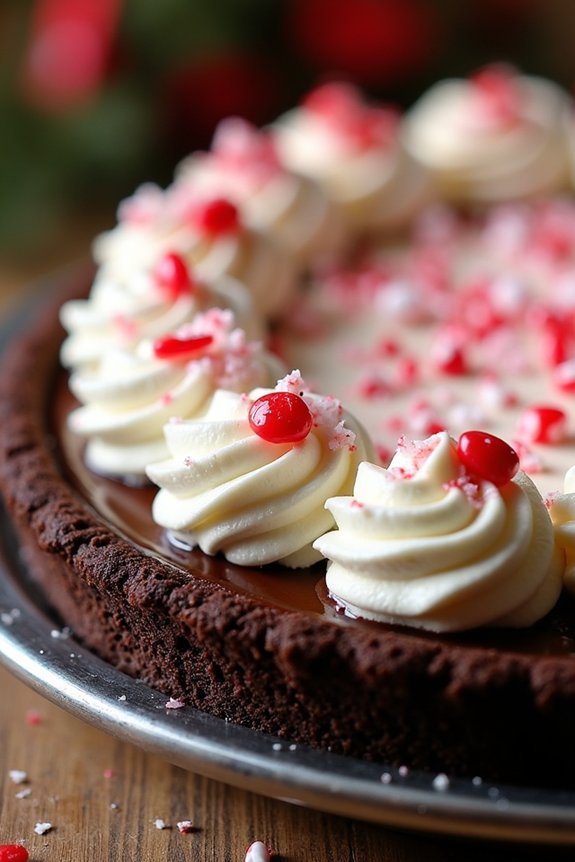
Decadent Chocolate Peppermint Pie is an indulgent holiday treat that combines the rich flavors of chocolate with the invigorating taste of peppermint. This pie is perfect for those who love a sweet, minty dessert that also satisfies their chocolate cravings.
It features a smooth chocolate filling infused with peppermint, set in a buttery crust, and topped with whipped cream and crushed peppermint candies for an extra festive touch. Whether you’re serving it at a holiday party or as a special dessert for a family dinner, this pie is sure to become a holiday favorite.
The recipe for Decadent Chocolate Peppermint Pie is designed to serve 4-6 people, making it ideal for a small gathering or family dinner. The pie starts with a chocolate cookie crust that provides a crunchy base for the creamy filling.
The filling itself is a silky mixture of chocolate and peppermint, which is chilled until set. Once ready, the pie is garnished with whipped cream and crushed peppermint candies, creating a beautiful and delicious presentation. Follow the instructions below to craft this delightful holiday dessert.
Ingredients:
- 1 1/2 cups chocolate cookie crumbs
- 1/3 cup melted butter
- 1 1/4 cups heavy cream
- 8 oz semisweet chocolate, chopped
- 1 teaspoon peppermint extract
- 1/4 cup granulated sugar
- 1 cup whipped cream
- 1/4 cup crushed peppermint candies
Instructions:
- Prepare the Crust: Preheat your oven to 350°F (175°C). In a medium bowl, combine the chocolate cookie crumbs and melted butter until the mixture resembles wet sand. Press the mixture evenly into the bottom and up the sides of a 9-inch pie pan. Bake for 10 minutes, then remove from the oven and let cool completely.
- Make the Chocolate Filling: In a small saucepan, heat 1 cup of heavy cream over medium heat until it just begins to simmer. Remove from heat and add the chopped semisweet chocolate. Let it sit for a minute, then stir until the chocolate is completely melted and smooth.
- Add Peppermint Flavor: Stir in the peppermint extract and granulated sugar into the chocolate mixture until well combined. Allow the mixture to cool slightly.
- Fill the Pie: Pour the chocolate mixture into the cooled crust. Use a spatula to spread it evenly. Cover with plastic wrap and refrigerate for at least 4 hours, or until the filling is firm.
- Garnish the Pie: Before serving, whip the remaining 1/4 cup of heavy cream to soft peaks and spread or pipe it over the top of the pie. Sprinkle the crushed peppermint candies over the whipped cream for decoration and extra flavor.
Extra Tips: When making the chocolate filling, verify that the cream is hot enough to melt the chocolate but not boiling, as overheating can cause the chocolate to seize.
If you prefer a stronger peppermint flavor, you can adjust the amount of peppermint extract to taste, but be cautious as it can quickly become overpowering. For an extra touch, consider adding some chocolate shavings or curls on top for a more elegant presentation.
Enjoy your Decadent Chocolate Peppermint Pie chilled for the best texture and flavor.
Spiced Pumpkin Pie With Maple Whipped Cream
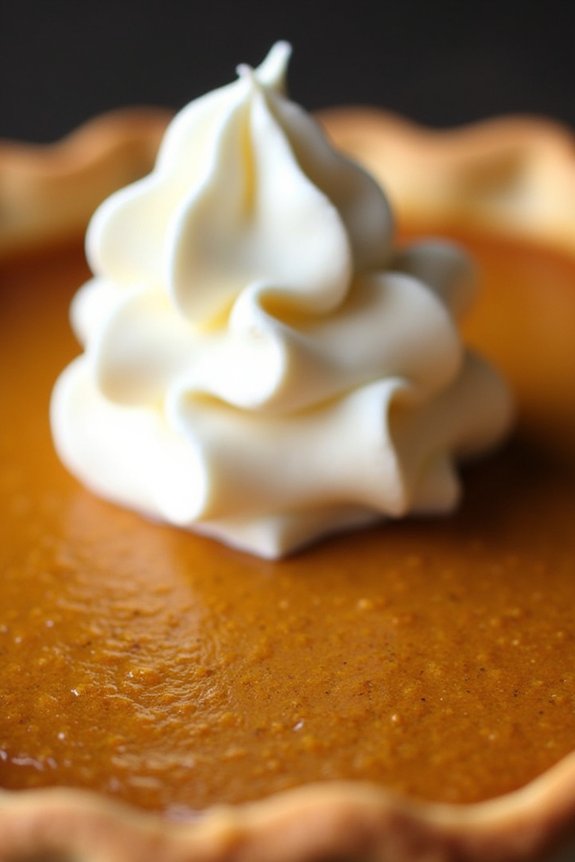
Spiced Pumpkin Pie With Maple Whipped Cream is a timeless classic that combines the rich, creamy texture of pumpkin with the warm, aromatic spices of fall. This dessert is perfect for festive gatherings or simply to indulge in the comforting flavors of the season. Its smooth, spiced filling is encased in a buttery, flaky crust and topped with a dollop of maple-flavored whipped cream, making every bite a delightful experience.
Pumpkin pie is often a staple on holiday tables, and this recipe elevates the traditional dish with the addition of maple syrup in the whipped cream, adding a subtle sweetness and depth of flavor. Whether you’re a seasoned baker or a beginner, this recipe is straightforward and rewarding, providing a satisfying dessert that can be prepared in advance to allow you to focus on other holiday preparations.
Ingredients for 4-6 Servings:
- 1 (9-inch) pie crust, store-bought or homemade
- 1 3/4 cups canned pumpkin puree
- 3/4 cup granulated sugar
- 1/2 cup packed light brown sugar
- 1 tablespoon all-purpose flour
- 1/2 teaspoon salt
- 1 teaspoon ground cinnamon
- 1/2 teaspoon ground ginger
- 1/4 teaspoon ground nutmeg
- 1/4 teaspoon ground cloves
- 3 large eggs
- 1 cup evaporated milk
- 1 teaspoon vanilla extract
- 1 cup heavy whipping cream
- 2 tablespoons pure maple syrup
Cooking Instructions:
- Preheat the Oven: Start by preheating your oven to 425°F (220°C). Place your pie crust in a 9-inch pie pan and set it aside.
- Prepare the Pumpkin Filling: In a large mixing bowl, combine the pumpkin puree, granulated sugar, brown sugar, flour, salt, cinnamon, ginger, nutmeg, and cloves. Mix well until all ingredients are fully incorporated.
- Add Wet Ingredients: Beat in the eggs, one at a time, guaranteeing each one is well mixed before adding the next. Gradually stir in the evaporated milk and vanilla extract until you achieve a smooth, creamy consistency.
- Fill the Pie Crust: Pour the pumpkin mixture into the prepared pie crust, smoothing the top with a spatula to guarantee even distribution.
- Bake the Pie: Place the pie in the preheated oven and bake for 15 minutes. Then, reduce the oven temperature to 350°F (175°C) and continue baking for an additional 40-50 minutes, or until a knife inserted into the center comes out clean. If the crust begins to brown too quickly, cover the edges with foil to prevent burning.
- Cool the Pie: Once baked, remove the pie from the oven and allow it to cool on a wire rack for at least 2 hours. This will help the filling set properly.
- Make the Maple Whipped Cream: In a chilled bowl, beat the heavy whipping cream with an electric mixer until soft peaks form. Gradually add the maple syrup, continuing to whip until stiff peaks form.
- Serve: Slice the cooled pie and serve with a generous dollop of maple whipped cream on top.
Extra Tips:
For an even richer flavor, consider toasting your spices slightly before adding them to the pumpkin mixture to enhance their aroma.
You can also prepare the pie a day in advance, allowing the flavors to meld together beautifully. Store the pie in the refrigerator and add the whipped cream just before serving to keep it fresh and airy.
If you’re using a store-bought crust, blind baking it for a few minutes before filling can prevent it from becoming soggy.
Cranberry and Orange Custard Pie
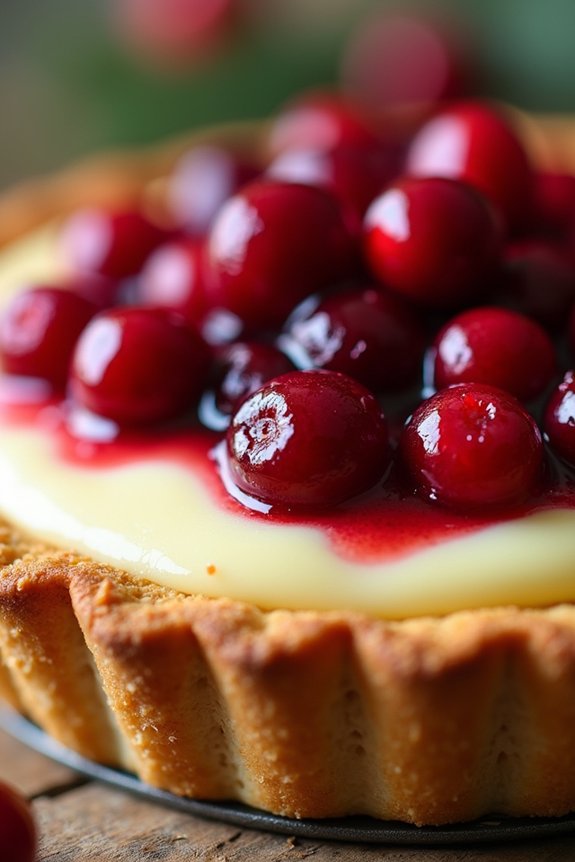
The Cranberry and Orange Custard Pie is a delightful and festive dessert that perfectly captures the essence of Christmas flavors. With its rich custard filling, zesty orange notes, and a tangy cranberry topping, this pie is sure to become a holiday favorite.
The balance of sweet and tart flavors, combined with a buttery crust, makes it a wonderful addition to your festive table. This pie isn’t only delicious but also visually stunning, with the vibrant red of the cranberries contrasting beautifully against the creamy custard.
The preparation is straightforward, making it an ideal choice for both novice and experienced bakers. With a serving size of 4-6 people, this pie is perfect for small gatherings or family dinners during the holiday season.
Ingredients:
- 1 pre-made pie crust (9-inch)
- 1 cup fresh cranberries
- 1/2 cup granulated sugar
- 1 tablespoon cornstarch
- 1/4 cup water
- 2 teaspoons orange zest
- 3 large eggs
- 1/2 cup heavy cream
- 1/2 cup whole milk
- 1/3 cup granulated sugar
- 1 teaspoon vanilla extract
- 1/4 teaspoon salt
Cooking Instructions:
1. Prepare the Pie Crust: Preheat your oven to 375°F (190°C). Roll out the pre-made pie crust and place it into a 9-inch pie pan. Trim any excess dough and crimp the edges. Prick the bottom with a fork to prevent bubbling.
Blind-bake the crust by covering it with parchment paper and filling it with pie weights or dried beans. Bake for 10 minutes, remove the weights and parchment, and bake for another 5 minutes until lightly golden.
2. Make the Cranberry Mixture: In a saucepan over medium heat, combine the cranberries, 1/2 cup sugar, cornstarch, and water. Stir frequently until the mixture thickens and the cranberries begin to burst, about 5-7 minutes.
Remove from heat and stir in the orange zest. Allow to cool slightly.
3. Prepare the Custard Filling: In a mixing bowl, whisk together the eggs, heavy cream, milk, 1/3 cup sugar, vanilla extract, and salt until well combined.
4. Assemble the Pie: Pour the custard filling into the pre-baked pie crust. Carefully spoon the cranberry mixture over the custard, distributing it evenly.
5. Bake the Pie: Place the assembled pie in the oven and bake for 30-35 minutes or until the custard is set and the top is lightly golden.
The pie should jiggle slightly in the center when done.
6. Cool and Serve: Allow the pie to cool at room temperature for at least 1 hour before serving to guarantee the custard sets completely. For best results, refrigerate for an additional hour before slicing.
Extra Tips:
For a more intense orange flavor, consider adding a teaspoon of orange extract to the custard filling. If you prefer a sweeter pie, increase the sugar in the cranberry mixture to 3/4 cup.
To prevent the crust from over-browning, cover the edges with foil halfway through baking. This pie pairs beautifully with a dollop of whipped cream or a scoop of vanilla ice cream.
Enjoy your festive Cranberry and Orange Custard Pie as a revitalizing and elegant holiday dessert!
Gingerbread Cream Pie With Gingersnap Crust
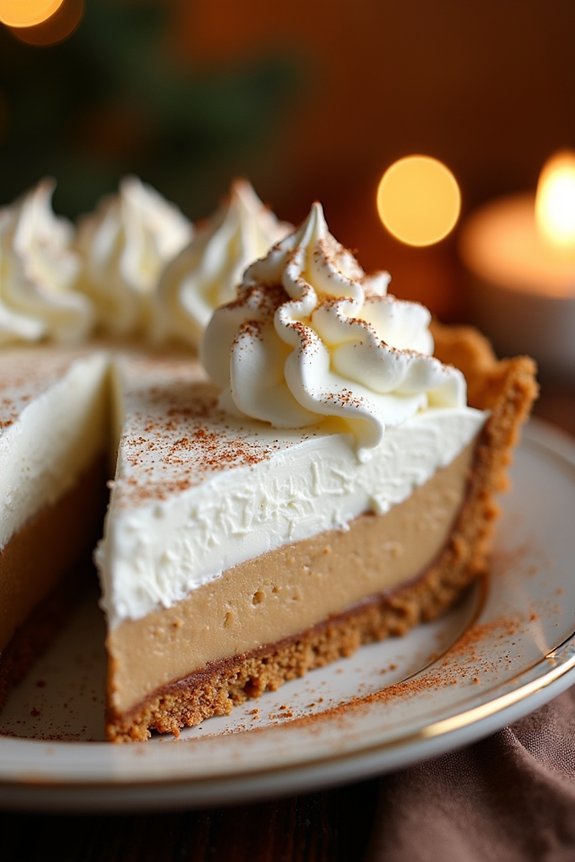
Gingerbread Cream Pie With Gingersnap Crust is a delightful twist on traditional holiday desserts, merging the spiced flavors of gingerbread with the creamy richness of a classic cream pie. This pie features a crunchy gingersnap crust that perfectly complements the smooth, spiced gingerbread filling.
It’s an ideal choice for those who want to add a unique and delicious pie to their holiday table, with flavors that evoke the warmth and coziness of the season.
Creating this pie involves a few steps, starting with preparing the gingersnap crust, followed by making the creamy gingerbread filling. The gingersnap crust is made from crushed gingersnap cookies, which provide a lovely texture and a burst of ginger flavor.
The filling combines spices like cinnamon, nutmeg, and ginger with a creamy base, creating a harmonious blend that captures the essence of gingerbread. Serve this pie chilled, and garnish with whipped cream for an indulgent dessert that’s sure to impress family and friends.
Ingredients (Serving Size: 4-6 people):
- 2 cups gingersnap cookies, crushed
- 5 tablespoons unsalted butter, melted
- 1/4 cup granulated sugar
- 1/2 cup brown sugar
- 1/4 cup cornstarch
- 3 cups whole milk
- 4 egg yolks
- 1 teaspoon ground cinnamon
- 1/2 teaspoon ground ginger
- 1/4 teaspoon ground nutmeg
- 1 teaspoon vanilla extract
- Whipped cream for garnish
Cooking Instructions:
1. Prepare the Crust: Preheat your oven to 350°F (175°C). In a medium bowl, combine the crushed gingersnap cookies, melted butter, and granulated sugar. Mix until the crumbs are evenly coated with butter.
Press this mixture firmly into the bottom and up the sides of a 9-inch pie dish to form the crust. Bake for 8-10 minutes until the crust is set. Remove from oven and let cool completely.
2. Make the Filling: In a medium saucepan, whisk together the brown sugar, cornstarch, ground cinnamon, ground ginger, and ground nutmeg. Gradually whisk in the milk until smooth.
Place the saucepan over medium heat and cook, whisking constantly, until the mixture is thickened and bubbling, about 5-7 minutes.
3. Temper the Eggs: In a small bowl, lightly beat the egg yolks. Slowly whisk about 1/2 cup of the hot milk mixture into the yolks to temper them.
Then, gradually whisk the yolk mixture back into the saucepan with the remaining milk mixture.
4. Cook the Filling: Return the saucepan to medium heat and cook, stirring constantly, until the mixture thickens further and coats the back of a spoon, about 2-3 minutes.
Remove from heat and stir in the vanilla extract.
5. Assemble the Pie: Pour the hot filling into the cooled gingersnap crust, smoothing the top with a spatula. Allow the pie to cool at room temperature for about 30 minutes, then transfer to the refrigerator to chill for at least 4 hours or overnight.
6. Serve: Before serving, garnish the pie with dollops of whipped cream. Slice and enjoy this festive dessert.
Extra Tips:
For the best results, make certain that the gingersnap crust is firmly packed into the pie dish to avoid crumbling when sliced.
When tempering the eggs, add the hot milk mixture slowly to prevent the yolks from cooking too quickly. If you like a more pronounced gingerbread flavor, feel free to adjust the spices to your preference.
Finally, make sure the pie is thoroughly chilled before serving to allow the flavors to meld and the filling to set properly.
Festive Pecan Pie With Bourbon Glaze
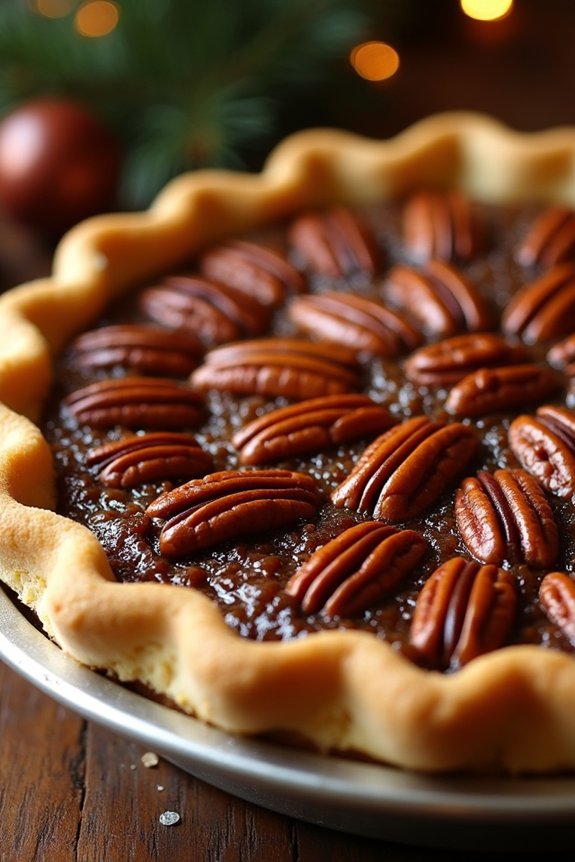
This Festive Pecan Pie with Bourbon Glaze is an indulgent dessert perfect for your holiday gatherings. Combining the rich, nutty flavor of pecans with a sweet and slightly boozy glaze, this pie is sure to be a crowd-pleaser. The buttery crust and gooey filling complement each other perfectly, creating a harmonious balance of textures and flavors.
This recipe is simple enough for novice bakers but impressive enough to become a centerpiece on your festive table. The bourbon glaze adds an exciting twist to a traditional pecan pie, giving it a depth of flavor that’s both sophisticated and comforting. Serving 4-6 people, this pie is an ideal choice for sharing with family and friends.
Whether you’re celebrating Christmas or simply want a delicious dessert to enjoy, this pecan pie is sure to make your holiday season a little sweeter.
Ingredients (Serves 4-6):
- 1 9-inch unbaked pie crust
- 1 cup light corn syrup
- 1 cup granulated sugar
- 3 large eggs
- 1/4 cup unsalted butter, melted
- 1 teaspoon vanilla extract
- 1 tablespoon bourbon
- 1 1/2 cups pecan halves
- 1/4 cup brown sugar
- 2 tablespoons bourbon (for glaze)
- 2 tablespoons heavy cream
- 1 tablespoon unsalted butter (for glaze)
- A pinch of salt
Instructions:
- Preheat and Prepare: Preheat your oven to 350°F (175°C). Roll out the pie crust and fit it into a 9-inch pie plate. Trim and crimp the edges as desired, then place in the refrigerator to chill while you prepare the filling.
- Make the Filling: In a large bowl, whisk together the corn syrup, granulated sugar, eggs, melted butter, vanilla extract, and 1 tablespoon of bourbon until smooth and well combined.
- Add Pecans: Gently fold in the pecan halves, making sure they’re evenly distributed throughout the filling mixture.
- Assemble the Pie: Pour the filling into the prepared pie crust. Use a spatula to spread the pecans evenly across the top.
- Bake: Place the pie on the center rack of the oven and bake for 50-60 minutes, or until the filling is set and the crust is golden brown. The pie should wobble slightly in the center when done.
- Prepare the Bourbon Glaze: While the pie is baking, combine the brown sugar, 2 tablespoons of bourbon, heavy cream, 1 tablespoon of butter, and a pinch of salt in a small saucepan. Cook over medium heat, stirring frequently, until the mixture comes to a gentle boil. Reduce the heat and simmer for another 2-3 minutes until the glaze thickens slightly. Remove from heat and let it cool.
- Cool and Glaze: Once the pie is done, remove it from the oven and let it cool on a wire rack for at least 30 minutes. Drizzle the cooled bourbon glaze over the top of the pie before serving.
Extra Tips:
For best results, use fresh pecans, as their natural oils enhance the flavor of the pie. If you don’t have bourbon, you can substitute with brandy or omit it entirely for a non-alcoholic version.
Confirm the pie is completely cooled before slicing to allow the filling to set properly. If you prefer a nuttier flavor, toast the pecans lightly before adding them to the filling. Finally, serve the pie with a dollop of whipped cream or a scoop of vanilla ice cream for an extra special treat.
Pear and Almond Tart With Nutmeg
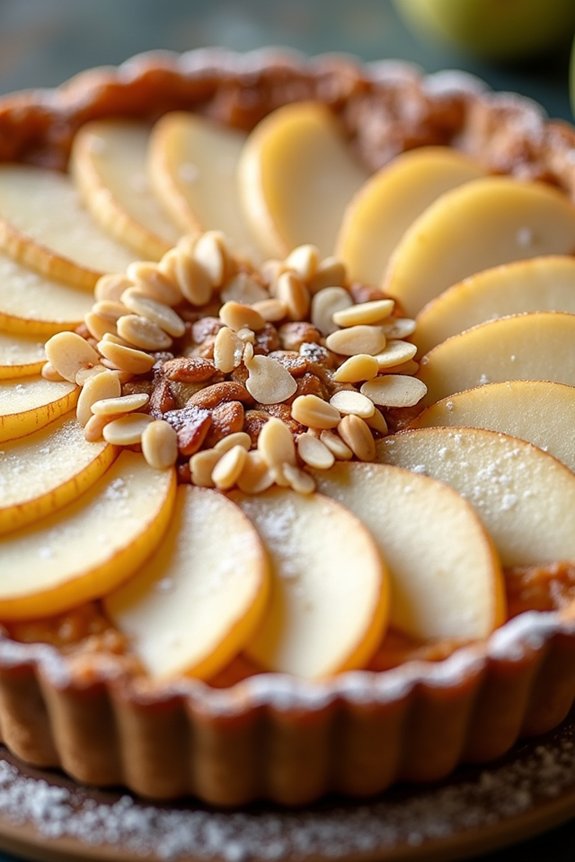
Pear and almond tart with nutmeg is a classic Christmas dessert that combines the sweet and juicy flavors of ripe pears with the nutty richness of almonds, all enhanced by the warm, spicy hint of nutmeg. This delightful tart is perfect for the holiday season, offering both a beautiful presentation and a delicious blend of textures and flavors.
The buttery, flaky crust provides a perfect base for the creamy almond filling and tender pear slices, making this dish a crowd-pleaser at any festive gathering.
To make this tart, you’ll need to prepare a simple almond cream filling, slice fresh pears, and arrange them on a pre-made tart crust. The nutmeg is added to the filling, giving it an aromatic essence that complements the sweetness of the pears. The tart is then baked until golden brown and served warm or at room temperature, making it a versatile dessert option.
Here’s how to create this elegant dish that serves 4-6 people.
Ingredients:
- 1 pre-made tart crust (9-inch)
- 3 ripe pears, peeled, cored, and sliced
- 3/4 cup almond flour
- 1/2 cup granulated sugar
- 1/2 cup unsalted butter, softened
- 2 large eggs
- 1 teaspoon vanilla extract
- 1/2 teaspoon ground nutmeg
- 1/4 teaspoon salt
- 2 tablespoons sliced almonds (optional, for garnish)
- Powdered sugar (optional, for dusting)
Instructions:
- Preheat the Oven: Preheat your oven to 350°F (175°C). This guarantees that your tart will bake evenly and develop a beautiful golden-brown crust.
- Prepare the Almond Cream Filling: In a mixing bowl, combine the almond flour, granulated sugar, and softened butter. Beat until smooth. Add the eggs one at a time, mixing well after each addition. Stir in the vanilla extract, ground nutmeg, and salt. Mix until all ingredients are well incorporated and the filling is smooth.
- Assemble the Tart: Place the pre-made tart crust in a tart pan, pressing it gently into the edges. Pour the almond cream filling into the crust, spreading it evenly with a spatula. Arrange the pear slices in a circular pattern on top of the filling, starting from the outer edge and working inward.
- Bake the Tart: Place the tart in the preheated oven and bake for 35-40 minutes, or until the filling is set and the crust is golden brown. If desired, sprinkle sliced almonds on top during the last 10 minutes of baking for added texture.
- Cool and Serve: Once baked, remove the tart from the oven and let it cool slightly in the pan. Dust with powdered sugar before serving, if desired. The tart can be served warm or at room temperature.
Extra Tips:
For the best results, use pears that are ripe but still firm, as overly soft pears can release too much juice during baking, which might make the filling soggy.
If you don’t have almond flour, you can grind whole almonds in a food processor until they reach a fine, flour-like consistency. Additionally, feel free to adjust the amount of nutmeg according to your personal taste preference, keeping in mind that a little goes a long way.
Finally, if you prefer a homemade crust, a simple shortcrust pastry can be made using flour, butter, sugar, and a pinch of salt. Enjoy your festive Pear and Almond Tart with Nutmeg!
White Chocolate and Raspberry Mousse Pie
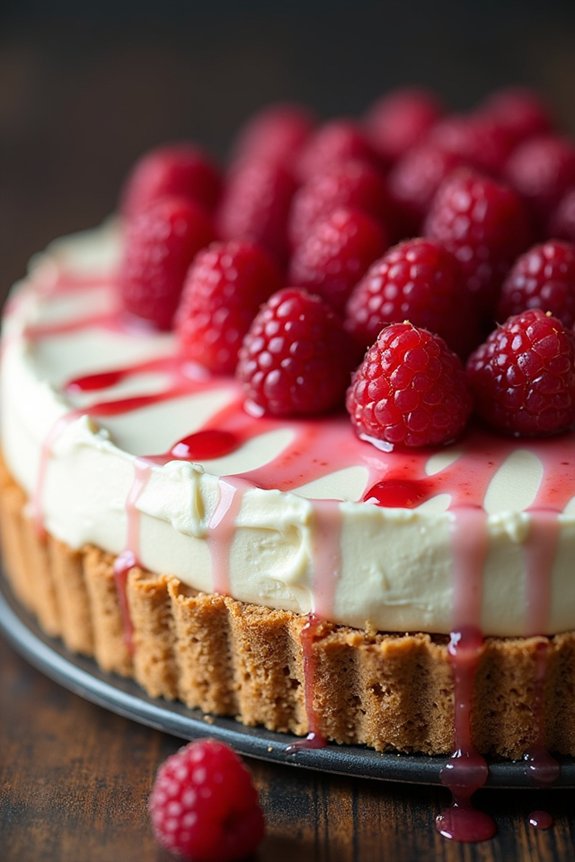
White Chocolate and Raspberry Mousse Pie is a delightful dessert that combines the creamy richness of white chocolate with the tangy freshness of raspberries. This pie is perfect for the holiday season, offering a light and fruity contrast to the often heavier holiday meals. The smooth mousse fills a buttery, crumbly crust, creating a satisfying texture that melts in your mouth.
Whether you’re hosting a dinner party or simply want to treat your family to something special, this pie will definitely be a hit.
The pie consists of a crisp, buttery crust, a smooth and airy white chocolate mousse, and a vibrant raspberry topping. The combination of flavors and textures creates a sophisticated dessert that looks as beautiful as it tastes. While it requires some preparation, the steps are straightforward, making it an excellent choice for both novice and experienced bakers.
Here’s how you can make this delicious pie for a serving size of 4-6 people.
Ingredients:
- 1 1/2 cups graham cracker crumbs
- 1/3 cup granulated sugar
- 6 tablespoons unsalted butter, melted
- 8 ounces white chocolate, chopped
- 1 cup heavy cream
- 8 ounces cream cheese, softened
- 1 teaspoon vanilla extract
- 1 pint fresh raspberries
- 1/4 cup raspberry jam
Instructions:
- Prepare the Crust: Preheat your oven to 350°F (175°C). In a medium bowl, combine the graham cracker crumbs and granulated sugar. Stir in the melted butter until the mixture resembles wet sand. Press the mixture firmly into the bottom and up the sides of a 9-inch pie pan. Bake the crust for 10 minutes, then let it cool completely.
- Make the White Chocolate Mousse: In a heatproof bowl set over a pan of simmering water, melt the white chocolate, stirring occasionally until smooth. Remove from heat and let it cool slightly. In another bowl, whip the heavy cream until soft peaks form. In a separate bowl, beat the softened cream cheese until smooth, then gradually add in the melted white chocolate and vanilla extract. Fold in the whipped cream gently until well combined.
- Assemble the Pie: Pour the white chocolate mousse into the cooled crust, spreading it evenly. Refrigerate the pie for at least 2 hours or until the mousse is set.
- Prepare the Raspberry Topping: In a small saucepan over low heat, gently heat the raspberry jam until it’s smooth and pourable. Remove from heat and let it cool slightly. Arrange the fresh raspberries on top of the set mousse. Drizzle the melted raspberry jam over the raspberries.
- Serve: Chill the assembled pie for at least 1 hour before serving. This will help the flavors meld together and guarantee the pie is perfectly set.
Extra Tips:
When making the crust, confirm it’s firmly packed into the pie pan to prevent it from crumbling when served. If fresh raspberries aren’t available, you can use frozen raspberries, but be sure to thaw and drain them well before use.
For a more intense raspberry flavor, consider adding a layer of raspberry jam underneath the mousse. If the white chocolate seems to seize or become grainy, try adding a tablespoon of warm cream to smooth it out. Serve the pie with a dollop of whipped cream for added indulgence.
Eggnog Custard Pie With Nutmeg Sprinkle
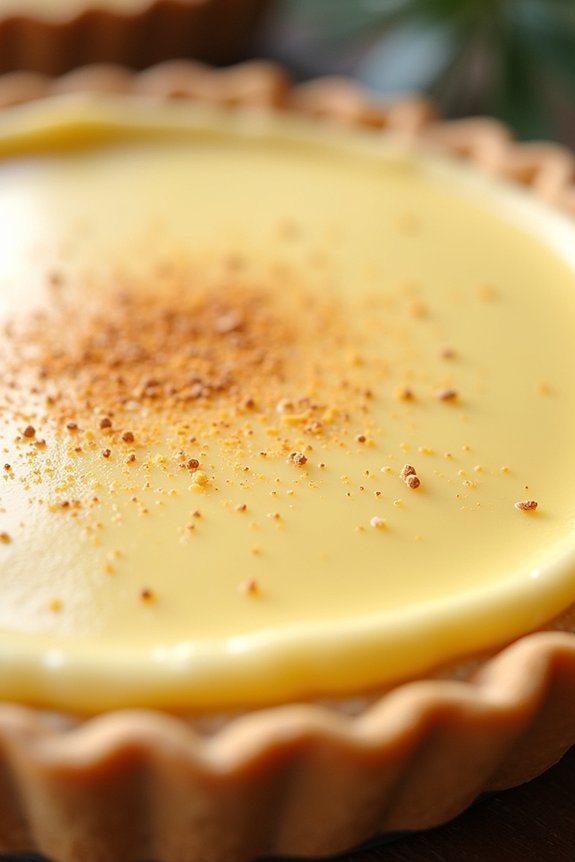
Eggnog Custard Pie with Nutmeg Sprinkle is a delightful twist on traditional holiday desserts, capturing the comforting flavors of eggnog in a smooth, creamy custard pie. This dessert is perfect for a festive gathering, combining the rich taste of eggnog with the subtle warmth of nutmeg, all set in a buttery, flaky crust.
It’s an elegant addition to any holiday table that both adults and children will love. This pie isn’t only delicious but also surprisingly easy to prepare, making it an excellent choice for both novice and seasoned bakers.
The custard filling is infused with the iconic flavors of eggnog, nutmeg, and a hint of vanilla, creating a harmonious blend that’s perfectly balanced by the crisp pie crust. Topped with a gentle sprinkle of freshly grated nutmeg, this pie is sure to become a cherished Christmas tradition.
Ingredients (serves 4-6 people):
- 1 pre-made 9-inch pie crust
- 3 large eggs
- 1 cup granulated sugar
- 2 cups eggnog
- 1 teaspoon pure vanilla extract
- 1/2 teaspoon ground nutmeg
- 1/4 teaspoon salt
- Freshly grated nutmeg, for garnish
Cooking Instructions:
- Preheat and Prepare: Preheat your oven to 350°F (175°C). Place the pie crust in a 9-inch pie pan and crimp the edges as desired. Prick the bottom of the crust with a fork to prevent bubbling. Set aside.
- Make the Custard: In a large mixing bowl, whisk together the eggs and sugar until well combined and slightly frothy. Add the eggnog, vanilla extract, ground nutmeg, and salt. Whisk until all ingredients are fully incorporated and the mixture is smooth.
- Fill the Crust: Pour the custard mixture into the prepared pie crust. Carefully transfer the pie to the oven.
- Bake the Pie: Bake the pie for 45-50 minutes, or until the custard is set around the edges but still slightly jiggles in the center. A toothpick inserted into the center should come out clean when the pie is done.
- Cool and Garnish: Remove the pie from the oven and let it cool on a wire rack. Once cooled, refrigerate for at least 2 hours to allow the custard to fully set. Before serving, sprinkle freshly grated nutmeg over the top for garnish.
Extra Tips: For the best flavor, use high-quality eggnog, as it will greatly impact the taste of the custard. If you prefer a homemade pie crust, feel free to make your own for a more personalized touch.
When baking, if the crust begins to brown too quickly, cover the edges with strips of aluminum foil to prevent burning. This pie is best served chilled, and it can be made a day in advance, making it a convenient option for holiday meal planning.