

When Christmas is around the corner, I think of cozy gatherings filled with the sweet aroma of holiday treats. White chocolate, with its creamy texture and subtle sweetness, transforms simple desserts into festive masterpieces. From peppermint bark to raspberry cheesecake, each dessert adds a sprinkle of magic to the season. Luscious mousse cups and charming truffles are sure to melt hearts during the holidays. Curious to explore these delightful treats?
White Chocolate Peppermint Bark
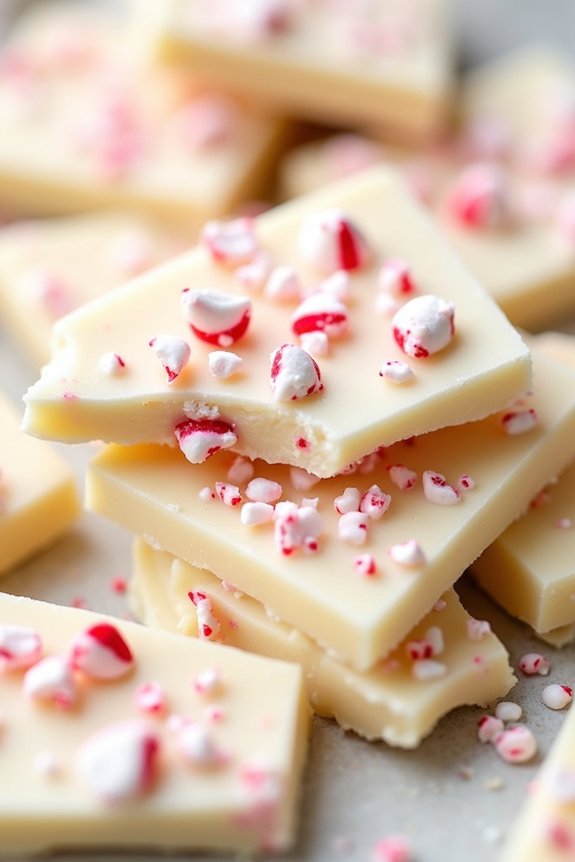
White Chocolate Peppermint Bark is a delightful holiday treat that combines the creamy richness of white chocolate with the invigorating crunch of peppermint candy. This simple yet elegant dessert is perfect for festive gatherings or as a homemade gift to share with friends and family. Its vibrant colors and irresistible flavor make it a standout addition to any holiday dessert table.
This recipe is designed to serve 4-6 people and can be prepared in under an hour, making it a convenient option for those busy holiday schedules. The combination of smooth white chocolate and the stimulating taste of peppermint creates a harmonious balance, guaranteeing each bite is a symphony of flavors. Here’s how to make this delicious White Chocolate Peppermint Bark.
Ingredients:
- 1 pound of high-quality white chocolate, chopped
- 1/2 teaspoon of peppermint extract
- 1/2 cup of crushed peppermint candies or candy canes
- Parchment paper
Instructions:
- Prepare Ingredients: Begin by gathering all the ingredients and equipment. Confirm the white chocolate is finely chopped for even melting. Crush the peppermint candies or candy canes until you have a half cup of small pieces and crumbs.
- Melt the Chocolate: In a heatproof bowl, melt the chopped white chocolate. You can use a microwave by heating it in 30-second intervals, stirring in between until smooth, or melt it over a double boiler on the stove, stirring continuously to prevent scorching.
- Add Peppermint Extract: Once the chocolate is fully melted, remove it from heat and stir in the peppermint extract. Mix well to confirm the extract is evenly distributed throughout the chocolate.
- Pour and Spread: Line a baking sheet with parchment paper. Pour the melted white chocolate onto the parchment paper and use a spatula to spread it evenly into a rectangle, about 1/4 inch thick.
- Add Peppermint Toppings: Immediately sprinkle the crushed peppermint candies over the white chocolate, pressing lightly to confirm they adhere as the chocolate begins to set.
- Set and Break: Allow the bark to cool at room temperature for about 1-2 hours, or until completely set. For quicker results, you can place it in the refrigerator for 30 minutes. Once set, break the bark into pieces of your desired size.
Extra Tips:
When making White Chocolate Peppermint Bark, confirm your work area and utensils are completely dry, as any moisture can cause the chocolate to seize.
Use high-quality white chocolate for the best flavor and texture. To create a visually appealing bark, vary the size of the peppermint pieces for a mix of color and texture.
Store the finished bark in an airtight container at room temperature for up to two weeks, or in the refrigerator for a slightly longer shelf life.
White Chocolate Raspberry Cheesecake
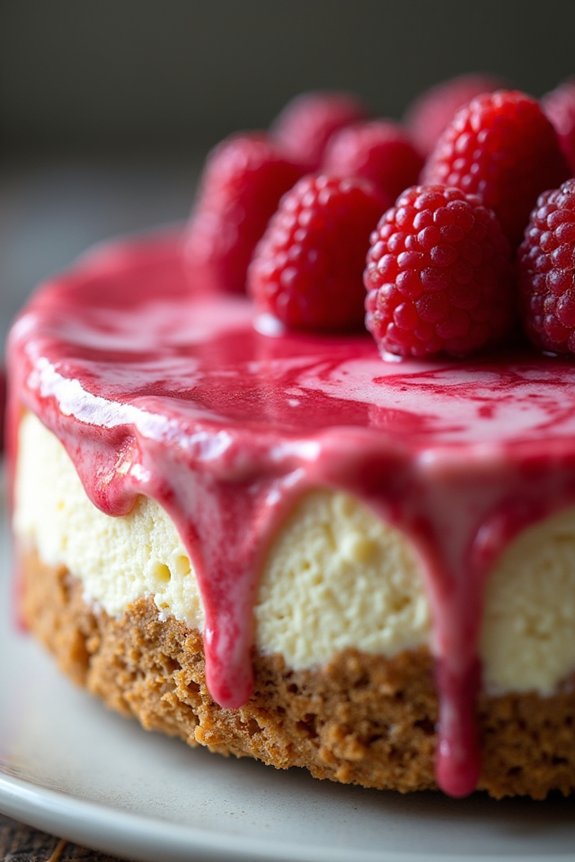
Indulge in the luscious and creamy delight of a White Chocolate Raspberry Cheesecake, a perfect dessert to highlight your festive Christmas table. This decadent dessert combines the rich, smooth taste of white chocolate with the tartness of fresh raspberries, creating a harmonious blend of flavors that melt in your mouth.
The cheesecake sits atop a buttery graham cracker crust, offering a satisfying crunch with every bite. Perfect for serving to a group of 4-6 people, this elegant dessert is sure to impress your guests and become a cherished holiday tradition.
The preparation of this cheesecake requires a bit of patience, but the end result is absolutely worth it. The process begins with creating the crust, followed by the smooth and creamy white chocolate cheesecake filling. The final touch is the raspberry swirl that not only adds a burst of color but also infuses the cheesecake with an irresistible fruity flavor.
Whether you’re serving it at a Christmas party or a cozy family gathering, this White Chocolate Raspberry Cheesecake is sure to be a showstopper.
Ingredients (serves 4-6):
- 1 1/2 cups graham cracker crumbs
- 1/4 cup unsalted butter, melted
- 1/4 cup granulated sugar
- 8 oz white chocolate, chopped
- 24 oz cream cheese, softened
- 1 cup granulated sugar
- 3 large eggs
- 1 teaspoon vanilla extract
- 1 cup fresh raspberries
- 2 tablespoons sugar (for raspberry sauce)
- 1 tablespoon cornstarch
- 1/4 cup water
Cooking Instructions:
1. Preheat the Oven:
Preheat your oven to 325°F (165°C). This will guarantee that the cheesecake bakes evenly.
2. Prepare the Crust:
In a medium bowl, combine the graham cracker crumbs, melted butter, and 1/4 cup sugar. Mix well until the crumbs are evenly coated with butter. Press the mixture firmly into the bottom of a 9-inch springform pan to form the crust. Set aside.
3. Melt the White Chocolate:
In a heatproof bowl, melt the chopped white chocolate over a pot of simmering water, stirring frequently until smooth. Remove from heat and let it cool slightly.
4. Make the Raspberry Sauce:
In a small saucepan, combine raspberries, 2 tablespoons sugar, cornstarch, and water. Cook over medium heat until the mixture thickens and the raspberries break down. Strain the sauce through a fine mesh sieve to remove the seeds. Set aside to cool.
5. Prepare the Cheesecake Filling:
In a large mixing bowl, beat the softened cream cheese and 1 cup sugar until smooth and creamy. Add the eggs one at a time, beating well after each addition. Stir in the vanilla extract and melted white chocolate, mixing until fully incorporated.
6. Assemble the Cheesecake:
Pour half of the cheesecake filling over the prepared crust. Spoon half of the raspberry sauce over the filling, then use a knife to gently swirl it through the batter. Repeat with the remaining cheesecake filling and raspberry sauce.
7. Bake the Cheesecake:
Place the springform pan on a baking sheet and bake in the preheated oven for 55-65 minutes, or until the center is set and the edges are lightly golden. Turn off the oven and let the cheesecake cool inside with the door slightly ajar for 1 hour.
8. Chill the Cheesecake:
Remove the cheesecake from the oven and refrigerate for at least 4 hours, or overnight, to allow it to set completely.
Extra Tips:
When preparing the cheesecake, verify all your ingredients, especially the cream cheese, are at room temperature to achieve a smooth filling.
If you prefer a more pronounced raspberry flavor, consider increasing the amount of raspberry sauce or serving the extra sauce on the side.
To prevent cracks on the surface of your cheesecake, avoid overmixing the batter and allow the cheesecake to cool gradually in the oven.
Finally, if you’re using frozen raspberries, be sure to thaw and drain them well before making the sauce to prevent excess moisture.
White Chocolate Cranberry Cookies
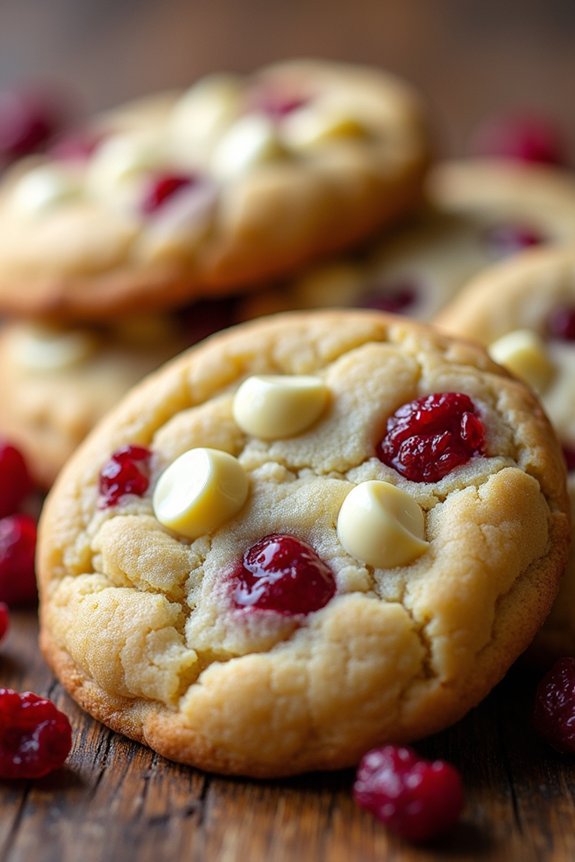
White Chocolate Cranberry Cookies are a delightful treat that combines the creamy sweetness of white chocolate with the tartness of dried cranberries. Perfect for the holiday season, these cookies aren’t only delicious but also visually appealing with their festive red and white colors. They make a wonderful addition to any holiday cookie platter and are sure to be a hit at Christmas gatherings or as a homemade gift for friends and family.
These cookies are easy to make and require only a few simple ingredients that come together beautifully to create a soft and chewy texture with a bit of a crunch from the white chocolate chips. The balance of sweet and tart flavors makes them irresistible, and the aroma wafting from your oven will fill your home with a warm and inviting holiday scent.
Whether you’re a novice baker or an experienced chef, these White Chocolate Cranberry Cookies will be a delightful addition to your holiday baking repertoire.
Ingredients (Serves 4-6):
- 1 cup unsalted butter, softened
- 1 cup granulated sugar
- 1 cup light brown sugar, packed
- 2 large eggs
- 1 teaspoon vanilla extract
- 2 1/2 cups all-purpose flour
- 1 teaspoon baking soda
- 1/2 teaspoon baking powder
- 1/2 teaspoon salt
- 1 cup white chocolate chips
- 1 cup dried cranberries
Instructions:
- Preheat the Oven: Begin by preheating your oven to 350°F (175°C). Line two baking sheets with parchment paper or silicone baking mats to prevent sticking.
- Cream the Butter and Sugars: In a large mixing bowl, cream together the softened butter, granulated sugar, and brown sugar until light and fluffy. This should take about 2-3 minutes using an electric mixer.
- Add Wet Ingredients: Add the eggs one at a time, beating well after each addition. Stir in the vanilla extract until fully combined.
- Combine Dry Ingredients: In a separate bowl, whisk together the all-purpose flour, baking soda, baking powder, and salt. Gradually add the dry ingredients to the wet mixture, mixing until just combined.
- Incorporate Chocolate and Cranberries: Gently fold in the white chocolate chips and dried cranberries, making sure they’re evenly distributed throughout the dough.
- Shape the Cookies: Using a cookie scoop or a tablespoon, drop rounded dough balls onto the prepared baking sheets, leaving about 2 inches of space between each cookie to allow for spreading.
- Bake the Cookies: Place the baking sheets in the preheated oven and bake for 10-12 minutes, or until the edges are lightly golden. The centers should still be soft.
- Cool and Serve: Remove the cookies from the oven and allow them to cool on the baking sheets for about 5 minutes before transferring them to a wire rack to cool completely. Serve and enjoy!
Extra Tips:
For best results, make sure your butter is softened to room temperature before you start; this will make creaming with the sugars easier and will help achieve the desired cookie texture.
You can also substitute semi-sweet chocolate chips if you prefer a more traditional chocolate flavor. For an added festive touch, consider sprinkling a little sea salt on top of the cookies before baking to enhance the flavors.
If you prefer a slightly different texture, try adding a teaspoon of cornstarch to the dry ingredients to make the cookies extra soft and tender. Enjoy your White Chocolate Cranberry Cookies with a warm cup of milk or hot cocoa for the ultimate holiday treat!
White Chocolate Mousse Cups
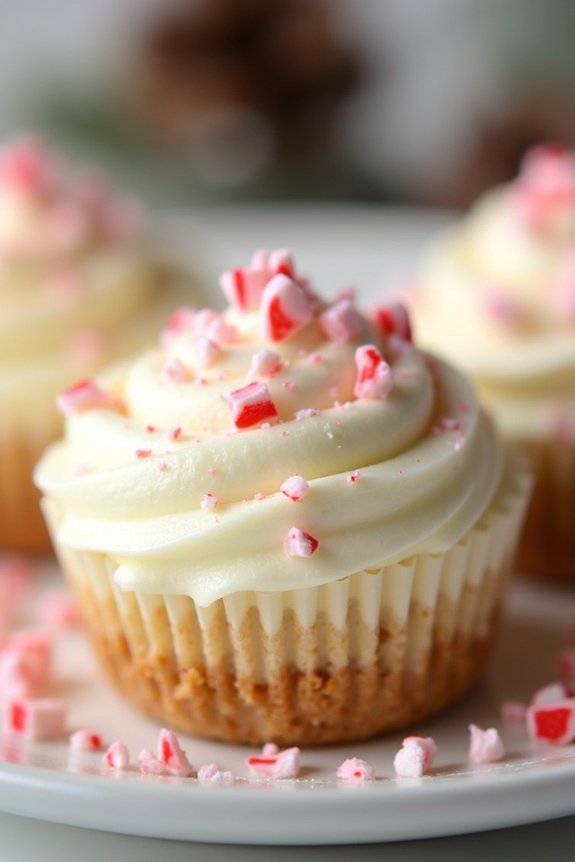
Indulge in the creamy and decadent delight of White Chocolate Mousse Cups, a perfect festive treat for your holiday gatherings. This dessert combines the luxurious texture of white chocolate mousse with the crumbly goodness of a graham cracker crust, all served in an elegant cup.
These mousse cups not only look exquisite but also capture the holiday spirit with their rich flavors and delicate presentation. Whether you’re hosting a Christmas party or looking for a sweet finale to your holiday dinner, these White Chocolate Mousse Cups are certain to impress your guests.
The mousse is light, airy, and infused with the sweet notes of white chocolate, creating a harmonious blend of flavors that melt in your mouth. Topped with a sprinkle of crushed peppermint or a dollop of whipped cream, each cup offers a perfect balance of sweetness and texture.
These cups can be prepared in advance, making them a convenient option for busy holiday schedules. With minimal effort and maximum elegance, White Chocolate Mousse Cups are a delightful addition to any Christmas dessert table.
Ingredients (Serving Size: 4-6 people):
- 8 ounces white chocolate, chopped
- 2 cups heavy cream, divided
- 2 tablespoons powdered sugar
- 1 teaspoon vanilla extract
- 6 graham crackers, crushed
- 2 tablespoons unsalted butter, melted
- Optional toppings: crushed peppermint candies, whipped cream, or white chocolate shavings
Instructions:
- Prepare the Crust: Combine the crushed graham crackers and melted butter in a mixing bowl. Stir until the mixture resembles wet sand. Divide the mixture evenly into the bottom of serving cups, pressing down gently to form an even layer. Set aside.
- Melt the White Chocolate: Place the chopped white chocolate in a heatproof bowl. In a small saucepan, heat 1/2 cup of heavy cream over medium heat until it just begins to simmer. Remove from heat and pour over the white chocolate. Let it sit for a minute, then stir until the chocolate is fully melted and smooth. Allow to cool slightly.
- Whip the Cream: In a large mixing bowl, add the remaining 1 1/2 cups of heavy cream, powdered sugar, and vanilla extract. Using an electric mixer, whip the cream until soft peaks form.
- Combine the Mixture: Gently fold the cooled white chocolate mixture into the whipped cream, being careful not to deflate the cream. Continue folding until the mixture is fully combined and smooth.
- Assemble the Mousse Cups: Spoon or pipe the white chocolate mousse into the prepared cups, filling them just above the graham cracker crust layer. Smooth the tops with a spatula.
- Chill the Mousse Cups: Refrigerate the mousse cups for at least 2 hours or until set. This allows the flavors to meld and the mousse to firm up.
- Garnish and Serve: Before serving, garnish each mousse cup with your choice of toppings, such as crushed peppermint candies, a dollop of whipped cream, or white chocolate shavings.
Extra Tips:
For best results, verify the white chocolate is finely chopped before melting to promote even melting and prevent any chunks. When folding in the white chocolate, do so gently to keep the mousse light and airy.
These mousse cups can be made a day in advance and stored in the refrigerator, allowing you to focus on other preparations. If you prefer a touch of color, consider adding a layer of raspberry or cranberry sauce between the graham cracker crust and the mousse for a festive touch.
White Chocolate Pistachio Fudge
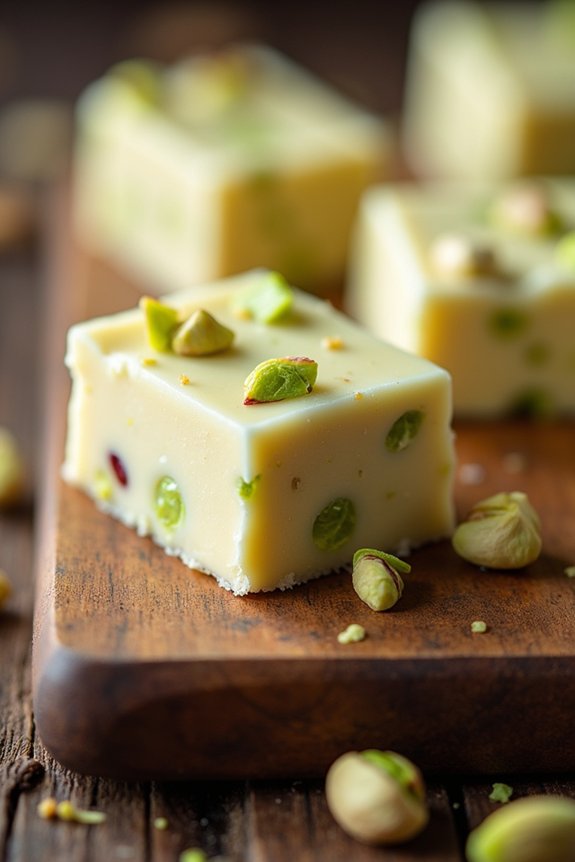
White Chocolate Pistachio Fudge is a delightful and festive dessert perfect for the holiday season. Combining the rich creaminess of white chocolate with the subtle crunch and nutty flavor of pistachios, this fudge is both luxurious and easy to make. It’s a wonderful treat for family gatherings, holiday parties, or as a homemade gift. The vibrant green pistachios against the white backdrop of the fudge also add a visually appealing touch that enhances any Christmas dessert table.
Making White Chocolate Pistachio Fudge requires minimal ingredients and preparation time, making it a convenient choice for busy holiday schedules. The flavor is sweet, rich, and decadently smooth, balanced by the nutty texture of the pistachios. The fudge sets beautifully, allowing for easy slicing into perfect squares, which can be stored for several days, maintaining their delicious taste and texture. This recipe is designed to serve 4-6 people, making it a suitable option for a small gathering or as a part of a larger dessert spread.
Ingredients (Serves 4-6):
- 2 cups white chocolate chips
- 1 can (14 ounces) sweetened condensed milk
- 1 teaspoon vanilla extract
- 1 cup shelled pistachios, roughly chopped
- Pinch of salt
Cooking Instructions:
- Prepare Your Workspace: Begin by lining an 8-inch square baking pan with parchment paper, leaving some overhang on the sides. This will make it easier to lift the fudge out once it has set.
- Melt the Chocolate: In a medium saucepan over low heat, combine the white chocolate chips and sweetened condensed milk. Stir continuously until the chocolate is completely melted and the mixture is smooth. Be cautious not to overheat, as white chocolate can seize if it gets too hot.
- Add Flavorings: Once the chocolate is melted and smooth, remove the saucepan from the heat. Stir in the vanilla extract and a pinch of salt. Mix well to guarantee the flavors are evenly distributed throughout the mixture.
- Incorporate Pistachios: Gently fold in the chopped pistachios until they’re evenly distributed throughout the fudge mixture. This will guarantee every piece of fudge has a delightful crunch.
- Pour and Set: Pour the mixture into the prepared baking pan, spreading it out evenly with a spatula. Smooth the top to create a uniform surface. Allow the fudge to cool at room temperature for about 30 minutes before transferring it to the refrigerator.
- Chill and Serve: Refrigerate the fudge for at least 2 hours, or until it’s firm and set. Once set, use the parchment paper overhang to lift the fudge out of the pan. Cut into squares and serve.
Extra Tips:
For an extra festive touch, consider sprinkling additional chopped pistachios or edible glitter on top of the fudge before it sets. If you prefer a sweeter fudge, you can add a tablespoon of honey or maple syrup to the mixture before folding in the pistachios.
Store any leftovers in an airtight container in the refrigerator, where they’ll keep for up to two weeks. If you want to experiment with different flavors, try adding a dash of almond extract or a sprinkle of sea salt on top for a gourmet twist.
White Chocolate Macadamia Nut Brownies
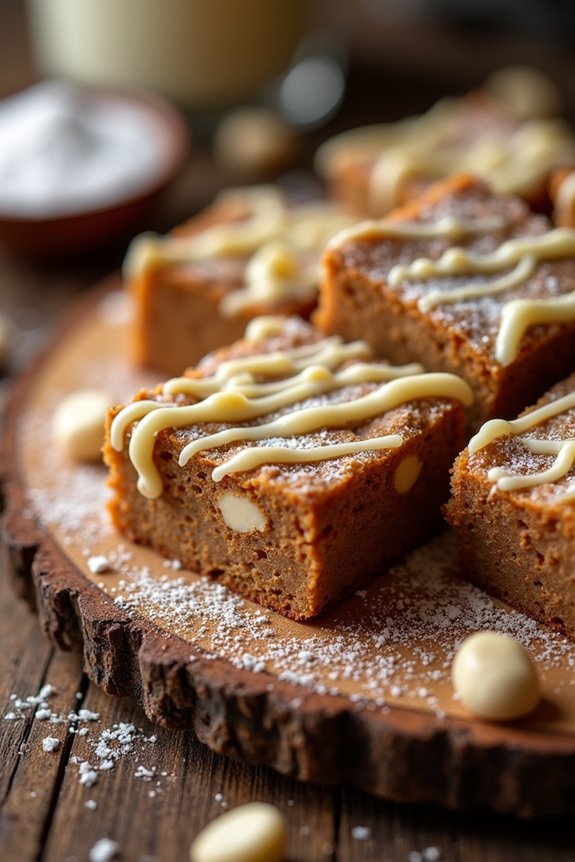
White Chocolate Macadamia Nut Brownies are a luxurious treat that adds a unique twist to traditional brownies. These brownies are rich, fudgy, and loaded with the creamy sweetness of white chocolate and the satisfying crunch of macadamia nuts. Perfect for the holiday season, they offer a delightful contrast of textures and flavors that will impress your family and friends.
Whether you’re serving them as a dessert at a festive gathering or indulging in a sweet snack, these brownies are certain to become a holiday favorite.
Making White Chocolate Macadamia Nut Brownies isn’t only easy but also a fun baking project. The key is to use high-quality white chocolate and fresh macadamia nuts to guarantee the best flavor and texture. By following this recipe, you’ll create a batch that serves 4-6 people, perfect for a small gathering or family dessert.
Gather your ingredients and get ready to enjoy a decadent holiday treat that combines the sweetness of white chocolate with the nutty crunch of macadamias.
Ingredients:
- 1 cup white chocolate chips
- 1/2 cup unsalted butter
- 2 large eggs
- 3/4 cup granulated sugar
- 1 teaspoon vanilla extract
- 1 cup all-purpose flour
- 1/2 teaspoon baking powder
- 1/4 teaspoon salt
- 3/4 cup macadamia nuts, roughly chopped
Instructions:
- Preheat the Oven: Start by preheating your oven to 350°F (175°C). Line an 8×8 inch baking pan with parchment paper, making sure the paper extends over the edges for easy removal of the brownies later.
- Melt the White Chocolate and Butter: In a microwave-safe bowl, combine the white chocolate chips and butter. Microwave in 30-second intervals, stirring between each interval, until the mixture is smooth and fully melted. Allow it to cool slightly.
- Prepare the Wet Ingredients: In a large mixing bowl, beat the eggs and granulated sugar together until the mixture is pale and fluffy. Add the vanilla extract and the cooled white chocolate mixture, stirring until combined.
- Mix the Dry Ingredients: In another bowl, whisk together the all-purpose flour, baking powder, and salt. Gradually fold the dry ingredients into the wet mixture, mixing until just combined. Be careful not to overmix to guarantee the brownies remain tender.
- Add the Macadamia Nuts: Gently fold in the chopped macadamia nuts, distributing them evenly throughout the batter. This will add a wonderful crunch to every bite.
- Bake the Brownies: Pour the batter into the prepared baking pan, smoothing the top with a spatula. Bake in the preheated oven for 25-30 minutes, or until a toothpick inserted into the center comes out with a few moist crumbs attached.
- Cool and Serve: Allow the brownies to cool in the pan for about 15 minutes, then lift them out using the parchment paper. Once completely cool, cut into squares and serve.
Extra Tips:
For the best texture, avoid overbaking the brownies as they’ll continue to set as they cool. If you prefer a more intense white chocolate flavor, consider adding an extra handful of white chocolate chips to the batter before baking.
Additionally, for a festive touch, drizzle some melted white chocolate over the cooled brownies or sprinkle them with powdered sugar before serving. Enjoy your White Chocolate Macadamia Nut Brownies with a scoop of vanilla ice cream or a mug of hot cocoa for a truly indulgent holiday treat.
White Chocolate Truffle Snowballs
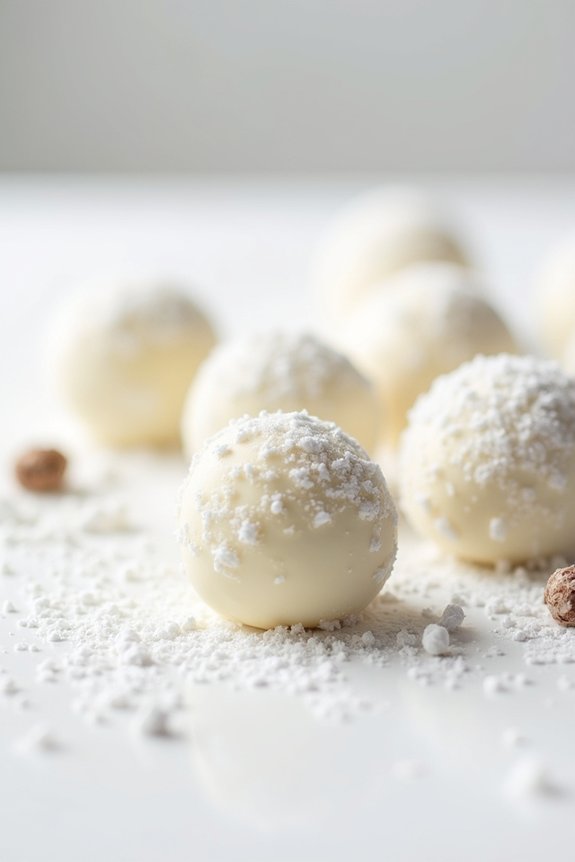
White Chocolate Truffle Snowballs are a delightful treat that encapsulate the essence of a white Christmas. These creamy, melt-in-your-mouth truffles are perfect for holiday gatherings or as a homemade gift for loved ones. The combination of rich white chocolate, a hint of vanilla, and a dusting of powdered sugar makes these snowball-shaped confections irresistible.
Whether you’re a seasoned baker or a novice, these truffles are simple to make and guaranteed to impress your guests. The beauty of White Chocolate Truffle Snowballs lies in their simplicity and elegance. Their delicate appearance, resembling freshly fallen snow, makes them a fitting addition to your festive dessert table.
The preparation process is straightforward, requiring just a few ingredients and minimal time in the kitchen. Once you create these sweet treats, you’ll find them to be a staple in your holiday dessert repertoire. Now, let’s explore the recipe to make these delightful truffles for 4-6 people.
Ingredients:
- 12 ounces of high-quality white chocolate, chopped
- 1/2 cup heavy cream
- 1 teaspoon pure vanilla extract
- A pinch of salt
- 1/2 cup unsalted butter, softened
- 1 cup powdered sugar, for coating
Instructions:
- Prepare the Chocolate Mixture: In a heat-proof bowl, combine the chopped white chocolate and softened unsalted butter. Set the bowl over a pot of simmering water, ensuring the bottom of the bowl doesn’t touch the water. Stir continuously until the chocolate and butter are completely melted and smooth.
- Incorporate Cream and Flavoring: Remove the bowl from the heat. Gradually stir in the heavy cream, ensuring it’s fully incorporated before adding the next bit. Add the vanilla extract and a pinch of salt, mixing until the ingredients are well combined.
- Chill the Mixture: Cover the bowl with plastic wrap and refrigerate for about 2 hours, or until the mixture is firm enough to handle. The chilling process is essential for shaping the truffles properly.
- Shape the Truffles: Once the mixture has firmed, use a small scoop or a teaspoon to portion out the truffles. Roll each portion between your palms to form smooth, round balls.
- Coat with Sugar: Place the powdered sugar in a shallow dish. Roll each truffle in the powdered sugar until fully coated, resembling little snowballs.
- Final Chill: Arrange the coated truffles on a baking sheet lined with parchment paper and refrigerate for an additional 30 minutes to allow them to set completely.
Extra Tips:
For the best results, use high-quality white chocolate as it will greatly affect the texture and flavor of the truffles. Avoid overheating the chocolate when melting it; gentle heat is key to preventing it from seizing.
If the mixture becomes too soft while shaping the truffles, return it to the refrigerator for a few minutes. To add a festive touch, consider incorporating finely chopped nuts or coconut flakes into the coating process.
These truffles can be stored in an airtight container in the refrigerator for up to a week, making them a great make-ahead dessert option for the busy holiday season.
White Chocolate Gingerbread Blondies
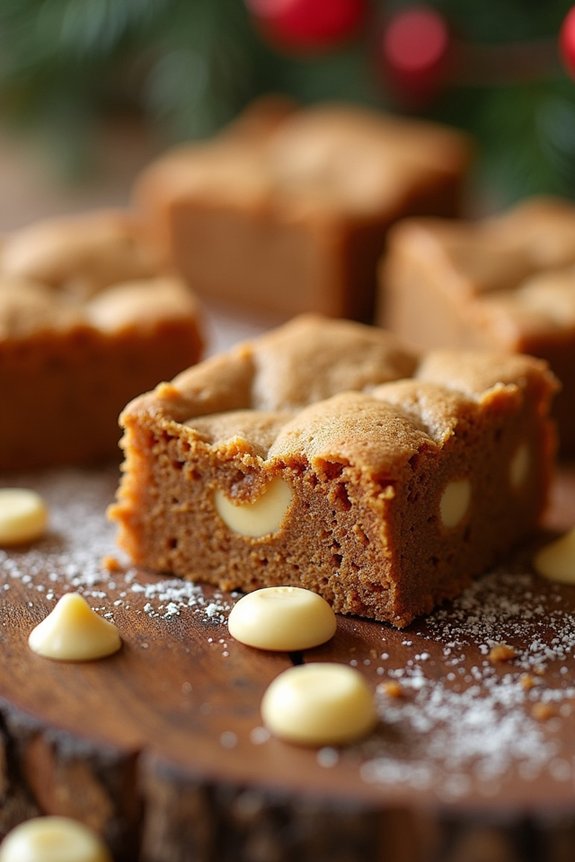
White Chocolate Gingerbread Blondies are a delightful twist on the classic gingerbread treat, combining the rich, spicy flavors of gingerbread with the sweet, creamy taste of white chocolate. Perfect for the holiday season, these blondies make a wonderful dessert for family gatherings or festive parties.
The warmth of ginger, cinnamon, and cloves mixed with the smoothness of melted white chocolate creates a decadent dessert that’s certain to become a holiday favorite.
The blondies have a chewy texture that’s complemented by the chunks of white chocolate, providing a pleasant contrast of flavors and textures in every bite. This recipe is designed to serve 4-6 people, making it ideal for a small gathering or as part of a larger dessert spread.
Whether you’re an experienced baker or a novice in the kitchen, these White Chocolate Gingerbread Blondies are easy to make and bound to impress your guests.
Ingredients (Serves 4-6):
- 1 cup all-purpose flour
- 1 teaspoon ground ginger
- 1 teaspoon ground cinnamon
- 1/4 teaspoon ground cloves
- 1/4 teaspoon baking soda
- 1/4 teaspoon salt
- 1/2 cup unsalted butter, melted
- 1/2 cup brown sugar
- 1/4 cup molasses
- 1 large egg
- 1 teaspoon vanilla extract
- 3/4 cup white chocolate chips
Instructions:
- Preheat and Prepare the Pan: Preheat your oven to 350°F (175°C). Line an 8×8 inch baking pan with parchment paper or lightly grease it to prevent sticking.
- Mix Dry Ingredients: In a medium bowl, whisk together the flour, ground ginger, ground cinnamon, ground cloves, baking soda, and salt. This guarantees that the spices are evenly distributed throughout the batter.
- Combine Wet Ingredients: In a separate large bowl, combine the melted butter, brown sugar, and molasses. Whisk until the mixture is smooth. Add in the egg and vanilla extract, and continue whisking until everything is well combined.
- Mix Dry and Wet Ingredients: Gradually add the dry ingredients to the wet mixture, stirring with a spatula or wooden spoon until just combined. Be careful not to overmix, as this can result in tough blondies.
- Incorporate White Chocolate Chips: Gently fold in the white chocolate chips, making sure they’re evenly distributed throughout the batter.
- Bake: Pour the batter into the prepared baking pan, spreading it evenly with a spatula. Bake in the preheated oven for 25-30 minutes, or until a toothpick inserted into the center comes out clean or with a few moist crumbs.
- Cool and Serve: Allow the blondies to cool in the pan for about 10 minutes, then transfer them to a wire rack to cool completely. Once cooled, cut into squares and serve.
Extra Tips: For a more intense ginger flavor, consider adding a pinch of freshly grated ginger to the batter. If you prefer your blondies on the gooier side, slightly underbake them by a minute or two.
You can also customize this recipe by adding nuts, such as chopped pecans or walnuts, for extra crunch. Store any leftovers in an airtight container at room temperature for up to 3 days. Enjoy these blondies with a glass of milk or a cup of hot cocoa for a truly festive treat!
White Chocolate Eggnog Panna Cotta
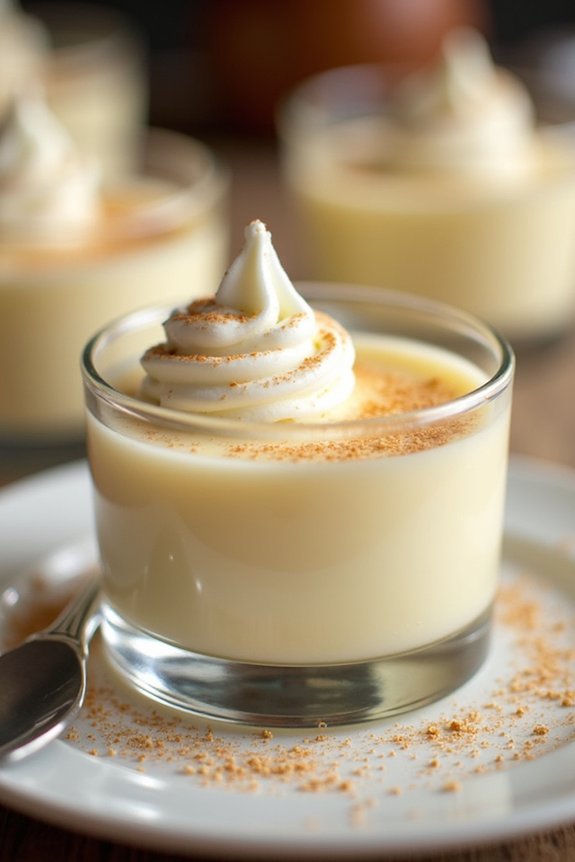
White Chocolate Eggnog Panna Cotta is an elegant and festive dessert that combines the rich flavors of white chocolate and the holiday classic, eggnog. This creamy and smooth Italian dessert is perfect for celebrating the Christmas season with family and friends.
The panna cotta is infused with warm spices like nutmeg and cinnamon, which complement the sweetness of the white chocolate and the subtle hints of rum in the eggnog. Served chilled, this dessert is a delightful way to end a holiday meal on a sweet note.
The preparation of White Chocolate Eggnog Panna Cotta is relatively simple, but it does require some time for the panna cotta to set in the refrigerator. The dessert can be prepared a day in advance, making it an ideal choice for holiday gatherings where you want to spend more time with your loved ones and less time in the kitchen.
Serve it in elegant glassware or small ramekins for a touch of sophistication, and consider garnishing with a dusting of nutmeg or a dollop of whipped cream for that extra festive flair.
Ingredients (Serves 4-6):
- 1 cup heavy cream
- 1 cup eggnog
- 3 oz white chocolate, chopped
- 1/4 cup granulated sugar
- 1 teaspoon vanilla extract
- 1/2 teaspoon ground nutmeg
- 1/4 teaspoon ground cinnamon
- 1 tablespoon unflavored gelatin
- 3 tablespoons cold water
- Optional garnish: whipped cream, ground nutmeg
Cooking Instructions:
- Prepare the Gelatin: In a small bowl, sprinkle the gelatin over the cold water and let it sit for about 5 minutes until it blooms, which means it will absorb the water and swell.
- Heat the Cream and Eggnog: In a medium saucepan, combine the heavy cream, eggnog, sugar, vanilla extract, ground nutmeg, and ground cinnamon. Heat the mixture over medium heat, stirring occasionally, until it just starts to simmer. Don’t let it boil.
- Melt the Chocolate: Remove the saucepan from heat and add the chopped white chocolate to the hot cream mixture. Stir gently until the chocolate is completely melted and the mixture is smooth.
- Add Gelatin: Add the bloomed gelatin to the warm cream mixture and stir until the gelatin is completely dissolved. Make sure there are no lumps.
- Strain and Pour: For a perfectly smooth panna cotta, strain the mixture through a fine-mesh sieve into a pouring jug to remove any undissolved pieces or bubbles. Pour the strained mixture evenly into 4-6 serving glasses or ramekins.
- Chill: Cover each glass or ramekin with plastic wrap and refrigerate for at least 4 hours, or until the panna cotta is set and has a slight jiggle.
- Serve: Once set, serve the panna cotta chilled. Optionally, top with a dollop of whipped cream and a sprinkle of ground nutmeg before serving.
Extra Tips:
When preparing White Chocolate Eggnog Panna Cotta, verify that the gelatin is fully dissolved in the warm cream mixture to avoid any graininess in the final product.
If you prefer a stronger eggnog flavor, you can adjust the amount of eggnog used, but remember to balance it with the cream to maintain the panna cotta’s creamy texture.
Also, be cautious when heating the cream and eggnog mixture; overheating might cause the cream to curdle, so keep the heat to medium and watch it closely.
This dessert can be made up to two days in advance, making it a convenient option for busy holiday celebrations.
White Chocolate Caramel Pretzel Bites
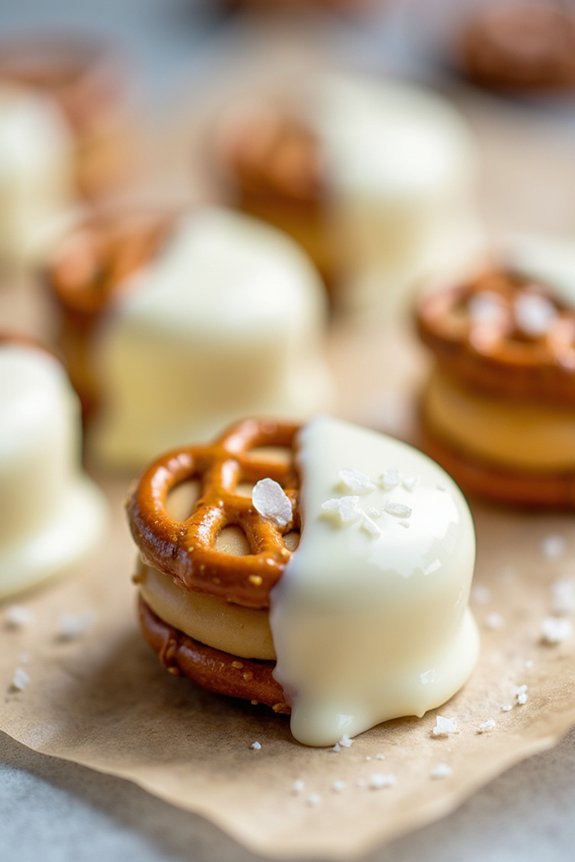
White Chocolate Caramel Pretzel Bites are a delightful treat that combines the sweet and salty flavors many of us crave during the festive season. This easy-to-make dessert is ideal for holiday gatherings, gift-giving, or simply enjoying as a sweet snack at home.
With the holidays around the corner, adding these bite-sized delights to your dessert table will surely impress your family and friends. The combination of white chocolate, smooth caramel, and crunchy pretzels creates a harmonious balance of textures and flavors that will leave everyone reaching for more.
To make these White Chocolate Caramel Pretzel Bites, you’ll only need a handful of ingredients and a little bit of time. The simplicity of this recipe makes it perfect for involving children in the kitchen or for preparing in advance of a busy holiday schedule.
The key is selecting quality ingredients to guarantee the best flavor, and the result is a delectable morsel that’s as pleasing to the eye as it’s to the palate. These bites are perfect for serving 4-6 people, making them a great option for smaller gatherings or as part of a larger dessert spread.
Ingredients (Serves 4-6):
- 24 mini pretzels
- 24 caramel candies
- 1 cup white chocolate chips
- 1 tablespoon vegetable oil
- Sea salt (optional, for garnish)
Cooking Instructions:
- Preheat and Prep: Preheat your oven to 350°F (175°C). Line a baking sheet with parchment paper to prevent sticking and make cleanup easier.
- Arrange Pretzels and Caramels: Place the mini pretzels in a single layer on the prepared baking sheet. Unwrap the caramel candies and place one on top of each pretzel.
- Melt the Caramels: Put the baking sheet in the preheated oven and bake for about 5-6 minutes, or until the caramels are soft but not completely melted. Keep a close eye to prevent the caramel from burning.
- Press and Cool: Remove the baking sheet from the oven and gently press another pretzel on top of each softened caramel to create a pretzel sandwich. Allow them to cool completely on the baking sheet.
- Melt White Chocolate: While the pretzels are cooling, melt the white chocolate chips with the vegetable oil in a microwave-safe bowl. Microwave in 20-second intervals, stirring between each, until the chocolate is smooth and completely melted.
- Dip and Decorate: Dip each pretzel sandwich halfway into the melted white chocolate and place them back onto the parchment-lined baking sheet. If desired, sprinkle a pinch of sea salt on the white chocolate before it sets for an added burst of flavor.
- Set the Chocolate: Let the white chocolate set completely at room temperature or speed up the process by placing the pretzel bites in the refrigerator for about 15-20 minutes.
Extra Tips:
When melting the white chocolate, make sure that no water comes into contact with it, as this can cause the chocolate to seize and become grainy. If you prefer a more uniform look, you can use a toothpick to help coat the pretzel sandwiches evenly in chocolate.
Additionally, feel free to experiment with different toppings such as crushed peppermint candies or festive sprinkles to add a personal touch to your White Chocolate Caramel Pretzel Bites. Enjoy these treats during the holiday season for a sweet and salty indulgence that everyone will love!
White Chocolate Coconut Snowballs
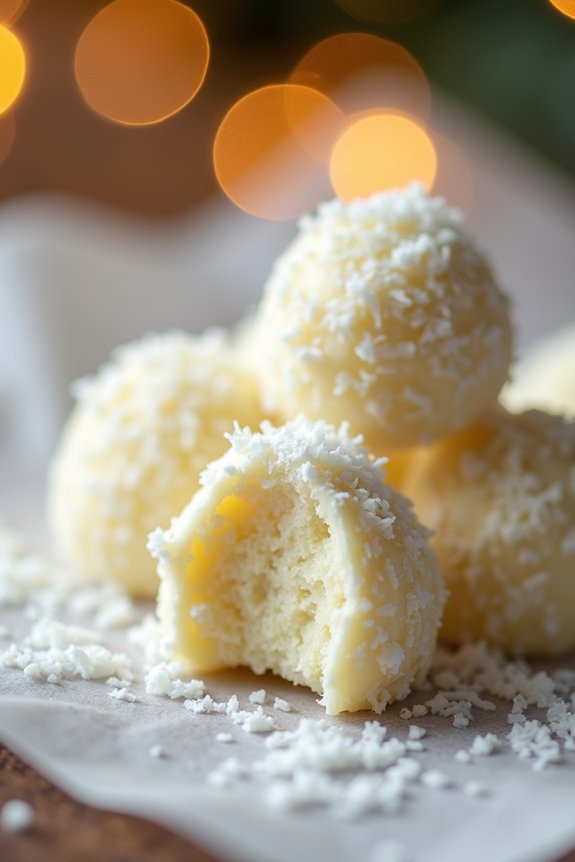
White Chocolate Coconut Snowballs are a delightful treat perfect for the festive season. These bite-sized desserts combine the creamy richness of white chocolate with the tropical flavor of coconut, making them a crowd-pleaser at any holiday gathering.
Their snowball-like appearance adds a whimsical touch to your Christmas dessert table, and they’re incredibly easy to make, requiring no baking. Whether you’re making them for a party or as a gift, these snowballs are sure to impress.
The White Chocolate Coconut Snowballs aren’t only delicious but also versatile. You can prepare them in advance and store them in the refrigerator, making them a convenient option for busy holiday schedules.
With a simple list of ingredients and straightforward instructions, anyone can whip up a batch of these delectable treats. This recipe serves 4-6 people, ensuring there’s enough to share with family and friends.
Ingredients:
- 2 cups shredded coconut
- 1 cup white chocolate chips
- 1/2 cup sweetened condensed milk
- 1 teaspoon vanilla extract
- A pinch of salt
- Additional shredded coconut for rolling
Instructions:
- Melt the Chocolate: In a microwave-safe bowl, melt the white chocolate chips in 30-second intervals, stirring in between, until completely smooth. Be careful not to overheat, as white chocolate can easily seize.
- Combine Ingredients: In a large mixing bowl, combine the melted white chocolate, shredded coconut, sweetened condensed milk, vanilla extract, and a pinch of salt. Stir the mixture until all ingredients are thoroughly combined and you achieve a sticky consistency.
- Form the Snowballs: Using your hands, scoop out small amounts of the mixture and roll them into 1-inch balls. If the mixture is too sticky to handle, you may refrigerate it for about 10 minutes to firm it up slightly.
- Coat with Coconut: Roll each ball in additional shredded coconut until fully coated. This will give the snowballs their signature appearance and add an extra layer of coconut flavor.
- Chill the Snowballs: Place the coated snowballs on a parchment-lined baking sheet and refrigerate for at least 1 hour. This will allow them to set and develop the perfect texture.
- Serve and Enjoy: Once chilled, serve the White Chocolate Coconut Snowballs on a festive plate and enjoy with friends and family.
Extra Tips:
To enhance the flavor of your White Chocolate Coconut Snowballs, consider toasting some of the shredded coconut before mixing it into the dough. This will add a subtle nutty flavor and a slight crunch to the snowballs.
Additionally, if you prefer a less sweet version, opt for unsweetened shredded coconut. For a festive touch, you can add a few drops of food coloring to the additional shredded coconut used for coating, creating colorful snowballs.
Store any leftovers in an airtight container in the refrigerator for up to a week.
White Chocolate Hazelnut Torte
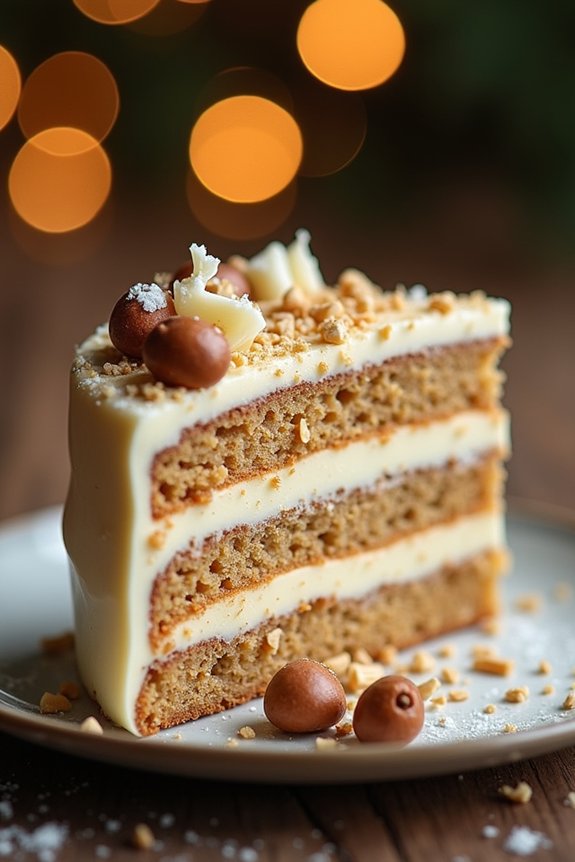
The White Chocolate Hazelnut Torte is a decadent and elegant dessert that perfectly complements the festive spirit of Christmas. This indulgent treat combines the creamy richness of white chocolate with the nutty flavor of hazelnuts, creating a luxurious dessert that will impress your family and friends.
The torte is layered with a smooth white chocolate ganache and enveloped in a delicate hazelnut-flavored sponge, making it an irresistible centerpiece for any holiday table. Ideal for serving 4-6 people, this torte isn’t only a treat for the taste buds but also a visual delight.
It captures the essence of the holiday season with its sophisticated flavors and beautiful presentation. Whether you’re hosting a festive gathering or simply indulging in a special treat at home, the White Chocolate Hazelnut Torte is certain to be a memorable addition to your Christmas celebrations.
Ingredients
- 200g white chocolate, chopped
- 150g hazelnuts, toasted and finely ground
- 150g all-purpose flour
- 150g unsalted butter, softened
- 150g granulated sugar
- 4 large eggs, separated
- 1 teaspoon vanilla extract
- 1 teaspoon baking powder
- 1/4 teaspoon salt
- 200ml heavy cream
- 50g powdered sugar
- Extra hazelnuts and white chocolate shavings for garnish (optional)
Cooking Instructions
- Preheat the Oven: Start by preheating your oven to 180°C (350°F). Grease and line a 9-inch round cake pan with parchment paper.
- Prepare the Hazelnut Sponge: In a large mixing bowl, cream the softened butter and granulated sugar together until light and fluffy. Add the egg yolks one at a time, beating well after each addition. Stir in the vanilla extract.
- Combine Dry Ingredients: In a separate bowl, mix the ground hazelnuts, all-purpose flour, baking powder, and salt. Gradually fold the dry mixture into the creamed butter mixture, making certain it’s well combined.
- Whip the Egg Whites: In another clean bowl, whisk the egg whites until stiff peaks form. Gently fold the whipped egg whites into the hazelnut batter, being careful not to deflate the mixture.
- Bake the Sponge: Pour the batter into the prepared cake pan and spread it evenly. Bake in the preheated oven for 25-30 minutes or until a toothpick inserted into the center comes out clean. Allow the cake to cool completely on a wire rack.
- Make the White Chocolate Ganache: In a heatproof bowl, melt the chopped white chocolate over a pot of simmering water, stirring occasionally. In a separate saucepan, heat the heavy cream until it just begins to simmer. Pour the hot cream over the melted white chocolate and stir until smooth and combined. Let it cool slightly until thickened but still pourable.
- Assemble the Torte: Once the sponge has cooled, slice it horizontally to create two layers. Place one layer on a serving plate and spread a generous amount of the white chocolate ganache on top. Place the second layer of sponge over the ganache and spread the remaining ganache over the top and sides of the torte.
- Garnish and Chill: Optionally, garnish with extra hazelnuts and white chocolate shavings. Refrigerate the torte for at least 2 hours to allow the ganache to set.
Extra Tips
When preparing the white chocolate ganache, confirm the chocolate is completely melted before combining it with the cream to achieve a smooth consistency. If the ganache appears too thin, let it cool for a few more minutes to thicken before spreading it on the torte.
Toasting the hazelnuts enhances their flavor, so don’t skip this step. Finally, confirm that the cake layers are completely cooled before assembling to prevent the ganache from melting. Enjoy your deliciously indulgent White Chocolate Hazelnut Torte!
White Chocolate Almond Biscotti
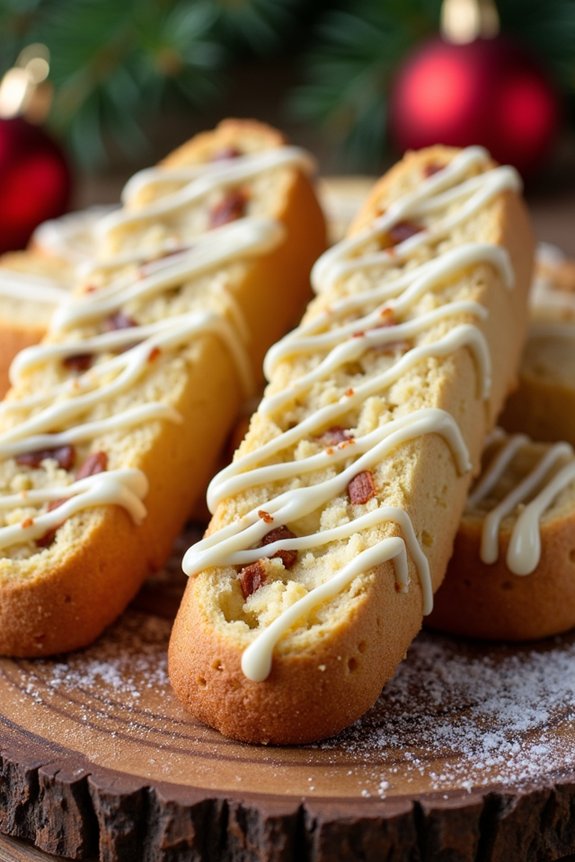
White Chocolate Almond Biscotti is a delightful festive treat that combines the rich, creamy flavor of white chocolate with the nutty, crunchy goodness of almonds. Perfect for the holiday season, these biscotti are ideal for enjoying with a cup of coffee or tea, or as a sweet finish to your Christmas meal.
The recipe creates a crispy, twice-baked cookie that’s both elegant and flavorful, making it a perfect addition to your holiday dessert table. This recipe yields enough biscotti to serve 4-6 people, guaranteeing everyone gets to enjoy a piece of this delightful confection.
The addition of white chocolate not only adds a touch of sweetness but also gives the biscotti a beautiful, snowy appearance that’s perfect for the Christmas season. Whether you’re an experienced baker or a novice in the kitchen, this recipe is straightforward and easy to follow, assuring a successful batch of biscotti every time.
Ingredients:
- 2 cups all-purpose flour
- 1 cup granulated sugar
- 1 teaspoon baking powder
- 1/2 teaspoon salt
- 3 large eggs
- 1 teaspoon vanilla extract
- 1 teaspoon almond extract
- 1 cup whole almonds, toasted
- 1 cup white chocolate chips or chunks
- Additional white chocolate for drizzling (optional)
Instructions:
- Preheat the Oven: Start by preheating your oven to 350°F (175°C). Line a large baking sheet with parchment paper to prevent the biscotti from sticking.
- Mix Dry Ingredients: In a large mixing bowl, combine the all-purpose flour, granulated sugar, baking powder, and salt. Mix these dry ingredients until they’re well combined.
- Prepare Wet Ingredients: In a separate bowl, whisk together the eggs, vanilla extract, and almond extract until the mixture is smooth and well blended.
- Combine Mixtures: Gradually add the wet ingredients to the dry ingredients, stirring until a dough begins to form. The dough should be slightly sticky.
- Add Almonds and Chocolate: Fold in the toasted almonds and white chocolate chips, making sure they’re evenly distributed throughout the dough.
- Shape the Dough: Divide the dough in half and shape each portion into a log approximately 12 inches long and 2 inches wide. Place the logs on the prepared baking sheet.
- First Bake: Bake the logs in the preheated oven for 25-30 minutes, or until they’re golden brown and firm to the touch.
- Cool and Slice: Remove from the oven and allow the logs to cool for about 10 minutes. Using a sharp serrated knife, slice each log diagonally into 1/2-inch thick slices.
- Second Bake: Arrange the slices cut side down on the baking sheet. Bake again for an additional 10-12 minutes, turning them halfway through, until they’re crisp and golden.
- Cool Completely: Remove the biscotti from the oven and let them cool completely on a wire rack. If desired, drizzle with additional melted white chocolate for extra sweetness.
Extra Tips:
Toasting the almonds before adding them to the dough enhances their flavor, giving the biscotti a deeper, nuttier taste. Be sure to cool the biscotti completely before drizzling with melted white chocolate to ensure the chocolate sets properly.
If you prefer a softer biscotti, reduce the second bake time slightly. Store the biscotti in an airtight container to maintain their crispness, and enjoy them within a week for the best flavor.
White Chocolate Cherry Bread Pudding
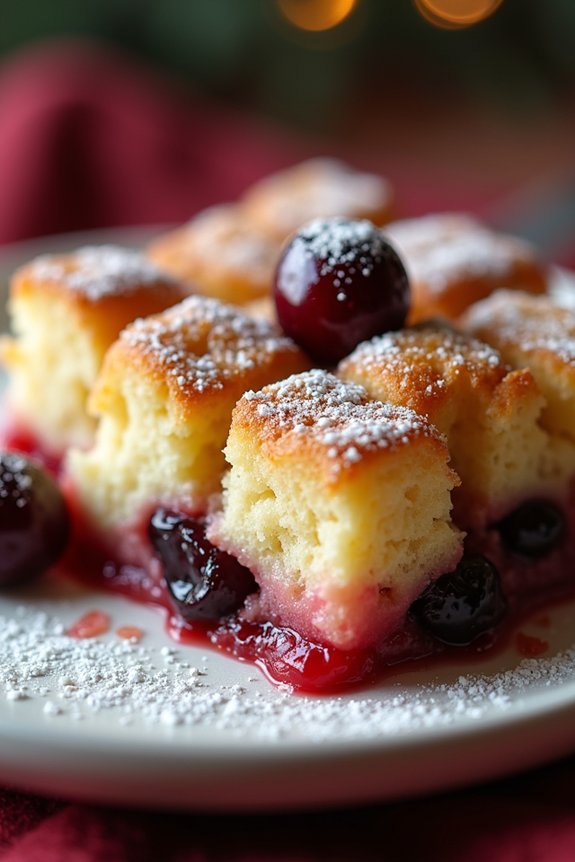
White Chocolate Cherry Bread Pudding is a delightful dessert that combines the creamy richness of white chocolate with the tartness of cherries, all nestled in a comforting bread pudding. This festive dish is perfect for any holiday gathering, offering a luxurious twist on a classic favorite.
The sweetness of the white chocolate complements the tangy cherries beautifully, while the bread pudding itself provides a soft, melt-in-your-mouth texture that’s perfect for a cold winter’s night.
This recipe serves 4-6 people, making it ideal for an intimate family dinner or a small holiday celebration. The preparation is straightforward, yet the results are bound to impress your guests with its elegant appearance and exquisite taste. Whether served warm or at room temperature, this dessert is sure to be a hit at your next Christmas event.
Ingredients:
- 6 cups of cubed day-old bread (such as brioche or challah)
- 1 cup of whole milk
- 1 cup of heavy cream
- 1 cup of white chocolate chips
- 1/2 cup of granulated sugar
- 3 large eggs
- 1 teaspoon of vanilla extract
- 1/2 teaspoon of almond extract
- 1/2 cup of dried cherries
- 1 tablespoon of unsalted butter (for greasing)
- Powdered sugar (for dusting, optional)
Instructions:
- Prepare the Baking Dish: Preheat your oven to 350°F (175°C). Butter a 9×9-inch baking dish generously to prevent the pudding from sticking.
- Cube the Bread: Cut the day-old bread into 1-inch cubes and spread them evenly in the prepared baking dish. This will guarantee they soak up the custard mixture evenly.
- Make the Custard: In a medium saucepan, combine the milk, cream, and white chocolate chips. Heat the mixture over medium-low heat, stirring constantly, until the white chocolate is completely melted and the mixture is smooth. Remove from heat and set aside to cool slightly.
- Mix the Eggs and Sugar: In a large mixing bowl, whisk together the granulated sugar, eggs, vanilla extract, and almond extract until well combined.
- Combine Custard and Eggs: Slowly pour the slightly cooled white chocolate mixture into the egg mixture, whisking constantly to avoid cooking the eggs. This will create a smooth custard base.
- Assemble the Pudding: Pour the custard mixture evenly over the bread cubes in the baking dish. Scatter the dried cherries over the top, gently pressing them into the bread to guarantee they’re evenly distributed.
- Bake: Place the baking dish in the preheated oven and bake for 40-45 minutes, or until the custard is set and the top is golden brown. A knife inserted into the center should come out clean.
- Rest and Serve: Allow the bread pudding to cool for at least 10 minutes before serving. Dust with powdered sugar if desired, and serve warm.
Extra Tips:
To guarantee the best texture, use day-old bread, as it absorbs the custard better without becoming too soggy. If you don’t have stale bread, you can lightly toast fresh bread cubes in the oven before starting.
For added flavor, consider adding a pinch of cinnamon or nutmeg to the custard mixture. If you prefer a more decadent version, drizzle some melted white chocolate over the top before serving.
This dessert can also be prepared a day ahead and reheated before serving, making it a convenient option for busy holiday schedules.
White Chocolate Meringue Nests

Creating these nests involves a delicate balance of whipping egg whites to the perfect stiffness and gently folding in sugar to achieve a smooth, glossy meringue. Once baked to a crisp, the nests are filled with a decadent white chocolate mousse or ganache, offering a rich contrast to the light meringue. This recipe will guide you through making White Chocolate Meringue Nests that serve 4-6 people, guaranteeing each guest can enjoy the delicate flavors and textures of this enchanting dessert.
Ingredients for White Chocolate Meringue Nests (Serves 4-6):
- 4 large egg whites
- 1 cup granulated sugar
- 1 teaspoon vanilla extract
- 1 teaspoon white vinegar
- 1 teaspoon cornstarch
- 1 cup white chocolate chips
- 1/2 cup heavy cream
- Fresh berries or mint leaves for garnish (optional)
Cooking Instructions:
- Preheat and Prepare: Preheat your oven to 250°F (120°C). Line a baking sheet with parchment paper to prevent the meringue from sticking.
- Whip the Egg Whites: In a clean, dry mixing bowl, whisk the egg whites on medium speed until soft peaks form. This should take about 3-5 minutes. Make sure no yolks are present as they can prevent proper whipping.
- Add Sugar Gradually: Gradually add the granulated sugar, a tablespoon at a time, while continuing to whisk. Increase the speed to high and beat until the mixture is glossy and forms stiff peaks.
- Incorporate Vanilla, Vinegar, and Cornstarch: Gently fold in the vanilla extract, white vinegar, and cornstarch using a spatula. This will help stabilize and add structure to the meringue.
- Shape the Nests: Spoon the meringue onto the prepared baking sheet, forming 4-6 individual mounds. Use the back of a spoon to create a well in the center of each mound to form nest shapes.
- Bake: Place the baking sheet in the preheated oven and bake for 1-1.5 hours until the meringues are dry to the touch and easily lift off the parchment. Turn off the oven and leave the meringues inside to cool completely.
- Prepare White Chocolate Filling: While the meringues cool, melt the white chocolate chips with heavy cream over a double boiler or in short bursts in the microwave, stirring until smooth. Allow to cool slightly.
- Assemble: Once the meringues are cool, spoon or pipe the white chocolate filling into the center of each meringue nest.
- Garnish and Serve: Top with fresh berries or mint leaves if desired. Serve immediately or store in an airtight container until ready to serve.
Extra Tips:
To guarantee your egg whites whip to their full volume, use room temperature eggs and ensure your mixing bowl and beaters are completely free of grease. For a more stable meringue, you can add a pinch of salt at the beginning of whipping.
When baking, avoid opening the oven door frequently as this can cause the meringues to collapse. If you prefer a different flavor, consider adding a drop of almond or lemon extract in place of vanilla.