

As the holiday season approaches, it’s time to start thinking about those special treats that make Christmas even more magical.
Gluten-free desserts can be just as delicious and festive as their traditional counterparts.
From a rich Flourless Chocolate Yule Log to the delightful crunch of Almond Flour Sugar Cookies, there’s something here for everyone.
Don’t forget the beautiful Pavlova topped with colorful mixed berries, a true showstopper.
These recipes will ensure that everyone can enjoy a sweet holiday celebration.
Flourless Chocolate Yule Log
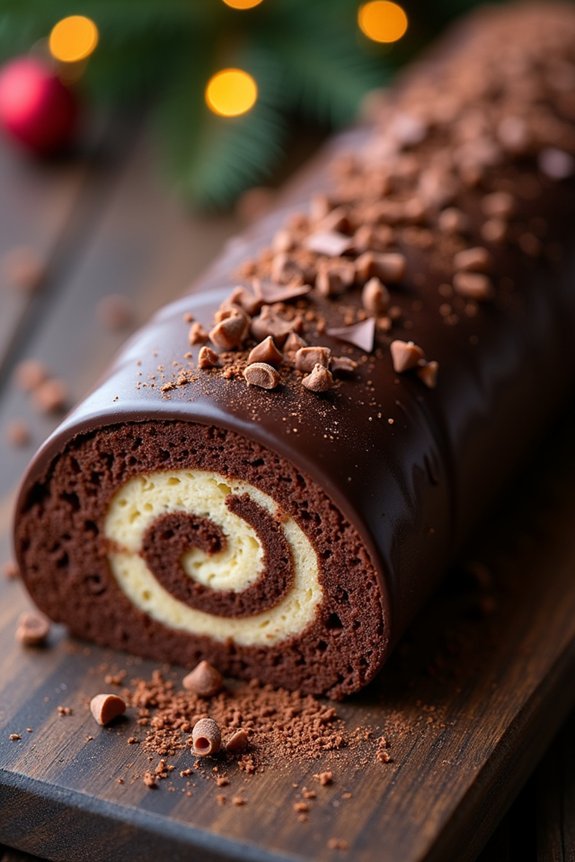
Indulge in the festive spirit with a decadent Flourless Chocolate Yule Log, a gluten-free delight that will add a touch of elegance to your holiday dessert table. This classic French dessert, also known as “Bûche de Noël,” combines the richness of chocolate with a light, airy texture that melts in your mouth. Perfect for those avoiding gluten, this recipe uses a combination of high-quality cocoa and eggs to create a sponge-like cake that’s rolled with a luscious chocolate filling, ensuring every bite is a celebration of flavor and festivity.
Creating a Flourless Chocolate Yule Log may sound challenging, but with a bit of patience and precision, it’s a rewarding experience. The key is in the technique: preparing a light and fluffy cake roll without flour, and then filling it with a rich, creamy chocolate ganache. Once rolled and chilled, the log is covered with a smooth layer of chocolate glaze or ganache, and decorated to resemble a festive yule log. This recipe serves 4-6 people, making it perfect for an intimate holiday gathering.
Ingredients:
- 6 large eggs, separated
- 1 cup granulated sugar, divided
- 1/2 cup unsweetened cocoa powder
- 1 teaspoon vanilla extract
- 1/4 teaspoon salt
- 1 cup heavy cream
- 8 ounces semisweet chocolate, chopped
- 2 tablespoons butter
- 1 tablespoon powdered sugar (for dusting)
- Optional: chocolate shavings or festive decorations
Cooking Instructions:
- Preheat and Prepare: Preheat your oven to 350°F (175°C). Line a 10×15-inch jelly roll pan with parchment paper, ensuring the paper extends over the edges for easy removal later.
- Beat Egg Yolks: In a large mixing bowl, beat the egg yolks with 1/2 cup of the granulated sugar until the mixture is thick and pale, about 3-5 minutes. Add in the cocoa powder and vanilla extract, mixing until combined.
- Beat Egg Whites: In a separate bowl, with clean beaters, beat the egg whites and salt until soft peaks form. Gradually add the remaining 1/2 cup of granulated sugar, beating until stiff peaks form.
- Fold and Combine: Gently fold one-third of the egg whites into the yolk mixture to lighten it. Carefully fold in the remaining egg whites until no streaks remain. Be gentle to maintain the air in the batter.
- Bake the Cake: Spread the batter evenly in the prepared pan. Bake for 15-18 minutes, or until the cake springs back when lightly touched. Avoid overbaking as this will make rolling difficult.
- Prepare Rolling Surface: While the cake is baking, lay a clean kitchen towel on the counter and dust it with the powdered sugar. Once the cake is done, immediately turn it out onto the sugared towel. Carefully peel off the parchment paper.
- Roll the Cake: Starting from the short end, gently roll up the cake with the towel inside. Let it cool completely while rolled, about 1 hour.
- Make Chocolate Filling: In a saucepan, heat the heavy cream until it just starts to simmer. Remove from heat and add the chopped semisweet chocolate and butter. Stir until smooth and let it cool until spreadable.
- Fill the Cake: Gently unroll the cooled cake, spread the chocolate filling evenly over the surface, then re-roll the cake without the towel.
- Chill and Decorate: Place the rolled cake seam-side down on a serving platter. Chill in the refrigerator for at least 1 hour. Before serving, you can cover with chocolate glaze or additional ganache and decorate with chocolate shavings or festive décor.
Extra Tips:
For the best results, use room temperature eggs, as they whip to a greater volume. Be cautious when folding the egg whites into the yolk mixture to prevent deflating the batter.
When rolling the cake, do so gently to avoid cracking, although small cracks can be hidden under the topping. For an added touch, consider flavoring the filling with a splash of coffee or liqueur.
Finally, plan ahead, as this dessert benefits from time to chill and set, making it a perfect make-ahead option for your holiday feast.
Almond Flour Sugar Cookies
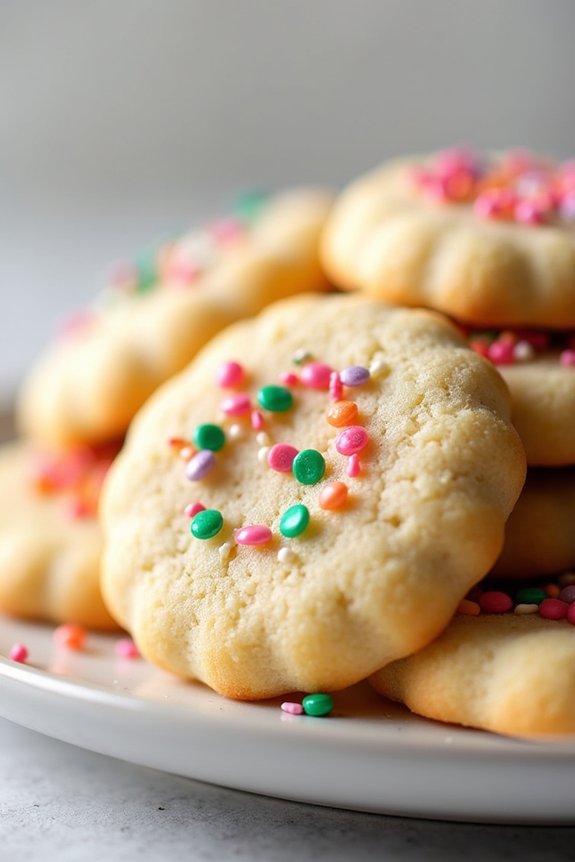
Looking for a delightful gluten-free treat to add to your Christmas dessert table? Almond Flour Sugar Cookies are a perfect choice! These cookies deliver the same sweet taste and satisfying crunch as traditional sugar cookies but cater to those avoiding gluten. With a rich almond flavor and a buttery texture, they’re bound to be a hit among your holiday guests.
Plus, they’re incredibly versatile—you can decorate them with festive icing or sprinkles to suit the holiday spirit.
These Almond Flour Sugar Cookies are simple to make and require only a few ingredients. Whether you’re an experienced baker or a novice, you’ll find this recipe straightforward and rewarding. The use of almond flour not only makes these cookies gluten-free but also adds a unique flavor and texture that pairs beautifully with holiday spices or classic vanilla.
Perfect for serving 4-6 people, these cookies are sure to become a family favorite.
Ingredients:
- 2 cups almond flour
- 1/4 cup coconut flour
- 1/2 cup unsalted butter, softened
- 1/2 cup granulated sugar
- 1 large egg
- 1 teaspoon vanilla extract
- 1/2 teaspoon baking powder
- 1/4 teaspoon salt
Instructions:
- Preheat the Oven: Start by preheating your oven to 350°F (175°C). This guarantees that your cookies will bake evenly and have the right texture.
- Mix the Dry Ingredients: In a medium-sized bowl, combine the almond flour, coconut flour, baking powder, and salt. Stir them together until they’re well mixed. This step helps to evenly distribute the leavening agent and salt throughout the dry ingredients.
- Cream the Butter and Sugar: In a separate large bowl, cream together the softened butter and granulated sugar until light and fluffy. This should take about 2-3 minutes using an electric mixer. Creaming the butter and sugar creates a smooth base for the cookies.
- Add the Wet Ingredients: Beat in the egg and vanilla extract into the butter and sugar mixture. Mix until everything is fully incorporated and the mixture is smooth.
- Combine the Mixtures: Gradually add the dry ingredients to the wet ingredients, mixing until a dough forms. Be careful not to overmix, as this can affect the texture of the cookies.
- Shape the Cookies: Scoop small amounts of dough and roll them into balls. Place them onto a baking sheet lined with parchment paper, leaving about 2 inches of space between each cookie. Flatten them slightly with your fingers or the back of a spoon to create an even surface.
- Bake: Place the baking sheet in the preheated oven and bake for 10-12 minutes, or until the edges are lightly golden. Be careful not to overbake, as almond flour cookies can brown quickly.
- Cool and Decorate: Once baked, remove the cookies from the oven and let them cool on the baking sheet for 5 minutes before transferring them to a wire rack to cool completely. Once cool, decorate as desired with icing or sprinkles.
Extra Tips:
For the best results, make sure your butter is at room temperature to facilitate it creaming well with the sugar. If you’re planning to decorate the cookies, you can prepare a simple icing by mixing powdered sugar with a little water or milk, and food coloring if desired.
These cookies can also be stored in an airtight container for up to a week, making them a perfect make-ahead option for your holiday gatherings. Additionally, if you want to experiment with flavors, try adding a pinch of cinnamon or nutmeg to the dough for a warm, spiced twist.
Gluten-Free Gingerbread Men
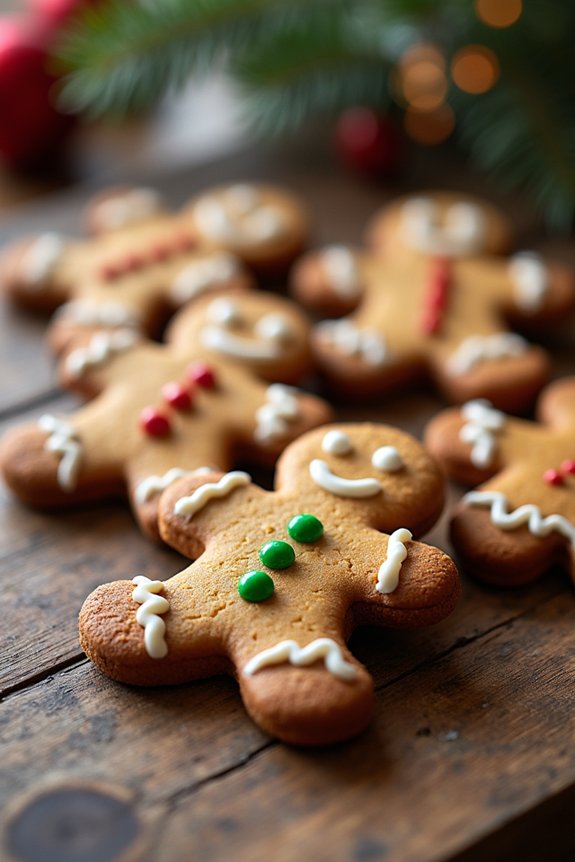
Celebrate the festive season with a delightful batch of Gluten-Free Gingerbread Men. This classic holiday treat is reimagined to suit those who are gluten intolerant, offering the same comforting spices and sweetness without compromising on flavor or texture. Perfect for sharing with friends and family, these gingerbread men are sure to bring joy to your holiday gatherings. The rich aroma of ginger, cinnamon, and cloves will fill your kitchen, making it feel like a winter wonderland.
These cookies aren’t only delicious but also fun to make, especially if you involve little ones in the decorating process. By using gluten-free flour, we guarantee that everyone can enjoy these adorable treats. Whether you’re baking them for a holiday party or as a cozy evening snack, these gingerbread men will surely be a hit. With a few simple ingredients and steps, you can create a batch of these delightful cookies that serve 4-6 people.
Ingredients:
- 2 cups gluten-free all-purpose flour
- 1 teaspoon baking soda
- 1/2 teaspoon xanthan gum
- 1 teaspoon ground ginger
- 1 teaspoon ground cinnamon
- 1/2 teaspoon ground cloves
- 1/4 teaspoon salt
- 1/2 cup unsalted butter, softened
- 1/2 cup packed brown sugar
- 1/3 cup molasses
- 1 large egg
- 1 teaspoon vanilla extract
Instructions:
- Prepare the Dry Ingredients: In a medium-sized bowl, whisk together the gluten-free all-purpose flour, baking soda, xanthan gum, ground ginger, ground cinnamon, ground cloves, and salt. Set aside.
- Mix the Wet Ingredients: In a large mixing bowl, cream the softened butter and brown sugar together until light and fluffy. Add the molasses, egg, and vanilla extract, and beat until well combined.
- Combine Wet and Dry Ingredients: Gradually add the dry ingredient mixture to the wet ingredients, mixing until a soft dough forms. Make sure everything is well incorporated.
- Chill the Dough: Divide the dough in half and wrap each half in plastic wrap. Chill in the refrigerator for at least 1 hour, or until firm. This is vital for rolling out the dough more easily.
- Preheat the Oven: Preheat your oven to 350°F (175°C). Line two baking sheets with parchment paper or silicone baking mats.
- Roll Out the Dough: On a lightly floured surface (using gluten-free flour), roll out one portion of the dough to about 1/4-inch thickness. Use gingerbread man cookie cutters to cut out shapes and place them on the prepared baking sheets.
- Bake the Cookies: Bake in the preheated oven for 8-10 minutes, or until the edges are just beginning to brown. Allow the cookies to cool on the baking sheets for 5 minutes before transferring them to wire racks to cool completely.
- Decorate: Once the cookies are completely cool, decorate them with icing, candies, or other gluten-free toppings as desired.
Extra Tips:
When making Gluten-Free Gingerbread Men, be mindful of the consistency of your dough. If it’s too sticky, add a bit more gluten-free flour, a tablespoon at a time, until you reach the desired texture.
Chilling the dough is essential to prevent sticking and to confirm that the cookies hold their shape during baking. For decorating, royal icing made with egg whites or meringue powder works well, and you can add natural food coloring to make them more festive.
Finally, be sure to store any leftover cookies in an airtight container to keep them fresh. Enjoy your holiday baking!
Coconut Macaroons With Chocolate Drizzle
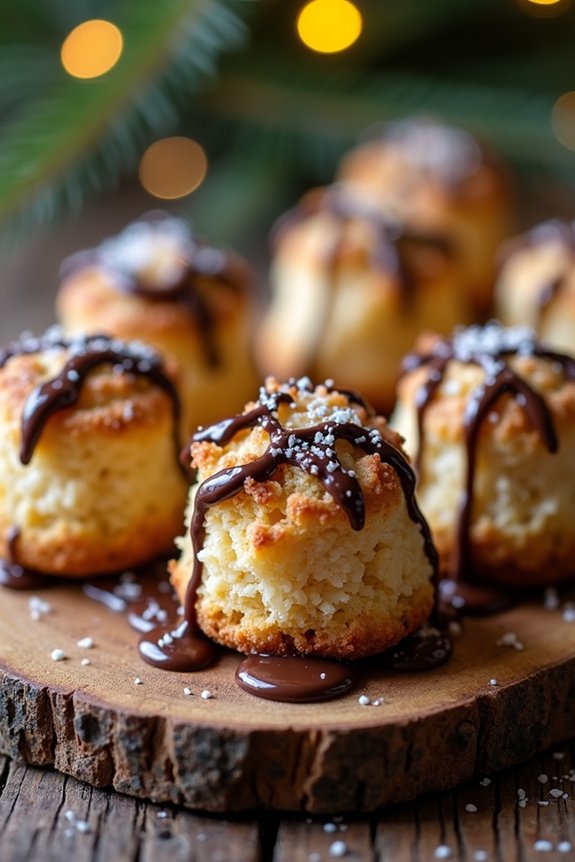
Coconut Macaroons With Chocolate Drizzle are a delightful treat that combines the chewy texture of sweetened coconut with the rich flavor of chocolate. Perfect for the holiday season, these gluten-free desserts offer an indulgent experience without the worry of gluten sensitivities.
Whether you’re hosting a Christmas party or simply enjoying a cozy night in, these macaroons will satisfy your sweet tooth and impress your guests with their elegant appearance and delightful taste.
This recipe is straightforward and requires minimal ingredients, making it an excellent choice for both novice bakers and experienced chefs. The key to the perfect macaroon is achieving the right balance of sweetness and moisture, which is beautifully complemented by a generous drizzle of dark chocolate.
Follow the instructions carefully, and you’ll be rewarded with a batch of macaroons that are crisp on the outside and soft on the inside, with a luscious chocolate finish.
Ingredients (Serves 4-6):
- 3 cups sweetened shredded coconut
- 4 large egg whites
- 1/2 cup granulated sugar
- 1 teaspoon vanilla extract
- 1/4 teaspoon salt
- 4 ounces dark chocolate, chopped
Instructions:
- Preheat the Oven: Begin by preheating your oven to 325°F (160°C). Line a baking sheet with parchment paper or a silicone baking mat to prevent the macaroons from sticking.
- Mix the Ingredients: In a large mixing bowl, combine the sweetened shredded coconut, egg whites, granulated sugar, vanilla extract, and salt. Stir the mixture until it’s well combined and the coconut is fully coated with the egg whites.
- Shape the Macaroons: Using a tablespoon or a small ice cream scoop, drop heaping spoonfuls of the coconut mixture onto the prepared baking sheet. Space them about 1 inch apart to allow for slight spreading during baking.
- Bake: Place the baking sheet in the preheated oven and bake for 18-20 minutes, or until the macaroons are golden brown around the edges. Keep a close eye on them to prevent over-browning.
- Cool: Once baked, remove the macaroons from the oven and let them cool on the baking sheet for about 5 minutes. Then transfer them to a wire rack to cool completely.
- Prepare the Chocolate Drizzle: While the macaroons are cooling, melt the dark chocolate in a heatproof bowl set over a pot of simmering water, or in short bursts in the microwave, stirring until smooth.
- Drizzle the Chocolate: Once the macaroons are completely cooled, use a spoon or a piping bag to drizzle the melted chocolate over the top of each macaroon. Allow the chocolate to set by leaving them at room temperature or placing them briefly in the refrigerator.
Extra Tips:
For the best results, verify that the egg whites are at room temperature before mixing them with the other ingredients, as this helps them blend more smoothly.
If you want to take your macaroons to the next level, consider adding a pinch of cinnamon or a drop of almond extract for a different flavor profile.
When melting the chocolate, be careful not to overheat it, as this can cause it to seize and become grainy. If you find the coconut mixture too sticky to manage, wet your hands slightly to make shaping the macaroons easier.
Enjoy your Coconut Macaroons With Chocolate Drizzle as part of your festive gluten-free dessert spread!
Gluten-Free Fruitcake
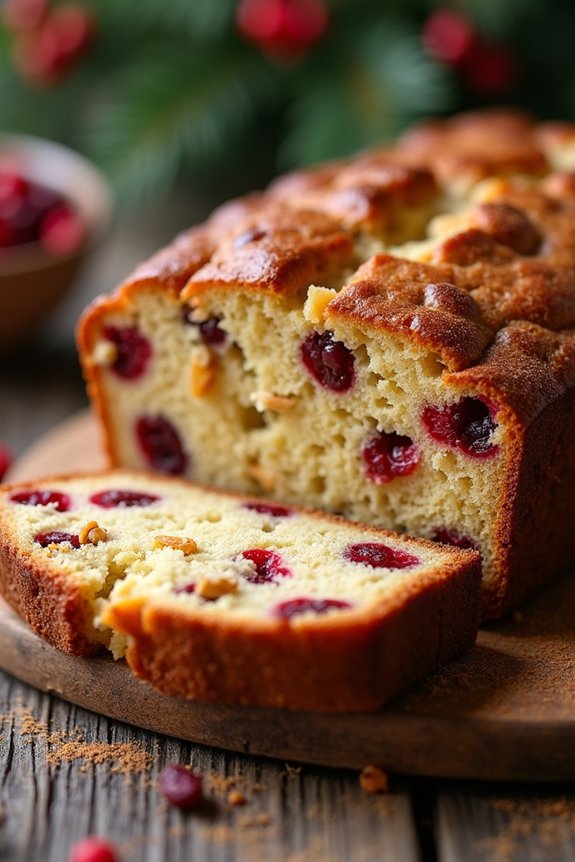
Celebrate the festive season with a delightful twist on a traditional favorite – the Gluten-Free Fruitcake. This scrumptious dessert is perfect for those who want to enjoy a classic holiday treat without worrying about gluten. Packed with a medley of dried fruits and nuts, this fruitcake is moist, flavorful, and guaranteed to be a hit at your Christmas gatherings.
It’s not only gluten-free but also rich in warm spices that evoke the spirit of the holiday season. This Gluten-Free Fruitcake is ideal for serving 4-6 people, making it perfect for intimate family dinners or small holiday parties.
Whether you’re catering to dietary restrictions or simply looking to try something new, this recipe is both simple to make and delicious to eat. With the right ingredients and a little bit of time, you can create a festive masterpiece that will leave everyone asking for seconds.
Ingredients:
- 1 cup mixed dried fruits (such as raisins, cranberries, and apricots)
- 1/2 cup chopped nuts (such as walnuts or pecans)
- 1/4 cup orange juice
- 1/4 cup unsweetened applesauce
- 1/4 cup honey or maple syrup
- 2 large eggs
- 1 teaspoon vanilla extract
- 1/4 cup melted coconut oil or unsalted butter
- 1 cup gluten-free all-purpose flour blend
- 1/2 teaspoon baking powder
- 1/2 teaspoon baking soda
- 1 teaspoon ground cinnamon
- 1/2 teaspoon ground nutmeg
- 1/4 teaspoon ground cloves
- A pinch of salt
Instructions:
- Preheat and Prepare Ingredients: Preheat your oven to 325°F (160°C). Grease a 9×5 inch loaf pan or line it with parchment paper for easier removal.
- Soak the Fruits: In a medium bowl, combine the mixed dried fruits and orange juice. Let them soak for at least 15 minutes to plump up the fruits and infuse them with flavor.
- Mix Wet Ingredients: In a large mixing bowl, whisk together the applesauce, honey (or maple syrup), eggs, vanilla extract, and melted coconut oil (or butter) until well combined.
- Combine Dry Ingredients: In a separate bowl, mix the gluten-free flour blend, baking powder, baking soda, cinnamon, nutmeg, cloves, and salt. Stir to guarantee all the spices are evenly distributed.
- Mix Everything Together: Gradually add the dry ingredients to the wet ingredients, stirring gently until just combined. Be careful not to overmix. Fold in the soaked fruits (along with any remaining juice) and chopped nuts.
- Bake the Cake: Pour the batter into the prepared loaf pan, smoothing the top with a spatula. Bake in the preheated oven for about 50-60 minutes or until a toothpick inserted into the center comes out clean.
- Cool and Serve: Allow the fruitcake to cool in the pan for about 10 minutes, then transfer it to a wire rack to cool completely. Slice and serve, or wrap it up as a thoughtful homemade gift.
Extra Tips:
When making this Gluten-Free Fruitcake, feel free to customize the dried fruits and nuts to suit your personal taste or to use what you have on hand.
Confirm that all your ingredients, especially the baking powder and flour, are labeled gluten-free to avoid any cross-contamination. If you prefer a more traditional fruitcake texture, consider making it a day or two ahead of time; the flavors will deepen and improve with a little aging.
Store any leftovers in an airtight container to maintain moisture and freshness.
Pavlova With Mixed Berries
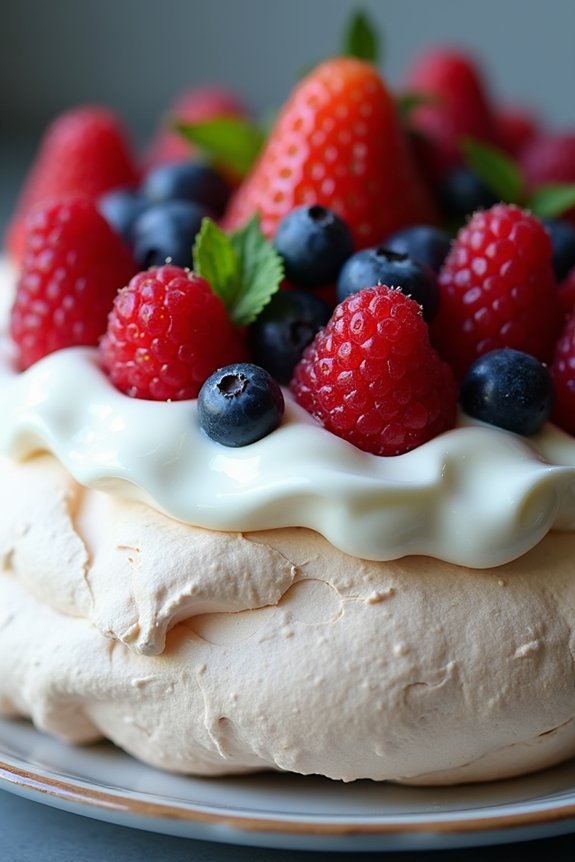
Pavlova, a meringue-based dessert named after the Russian ballerina Anna Pavlova, is a delightful treat that’s naturally gluten-free and perfect for any holiday gathering. With its crisp crust and soft, light inside, this dessert is a favorite among those who enjoy a balance of textures. Topped with a medley of fresh berries, this dish not only looks stunning but also provides a burst of tartness and sweetness that complements the meringue beautifully.
The key to a successful pavlova is achieving the perfect meringue; crisp on the outside and marshmallow-soft on the inside. It’s important to verify that all your tools are free of grease, as even a small amount can prevent the egg whites from whipping up properly. This recipe serves 4-6 people, making it ideal for a small family gathering or an intimate holiday celebration with friends.
Ingredients (Serves 4-6):
- 4 large egg whites
- 1 cup granulated sugar
- 1 teaspoon white vinegar
- 1 teaspoon vanilla extract
- 1 tablespoon cornstarch
- 1 cup heavy cream
- 2 tablespoons powdered sugar
- 1 cup mixed fresh berries (strawberries, blueberries, raspberries, etc.)
- Fresh mint leaves for garnish (optional)
Cooking Instructions:
- Preheat the Oven: Preheat your oven to 300°F (150°C). Line a baking sheet with parchment paper and draw an 8-inch circle on the paper as a guide for your pavlova.
- Prepare the Meringue: In a clean, dry bowl, whisk the egg whites at medium speed until soft peaks form. Gradually add the granulated sugar, one tablespoon at a time, continuing to beat until the mixture is glossy and stiff peaks form.
- Add Stabilizers: Gently fold in the vinegar, vanilla extract, and cornstarch using a spatula. These ingredients will help stabilize the meringue and create the ideal texture.
- Shape the Pavlova: Spoon the meringue onto the prepared baking sheet, using the circle as a guide. Shape it into a round with slightly raised edges to hold the toppings.
- Bake: Reduce the oven temperature to 250°F (120°C) and bake the pavlova for approximately 1 hour and 15 minutes. The pavlova should be pale and dry on the outside. Turn off the oven and let the pavlova cool completely inside the oven with the door slightly ajar.
- Whip the Cream: In a chilled bowl, whip the heavy cream with powdered sugar until soft peaks form. This will be the luscious topping for your pavlova.
- Assemble the Pavlova: Once the pavlova is cool, gently place it on a serving platter. Dollop the whipped cream on top, spreading it out evenly. Scatter the mixed berries over the cream, and garnish with fresh mint leaves if desired.
Extra Tips:
When making pavlova, it’s crucial to avoid making it on a humid day, as moisture can prevent the meringue from forming a crisp crust. If you find that your meringue isn’t stiffening, verify that your bowl and whisk are completely clean and free of any fat or yolk.
Additionally, when cooling the pavlova, don’t rush the process; allowing it to cool slowly in the oven helps prevent cracking. Enjoy your pavlova the same day it’s made for the best texture, as storing it can cause it to become soggy.
Chocolate-Dipped Meringue Trees
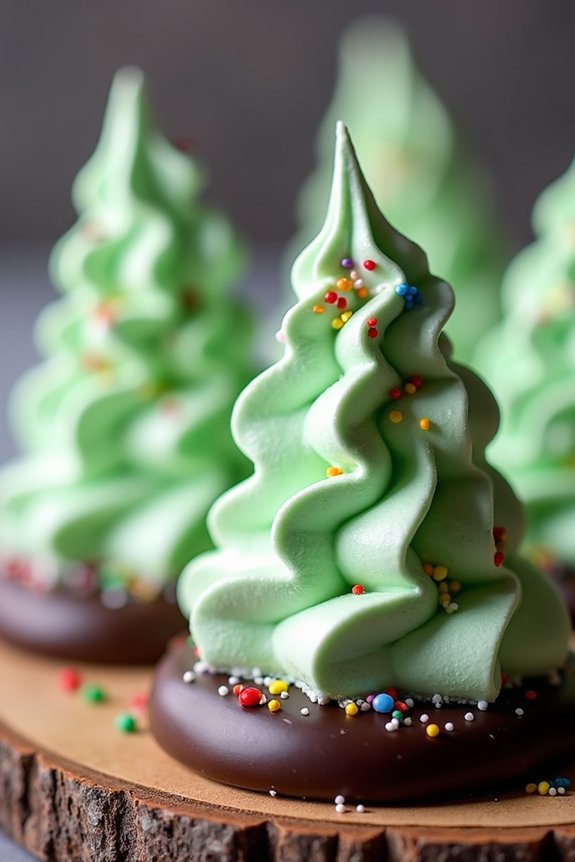
Celebrate the festive season with these delightful Chocolate-Dipped Meringue Trees, a treat that’s both visually enchanting and deliciously sweet.
These light and airy meringues are shaped into whimsical tree forms and dipped in rich, dark chocolate, making them a perfect gluten-free dessert option for your Christmas table. The crisp exterior and soft, melt-in-your-mouth interior of the meringues pair perfectly with the smooth, slightly bitter chocolate, creating a treat that’s sure to be a holiday favorite.
These meringue trees aren’t only a joy to eat but also a fun project to make with family or friends. Suitable for serving 4-6 people, they’re a charming addition to any holiday gathering. Whether you’re looking to impress guests with your culinary creativity or simply want to enjoy a guilt-free dessert, these Chocolate-Dipped Meringue Trees are sure to do the trick.
Ingredients for 4-6 Servings:
- 4 large egg whites
- 1 cup granulated sugar
- 1/2 teaspoon cream of tartar
- 1 teaspoon vanilla extract
- 1/4 teaspoon green gel food coloring
- 8 ounces dark chocolate, chopped
- Sprinkles or edible decorations for garnish
Instructions:
- Prepare the Meringue:
- Preheat your oven to 200°F (93°C) and line two baking sheets with parchment paper.
- In a clean, dry mixing bowl, combine the egg whites and cream of tartar. Using an electric mixer, beat the mixture on medium speed until soft peaks form.
- Gradually add the granulated sugar, one tablespoon at a time, while continuing to beat the mixture. Increase the speed to high and beat until the meringue is glossy and forms stiff peaks.
- Add the vanilla extract and green gel food coloring, and gently fold them into the meringue until the color is evenly distributed.
- Shape the Trees:
- Transfer the meringue to a piping bag fitted with a star tip. Pipe small tree shapes onto the prepared baking sheets, spacing them about 1 inch apart.
- Bake for 1.5 to 2 hours, or until the meringues are dry to the touch and can easily be lifted off the parchment paper. Turn off the oven and let the meringues cool completely inside with the door slightly ajar.
- Dip in Chocolate:
- Once the meringues are cool, melt the dark chocolate in a microwave-safe bowl in 30-second intervals, stirring in between, until completely smooth.
- Dip the base of each meringue tree into the melted chocolate, allowing any excess to drip off. Place them back on the parchment-lined baking sheets.
- Before the chocolate sets, sprinkle decorations of your choice onto the chocolate-dipped bases.
- Set and Serve:
- Allow the chocolate to set completely at room temperature or in the refrigerator. Once set, the Chocolate-Dipped Meringue Trees are ready to serve.
Extra Tips:
For the best texture, make sure your mixing bowl and beaters are completely free of grease or moisture before starting the meringue.
When adding the food coloring, use gel rather than liquid to avoid altering the consistency of the meringue. If you find the chocolate is too thick for dipping, you can thin it with a teaspoon of coconut oil until you reach the desired consistency.
Store any leftovers in an airtight container to maintain their crispness, and enjoy them within a week for peak freshness.
Gluten-Free Apple Crumble
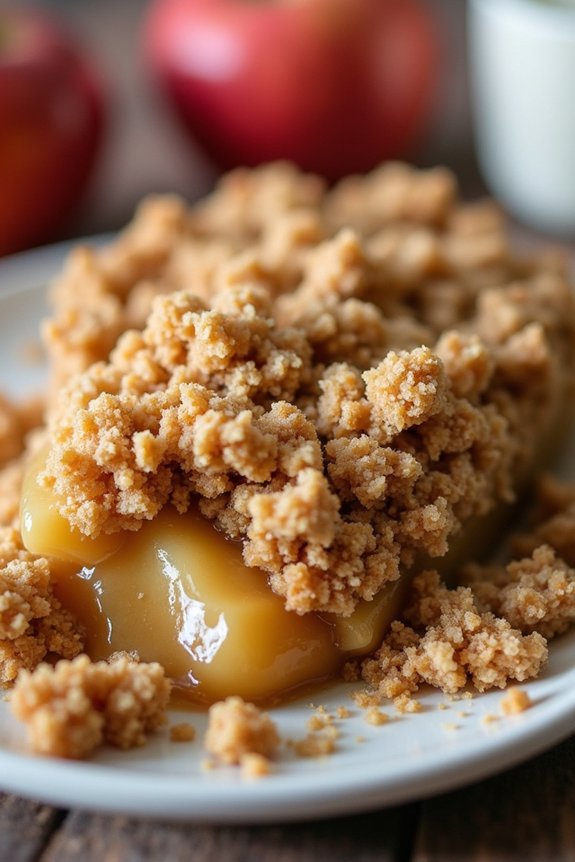
Gluten-Free Apple Crumble is a delightful dessert that combines the warmth of baked apples with a crunchy, gluten-free topping. Perfect for the festive season, this dessert is a favorite among those who need or prefer to avoid gluten. The softness of the apples pairs beautifully with the crispy texture of the crumble, creating a satisfying contrast in every bite.
Not only is it delicious, but it’s also incredibly easy to make, making it an ideal choice for holiday gatherings when you want to spend more time with loved ones and less time in the kitchen.
This recipe captures the essence of a traditional apple crumble but substitutes gluten-free ingredients, guaranteeing that everyone at your holiday table can enjoy it without worry. Whether you’re serving it on its own or adding a scoop of vanilla ice cream or a dollop of whipped cream, this Gluten-Free Apple Crumble is sure to be a crowd-pleaser.
With a perfect balance of sweet and tart flavors, it’s a comforting treat that embodies the cozy spirit of Christmas.
Ingredients (Serves 4-6):
- 6 medium apples (such as Granny Smith or Honeycrisp), peeled, cored, and sliced
- 2 tablespoons lemon juice
- 1 tablespoon cornstarch
- 1 teaspoon ground cinnamon
- 1/2 teaspoon ground nutmeg
- 1/2 cup granulated sugar
- 1 cup gluten-free rolled oats
- 1/2 cup almond flour
- 1/2 cup brown sugar
- 1/2 teaspoon salt
- 1/2 cup unsalted butter, cold and cubed
Cooking Instructions:
- Preheat the Oven: Start by preheating your oven to 350°F (175°C). This will guarantee the oven is at the right temperature when you’re ready to bake your crumble.
- Prepare the Apples: In a large mixing bowl, combine the sliced apples with the lemon juice, cornstarch, ground cinnamon, ground nutmeg, and granulated sugar. Toss until the apples are evenly coated. The lemon juice will help to prevent the apples from browning and add a touch of tanginess.
- Create the Crumble Topping: In another mixing bowl, mix together the gluten-free rolled oats, almond flour, brown sugar, and salt. Add the cold, cubed butter to the mixture. Using your fingers or a pastry cutter, blend the butter into the dry ingredients until the mixture resembles coarse crumbs.
- Assemble the Crumble: Spread the apple mixture evenly in a greased 9×13-inch baking dish. Sprinkle the crumble topping over the apples, covering them completely. This will bake into a golden, crunchy top that complements the soft apples beautifully.
- Bake the Crumble: Place the baking dish in the preheated oven and bake for 35-40 minutes, or until the top is golden brown and the apples are tender when pierced with a fork. If the topping browns too quickly, cover it loosely with aluminum foil.
- Cool and Serve: Remove the crumble from the oven and let it cool for at least 10 minutes before serving. This will allow the juices to thicken slightly, making it easier to serve.
Extra Tips:
For the best flavor, choose apples that are firm and slightly tart, such as Granny Smith, which hold their shape well during baking. If you prefer a sweeter crumble, consider adding a handful of raisins or dried cranberries to the apple mixture.
To make this dessert dairy-free, you can substitute the butter with a plant-based alternative. Additionally, feel free to experiment with different nuts or seeds in the crumble topping for added texture and flavor.
Enjoy your Gluten-Free Apple Crumble warm with a scoop of your favorite vanilla ice cream or a dollop of whipped cream for an extra special treat.
Peppermint Chocolate Bark
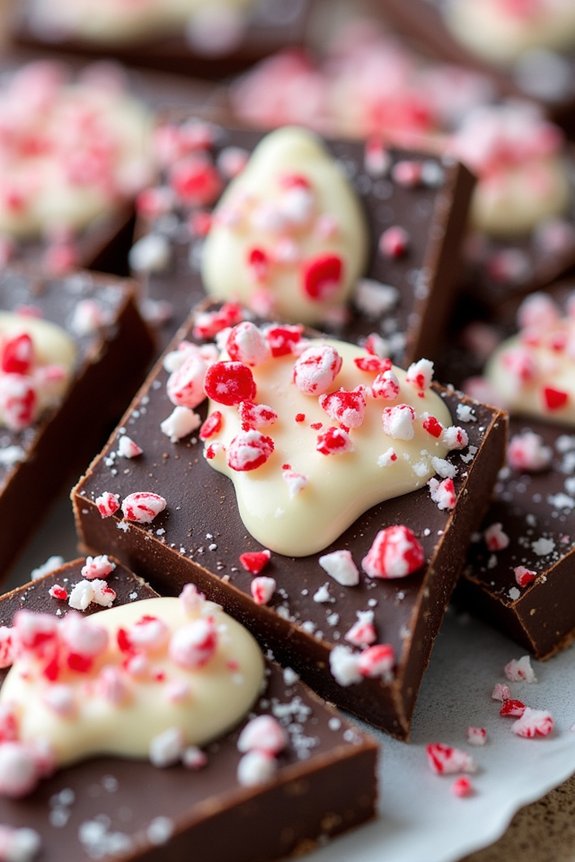
Peppermint Chocolate Bark is a delightful and festive holiday treat that isn’t only simple to make but also completely gluten-free, making it a perfect option for those with dietary restrictions. The combination of rich, smooth chocolate and the invigorating crunch of peppermint candies creates a delicious and irresistible dessert that captures the essence of the holiday season.
Whether you’re hosting a holiday gathering or looking for a homemade gift, this Peppermint Chocolate Bark is sure to please everyone on your list. This recipe yields a serving size for 4-6 people, making it ideal for a small holiday party or as part of a larger dessert spread.
The great thing about chocolate bark is its versatility; you can easily adjust the quantities or add other toppings to suit your personal taste. With just a few ingredients and minimal preparation time, you can create this impressive dessert that’s both visually stunning and mouthwateringly delicious.
Ingredients:
- 12 ounces of high-quality dark chocolate
- 12 ounces of high-quality white chocolate
- 1 teaspoon of peppermint extract
- 1 cup of crushed peppermint candies or candy canes
Cooking Instructions:
- Prepare the workspace: Line a large baking sheet with parchment paper or a silicone baking mat to prevent the bark from sticking and to make clean-up easier.
- Melt the dark chocolate: In a microwave-safe bowl, melt the dark chocolate in 30-second intervals, stirring after each interval until completely smooth. This should take about 1-2 minutes. Alternatively, you can melt the chocolate over a double boiler on the stove.
- Add peppermint extract: Once the dark chocolate is melted, stir in ½ teaspoon of peppermint extract until fully combined. This will infuse the chocolate with a minty flavor that enhances the peppermint candies.
- Spread the dark chocolate: Pour the melted dark chocolate onto the prepared baking sheet and spread it evenly to about 1/4 inch thick using a spatula. Place the sheet in the refrigerator for about 20 minutes to let it set.
- Melt the white chocolate: While the dark chocolate is setting, melt the white chocolate. Use the same method as for the dark chocolate, either in the microwave or over a double boiler.
- Add peppermint extract to white chocolate: Once melted, stir in the remaining ½ teaspoon of peppermint extract to the white chocolate.
- Layer the white chocolate: After the dark chocolate has set, pour the melted white chocolate over it and spread evenly. The white chocolate should be distributed evenly over the dark chocolate layer.
- Add crushed peppermint: Immediately sprinkle the crushed peppermint candies over the top of the white chocolate layer. Press gently with your hands to make sure the pieces adhere to the chocolate.
- Set the bark: Refrigerate the bark for at least 1 hour or until fully hardened. Once set, break the bark into pieces of desired size using your hands.
Extra Tips:
When making Peppermint Chocolate Bark, it’s important to use high-quality chocolate for the best taste and texture. Be sure to melt the chocolate slowly to avoid burning, as overheated chocolate can become grainy.
If you prefer a less sweet version, consider using bittersweet or semi-sweet chocolate instead of dark chocolate. Additionally, you can experiment with other toppings such as nuts, dried fruits, or even a sprinkle of sea salt for added flavor and texture.
Store the finished bark in an airtight container at room temperature for up to two weeks, or in the refrigerator if you prefer a firmer texture.
Gluten-Free Pumpkin Pie
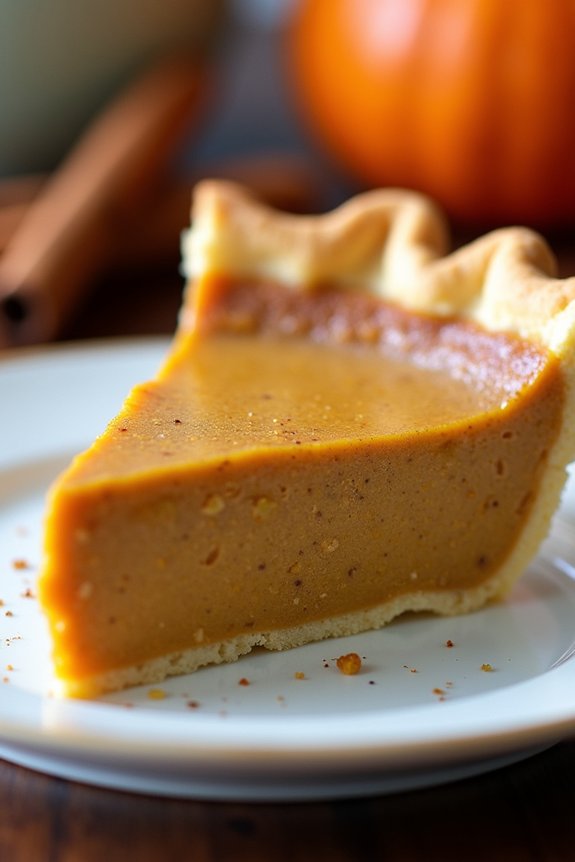
Indulging in a creamy, rich pumpkin pie is one of the highlights of the holiday season, and going gluten-free doesn’t mean you have to miss out on this classic dessert. A gluten-free pumpkin pie offers a delightful blend of spices and creamy pumpkin filling encased in a tender, flaky gluten-free crust. Perfect for Christmas celebrations, this pie can be enjoyed by everyone at the table, regardless of dietary restrictions.
Creating a gluten-free pumpkin pie is easier than you might think, and it doesn’t skimp on flavor or texture. The key to a successful gluten-free pie lies in a well-made crust that complements the rich, spiced pumpkin filling. This recipe makes enough to serve a group of 4-6 people, guaranteeing everyone gets a generous slice of holiday cheer.
Ingredients:
*For the Gluten-Free Crust:*
- 1 1/4 cups gluten-free all-purpose flour
- 1/2 cup unsalted butter, chilled and diced
- 1/4 teaspoon salt
- 1/4 cup ice water
For the Pumpkin Filling:
- 1 can (15 ounces) pumpkin puree
- 3/4 cup brown sugar
- 1 teaspoon ground cinnamon
- 1/2 teaspoon ground ginger
- 1/4 teaspoon ground cloves
- 1/2 teaspoon salt
- 2 large eggs
- 1 cup heavy cream
Cooking Instructions:
- Prepare the Crust:
- In a large bowl, combine the gluten-free flour and salt. Cut in the chilled butter using a pastry cutter or your fingertips until the mixture resembles coarse crumbs.
- Gradually add the ice water, one tablespoon at a time, mixing with a fork until the dough starts to come together. Form the dough into a ball, wrap it in plastic wrap, and refrigerate for at least 30 minutes.
- Roll Out the Dough:
- Preheat your oven to 375°F (190°C). On a lightly floured surface, roll out the chilled dough to fit a 9-inch pie pan.
- Transfer the dough to the pie pan, trimming any excess around the edges. Crimp the edges as desired.
- Prepare the Filling:
- In a large mixing bowl, combine the pumpkin puree, brown sugar, cinnamon, ginger, cloves, and salt. Mix well until smooth.
- Beat in the eggs one at a time, making certain each is fully incorporated before adding the next. Gradually stir in the heavy cream until the filling is smooth and well combined.
- Assemble and Bake:
- Pour the pumpkin filling into the prepared pie crust. Smooth the top with a spatula.
- Bake in the preheated oven for 50-60 minutes, or until the filling is set and a knife inserted into the center comes out clean. If the crust begins to brown too quickly, cover the edges with aluminum foil.
- Cool and Serve:
- Allow the pie to cool on a wire rack for at least 2 hours before slicing. This cooling period helps the filling to set properly.
Extra Tips:
When working with gluten-free dough, it can sometimes be a little more delicate than traditional dough. Be gentle when rolling it out to prevent it from cracking.
If any cracks do appear, you can patch them with a little bit of extra dough. Additionally, for an extra silky filling, consider blending the pumpkin and spices together in a food processor before adding the eggs and cream. This will guarantee a perfectly smooth texture.
Enjoy your gluten-free pumpkin pie with a dollop of whipped cream or a scoop of vanilla ice cream for added indulgence!