

I’ve always adored the cozy charm of Christmas. But let’s be honest, the holiday treats can be a bit much. This year, I want to enjoy them without feeling guilty. So, I’ve found 10 healthy Christmas cookie recipes that are both tasty and nourishing. Think almond flour chocolate chip cookies and vegan gingerbread treats.
Almond Flour Chocolate Chip Cookies

Almond Flour Chocolate Chip Cookies are a delicious and healthier alternative to traditional cookies, perfect for the holiday season. These cookies are made with almond flour, which is gluten-free and packed with nutrients like vitamin E and healthy fats. The result is a soft, chewy cookie that’s just as satisfying as its conventional counterpart but with the added benefit of being more nutritious.
Whether you’re hosting a holiday gathering or simply looking to indulge in a healthier treat, these cookies are bound to be a hit. The addition of almond flour not only makes these cookies gluten-free but also adds a delightful nutty flavor that complements the rich chocolate chips perfectly. The use of dark chocolate chips means you get a lower sugar content while still enjoying the deep cocoa flavor.
These Almond Flour Chocolate Chip Cookies are easy to make and are a great option for those who are looking to maintain their health goals during the festive season, without sacrificing on taste or enjoyment.
Ingredients (Serves 4-6):
- 2 cups almond flour
- 1 teaspoon baking soda
- 1/4 teaspoon salt
- 1/3 cup coconut oil, melted
- 1/4 cup pure maple syrup
- 1 tablespoon vanilla extract
- 1 large egg
- 1 cup dark chocolate chips
Instructions:
- Preheat the Oven: Begin by preheating your oven to 350°F (175°C). Line a baking sheet with parchment paper to guarantee the cookies don’t stick.
- Mix Dry Ingredients: In a medium-sized bowl, combine the almond flour, baking soda, and salt. Stir these dry ingredients together until they’re well blended.
- Prepare Wet Ingredients: In a separate large bowl, mix together the melted coconut oil, maple syrup, vanilla extract, and egg. Whisk these ingredients until they’re smooth and fully combined.
- Combine Mixtures: Slowly add the dry ingredients into the wet ingredients, stirring continuously until a dough forms. Confirm there are no lumps and the mixture is smooth.
- Add Chocolate Chips: Gently fold the dark chocolate chips into the dough, making sure they’re evenly distributed throughout the mixture.
- Shape and Place: Scoop tablespoon-sized amounts of dough and roll them into balls. Place each ball onto the prepared baking sheet, leaving enough space between each cookie to allow them to spread slightly during baking.
- Bake Cookies: Place the baking sheet in the preheated oven and bake for 10-12 minutes, or until the edges of the cookies are golden brown. Keep an eye on them to avoid over-baking.
- Cool and Serve: Remove the cookies from the oven and let them cool on the baking sheet for about 5 minutes. Transfer them to a wire rack to cool completely before serving.
Extra Tips:
For a variation in texture, consider adding a handful of chopped nuts, such as walnuts or pecans, to the cookie dough along with the chocolate chips. If you prefer a more pronounced almond flavor, a few drops of almond extract can be included in the wet ingredients.
Make sure to use room temperature ingredients for the best results, as this helps the dough come together more smoothly. Finally, for those who may require a dairy-free option, verify that the dark chocolate chips used are dairy-free. Enjoy your healthy treat!
Oatmeal Cranberry Cookies
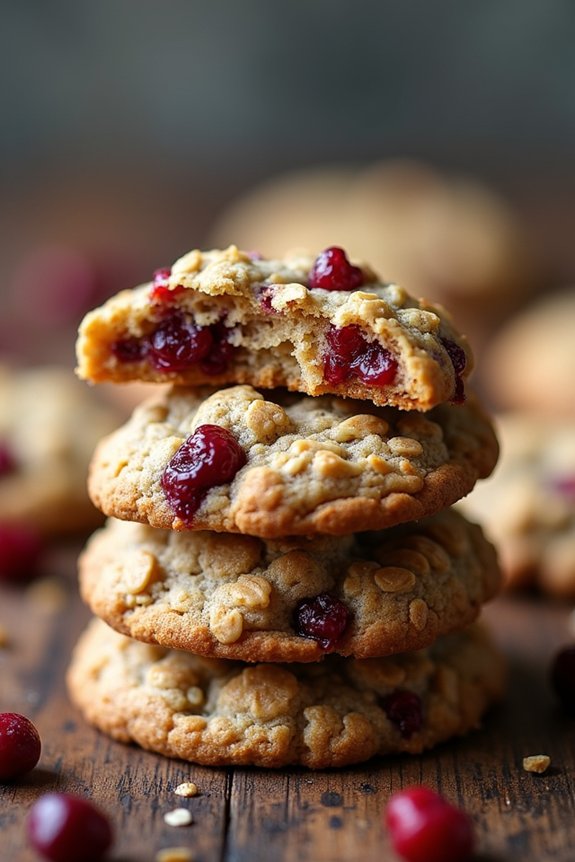
Oatmeal Cranberry Cookies are a delightful and healthier alternative to traditional holiday treats. Packed with the goodness of oats and the natural sweetness of cranberries, these cookies are perfect for those looking to indulge without the usual guilt associated with festive treats. Not only are they delicious, but they also provide a nice balance of chewy and crunchy textures, making them a hit among friends and family.
These cookies are perfect for serving about 4-6 people, making them ideal for small gatherings or as a special treat for your loved ones. The tartness of the cranberries is beautifully complemented by the warmth of cinnamon and the subtle sweetness of honey. Plus, using whole wheat flour and rolled oats adds extra fiber to make these cookies not only tasty but also nourishing.
Ingredients (Serving size: 4-6 people):
- 1 cup whole wheat flour
- 1 cup rolled oats
- 1/2 teaspoon baking soda
- 1/2 teaspoon ground cinnamon
- 1/4 teaspoon salt
- 1/2 cup unsalted butter, softened
- 1/3 cup honey
- 1/3 cup brown sugar
- 1 large egg
- 1 teaspoon vanilla extract
- 3/4 cup dried cranberries
Cooking Instructions:
- Preheat the Oven: Start by preheating your oven to 350°F (175°C). Line a baking sheet with parchment paper to prevent the cookies from sticking.
- Mix the Dry Ingredients: In a medium bowl, combine the whole wheat flour, rolled oats, baking soda, ground cinnamon, and salt. Stir the ingredients together until they’re well mixed, and then set the bowl aside.
- Cream the Butter and Sugar: In a large mixing bowl, cream together the softened butter, honey, and brown sugar until the mixture is light and fluffy. This should take about 2-3 minutes using an electric mixer on medium speed.
- Add the Egg and Vanilla: Beat in the egg and vanilla extract until fully incorporated into the butter-sugar mixture. This step guarantees that the wet ingredients are well combined, providing a smooth base for the cookies.
- Combine Wet and Dry Ingredients: Gradually add the dry ingredient mixture to the wet ingredients, mixing on low speed until just combined. Be careful not to overmix, as this can result in tough cookies.
- Fold in the Cranberries: Using a spatula, gently fold the dried cranberries into the dough until they’re evenly distributed throughout the mixture.
- Shape the Cookies: Scoop tablespoon-sized portions of dough onto the prepared baking sheet, spacing them about 2 inches apart. Flatten each scoop slightly with the back of a spoon to help them spread evenly as they bake.
- Bake the Cookies: Place the baking sheet in the preheated oven and bake for 10-12 minutes or until the edges of the cookies are golden brown. Allow the cookies to cool on the baking sheet for 5 minutes before transferring them to a wire rack to cool completely.
Extra Tips:
To guarantee your Oatmeal Cranberry Cookies turn out perfectly every time, make sure your butter is at room temperature before you start. This will help it cream smoothly with the sugar, creating a better texture for the cookies.
If you prefer a softer cookie, consider reducing the baking time slightly. Additionally, you can experiment with adding nuts like walnuts or almonds for an extra crunch or substitute the cranberries with other dried fruits like cherries or apricots for different flavor variations. Enjoy your healthier holiday treat!
Vegan Gingerbread Cookies

Vegan Gingerbread Cookies are a delicious and festive treat that will bring joy to your holiday season without compromising on dietary preferences. These cookies are perfect for those looking to enjoy the classic, spicy-sweet flavor of gingerbread while adhering to a vegan diet.
They’re made with wholesome plant-based ingredients that create a rich and aromatic cookie, perfect for sharing with family and friends during Christmas gatherings.
These vegan gingerbread cookies aren’t only easy to make, but they’re also fun to decorate, making them an ideal activity for both children and adults. With a delightful combination of spices like ginger, cinnamon, and cloves, these cookies are bursting with holiday cheer.
Whether you enjoy them plain or decorated with vegan icing, they’re sure to become a staple in your festive celebrations.
Ingredients (Serving Size: 4-6 people):
- 2 1/4 cups all-purpose flour
- 1/2 teaspoon baking soda
- 1/4 teaspoon salt
- 1 teaspoon ground ginger
- 1 teaspoon ground cinnamon
- 1/4 teaspoon ground cloves
- 1/4 teaspoon ground nutmeg
- 1/2 cup coconut oil, solid
- 1/2 cup brown sugar
- 1/4 cup molasses
- 3 tablespoons almond milk
- 1 teaspoon vanilla extract
Cooking Instructions:
- Preheat the Oven: Begin by preheating your oven to 350°F (175°C). Line a baking sheet with parchment paper to prevent the cookies from sticking.
- Mix Dry Ingredients: In a medium-sized bowl, whisk together the flour, baking soda, salt, ginger, cinnamon, cloves, and nutmeg. Verify the spices are evenly distributed throughout the flour.
- Cream Wet Ingredients: In a larger mixing bowl, use an electric mixer to beat the solid coconut oil and brown sugar together until light and fluffy. This should take about 2 minutes.
- Combine Molasses and Milk: Add the molasses, almond milk, and vanilla extract to the creamed mixture. Mix until fully combined and the mixture is smooth.
- Form the Dough: Gradually add the dry ingredients to the wet ingredients, mixing just until the dough comes together. Avoid overmixing to keep the cookies tender.
- Chill the Dough: Wrap the dough in plastic wrap and refrigerate for at least 30 minutes. This step helps to firm up the dough, making it easier to roll out and cut.
- Roll and Cut: On a lightly floured surface, roll out the dough to about 1/4-inch thickness. Use cookie cutters to cut out desired shapes and place them on the prepared baking sheet.
- Bake the Cookies: Bake in the preheated oven for 8-10 minutes, or until the edges are firm but the centers are still slightly soft. Allow to cool on the baking sheet for 5 minutes before transferring to a wire rack to cool completely.
- Decorate: Once cooled, decorate the cookies as desired with vegan icing or leave them plain.
Extra Tips:
For an extra burst of flavor, consider adding a pinch of black pepper to the dough for a subtle spiciness that enhances the gingerbread taste.
If you prefer softer cookies, slightly underbake them and allow them to cool on the baking sheet. Be sure to store the cookies in an airtight container to maintain their freshness and keep them soft.
When decorating, allow any icing to set completely before stacking the cookies to prevent smudging. Enjoy these delightful vegan gingerbread cookies with a warm cup of tea or plant-based milk for a cozy holiday treat.
Coconut Macaroons With Dark Chocolate Drizzle

Coconut Macaroons With Dark Chocolate Drizzle are a delightful treat that combines the tropical flavor of coconut with the rich, bittersweet notes of dark chocolate. Perfect for the holiday season, these macaroons are a healthier option for cookie lovers who still want to indulge in something sweet. Not only are they easy to make, but their chewy texture and decadent chocolate topping make them a festive addition to any dessert tray.
These cookies are naturally gluten-free and can be made with minimal ingredients, making them a convenient option for those with dietary restrictions. The combination of unsweetened shredded coconut and dark chocolate provides a balance of flavors and nutrients, with the coconut adding fiber and healthy fats, while the dark chocolate offers antioxidants.
Whether you’re hosting a holiday party or looking for a homemade gift, these Coconut Macaroons With Dark Chocolate Drizzle are sure to be a hit.
Ingredients (Serves 4-6):
- 3 cups unsweetened shredded coconut
- 3/4 cup sweetened condensed milk
- 1 teaspoon vanilla extract
- 1/4 teaspoon salt
- 2 large egg whites
- 1 cup dark chocolate chips
- 1 tablespoon coconut oil
Cooking Instructions:
- Preheat the Oven: Start by preheating your oven to 325°F (165°C). Line a baking sheet with parchment paper to prevent the macaroons from sticking.
- Mix the Ingredients: In a large mixing bowl, combine the unsweetened shredded coconut, sweetened condensed milk, vanilla extract, and salt. Stir the mixture until the ingredients are well incorporated and the coconut is evenly coated.
- Beat the Egg Whites: In a separate bowl, use an electric mixer to beat the egg whites on medium-high speed until stiff peaks form. This should take about 2-3 minutes. Gently fold the beaten egg whites into the coconut mixture, being careful not to deflate them.
- Shape the Macaroons: Using a tablespoon or a small ice cream scoop, drop mounds of the coconut mixture onto the prepared baking sheet, spacing them about an inch apart.
- Bake the Macaroons: Bake in the preheated oven for 18-20 minutes, or until the edges are golden brown. Remove from the oven and let them cool on the baking sheet for 5 minutes before transferring to a wire rack to cool completely.
- Prepare the Chocolate Drizzle: While the macaroons are cooling, melt the dark chocolate chips and coconut oil together in a microwave-safe bowl, stirring every 30 seconds, until smooth.
- Drizzle the Chocolate: Once the macaroons are completely cool, use a fork to drizzle the melted chocolate over the tops of the cookies. Let the chocolate set at room temperature or refrigerate for quicker setting.
Extra Tips: For a more intense coconut flavor, lightly toast the shredded coconut in a dry skillet over medium heat before using it in the recipe. Keep an eye on it to avoid burning, as it can quickly turn from golden to brown.
Additionally, if you prefer a sweeter treat, you can use sweetened shredded coconut instead of unsweetened. Store the macaroons in an airtight container at room temperature for up to a week, or freeze them for longer storage.
Gluten-Free Snickerdoodles
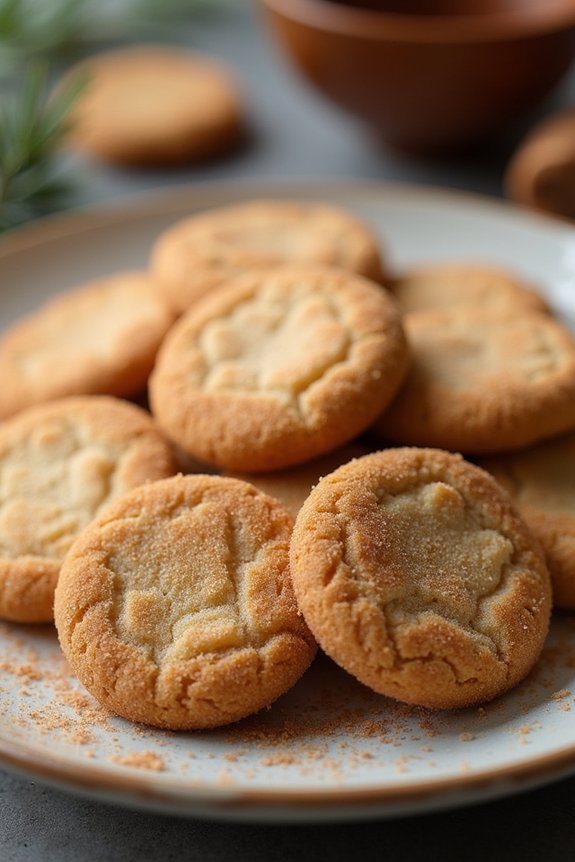
Gluten-Free Snickerdoodles are a delightful treat perfect for the holiday season. These cookies offer the classic cinnamon-sugar flavor that everyone loves, but with a gluten-free twist, making them perfect for those with dietary restrictions.
Whether you’re serving them at a holiday party or enjoying them at home with a cup of hot cocoa, these snickerdoodles will surely bring a smile to your face. Their soft and chewy texture combined with the warm spices make them a comforting choice during the colder months.
Creating Gluten-Free Snickerdoodles for a serving size of 4-6 people is a simple and rewarding process. The recipe guarantees that you don’t miss out on the traditional taste and feel of this beloved cookie, even without the use of wheat flour.
By using gluten-free flour and a few other key ingredients, you can enjoy these cookies without worry. The following ingredients and instructions will guide you through the process of making these delicious holiday cookies.
Ingredients:
- 1 1/2 cups gluten-free all-purpose flour
- 1/2 teaspoon baking soda
- 1/4 teaspoon cream of tartar
- 1/4 teaspoon salt
- 1/2 cup unsalted butter, softened
- 3/4 cup granulated sugar
- 1 large egg
- 1 teaspoon vanilla extract
- 2 tablespoons granulated sugar (for coating)
- 1 tablespoon ground cinnamon (for coating)
Instructions:
- Preheat the Oven: Begin by preheating your oven to 350°F (175°C). Line a baking sheet with parchment paper to prevent sticking.
- Mix Dry Ingredients: In a medium bowl, whisk together the gluten-free flour, baking soda, cream of tartar, and salt. Set the bowl aside.
- Cream Butter and Sugar: In a large mixing bowl, cream together the softened butter and 3/4 cup of sugar using an electric mixer until light and fluffy. This should take about 2-3 minutes.
- Add Egg and Vanilla: Beat in the egg and vanilla extract into the butter-sugar mixture until fully incorporated.
- Combine Wet and Dry Ingredients: Gradually add the dry ingredients to the wet ingredients, mixing until just combined. Be careful not to overmix.
- Prepare the Coating: In a small bowl, combine the 2 tablespoons of granulated sugar with the ground cinnamon.
- Form and Coat Cookies: Scoop tablespoon-sized amounts of dough and roll them into balls. Roll each ball in the cinnamon-sugar mixture until completely coated.
- Bake the Cookies: Place the coated dough balls onto the prepared baking sheet, spacing them about 2 inches apart. Bake in the preheated oven for 10-12 minutes, or until the edges are set and the centers are still soft.
- Cool and Serve: Allow the cookies to cool on the baking sheet for 5 minutes before transferring them to a wire rack to cool completely.
Extra Tips:
For the best texture, make sure your butter is softened to room temperature before starting. If your dough feels too sticky to handle, chill it in the refrigerator for 20-30 minutes before rolling into balls.
This will make it easier to work with and help the cookies maintain their shape while baking. Additionally, storing the baked cookies in an airtight container will keep them fresh for several days, so you can enjoy them throughout the holiday season.
Matcha Green Tea Shortbread
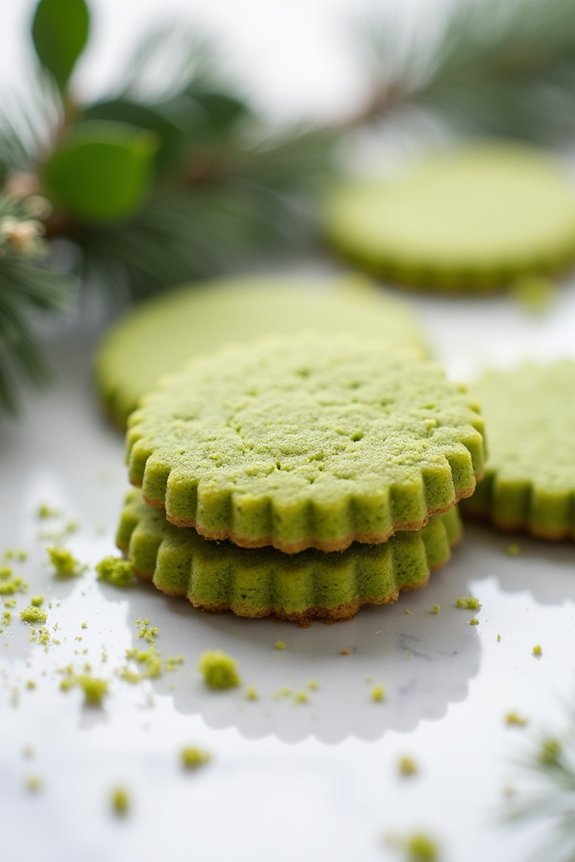
Matcha Green Tea Shortbread is a delightful twist on the traditional shortbread cookie, blending the rich, buttery flavor of shortbread with the earthy, slightly sweet taste of matcha green tea powder. This recipe is perfect for adding a touch of elegance to your holiday cookie platter, and the vibrant green color of the cookies makes them a festive addition to any Christmas celebration.
Not only are these cookies visually appealing, but they also provide a subtle caffeine kick, making them an excellent treat to serve with afternoon tea or coffee. This recipe yields approximately 24 cookies, suitable for serving 4-6 people. It’s an easy-to-follow recipe that even novice bakers can master.
The key to these cookies lies in the quality of the matcha powder used, so be certain to select a high-quality culinary or ceremonial grade matcha for the best flavor and color. Whether you’re a matcha enthusiast or new to the flavor, these cookies are sure to impress your family and friends this holiday season.
Ingredients:
- 2 cups all-purpose flour
- 2 tablespoons matcha green tea powder
- 1/4 teaspoon salt
- 1 cup unsalted butter, room temperature
- 1/2 cup powdered sugar
- 1 teaspoon vanilla extract
Cooking Instructions:
- Preheat the Oven: Begin by preheating your oven to 325°F (165°C). This guarantees that your oven is at the right temperature when you’re ready to bake the cookies.
- Mix Dry Ingredients: In a medium-sized bowl, sift together the all-purpose flour, matcha green tea powder, and salt. This helps to combine the dry ingredients evenly and removes any lumps in the flour or matcha powder.
- Cream Butter and Sugar: In a separate large bowl, beat the unsalted butter and powdered sugar together using an electric mixer on medium speed until the mixture is light and fluffy. This should take about 3-5 minutes.
- Add Vanilla: Blend in the vanilla extract into the butter and sugar mixture. Mix until well incorporated.
- Combine Wet and Dry Ingredients: Gradually add the flour mixture to the butter mixture, mixing on low speed until a dough forms. Be careful not to overmix, as this can lead to tough cookies.
- Shape the Dough: Turn the dough out onto a lightly floured surface. Divide the dough in half and shape each portion into a log approximately 1.5 inches in diameter. Wrap each log in plastic wrap and refrigerate for at least 1 hour, or until firm.
- Slice and Bake: Once chilled, remove the dough from the refrigerator and unwrap. Slice the dough into 1/4-inch thick rounds and place them on a baking sheet lined with parchment paper, leaving about 1 inch between each cookie.
- Bake the Cookies: Bake in the preheated oven for 12-15 minutes, or until the edges are just beginning to turn golden. Keep a close eye, as overbaking can cause the cookies to lose their vibrant green color.
- Cool: Remove from the oven and allow the cookies to cool on the baking sheet for 5 minutes before transferring them to a wire rack to cool completely.
Extra Tips:
For the best results, confirm your butter is at room temperature before you begin. This helps to achieve the desired creamy texture when creaming the butter and sugar.
If you prefer a sweeter cookie, you can increase the powdered sugar to 3/4 cup. Additionally, handle the dough as little as possible to maintain the cookies’ tender texture. If you’re feeling creative, consider adding white chocolate chips or a light dusting of powdered sugar on top for extra flair.
No-Bake Peanut Butter Balls

Indulging in festive treats doesn’t have to mean sacrificing your health goals. These No-Bake Peanut Butter Balls are a delightful and guilt-free option, perfect for satisfying your sweet tooth during the holiday season. Made with wholesome ingredients, these treats aren’t only delicious but also incredibly easy to prepare.
With their rich peanut butter flavor and a hint of chocolate, they’re sure to become a favorite addition to your healthy holiday dessert collection. The best part is that these No-Bake Peanut Butter Balls require no oven time, making them an ideal choice for busy holiday schedules.
Whether you’re hosting a Christmas party or simply looking for a quick and healthy snack, this recipe will surely impress your guests. Plus, they can be prepared in advance and stored in the refrigerator, allowing you to enjoy them all through the festive season.
Now, let’s explore the ingredients and instructions for making these delicious treats.
Ingredients (serves 4-6):
- 1 cup natural peanut butter
- 1/4 cup honey or maple syrup
- 1 teaspoon vanilla extract
- 1 cup rolled oats
- 1/2 cup unsweetened shredded coconut
- 1/4 cup dark chocolate chips
- 1 tablespoon chia seeds
- Pinch of salt
Instructions:
- Prepare the Peanut Butter Mixture: In a large mixing bowl, combine the natural peanut butter, honey or maple syrup, and vanilla extract. Stir until the mixture is smooth and well-blended.
- Add Dry Ingredients: To the peanut butter mixture, add the rolled oats, shredded coconut, dark chocolate chips, chia seeds, and a pinch of salt. Mix thoroughly until all the ingredients are evenly combined and a sticky dough forms.
- Shape the Balls: Using a tablespoon or small cookie scoop, portion out the mixture and roll it between your palms to form balls. Aim for uniform sizes to guarantee even chilling.
- Chill the Balls: Place the formed peanut butter balls onto a baking sheet lined with parchment paper. Refrigerate them for at least 30 minutes or until they’re firm and set.
- Serve and Enjoy: Once chilled, transfer the No-Bake Peanut Butter Balls to a serving platter. They’re ready to be enjoyed immediately or can be stored in an airtight container in the refrigerator for up to a week.
Extra Tips:
For a touch of festive flair, consider rolling the peanut butter balls in finely chopped nuts or dusting them with cocoa powder before chilling. If you prefer a sweeter treat, adjust the amount of honey or maple syrup to taste.
For those with dietary restrictions, verify that the oats and chocolate chips are gluten-free and vegan, if necessary. Additionally, these peanut butter balls can be frozen for up to three months, making them a convenient option for make-ahead holiday preparations.
Date-Sweetened Thumbprint Cookies
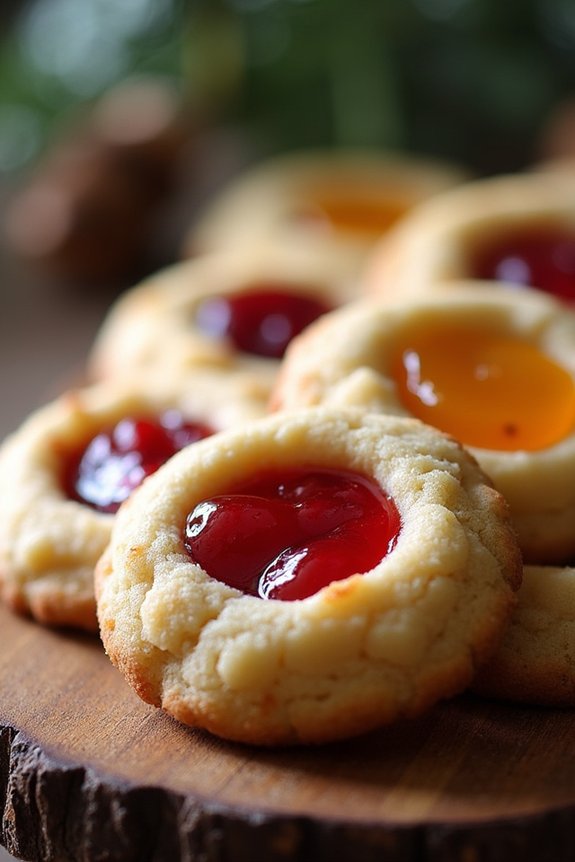
Date-Sweetened Thumbprint Cookies are a delightful addition to any holiday dessert table. These cookies offer a naturally sweet and chewy texture without any added refined sugar, making them a healthier alternative to traditional holiday treats. The natural sweetness comes from dates, which are blended into a paste and combined with almond flour to create a moist and flavorful cookie dough.
Thumbprint cookies are a classic holiday favorite, with a small indentation in the center filled with your choice of fruit preserves, giving each bite a burst of fruity flavor. Perfect for gatherings or as a thoughtful homemade gift, Date-Sweetened Thumbprint Cookies can be enjoyed by those looking to indulge in a healthier festive treat. This recipe makes around 24 cookies, ideal for serving 4-6 people.
They pair beautifully with a warm cup of tea or coffee, making them a versatile treat for any time of day. Follow the instructions below to create these delicious cookies that everyone will love.
Ingredients (Serving Size: 4-6 people):
- 1 ½ cups pitted Medjool dates
- 1 cup almond flour
- 1 teaspoon vanilla extract
- ½ teaspoon baking soda
- ¼ teaspoon salt
- 1 tablespoon coconut oil, melted
- 1 tablespoon water
- ½ cup fruit preserves (such as raspberry, strawberry, or apricot)
Cooking Instructions:
- Preheat the Oven: Start by preheating your oven to 350°F (175°C). Line a baking sheet with parchment paper to prevent the cookies from sticking.
- Prepare the Date Paste: In a food processor, combine the pitted Medjool dates with the vanilla extract and water. Blend until the mixture becomes a smooth paste. This will be the natural sweetener and moisture provider for the cookies.
- Mix the Dry Ingredients: In a medium-sized bowl, whisk together the almond flour, baking soda, and salt. Confirm the dry ingredients are well combined to avoid any clumps in the cookie dough.
- Combine Wet and Dry Ingredients: Add the date paste and melted coconut oil to the dry ingredients. Mix thoroughly until a dough forms. The dough should be slightly sticky but manageable.
- Shape the Cookies: Using a tablespoon or a small cookie scoop, portion out the dough onto the prepared baking sheet. Roll each portion into a ball, and place them about 2 inches apart on the sheet.
- Create the Thumbprint Indentation: Gently press your thumb into the center of each dough ball to create an indentation. Be careful not to press too hard to avoid cracking the edges.
- Add the Preserves: Fill each indentation with about ½ teaspoon of your chosen fruit preserves. Don’t overfill, as the preserves will spread slightly during baking.
- Bake the Cookies: Place the baking sheet in the preheated oven and bake for 12-15 minutes, or until the edges of the cookies are lightly golden. Remove from the oven and allow them to cool on the baking sheet for a few minutes before transferring to a wire rack to cool completely.
Extra Tips:
For the best results, verify that your dates are soft and fresh; if they seem a bit dry, you can soak them in warm water for about 10 minutes before processing.
Feel free to experiment with different types of fruit preserves or even a combination of flavors for an extra twist. If you prefer a nut-free version, you can substitute the almond flour with oat flour, though this may slightly alter the texture.
Store any leftover cookies in an airtight container at room temperature for up to a week or freeze them for longer storage. Enjoy your healthy and delicious Date-Sweetened Thumbprint Cookies!
Lemon Poppy Seed Biscotti
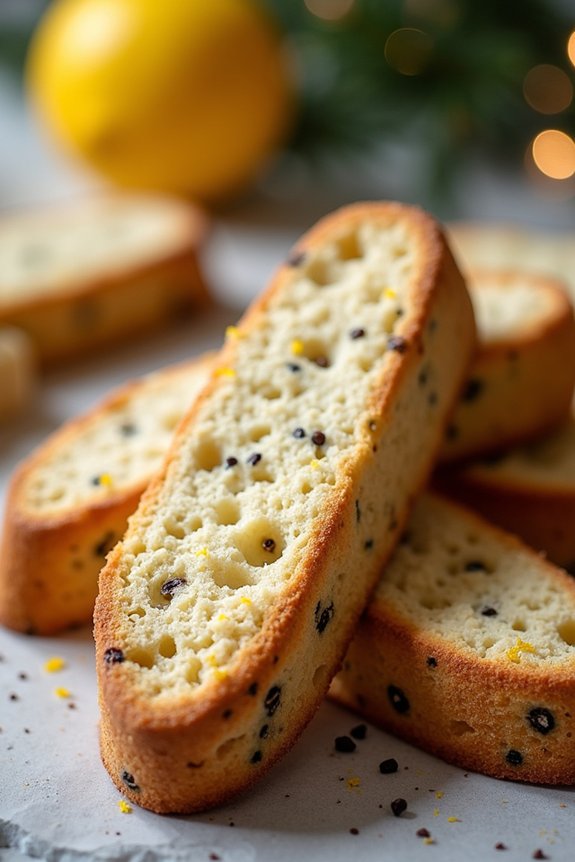
Lemon Poppy Seed Biscotti are the perfect festive treat to enjoy during the holiday season, offering a delightful blend of zesty lemon and crunchy poppy seeds. These twice-baked Italian cookies aren’t only delicious but also healthier than traditional Christmas cookies, as they’re made with wholesome ingredients.
Their crisp texture makes them ideal for dunking in hot tea or coffee, adding a touch of sophistication to your holiday gatherings. With this easy recipe, you can make a batch of these delightful biscotti to serve to family and friends or to give as thoughtful homemade gifts.
This recipe yields 24 biscotti, perfect for serving 4-6 people. The combination of almond flour and whole wheat flour gives these biscotti a nutty richness, while the hint of lemon zest provides a revitalizing flavor. The poppy seeds add a subtle crunch and a beautiful speckled appearance.
These biscotti aren’t only a treat for the taste buds but also a feast for the eyes, making them a fantastic addition to your holiday dessert table.
Ingredients:
- 1 cup almond flour
- 1 cup whole wheat flour
- 1/2 cup granulated sugar
- 1 teaspoon baking powder
- 1 tablespoon poppy seeds
- Zest of 2 lemons
- 2 large eggs
- 1 teaspoon vanilla extract
- 1/4 cup unsalted butter, melted
- 1/4 teaspoon salt
Cooking Instructions:
- Preheat the Oven: Begin by preheating your oven to 350°F (175°C). Line a baking sheet with parchment paper or a silicone baking mat to prevent sticking.
- Mix Dry Ingredients: In a large mixing bowl, combine the almond flour, whole wheat flour, sugar, baking powder, poppy seeds, and salt. Stir well to make sure all the dry ingredients are evenly distributed.
- Prepare Wet Ingredients: In a separate bowl, whisk together the eggs, lemon zest, vanilla extract, and melted butter until smooth and well combined.
- Combine Ingredients: Gradually add the wet ingredients to the dry ingredients, mixing until a dough forms. The dough should be slightly sticky but manageable.
- Shape the Dough: Transfer the dough onto a lightly floured surface and divide it into two equal parts. Shape each portion into a log approximately 12 inches long and 2 inches wide.
- First Bake: Place the logs on the prepared baking sheet, leaving space between them. Bake in the preheated oven for 25-30 minutes or until the logs are lightly golden and firm to the touch.
- Cool and Slice: Remove the baking sheet from the oven and let the logs cool for about 10 minutes. Using a sharp serrated knife, slice each log diagonally into 1/2-inch-thick slices.
- Second Bake: Arrange the biscotti slices cut side down on the baking sheet. Return them to the oven and bake for an additional 10-12 minutes, flipping them halfway through, until they’re crisp and golden on both sides.
- Cool Completely: Allow the biscotti to cool completely on a wire rack before serving or storing.
Extra Tips:
For the best results, make sure to cool the biscotti slices completely before storing them in an airtight container; this guarantees they remain crisp.
If you prefer a sweeter biscotti, consider drizzling them with a lemon glaze made from powdered sugar and lemon juice. Additionally, feel free to substitute the whole wheat flour with all-purpose flour if you prefer a lighter texture.
Enjoy these biscotti with a warm cup of tea or coffee for a delightful holiday treat!
Spiced Chai Biscuit Bites

Spiced Chai Biscuit Bites are a delightful treat that combines the warmth of chai spices with the comforting texture of a biscuit. These little bites are perfect for your holiday spread, offering a unique twist to the traditional Christmas cookie lineup. Made with a blend of chai spices like cinnamon, cardamom, and ginger, these bites have a rich aroma and a subtly sweet flavor that complements their buttery base.
Whether you’re enjoying them with a cup of tea or as a sweet end to your meal, these cookies are bound to be a hit.
Not only are Spiced Chai Biscuit Bites delicious, but they’re also a healthier option compared to many holiday treats. By using whole wheat flour and a moderate amount of natural sweeteners, these cookies provide a satisfying crunch without the guilt. They’re easy to make and can be prepared in advance, making them a convenient choice for your festive gatherings.
With a serving size of 4-6 people, this recipe guarantees there’s enough to go around while keeping portion control in mind.
Ingredients (Serving Size: 4-6 people):
- 1 1/4 cups whole wheat flour
- 1/2 cup unsalted butter, softened
- 1/4 cup coconut sugar
- 1/4 cup honey
- 1 teaspoon vanilla extract
- 1 teaspoon ground cinnamon
- 1/2 teaspoon ground cardamom
- 1/2 teaspoon ground ginger
- 1/4 teaspoon ground cloves
- 1/4 teaspoon salt
- 1/4 teaspoon baking soda
- 2-3 tablespoons almond milk (as needed)
Cooking Instructions:
- Prepare the Oven and Baking Sheet: Preheat your oven to 350°F (175°C). Line a baking sheet with parchment paper to prevent sticking and ascertain even baking.
- Mix the Dry Ingredients: In a medium bowl, whisk together the whole wheat flour, cinnamon, cardamom, ginger, cloves, salt, and baking soda. This makes sure that the spices are well distributed throughout the flour.
- Cream the Butter and Sugar: In a large mixing bowl, cream the softened butter, coconut sugar, and honey together until the mixture is light and fluffy. This should take about 2-3 minutes with an electric mixer.
- Combine Wet and Dry Ingredients: Stir in the vanilla extract to the butter mixture. Gradually add the dry ingredients to the wet ingredients, mixing until just combined. If the dough is too dry, add almond milk one tablespoon at a time until the dough holds together but isn’t sticky.
- Shape the Biscuit Bites: Scoop out tablespoon-sized amounts of dough and roll them into small balls with your hands. Place them on the prepared baking sheet, spacing them about 2 inches apart.
- Bake: Bake in the preheated oven for 10-12 minutes, or until the edges are golden brown. The biscuits will firm up as they cool, so avoid overbaking.
- Cool and Serve: Allow the biscuits to cool on the baking sheet for 5 minutes before transferring them to a wire rack to cool completely. Enjoy them warm or at room temperature.
Extra Tips:
For an added flavor boost, consider toasting the spices lightly in a dry skillet before mixing them into the flour. This will enhance their aroma and depth, creating a more pronounced chai flavor.
If you prefer a little extra sweetness, sprinkle a touch of powdered sugar over the cooled biscuits before serving. Storing these cookies in an airtight container will keep them fresh for up to a week, making them a great option for preparing ahead of time during the busy holiday season.