

It’s that time of year when the kitchen becomes the heart of the home, filled with warmth and the sweet scent of cookies baking.
I’ve rounded up 13 delectable chewy Christmas cookie recipes that will make your holidays merrier.
From classic chocolate chip mint to the unique twist of lemon poppy seed, these cookies promise the perfect mix of softness and chewiness.
Ready to uncover the secrets to these irresistible treats?
Let’s bake up some holiday magic together!
Chewy Chocolate Chip Mint Cookies

Chewy Chocolate Chip Mint Cookies are the perfect holiday treat, combining the classic comfort of chocolate chip cookies with a revitalizing hint of mint. The soft and chewy texture of these cookies makes them an irresistible addition to any festive gathering.
Whether you’re baking them for a Christmas party or enjoying a cozy night in with family, these cookies are sure to bring a smile to everyone’s face. The delightful fusion of mint and chocolate creates a unique flavor profile that’s both nostalgic and exciting, making these cookies a must-try during the holiday season.
Using simple ingredients, these cookies are easy to whip up and will fill your home with the warm, inviting aroma of freshly baked goodies. The key to achieving the perfect chewiness lies in the balance of ingredients and the careful baking process.
With a few easy steps, you’ll have a batch of delicious Chewy Chocolate Chip Mint Cookies ready to share with loved ones. The recipe yields enough cookies to serve 4-6 people, making it ideal for small gatherings or as a delightful homemade gift.
Ingredients:
- 1 cup unsalted butter, softened
- 1 cup granulated sugar
- 1/2 cup packed brown sugar
- 2 large eggs
- 1 teaspoon vanilla extract
- 1 teaspoon peppermint extract
- 2 1/2 cups all-purpose flour
- 1 teaspoon baking soda
- 1/2 teaspoon salt
- 1 cup semi-sweet chocolate chips
- 1 cup mint chocolate chips
Cooking Instructions:
- Preheat the Oven: Start by preheating your oven to 350°F (175°C). Line two baking sheets with parchment paper to prevent the cookies from sticking and guarantee even baking.
- Cream the Butter and Sugars: In a large mixing bowl, cream together the softened butter, granulated sugar, and brown sugar until the mixture is light and fluffy. This should take about 2-3 minutes with an electric mixer set on medium speed.
- Add Eggs and Extracts: Beat in the eggs one at a time, confirming each is fully incorporated before adding the next. Mix in the vanilla and peppermint extracts until well combined.
- Combine Dry Ingredients: In a separate bowl, whisk together the flour, baking soda, and salt. Gradually add the dry ingredients to the wet ingredients, mixing until just combined to avoid overworking the dough.
- Fold in Chocolate Chips: Gently fold in the semi-sweet and mint chocolate chips using a spatula or wooden spoon, ensuring the chips are distributed evenly throughout the dough.
- Shape and Bake: Scoop tablespoons of dough onto the prepared baking sheets, spacing them about 2 inches apart. Bake in the preheated oven for 10-12 minutes, or until the edges are golden brown but the centers are still soft.
- Cool the Cookies: Allow the cookies to cool on the baking sheets for 5 minutes before transferring them to a wire rack to cool completely. This helps them firm up while retaining their chewy texture.
Extra Tips: To guarantee your cookies remain soft and chewy, store them in an airtight container with a slice of bread; this will help maintain their moisture.
If you prefer a stronger mint flavor, you can increase the peppermint extract slightly, but be cautious as it can quickly become overpowering. Finally, if you’d like a festive touch, consider adding a few drops of green food coloring to the dough during mixing for a more seasonal appearance.
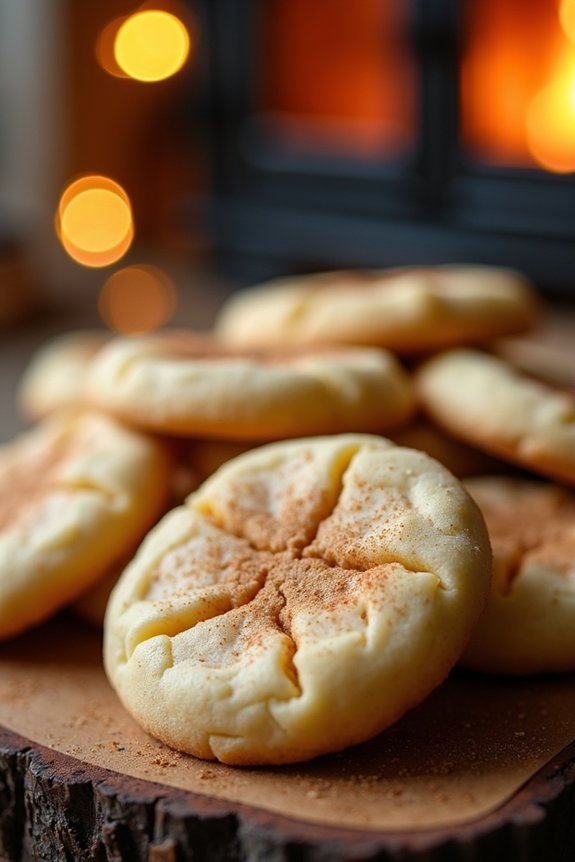
Brown Butter Snickerdoodles
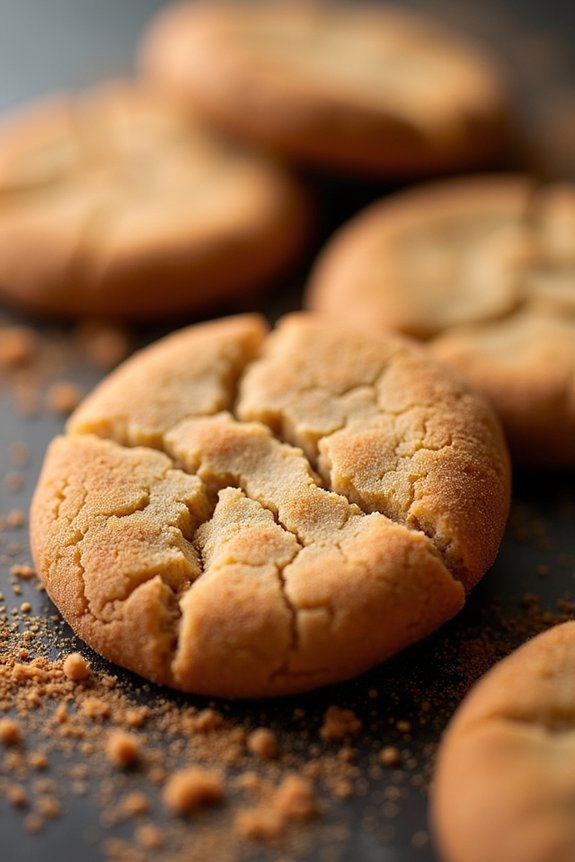
Brown Butter Snickerdoodles are a delightful twist on the classic snickerdoodle, bringing a rich nutty flavor to the beloved cookie. The secret to these cookies is browning the butter, which adds a deep, caramel-like taste that pairs perfectly with the cinnamon sugar coating.
These cookies maintain a chewy texture that’s sure to be a hit at any holiday gathering, making them an excellent addition to your Christmas cookie lineup.
The process of browning butter may seem intimidating, but it’s quite simple and well worth the effort for the depth of flavor it brings to the cookies. Once the butter is browned and cooled, it’s combined with sugar, eggs, and other classic baking ingredients to form a dough.
The dough is then rolled in a cinnamon sugar mixture before baking, creating a deliciously spiced exterior. This recipe makes enough to serve 4-6 people, ensuring there’s plenty to share with family and friends.
Ingredients:
- 1 cup unsalted butter
- 1 1/2 cups granulated sugar
- 1/2 cup packed light brown sugar
- 2 large eggs
- 2 teaspoons pure vanilla extract
- 2 3/4 cups all-purpose flour
- 1 teaspoon baking soda
- 1/2 teaspoon cream of tartar
- 1/2 teaspoon salt
- 2 teaspoons ground cinnamon
- Additional 1/4 cup granulated sugar for rolling
- Additional 1 teaspoon ground cinnamon for rolling
Instructions:
- Brown the Butter: In a medium saucepan, melt the butter over medium heat. Continue cooking, swirling the pan occasionally, until the butter turns golden brown and has a nutty aroma, about 5-7 minutes. Remove from heat and let cool to room temperature.
- Prepare the Dough: In a large mixing bowl, combine the cooled brown butter, granulated sugar, and light brown sugar. Beat with an electric mixer on medium speed until well combined, about 2 minutes. Add the eggs one at a time, mixing well after each addition, followed by the vanilla extract.
- Mix Dry Ingredients: In another bowl, whisk together the flour, baking soda, cream of tartar, salt, and 2 teaspoons of ground cinnamon. Gradually add the dry ingredients to the wet ingredients, beating on low speed until just combined.
- Chill the Dough: Cover the mixing bowl with plastic wrap and refrigerate the dough for at least 30 minutes. This will make it easier to handle and enhance the flavors.
- Preheat the Oven: Preheat your oven to 350°F (175°C) and line two baking sheets with parchment paper.
- Form the Cookies: In a small bowl, mix the additional 1/4 cup granulated sugar with 1 teaspoon of ground cinnamon. Scoop tablespoons of dough and roll into balls. Roll each ball in the cinnamon sugar mixture until fully coated.
- Bake: Place the dough balls on the prepared baking sheets about 2 inches apart. Bake for 10-12 minutes, or until the edges are set and the centers are slightly soft. Remove from oven and let cool on the baking sheets for 5 minutes before transferring to a wire rack to cool completely.
Extra Tips:
Browning butter is all about timing, so keep a close eye on it to prevent burning. The butter will foam and then subside; once you see brown specks forming at the bottom of the pan, it’s ready.
If you prefer a softer, chewier cookie, slightly underbake them, as they’ll continue to firm up while cooling. For a more intense cinnamon flavor, consider adding a pinch of cinnamon to the dough itself.
Enjoy these Brown Butter Snickerdoodles with a glass of milk or a steaming cup of coffee for the ultimate holiday treat.
Soft and Chewy Ginger Molasses Cookies

Soft and Chewy Ginger Molasses Cookies are a classic holiday favorite that combines the warm, spicy flavors of ginger and cinnamon with the rich, deep taste of molasses. These cookies are perfect for those chilly winter days and are bound to become a staple in your holiday baking repertoire.
With their soft, chewy texture and aromatic spices, they’re a comforting treat that pairs perfectly with a cup of hot cocoa or spiced tea. This recipe yields approximately 24 cookies, making it ideal for a small gathering of 4-6 people. The dough can be made ahead of time and refrigerated, allowing you to bake fresh batches as needed throughout the holiday season.
The key to achieving the perfect chewiness lies in not overbaking the cookies and verifying they’re stored properly to maintain moisture.
Ingredients:
- 2 1/4 cups all-purpose flour
- 2 teaspoons ground ginger
- 1 teaspoon baking soda
- 3/4 teaspoon ground cinnamon
- 1/2 teaspoon ground cloves
- 1/4 teaspoon salt
- 3/4 cup (1 1/2 sticks) unsalted butter, softened
- 1 cup granulated sugar
- 1 large egg
- 1/4 cup molasses
- 1 tablespoon freshly grated ginger (optional)
- 1/4 cup turbinado sugar or granulated sugar, for rolling
Instructions:
- Preheat and Prepare Baking Sheets: Preheat your oven to 350°F (175°C). Line two baking sheets with parchment paper or silicone baking mats and set aside.
- Mix Dry Ingredients: In a medium-sized bowl, whisk together the all-purpose flour, ground ginger, baking soda, ground cinnamon, ground cloves, and salt. This guarantees the spices are evenly distributed throughout the dough.
- Cream Butter and Sugar: In a large mixing bowl, beat the softened butter and granulated sugar together using an electric mixer on medium speed until light and fluffy, about 2-3 minutes.
- Add Wet Ingredients: Beat in the egg, molasses, and freshly grated ginger (if using) until well combined. The mixture should be smooth and creamy.
- Combine Dry and Wet Ingredients: Gradually add the dry ingredients to the wet ingredients, mixing on low speed until just combined. Be careful not to overmix, as this can result in tough cookies.
- Shape the Cookies: Scoop tablespoon-sized portions of dough and roll them into balls. Roll each ball in the turbinado or granulated sugar to coat. Place the sugar-coated dough balls onto the prepared baking sheets, leaving about 2 inches of space between each cookie.
- Bake: Bake the cookies in the preheated oven for 8-10 minutes, or until the edges are set, but the centers appear slightly underbaked. This will guarantee that the cookies remain soft and chewy.
- Cool: Allow the cookies to cool on the baking sheets for 5 minutes before transferring them to a wire rack to cool completely.
Extra Tips:
To verify your Soft and Chewy Ginger Molasses Cookies are perfect every time, consider refrigerating the dough for at least 30 minutes before baking. This will help prevent the cookies from spreading too much.
If you prefer a more intense ginger flavor, you can add an additional teaspoon of ground ginger. Be mindful of the bake time; removing the cookies from the oven when the centers are still soft will help maintain their chewy texture.
Store the cookies in an airtight container to keep them fresh and chewy for several days.
Red Velvet Crinkle Cookies

Red Velvet Crinkle Cookies are the perfect treat for those who love a chewy, festive cookie with a hint of chocolate and a stunning red hue. These cookies aren’t only visually appealing with their snowy white powdered sugar coating and vibrant red color, but they also offer a delightful texture that’s both soft and slightly chewy.
Whether you’re baking them for a holiday party or as a cozy snack at home, these cookies are sure to impress.
The secret to achieving that perfect crinkle on top lies in the consistency of the dough and the generous coating of powdered sugar before baking. The slight tang from the cream cheese and the richness from the cocoa powder create a balanced flavor profile that’s hard to resist.
This recipe yields approximately 24 cookies, which is enough to serve 4-6 people, making it ideal for small gatherings or family events.
Ingredients
- 1 and 1/2 cups all-purpose flour
- 1/4 cup cocoa powder
- 1 teaspoon baking powder
- 1/4 teaspoon baking soda
- 1/4 teaspoon salt
- 1/4 cup unsalted butter, softened
- 4 ounces cream cheese, softened
- 1 cup granulated sugar
- 1 large egg
- 1 teaspoon vanilla extract
- 1 tablespoon red food coloring
- 1 cup powdered sugar
Instructions
- Preheat the Oven: Begin by preheating your oven to 350°F (175°C). Line two baking sheets with parchment paper or silicone baking mats.
- Mix Dry Ingredients: In a medium bowl, whisk together the flour, cocoa powder, baking powder, baking soda, and salt. Set aside.
- Cream Butter and Sugar: In a large mixing bowl, cream the softened butter, cream cheese, and granulated sugar together using an electric mixer on medium speed until the mixture is light and fluffy, about 2-3 minutes.
- Add Wet Ingredients: Add the egg, vanilla extract, and red food coloring to the butter mixture. Beat on medium speed until well combined and the color is evenly distributed.
- Combine Ingredients: Gradually add the dry ingredients to the wet ingredients, mixing on low speed until just combined. Be careful not to overmix the dough.
- Chill the Dough: Cover the dough with plastic wrap and refrigerate for at least 30 minutes. This makes the dough easier to handle and helps the cookies maintain their shape while baking.
- Coat with Sugar: Place the powdered sugar in a shallow dish. Scoop tablespoons of dough and roll them into balls. Roll each ball in the powdered sugar until completely coated.
- Bake the Cookies: Arrange the sugar-coated dough balls on the prepared baking sheets, leaving about 2 inches between each cookie. Bake in the preheated oven for 10-12 minutes, or until the cookies have puffed and the tops have crackled.
- Cool and Serve: Remove the cookies from the oven and let them cool on the baking sheet for 5 minutes before transferring them to a wire rack to cool completely.
Extra Tips
For the best results, verify your butter and cream cheese are at room temperature before starting, as this will help them cream together more smoothly.
If you want a deeper red color, feel free to adjust the amount of food coloring to your preference. Additionally, if you find that the dough is too sticky to handle, return it to the refrigerator for a few more minutes.
These cookies can be stored in an airtight container at room temperature for up to a week, maintaining their chewy texture. Enjoy your delightful Red Velvet Crinkle Cookies with a glass of milk or a hot cup of cocoa for a truly festive treat!
Peppermint White Chocolate Cookies
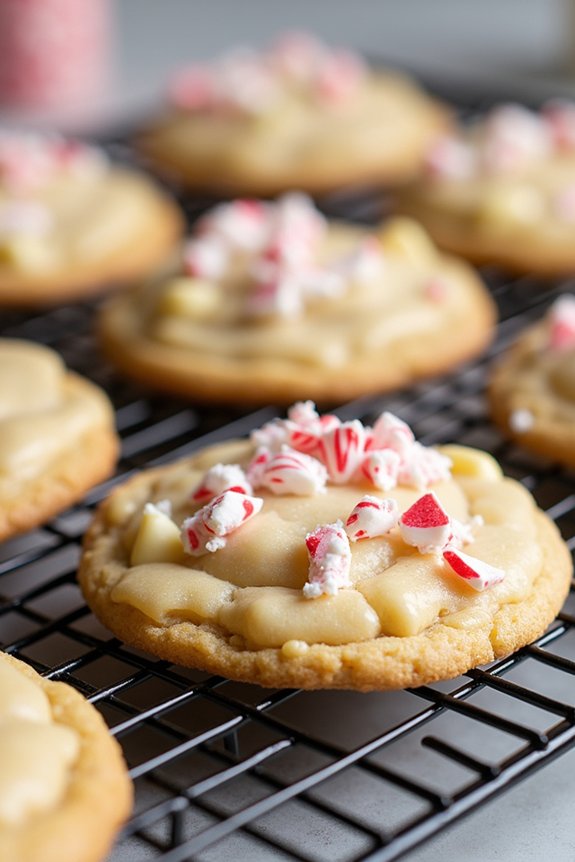
This recipe yields approximately 24 cookies, serving 4-6 people comfortably. The preparation is straightforward, guaranteeing even novice bakers can achieve delicious results. Once baked, these cookies have a crisp outer edge and a soft, chewy center, with crushed candy canes adding a fun, festive touch. The white chocolate chips melt slightly into the dough, creating a beautiful marbling effect that complements the peppermint.
Ingredients:
- 2 1/4 cups all-purpose flour
- 1/2 teaspoon baking soda
- 1/2 teaspoon salt
- 1 cup unsalted butter, room temperature
- 1 cup granulated sugar
- 1/2 cup packed light brown sugar
- 1 large egg
- 1 teaspoon vanilla extract
- 1 teaspoon peppermint extract
- 1 cup white chocolate chips
- 1/2 cup crushed candy canes
Instructions:
- Preheat the Oven: Begin by preheating your oven to 350°F (175°C). Line two baking sheets with parchment paper or silicone baking mats to prevent the cookies from sticking.
- Mix Dry Ingredients: In a medium-sized bowl, whisk together the flour, baking soda, and salt. Set aside. This guarantees an even distribution of the leavening agent and salt throughout your dough.
- Cream Butter and Sugars: In a large mixing bowl, beat the softened butter, granulated sugar, and brown sugar together using an electric mixer on medium speed. Beat until the mixture is light and fluffy, about 2-3 minutes.
- Add Wet Ingredients: Add the egg, vanilla extract, and peppermint extract to the butter-sugar mixture. Beat until well combined, scraping down the sides of the bowl as necessary.
- Combine with Dry Ingredients: Gradually add the dry ingredients to the wet mixture, mixing on low speed until just combined. Be careful not to overmix, as this can make the cookies tough.
- Fold in Add-ins: Gently fold in the white chocolate chips and crushed candy canes with a spatula, guaranteeing they’re evenly distributed throughout the dough.
- Shape and Bake: Use a tablespoon or cookie scoop to drop rounded tablespoons of dough onto the prepared baking sheets, spacing them about 2 inches apart to allow for spreading.
- Bake Cookies: Bake in the preheated oven for 10-12 minutes, or until the edges are lightly golden but the centers are still soft. The cookies will continue to firm up as they cool.
- Cool Cookies: Remove the cookies from the oven and let them cool on the baking sheet for 5 minutes before transferring them to a wire rack to cool completely.
Extra Tips:
For best results, guarantee your butter is at room temperature before starting, as this helps achieve the desired texture. If you prefer a more pronounced peppermint flavor, consider adding an extra 1/4 teaspoon of peppermint extract.
Crushing candy canes can be done easily by placing them in a ziplock bag and using a rolling pin to break them into smaller pieces. For an added touch, sprinkle a few extra crushed candy canes on top of the dough balls before baking.
Store any leftover cookies in an airtight container to keep them chewy for up to a week.
Chewy Oatmeal Cranberry Cookies
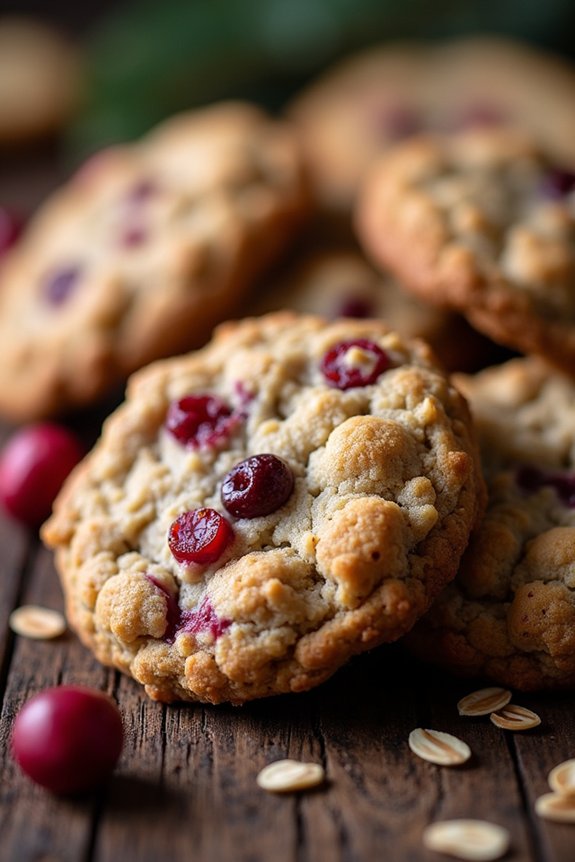
Chewy Oatmeal Cranberry Cookies are a delightful twist on the classic oatmeal cookie, offering a perfect balance of sweet and tart flavors. The chewy texture of these cookies makes them a favorite holiday treat, ideal for sharing with family and friends during festive gatherings.
The combination of hearty oats, tart cranberries, and a hint of warm spices creates a cookie that’s both comforting and full of flavor. These cookies aren’t only delicious but also easy to make, guaranteeing they become a staple in your holiday baking repertoire.
Made with simple ingredients, these cookies are packed with wholesome oats and dried cranberries, making them a slightly healthier option among holiday treats. The use of brown sugar adds a rich molasses flavor, enhancing the chewy texture. A touch of cinnamon and vanilla provides warmth, while the cranberries offer a revitalizing tang.
Perfect for a serving size of 4-6 people, this recipe guarantees you have enough to share or to enjoy with a cup of tea or coffee on a cold winter day.
Ingredients:
- 1 cup unsalted butter, softened
- 1 cup packed brown sugar
- 1/2 cup granulated sugar
- 2 large eggs
- 1 teaspoon vanilla extract
- 1 1/2 cups all-purpose flour
- 1 teaspoon baking soda
- 1 teaspoon ground cinnamon
- 1/2 teaspoon salt
- 3 cups old-fashioned oats
- 1 cup dried cranberries
Cooking Instructions:
- Preheat the Oven: Start by preheating your oven to 350°F (175°C). Line two baking sheets with parchment paper or silicone baking mats to prevent the cookies from sticking.
- Cream Butter and Sugars: In a large mixing bowl, cream together the softened butter, brown sugar, and granulated sugar until the mixture is light and fluffy. This should take about 3-4 minutes using an electric mixer on medium speed.
- Add Eggs and Vanilla: Beat in the eggs one at a time, guaranteeing each egg is fully incorporated before adding the next. Stir in the vanilla extract until well combined.
- Combine Dry Ingredients: In a separate bowl, whisk together the flour, baking soda, cinnamon, and salt. Gradually add this dry mixture to the wet ingredients, mixing until just combined.
- Incorporate Oats and Cranberries: Fold in the oats and dried cranberries using a spatula or wooden spoon, making sure they’re evenly distributed throughout the dough.
- Shape the Cookies: Using a cookie scoop or tablespoon, drop rounded balls of dough onto the prepared baking sheets, spacing them about 2 inches apart to allow for spreading.
- Bake the Cookies: Bake the cookies in the preheated oven for 10-12 minutes, or until the edges are golden brown but the centers are still slightly soft. Be cautious not to overbake as they’ll continue to firm up as they cool.
- Cool and Serve: Allow the cookies to cool on the baking sheets for 5 minutes before transferring them to a wire rack to cool completely. Enjoy warm or store in an airtight container for later.
Extra Tips: For the best chewy texture, make sure not to overbake the cookies; they should still look a bit underdone in the center when you take them out of the oven.
You can substitute other dried fruits like raisins or chopped apricots for the cranberries if desired. To add an extra dimension of flavor, consider adding a handful of white chocolate chips or chopped nuts to the dough.
Finally, make sure to measure your ingredients accurately, especially the oats, as too much can result in a dry cookie.
Double Chocolate Chip Cookies

Double Chocolate Chip Cookies are the perfect holiday treat for anyone who loves a rich, chocolaty dessert. These cookies combine the deep flavor of cocoa powder with semi-sweet chocolate chips for a double dose of chocolate goodness. With a chewy interior and a slightly crispy exterior, they’re bound to be a hit at any Christmas gathering.
The recipe is simple and straightforward, making it an excellent choice for both novice and experienced bakers alike. Whether you’re baking for a family get-together or a festive cookie exchange, these Double Chocolate Chip Cookies won’t disappoint.
The recipe yields approximately 24 cookies, making it perfect for serving 4-6 people, depending on cookie size and appetites. You can easily double the recipe if you’re expecting a larger crowd or want to keep some for yourself as a treat throughout the holiday season.
Ingredients:
- 1 cup (2 sticks) unsalted butter, softened
- 1 cup granulated sugar
- 1 cup packed light brown sugar
- 2 large eggs
- 2 teaspoons vanilla extract
- 2 cups all-purpose flour
- 3/4 cup unsweetened cocoa powder
- 1 teaspoon baking soda
- 1/2 teaspoon salt
- 2 cups semi-sweet chocolate chips
Instructions:
- Preheat the Oven: Begin by preheating your oven to 350°F (175°C). Line two baking sheets with parchment paper to prevent the cookies from sticking and guarantee even baking.
- Cream the Butter and Sugars: In a large mixing bowl, use an electric mixer to beat the softened butter, granulated sugar, and brown sugar together until the mixture is light and fluffy. This should take about 3 minutes on medium speed.
- Add the Eggs and Vanilla: Add the eggs one at a time, mixing well after each addition to confirm they’re fully incorporated. Stir in the vanilla extract.
- Mix Dry Ingredients: In a separate bowl, whisk together the flour, cocoa powder, baking soda, and salt. This will help to evenly distribute the baking soda and salt throughout the dry ingredients.
- Combine Wet and Dry Ingredients: Gradually add the dry ingredients to the wet ingredients, mixing until just combined. Be careful not to overmix, as this can lead to tough cookies.
- Fold in Chocolate Chips: Using a spatula, gently fold in the chocolate chips until they’re evenly distributed throughout the dough.
- Shape the Cookies: Using a tablespoon or cookie scoop, drop rounded tablespoons of dough onto the prepared baking sheets, leaving about 2 inches of space between each cookie to allow for spreading.
- Bake the Cookies: Bake in the preheated oven for 10-12 minutes, or until the edges are set and the centers look slightly underbaked. The cookies will continue to cook and set as they cool.
- Cool and Serve: Allow the cookies to cool on the baking sheets for 5 minutes before transferring them to a wire rack to cool completely. Enjoy them warm or at room temperature.
Extra Tips:
For the best results, make sure your butter is at room temperature before you begin. This will help it to cream properly with the sugars, creating the ideal texture for your cookies.
If you prefer your cookies extra chewy, try chilling the dough for at least 30 minutes before baking. This will help control the spread of the cookies and enhance their chewy texture.
Additionally, feel free to experiment with different types of chocolate chips or add nuts for extra flavor and texture. Happy baking!
Almond Flour Sugar Cookies
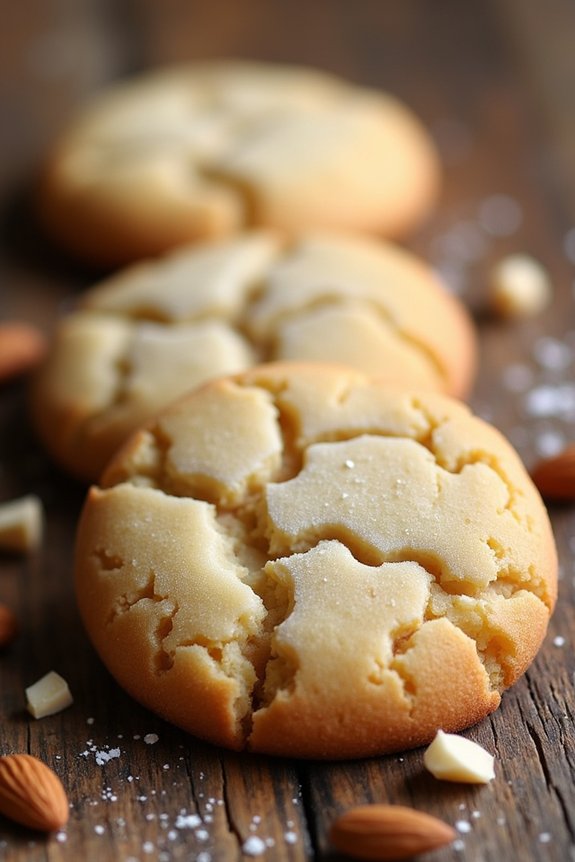
Almond Flour Sugar Cookies are a delightful and chewy treat that are perfect for the holiday season. These cookies have a rich, nutty flavor thanks to the almond flour and are perfectly sweetened to satisfy your sugar cravings. They’re also gluten-free, making them an ideal choice for those who are avoiding gluten but still want to indulge in festive cookies.
The texture is soft and chewy, with a slight crisp around the edges, making them irresistible for people of all ages. Making these cookies is quite simple and requires only a few ingredients that are likely already in your pantry. The use of almond flour not only adds a unique flavor but also enhances the texture, making the cookies tender and moist.
These cookies are perfect for decorating with icing or leaving plain, depending on your preference. Whether you’re preparing them for a holiday party or enjoying them with a warm cup of coffee, Almond Flour Sugar Cookies are sure to be a hit.
Ingredients (Serves 4-6):
- 2 cups almond flour
- 1/3 cup granulated sugar
- 1/4 cup unsalted butter, softened
- 1 large egg
- 1 teaspoon vanilla extract
- 1/2 teaspoon baking soda
- 1/4 teaspoon salt
Cooking Instructions:
- Preheat the Oven: Start by preheating your oven to 350°F (175°C). This guarantees that your cookies bake evenly and develop the perfect texture.
- Mix the Dry Ingredients: In a medium-sized bowl, combine the almond flour, baking soda, and salt. Mix these ingredients well to guarantee that the baking soda is evenly distributed throughout the flour.
- Cream the Butter and Sugar: In a separate large mixing bowl, cream together the softened butter and granulated sugar using an electric mixer. Beat them until the mixture is light and fluffy, which should take about 2-3 minutes.
- Add the Wet Ingredients: To the creamed butter and sugar, add the egg and vanilla extract. Continue to beat until well combined and smooth.
- Combine the Mixtures: Gradually add the dry ingredients to the wet ingredients, mixing on low speed until a dough forms. Guarantee that all the ingredients are fully incorporated, and you have a consistent dough.
- Shape the Cookies: Using your hands, roll the dough into small balls, about 1 inch in diameter. Place the balls onto a baking sheet lined with parchment paper, leaving some space between each ball.
- Flatten the Cookies: Gently press down on each ball to flatten it slightly. This will help the cookies bake evenly and achieve the desired shape.
- Bake the Cookies: Place the baking sheet in the preheated oven and bake for 10-12 minutes, or until the edges are golden brown. Keep an eye on them to prevent overbaking.
- Cool and Serve: Remove the cookies from the oven and allow them to cool on the baking sheet for a few minutes before transferring them to a wire rack to cool completely. Enjoy your Almond Flour Sugar Cookies once they’ve cooled.
Extra Tips:
When making Almond Flour Sugar Cookies, it’s important to use finely ground almond flour for the best texture. If your dough seems too sticky to handle, you can chill it in the refrigerator for about 30 minutes to make it easier to work with.
Additionally, you can customize these cookies by adding a pinch of cinnamon or a dash of almond extract for an extra layer of flavor. If you’d like to decorate them, wait until the cookies have completely cooled before adding any icing or toppings. Enjoy these delicious cookies with a tall glass of milk or your favorite holiday beverage!
Salted Caramel Chocolate Cookies

Salted Caramel Chocolate Cookies are a delightful treat that combines the rich flavors of chocolate with the sweet and savory taste of salted caramel. These chewy cookies are perfect for the holiday season, offering a delicious balance of sweet and salty in every bite.
Whether you’re baking them for a festive gathering or just to enjoy with a cup of hot cocoa, these cookies are bound to become a favorite.
Crafting the perfect Salted Caramel Chocolate Cookies involves using high-quality ingredients and following a few simple steps to achieve the right texture and flavor. This recipe is designed to serve 4-6 people, making it ideal for small gatherings or as a special treat for your family.
The key to these cookies is confirming the caramel remains soft and gooey while the chocolate creates a rich backdrop for the salty-sweet contrast.
Ingredients (Serves 4-6):
- 1 cup unsalted butter, softened
- 1 cup granulated sugar
- 1 cup packed brown sugar
- 2 large eggs
- 2 teaspoons vanilla extract
- 2 1/4 cups all-purpose flour
- 1/2 cup unsweetened cocoa powder
- 1 teaspoon baking soda
- 1/2 teaspoon salt
- 1 cup semi-sweet chocolate chips
- 1/2 cup caramel bits
- Sea salt flakes for sprinkling
Instructions:
- Preheat the Oven: Start by preheating your oven to 350°F (175°C). This makes sure it’s ready for baking once your cookie dough is prepared.
- Cream Butter and Sugars: In a large mixing bowl, cream together the softened butter, granulated sugar, and brown sugar until light and fluffy. This should take about 3-4 minutes with an electric mixer on medium speed.
- Add Eggs and Vanilla: Beat in the eggs one at a time, confirming each is fully incorporated before adding the next. Mix in the vanilla extract.
- Mix Dry Ingredients: In a separate bowl, whisk together the flour, cocoa powder, baking soda, and salt. This helps confirm even distribution of the dry ingredients.
- Combine Wet and Dry Mixtures: Gradually add the dry ingredients to the wet mixture, mixing on low speed until just combined. Be careful not to overmix.
- Fold in Chocolate and Caramel: Gently fold in the chocolate chips and caramel bits using a spatula or wooden spoon until they’re evenly distributed throughout the dough.
- Shape and Arrange: Using a tablespoon or cookie scoop, drop rounded tablespoons of dough onto a baking sheet lined with parchment paper, spacing them about 2 inches apart.
- Bake: Place the baking sheet in the preheated oven and bake for 10-12 minutes, or until the edges are set but the centers remain soft.
- Add Salt and Cool: Immediately after removing the cookies from the oven, sprinkle them with sea salt flakes. Allow them to cool on the baking sheet for 5 minutes before transferring to a wire rack to cool completely.
Extra Tips:
For best results, confirm that your butter is softened to room temperature before starting, as this will help the sugars blend smoothly and create a creamy texture.
If you prefer your cookies with a softer middle, slightly underbake them and let them finish setting on the baking sheet.
Also, using parchment paper prevents the cookies from sticking to the sheet and makes cleanup easy.
If you can’t find caramel bits, you can use soft caramels cut into small pieces. Enjoy these cookies fresh out of the oven for the ultimate gooey caramel experience!
Chewy Eggnog Cookies
Chewy Eggnog Cookies are the perfect festive treat to bring the flavors of the holiday season into your home. With their soft, chewy texture and delightful taste of eggnog, these cookies are ideal for any Christmas gathering or cozy night by the fire. The spices and rich flavors blend beautifully to create a cookie that’s both nostalgic and unique, making them a must-try for any eggnog lover.
Making Chewy Eggnog Cookies is a simple process that combines traditional cookie-making techniques with a few added ingredients to capture the essence of eggnog. The result is a batch of cookies that aren’t only delicious but also visually appealing with a light dusting of nutmeg on top. Below, you’ll find all the necessary ingredients and step-by-step instructions to prepare these delightful cookies for 4-6 people.
Ingredients:
- 2 1/4 cups all-purpose flour
- 1 teaspoon baking powder
- 1/2 teaspoon ground cinnamon
- 1/2 teaspoon ground nutmeg
- 1/4 teaspoon salt
- 1/2 cup unsalted butter, softened
- 1/2 cup granulated sugar
- 1/2 cup packed light brown sugar
- 2 large egg yolks
- 1/2 cup eggnog
- 1 teaspoon vanilla extract
- 1/2 teaspoon rum extract
Cooking Instructions:
- Preheat the Oven: Begin by preheating your oven to 300°F (150°C). This guarantees that the cookies bake evenly and develop their chewy texture.
- Mix Dry Ingredients: In a medium-sized bowl, whisk together the all-purpose flour, baking powder, ground cinnamon, ground nutmeg, and salt. This helps to evenly distribute the spices throughout the cookies.
- Cream Butter and Sugars: In a large mixing bowl, use an electric mixer to cream together the softened butter, granulated sugar, and light brown sugar until the mixture is light and fluffy. This usually takes about 3 minutes.
- Add Wet Ingredients: To the creamed butter mixture, add the egg yolks, eggnog, vanilla extract, and rum extract. Mix until the ingredients are thoroughly combined.
- Combine Wet and Dry Mixtures: Gradually add the dry ingredients to the wet mixture, mixing on low speed just until the dough comes together. Be careful not to overmix.
- Shape the Cookies: Using a tablespoon, scoop out dough and form it into balls. Place them on a baking sheet lined with parchment paper, leaving some space between each cookie.
- Bake the Cookies: Bake in the preheated oven for 18-20 minutes or until the edges are lightly golden. The centers should still look slightly soft.
- Cool and Serve: Allow the cookies to cool on the baking sheet for about 5 minutes before transferring them to a wire rack to cool completely. Dust lightly with additional nutmeg if desired.
Extra Tips: For an extra touch of holiday spirit, consider adding a sprinkle of powdered sugar on top of the cookies once they’ve cooled. If you want to enhance the eggnog flavor, you can increase the amount of nutmeg slightly.
Make sure your butter is at room temperature before starting, as this will help achieve the perfect creamy consistency when mixing with the sugars. Enjoy these cookies with a glass of milk or a cup of eggnog for the full festive experience!
Soft Lemon Poppy Seed Cookies

Soft Lemon Poppy Seed Cookies are a delightful treat that combines the zesty tang of fresh lemon with the subtle crunch of poppy seeds. These cookies are perfect for the holiday season or any time of year when you crave a soft, chewy cookie with a burst of citrus flavor. The cookies are easy to make and can be prepared in under an hour, making them a great choice for both beginner and experienced bakers.
The key to these cookies is the balance between the lemon and the poppy seeds, creating a harmonious blend that pleases the palate. The addition of a light lemon glaze enhances the citrus notes, while the poppy seeds add a unique texture. With a serving size of 4-6 people, this recipe is ideal for a small gathering or as a thoughtful homemade gift during the festive season.
Ingredients:
- 1 cup unsalted butter, softened
- 1 cup granulated sugar
- 1 large egg
- 2 tablespoons fresh lemon juice
- 1 tablespoon lemon zest
- 2 cups all-purpose flour
- 1 teaspoon baking powder
- 1/2 teaspoon baking soda
- 1/4 teaspoon salt
- 2 tablespoons poppy seeds
- 1 cup powdered sugar (for glaze)
- 2 tablespoons fresh lemon juice (for glaze)
Cooking Instructions:
- Preheat the Oven: Start by preheating your oven to 350°F (175°C). Line two baking sheets with parchment paper or silicone baking mats.
- Cream the Butter and Sugar: In a large mixing bowl, use an electric mixer to cream together the softened butter and granulated sugar until light and fluffy, about 3-4 minutes. This step is essential for achieving a soft and chewy texture.
- Add Wet Ingredients: Beat in the egg, lemon juice, and lemon zest until well combined. The lemon juice and zest will infuse the dough with a fresh, citrusy flavor.
- Combine Dry Ingredients: In a separate bowl, whisk together the flour, baking powder, baking soda, and salt. Gradually add these dry ingredients to the wet mixture, mixing until just combined. Be careful not to overmix.
- Incorporate Poppy Seeds: Gently fold in the poppy seeds until they’re evenly distributed throughout the dough.
- Shape the Cookies: Using a tablespoon or cookie scoop, drop rounded tablespoons of dough onto the prepared baking sheets, spacing them about 2 inches apart.
- Bake the Cookies: Place the baking sheets in the preheated oven and bake for 10-12 minutes, or until the edges are lightly golden. The centers should remain soft. Remove from the oven and allow the cookies to cool on the baking sheets for a few minutes before transferring them to a wire rack to cool completely.
- Prepare the Glaze: In a small bowl, mix together the powdered sugar and 2 tablespoons of fresh lemon juice until smooth. Drizzle the glaze over the cooled cookies and let it set for about 10 minutes before serving.
Extra Tips:
When measuring the flour, make sure to spoon it into your measuring cup and level it off with a knife to avoid packing in too much flour, which can make the cookies dense.
For extra lemon flavor, consider adding a bit more lemon zest to the dough. If you prefer a thicker glaze, add more powdered sugar until the desired consistency is reached.
Finally, these cookies can be stored in an airtight container at room temperature for up to a week, making them a convenient make-ahead option for holiday gatherings.
Maple Pecan Cookies

Maple Pecan Cookies are a delightful treat that perfectly encapsulate the warm, fragrant essence of the holiday season. These cookies are a delicious combination of rich maple syrup and crunchy pecans, offering a chewy texture that’s irresistible to cookie lovers. Perfect for Christmas gatherings or as a cozy snack on a chilly winter day, these cookies are certain to be a favorite among your family and friends.
The subtle sweetness of maple syrup paired with the nutty flavor of pecans creates a truly festive cookie that’s both satisfying and comforting. The key to achieving the perfect chewiness in these cookies lies in the balance of ingredients and the right baking technique. By using brown sugar, you enhance the cookies’ moist texture, while the right amount of butter guarantees a rich flavor.
The pecans add a delightful crunch, and the maple syrup infuses each bite with a natural sweetness. Whether you’re an experienced baker or a novice in the kitchen, these Maple Pecan Cookies are simple to make and deliver impressive results that will have everyone reaching for seconds.
Ingredients (serving size: 4-6 people):
- 1 cup unsalted butter, softened
- 1 cup brown sugar, packed
- 1/2 cup granulated sugar
- 1/4 cup pure maple syrup
- 1 teaspoon vanilla extract
- 2 large eggs
- 2 3/4 cups all-purpose flour
- 1 teaspoon baking soda
- 1/2 teaspoon salt
- 1 cup chopped pecans
- Additional pecan halves for topping (optional)
Cooking Instructions:
- Preheat and Prepare: Preheat your oven to 350°F (175°C) and line two baking sheets with parchment paper. This will prevent the cookies from sticking and guarantee even baking.
- Cream the Butter and Sugars: In a large mixing bowl, beat the softened butter, brown sugar, and granulated sugar together until light and fluffy. This should take about 2-3 minutes with an electric mixer.
- Add Wet Ingredients: Mix in the maple syrup, vanilla extract, and eggs. Continue to beat until all ingredients are well incorporated and the mixture is smooth.
- Combine Dry Ingredients: In a separate bowl, whisk together the all-purpose flour, baking soda, and salt. Gradually add the dry ingredients to the wet mixture, beating on low speed until just combined.
- Fold in Pecans: Gently fold in the chopped pecans using a spatula. Confirm the pecans are evenly distributed throughout the dough.
- Shape Cookies: Using a tablespoon or cookie scoop, portion out dough balls onto the prepared baking sheets, spacing them about 2 inches apart. If desired, gently press a pecan half on top of each cookie for decoration.
- Bake: Bake in the preheated oven for 10-12 minutes, or until the edges are golden brown and the centers are set but still soft. Be careful not to overbake, as this will affect the cookies’ chewiness.
- Cool: Allow the cookies to cool on the baking sheets for 5 minutes before transferring them to a wire rack to cool completely.
Extra Tips:
To achieve the best flavor, use high-quality pure maple syrup rather than artificial varieties, as it greatly enhances the cookies’ taste. For a more pronounced maple flavor, you can increase the maple syrup slightly, but be sure to adjust the flour to maintain the dough’s consistency.
Additionally, for an extra touch of holiday spirit, consider including a pinch of cinnamon or nutmeg to the dough. Finally, if you prefer a softer cookie, you can slightly underbake them and let them cool on the baking sheet for a few extra minutes. Happy baking!
Chewy Peanut Butter Blossoms

Chewy Peanut Butter Blossoms are a delightful twist on the classic cookie that combines the rich taste of peanut butter with a sweet chocolate kiss on top. Perfect for the holiday season, these cookies offer a chewy texture that melts in your mouth, leaving a burst of flavor with every bite.
Whether you’re baking for a festive gathering or just to enjoy with a cup of hot cocoa, these cookies are bound to become a favorite.
Creating these Chewy Peanut Butter Blossoms isn’t only simple but also a fun activity to share with family and friends. This recipe serves 4-6 people, making it ideal for small gatherings or those cozy nights in. With a short list of ingredients and easy-to-follow steps, you can whip these up in no time and impress everyone with your baking skills.
Ingredients:
- 1/2 cup unsalted butter, softened
- 1/2 cup creamy peanut butter
- 1/2 cup granulated sugar
- 1/2 cup packed brown sugar
- 1 large egg
- 2 tablespoons milk
- 1 teaspoon vanilla extract
- 1 3/4 cups all-purpose flour
- 1 teaspoon baking soda
- 1/2 teaspoon salt
- Additional granulated sugar for rolling
- About 24 chocolate kisses, unwrapped
Instructions:
- Preheat your oven to 375°F (190°C). Line two baking sheets with parchment paper or silicone baking mats.
- In a large mixing bowl, cream together the softened butter, peanut butter, granulated sugar, and brown sugar until light and fluffy. This should take about 2-3 minutes using an electric mixer on medium speed.
- Add the egg, milk, and vanilla extract to the butter mixture. Mix until well combined.
- In a separate bowl, whisk together the all-purpose flour, baking soda, and salt. Gradually add the dry ingredients to the wet ingredients, mixing until just combined.
- Roll the dough into 1-inch balls. Roll each ball in additional granulated sugar to coat.
- Place the balls about 2 inches apart on the prepared baking sheets.
- Bake in the preheated oven for 8-10 minutes, or until the edges are lightly golden. The cookies should be soft in the center.
- Immediately upon removing the cookies from the oven, gently press a chocolate kiss into the center of each cookie. The cookie will crack slightly around the edges.
- Allow the cookies to cool on the baking sheet for 5 minutes before transferring them to a wire rack to cool completely.
Extra Tips:
For an even more pronounced peanut butter flavor, you can use crunchy peanut butter instead of creamy. Confirm the butter is at room temperature for easier creaming with the sugars.
If you prefer a softer texture, slightly underbake the cookies, as they’ll continue to firm up slightly as they cool. Finally, make sure the chocolate kisses are unwrapped and ready to go before the cookies come out of the oven to guarantee they adhere properly.