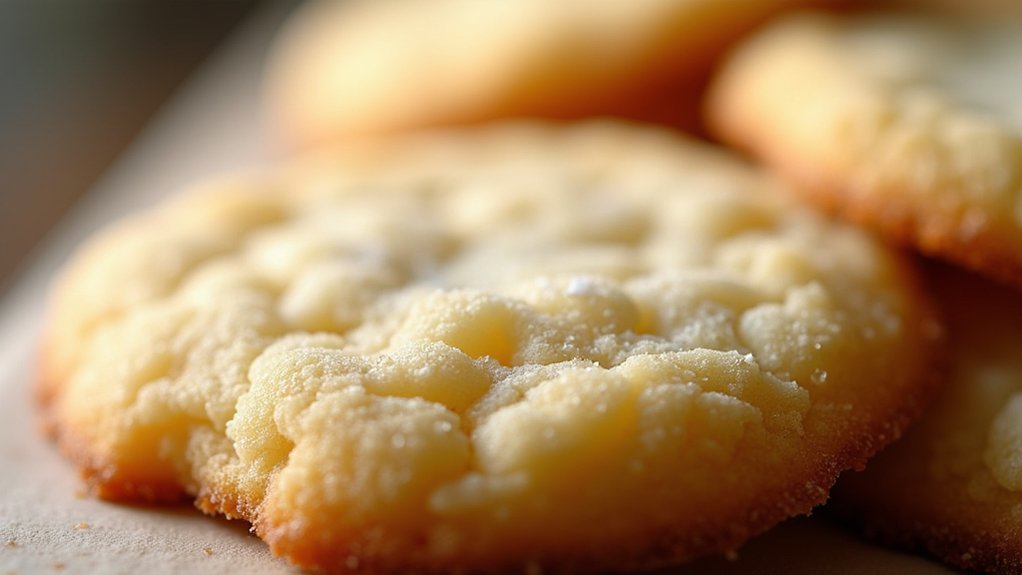
As the holiday season draws near, I can’t resist the pull of my kitchen, where the oven’s warmth and the scent of baked delights offer a comforting nostalgia. Crafting rustic Christmas cookies feels like a beautiful blend of tradition and flavor. From buttery shortbread to chewy gingerbread men, these recipes are sure to please. Let’s explore these charming treats, perfect for sharing with loved ones.
Classic Butter Shortbread Cookies
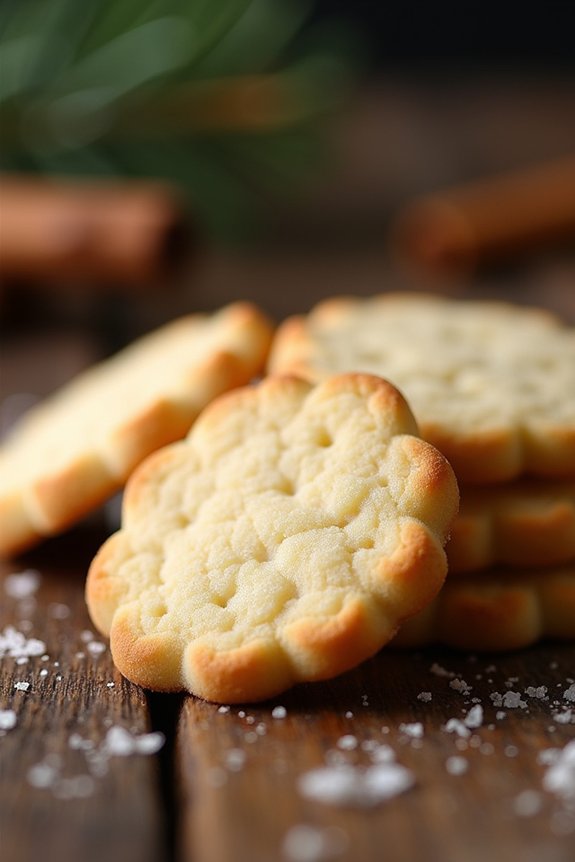
Classic Butter Shortbread Cookies are a quintessential holiday treat, perfect for adding a rustic charm to your Christmas cookie platter. These cookies are rich and buttery, with a delicate crumb that melts in your mouth. The simplicity of the recipe allows the quality of the butter to shine, making it essential to use the best butter you can find. This timeless recipe is a crowd-pleaser, sure to evoke warm memories of the holiday season with every bite.
Whether you’re baking for family gatherings, cookie swaps, or just to enjoy with a hot cup of cocoa, these Classic Butter Shortbread Cookies are a festive addition to your holiday baking repertoire. With only a handful of ingredients, they come together quickly and can be customized with a sprinkle of sugar on top or a dip in chocolate. This recipe serves 4-6 people, making it perfect for a small holiday celebration or as a part of a larger dessert spread.
Ingredients:
- 1 cup (2 sticks) unsalted butter, at room temperature
- 1/2 cup powdered sugar
- 1/4 cup granulated sugar
- 1 teaspoon pure vanilla extract
- 2 cups all-purpose flour
- 1/4 teaspoon salt
Instructions:
- Preheat the Oven: Begin by preheating your oven to 325°F (160°C). Line a baking sheet with parchment paper to prevent the cookies from sticking.
- Cream the Butter and Sugars: In a large mixing bowl, combine the room temperature butter, powdered sugar, and granulated sugar. Use an electric mixer on medium speed to cream the ingredients until the mixture is light and fluffy, about 3-5 minutes. This step is vital for achieving the right texture in your cookies.
- Add Vanilla: Pour in the vanilla extract and continue to mix until it’s fully incorporated into the butter and sugar mixture.
- Incorporate Dry Ingredients: In a separate bowl, whisk together the flour and salt. Gradually add this dry mixture to the wet ingredients, mixing on low speed until just combined. Avoid overmixing, as this can make the cookies tough.
- Form the Dough: Turn the dough out onto a lightly floured surface and gently knead until it comes together into a smooth dough. If the dough is too sticky, add a little more flour, one tablespoon at a time.
- Shape the Cookies: Roll the dough into a log about 2 inches in diameter, then wrap it in plastic wrap and chill in the refrigerator for about 30 minutes. This step helps the dough firm up, making it easier to slice.
- Slice and Bake: Once chilled, slice the dough into 1/4-inch thick rounds and place them on the prepared baking sheet, leaving about an inch of space between each cookie. Bake in the preheated oven for 12-15 minutes or until the edges begin to turn golden brown.
- Cool the Cookies: Remove the cookies from the oven and let them cool on the baking sheet for 5 minutes before transferring them to a wire rack to cool completely.
Tips:
For the best results, make sure your butter is at room temperature before you begin mixing. Cold butter won’t cream properly, affecting the texture of your cookies.
If you prefer a bit of extra sweetness, sprinkle a little granulated sugar on top of the cookies before baking. Additionally, these cookies can be stored in an airtight container for up to a week, making them a great make-ahead option for holiday gatherings.
If you’re feeling adventurous, try adding a pinch of cinnamon or nutmeg to the dough for a festive twist.
Cinnamon Sugar Snickerdoodles
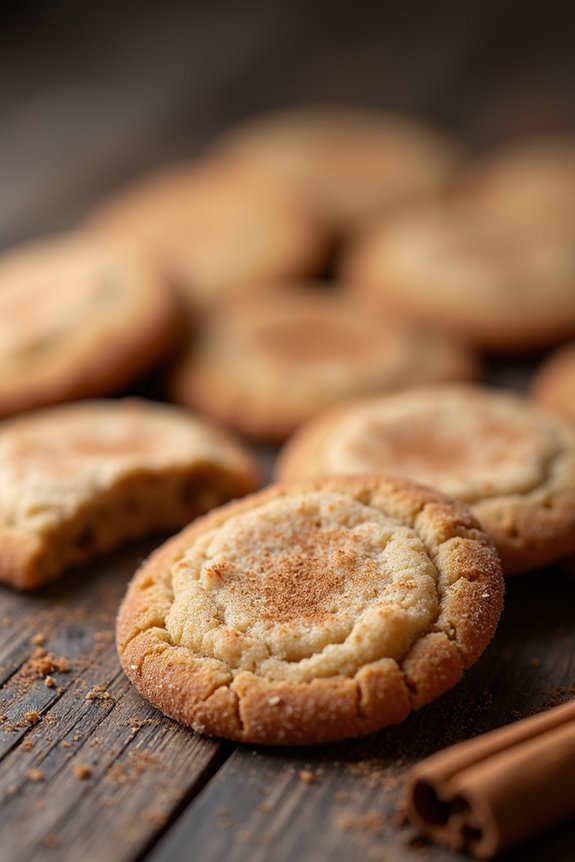
Cinnamon Sugar Snickerdoodles are a timeless holiday classic that bring warmth and cheer to any festive gathering. These rustic cookies are known for their soft, chewy texture and the delightful combination of cinnamon and sugar that coats each one. Perfectly golden on the outside and tender on the inside, Snickerdoodles are a treat that evokes nostalgia and comfort, making them an ideal choice for Christmas celebrations.
With their simple ingredients and straightforward preparation, these cookies are a joy to bake and share with loved ones during the holiday season.
To create the perfect Cinnamon Sugar Snickerdoodles, you’ll start by mixing a buttery dough that’s enhanced with a hint of vanilla and a touch of cream of tartar, which gives them their signature tangy flavor. After rolling the dough into balls, you’ll coat them generously in a blend of cinnamon and sugar, guaranteeing every bite is bursting with flavor.
They bake quickly, filling your kitchen with an irresistible aroma that signals the arrival of Christmas magic. Follow this recipe, and you’ll have a batch of cookies that are sure to delight everyone at your holiday table.
Ingredients (Serves 4-6 people):
- 1 cup unsalted butter, softened
- 1 1/2 cups granulated sugar
- 2 large eggs
- 1 teaspoon vanilla extract
- 2 3/4 cups all-purpose flour
- 2 teaspoons cream of tartar
- 1 teaspoon baking soda
- 1/4 teaspoon salt
- 2 tablespoons ground cinnamon
- 1/4 cup granulated sugar (for rolling)
Instructions:
- Preheat the Oven: Begin by preheating your oven to 375°F (190°C). Line two baking sheets with parchment paper to guarantee the cookies don’t stick and bake evenly.
- Cream the Butter and Sugar: In a large mixing bowl, cream together the softened butter and 1 1/2 cups of granulated sugar using an electric mixer on medium speed until the mixture is light and fluffy. This should take about 2-3 minutes.
- Add the Wet Ingredients: Beat in the eggs, one at a time, guaranteeing each is fully incorporated before adding the next. Then, mix in the vanilla extract.
- Combine Dry Ingredients: In a separate bowl, whisk together the all-purpose flour, cream of tartar, baking soda, and salt. Gradually add this dry mixture to the wet ingredients, mixing on low speed until a soft dough forms.
- Prepare Cinnamon Sugar Coating: In a small bowl, combine the 1/4 cup of granulated sugar with the ground cinnamon for rolling.
- Shape the Cookies: Using a tablespoon or a small cookie scoop, portion out the dough and roll it into 1-inch balls. Roll each ball in the cinnamon-sugar mixture until fully coated.
- Bake the Cookies: Place the coated dough balls on the prepared baking sheets, leaving about 2 inches of space between each one. Bake in the preheated oven for 10-12 minutes or until the edges are lightly browned but the centers are still soft.
- Cool and Serve: Allow the cookies to cool on the baking sheets for 5 minutes before transferring them to a wire rack to cool completely. Enjoy warm or store in an airtight container for up to a week.
Extra Tips: To guarantee the best texture, don’t over-bake the cookies; they should be just set in the center when you remove them from the oven. If you prefer a little extra flavor, you can add a pinch of nutmeg to the cinnamon-sugar coating for a subtle spice twist.
Additionally, chilling the dough for about 30 minutes before shaping can help the cookies maintain their shape and prevent excessive spreading while baking.
Old-Fashioned Gingerbread Men

Get ready to fill your home with the warm, spicy aroma of Old-Fashioned Gingerbread Men, a classic Christmas treat that never goes out of style. These charming cookies are perfect for bringing a touch of nostalgia to your holiday celebrations.
With their delightful blend of ginger, cinnamon, and molasses, these gingerbread men aren’t only delicious but also fun to decorate with family and friends. Whether hung on the Christmas tree or served on a festive platter, they’re sure to be a hit with everyone, young and old alike.
This recipe yields enough gingerbread men to serve 4-6 people, making it ideal for a cozy family gathering or a small holiday party. The key to the perfect gingerbread men lies in the dough’s consistency, which should be firm enough to hold its shape during baking yet soft enough to remain chewy.
With the right balance of spices and sweetness, these cookies are a demonstration of the timeless appeal of traditional holiday baking. Let’s plunge into the ingredients and steps to create these delightful gingerbread men.
Ingredients (serves 4-6 people):
- 3 cups all-purpose flour
- 3/4 cup packed brown sugar
- 3/4 teaspoon baking soda
- 1 tablespoon ground ginger
- 1 tablespoon ground cinnamon
- 1/2 teaspoon ground cloves
- 1/2 teaspoon salt
- 1/2 cup (1 stick) unsalted butter, room temperature
- 3/4 cup molasses
- 1 large egg
- 1 teaspoon vanilla extract
- Assorted decorating candies and icing
Instructions:
- Mix Dry Ingredients: In a large bowl, whisk together the flour, brown sugar, baking soda, ginger, cinnamon, cloves, and salt. Confirm the mixture is evenly combined to distribute the spices throughout the dough.
- Cream Butter and Molasses: In a separate large bowl, beat the butter until creamy using an electric mixer. Gradually add the molasses, beating until the mixture is smooth and well combined.
- Combine Wet and Dry Mixtures: Add the egg and vanilla extract to the butter and molasses mixture. Beat until just combined. Gradually add the dry ingredients, mixing on low speed until a dough forms. If the dough is too sticky, add a little more flour until it reaches the desired consistency.
- Chill the Dough: Divide the dough into two flattened disks, wrap them in plastic wrap, and refrigerate for at least 1 hour. Chilling helps the dough firm up, making it easier to roll and cut.
- Preheat and Prepare: Preheat your oven to 350°F (175°C). Line baking sheets with parchment paper or silicone baking mats.
- Roll and Cut the Dough: On a lightly floured surface, roll the dough out to about 1/4 inch thick. Use a gingerbread man cookie cutter to cut out shapes, and transfer them to the prepared baking sheets, spacing them about 1 inch apart.
- Bake the Cookies: Bake in the preheated oven for 8-10 minutes, or until the edges just begin to darken. Be careful not to overbake, as this can make the cookies too hard.
- Cool and Decorate: Remove the cookies from the oven and allow them to cool on the baking sheets for 5 minutes before transferring them to wire racks to cool completely. Once cooled, decorate with icing and candies as desired.
Tips:
For the best results, confirm all your ingredients, especially the butter and eggs, are at room temperature before you begin. This helps achieve a smoother dough.
If you find the dough too sticky while rolling, sprinkle a little flour on your rolling surface or your rolling pin. Additionally, to make decorating easier, use squeeze bottles or piping bags for icing, which allow for more precision and creativity.
Finally, store the decorated cookies in an airtight container to keep them fresh and chewy for several days.
Rustic Chocolate Chip Oatmeal Cookies

If you’re looking to capture the warm and cozy essence of the holiday season, then Rustic Chocolate Chip Oatmeal Cookies are the perfect treat. These cookies combine the rich, comforting flavors of chocolate and oatmeal, creating a delightful balance of sweet and hearty. With their chewy texture and slightly crispy edges, they’re perfect for enjoying with a mug of hot cocoa by the fire.
Whether you’re baking for a family gathering or simply indulging in a little holiday magic for yourself, these cookies are sure to please. The rustic charm of these cookies lies in their simplicity and the use of wholesome ingredients. Whole oats contribute to a satisfying texture and add a touch of nuttiness, while generous chocolate chips offer bursts of sweetness in every bite.
This recipe is designed to make 4-6 servings, making it ideal for sharing with loved ones or keeping a small stash for yourself. Let’s explore the ingredients and the straightforward steps that will have your kitchen filled with the comforting aroma of homemade cookies.
Ingredients (Serves 4-6):
- 1 cup all-purpose flour
- 1/2 teaspoon baking soda
- 1/4 teaspoon salt
- 1/2 cup unsalted butter, softened
- 1/2 cup brown sugar, packed
- 1/4 cup granulated sugar
- 1 large egg
- 1 teaspoon vanilla extract
- 1 cup old-fashioned rolled oats
- 1 cup semisweet chocolate chips
Cooking Instructions:
- Preheat the Oven: Begin by preheating your oven to 350°F (175°C). Line a baking sheet with parchment paper for easy cleanup and to prevent sticking.
- Prepare the Dry Ingredients: In a medium bowl, whisk together the flour, baking soda, and salt. This step guarantees that the baking soda and salt are evenly distributed throughout the flour.
- Cream the Butter and Sugars: In a large bowl, using an electric mixer on medium speed, cream together the softened butter, brown sugar, and granulated sugar until the mixture is light and fluffy. This should take about 2-3 minutes.
- Add the Wet Ingredients: Beat in the egg and vanilla extract until well combined. Scrape down the sides of the bowl as needed to confirm all ingredients are incorporated.
- Combine with Dry Ingredients: Gradually add the dry ingredient mixture to the wet ingredients, mixing on low speed until just combined. Don’t overmix.
- Fold in the Oats and Chocolate Chips: Using a spatula, gently fold in the rolled oats and chocolate chips until evenly distributed throughout the dough.
- Shape the Cookies: Scoop tablespoon-sized portions of dough onto the prepared baking sheet, spacing them about 2 inches apart to allow for spreading.
- Bake: Place the baking sheet in the preheated oven and bake for 12-15 minutes, or until the cookies are golden brown around the edges and slightly soft in the center.
- Cool: Remove the cookies from the oven and let them cool on the baking sheet for 5 minutes before transferring them to a wire rack to cool completely.
Extra Tips:
For the best results, make sure your butter is at room temperature before creaming it with the sugars; this will help achieve the desired light and fluffy texture. If you prefer chewier cookies, try slightly underbaking them, as they’ll continue to firm up as they cool.
For an extra touch of flavor, consider adding a pinch of cinnamon or nutmeg to the dry ingredients. Finally, these cookies can be stored in an airtight container at room temperature for up to a week, though they’re often too irresistible to last that long!
Festive Cranberry Almond Biscotti
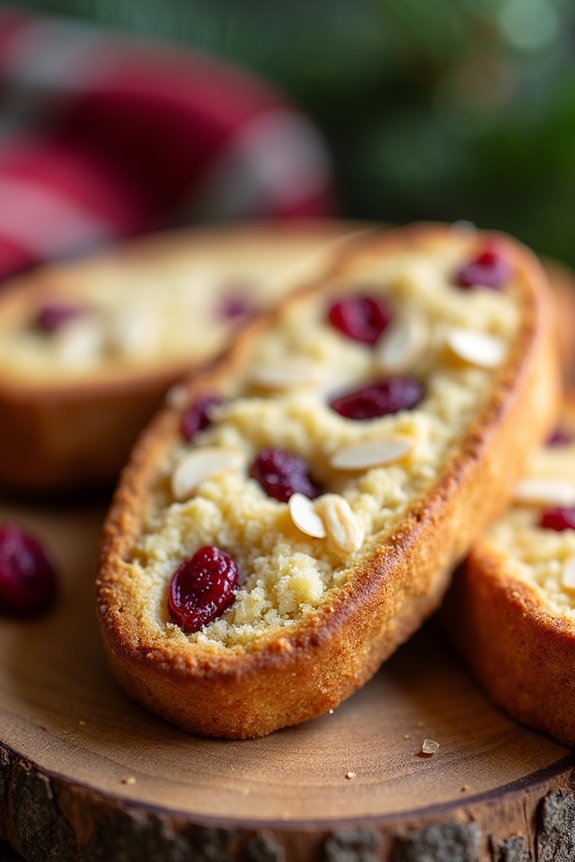
The Festive Cranberry Almond Biscotti is the perfect treat to accompany your holiday gatherings. This delightful cookie combines the tartness of dried cranberries with the nutty richness of almonds, creating a balanced flavor that’s both sweet and savory. Perfect for dipping into a warm mug of coffee or tea, these biscotti are a wonderful addition to your holiday cookie platter. Their crisp and crunchy texture makes them ideal for gifting, as they can be packaged beautifully and stored for weeks.
Biscotti, a twice-baked Italian cookie, is known for its long shelf life and crunchy texture. The addition of cranberries and almonds not only enhances the flavor but also adds a festive touch with a pop of color and a satisfying crunch. This recipe yields 4-6 servings, making it a great choice for small gatherings or as a thoughtful homemade gift for friends and family.
Follow the recipe below to create these delightful Festive Cranberry Almond Biscotti and add a touch of rustic charm to your holiday season.
Ingredients for 4-6 People:
- 2 cups all-purpose flour
- 1 cup granulated sugar
- 1 teaspoon baking powder
- 1/2 teaspoon salt
- 3 large eggs
- 2 teaspoons vanilla extract
- 1/2 teaspoon almond extract
- 1 cup dried cranberries
- 1 cup sliced almonds
Cooking Instructions:
- Preheat the Oven: Begin by preheating your oven to 350°F (175°C). Line a baking sheet with parchment paper or a silicone baking mat for easy cleanup.
- Mix Dry Ingredients: In a medium-sized bowl, whisk together the flour, sugar, baking powder, and salt. Verify that all the dry ingredients are well combined to prevent any lumps.
- Prepare Wet Ingredients: In a separate large bowl, beat the eggs until they’re light and frothy. Add the vanilla and almond extracts, and continue to beat until fully incorporated.
- Combine Wet and Dry Ingredients: Gradually add the dry ingredient mixture to the wet ingredients, mixing just until combined. Avoid overmixing to maintain a tender biscotti.
- Add Cranberries and Almonds: Gently fold in the dried cranberries and sliced almonds with a spatula or wooden spoon. Distribute them evenly throughout the dough.
- Shape the Dough: Divide the dough in half. On a lightly floured surface, shape each portion into a log about 12 inches long and 2 inches wide. Place the logs onto the prepared baking sheet, leaving space between them.
- First Bake: Bake in the preheated oven for 25-30 minutes, or until the logs are lightly golden and firm to the touch.
- Cool and Slice: Remove the logs from the oven and allow them to cool slightly on the baking sheet for about 10 minutes. Transfer to a cutting board and use a serrated knife to slice the logs diagonally into 1/2-inch thick slices.
- Second Bake: Arrange the slices cut side down back onto the baking sheet. Return to the oven and bake for an additional 10-12 minutes. Flip the biscotti over and bake for another 10-12 minutes, or until crisp and golden on both sides.
- Cool Completely: Remove the biscotti from the oven and let them cool completely on a wire rack before serving or storing.
Extra Tips:
When slicing the biscotti, use a serrated knife to get clean, even slices without crumbling. If you prefer softer biscotti, you can reduce the second bake time slightly.
For an extra festive touch, consider drizzling the cooled biscotti with melted white chocolate or adding a sprinkle of cinnamon to the dough. Store biscotti in an airtight container at room temperature to maintain their crispness, and enjoy them within two weeks for the best flavor and texture.
Spiced Molasses Cookies
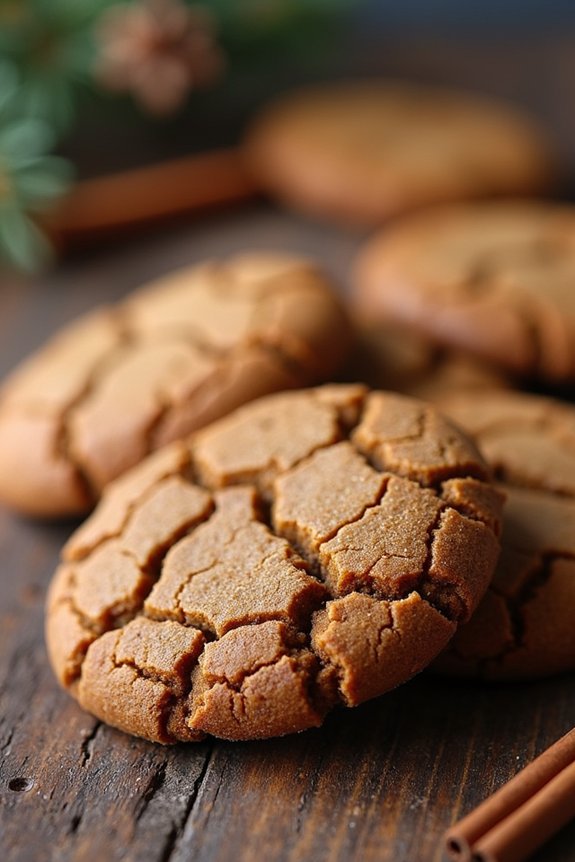
Spiced Molasses Cookies are a delicious treat that perfectly capture the warm, festive spirit of the holiday season. These cookies are a rustic Christmas delight, combining rich flavors of molasses with aromatic spices like cinnamon, ginger, and cloves. The result is a cookie that isn’t only delicious but also fills your home with the comforting scent of Christmas.
These cookies have a soft and chewy texture with a slightly crisp edge, making them a perfect accompaniment to a cup of hot cocoa or mulled wine. This recipe for Spiced Molasses Cookies is designed to serve 4-6 people and is ideal for holiday gatherings or as a homemade gift. With just the right balance of sweetness and spice, these cookies are sure to be a hit at any Christmas celebration.
The molasses adds depth and richness, while the spices provide a warming background note, making each bite a delightful experience.
Ingredients:
- 2 1/4 cups all-purpose flour
- 2 teaspoons baking soda
- 1 teaspoon ground cinnamon
- 1 teaspoon ground ginger
- 1/2 teaspoon ground cloves
- 1/4 teaspoon salt
- 3/4 cup unsalted butter, softened
- 1 cup brown sugar, packed
- 1 large egg
- 1/4 cup molasses
- 1/4 cup granulated sugar (for rolling)
Cooking Instructions:
- Preheat the Oven: Start by preheating your oven to 350°F (175°C) to guarantee it’s ready for baking the cookies.
- Mix Dry Ingredients: In a medium bowl, whisk together the flour, baking soda, cinnamon, ginger, cloves, and salt. This will evenly distribute the spices throughout the flour.
- Cream Butter and Sugar: In a large mixing bowl, cream the softened butter and brown sugar together until the mixture is light and fluffy. This should take about 2-3 minutes using an electric mixer on medium speed.
- Add Wet Ingredients: Beat in the egg and molasses to the butter and sugar mixture until well combined. The molasses will give the dough its characteristic rich color and flavor.
- Combine Mixtures: Gradually add the dry ingredients to the wet ingredients, mixing on low speed until just combined. Be careful not to overmix, as this can make the cookies tough.
- Shape Cookies: Scoop tablespoon-sized amounts of dough and roll them into balls. Roll each ball in the granulated sugar to coat.
- Bake: Place the dough balls on an ungreased baking sheet, spacing them about 2 inches apart. Bake in the preheated oven for 10-12 minutes, or until the edges are set and the tops have cracked slightly.
- Cool: Remove from the oven and allow the cookies to cool on the baking sheet for 5 minutes before transferring them to a wire rack to cool completely.
Extra Tips:
For an extra layer of flavor, consider adding a pinch of black pepper to the dry ingredients for a subtle spicy kick. If you prefer a slightly crispier cookie, extend the baking time by 1-2 minutes, but keep a close eye to prevent overbaking.
For those who enjoy a more pronounced molasses flavor, you can increase the molasses to 1/3 cup. These cookies store well in an airtight container for up to a week, making them a great option for advance holiday baking. Enjoy the process and the wonderful aroma that fills your kitchen!
Traditional Linzer Cookies
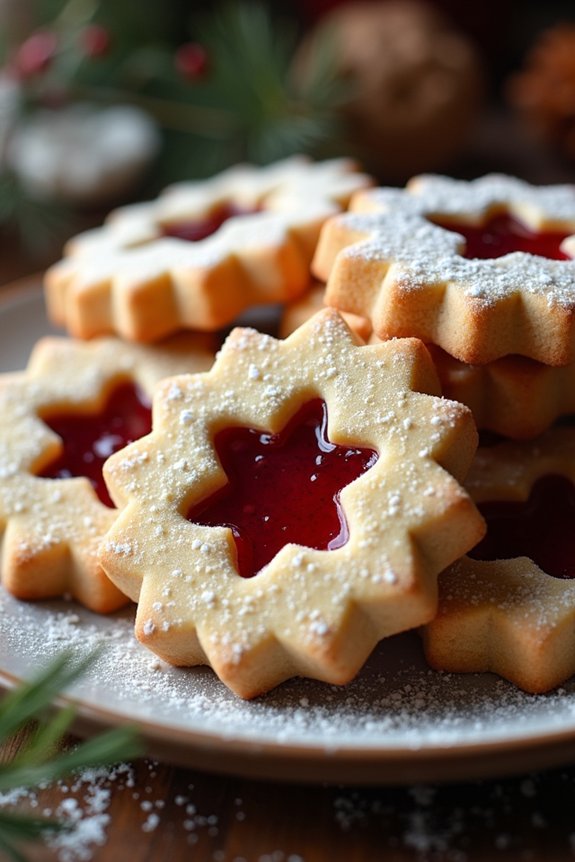
Indulge in the delightful taste of these traditional Linzer Cookies, a classic treat that brings the essence of a rustic Christmas to your home. Originating from Linz, Austria, these cookies are characterized by their buttery, nutty flavor and a sweet, fruity filling. Perfect for holiday gatherings or as a charming homemade gift, Linzer Cookies aren’t only delicious but also visually appealing with their unique cut-out design, revealing a peek of the jam inside.
These cookies are typically made with finely ground nuts, such as almonds or hazelnuts, which add a rich texture and flavor to the dough. The dough is then rolled out, cut into rounds, and sandwiched together with a tart raspberry or apricot jam. The top cookie often has a small shape cut out, like a heart or star, allowing the vibrant jam to peek through. This recipe serves 4-6 people, making it ideal for a cozy family gathering or a small holiday celebration.
Ingredients:
- 1 cup (2 sticks) unsalted butter, softened
- 1/2 cup granulated sugar
- 1 large egg yolk
- 1 teaspoon vanilla extract
- 1/2 teaspoon almond extract
- 2 cups all-purpose flour
- 1 cup finely ground almonds or hazelnuts
- 1/4 teaspoon salt
- 1/2 cup raspberry or apricot jam
- Powdered sugar for dusting
Instructions:
- Prepare the Dough: In a large bowl, cream together the softened butter and granulated sugar until light and fluffy. Add the egg yolk, vanilla extract, and almond extract, mixing until well combined.
- Combine Dry Ingredients: In a separate bowl, whisk together the all-purpose flour, finely ground almonds or hazelnuts, and salt. Gradually add the dry ingredients to the creamed mixture, mixing until a dough forms.
- Chill the Dough: Divide the dough into two equal portions, flatten them into discs, and wrap each in plastic wrap. Refrigerate for at least 1 hour or until firm enough to roll out.
- Roll Out the Dough: Preheat your oven to 350°F (175°C). On a lightly floured surface, roll out one portion of dough to about 1/8 inch thickness. Use a round cookie cutter to cut out cookies. Repeat with the second portion, but use a smaller cutter to cut out a shape in the center of each round.
- Bake the Cookies: Place the cookies on a baking sheet lined with parchment paper. Bake for 10-12 minutes or until the edges are lightly golden. Allow to cool on a wire rack.
- Assemble the Cookies: Spread a small amount of jam on the flat side of the whole cookies. Place the cut-out cookies on top, pressing gently to adhere. Dust with powdered sugar before serving.
Extra Tips:
For the best results, verify the butter is softened but not melted, as this will help achieve the perfect cookie texture. When rolling out the dough, make sure to lightly flour the surface to prevent sticking, but avoid adding too much flour, as it can make the cookies tough.
If the dough becomes too soft while working, return it to the refrigerator to firm up. When selecting jam, opt for a high-quality brand for the richest flavor. Finally, storing the assembled cookies in an airtight container will help them remain fresh and flavorful for several days.
Walnut and Honey Rugelach
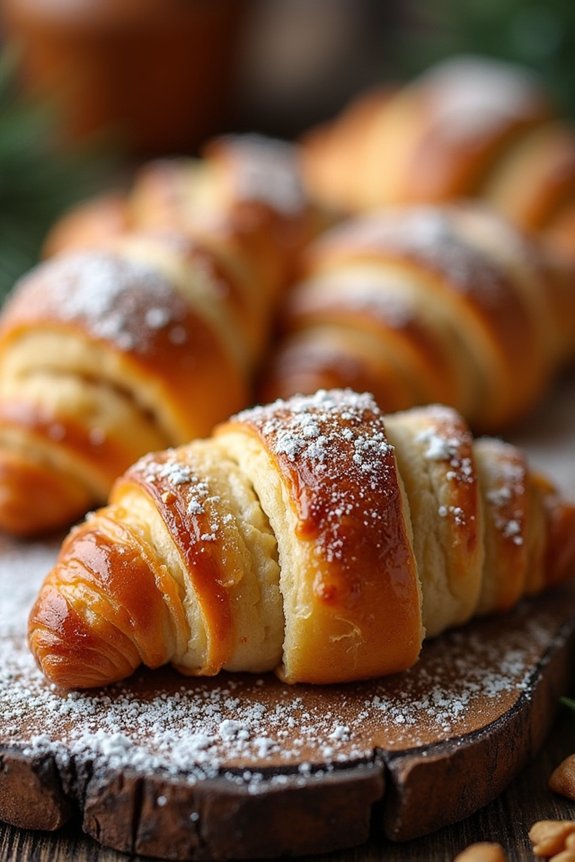
Walnut and Honey Rugelach is a delightful treat that combines the nutty richness of walnuts with the natural sweetness of honey. This traditional pastry, with its roots in Eastern European Jewish cuisine, makes an excellent addition to your rustic Christmas cookie lineup. Its flaky dough and sweet, nutty filling are certain to impress your holiday guests and add a touch of warmth and nostalgia to your festive celebrations.
Creating these delicious rugelach takes a little time, but the results are well worth the effort. The combination of butter and cream cheese in the dough lends a tender texture, while the honey and nuts provide a delightful contrast in flavor and texture. To achieve the perfect balance, it’s crucial to follow the steps carefully and allow the dough to chill properly before rolling it out. This recipe serves 4-6 people, making it ideal for intimate gatherings or as part of a larger dessert spread.
Ingredients:
- 1 cup unsalted butter, softened
- 8 oz cream cheese, softened
- 2 cups all-purpose flour
- 1/4 teaspoon salt
- 1 cup walnuts, finely chopped
- 1/2 cup honey
- 1 teaspoon cinnamon
- 1/4 cup granulated sugar
- 1 egg, beaten
- Powdered sugar for dusting
Instructions:
1. Prepare the Dough: In a large mixing bowl, beat together the softened butter and cream cheese until smooth and creamy. Gradually add in the flour and salt, mixing until a soft dough forms.
Divide the dough into two equal portions, wrap them in plastic wrap, and refrigerate for at least 2 hours or until firm.
2. Make the Filling: While the dough is chilling, combine the finely chopped walnuts, honey, cinnamon, and granulated sugar in a separate bowl. Mix well until the ingredients are evenly distributed.
3. Roll Out the Dough: Preheat your oven to 350°F (175°C). On a lightly floured surface, roll out one portion of the chilled dough into a 1/8-inch thick circle. Spread half of the walnut and honey mixture evenly over the dough, leaving a small border around the edges.
4. Shape the Rugelach: Cut the dough circle into 12 equal wedges, like slicing a pizza. Starting from the wide end, roll each wedge towards the pointed end to form a crescent shape.
Place the rugelach on a baking sheet lined with parchment paper. Repeat with the second portion of dough and remaining filling.
5. Bake the Rugelach: Brush the tops of the rugelach with the beaten egg to give them a nice golden color as they bake. Bake in the preheated oven for 20-25 minutes, or until the rugelach are golden brown and the filling is bubbly.
Allow them to cool on a wire rack.
6. Finish and Serve: Once cooled, dust the rugelach with powdered sugar for a festive touch. Serve them on a platter and enjoy their sweet, nutty flavors with friends and family.
Extra Tips:
To guarantee your rugelach turn out perfectly, make sure the dough is well-chilled before rolling it out. This helps maintain its shape and prevents the butter from melting too quickly in the oven.
Additionally, you can experiment with different types of nuts or add dried fruits like raisins or apricots to the filling for added texture and flavor. Store any leftovers in an airtight container at room temperature for up to a week, or freeze them for longer storage. Enjoy these delightful walnut and honey rugelach as a special treat during the holiday season!
Italian Pizzelle Wafers
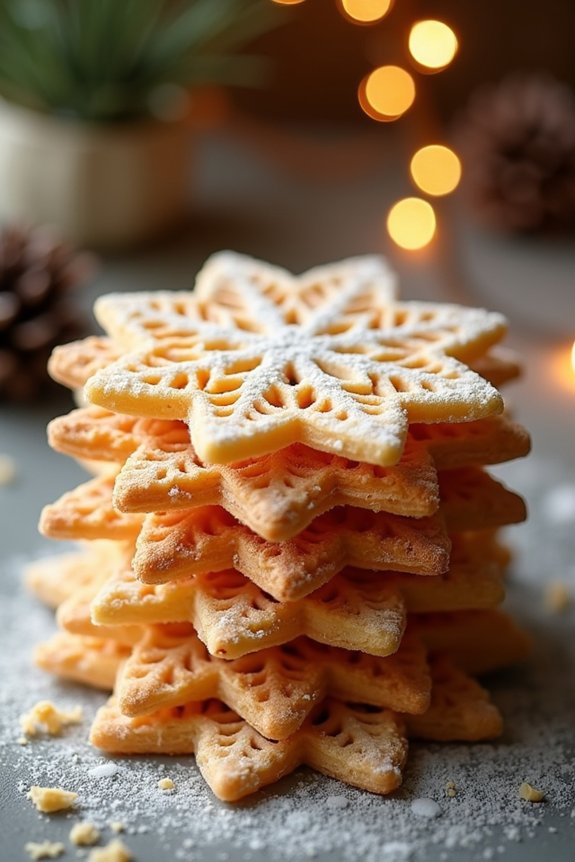
Italian Pizzelle wafers are a classic Italian holiday treat that brings a touch of rustic charm to any festive gathering. These delicate waffle cookies have a rich history in Italy, where they’re traditionally made using a pizzelle iron, resulting in their signature snowflake pattern.
Light and crisp, pizzelle wafers can be flavored with vanilla, anise, or lemon zest, making them a versatile addition to your Christmas cookie platter. Their thin, lacy texture makes them perfect for enjoying with a warm cup of tea or coffee, and they can even be shaped while warm to create cones or bowls for holding other sweet treats.
Crafting these delightful cookies at home is a rewarding experience that allows you to infuse your personal touch into a time-honored recipe. Whether you’re a seasoned baker or a novice in the kitchen, Italian Pizzelle wafers are both simple and satisfying to make.
The key to success lies in achieving the perfect batter consistency and mastering the timing of the pizzelle iron to guarantee even cooking. For a serving size of 4-6 people, you’ll be able to whip up a batch of freshly made pizzelle wafers that will surely delight your family and friends.
Ingredients:
- 3 large eggs
- 3/4 cup granulated sugar
- 1/2 cup unsalted butter, melted and cooled
- 1 tablespoon pure vanilla extract (or anise extract for a traditional flavor)
- 1 3/4 cups all-purpose flour
- 2 teaspoons baking powder
- Pinch of salt
Cooking Instructions:
- Prepare the Batter: In a large mixing bowl, beat the eggs and sugar together until the mixture is light and fluffy. This should take about 3-4 minutes. Gradually add the melted and cooled butter, along with the vanilla extract, and mix until well combined.
- Combine Dry Ingredients: In a separate bowl, sift together the all-purpose flour, baking powder, and a pinch of salt. Gradually add the dry ingredients to the wet mixture, folding gently until a smooth batter forms. The batter should be thick but smooth, similar to pancake batter.
- Heat the Pizzelle Iron: Preheat your pizzelle iron according to the manufacturer’s instructions. Lightly grease the iron with a small amount of oil or non-stick spray to prevent sticking.
- Cook the Pizzelle: Drop about a tablespoon of batter onto the center of the preheated pizzelle iron. Close the lid and cook for about 30-40 seconds, or until the pizzelle are golden brown and crisp. The exact time may vary depending on your iron, so adjust as needed. Carefully remove the pizzelle using a spatula and transfer them to a wire rack to cool.
- Repeat the Process: Continue the process, greasing the iron as needed, until all the batter is used up. Allow the pizzelle to cool completely before serving or storing.
Extra Tips:
For best results, keep an eye on the pizzelle as they cook; they can go from perfect to overdone very quickly. If you prefer a slightly softer pizzelle, reduce the cooking time by a few seconds.
When shaping pizzelle into cones or bowls, do so immediately after removing them from the iron, as they harden quickly. Store the pizzelle in an airtight container to maintain their crispness, and enjoy them within a week for peak flavor. If making pizzelle with anise extract, consider adding a teaspoon of anise seeds for an extra burst of flavor.
Chewy Chocolate Crinkle Cookies
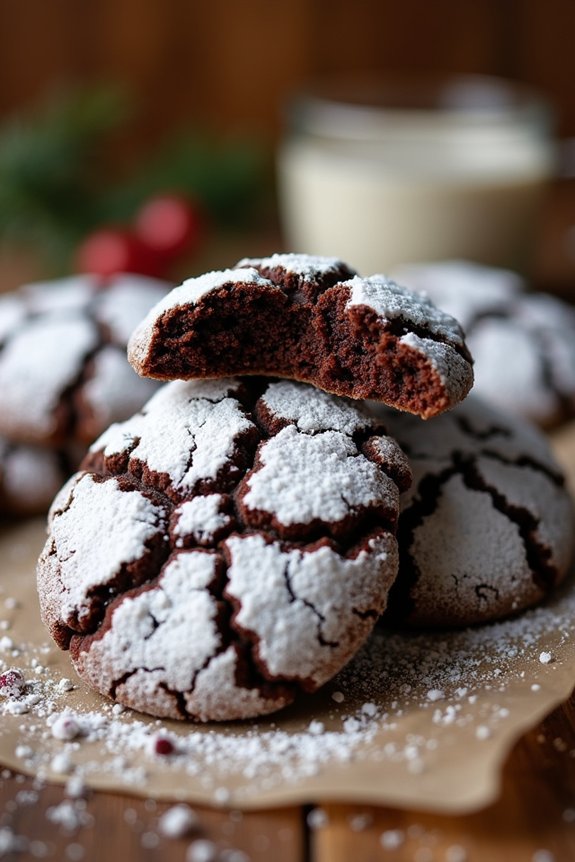
Chewy Chocolate Crinkle Cookies are a delightful addition to any rustic Christmas cookie platter. With their rich chocolate flavor and signature crackled appearance, these cookies are certain to impress both the eyes and the taste buds of your holiday guests. The exterior of the cookie is slightly crisp, while the inside remains soft and fudgy, making it a perfect treat for chocolate lovers.
The process of making Chewy Chocolate Crinkle Cookies is relatively simple and can be a fun holiday activity for the whole family. The key to achieving the perfect crinkle effect is to thoroughly chill the dough before baking, allowing the cookies to spread and crack in the oven. This recipe yields approximately 24-30 cookies, making it ideal for serving 4-6 people who might want more than just one!
Ingredients:
- 1 cup all-purpose flour
- 1/2 cup unsweetened cocoa powder
- 1 teaspoon baking powder
- 1/4 teaspoon salt
- 1 cup granulated sugar
- 1/4 cup vegetable oil
- 2 large eggs
- 1 teaspoon vanilla extract
- 1 cup powdered sugar (for coating)
Instructions:
- Prepare the Dry Ingredients: In a medium-sized bowl, whisk together the flour, cocoa powder, baking powder, and salt. Confirm that all dry ingredients are well combined to avoid any lumps in your dough.
- Mix the Wet Ingredients: In a separate large bowl, mix the granulated sugar and vegetable oil until well combined. Add the eggs one at a time, beating well after each addition. Stir in the vanilla extract until everything is evenly mixed.
- Combine the Mixtures: Gradually add the dry ingredient mixture to the wet ingredients, stirring until a thick dough forms. The dough will be quite sticky, which is normal.
- Chill the Dough: Cover the bowl with plastic wrap and refrigerate the dough for at least 2 hours or until it’s firm enough to handle. Chilling helps to prevent the cookies from spreading too much while baking.
- Preheat the Oven: Preheat your oven to 350°F (175°C) and line two baking sheets with parchment paper.
- Shape the Cookies: Once chilled, scoop tablespoon-sized portions of dough and roll them into balls. Roll each ball in powdered sugar until they’re fully coated. This will give the cookies their distinctive crinkle appearance.
- Bake the Cookies: Place the coated dough balls onto the prepared baking sheets, spacing them about 2 inches apart. Bake in the preheated oven for 10-12 minutes or until the cookies have spread and cracked. The tops should appear set, but the centers will still be soft.
- Cool the Cookies: Remove the cookies from the oven and allow them to cool on the baking sheets for about 5 minutes before transferring them to a wire rack to cool completely.
Extra Tips:
For the best results, make sure the dough is properly chilled; if it’s too warm, the cookies will spread too much and lose their signature crinkle look. If you find the dough too sticky to handle, consider chilling it for an additional hour.
Additionally, feel free to experiment with different flavored extracts like peppermint or almond for a festive twist. Remember, the cookies might look under-baked when you first take them out, but they’ll firm up as they cool. Enjoy these cookies with a cup of hot cocoa for a delightful holiday treat!
Nutty Pecan Sandies
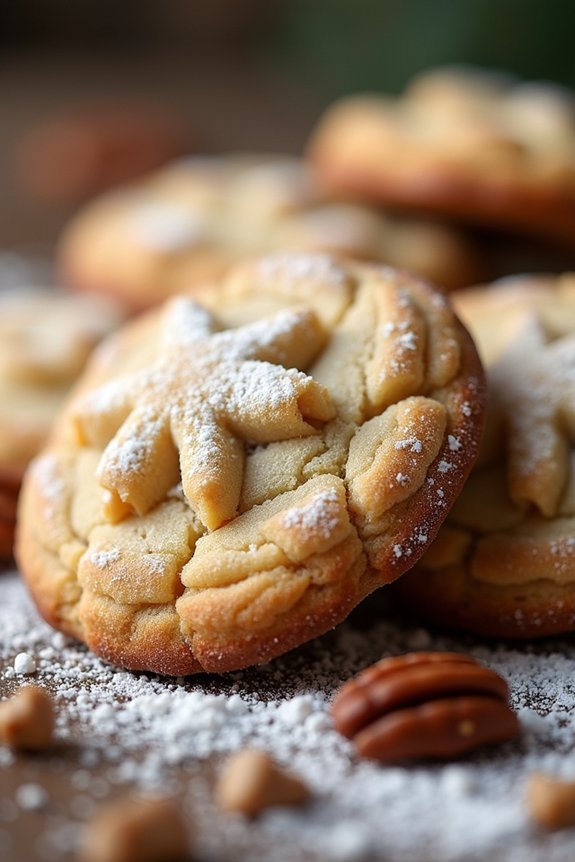
Nutty Pecan Sandies are a delightful addition to any holiday cookie platter, offering a rustic charm that’s both heartwarming and delicious. These cookies are a perfect blend of buttery sweetness and nutty richness, making them a must-have for any Christmas celebration.
Whether enjoyed on their own or with a cup of hot cocoa, Nutty Pecan Sandies bring a touch of homemade comfort to your festive gatherings.
The secret to the irresistible texture of these cookies lies in the perfect balance of ingredients that bring out the rich flavors of pecans and butter. With a melt-in-your-mouth crumbly texture and a hint of vanilla, these cookies will quickly become a family favorite.
Ideal for a serving size of 4-6 people, this recipe guarantees that there are plenty to share, or to keep all to yourself!
Ingredients:
- 1 cup unsalted butter, softened
- 1 cup confectioners’ sugar
- 1 teaspoon vanilla extract
- 2 cups all-purpose flour
- 1 cup pecans, finely chopped
- 1/4 teaspoon salt
- Additional confectioners’ sugar for dusting
Cooking Instructions:
- Prepare the Oven and Baking Sheet: Preheat your oven to 350°F (175°C). Line a baking sheet with parchment paper or a silicone baking mat to prevent the cookies from sticking.
- Cream Butter and Sugar: In a large mixing bowl, beat the softened butter and confectioners’ sugar together until creamy and smooth. This should take about 2-3 minutes using an electric mixer on medium speed.
- Add Vanilla Extract: Mix in the vanilla extract until fully incorporated, enhancing the aroma and flavor of the cookies.
- Combine Dry Ingredients: In another bowl, whisk together the all-purpose flour and salt. Gradually add this dry mixture to the butter mixture, mixing on low speed until just combined.
- Incorporate Pecans: Gently fold in the finely chopped pecans using a spatula or wooden spoon, making sure they’re evenly distributed throughout the dough.
- Shape the Cookies: Scoop tablespoon-sized portions of dough and roll them into balls. Place them on the prepared baking sheet, leaving about 2 inches of space between each cookie to allow for spreading.
- Bake: Bake in the preheated oven for 15-18 minutes, or until the edges are lightly golden. Be careful not to overbake, as the cookies will firm up as they cool.
- Cool and Dust: Allow the cookies to cool on the baking sheet for 5 minutes before transferring them to a wire rack. Once fully cooled, dust them generously with additional confectioners’ sugar.
Extra Tips:
For best results, verify that the butter is at room temperature before starting the recipe, as this helps achieve the desired creamy texture when mixed with sugar.
If you prefer a more pronounced nutty flavor, you can lightly toast the pecans before chopping them. Just spread them on a baking sheet and bake at 350°F (175°C) for about 5-7 minutes, stirring occasionally.
Simple Almond Crescents
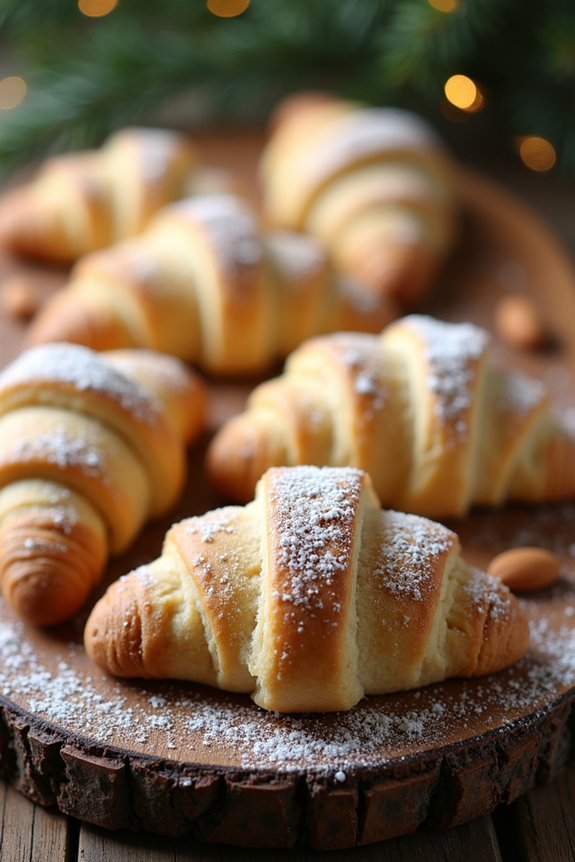
Rustic Christmas Cookie Recipes are a delightful way to bring a touch of tradition and warmth to your holiday celebrations. Among these festive treats, Simple Almond Crescents stand out for their delicate texture and subtle nutty flavor. Perfect for a cozy family gathering or as a thoughtful homemade gift, these cookies are a charming addition to your holiday cookie platter. With their crescent shape and dusting of powdered sugar, they’re as visually appealing as they’re delicious.
Simple Almond Crescents aren’t only a pleasure to eat but also a joy to make. This recipe is straightforward and requires minimal ingredients, making it an ideal choice for bakers of all skill levels. The combination of ground almonds and a hint of vanilla creates a cookie that’s both aromatic and melt-in-your-mouth tender. As you bake these crescents, your home will fill with the inviting scent of almonds, setting the perfect festive atmosphere.
Ingredients (Serves 4-6):
- 1 cup unsalted butter, softened
- 1/2 cup granulated sugar
- 1 teaspoon vanilla extract
- 1 cup ground almonds
- 2 cups all-purpose flour
- 1/4 teaspoon salt
- 1/2 cup powdered sugar (for dusting)
Cooking Instructions:
1. Preheat the Oven:
Preheat your oven to 350°F (175°C). Line two baking sheets with parchment paper or silicone baking mats to prevent the cookies from sticking.
2. Cream Butter and Sugar:
In a large mixing bowl, cream together the softened butter and granulated sugar until light and fluffy. This should take about 2-3 minutes using an electric mixer.
3. Add Vanilla and Almonds:
Mix in the vanilla extract, followed by the ground almonds. Stir until well combined, guaranteeing the almonds are evenly distributed throughout the mixture.
4. Combine Dry Ingredients:
In a separate bowl, whisk together the all-purpose flour and salt. Gradually add this dry mixture to the butter and almond mixture, mixing until a cohesive dough forms.
5. Shape the Crescents:
Take small portions of dough (about a tablespoon each) and roll them into a ball. Then, gently shape each ball into a crescent by rolling it into a small log and curving the ends.
6. Bake the Cookies:
Place the shaped crescents onto the prepared baking sheets, leaving about an inch of space between each cookie. Bake in the preheated oven for 12-15 minutes, or until the edges are lightly golden.
7. Cool and Dust:
Allow the cookies to cool on the baking sheets for about 5 minutes, then transfer them to a wire rack to cool completely. Once cooled, generously dust the cookies with powdered sugar.
Extra Tips:
For the best results, verify your butter is at room temperature before you begin, as this will make it easier to achieve a creamy consistency when mixing.
If you don’t have ground almonds, you can make your own by pulsing whole almonds in a food processor until finely ground. Be careful not to over-process, as this can turn them into almond butter.
To add a bit more flavor, consider adding a pinch of cinnamon to the dough or incorporating a few drops of almond extract along with the vanilla.
Store the finished cookies in an airtight container to keep them fresh and maintain their delicate texture.
Soft and Chewy Sugar Cookies
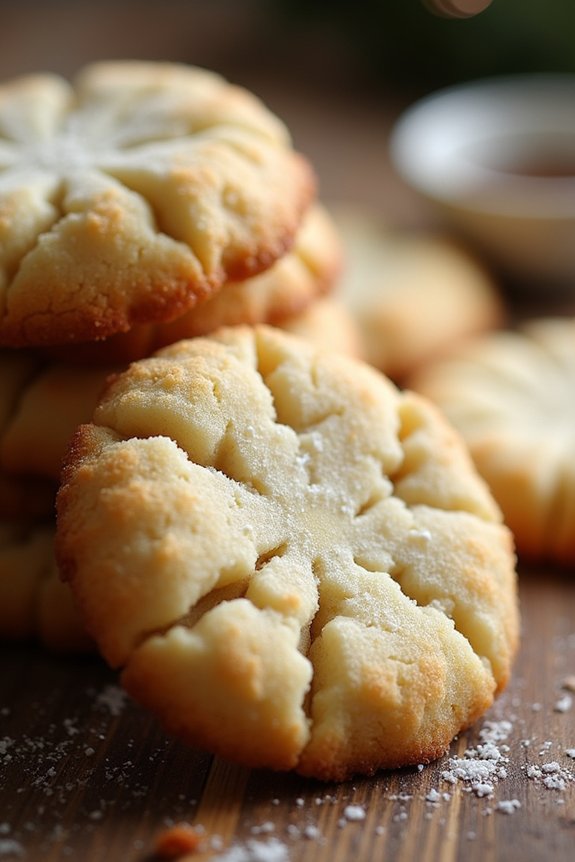
There’s something truly magical about the simplicity and nostalgia of Soft and Chewy Sugar Cookies, especially around the holiday season. These cookies are a classic favorite for many, with their tender, buttery texture that melts in your mouth. The rustic charm of these cookies comes from their homemade touch, offering a delightful balance of sweetness and a slight vanilla aroma.
Perfect for a cozy afternoon of baking, these cookies are easy to make and even more enjoyable to share with loved ones. Whether you’re baking them for a Christmas gathering or simply to enjoy on a crisp winter day, these sugar cookies will certainly bring a smile to anyone’s face.
Creating the perfect batch of Soft and Chewy Sugar Cookies involves just a few simple ingredients, but the key is in the technique. These cookies require careful mixing to guarantee the right texture – soft and chewy rather than crisp and crumbly. A little extra care during the baking process will reward you with cookies that are beautifully golden and packed with flavor.
This recipe makes enough to serve 4-6 people, allowing everyone to indulge in a few delicious cookies. Enjoy them as they are, or get creative with festive decorations to add a personal touch.
Ingredients (Serves 4-6):
- 2 ¾ cups all-purpose flour
- 1 teaspoon baking soda
- ½ teaspoon baking powder
- 1 cup unsalted butter, softened
- 1 ½ cups white sugar
- 1 egg
- 1 teaspoon vanilla extract
- ½ teaspoon almond extract (optional)
- 3-4 tablespoons granulated sugar for rolling
Instructions:
- Preheat and Prepare: Begin by preheating your oven to 375°F (190°C). Line two baking sheets with parchment paper or silicone baking mats to prevent the cookies from sticking.
- Mix Dry Ingredients: In a medium-sized bowl, whisk together the flour, baking soda, and baking powder. This helps to evenly distribute the leavening agents, guaranteeing your cookies rise perfectly.
- Cream Butter and Sugar: In a large mixing bowl, using an electric mixer, cream together the softened butter and 1 ½ cups of white sugar on medium speed until the mixture is light and fluffy. This should take about 2-3 minutes.
- Add Egg and Flavors: Beat in the egg along with the vanilla and almond extracts until well combined. The extracts add depth and a subtle flavor to the cookies.
- Combine Mixtures: Gradually add the dry ingredients to the wet ingredients, mixing until just combined. Be careful not to overmix, as this can lead to tougher cookies.
- Shape Cookies: Scoop about one tablespoon of dough and roll it into a ball. Roll each ball in the additional granulated sugar to coat the outside, giving the cookies a delightful crunch when baked.
- Bake: Place the dough balls onto the prepared baking sheets, leaving about 2 inches of space between each cookie. Bake in the preheated oven for 8-10 minutes, or until the edges are just starting to turn golden.
- Cool: Remove the cookies from the oven and allow them to cool on the baking sheets for a few minutes before transferring them to wire racks to cool completely.
Extra Tips: For perfectly soft and chewy cookies, make sure not to overbake them; the centers should look slightly underdone when you remove them from the oven. They’ll continue to cook as they cool on the baking sheet.
Additionally, chilling the dough for about 30 minutes before baking can help prevent the cookies from spreading too much, maintaining their perfect round shape. If you want to add a festive touch, consider sprinkling colored sugar or adding a glaze once the cookies have cooled.

