

Christmas is just around the corner, and I can’t wait to start baking with these 15 aesthetic cookie recipes that are sure to shine on Pinterest. From delicate snowflake sugar cookies to flavorful gingerbread men, each recipe is a delightful creation that will impress your taste buds and enhance any holiday gathering. Are you ready to create some baking magic and wow your followers? These cookies are your pathway to a picture-perfect holiday season.
Snowflake Sugar Cookies
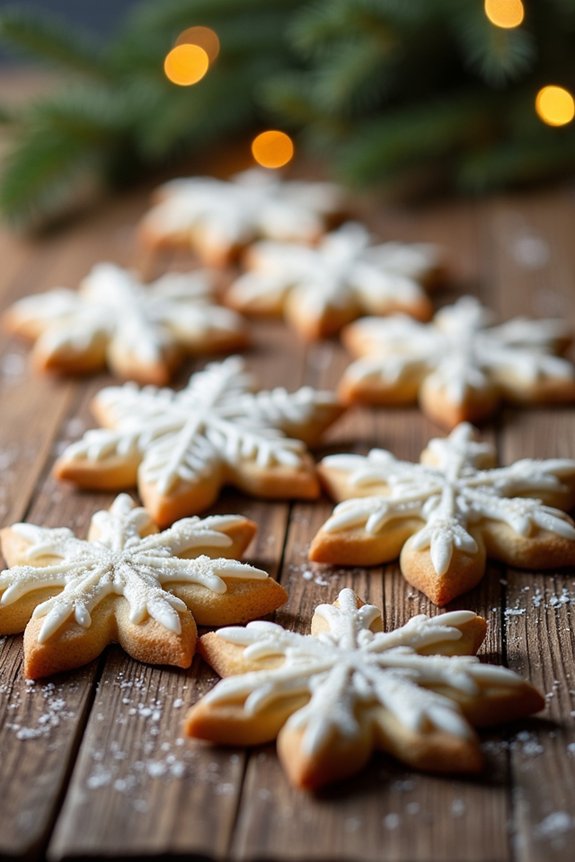
Snowflake Sugar Cookies are the epitome of holiday elegance, combining the delicate beauty of winter snowflakes with the sweet, nostalgic taste of classic sugar cookies. These cookies are perfect for Christmas gatherings, adding a touch of charm to your dessert table.
With their intricate designs and shimmering decorations, Snowflake Sugar Cookies aren’t only a treat for the taste buds but also a feast for the eyes. Whether you’re an experienced baker or a beginner, these cookies are a delightful addition to your holiday baking repertoire.
This recipe yields approximately 24 cookies, making it ideal for a festive gathering of 4-6 people. The process involves creating a buttery, tender sugar cookie dough, which is then rolled out and cut into snowflake shapes using cookie cutters. Once baked, these cookies are decorated with royal icing and embellished with sparkling sugar or edible glitter for that magical, wintry effect.
Follow the steps below to create your own batch of beautiful Snowflake Sugar Cookies.
Ingredients:
- 3 cups all-purpose flour
- 1 teaspoon baking powder
- 1/2 teaspoon salt
- 1 cup unsalted butter, softened
- 1 cup granulated sugar
- 1 large egg
- 1 teaspoon vanilla extract
- 1/2 teaspoon almond extract
- Royal icing (store-bought or homemade)
- Edible glitter or sparkling sugar for decoration
Instructions:
- Prepare the Dough: In a medium bowl, whisk together the flour, baking powder, and salt. In a large mixing bowl, cream the softened butter and sugar together until light and fluffy. Beat in the egg, vanilla extract, and almond extract until well combined.
- Combine Ingredients: Gradually add the dry ingredients to the wet ingredients, mixing until a smooth dough forms. Divide the dough into two portions, flatten each into a disk, and wrap them in plastic wrap. Refrigerate the dough for at least 1 hour or until firm.
- Preheat and Roll Out Dough: Preheat your oven to 350°F (175°C). On a lightly floured surface, roll out one portion of the dough to about 1/4 inch thickness. Use snowflake-shaped cookie cutters to cut out the cookies, placing them on a baking sheet lined with parchment paper.
- Bake the Cookies: Place the baking sheet in the preheated oven and bake for 8-10 minutes, or until the edges of the cookies are slightly golden. Allow the cookies to cool on the baking sheet for 5 minutes before transferring them to a wire rack to cool completely.
- Decorate: Once the cookies have cooled, prepare your royal icing following package instructions or your favorite recipe. Use a piping bag with a small round tip to outline and fill in the snowflake designs on each cookie. While the icing is still wet, sprinkle edible glitter or sparkling sugar over the cookies for a shimmering effect.
Extra Tips:
To guarantee your Snowflake Sugar Cookies keep their shape, make sure the dough is well-chilled before rolling it out. If the dough becomes too soft while working with it, simply return it to the refrigerator for a few minutes.
When decorating with royal icing, practice your piping skills on parchment paper before applying it to the cookies for a more precise and clean look. If you’re using multiple colors of icing, make sure to allow each color to dry completely before applying the next to prevent bleeding.
Enjoy your beautiful and delicious creations!
Gingerbread Men With Royal Icing

Gingerbread Men With Royal Icing are a classic holiday favorite that bring joy and festivity to any Christmas gathering. These charming cookies aren’t only delicious but also allow for creative decoration, making them a fun activity to do with family and friends. The combination of warm spices in the gingerbread and the sweet, smooth texture of royal icing makes these cookies irresistible.
Perfect for gifting or enjoying at home, these cookies are sure to become a staple in your holiday baking repertoire.
Making Gingerbread Men With Royal Icing involves two main components: the gingerbread cookie dough and the royal icing for decorating. The gingerbread dough is flavored with molasses, ginger, cinnamon, and cloves, giving it a rich and spicy taste. Once baked, the cookies are cooled and then decorated with royal icing, which hardens to a smooth, shiny finish.
This recipe is designed to serve 4-6 people, providing enough cookies for everyone to enjoy or to share with loved ones.
Ingredients:
- For the Gingerbread Cookies:
- 3 cups all-purpose flour
- 1 teaspoon baking soda
- 1/4 teaspoon salt
- 1 tablespoon ground ginger
- 2 teaspoons ground cinnamon
- 1/4 teaspoon ground cloves
- 1/4 teaspoon ground nutmeg
- 1/2 cup unsalted butter, softened
- 1/2 cup brown sugar, packed
- 1 large egg
- 1/2 cup molasses
- 1 teaspoon vanilla extract
- For the Royal Icing:
- 3 cups powdered sugar, sifted
- 2 large egg whites or 1/4 cup meringue powder mixed with 1/4 cup water
- 1 teaspoon lemon juice
- Food coloring (optional)
Instructions:
- Prepare the Gingerbread Dough:
- In a medium bowl, whisk together flour, baking soda, salt, ginger, cinnamon, cloves, and nutmeg. Set aside.
- In a large bowl, beat the softened butter and brown sugar with an electric mixer until light and fluffy. Add the egg, molasses, and vanilla extract, mixing until well combined.
- Gradually add the dry ingredients to the wet mixture, mixing until a dough forms. Divide the dough in half, flatten each half into a disk, wrap in plastic wrap, and refrigerate for at least 1 hour or until firm.
- Bake the Cookies:
- Preheat your oven to 350°F (175°C) and line two baking sheets with parchment paper.
- On a lightly floured surface, roll out the dough to about 1/4-inch thickness. Use a gingerbread man cookie cutter to cut out shapes and place them on the prepared baking sheets, leaving a little space between each cookie.
- Bake for 8-10 minutes, or until the edges are firm. Let the cookies cool on the baking sheets for 5 minutes, then transfer them to a wire rack to cool completely.
- Prepare the Royal Icing:
- In a large bowl, beat the powdered sugar and egg whites (or meringue powder mixture) on high speed until stiff peaks form. Add lemon juice and beat until incorporated.
- If using food coloring, divide the icing into separate bowls and add desired colors, mixing well.
- Decorate the Cookies:
- Once the cookies are completely cool, use a piping bag or a small spoon to decorate the gingerbread men with the royal icing. Allow the icing to set at room temperature until it hardens completely.
Extra Tips:
When rolling out the gingerbread dough, make sure your surface and rolling pin are well-floured to prevent sticking. If the dough becomes too soft while rolling, pop it back into the fridge for a few minutes to firm up again.
For a professional-looking finish on your royal icing, use a small round tip for piping. If you don’t have a piping bag, you can use a resealable plastic bag with the corner snipped off. Remember, the royal icing will harden quickly, so work efficiently and have fun with your designs!
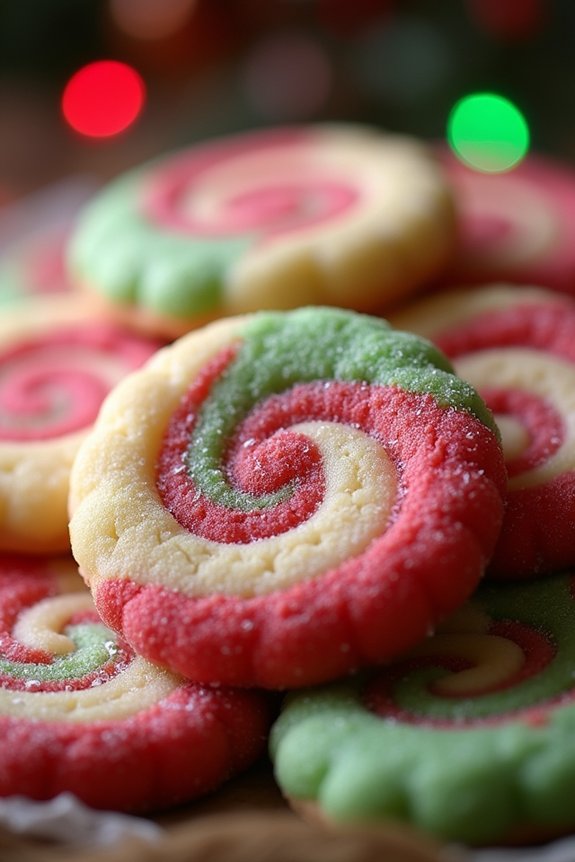
Peppermint Candy Cane Cookies
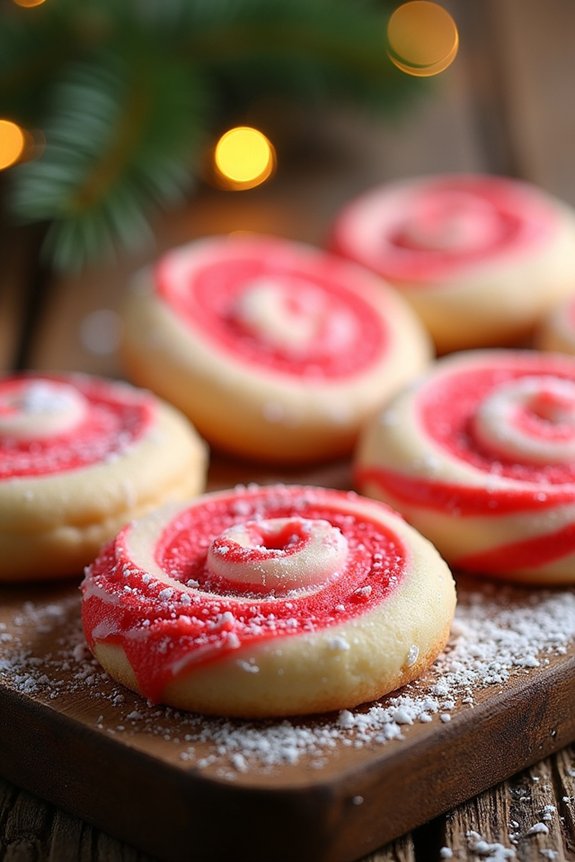
Peppermint Candy Cane Cookies are a delightful and festive treat perfect for the holiday season. These cookies aren’t just pleasing to the eye with their vibrant red and white swirls, but they’re also infused with the invigorating taste of peppermint, making them a favorite for both kids and adults alike.
The combination of buttery cookie dough and peppermint extract creates a harmonious blend of flavors that perfectly encapsulates the spirit of Christmas. Whether you’re making them for a holiday party, as a gift, or simply to enjoy with a cup of hot cocoa, these cookies are sure to be a hit.
These cookies are designed to resemble mini candy canes, which adds a whimsical touch to your dessert table. By using simple ingredients that are staples in most pantries, you can whip up a batch of these charming cookies in no time.
The dough is split into two portions, with one being colored red, and then twisted together to form the classic candy cane shape. It’s a fun and engaging activity that you can enjoy with family or friends, making the cookie-making process an event in itself.
Now, let’s explore the ingredients and instructions that will guide you to creating these festive Peppermint Candy Cane Cookies for 4-6 people.
Ingredients:
- 2 1/2 cups all-purpose flour
- 1 cup unsalted butter, softened
- 1 cup powdered sugar
- 1 large egg
- 1 teaspoon vanilla extract
- 1 teaspoon peppermint extract
- 1/2 teaspoon salt
- 1/2 teaspoon red food coloring
- Additional powdered sugar for dusting (optional)
Instructions:
- Prepare the Dough: In a large mixing bowl, cream together the softened butter and powdered sugar until light and fluffy. This usually takes about 2-3 minutes using an electric mixer on medium speed.
- Add Wet Ingredients: Beat in the egg, vanilla extract, and peppermint extract until well combined.
- Combine Dry Ingredients: In a separate bowl, whisk together the flour and salt. Gradually add this to the butter mixture, mixing until a soft dough forms.
- Divide and Color the Dough: Divide the dough into two equal portions. Leave one portion plain. To the other portion, add the red food coloring and mix until the color is evenly distributed.
- Chill the Dough: Wrap each dough portion in plastic wrap and refrigerate for at least 30 minutes. This helps the dough to firm up, making it easier to shape.
- Preheat the Oven: Preheat your oven to 350°F (175°C) and line two baking sheets with parchment paper.
- Shape the Cookies: Take small portions of each dough and roll into ropes about 4 inches long. Gently twist one plain rope and one red rope together and form into a candy cane shape, pinching the ends to seal.
- Bake the Cookies: Place the shaped cookies onto the prepared baking sheets, spacing them about 2 inches apart. Bake for 9-11 minutes, or until the edges just start to turn golden.
- Cool and Serve: Allow the cookies to cool on the baking sheet for a few minutes before transferring them to a wire rack to cool completely. Dust with additional powdered sugar if desired before serving.
Extra Tips: When shaping the cookies, try to work quickly and with a gentle hand to prevent the dough from becoming too warm and difficult to handle. If you find the dough is softening too much, return it to the refrigerator for a few minutes before continuing.
Additionally, for a more intense peppermint flavor, you can sprinkle crushed candy canes over the cookies while they’re still warm. This not only enhances the minty taste but also adds a delightful crunch and decorative touch. Enjoy your Peppermint Candy Cane Cookies with family and friends for a festive treat!
Stained Glass Window Cookies
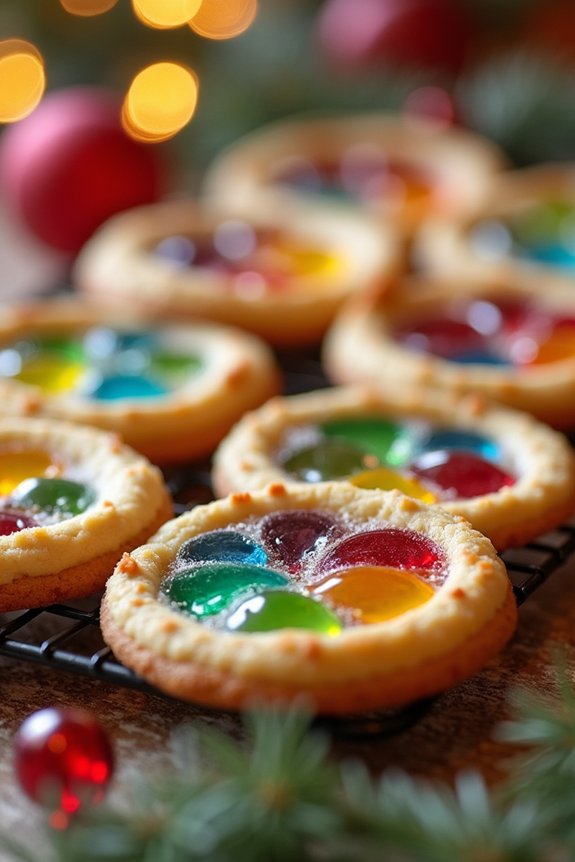
Stained Glass Window Cookies are a delightful and festive treat that not only taste delicious but also serve as beautiful edible decorations during the holiday season. These cookies get their name from the vibrant, translucent “windows” created using crushed hard candies that melt during baking. The result is a stunning cookie with colorful, jewel-like centers that catch the light, making them perfect for adding a touch of elegance to your Christmas cookie platter or even hanging on your Christmas tree.
While the cookies might look intricate, they’re surprisingly easy to make, making them a fun project to do with family or friends. The key to their beauty lies in the contrast between the buttery, golden cookie and the bright, glassy centers. Stained Glass Window Cookies can be customized with different shapes and colors, allowing you to tailor them to your holiday decor theme. This recipe yields enough cookies to serve 4-6 people, making them a perfect addition to your festive gatherings.
Ingredients:
- 1 cup unsalted butter, softened
- 1 cup granulated sugar
- 1 large egg
- 1 teaspoon vanilla extract
- 2 ½ cups all-purpose flour
- 1 teaspoon baking powder
- ¼ teaspoon salt
- Assorted hard candies (such as Jolly Ranchers or Life Savers), crushed
- Additional flour for rolling
Cooking Instructions:
- Prepare the Dough: In a large mixing bowl, cream together the softened butter and granulated sugar until light and fluffy. This should take about 2-3 minutes with an electric mixer. Add in the egg and vanilla extract, mixing until well combined.
- Combine Dry Ingredients: In a separate bowl, whisk together the all-purpose flour, baking powder, and salt. Gradually add the dry ingredients to the wet mixture, mixing until a smooth dough forms. If the dough is too sticky, you can add a little more flour, one tablespoon at a time.
- Chill the Dough: Divide the dough in half, shape each portion into a disk, and wrap them in plastic wrap. Refrigerate for at least one hour, or until the dough is firm enough to roll out.
- Preheat and Prepare: Preheat your oven to 350°F (175°C). Line two baking sheets with parchment paper or silicone baking mats. While the oven is heating, crush your hard candies by placing them in a zip-top bag and using a rolling pin to break them into small pieces.
- Roll and Cut the Dough: On a lightly floured surface, roll out one disk of dough to about 1/4 inch thickness. Use cookie cutters to cut out desired shapes, then use a smaller cutter to remove the center from each cookie to create a window.
- Fill the Windows: Transfer the cookies to the prepared baking sheets. Fill the center of each cookie with a generous amount of crushed hard candy, making sure the candy completely fills the cut-out areas.
- Bake: Bake the cookies in the preheated oven for 8-10 minutes, or until the edges are lightly golden and the candy is melted and bubbly. Keep an eye on them to prevent the candy from browning too much.
- Cool Completely: Allow the cookies to cool on the baking sheet for about 5 minutes before transferring them to a wire rack to cool completely. The candy will harden as it cools, forming a glass-like center.
Extra Tips: To guarantee your Stained Glass Window Cookies are picture-perfect, make sure the candy is well-crushed and evenly distributed within the cookie cut-outs to avoid overflow. If you plan to hang the cookies as decorations, use a straw to make a small hole at the top of each cookie before baking. Also, be cautious when handling the cookies while they’re warm as the candy centers will be hot and can easily break. Enjoy experimenting with different color combinations to match your holiday theme!
Almond Snowball Cookies
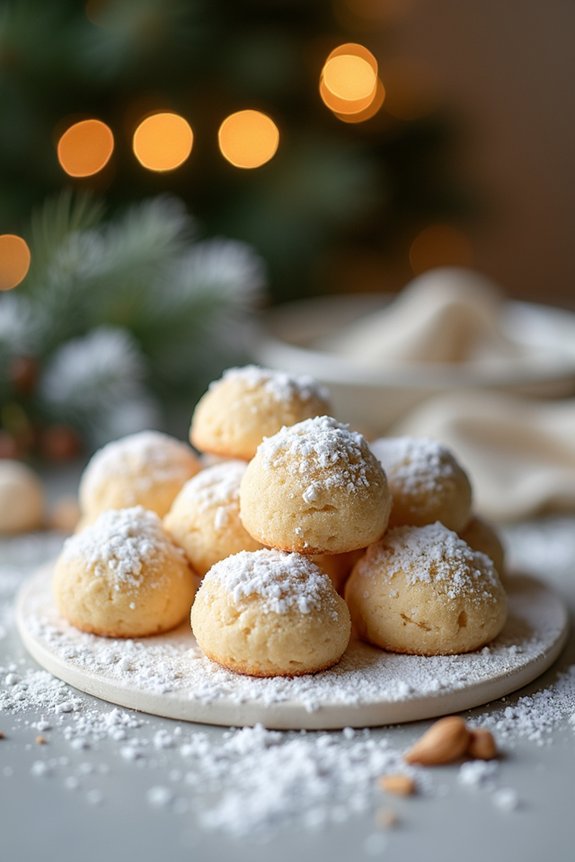
Almond Snowball Cookies are a classic and elegant treat that captures the essence of the holiday season. These delightful cookies are known for their tender, crumbly texture and their perfect coating of powdered sugar, which resembles freshly fallen snow.
With a delicate almond flavor, these cookies are an exquisite addition to any Christmas cookie platter, offering a sweet and nutty contrast to the usual holiday treats. Ideal for serving 4-6 people, these cookies are both simple to prepare and delightful to enjoy.
Whether you’re planning a festive gathering or simply want to make your holiday season more magical, Almond Snowball Cookies are a must-try recipe. Gather your ingredients and enjoy the process of creating these little bites of joy that melt in your mouth and leave a lasting impression on your taste buds.
Ingredients:
- 1 cup unsalted butter, softened
- 1/2 cup powdered sugar
- 1 teaspoon vanilla extract
- 2 teaspoons almond extract
- 2 cups all-purpose flour
- 1 cup finely chopped almonds
- 1/4 teaspoon salt
- Additional powdered sugar for coating
Instructions:
- Preheat the Oven: Begin by preheating your oven to 350°F (175°C). Line two baking sheets with parchment paper to prevent the cookies from sticking during baking.
- Prepare the Dough: In a large mixing bowl, cream together the softened butter and 1/2 cup of powdered sugar until light and fluffy. This process usually takes about 3-5 minutes using an electric mixer on medium speed.
- Flavor the Dough: Add the vanilla extract and almond extract to the creamed mixture. Mix until well combined, ensuring the extracts are evenly distributed throughout the dough.
- Combine Dry Ingredients: In a separate bowl, whisk together the all-purpose flour and salt. Gradually add the dry ingredients to the creamed mixture, mixing on low speed until just combined.
- Incorporate the Almonds: Gently fold in the finely chopped almonds with a spatula or wooden spoon, ensuring they’re evenly distributed throughout the dough.
- Shape the Cookies: Using a small cookie scoop or your hands, roll the dough into 1-inch balls and place them on the prepared baking sheets, leaving about an inch of space between each cookie.
- Bake the Cookies: Place the baking sheets in the preheated oven and bake for 12-15 minutes, or until the cookies are set but not browned. The bottoms should be just starting to turn golden.
- Coat with Powdered Sugar: Remove the cookies from the oven and let them cool on the baking sheets for about 5 minutes. While still warm, roll the cookies in additional powdered sugar, ensuring they’re completely covered. Let them cool completely on a wire rack.
- Final Coating: Once the cookies have cooled, give them a second coating of powdered sugar for that signature snowball appearance.
Extra Tips:
For the best results, make sure your butter is softened to room temperature before starting, as this helps achieve the right dough consistency.
Finely chop the almonds for a more uniform texture in the cookies, and consider toasting them lightly before adding to enhance their flavor. If you’re making these cookies in advance, store them in an airtight container at room temperature for up to a week.
Just before serving, you may want to roll them in powdered sugar again to refresh their snowy appearance. Enjoy these Almond Snowball Cookies with a warm cup of tea or coffee for a perfect holiday treat.
Chocolate-Dipped Shortbread Trees

Indulge in the festive charm of Chocolate-Dipped Shortbread Trees, a delightful treat that combines the buttery richness of shortbread with the decadent allure of chocolate. Perfect for holiday gatherings or as a sweet gift, these cookies bring a touch of elegance to your dessert table.
The combination of crisp shortbread and smooth chocolate gives a satisfying contrast in texture and flavor, making each bite a joyous celebration of the season. This recipe is designed to serve 4-6 people, making it ideal for small gatherings or for enjoying a few cookies yourself while sharing the holiday spirit with loved ones.
The preparation is straightforward, with a simple shortbread dough that’s cut into tree shapes, baked to golden perfection, and then artfully dipped in melted chocolate. Let’s get started on creating this lovely and tasty holiday treat.
Ingredients:
- 1 cup unsalted butter, softened
- 1/2 cup granulated sugar
- 1 teaspoon vanilla extract
- 2 cups all-purpose flour
- 1/4 teaspoon salt
- 8 ounces semisweet chocolate
- Sprinkles or crushed nuts for decoration (optional)
Instructions:
- Prepare the Dough: In a large mixing bowl, cream together the softened butter and granulated sugar until light and fluffy. This should take about 3-5 minutes with an electric mixer on medium speed. Add the vanilla extract and mix until fully incorporated.
- Mix in Dry Ingredients: Gradually add the all-purpose flour and salt to the butter mixture. Mix on low speed until the dough comes together. It should be smooth and not sticky.
- Chill the Dough: Wrap the dough in plastic wrap and refrigerate for at least 30 minutes. This will make it easier to roll out and cut into shapes.
- Preheat and Prepare Baking Sheets: Preheat your oven to 350°F (175°C). Line two baking sheets with parchment paper or silicone baking mats.
- Roll and Cut the Dough: On a lightly floured surface, roll out the dough to about 1/4-inch thickness. Use a tree-shaped cookie cutter to cut out the cookies and carefully transfer them to the prepared baking sheets.
- Bake the Cookies: Bake in the preheated oven for 10-12 minutes, or until the edges are lightly golden. Remove from the oven and let them cool on the baking sheets for 5 minutes before transferring to a wire rack to cool completely.
- Melt the Chocolate: While the cookies are cooling, melt the semisweet chocolate in a heatproof bowl set over a pot of simmering water, or in the microwave in short bursts, stirring frequently until smooth.
- Dip and Decorate: Once the cookies are completely cool, dip the tips of each tree into the melted chocolate. Place them back on the parchment-lined baking sheets and, if desired, sprinkle with decorations such as sprinkles or crushed nuts. Allow the chocolate to set completely before serving.
Extra Tips:
For the best results, make certain that your butter is at room temperature before starting the recipe; this helps in achieving that perfect creamy consistency when beating with sugar.
If you find that your dough is too soft to handle, an extra chill in the refrigerator will make it firmer and easier to work with. When melting the chocolate, be careful not to overheat it as it can cause the chocolate to seize. Stirring often and melting slowly will guarantee a smooth and glossy finish for your cookies.
Enjoy your beautifully decorated, festive shortbread trees!
Red Velvet Crinkle Cookies
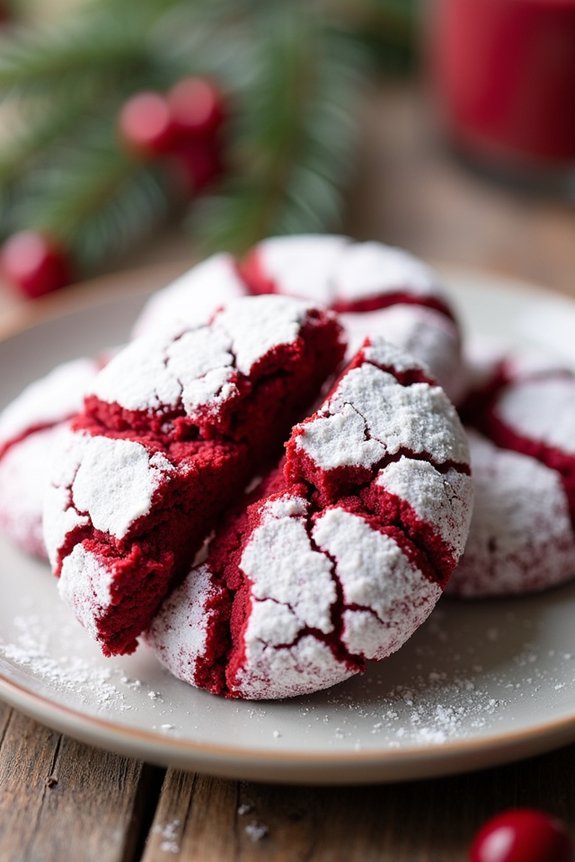
Red Velvet Crinkle Cookies are a delightful addition to any holiday spread, combining the rich taste of red velvet cake with the chewy texture of crinkle cookies. These cookies not only taste divine but also add a pop of color to your festive table.
They’re perfect for baking with family or friends, offering a fun and visually appealing project that results in scrumptious treats. Whether you’re an experienced baker or a novice, this recipe is simple enough to follow yet yields impressive results that will surely impress your guests.
The cookies are characterized by their deep red color contrasted with a dusting of powdered sugar, creating a crinkle effect that’s both beautiful and delicious. The slight crisp on the outside pairs perfectly with the soft, chewy interior, and the subtle hint of cocoa adds depth to the flavor.
These cookies are ideal for holiday cookie exchanges, gift-giving, or simply indulging in the comfort of your own home. They make for a perfect festive treat that embodies the spirit of Christmas.
Ingredients for 4-6 people:
- 1 cup all-purpose flour
- 3 tablespoons unsweetened cocoa powder
- 1 teaspoon baking powder
- 1/4 teaspoon salt
- 1/2 cup granulated sugar
- 1/4 cup unsalted butter, softened
- 1 large egg
- 1 teaspoon vanilla extract
- 1 teaspoon red food coloring
- 1/4 cup buttermilk
- 1/2 cup powdered sugar, for rolling
Instructions:
- Prepare the dry mix: In a medium bowl, whisk together the flour, cocoa powder, baking powder, and salt. This will guarantee that the dry ingredients are evenly distributed and will help to prevent any lumps in your cookies.
- Cream the butter and sugar: In a large mixing bowl, beat the softened butter and granulated sugar together using an electric mixer on medium speed until the mixture is light and fluffy. This should take about 2-3 minutes.
- Add wet ingredients: Beat in the egg, vanilla extract, and red food coloring until well combined. The mixture should have a uniform red color. Slowly mix in the buttermilk until everything is well incorporated.
- Combine dry and wet ingredients: Gradually add the dry mixture to the wet ingredients, mixing on low speed until just combined. Be careful not to overmix, as this can result in tough cookies.
- Chill the dough: Cover the dough with plastic wrap and chill in the refrigerator for at least 2 hours or overnight. This step is vital for achieving the crinkle effect and helps to prevent the cookies from spreading too much.
- Preheat and prepare for baking: Preheat your oven to 350°F (175°C). Line a baking sheet with parchment paper.
- Shape the cookies: Scoop tablespoon-sized amounts of dough and roll them into balls. Roll each ball in powdered sugar, making sure they’re generously coated.
- Bake the cookies: Place the sugar-coated dough balls on the prepared baking sheet, spaced about 2 inches apart. Bake for 10-12 minutes, or until the cookies have spread and the tops have cracked.
- Cool and serve: Allow the cookies to cool on the baking sheet for a few minutes before transferring them to a wire rack to cool completely. Serve them with a hot beverage or as part of your holiday dessert spread.
Extra Tips:
To guarantee the perfect crinkle effect, it’s essential to coat the dough balls generously in powdered sugar. This not only gives the cookies their signature look but also adds a layer of sweet crunch.
If the dough becomes too sticky to handle, dust your hands with a little powdered sugar before rolling. For an extra festive touch, consider adding a drop of peppermint extract or a sprinkle of edible glitter to the dough.
Finally, for the freshest taste, store the cookies in an airtight container at room temperature for up to a week.
Iced Christmas Ornament Cookies

Get ready to impress your family and friends this holiday season with these delightful Iced Christmas Ornament Cookies. These cookies aren’t only delicious but also serve as a beautiful, edible decoration for your festive gatherings.
The crisp, buttery base is enhanced with sweet royal icing, giving you the perfect canvas to release your creativity. Whether you prefer classic red and green or wish to experiment with bold and bright hues, these cookies will add a touch of magic to your Christmas celebrations.
Perfect for a serving size of 4-6 people, these cookies are a joy to make and even more fun to decorate. You’ll find that the process is just as rewarding as the final product, allowing you to express your artistic flair while creating memorable treats.
Gather your loved ones and make a day out of baking and decorating these charming cookies, turning your kitchen into a winter wonderland.
Ingredients
- 2 1/2 cups all-purpose flour
- 1/2 teaspoon baking powder
- 1/4 teaspoon salt
- 1 cup unsalted butter, softened
- 1 cup granulated sugar
- 1 large egg
- 1 teaspoon vanilla extract
- 1/2 teaspoon almond extract
- 2 cups powdered sugar
- 2 tablespoons meringue powder
- 5-6 tablespoons water
- Food coloring (various colors)
- Sprinkles, edible glitter, and other decorations as desired
Cooking Instructions
1. Prepare the Dough: In a medium bowl, whisk together the flour, baking powder, and salt. In a separate large bowl, beat the softened butter and granulated sugar together until light and fluffy.
Add the egg, vanilla extract, and almond extract, mixing well. Gradually add the dry ingredients to the wet mixture, stirring until a soft dough forms.
2. Chill the Dough: Divide the dough into two portions, flatten them into disks, and wrap each in plastic wrap. Refrigerate for at least 1 hour, or until firm. This step is essential for maintaining the shape of the cookies during baking.
3. Roll and Cut the Cookies: Preheat your oven to 350°F (175°C). On a floured surface, roll out the dough to about 1/4 inch thickness. Use ornament-shaped cookie cutters to cut out shapes and place them on a baking sheet lined with parchment paper.
4. Bake the Cookies: Bake the Cookies in the preheated oven for 8-10 minutes, or until the edges are just beginning to turn golden brown. Allow them to cool completely on a wire rack before decorating.
5. Prepare the Royal Icing: In a large bowl, whisk together the powdered sugar, meringue powder, and 5 tablespoons of water. Mix on high speed until stiff peaks form, adding more water if necessary to reach a piping consistency.
Divide the icing into bowls and tint with desired food colors.
6. Decorate the Cookies: Load the colored icing into piping bags fitted with small round tips. Outline each cookie and flood the center with icing. Use a toothpick or a small spatula to spread the icing evenly.
While the icing is still wet, add sprinkles, edible glitter, or other decorations as desired. Allow the icing to dry completely before serving or storing.
Extra Tips
When decorating your Iced Christmas Ornament Cookies, keep a damp cloth handy to cover the royal icing bowls to prevent them from drying out.
If you’re new to using royal icing, practice on a piece of parchment paper before decorating the cookies to get a feel for the consistency and flow.
Additionally, allow each color of icing to dry slightly before applying another color to prevent bleeding and achieve crisp, clean designs. With these tips, your cookies won’t only taste amazing but will also look stunning and professional.
Linzer Star Cookies
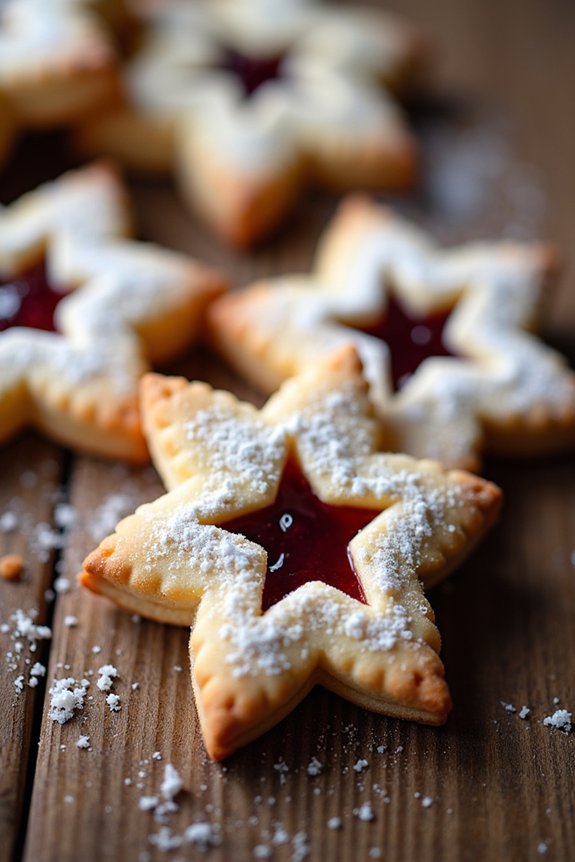
Linzer Star Cookies are a delightful holiday treat that brings a touch of elegance to your Christmas dessert spread. These cookies aren’t only delicious but visually stunning, featuring a delicate, crumbly texture and a sweet, jam-filled center that peeks through a star-shaped cutout.
Originating from Austria, Linzer cookies are traditionally made with ground nuts, providing a rich flavor that complements the fruity filling. Their festive star shape makes them perfect for holiday celebrations, and they can be dusted with powdered sugar to add a snowy touch, enhancing their aesthetic appeal.
The process of making Linzer Star Cookies involves creating a dough that incorporates ground almonds or hazelnuts, which lends the cookies their signature nutty flavor. The dough is then rolled out and cut into star shapes using cookie cutters, with a smaller star cut out from the center of half of the cookies.
After baking, the cookies are sandwiched together with a layer of fruit preserves, such as raspberry or apricot jam, which shines through the cutout. These cookies can be stored in an airtight container and make for a beautiful homemade gift or a delightful addition to any holiday cookie platter.
Ingredients for Linzer Star Cookies (Serves 4-6 people):
- 1 ¾ cups all-purpose flour
- ¾ cup ground almonds or hazelnuts
- ½ teaspoon ground cinnamon
- ¼ teaspoon salt
- 1 cup unsalted butter, softened
- ⅔ cup granulated sugar
- 1 teaspoon vanilla extract
- 2 large egg yolks
- ½ cup raspberry or apricot jam
- Powdered sugar, for dusting
Cooking Instructions:
- Prepare the Dry Ingredients: In a medium bowl, whisk together the all-purpose flour, ground almonds or hazelnuts, ground cinnamon, and salt until well combined. Set the mixture aside.
- Cream the Butter and Sugar: In a large mixing bowl, beat the softened unsalted butter and granulated sugar together using an electric mixer on medium speed until the mixture is light and fluffy, about 3-4 minutes.
- Add Wet Ingredients: Add the vanilla extract and egg yolks to the butter and sugar mixture, beating until fully incorporated.
- Combine with Dry Ingredients: Gradually add the flour mixture to the wet ingredients, mixing on low speed until a dough forms. Be careful not to overmix.
- Chill the Dough: Divide the dough into two equal portions, flatten each into a disk, and wrap in plastic wrap. Refrigerate for at least 1 hour or until firm.
- Preheat and Roll Out Dough: Preheat your oven to 350°F (175°C). Remove one disk of dough from the refrigerator and roll it out on a lightly floured surface to about 1/8-inch thickness.
- Cut Out Cookies: Use a large star-shaped cookie cutter to cut out cookies from the rolled dough. On half of the cookies, use a smaller star cutter to cut out the center.
- Bake the Cookies: Place the cookies on a baking sheet lined with parchment paper, spacing them about 1 inch apart. Bake in the preheated oven for 10-12 minutes or until the edges are lightly golden. Allow the cookies to cool on a wire rack.
- Assemble the Cookies: Once the cookies have cooled completely, spread about 1 teaspoon of jam on the whole star cookies. Place the cookies with the star cutouts on top, pressing gently to sandwich them together.
- Dust with Powdered Sugar: Before serving, dust the tops of the cookies with powdered sugar for a decorative touch.
Extra Tips:
For best results, confirm that your butter is softened but not melted, as this will affect the texture of the dough. If the dough becomes too soft while rolling, you can return it to the refrigerator for a few minutes to firm up.
When cutting out the cookies, try to re-roll the scraps only once to avoid tough cookies. You can experiment with different fillings, such as lemon curd or chocolate spread, for a unique twist on the classic Linzer cookie.
These cookies are best enjoyed fresh but can be stored in an airtight container for up to a week.
Matcha Christmas Wreaths
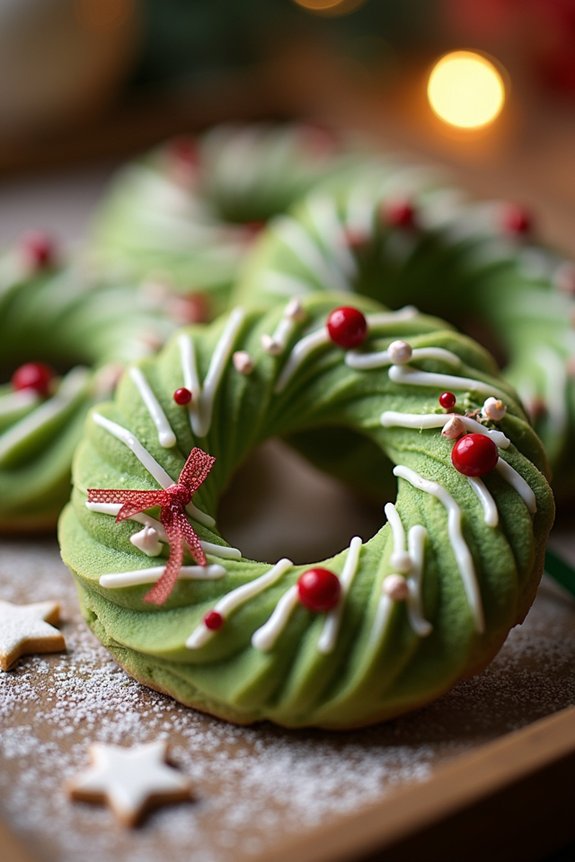
Celebrate the festive season with these delightful Matcha Christmas Wreaths that not only taste divine but also add a touch of elegance to your holiday table.
These cookies blend the earthy, slightly sweet flavor of matcha with the buttery richness of a classic sugar cookie, creating a unique and visually striking holiday treat. The vibrant green hue of the matcha pairs perfectly with the decorative red and white accents, creating a cookie that resembles a beautiful Christmas wreath.
Perfect for gifting or serving at holiday gatherings, this recipe yields approximately 24 cookies, making it suitable for serving 4-6 people. The delicate balance of flavors and the eye-catching design are sure to make these cookies a favorite among your family and friends.
Whether you’re a seasoned baker or a beginner, these Matcha Christmas Wreaths are a fun and rewarding project to undertake this holiday season.
Ingredients:
- 1 cup unsalted butter, room temperature
- 1 cup granulated sugar
- 1 large egg
- 1 teaspoon vanilla extract
- 2 ½ cups all-purpose flour
- 2 tablespoons matcha green tea powder
- ½ teaspoon salt
- 1 cup powdered sugar
- 2 tablespoons milk
- Red and white sprinkles or small candies
- 24 small decorative ribbons (optional)
Cooking Instructions:
- Preheat and Prepare: Preheat your oven to 350°F (175°C). Line two baking sheets with parchment paper to guarantee the cookies don’t stick.
- Cream Butter and Sugar: In a large mixing bowl, use an electric mixer to cream the butter and granulated sugar together until light and fluffy, about 3 minutes.
- Add Wet Ingredients: Add the egg and vanilla extract to the mixture, beating until fully incorporated.
- Mix Dry Ingredients: In a separate bowl, whisk together the all-purpose flour, matcha powder, and salt.
- Combine Ingredients: Gradually add the dry ingredients to the wet ingredients, mixing gently until a dough forms. Be careful not to overmix.
- Shape the Cookies: Divide the dough into 24 equal pieces. Roll each piece into a small ball and then flatten slightly. Use your thumb or a small spoon to make a hole in the center, creating a wreath shape.
- Bake the Cookies: Place the cookies on the prepared baking sheets, leaving space between each one. Bake in the preheated oven for 10-12 minutes, or until the edges are just starting to turn golden.
- Cool and Decorate: Allow the cookies to cool on the baking sheets for 5 minutes before transferring them to a wire rack to cool completely. In a small bowl, mix the powdered sugar and milk to create a glaze. Drizzle over the cooled cookies and decorate with red and white sprinkles or candies to resemble holly berries. Optionally, tie a small decorative ribbon around each cookie.
Extra Tips:
To achieve the perfect texture, make sure your butter is at room temperature before you begin mixing. This will result in a smoother dough that’s easier to work with.
If the dough feels too sticky, you can refrigerate it for about 30 minutes before shaping the cookies. When drizzling the glaze, use a piping bag or a small ziplock bag with the corner cut off for more precision.
Finally, for an extra festive touch, consider using edible glitter or gold leaf as additional decoration. Enjoy these cookies with a warm cup of tea or hot chocolate to enhance the matcha flavor.
Nutella-Stuffed Santa Hats

Nutella-Stuffed Santa Hats are a delightful treat that combines the rich, creamy flavor of Nutella with the festive charm of a classic holiday dessert. These cookies are shaped to resemble Santa’s iconic red hat, making them a perfect addition to your holiday cookie platter. The combination of flaky pastry, rich chocolate-hazelnut filling, and a touch of powdered sugar creates a delectable and visually stunning treat that will impress your family and guests.
This recipe is designed to serve 4-6 people, so it’s perfect for an intimate holiday gathering or as part of a larger dessert spread. Not only are these cookies delicious, but they’re also relatively simple to make, allowing you to spend more time enjoying the holiday festivities and less time in the kitchen. Follow these instructions for a sweet and whimsical addition to your Christmas cookie lineup.
Ingredients:
- 1 sheet of puff pastry, thawed
- 1/2 cup Nutella
- 1 egg, beaten
- Red food coloring
- Powdered sugar, for dusting
- 1 tablespoon granulated sugar (optional for added sweetness)
Cooking Instructions:
- Preheat and Prepare: Preheat your oven to 375°F (190°C). Line a baking sheet with parchment paper to prevent sticking and make cleanup easier.
- Roll Out the Puff Pastry: On a lightly floured surface, roll out the thawed puff pastry sheet to about 1/4-inch thickness. Use a round cutter (about 3 inches in diameter) to cut out circles from the pastry. You should have about 8-10 circles.
- Add Nutella: Spoon about a teaspoon of Nutella into the center of each pastry circle. Be careful not to overfill, as this can cause the filling to leak during baking.
- Shape the Hats: Fold each circle in half to create a half-moon shape, then pinch the edges to seal. Gently shape the top of the half-moon to form a point, resembling a Santa hat.
- Color and Brush: Mix the beaten egg with a few drops of red food coloring until it reaches a vibrant red hue. Use a pastry brush to paint the tops of the Santa hats, leaving the bottom edges uncolored to resemble the white fur trim.
- Bake the Cookies: Arrange the prepared Santa hats on the lined baking sheet. Bake in the preheated oven for about 12-15 minutes, or until the pastry is puffed and golden brown.
- Cool and Decorate: Allow the cookies to cool on the baking sheet for a few minutes before transferring them to a wire rack. Once completely cool, dust the uncolored edges with powdered sugar to enhance the Santa hat appearance.
Extra Tips: To guarantee the puff pastry puffs up nicely, make sure it’s cold when you work with it. If it becomes too warm, place it in the fridge for a few minutes before proceeding. Additionally, for a more intense color, use gel food coloring instead of liquid red food coloring.
If you’re looking for an extra touch of sweetness, sprinkle a bit of granulated sugar over the painted areas before baking. This will create a subtle sugary crust. Enjoy these Nutella-Stuffed Santa Hats with a glass of milk or a warm cup of cocoa for the perfect holiday treat.
Spiced Molasses Stars
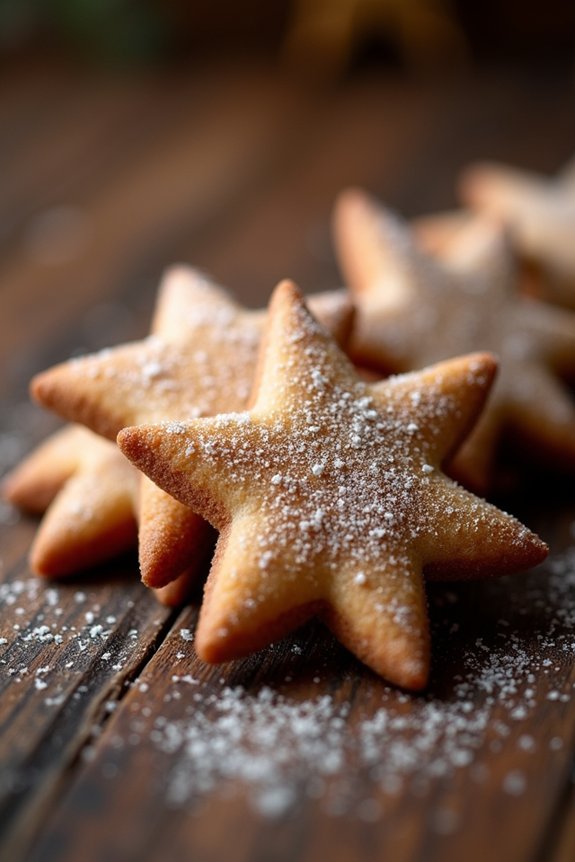
Spiced Molasses Stars are a delightful and visually appealing treat perfect for the holiday season. Their rich, deep flavor comes from the combination of warm spices and the dark sweetness of molasses, making them a festive favorite for Christmas cookie platters.
These cookies aren’t only delicious but also beautiful, resembling stars twinkling in the winter night sky, making them a lovely addition to any holiday spread. Whether you’re hosting a gathering or simply want to enjoy a special treat with loved ones, these cookies are sure to impress with their intricate flavors and enchanting appearance.
With a soft and chewy texture, Spiced Molasses Stars offer a harmonious blend of cinnamon, ginger, and cloves, balanced perfectly by the robust molasses. The process of making these cookies is as gratifying as the end result, involving the rolling out of dough and using star-shaped cutters to create the iconic shape.
After baking, you can choose to leave them plain for a rustic look or ice them for a more polished finish. This recipe serves 4-6 people, making it ideal for small gatherings or as a generous batch for your family to enjoy throughout the holidays.
Ingredients:
- 2 3/4 cups all-purpose flour
- 1 teaspoon baking soda
- 1/4 teaspoon baking powder
- 1/2 teaspoon salt
- 1 teaspoon ground cinnamon
- 1 teaspoon ground ginger
- 1/2 teaspoon ground cloves
- 3/4 cup unsalted butter, softened
- 1 cup packed dark brown sugar
- 1 large egg
- 1/2 cup molasses
- 1 teaspoon vanilla extract
- Granulated sugar (for sprinkling)
Cooking Instructions:
- Preheat and Prep: Preheat your oven to 350°F (175°C) and line two baking sheets with parchment paper. This will prevent the cookies from sticking and guarantee even baking.
- Mix Dry Ingredients: In a medium bowl, whisk together the flour, baking soda, baking powder, salt, cinnamon, ginger, and cloves. This guarantees the spices are evenly distributed throughout the dough.
- Cream Butter and Sugar: In a large bowl, use an electric mixer to cream the softened butter and brown sugar until light and fluffy. This process incorporates air into the mixture, contributing to the cookie’s texture.
- Add Wet Ingredients: Beat in the egg, molasses, and vanilla extract until well combined. This will create a smooth and homogeneous mixture.
- Combine Wet and Dry: Gradually add the dry ingredients to the wet ingredients, mixing just until incorporated. Avoid overmixing to prevent tough cookies.
- Roll Out Dough: Divide the dough in half. Roll out each half on a lightly floured surface to about 1/4-inch thickness. Use star-shaped cookie cutters to cut out the cookies.
- Bake: Place the stars on the prepared baking sheets and sprinkle with granulated sugar. Bake in the preheated oven for 8-10 minutes, or until the edges are firm but the centers are still soft.
- Cool: Allow the cookies to cool on the baking sheet for 5 minutes before transferring to a wire rack to cool completely.
Extra Tips:
For the best flavor, consider allowing the dough to chill in the refrigerator for at least an hour before rolling it out. This helps the spices to meld and deepens the molasses flavor.
If you prefer a crisper cookie, roll the dough thinner and bake a minute or two longer, keeping an eye on them to prevent burning. For a decorative touch, you can drizzle or pipe royal icing on the cooled cookies, adding a touch of elegance to your Spiced Molasses Stars.
Marbled Sugar Cookies
Marbled Sugar Cookies are a delightful addition to your holiday baking repertoire, combining both taste and visual appeal. These cookies aren’t only delicious with their buttery, sweet flavor, but they also boast a stunning marbled effect that’s sure to impress your guests. The marbling technique involves swirling different colors of dough together, creating a unique and artistic pattern on each cookie. The result is a batch of cookies that look as good as they taste, making them perfect for festive gatherings or as a thoughtful homemade gift.
In addition to their aesthetic appeal, Marbled Sugar Cookies are relatively simple to prepare. The base is a classic sugar cookie dough, which is easy to handle and lends itself well to the marbling process. The key is to divide the dough and color each portion with food coloring of your choice, then roll them together to create the marbling effect. Whether you opt for traditional holiday colors like red and green or choose a more subtle palette, these cookies are a versatile and fun project for bakers of all levels.
Ingredients (serves 4-6 people):
- 2 3/4 cups all-purpose flour
- 1 teaspoon baking powder
- 1/2 teaspoon salt
- 1 cup unsalted butter, softened
- 1 1/2 cups granulated sugar
- 1 egg
- 2 teaspoons vanilla extract
- Food coloring (various colors)
- Optional: 1 teaspoon almond extract
Instructions:
- Preheat the Oven: Start by preheating your oven to 350°F (175°C). Line two baking sheets with parchment paper and set aside.
- Prepare the Dry Ingredients: In a medium-sized bowl, whisk together the flour, baking powder, and salt. This will guarantee that the baking powder is evenly distributed throughout the flour mixture.
- Cream the Butter and Sugar: In a large mixing bowl, beat the softened butter and granulated sugar together using an electric mixer on medium speed until light and fluffy. This should take about 2-3 minutes.
- Add Wet Ingredients: Add the egg and vanilla extract (and almond extract, if using) to the butter-sugar mixture. Beat until completely incorporated.
- Combine Dry and Wet Ingredients: Gradually add the dry mixture to the wet mixture, beating on low speed just until combined. Don’t overmix.
- Divide and Color the Dough: Divide the dough into as many portions as you have chosen food colors. Add a few drops of food coloring to each portion and knead until the color is evenly distributed.
- Create the Marbled Effect: Roll each colored dough into long ropes, then twist and fold them together to create a marbled effect. Be careful not to overmix, as this will blend the colors too much.
- Form the Cookies: Pinch off small sections of the marbled dough and roll them into balls. Place them on the prepared baking sheets, spacing them about 2 inches apart. Use the bottom of a glass to gently flatten each ball into a disc.
- Bake: Bake the cookies in the preheated oven for 8-10 minutes, or until the edges are set and just beginning to turn golden. Be careful not to overbake, as sugar cookies can become hard.
- Cool: Allow the cookies to cool on the baking sheets for a few minutes before transferring them to a wire rack to cool completely.
Extra Tips:
To create the best marbled effect, use gel or paste food coloring as it provides vibrant colors without altering the dough’s consistency.
Also, when marbling the dough, less is more: a few twists and folds will create a beautiful pattern without blending the colors too much.
If you want to make your cookies extra special, consider sprinkling some edible glitter on top before baking for a festive touch.
Finally, make sure your butter is softened, not melted, to achieve the perfect dough consistency.
Pistachio Cranberry Biscotti
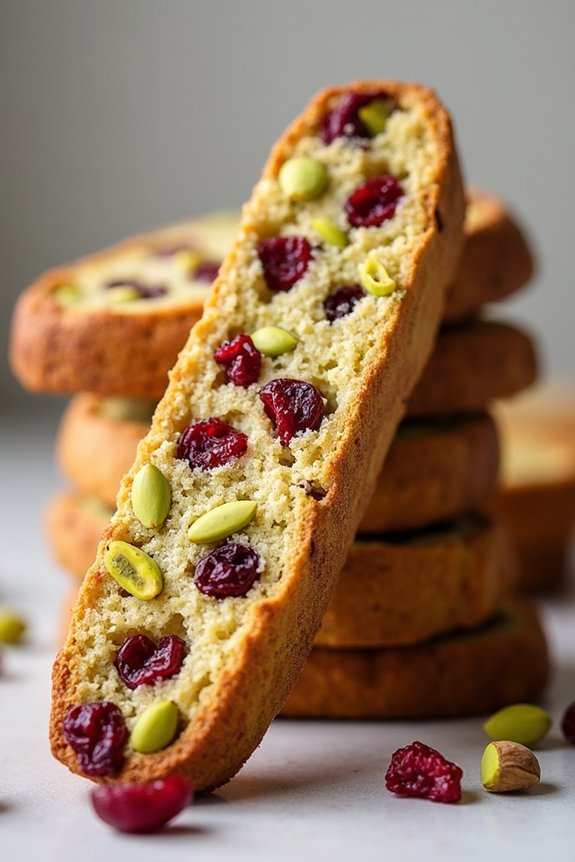
Pistachio Cranberry Biscotti are the perfect addition to your holiday cookie platter, offering a delightful balance of flavors and a festive appearance. These twice-baked Italian cookies are known for their crunchy texture and are ideal for dunking in a steaming cup of coffee or hot chocolate. The combination of vibrant green pistachios and ruby-red cranberries not only makes these cookies visually appealing but also adds a wonderful contrast of nutty and tart flavors that embody the spirit of the season.
Making Pistachio Cranberry Biscotti at home is a rewarding experience, as you can tailor the sweetness and flavor profile to your preference. This recipe yields around 24 biscotti, making it perfect for a gathering of 4-6 people, or as a charming homemade gift. The process involves creating a dough enriched with the flavors of pistachios and cranberries, shaping it into logs, and baking it twice to achieve that signature biscotti crunch. Follow the instructions and enjoy the process of crafting these elegant cookies that are sure to impress your family and friends.
Ingredients (Serving Size: 4-6 people):
- 1 3/4 cups all-purpose flour
- 1 cup granulated sugar
- 1 teaspoon baking powder
- 1/2 teaspoon salt
- 1/2 cup unsalted butter, softened
- 2 large eggs
- 1 teaspoon vanilla extract
- 1/2 teaspoon almond extract
- 3/4 cup shelled pistachios, coarsely chopped
- 3/4 cup dried cranberries
Instructions:
- Preheat the Oven: Start by preheating your oven to 350°F (175°C). Line a baking sheet with parchment paper to prevent the biscotti from sticking and to guarantee even baking.
- Prepare the Dry Ingredients: In a medium-sized bowl, whisk together the flour, baking powder, and salt. This guarantees that the baking powder is evenly distributed throughout the flour.
- Cream Butter and Sugar: In a large mixing bowl, beat the softened butter and sugar together using an electric mixer on medium speed until the mixture is light and fluffy. This usually takes about 2-3 minutes.
- Add Eggs and Extracts: Beat in the eggs one at a time, ensuring each egg is fully incorporated before adding the next. Mix in the vanilla and almond extracts until well combined.
- Combine with Dry Ingredients: Gradually add the dry ingredients to the wet mixture, mixing on low speed until a dough forms. Be careful not to overmix.
- Incorporate Pistachios and Cranberries: Fold in the chopped pistachios and dried cranberries using a spatula, ensuring they’re evenly distributed throughout the dough.
- Shape the Dough: Divide the dough in half and shape each half into a log approximately 10 inches long and 2 inches wide. Place the logs on the prepared baking sheet.
- First Bake: Bake the logs in the preheated oven for 25-30 minutes or until they’re lightly golden and firm to the touch. Remove from the oven and let them cool for 10 minutes.
- Slice the Biscotti: Once slightly cooled, use a sharp serrated knife to slice the logs into 1/2-inch thick slices. Arrange the slices cut-side down on the baking sheet.
- Second Bake: Return the slices to the oven and bake for an additional 10-12 minutes on each side, until they’re golden brown and crisp. Allow them to cool completely on a wire rack.
Extra Tips:
To achieve the perfect biscotti texture, make sure to slice the logs while they’re still warm but not too hot to handle. A serrated knife is ideal for this task as it will prevent the biscotti from crumbling. If you prefer a softer biscotti, reduce the second baking time slightly.
For an extra festive touch, consider drizzling melted white chocolate over the cooled biscotti or dipping one end into the chocolate for added sweetness and visual appeal. Store the biscotti in an airtight container to maintain their crispness.
Hot Cocoa Thumbprints

Hot Cocoa Thumbprints are the quintessential holiday treat, combining the beloved flavors of hot cocoa with the irresistible charm of thumbprint cookies. These delightful cookies are perfectly designed to capture the warmth and coziness of a steaming mug of hot chocolate, with their soft and chewy texture complemented by a rich, gooey center.
Whether you’re serving them at a festive gathering or enjoying them by the fire, these cookies are sure to be a hit with both kids and adults alike.
What sets Hot Cocoa Thumbprints apart from other holiday cookies is their ingenious use of a chocolate and marshmallow filling that mimics the classic hot cocoa experience. The cookie base is a tender chocolate dough, while the center is filled with a luscious chocolate ganache, topped with a mini marshmallow that melts just enough to create a gooey bite.
This recipe is designed to serve 4-6 people, making it perfect for sharing with family and friends during the holiday season.
Ingredients (Serves 4-6):
- 1 cup all-purpose flour
- 1/3 cup unsweetened cocoa powder
- 1/4 teaspoon salt
- 1/2 cup unsalted butter, softened
- 2/3 cup granulated sugar
- 1 large egg
- 1 teaspoon vanilla extract
- 1/2 cup semi-sweet chocolate chips
- 1/4 cup heavy cream
- 12 mini marshmallows
Instructions:
- Preheat and Prepare: Preheat your oven to 350°F (175°C). Line a baking sheet with parchment paper to guarantee easy removal of cookies after baking.
- Mix Dry Ingredients: In a medium bowl, whisk together the flour, cocoa powder, and salt. This guarantees the cocoa is evenly distributed and helps avoid lumps in the dough.
- Cream Butter and Sugar: In a large mixing bowl, beat the softened butter and granulated sugar together with an electric mixer until light and fluffy, about 2 minutes. This creaming process is essential for the texture of the cookies.
- Add Egg and Vanilla: Beat in the egg and vanilla extract until fully incorporated. The mixture should be smooth and slightly pale.
- Combine with Dry Ingredients: Gradually add the dry ingredients to the wet ingredients, mixing on low speed until just combined. Avoid overmixing to maintain a tender cookie texture.
- Shape and Indent: Roll the dough into 1-inch balls and place them on the prepared baking sheet, spaced about 2 inches apart. Use your thumb or the back of a teaspoon to make an indentation in the center of each ball.
- Bake: Bake in the preheated oven for 10-12 minutes or until the edges are set. Remove from the oven and if needed, gently press the center again to reinforce the indentation.
- Prepare Ganache Filling: While cookies are cooling, heat the heavy cream in a small saucepan until it just begins to simmer. Remove from heat and pour over the chocolate chips in a bowl. Let sit for a minute, then stir until smooth and glossy.
- Fill and Garnish: Once cookies are cool, spoon the chocolate ganache into each thumbprint. Top with a mini marshmallow while the ganache is still warm.
- Set: Allow cookies to sit at room temperature until the ganache is set, about 30 minutes.
Extra Tips: For an extra festive touch, you can toast the marshmallows slightly using a kitchen torch for a s’mores-like effect. Store the cookies in an airtight container at room temperature for up to a week.
If you want a more intense chocolate flavor, consider adding a pinch of espresso powder to the dough. These cookies can also be frozen for up to a month, though it’s best to add the marshmallows after thawing to maintain their texture.