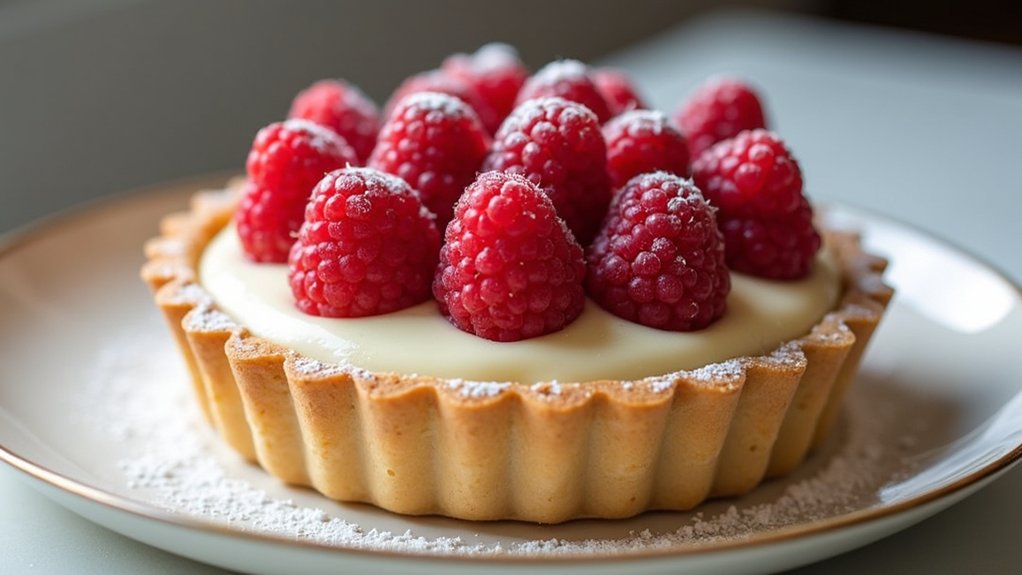
Welcome to my cozy corner of holiday sweetness, where Christmas desserts take center stage. Picture the inviting scent of gingerbread cookies baking and the indulgence of a chocolate yule log on your festive table. These treats are a heartwarming way to celebrate the season with loved ones. Ready to explore more delightful recipes that will bring joy to your festivities?
Classic Gingerbread Cookies

Gingerbread cookies are a quintessential treat during the holiday season, bringing warmth and joy to every festive gathering. These classic cookies aren’t only delicious but also fun to make, perfect for involving the whole family in a holiday baking tradition.
With their distinct spicy-sweet flavor and the option to decorate with icing, these cookies are bound to become a staple in your Christmas dessert repertoire. Whether you enjoy them with a hot cup of cocoa or as a sugary snack, these cookies are sure to evoke the holiday spirit.
The recipe for Classic Gingerbread Cookies yields a batch perfect for serving 4-6 people. The combination of ginger, cinnamon, and molasses creates a rich and aromatic dough that bakes into soft, chewy cookies. For the best results, make certain to chill the dough before rolling it out, which helps in achieving that perfect shape and consistency.
Get creative with your cookie cutters and have fun decorating them with royal icing or sprinkles for an added festive touch.
Ingredients:
- 3 cups all-purpose flour
- 3/4 cup brown sugar, packed
- 3/4 teaspoon baking soda
- 1 tablespoon ground ginger
- 1 tablespoon ground cinnamon
- 1/2 teaspoon ground cloves
- 1/2 teaspoon salt
- 3/4 cup unsalted butter, softened
- 3/4 cup molasses
- 2 tablespoons milk
- Royal icing and sprinkles for decorating (optional)
Cooking Instructions:
- Prepare the Dough: In a large bowl, whisk together the flour, brown sugar, baking soda, ginger, cinnamon, cloves, and salt until well combined. In a separate bowl, beat the softened butter with molasses and milk until smooth. Gradually add the dry ingredients to the wet ingredients, mixing until the dough comes together.
- Chill the Dough: Shape the dough into a flat disk, wrap it in plastic wrap, and refrigerate for at least 2 hours or overnight. Chilling the dough makes it easier to roll out and helps prevent the cookies from spreading too much during baking.
- Preheat the Oven: When ready to bake, preheat your oven to 350°F (175°C) and line two baking sheets with parchment paper.
- Roll Out the Dough: On a lightly floured surface, roll out the dough to about 1/4-inch thickness. Use cookie cutters to cut out shapes, and place them on the prepared baking sheets, leaving a little space between each cookie.
- Bake the Cookies: Bake in the preheated oven for 8-10 minutes, or until the edges are firm and the center is set. Be careful not to overbake, as the cookies will harden as they cool.
- Cool and Decorate: Allow the cookies to cool on the baking sheets for a few minutes before transferring them to a wire rack to cool completely. Once cooled, decorate with royal icing and sprinkles as desired.
Extra Tips:
To guarantee your Classic Gingerbread Cookies come out perfectly every time, make certain to measure your flour accurately by spooning it into the measuring cup and leveling it off with a knife.
You can also experiment with different spices, such as nutmeg or allspice, to tailor the flavor to your liking. If the dough becomes too sticky while rolling, dust it lightly with flour or roll it between two sheets of parchment paper to prevent sticking.
Finally, these cookies make great gifts when packaged in festive tins or bags, adding a personal touch to your holiday giving.
Decadent Chocolate Yule Log
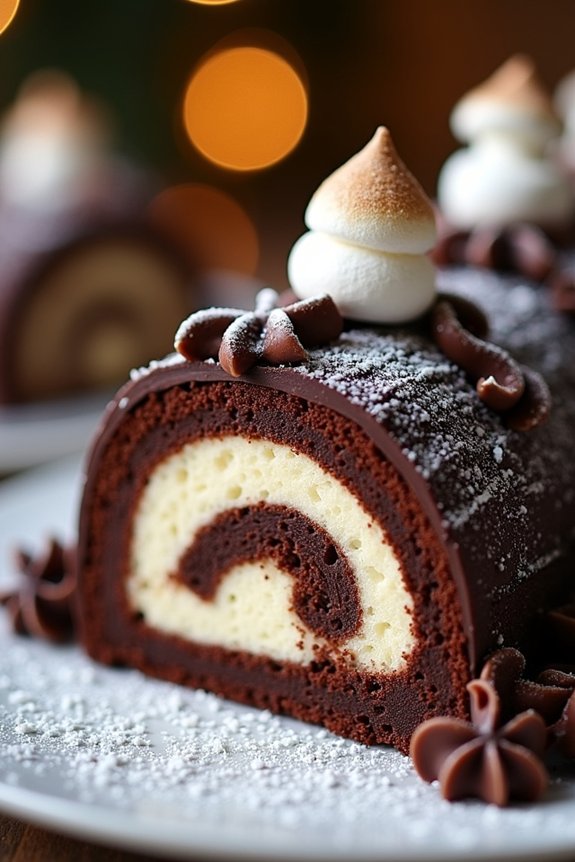
The Decadent Chocolate Yule Log is a classic holiday dessert that beautifully combines the rich flavors of chocolate with a touch of elegance. This festive dessert isn’t only visually stunning but also incredibly delicious, making it a perfect centerpiece for your Christmas table.
The Yule Log, or Bûche de Noël, is traditionally a rolled sponge cake filled with a luscious chocolate filling and covered with a smooth chocolate ganache. Its log-like appearance, often decorated with meringue mushrooms and festive sprigs, adds a whimsical touch to your holiday celebrations.
The preparation of this dessert requires some time and patience, but the end result is well worth the effort. It’s important to focus on the details, from creating a light and airy sponge to mastering the art of rolling the cake without cracks. With the right techniques, you can create a dessert that isn’t only beautiful but also mouth-wateringly delicious.
The following recipe is designed to serve 4-6 people, making it perfect for a small family gathering or an intimate holiday meal.
Ingredients:
- For the Sponge Cake:
- 4 large eggs, separated
- 1/2 cup granulated sugar
- 1/4 cup unsweetened cocoa powder
- 1/4 cup all-purpose flour
- 1/4 teaspoon salt
- For the Filling:
- 1 cup heavy whipping cream
- 2 tablespoons powdered sugar
- 1 teaspoon vanilla extract
- 1/4 cup finely chopped dark chocolate
- For the Chocolate Ganache:
- 1 cup heavy cream
- 8 ounces dark chocolate, chopped
- For Decoration:
- Powdered sugar for dusting
- Chocolate curls or shavings
- Fresh berries or meringue mushrooms (optional)
Cooking Instructions:
- Preheat and Prepare: Preheat your oven to 350°F (175°C). Line a 10×15-inch jelly roll pan with parchment paper and lightly grease it.
- Prepare the Batter: In a large bowl, beat the egg yolks and sugar until thick and pale. In a separate bowl, sift together the cocoa powder, flour, and salt. Gently fold the dry ingredients into the yolk mixture.
- Whip Egg Whites: In another bowl, beat the egg whites until stiff peaks form. Carefully fold the whipped egg whites into the chocolate batter, being careful not to deflate the mixture.
- Bake the Cake: Spread the batter evenly in the prepared pan. Bake for 12-15 minutes or until the cake springs back when touched. Remove from oven.
- Roll the Cake: Turn the cake onto a clean, damp kitchen towel dusted with cocoa powder. Peel off the parchment paper. Starting at a short end, roll the cake and towel together. Let it cool.
- Make the Filling: In a chilled bowl, whip the heavy cream, powdered sugar, and vanilla extract until stiff peaks form. Gently fold in the chopped dark chocolate.
- Unroll and Fill: Once the cake is cooled, carefully unroll it. Spread the chocolate filling over the surface, leaving a small border around the edges. Reroll the cake without the towel.
- Prepare the Ganache: Heat the heavy cream in a saucepan until it starts to simmer. Pour it over the chopped dark chocolate in a bowl. Let sit for a few minutes, then stir until smooth. Let it cool slightly.
- Frost the Cake: Spread the chocolate ganache evenly over the rolled cake. Use a fork to create a bark-like texture on the surface.
- Decorate: Dust with powdered sugar and decorate with chocolate curls, berries, or meringue mushrooms as desired.
Extra Tips:
To guarantee a smooth roll without cracking, make sure the cake is still slightly warm when you roll it with the towel initially. This helps it to mold into shape more easily.
When making the ganache, let it cool to a spreadable consistency but not so much that it hardens. You can prepare the meringue mushrooms ahead of time, adding a fun and authentic touch to your Yule Log.
Remember to serve it fresh for the best flavor and texture!
Festive Eggnog Cheesecake
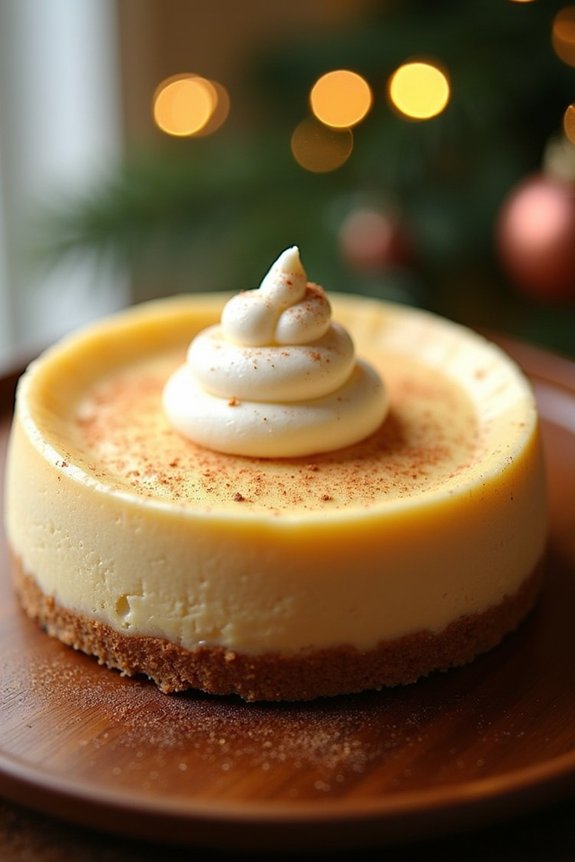
Indulge in the rich and creamy flavors of the holiday season with this Festive Eggnog Cheesecake. Perfect for Christmas gatherings, this cheesecake combines the classic taste of eggnog with the smooth, decadent texture of cheesecake, creating a dessert that’s both luxurious and comforting. The subtle hints of nutmeg and cinnamon enhance the eggnog flavor, while the buttery graham cracker crust provides the perfect base for this holiday treat.
Whether you’re hosting a festive party or simply enjoying a cozy family dinner, this cheesecake is sure to be a hit. This dessert isn’t only delicious but also visually appealing, making it a stunning centerpiece for your holiday table. With a serving size of 4-6 people, it’s just the right amount to satisfy everyone’s sweet tooth without overwhelming them. Follow this simple recipe to create a memorable dessert that captures the essence of Christmas in every bite.
Ingredients for 4-6 servings:
- 1 ½ cups graham cracker crumbs
- ¼ cup granulated sugar
- ½ cup unsalted butter, melted
- 24 oz cream cheese, softened
- 1 cup granulated sugar
- 3 tablespoons all-purpose flour
- ¾ cup eggnog
- 2 teaspoons vanilla extract
- ½ teaspoon ground nutmeg
- 4 large eggs
- Whipped cream, for topping (optional)
- Additional nutmeg or cinnamon, for garnish (optional)
Cooking Instructions:
- Prepare the Crust: Preheat your oven to 325°F (163°C). In a medium bowl, combine the graham cracker crumbs and ¼ cup of granulated sugar. Stir in the melted butter until the mixture resembles wet sand. Press the mixture firmly into the bottom of a 9-inch springform pan to form an even crust. Bake for 10 minutes, then remove from the oven and set aside to cool.
- Make the Cheesecake Filling: In a large mixing bowl, beat the softened cream cheese until smooth and creamy. Gradually add 1 cup of granulated sugar and the flour, beating well until fully incorporated. Pour in the eggnog, vanilla extract, and ground nutmeg, mixing until smooth. Add the eggs one at a time, beating on low speed just until combined. Be careful not to overmix, as this can introduce excess air into the batter.
- Assemble and Bake: Pour the cheesecake filling over the pre-baked crust in the springform pan. Smooth the top with a spatula. Place the pan in the preheated oven and bake for 50-60 minutes, or until the center is set but still slightly jiggly. Turn off the oven and leave the cheesecake inside with the door slightly ajar for about 1 hour to cool gradually.
- Chill the Cheesecake: After cooling in the oven, remove the cheesecake and let it come to room temperature. Refrigerate for at least 4 hours, preferably overnight, to allow the flavors to meld and the texture to set.
- Serve: Before serving, optionally top with whipped cream and a sprinkle of nutmeg or cinnamon for garnish. Carefully remove the sides of the springform pan, slice, and enjoy!
Extra Tips:
To guarantee your Festive Eggnog Cheesecake has a smooth and crack-free surface, make sure all ingredients are at room temperature before mixing. This helps create a uniform batter and reduces the risk of air bubbles.
It’s also important to avoid overbaking; the center should have a slight jiggle. If you notice any cracks during cooling, don’t worry—these can easily be covered with whipped cream or a festive garnish.
Finally, for best results, use a water bath during baking to create a humid environment that further prevents cracking.
Spiced Apple Cider Cupcakes
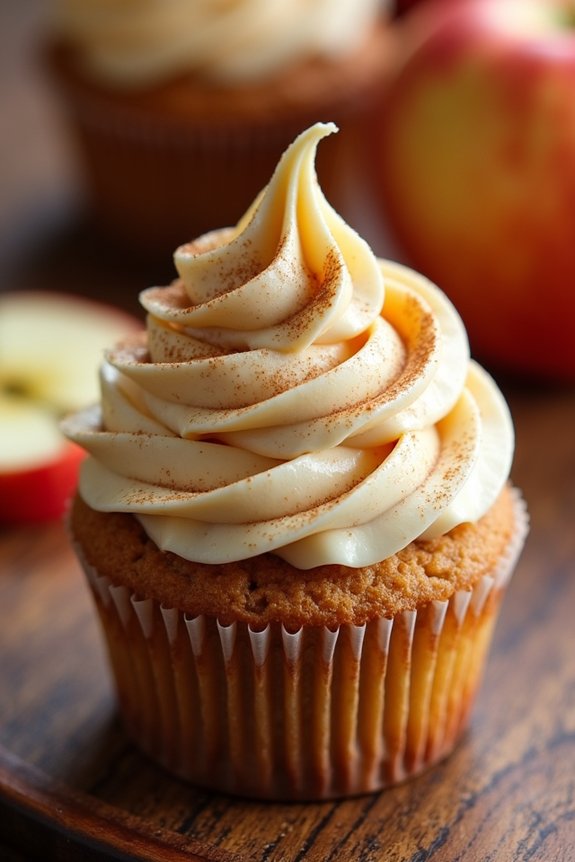
As the festive season approaches, the comforting aroma of spiced apple cider envelops homes and hearts alike. To further sweeten your holiday celebrations, consider indulging in these delightful Spiced Apple Cider Cupcakes.
These cupcakes capture the essence of Christmas with the warmth of cinnamon, nutmeg, and cloves, combined with the tangy sweetness of apple cider. Perfect for a cozy gathering, these cupcakes are sure to impress your guests with their moist texture and rich flavors, making them a splendid addition to your Christmas dessert spread.
These Spiced Apple Cider Cupcakes are easy to prepare and will serve 4-6 people, making them an ideal treat for small gatherings or as a special treat for your family. Topped with a luscious apple cider frosting, these cupcakes aren’t only visually appealing but also a delectable bite of holiday cheer.
The recipe combines simple pantry staples with the unique taste of apple cider, creating a dessert that’s both nostalgic and innovative.
Ingredients:
- 1 cup apple cider
- 1 1/4 cups all-purpose flour
- 1 teaspoon baking powder
- 1/2 teaspoon baking soda
- 1/2 teaspoon ground cinnamon
- 1/4 teaspoon ground nutmeg
- 1/4 teaspoon ground cloves
- 1/4 teaspoon salt
- 1/2 cup unsalted butter, softened
- 1/2 cup granulated sugar
- 1/4 cup packed brown sugar
- 2 large eggs
- 1 teaspoon vanilla extract
For the Frosting:
- 1/2 cup unsalted butter, softened
- 2 cups powdered sugar
- 3 tablespoons apple cider
- 1/2 teaspoon ground cinnamon
Instructions:
- Preheat the Oven: Start by preheating your oven to 350°F (175°C). Line a muffin tin with cupcake liners to prepare for baking.
- Reduce the Apple Cider: In a small saucepan, bring 1 cup of apple cider to a simmer over medium heat. Allow it to reduce by half, leaving you with 1/2 cup. This intensifies the apple flavor. Set aside to cool.
- Mix Dry Ingredients: In a medium bowl, whisk together the flour, baking powder, baking soda, cinnamon, nutmeg, cloves, and salt. This guarantees even distribution of the spices and leavening agents.
- Cream the Butter and Sugars: In a large mixing bowl, cream the butter, granulated sugar, and brown sugar until light and fluffy. This should take about 3 minutes using an electric mixer on medium speed.
- Add Wet Ingredients: Add the eggs one at a time, mixing well after each addition. Stir in the vanilla extract and the reduced apple cider.
- Combine Wet and Dry Ingredients: Gradually add the dry ingredients to the wet mixture, mixing just until combined. Be careful not to overmix to maintain a tender crumb.
- Fill the Cupcake Liners: Divide the batter evenly among the prepared cupcake liners, filling each about two-thirds full.
- Bake the Cupcakes: Bake in the preheated oven for 18-20 minutes, or until a toothpick inserted into the center of a cupcake comes out clean. Allow them to cool completely on a wire rack.
- Prepare the Frosting: In a medium bowl, beat the softened butter until creamy. Gradually add the powdered sugar, mixing on low speed until combined. Add the apple cider and cinnamon, then increase the speed to medium and beat until the frosting is smooth and fluffy.
- Frost the Cupcakes: Once the cupcakes are completely cooled, spread or pipe the frosting on top of each one. For a festive touch, consider sprinkling a bit of cinnamon sugar or topping with an apple slice.
Extra Tips:
To enhance the apple flavor, consider adding a small amount of finely grated apple to the batter. Additionally, verify your ingredients, especially the butter and eggs, are at room temperature for a smoother batter and better rise.
For a more robust spiced profile, adjust the spices to your preference, but be mindful of the balance to maintain the desired cupcake flavor. These cupcakes can be stored in an airtight container for up to three days, making them a convenient make-ahead option for your holiday festivities.
Traditional Sticky Toffee Pudding
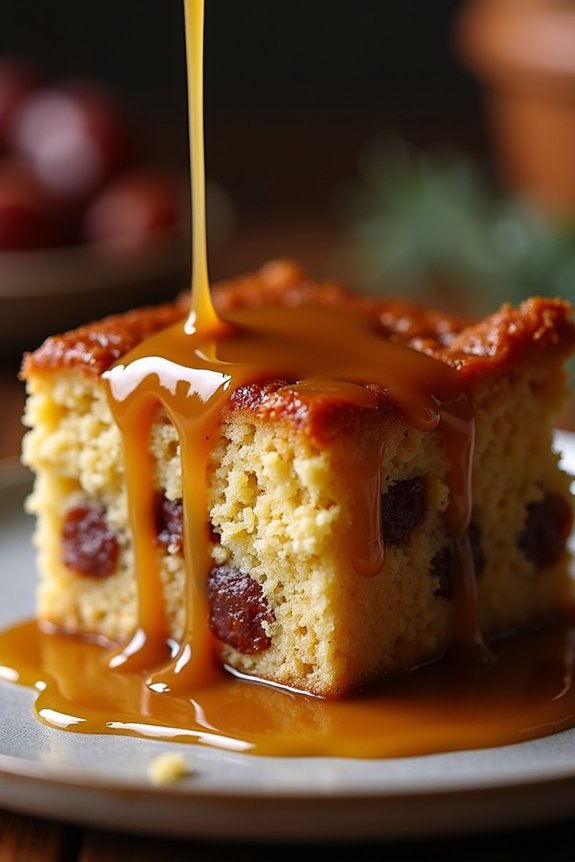
Sticky Toffee Pudding is a classic British dessert that’s beloved for its rich, moist sponge soaked in a decadent toffee sauce. This festive treat is perfect for the Christmas season, providing a warm, comforting end to a holiday meal. The pudding is traditionally made with dates, which give it a unique sweetness and luscious texture. When served fresh out of the oven with a generous drizzle of sticky toffee sauce, it’s a dessert that’s sure to impress your guests.
The origins of Sticky Toffee Pudding are somewhat debated, with some claiming it was first created in Scotland, while others believe it originated in England. Regardless of its origins, this dessert has become a staple during the holiday season in many households. Its caramel-like flavors paired with the moist sponge make it an irresistible choice for those with a sweet tooth.
Below is a detailed recipe to make this delightful dessert for 4-6 people.
Ingredients:
- 200g pitted dates, chopped
- 250ml boiling water
- 1 tsp bicarbonate of soda
- 85g unsalted butter, softened
- 175g light muscovado sugar
- 2 large eggs
- 200g self-raising flour
- 1 tsp vanilla extract
- 200ml double cream
- 100g dark muscovado sugar
Cooking Instructions:
- Preheat and Prepare: Preheat your oven to 180°C (160°C fan) or 350°F. Grease and line a baking dish or pudding basin suitable for baking.
- Soak the Dates: In a bowl, combine the chopped dates and boiling water. Stir in the bicarbonate of soda and let it sit for about 15 minutes until the dates soften.
- Cream Butter and Sugar: In a mixing bowl, cream together the softened butter and light muscovado sugar until light and fluffy. This should take about 3-5 minutes using an electric mixer.
- Add Eggs and Flour: Gradually beat in the eggs one at a time, ensuring each is well incorporated. Then, gently fold in the self-raising flour until you have a smooth batter.
- Combine Mixtures: Stir in the soaked date mixture and vanilla extract into the batter, ensuring all ingredients are well mixed.
- Bake the Pudding: Pour the mixture into the prepared baking dish. Bake in the preheated oven for 30-35 minutes or until a skewer inserted into the center comes out clean.
- Make the Toffee Sauce: While the pudding is baking, make the sauce. In a saucepan, combine the double cream and dark muscovado sugar. Heat gently, stirring continuously, until the sugar dissolves and the sauce thickens slightly.
- Serve: Once the pudding is baked, let it cool for a few minutes. Slice and serve warm, generously drizzled with the toffee sauce. For an extra indulgent touch, add a scoop of vanilla ice cream or a dollop of whipped cream.
Extra Tips:
For a deeper flavor, consider soaking the dates overnight in the refrigerator. This will allow the dates to absorb more liquid, resulting in an even moister pudding.
If you want to prepare ahead, the pudding can be made a day in advance and simply reheated before serving. When reheating, cover with foil to prevent it from drying out.
Finally, don’t skip the toffee sauce—it’s what makes this dessert truly special!
Peppermint Bark Fudge
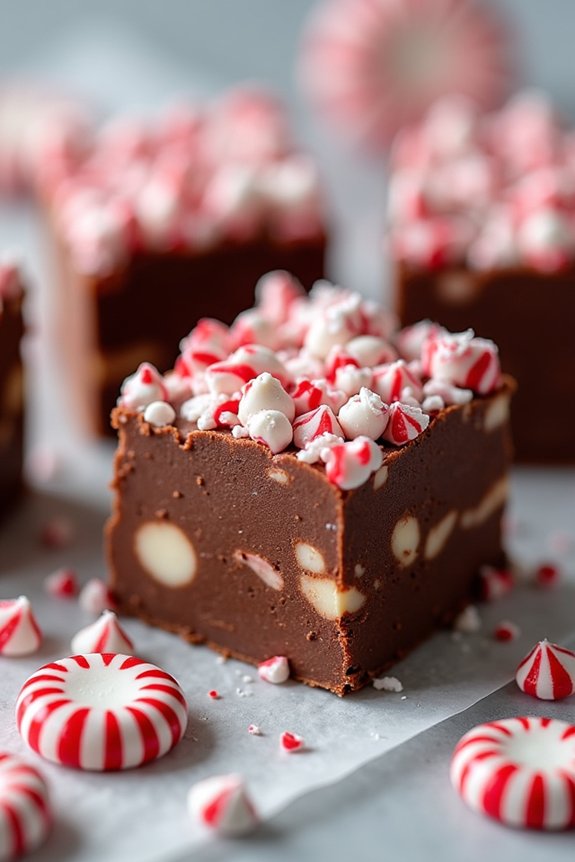
Peppermint Bark Fudge is a delightful holiday treat that combines the rich, creamy texture of fudge with the invigorating taste of peppermint. It’s perfect for Christmas gatherings or as a homemade gift for loved ones. This delicious dessert makes use of simple ingredients and requires no baking, making it an easy and enjoyable project for both novice and experienced cooks.
The fusion of chocolate and peppermint creates a festive flavor profile that’s both indulgent and invigorating. With its beautiful marbled appearance and crunchy peppermint topping, Peppermint Bark Fudge isn’t only tasty but also visually appealing, adding a touch of elegance to your holiday dessert table. This recipe yields enough fudge to serve 4-6 people, making it ideal for small get-togethers or family celebrations.
Ingredients:
- 2 cups semi-sweet chocolate chips
- 1 cup white chocolate chips
- 1 can (14 oz) sweetened condensed milk
- 1 teaspoon peppermint extract
- 1/2 cup crushed peppermint candies
- 1 tablespoon unsalted butter
- Pinch of salt
Cooking Instructions:
- Prepare the Pan: Line an 8×8 inch square baking pan with parchment paper, leaving an overhang on the sides to easily lift the fudge out once set. Lightly grease the parchment paper with butter to prevent sticking.
- Melt the Chocolate: In a medium saucepan, combine the semi-sweet chocolate chips, half a can of sweetened condensed milk, and a pinch of salt over low heat. Stir continuously until the chocolate is completely melted and smooth. Remove from heat and stir in 1/2 teaspoon of peppermint extract.
- Pour the Chocolate Layer: Pour the melted chocolate mixture into the prepared pan, spreading it evenly with a spatula. Tap the pan gently on the counter to remove any air bubbles.
- Prepare the White Chocolate Layer: In a separate saucepan, melt the white chocolate chips with the remaining sweetened condensed milk over low heat, stirring until smooth. Remove from heat and stir in the remaining 1/2 teaspoon of peppermint extract.
- Pour the White Chocolate Layer: Pour the melted white chocolate over the semi-sweet chocolate layer in the pan. Use a knife or spatula to gently swirl the two layers together, creating a marbled effect.
- Add the Toppings: Sprinkle the crushed peppermint candies evenly over the top, pressing them lightly into the surface with your hands to ensure they adhere.
- Set the Fudge: Chill the fudge in the refrigerator for at least 2 hours or until it’s firm enough to cut. For best results, allow it to set overnight.
- Cut and Serve: Once the fudge is set, lift it out of the pan using the parchment paper overhang. Cut into small squares or rectangles for serving.
Extra Tips: When melting chocolate, be sure to keep the heat low to prevent the chocolate from scorching. If the chocolate mixture becomes too thick, you can add a small amount of additional sweetened condensed milk to achieve a smoother consistency. For a less sweet version, consider using dark chocolate chips instead of semi-sweet. Store any leftovers in an airtight container in the refrigerator to maintain freshness and texture.
Cranberry Orange Biscotti
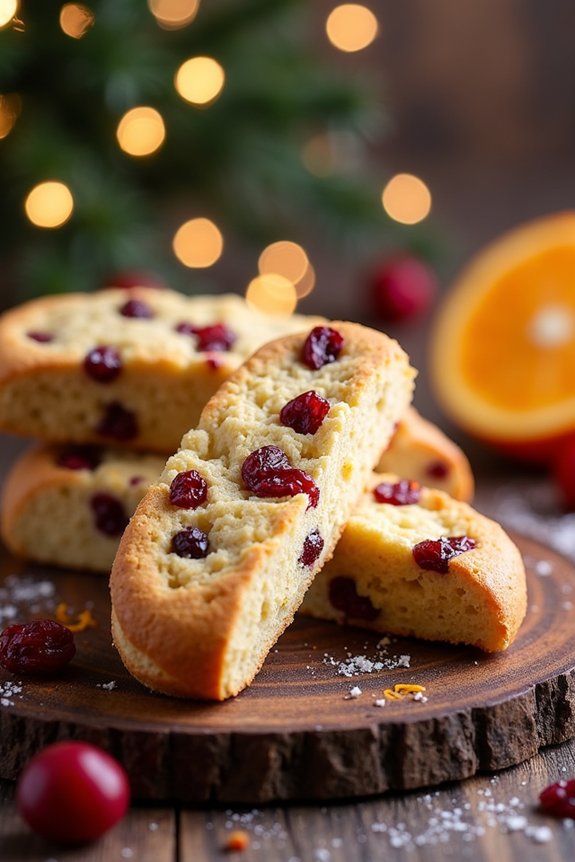
Cranberry Orange Biscotti is a delightful holiday treat that perfectly combines the tartness of cranberries with the fresh zest of oranges. These twice-baked Italian cookies are crisp, crunchy, and ideal for dipping into a warm cup of coffee or tea during the festive season.
Whether you’re serving them at a holiday gathering or gifting them to loved ones, this recipe is bound to impress with its unique blend of flavors and textures. This recipe yields approximately 24 biscotti, perfect for serving 4 to 6 people.
The preparation involves creating a dough enriched with the vibrant flavors of dried cranberries and orange zest, which is then baked to perfection. The biscotti are baked first as a loaf, then sliced and baked again to achieve their signature crispness.
Enjoy the warm aroma that fills your kitchen as you bake these delightful treats, and savor the joy they bring to your holiday celebrations.
Ingredients:
- 2 cups all-purpose flour
- 1 teaspoon baking powder
- 1/4 teaspoon salt
- 1/2 cup granulated sugar
- 1/2 cup brown sugar
- 1/2 cup unsalted butter, softened
- 1 tablespoon grated orange zest
- 2 large eggs
- 1 teaspoon vanilla extract
- 1/2 cup dried cranberries
- 1/2 cup chopped almonds (optional)
Cooking Instructions:
- Preheat the Oven: Begin by preheating your oven to 350°F (175°C). Line a baking sheet with parchment paper or a silicone baking mat to prevent sticking.
- Mix Dry Ingredients: In a medium bowl, whisk together the flour, baking powder, and salt. Set aside.
- Cream Butter and Sugar: In a large mixing bowl, use an electric mixer to beat the softened butter, granulated sugar, and brown sugar until light and fluffy. This should take about 2 to 3 minutes.
- Add Wet Ingredients: Mix in the grated orange zest, eggs, and vanilla extract into the butter-sugar mixture until well combined and smooth.
- Combine Dry and Wet Ingredients: Gradually add the dry ingredients to the wet mixture, mixing on low speed until just combined. Be careful not to overmix.
- Incorporate Cranberries and Nuts: Gently fold in the dried cranberries and almonds (if using) with a spatula or wooden spoon.
- Shape the Dough: Divide the dough in half and shape each half into a log, approximately 12 inches long and 2 inches wide, on the prepared baking sheet. Verify there’s enough space between the logs for spreading during baking.
- First Bake: Bake in the preheated oven for 25 to 30 minutes or until the logs are golden brown and firm to the touch. Allow them to cool on the baking sheet for about 10 minutes.
- Slice the Biscotti: Lower the oven temperature to 325°F (160°C). Using a serrated knife, carefully slice the logs diagonally into 3/4-inch thick slices.
- Second Bake: Arrange the slices cut side down on the baking sheet. Return them to the oven and bake for an additional 10 to 12 minutes. Flip the biscotti over and bake for another 10 to 12 minutes, or until they’re dry and crisp.
- Cool and Store: Remove from the oven and transfer the biscotti to a wire rack to cool completely. Store in an airtight container for up to two weeks.
Extra Tips: For a more intense orange flavor, you can add a teaspoon of orange extract along with the vanilla extract. Additionally, if you prefer a slightly softer biscotti, reduce the second baking time by a few minutes.
If you want to make them extra festive, consider drizzling the cooled biscotti with melted white or dark chocolate. Remember to use a sharp, serrated knife for clean cuts when slicing the logs to avoid crumbling. Enjoy the process, as making biscotti is a wonderful way to add a touch of homemade charm to your holiday celebrations!
Caramel Pecan Bread Pudding
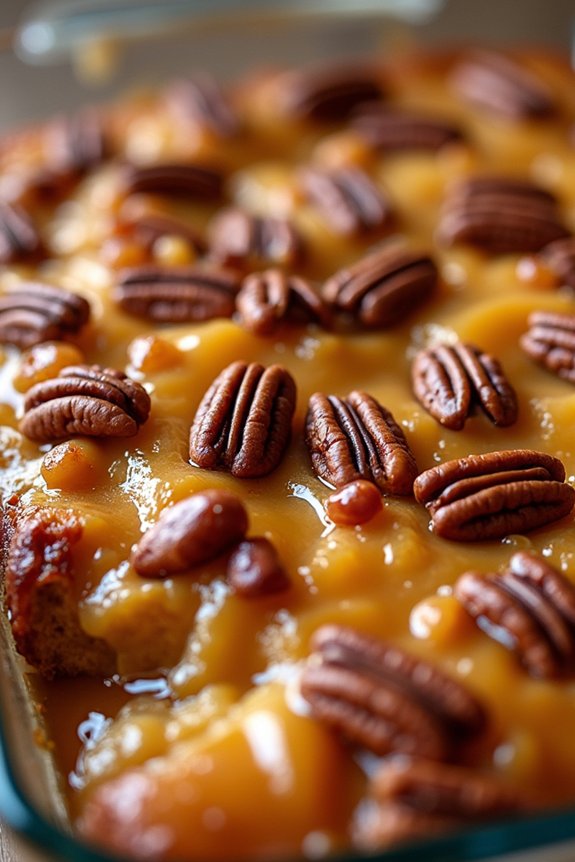
Caramel Pecan Bread Pudding is a delightful and indulgent dessert that combines the rich flavors of caramel and pecans with the comforting texture of bread pudding. Perfect for a Christmas gathering, this dessert is easy to prepare and will certainly impress your family and friends with its delicious taste and inviting aroma.
The combination of creamy custard soaked into soft bread, topped with a layer of sweet caramel and crunchy pecans, makes this dish a holiday favorite.
Bread pudding is a versatile dish that can be adapted to suit various tastes and preferences. This recipe adds a festive twist to a classic by incorporating the nutty richness of pecans and the sweet, buttery flavor of caramel.
Whether served warm with a scoop of vanilla ice cream or enjoyed on its own, Caramel Pecan Bread Pudding is sure to become a cherished addition to your holiday dessert repertoire.
Ingredients for 4-6 servings:
- 1 loaf of day-old brioche or challah bread
- 4 large eggs
- 2 cups whole milk
- 1 cup heavy cream
- 1 cup granulated sugar
- 1 tablespoon vanilla extract
- 1 teaspoon ground cinnamon
- 1/4 teaspoon salt
- 1 cup chopped pecans
- 1 cup caramel sauce (store-bought or homemade)
- Butter for greasing the baking dish
Cooking Instructions:
- Prepare the Bread: Cut the day-old brioche or challah bread into 1-inch cubes. Confirm the bread is slightly stale, as this will help it soak up the custard mixture more effectively.
- Make the Custard: In a large mixing bowl, whisk together the eggs, whole milk, heavy cream, granulated sugar, vanilla extract, ground cinnamon, and salt until fully combined and smooth.
- Combine Bread and Custard: Add the cubed bread into the mixing bowl with the custard mixture. Stir gently to confirm all pieces of bread are evenly coated with the custard. Allow the mixture to sit for about 15 minutes to let the bread soak up the liquid.
- Prepare the Baking Dish: Preheat the oven to 350°F (175°C). Grease a 9×13 inch baking dish with butter to prevent the pudding from sticking.
- Assemble the Pudding: Pour the bread and custard mixture into the prepared baking dish. Spread it evenly. Sprinkle the chopped pecans over the top.
- Bake the Pudding: Place the baking dish in the preheated oven and bake for 45-50 minutes, or until the pudding is set and the top is golden brown. A toothpick inserted into the center should come out clean.
- Add Caramel Sauce: Remove the pudding from the oven and allow it to cool for about 10 minutes. Drizzle the caramel sauce generously over the top of the bread pudding.
- Serve: Serve warm, optionally with vanilla ice cream or whipped cream for an extra touch of indulgence.
Extra Tips:
To confirm the best texture, use bread that’s slightly stale as it will absorb the custard mixture better. If you only have fresh bread, you can dry it out by toasting the cubes in the oven at a low temperature for 10 minutes.
When making the custard, take care not to overbeat the eggs as this can make the pudding dense. For the caramel sauce, you can easily make your own by melting sugar in a saucepan until it turns amber, then adding butter and cream. This homemade touch can enhance the flavor, though store-bought sauce works perfectly well too.
Red Velvet Snowball Cookies
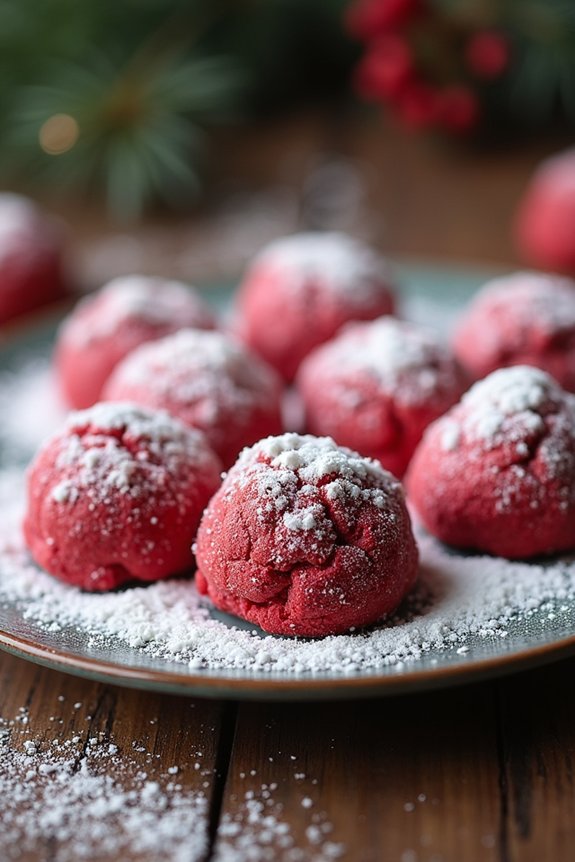
Red Velvet Snowball Cookies are a delightful holiday treat that combines the classic red velvet flavor with a festive, snowball-like appearance. These cookies are perfect for adding a splash of color and a hint of cocoa to your Christmas dessert table. Their soft, buttery texture, combined with a light dusting of powdered sugar, makes them irresistible to both children and adults alike.
The beauty of Red Velvet Snowball Cookies lies in their simplicity and elegance. They’re easy to make and require minimal ingredients, making them a wonderful choice for a busy holiday season. These cookies not only look appealing but also offer a unique twist on traditional snowball cookies, thanks to the addition of cocoa and red food coloring.
Whether you’re hosting a holiday party or simply want to enjoy a cozy night in with family, these cookies are sure to become a seasonal favorite.
Ingredients (Serves 4-6):
- 1 cup unsalted butter, softened
- 1/2 cup powdered sugar, plus more for dusting
- 1 teaspoon vanilla extract
- 1 tablespoon red food coloring
- 2 cups all-purpose flour
- 1/4 cup unsweetened cocoa powder
- 1/2 teaspoon salt
- 1 cup finely chopped pecans or walnuts (optional)
Instructions:
- Preheat the Oven: Begin by preheating your oven to 350°F (175°C). This guarantees that the cookies bake evenly and achieve the perfect texture.
- Mix the Wet Ingredients: In a large mixing bowl, cream together the softened butter and 1/2 cup of powdered sugar using an electric mixer until the mixture is light and fluffy. Add the vanilla extract and red food coloring, and continue to mix until fully incorporated.
- Combine Dry Ingredients: In a separate bowl, whisk together the flour, cocoa powder, and salt. This helps to evenly distribute the cocoa and guarantees there are no lumps in the final cookie dough.
- Form the Dough: Gradually add the dry ingredients to the wet ingredients, mixing on low speed until just combined. If using, fold in the finely chopped pecans or walnuts with a spatula.
- Shape the Cookies: Using a tablespoon or a small cookie scoop, portion out the dough and roll it into balls approximately 1 inch in diameter. Place each ball onto a lined baking sheet, leaving about 1 inch of space between each cookie.
- Bake: Bake in the preheated oven for 12-15 minutes or until the cookies are set and the bottoms are lightly browned. Be careful not to over-bake, as this can lead to a dry texture.
- Cool and Dust: Allow the cookies to cool on the baking sheet for about 5 minutes before transferring them to a wire rack. Once completely cooled, generously dust the cookies with additional powdered sugar to create the snowball effect.
Extra Tips:
For the best results, verify that the butter is fully softened before beginning the recipe. This will help achieve the desired creamy texture in your dough.
If you prefer a richer red color, you can adjust the amount of food coloring to suit your preference. Additionally, if you decide to add nuts, toasting them lightly beforehand can enhance their flavor, adding an extra layer of complexity to your cookies.
Store any leftover cookies in an airtight container to maintain their freshness.
White Chocolate Raspberry Tart
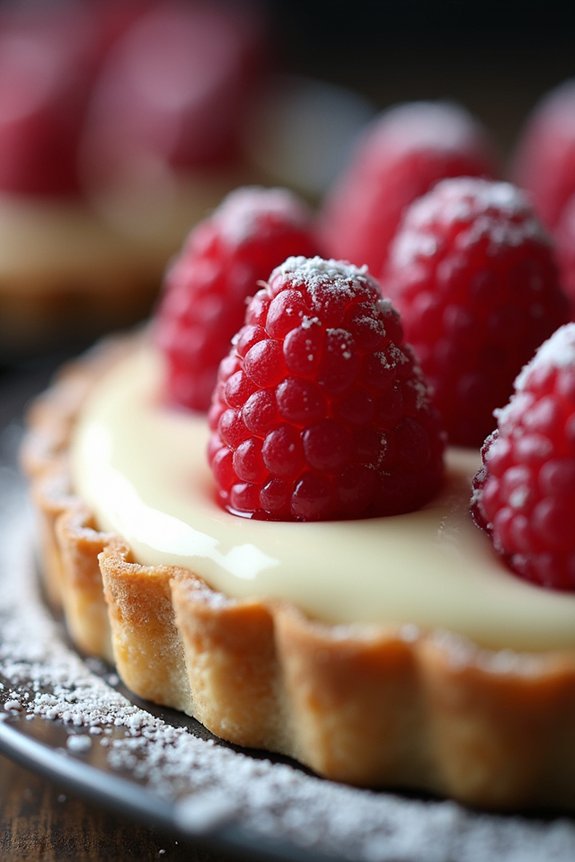
White Chocolate Raspberry Tart is a delightful dessert that combines the smoothness of white chocolate with the tart sweetness of raspberries. This elegant tart is perfect for any festive occasion, especially Christmas, as it not only tastes divine but also adds a touch of sophistication to your dessert table.
The crispness of the tart shell perfectly complements the creamy white chocolate filling, while the fresh raspberries provide a burst of flavor and color that’s both appealing to the eye and the palate.
The preparation of this tart involves creating a buttery pastry crust, a rich white chocolate ganache, and topping it with fresh raspberries. This dessert is ideal for serving 4-6 people, making it a great choice for a small gathering or family dinner during the holiday season.
The balance of flavors and textures in this tart will surely impress your guests and leave them craving for more.
Ingredients (Serves 4-6)
- 1 1/4 cups all-purpose flour
- 1/4 cup sugar
- 1/2 cup unsalted butter, chilled and cubed
- 1 egg yolk
- 2 tablespoons cold water
- 1 cup heavy cream
- 8 ounces white chocolate, chopped
- 1 teaspoon vanilla extract
- 1 1/2 cups fresh raspberries
- Powdered sugar for dusting (optional)
Cooking Instructions
1. Prepare the Crust: In a large mixing bowl, combine the all-purpose flour and sugar. Add the chilled, cubed butter and mix until the mixture resembles coarse crumbs. Add the egg yolk and cold water, mixing until the dough begins to come together.
2. Chill the Dough: Shape the dough into a disk, wrap it in plastic wrap, and refrigerate for at least 30 minutes. This will make it easier to roll out and will prevent the crust from shrinking during baking.
3. Roll Out the Dough: Preheat your oven to 350°F (175°C). On a lightly floured surface, roll out the dough to fit a 9-inch tart pan. Carefully transfer the dough to the pan, pressing it into the bottom and up the sides. Trim any excess dough.
4. Bake the Crust: Prick the bottom of the crust with a fork to prevent it from puffing up. Line the crust with parchment paper and fill it with pie weights or dried beans. Bake in the preheated oven for 15 minutes.
Remove the weights and parchment paper, and bake for an additional 10 minutes, or until golden brown. Let it cool completely.
5. Make the Ganache: In a medium saucepan, bring the heavy cream to a simmer over medium heat. Remove from heat and add the chopped white chocolate. Stir until the chocolate is completely melted and the mixture is smooth. Stir in the vanilla extract.
6. Assemble the Tart: Pour the white chocolate ganache into the cooled tart shell, spreading it evenly. Arrange the fresh raspberries on top of the ganache, pressing them gently into the filling.
7. Chill the Tart: Refrigerate the tart for at least 2 hours, or until the ganache is set. Before serving, dust with powdered sugar if desired.
Extra Tips
When making the tart crust, make certain that your butter is very cold for the flakiest result. If the dough becomes too soft while rolling it out, return it to the refrigerator for a few minutes to firm up.
For a more intense raspberry flavor, consider making a raspberry coulis to drizzle over the tart before serving. If fresh raspberries aren’t available, frozen raspberries can be used, but make sure to defrost and drain them well to prevent excess moisture in the tart.
Enjoy your White Chocolate Raspberry Tart with a scoop of vanilla ice cream or a dollop of whipped cream for an extra indulgent treat.

