

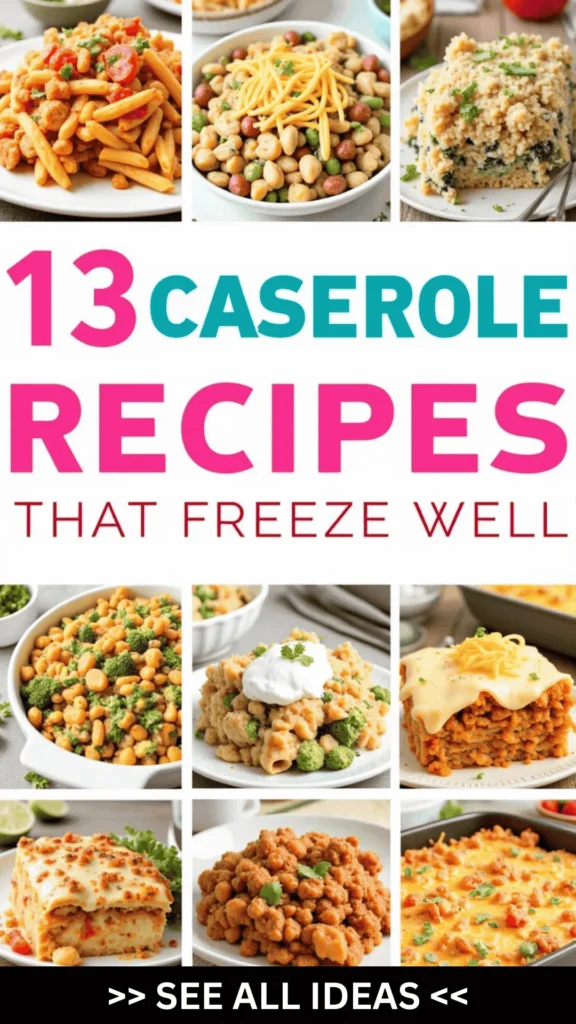
Casseroles have always been my kitchen’s little secret weapon.
They save the day when life gets busy, offering comforting meals in no time.
My freezer is filled with delicious options, from creamy Chicken and Rice Casserole to a zesty Enchilada Bake with Ground Turkey.
Each dish is a reminder that homemade goodness can be just moments away.
Let’s explore some of my favorite casserole recipes that freeze beautifully and make weeknight dinners a breeze!
Creamy Chicken and Rice Casserole
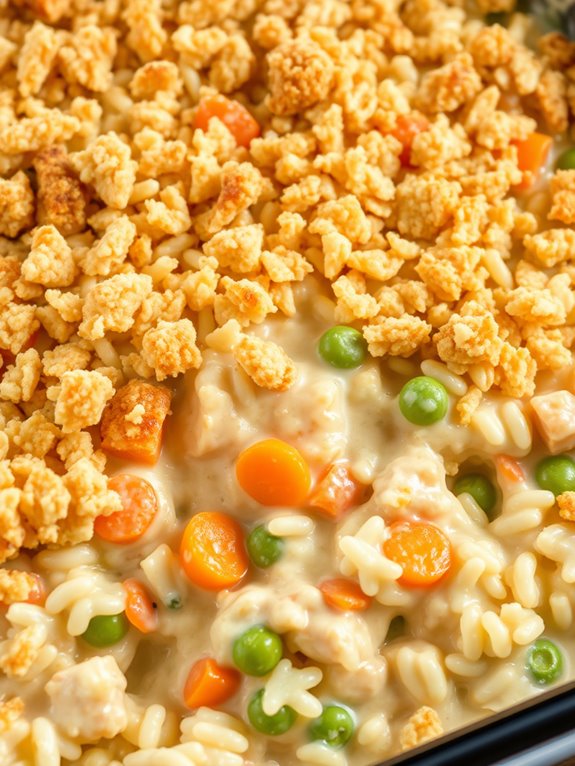
Creamy Chicken and Rice Casserole is a comforting and hearty dish that’s perfect for both immediate enjoyment and future meals. This casserole combines tender chicken, fluffy rice, and a rich, creamy sauce that melds together beautifully when baked to perfection. Perfect for busy weeknights or lazy weekends, this dish can be made ahead of time and stored in the freezer for a convenient meal later. Its creamy texture and savory flavor make it a family favorite that everyone will love.
One of the best things about this casserole is its versatility. You can easily adapt the recipe to include your favorite vegetables or use different types of rice to suit your taste preferences. The dish is also a great way to use up leftover chicken, making it both an economical and delicious option. When properly stored, this casserole can last in the freezer for up to three months, guaranteeing you have a tasty meal ready whenever you need it.
Here’s how you can make this delightful Creamy Chicken and Rice Casserole for 4-6 people:
Ingredients:
- 2 cups cooked chicken, shredded or cubed
- 2 cups cooked rice (white or brown)
- 1 cup frozen peas and carrots
- 1 small onion, finely chopped
- 2 cloves garlic, minced
- 1 can (10.5 oz) cream of chicken soup
- 1 cup sour cream
- 1 cup chicken broth
- 1 cup shredded cheddar cheese
- 1/2 teaspoon salt
- 1/4 teaspoon black pepper
- 1/4 teaspoon dried thyme
- 1/2 cup breadcrumbs (optional)
- 2 tablespoons butter, melted (optional)
Instructions:
- Preheat the Oven: Begin by preheating your oven to 350°F (175°C). This will make certain it’s hot and ready for the casserole once prepared.
- Prepare the Base: In a large mixing bowl, combine the cooked chicken, cooked rice, frozen peas and carrots, chopped onion, and minced garlic. Mix these ingredients well to guarantee even distribution.
- Make the Sauce: In a separate bowl, whisk together the cream of chicken soup, sour cream, and chicken broth until smooth. Add in the salt, pepper, and dried thyme, mixing until the spices are well combined.
- Combine Ingredients: Pour the sauce mixture over the chicken and rice mixture, then add the shredded cheddar cheese. Stir everything together until the ingredients are thoroughly coated with the sauce.
- Transfer to Baking Dish: Lightly grease a 9×13 inch baking dish and pour the casserole mixture into it, spreading it out evenly with a spatula.
- Optional Topping: If desired, combine the breadcrumbs and melted butter in a small bowl, then sprinkle evenly over the top of the casserole for a crispy finish.
- Bake the Casserole: Place the baking dish in the preheated oven and bake for 30-35 minutes, or until the casserole is bubbly and the top is golden brown.
- Serve and Enjoy: Once baked, remove the casserole from the oven and let it cool for a few minutes before serving. Enjoy the creamy goodness with your family or save it for later.
Extra Tips:
To guarantee the best results, make sure your chicken and rice are fully cooked before assembling the casserole. If you’re planning to freeze the casserole, allow it to cool completely before wrapping it tightly with plastic wrap and aluminum foil. Label the package with the date to keep track of freshness.
When ready to eat, thaw the casserole overnight in the refrigerator and reheat in the oven at 350°F (175°C) until warmed through. For added flavor, consider stirring in some sautéed mushrooms or bell peppers. Enjoy experimenting with your favorite ingredients to make this dish uniquely yours!
Beef and Mushroom Stroganoff Bake
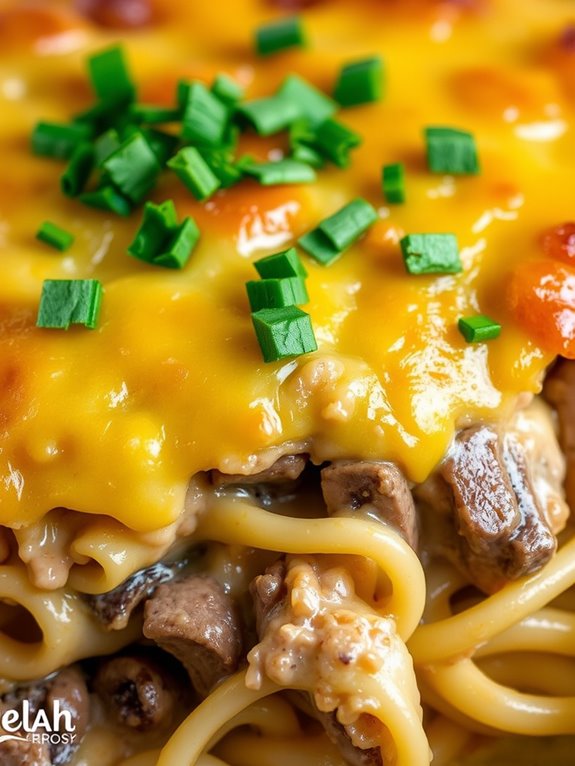
Beef and Mushroom Stroganoff Bake is a delicious and comforting casserole that combines the rich flavors of tender beef, earthy mushrooms, and a creamy sauce, all baked to perfection. This dish is perfect for family dinners or gatherings, and it freezes exceptionally well, making it a great option for meal prep. The combination of beef and mushrooms creates a hearty and satisfying meal that’s sure to please everyone at the table.
The creamy sauce in the Beef and Mushroom Stroganoff Bake is made with sour cream and beef broth, which adds depth and richness to the dish. The casserole is topped with a layer of cheese that melts beautifully in the oven, creating a golden, bubbly crust. This dish can be served on its own or with a side of crusty bread or a fresh green salad to complete the meal. It serves 4-6 people and is sure to become a family favorite.
Ingredients:
- 1 lb beef sirloin, thinly sliced
- 2 cups sliced mushrooms
- 1 medium onion, chopped
- 3 cloves garlic, minced
- 2 tablespoons olive oil
- 2 tablespoons all-purpose flour
- 1 cup beef broth
- 1 cup sour cream
- Salt and pepper to taste
- 1 teaspoon paprika
- 1 cup shredded cheddar cheese
- 8 oz egg noodles
- 2 tablespoons chopped fresh parsley (optional)
Cooking Instructions:
- Prepare the Ingredients: Start by slicing the beef sirloin into thin strips and seasoning it with salt and pepper. Slice the mushrooms, chop the onion, and mince the garlic.
- Cook the Beef: In a large skillet, heat 1 tablespoon of olive oil over medium-high heat. Add the beef strips and cook until browned on all sides, about 5-7 minutes. Remove the beef from the skillet and set aside.
- Sauté the Vegetables: In the same skillet, add the remaining tablespoon of olive oil. Add the onions and garlic, and sauté until the onions are translucent, about 3 minutes. Add the mushrooms and cook until they’re tender and any liquid has evaporated, about 5 more minutes.
- Make the Sauce: Sprinkle the flour over the mushroom mixture and stir well to coat. Gradually add the beef broth, stirring constantly until the mixture thickens. Lower the heat and stir in the sour cream and paprika. Add the cooked beef back to the skillet and mix well to combine.
- Cook the Noodles: In a separate pot, cook the egg noodles according to package instructions until al dente. Drain and set aside.
- Assemble the Casserole: Preheat your oven to 350°F (175°C). In a large baking dish, combine the cooked noodles with the beef and mushroom mixture. Stir well to guarantee everything is evenly distributed. Top with shredded cheddar cheese.
- Bake: Place the casserole in the preheated oven and bake for 20-25 minutes, or until the cheese is melted and bubbly. Remove from the oven and let it cool slightly before serving.
- Garnish and Serve: If desired, garnish with chopped fresh parsley before serving.
Extra Tips:
To make certain your Beef and Mushroom Stroganoff Bake freezes well, allow it to cool completely before transferring to an airtight container or wrapping tightly in foil.
Label the container with the date and contents before placing it in the freezer. When you’re ready to enjoy your frozen casserole, thaw it in the refrigerator overnight and reheat it in the oven at 350°F (175°C) until heated through. You may need to add a splash of beef broth or water if the casserole appears dry during reheating.
Cheesy Broccoli and Quinoa Casserole

Cheesy Broccoli and Quinoa Casserole is a delicious and nutritious dish that combines the nutty flavor of quinoa with the creamy, cheesy goodness of melted cheddar and the vibrant, earthy taste of broccoli.
This casserole is perfect for a cozy family dinner and can be prepared in advance and frozen for a quick meal on busy days. Ideal as a main course or a side dish, this casserole isn’t only tasty but also packed with protein and fiber, making it a healthy choice for any meal.
This recipe serves 4-6 people and is designed to be simple and straightforward, with ingredients that are easy to find and steps that are easy to follow. Once made, the casserole can be stored in the freezer for up to three months, allowing you to enjoy a home-cooked meal without the hassle of daily cooking.
Whether you’re a seasoned chef or a novice in the kitchen, this recipe is sure to become a staple in your meal rotation.
Ingredients for 4-6 servings:
- 1 cup quinoa
- 2 cups water
- 3 cups broccoli florets
- 2 tablespoons olive oil
- 1 small onion, finely chopped
- 2 cloves garlic, minced
- 1 teaspoon salt
- 1/2 teaspoon black pepper
- 1/2 teaspoon paprika
- 1 1/2 cups milk
- 1 tablespoon all-purpose flour
- 2 cups shredded cheddar cheese
- 1/4 cup grated Parmesan cheese
- Cooking spray
Cooking Instructions:
- Cook the Quinoa: Rinse the quinoa under cold water in a fine-mesh strainer. In a medium-sized pot, bring 2 cups of water to a boil. Add the quinoa, cover, and reduce the heat to low. Simmer for 15 minutes or until the water is absorbed and the quinoa is fluffy. Set aside.
- Prepare the Broccoli: Steam the broccoli florets for about 4-5 minutes until just tender. You can do this by placing a steamer basket in a pot with about an inch of water, bringing it to a boil, then covering and steaming the broccoli. Once done, set aside.
- Sauté the Aromatics: In a large skillet, heat the olive oil over medium heat. Add the chopped onion and garlic, sautéing until the onion becomes translucent, about 5 minutes.
- Make the Cheese Sauce: In a small bowl, whisk together the milk and flour until smooth. Pour this mixture into the skillet with the sautéed onions and garlic. Stir continuously until it thickens, about 5 minutes. Add salt, pepper, and paprika for seasoning. Then, stir in 1 1/2 cups of cheddar cheese and mix until melted and smooth.
- Combine and Assemble: Preheat your oven to 350°F (175°C). In a large mixing bowl, combine the cooked quinoa, steamed broccoli, and cheese sauce. Mix until well combined. Spray a 9×13-inch baking dish with cooking spray and pour the mixture into the dish. Sprinkle the remaining 1/2 cup of cheddar cheese and the Parmesan cheese evenly over the top.
- Bake the Casserole: Place the casserole dish in the preheated oven and bake for 25-30 minutes, or until the top is golden and bubbly. Remove from the oven and let it cool for a few minutes before serving.
Extra Tips:
To guarantee the best texture and flavor, make sure not to overcook the quinoa or broccoli during their initial cooking stages, as they’ll continue to cook in the oven.
For added flavor, you can incorporate additional spices such as thyme or rosemary, or mix in cooked chicken or bacon for extra protein.
When freezing, allow the casserole to cool completely before wrapping it tightly in plastic wrap, followed by aluminum foil, to prevent freezer burn. Defrost in the refrigerator before reheating in the oven until heated through.
Classic Tuna Noodle Casserole
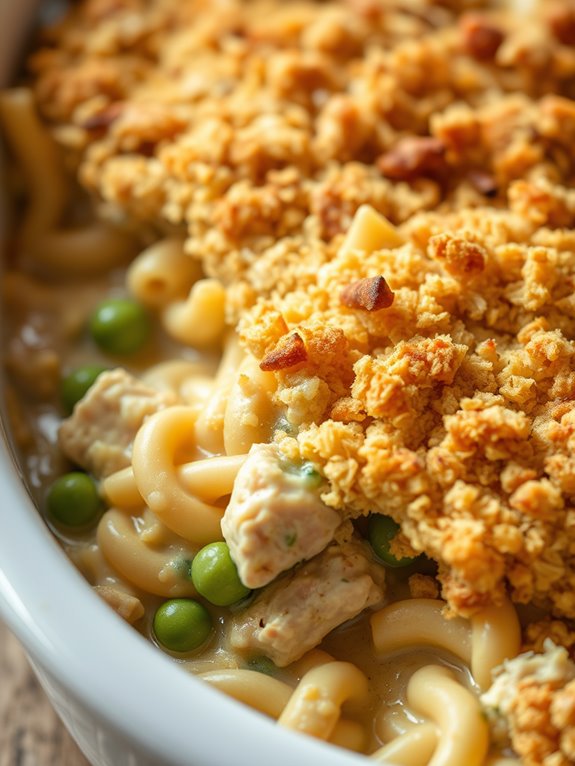
Classic Tuna Noodle Casserole is a beloved dish that combines the comforting flavors of tuna, noodles, and a creamy sauce. This casserole isn’t only delicious but also easy to prepare and perfect for making ahead of time.
It’s an ideal meal to have on hand, as it freezes well and can be reheated for a quick and satisfying dinner. The creamy texture and savory taste make it a family favorite, and it’s a great way to use pantry staples for a wholesome meal.
This recipe serves 4-6 people, making it a convenient option for family dinners or potlucks. The combination of tender noodles, flaky tuna, and a rich, cheesy sauce, topped with crunchy breadcrumbs, creates a delightful contrast of textures and flavors.
Plus, it’s a versatile dish, allowing you to add your favorite vegetables to make it even more nutritious. Whether you’re a seasoned cook or a beginner in the kitchen, this Classic Tuna Noodle Casserole is sure to become a staple in your meal rotation.
Ingredients:
- 12 ounces egg noodles
- 2 cans (5 ounces each) tuna, drained
- 1 can (10.5 ounces) cream of mushroom soup
- 1 cup milk
- 1 cup frozen peas
- 1 cup shredded cheddar cheese
- 1/2 cup chopped onion
- 1/2 cup chopped celery
- 1 tablespoon butter
- 1 cup breadcrumbs
- 1 tablespoon olive oil
- Salt and pepper to taste
Cooking Instructions:
- Preheat Oven: Preheat your oven to 375°F (190°C). Grease a 9×13-inch baking dish and set aside.
- Cook Noodles: In a large pot, cook the egg noodles according to the package instructions until al dente. Drain and set aside.
- Sauté Vegetables: In a skillet over medium heat, melt the butter. Add the chopped onion and celery, and sauté until the vegetables are tender, about 5 minutes.
- Mix the Casserole: In a large mixing bowl, combine the cooked noodles, tuna, cream of mushroom soup, milk, sautéed vegetables, frozen peas, and shredded cheddar cheese. Season with salt and pepper to taste. Mix until all ingredients are well combined.
- Prepare Topping: In a small bowl, mix the breadcrumbs with olive oil until evenly coated. This will create a crunchy topping.
- Assemble the Casserole: Pour the noodle mixture into the prepared baking dish, spreading it evenly. Sprinkle the breadcrumb mixture over the top.
- Bake: Place the casserole in the preheated oven and bake for 25-30 minutes, or until the top is golden brown and the casserole is bubbling.
- Rest and Serve: Allow the casserole to cool for a few minutes before serving. This will help the flavors meld together and make it easier to dish out.
Extra Tips:
When making Classic Tuna Noodle Casserole, consider adding some extra vegetables like bell peppers or mushrooms for additional flavor and nutrition.
If you prefer a creamier consistency, you can add a bit more milk or even a dollop of sour cream. For a cheesy top layer, sprinkle extra cheddar cheese over the breadcrumbs before baking.
If you plan to freeze the casserole, allow it to cool completely before wrapping it tightly with plastic wrap and aluminum foil. When ready to serve, thaw in the refrigerator overnight and reheat in the oven at 350°F (175°C) until heated through.
Enchilada Bake With Ground Turkey
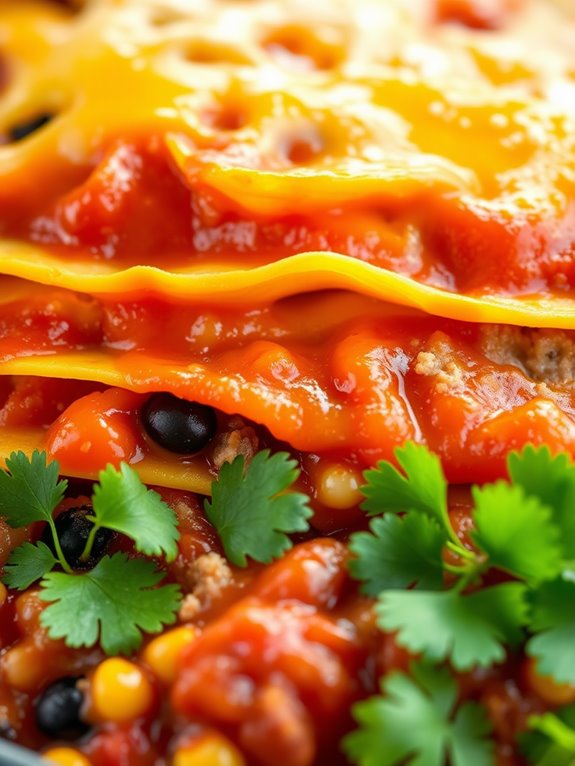
Enchilada Bake With Ground Turkey is a flavorful and hearty dish that’s perfect for freezing, making it an ideal meal prep option for busy weeks. This recipe takes the classic flavors of enchiladas and transforms them into a comforting casserole that you can easily prepare ahead of time. The combination of seasoned ground turkey, black beans, corn, and a rich enchilada sauce, all topped with melty cheese, guarantees every bite is packed with deliciousness.
Whether you’re serving it for a family dinner or saving it for later, this enchilada bake is sure to become a favorite. This casserole not only tastes great fresh out of the oven but also holds up well when frozen and reheated. Freezing the dish allows the flavors to meld together, making it an even more satisfying meal.
It’s a convenient solution for those nights when you want a home-cooked meal without all the effort. Simply prepare the casserole, pop it in the freezer, and reheat when you’re ready to enjoy. Perfect for a serving size of 4-6 people, this recipe is both simple and versatile, allowing you to customize it to your taste.
Ingredients:
- 1 lb ground turkey
- 1 can (15 oz) black beans, drained and rinsed
- 1 cup corn kernels (fresh, canned, or frozen)
- 1 can (10 oz) red enchilada sauce
- 1 cup salsa
- 1 teaspoon ground cumin
- 1 teaspoon chili powder
- 1/2 teaspoon garlic powder
- 1/2 teaspoon onion powder
- 1/2 teaspoon salt
- 6 corn tortillas, cut into strips
- 2 cups shredded cheddar cheese
- 1/4 cup chopped fresh cilantro (optional)
- Sour cream and diced avocado for serving (optional)
Cooking Instructions:
- Preheat and Prepare Ingredients: Preheat your oven to 375°F (190°C). Gather all your ingredients and prepare them for use—drain and rinse the black beans, and cut the corn tortillas into strips.
- Cook the Ground Turkey: In a large skillet, cook the ground turkey over medium heat until it’s no longer pink, breaking it apart with a spatula as it cooks. Drain any excess fat.
- Season the Turkey: Add the ground cumin, chili powder, garlic powder, onion powder, and salt to the turkey. Stir well to combine.
- Mix in Beans and Corn: Stir in the black beans and corn kernels. Cook for an additional 2-3 minutes until everything is heated through.
- Add Sauces: Pour in the enchilada sauce and salsa, mixing until all ingredients are well-coated. Allow the mixture to simmer for about 5 minutes to let the flavors meld.
- Assemble the Casserole: In a greased 9×13-inch baking dish, spread a thin layer of the turkey mixture. Layer half of the corn tortilla strips over the turkey, followed by half of the cheese. Repeat these layers, ending with the remaining cheese on top.
- Bake the Casserole: Cover the dish with aluminum foil and bake in the preheated oven for 20 minutes. Remove the foil and continue baking for an additional 10 minutes, or until the cheese is melted and bubbly.
- Garnish and Serve: Remove from the oven and let it cool for a few minutes. Garnish with chopped cilantro if desired. Serve with sour cream and diced avocado on the side.
Extra Tips:
To guarantee the best texture when freezing, let the casserole cool completely before wrapping it tightly in plastic wrap and aluminum foil. Label it with the date and reheating instructions for convenience.
When you’re ready to enjoy your enchilada bake, thaw it in the refrigerator overnight and reheat it in the oven at 350°F (175°C) until warmed through. You can customize this dish by adding other ingredients like bell peppers or jalapeños for extra heat or using whole wheat tortillas for added nutrition.
Spinach and Ricotta Stuffed Shells

Spinach and Ricotta Stuffed Shells are a delicious and satisfying dish that’s perfect for a cozy family dinner or a gathering with friends. This Italian-inspired casserole isn’t only easy to prepare but also freezes exceptionally well, making it a convenient option for meal prepping.
The creamy ricotta filling is combined with fresh spinach and stuffed into jumbo pasta shells, then smothered in marinara sauce and topped with a generous amount of mozzarella cheese. When baked to perfection, this dish offers a delightful blend of flavors and textures that will please even the pickiest eaters.
This recipe serves 4-6 people and is ideal for those who love hearty, comforting meals. The key to making these stuffed shells freezer-friendly is to carefully prepare and assemble the components, ensuring that each element can withstand freezing and reheating without losing its integrity or flavor.
With just a little bit of preparation, you can enjoy this delectable dish whenever you want, simply by pulling it out of the freezer and popping it into the oven.
Ingredients:
- 20 jumbo pasta shells
- 15 oz ricotta cheese
- 10 oz fresh spinach, chopped
- 1 egg, beaten
- 1 cup grated Parmesan cheese
- 2 cups shredded mozzarella cheese
- 3 cups marinara sauce
- 1 teaspoon garlic powder
- 1 teaspoon onion powder
- 1/2 teaspoon salt
- 1/4 teaspoon black pepper
- 2 tablespoons olive oil
Cooking Instructions:
- Preheat Oven and Cook Pasta: Preheat your oven to 375°F (190°C). Cook the jumbo pasta shells according to the package instructions until they’re al dente. Drain the shells and set them aside to cool slightly.
- Prepare Spinach Mixture: In a large skillet, heat the olive oil over medium heat. Add the chopped spinach and sauté for about 3-4 minutes until wilted. Remove from heat and let it cool for a few minutes.
- Mix Filling: In a large mixing bowl, combine the ricotta cheese, beaten egg, grated Parmesan cheese, garlic powder, onion powder, salt, and pepper. Add the sautéed spinach to the mixture and stir until well combined.
- Stuff Shells: Using a spoon, carefully fill each cooked pasta shell with the ricotta and spinach mixture. Be generous with the filling, ensuring each shell is well-stuffed.
- Assemble Casserole: Spread 1 cup of marinara sauce evenly over the bottom of a 9×13 inch baking dish. Arrange the stuffed shells in the dish in a single layer. Pour the remaining marinara sauce over the top of the shells.
- Add Cheese and Bake: Sprinkle the shredded mozzarella cheese evenly over the sauce-covered shells. Cover the baking dish with aluminum foil and bake for 25 minutes. Remove the foil and bake for an additional 10 minutes, or until the cheese is bubbly and golden brown.
- Cool and Serve: Allow the Spinach and Ricotta Stuffed Shells to cool for a few minutes before serving. This will help the dish set a bit and make it easier to serve.
Extra Tips: When preparing Spinach and Ricotta Stuffed Shells for freezing, consider assembling the dish in a freezer-safe container with a lid. After adding the cheese, cover the casserole tightly with plastic wrap or aluminum foil before placing the lid on top.
Be sure to label the container with the date and reheating instructions. When ready to enjoy, thaw the dish in the refrigerator overnight before baking, or increase the baking time if cooking directly from frozen. Adding a splash of water or additional marinara sauce before reheating can help keep the dish moist.
Hearty Shepherd’s Pie
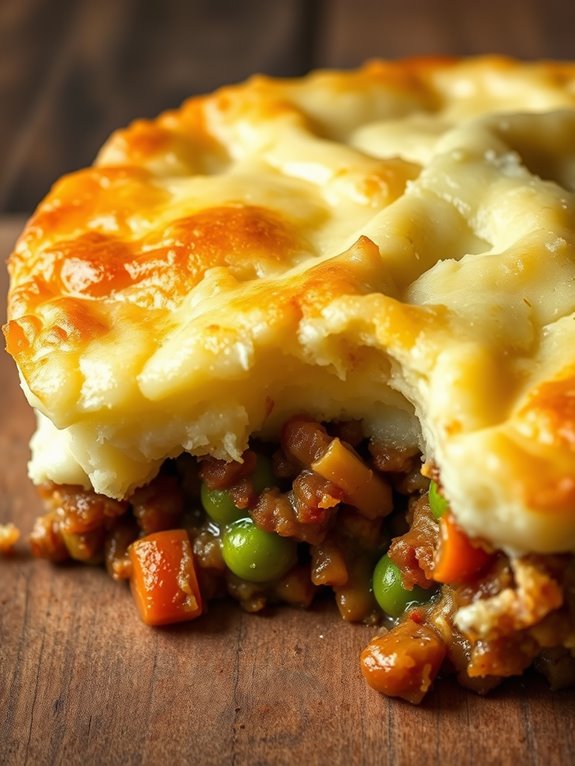
Hearty Shepherd’s Pie is a classic comfort food that not only warms the heart but also freezes beautifully, making it an ideal dish for meal prepping or for those busy nights when you need a delicious meal in a pinch.
Originating from the United Kingdom, this dish combines a savory mixture of minced meat and vegetables topped with a creamy layer of mashed potatoes, creating a delightful balance of flavors and textures. This recipe is perfect for serving a family of 4-6 people, and with its robust ingredients, it becomes even more flavorful as it sits in the freezer, ready to be baked and enjoyed at a moment’s notice.
The beauty of Shepherd’s Pie lies in its flexibility; you can customize it based on your preferences or the ingredients you have on hand. Traditionally, lamb is used for the filling, but beef is a popular and equally delicious substitute.
The vegetable mix can also be varied to include your favorites or whatever is in season. By following this tried-and-true recipe, you’ll have a hearty meal that pleases everyone around the dinner table and leaves plenty for future meals.
Ingredients (Serves 4-6):
- 2 pounds potatoes, peeled and quartered
- 1/2 cup milk
- 2 tablespoons butter
- Salt and pepper to taste
- 1 tablespoon olive oil
- 1 onion, finely chopped
- 2 carrots, diced
- 1 cup frozen peas
- 2 pounds ground lamb or beef
- 2 tablespoons all-purpose flour
- 1 cup beef or chicken broth
- 2 tablespoons tomato paste
- 1 teaspoon Worcestershire sauce
- 1 teaspoon dried thyme
Cooking Instructions:
- Prepare the Mashed Potatoes: Begin by boiling the potatoes in a large pot of salted water until tender, about 15-20 minutes. Drain the potatoes and return them to the pot. Add milk, butter, salt, and pepper, and mash until smooth and creamy. Set aside.
- Cook the Filling: In a large skillet, heat the olive oil over medium heat. Add the onion and carrots, cooking until they begin to soften, about 5 minutes. Stir in the peas and cook for another 2 minutes.
- Brown the Meat: Increase the heat to medium-high and add the ground lamb or beef to the skillet. Cook until browned, breaking up any large chunks with a spoon. Drain excess fat if necessary.
- Thicken the Mixture: Sprinkle the flour over the meat and vegetables, stirring to coat evenly. Gradually add the broth, tomato paste, Worcestershire sauce, and thyme. Simmer the mixture until it thickens, about 5-7 minutes, stirring occasionally.
- Assemble the Pie: Preheat your oven to 400°F (200°C). Transfer the meat mixture to a baking dish and spread it out evenly. Spoon the mashed potatoes over the top, smoothing them with a spatula or fork to cover the meat completely.
- Bake the Pie: Place the dish in the preheated oven and bake for 25-30 minutes, or until the mashed potatoes are golden brown on top. Remove from the oven and let it cool slightly before serving.
Extra Tips:
When preparing Shepherd’s Pie for freezing, allow it to cool completely before covering it tightly with aluminum foil or plastic wrap. Label with the date and freeze for up to 3 months.
For reheating, it’s best to thaw the pie in the refrigerator overnight before baking it in the oven at 350°F (175°C) until heated through. You can also add cheese to the mashed potatoes for a cheesy crust, or mix in additional herbs for extra flavor. Adjust seasoning to your taste, and enjoy the comforting warmth of homemade Shepherd’s Pie any time you desire.
Italian Sausage and Zucchini Bake
Italian Sausage and Zucchini Bake is a hearty and flavorful casserole that’s perfect for a family meal or for freezing and enjoying later. This dish combines the savory taste of Italian sausage with the freshness of zucchini, all baked together with creamy cheese and a hint of Italian herbs.
It’s an excellent way to use up any zucchini you might have, and it makes for a comforting and satisfying meal. This casserole isn’t only delicious but also convenient because it can be prepared ahead of time and stored in the freezer for those busy days when you need a quick and easy dinner option.
The combination of ingredients provides a balanced meal that’s sure to please everyone at the table. It’s an ideal choice for meal prepping or for sharing with friends and family.
Ingredients (serves 4-6):
- 1 lb Italian sausage, casing removed
- 3 medium zucchinis, sliced
- 1 medium onion, chopped
- 3 cloves garlic, minced
- 2 cups marinara sauce
- 1 teaspoon dried oregano
- 1 teaspoon dried basil
- 1 cup ricotta cheese
- 1 cup shredded mozzarella cheese
- 1/2 cup grated Parmesan cheese
- 1 tablespoon olive oil
- Salt and pepper to taste
Cooking Instructions:
- Preheat the Oven: Preheat your oven to 375°F (190°C) to make sure it’s ready for baking the casserole once it’s assembled.
- Cook the Sausage: In a large skillet, heat the olive oil over medium heat. Add the Italian sausage and cook until browned, breaking it up into smaller pieces with a wooden spoon. Once cooked, remove the sausage from the skillet and set it aside.
- Sauté Vegetables: In the same skillet, add the chopped onion and garlic. Sauté for about 2-3 minutes until the onion becomes translucent and fragrant. Add the sliced zucchini and continue to sauté for an additional 5 minutes until they start to soften.
- Combine Ingredients: Return the cooked sausage to the skillet with the vegetables. Pour in the marinara sauce, and stir in the oregano and basil. Season with salt and pepper to taste. Let the mixture simmer for 5 minutes to allow the flavors to meld together.
- Layer the Casserole: In a 9×13 inch baking dish, spread half of the sausage and zucchini mixture evenly. Dollop the ricotta cheese over the top and spread it out. Sprinkle half of the mozzarella and Parmesan cheese over the ricotta. Repeat the layers with the remaining sausage mixture and cheeses.
- Bake: Cover the baking dish with aluminum foil and bake in the preheated oven for 20 minutes. Remove the foil and bake for an additional 10-15 minutes, or until the cheese is bubbly and golden brown.
- Cool and Serve: Allow the casserole to cool for a few minutes before serving. This will make it easier to cut and serve.
Extra Tips: For a healthier twist, you can use turkey sausage instead of Italian sausage. If you want to add more vegetables, consider including bell peppers or mushrooms in the sautéing process.
When freezing, allow the casserole to cool completely and then wrap it tightly in plastic wrap and aluminum foil before placing it in the freezer. For best results, thaw in the refrigerator overnight before reheating in the oven. This dish can be stored in the freezer for up to three months.
Loaded Baked Potato Casserole
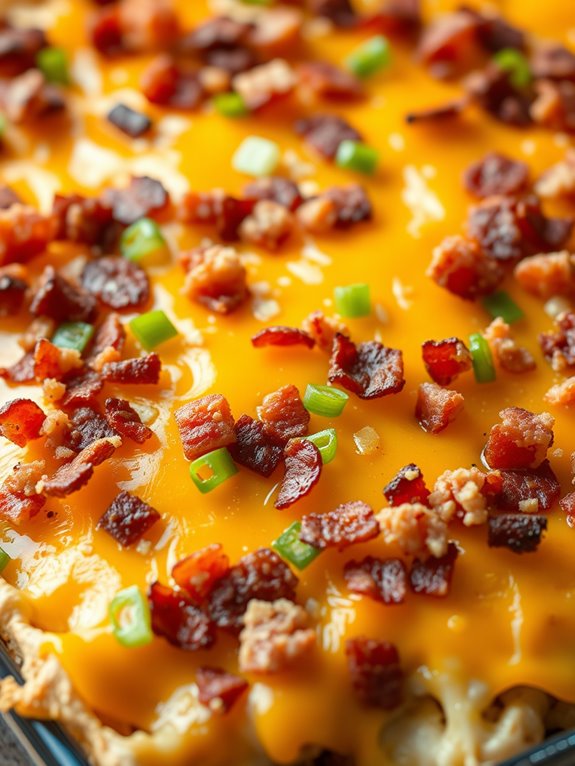
Loaded Baked Potato Casserole is a delightful twist on the classic baked potato, combining all your favorite toppings into one creamy, cheesy dish. This casserole is perfect for a family dinner or a potluck, offering the comforting flavors of a loaded baked potato in an easy-to-serve format.
The best part? It freezes extremely well, making it an excellent option for meal prep or for those busy nights when you need something quick and satisfying.
The casserole starts with a base of tender potatoes, which are mixed with sour cream, butter, and cheese to create a rich, creamy texture. This is then layered with bacon and green onions, bringing a savory punch to the dish. Topped with even more cheese, the casserole is baked until golden and bubbly. Not only does this dish serve as an excellent main course, but it also pairs well with a simple salad or steamed vegetables. Plus, the leftovers (if there are any!) are just as delicious when reheated.
Ingredients for 4-6 servings:
- 6 medium russet potatoes
- 1 cup sour cream
- 1/2 cup milk
- 4 tablespoons unsalted butter
- 2 cups shredded cheddar cheese, divided
- 6 slices of bacon, cooked and crumbled
- 4 green onions, sliced
- Salt and pepper to taste
Cooking Instructions:
- Preheat the Oven: Start by preheating your oven to 375°F (190°C).
- Prepare the Potatoes: Peel the potatoes and cut them into large chunks. Place them in a large pot of salted water and bring to a boil. Cook until the potatoes are fork-tender, about 15-20 minutes. Drain the potatoes well.
- Mash the Potatoes: In the same pot, add the drained potatoes, sour cream, milk, and butter. Mash until smooth and creamy. Season with salt and pepper to taste.
- Assemble the Casserole: Transfer the mashed potatoes into a greased 9×13-inch baking dish. Stir in 1 cup of shredded cheddar cheese, half of the crumbled bacon, and half of the sliced green onions until well combined.
- Top the Casserole: Sprinkle the remaining cheddar cheese evenly over the top of the casserole. Scatter the remaining bacon and green onions over the cheese.
- Bake: Place the casserole in the preheated oven and bake for 25-30 minutes, or until the cheese is melted and bubbly, and the edges are lightly golden brown.
- Serve: Allow the casserole to cool for a few minutes before serving. Enjoy warm.
Extra Tips:
For the best results, use high-quality russet potatoes as they provide the perfect texture for this dish. If you prefer a bit of a kick, consider adding a pinch of cayenne pepper or a few dashes of hot sauce to the mashed potatoes.
Additionally, this casserole can be prepared ahead of time and stored in the refrigerator for up to two days before baking. If freezing, verify the casserole is fully cooled before wrapping it tightly in plastic wrap and foil. To reheat, thaw overnight in the refrigerator and bake as instructed, adding a few extra minutes if needed.
Mexican Black Bean and Corn Casserole
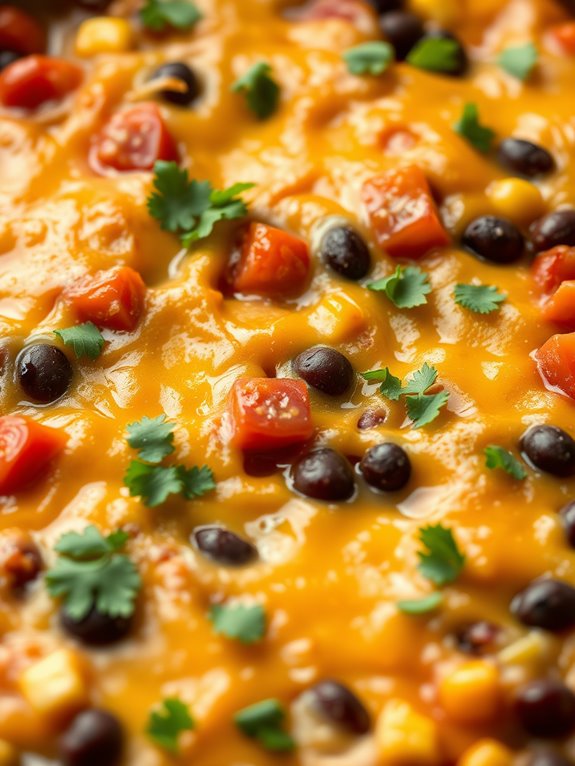
Mexican Black Bean and Corn Casserole is a delightful and hearty dish that’s perfect for a family dinner or a gathering with friends. With its vibrant flavors and satisfying textures, this casserole combines the rich taste of black beans, sweet corn, and a blend of spices to create a comforting meal.
What’s even better is that it freezes wonderfully, making it an ideal choice for meal prep or for those days when you need a quick and delicious homemade meal.
This casserole not only brings a burst of Mexican-inspired flavors to your table but also offers the convenience of being a one-dish meal. Packed with protein and fiber, it’s a nutritious option that can be paired with a simple side salad or enjoyed on its own.
Whether you’re serving it fresh out of the oven or reheating from frozen, the Mexican Black Bean and Corn Casserole promises to be a crowd-pleaser.
Ingredients for 4-6 servings:
- 2 tablespoons olive oil
- 1 medium onion, diced
- 2 cloves garlic, minced
- 1 red bell pepper, chopped
- 2 cups canned black beans, drained and rinsed
- 1 1/2 cups corn kernels (fresh, frozen, or canned)
- 1 can (14.5 oz) diced tomatoes, drained
- 1 cup salsa
- 1 teaspoon ground cumin
- 1 teaspoon chili powder
- 1 teaspoon salt
- 1/2 teaspoon black pepper
- 2 cups cooked rice
- 1 1/2 cups shredded cheddar cheese
- 1/4 cup chopped fresh cilantro
Cooking Instructions:
1. Preheat Oven: Preheat your oven to 375°F (190°C) to make certain it’s ready for baking once the casserole is assembled.
2. Sauté Vegetables: In a large skillet, heat olive oil over medium heat. Add the diced onion and sauté for about 3-4 minutes until it becomes translucent.
Add the minced garlic and chopped red bell pepper, continuing to sauté for another 2-3 minutes until the vegetables are softened.
3. Combine Ingredients: Stir in the black beans, corn, diced tomatoes, and salsa into the skillet. Season with cumin, chili powder, salt, and black pepper.
Mix everything thoroughly and let it simmer for about 5 minutes to allow the flavors to meld.
4. Assemble Casserole: In a large mixing bowl, combine the cooked rice with the bean and vegetable mixture. Stir in 1 cup of the shredded cheddar cheese.
Transfer the mixture into a greased 9×13 inch baking dish, spreading it evenly.
5. Bake: Sprinkle the remaining 1/2 cup of cheddar cheese on top of the casserole. Cover with foil and bake in the preheated oven for 20 minutes.
Remove the foil and bake for an additional 10 minutes, or until the cheese is melted and bubbly.
6. Garnish and Serve: Once baked, remove the casserole from the oven and let it cool for a few minutes. Garnish with chopped fresh cilantro before serving.
Extra Tips:
To freeze this casserole, allow it to cool completely after baking. Wrap it tightly with plastic wrap and aluminum foil or use an airtight container.
It can be stored in the freezer for up to three months. When ready to enjoy, thaw it in the refrigerator overnight and reheat in the oven at 350°F (175°C) until heated through.
For an additional burst of flavor, consider adding a squeeze of lime juice or a dollop of sour cream on top before serving.
Vegetarian Eggplant Parmesan
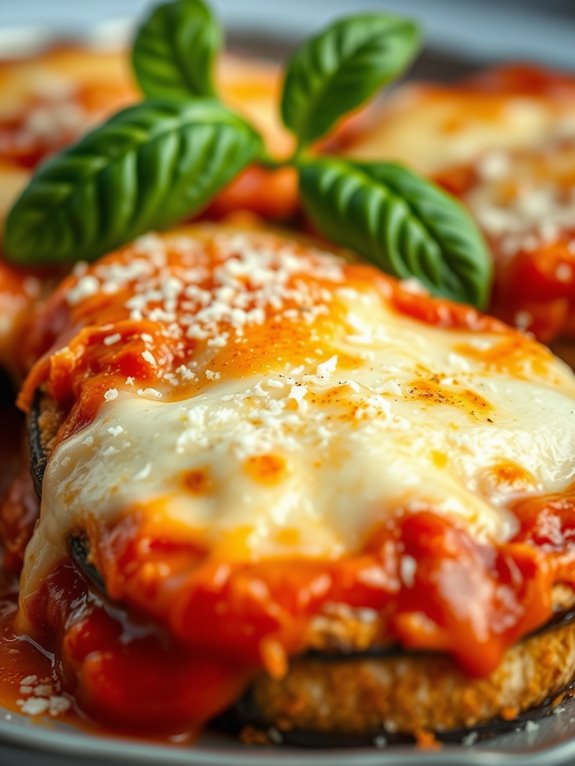
Vegetarian Eggplant Parmesan is a delightful and hearty dish that satisfies both vegetarians and meat-lovers alike. This casserole combines layers of tender, breaded eggplant slices, rich tomato sauce, and melted cheese to create a comforting and flavorful meal. One of the best things about this dish is its ability to freeze well, making it a convenient option for busy weeknights or when you want to prepare meals ahead of time.
With a balance of texture and taste, Vegetarian Eggplant Parmesan is sure to become a favorite in your household. This recipe serves 4-6 people and is perfect for gatherings or a family dinner. The key to a successful Eggplant Parmesan is in the preparation of the eggplant itself. Properly salting and pressing the eggplant slices guarantees they’re tender and flavorful, without being too watery.
Once layered with tomato sauce and cheese, this casserole bakes to perfection, with a bubbly, golden top that’s simply irresistible. Let’s explore the ingredients and steps needed to create this delicious dish.
Ingredients:
- 2 large eggplants, sliced into 1/4 inch rounds
- Salt, for sprinkling
- 1 cup all-purpose flour
- 3 large eggs, beaten
- 2 cups breadcrumbs
- 2 tablespoons olive oil
- 4 cups marinara sauce
- 2 cups shredded mozzarella cheese
- 1 cup grated Parmesan cheese
- 1 teaspoon dried oregano
- 1 teaspoon dried basil
- Fresh basil leaves, for garnish (optional)
Cooking Instructions:
- Prepare the Eggplant: Start by slicing the eggplants into 1/4 inch thick rounds. Lay the slices on a baking sheet, sprinkle them generously with salt on both sides, and let them sit for about 30 minutes. This process will draw out excess moisture and bitterness. After 30 minutes, rinse the slices under cold water and pat them dry with a paper towel.
- Set Up Breading Station: Place the flour in one shallow dish, the beaten eggs in a second dish, and the breadcrumbs in a third dish. Dredge each eggplant slice first in flour, then dip it into the beaten eggs, and finally coat it with breadcrumbs. Confirm each slice is well-covered.
- Fry Eggplant Slices: Heat olive oil in a large skillet over medium heat. Add the breaded eggplant slices in batches, cooking each side for about 3-4 minutes or until golden brown. Remove and place them on a paper towel-lined plate to drain excess oil.
- Assemble the Casserole: Preheat your oven to 375°F (190°C). Spread a thin layer of marinara sauce at the bottom of a 9×13 inch baking dish. Layer half of the fried eggplant slices over the sauce. Top with half of the remaining marinara sauce, half of the mozzarella, and half of the Parmesan cheese. Sprinkle with half of the oregano and basil.
- Repeat Layers: Add another layer of the remaining eggplant slices, followed by the rest of the marinara sauce, mozzarella, Parmesan, and the remaining oregano and basil.
- Bake the Casserole: Cover the baking dish with aluminum foil and bake in the preheated oven for 25 minutes. Remove the foil and bake for an additional 15 minutes, or until the cheese is bubbly and golden brown.
- Serve: Let the casserole cool for a few minutes before slicing. Garnish with fresh basil leaves, if desired, and serve warm.
Extra Tips:
When preparing the eggplant slices, confirm they’re evenly coated with breadcrumbs for a uniform crispiness. If you prefer a lower-fat version, you can bake the breaded eggplant slices instead of frying them. Simply place them on a baking sheet lined with parchment paper, brush with a little olive oil, and bake at 375°F (190°C) until golden brown.
To freeze the casserole, allow it to cool completely, then cover it tightly with plastic wrap and aluminum foil before placing it in the freezer. When ready to enjoy, thaw overnight in the refrigerator and reheat in the oven until heated through.
Sweet Potato and Black Bean Enchilada Casserole
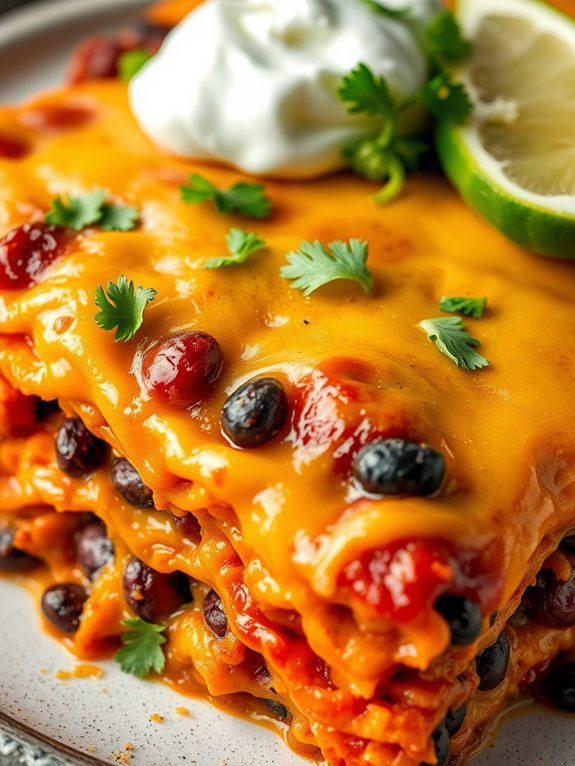
The Sweet Potato and Black Bean Enchilada Casserole is a delightful and hearty dish that combines the sweetness of roasted sweet potatoes with the earthy flavor of black beans, all wrapped in the comforting layers of tortillas and enchilada sauce.
This casserole isn’t only delicious but also incredibly nutritious, loaded with fiber, vitamins, and plant-based protein. It’s perfect for a family dinner or a gathering, and the best part is that it freezes exceptionally well, making it a convenient option for meal prepping.
This recipe yields a serving size for approximately 4-6 people, making it an ideal dish for a cozy family meal or for entertaining a small group of friends. The combination of spices and fresh ingredients guarantees a burst of flavor in every bite.
Whether you’re a seasoned cook or a beginner, this casserole is easy to assemble and will quickly become a favorite in your household.
Ingredients:
- 2 large sweet potatoes, peeled and diced
- 1 tablespoon olive oil
- 1 teaspoon ground cumin
- 1 teaspoon smoked paprika
- Salt and pepper, to taste
- 1 (15-ounce) can black beans, drained and rinsed
- 1 (10-ounce) can enchilada sauce
- 8 corn tortillas
- 1 cup shredded Monterey Jack cheese
- 1 cup shredded cheddar cheese
- 1/4 cup chopped fresh cilantro
- Optional toppings: sour cream, sliced avocado, lime wedges
Cooking Instructions:
1. Preheat and Prepare Sweet Potatoes: Preheat your oven to 400°F (200°C). In a large bowl, toss the diced sweet potatoes with olive oil, cumin, smoked paprika, salt, and pepper until evenly coated.
Spread the sweet potatoes on a baking sheet in a single layer and roast in the preheated oven for about 20-25 minutes or until they’re tender and slightly caramelized.
2. Prepare the Filling: While the sweet potatoes are roasting, in a mixing bowl, combine the black beans and half a can of enchilada sauce. Stir in the roasted sweet potatoes once they’re ready, mixing gently to combine all the ingredients.
3. Assemble the Casserole: Reduce the oven temperature to 350°F (175°C). In a 9×13-inch baking dish, pour a small amount of enchilada sauce to coat the bottom.
Place two tortillas over the sauce, tearing them to fit if necessary. Spread half of the sweet potato and bean mixture over the tortillas, followed by a sprinkle of Monterey Jack and cheddar cheese.
4. Layer and Bake: Repeat the layering process, adding more tortillas, the remaining sweet potato and bean mixture, and another layer of cheese. Top with the remaining enchilada sauce and a final layer of cheese.
Cover the dish with foil and bake for 20 minutes.
5. Finish Baking: Remove the foil and bake for an additional 10 minutes, or until the cheese is bubbly and golden brown. Remove from the oven and let it cool for a few minutes.
6. Garnish and Serve: Sprinkle chopped cilantro over the top of the casserole before serving. Serve warm with optional toppings such as sour cream, sliced avocado, and lime wedges.
Extra Tips:
For a spicier version, consider adding chopped jalapeños or a pinch of cayenne pepper to the sweet potato mixture.
If you prefer a creamier texture, you can add a dollop of Greek yogurt to the enchilada sauce. This casserole freezes well; simply let it cool completely before wrapping it tightly in foil or plastic wrap.
It will keep in the freezer for up to 3 months. When ready to eat, thaw in the refrigerator overnight and reheat in the oven at 350°F (175°C) until warmed through. Enjoy your delicious, homemade Sweet Potato and Black Bean Enchilada Casserole anytime!
Sausage and Pepper Breakfast Casserole

Sausage and Pepper Breakfast Casserole is a hearty and flavorful dish perfect for starting your day on a savory note. This casserole combines the robust flavors of Italian sausage with the sweetness of bell peppers, all enveloped in a creamy egg mixture and topped with melted cheese.
It’s an ideal make-ahead breakfast that can also be frozen for those busy mornings when you need a quick and satisfying meal. The harmonious blend of ingredients guarantees that every bite is packed with taste and nutrition.
Not only is this casserole delicious, but it’s also incredibly versatile. You can customize it with your favorite vegetables, switch out the cheese for different varieties, or even add some spice if you prefer a little heat.
The beauty of this dish is in its simplicity and adaptability, making it a staple in any breakfast repertoire. Plus, it freezes exceptionally well, maintaining its texture and flavor even after being stored for weeks.
Ingredients for 4-6 Servings:
- 1 pound Italian sausage, casings removed
- 1 tablespoon olive oil
- 1 red bell pepper, diced
- 1 green bell pepper, diced
- 1 medium onion, diced
- 8 large eggs
- 1 cup milk
- 1 teaspoon salt
- 1/2 teaspoon black pepper
- 1 teaspoon Italian seasoning
- 2 cups shredded cheddar cheese
- 4 cups cubed day-old bread
Cooking Instructions:
- Preheat and Prepare: Preheat your oven to 375°F (190°C). Lightly grease a 9×13-inch baking dish to prevent sticking.
- Cook the Sausage: In a large skillet over medium heat, add the olive oil and cook the Italian sausage until browned and cooked through, breaking it up with a spoon as it cooks. This should take about 8-10 minutes. Remove the sausage from the skillet and set aside.
- Sauté Vegetables: In the same skillet, add the diced onions and bell peppers. Sauté for about 5 minutes, or until the vegetables are softened. Remove from heat and set aside.
- Prepare Egg Mixture: In a large mixing bowl, whisk together the eggs, milk, salt, black pepper, and Italian seasoning until well combined.
- Assemble the Casserole: In the prepared baking dish, layer the cubed bread evenly. Distribute the cooked sausage and sautéed vegetables over the bread. Pour the egg mixture evenly over the entire dish, guaranteeing it soaks through the bread. Sprinkle the shredded cheddar cheese on top.
- Bake: Place the casserole in the preheated oven and bake for 30-35 minutes, or until the eggs are set and the top is golden brown. Remove from the oven and let it cool slightly before serving.
Extra Tips:
For best results, use day-old bread as it absorbs the egg mixture more effectively without becoming too soggy.
If you plan to freeze the casserole, allow it to cool completely before wrapping it tightly in plastic wrap and aluminum foil. When ready to serve, thaw overnight in the refrigerator and reheat in the oven at 350°F (175°C) until warmed through.
Feel free to experiment with different cheeses or add in some chopped spinach or mushrooms for additional flavor and nutrients.