

As I flipped through my recipe book, the scent of cinnamon and nutmeg filled the air, taking me back to cherished Christmas memories. Each page revealed not just a cake, but a story ready to unfold. These creations are sure to bring joy to any holiday table, blending beauty with taste perfectly. Curious about which cake is my favorite this season? Let’s unwrap these festive delights together.
Classic Christmas Fruitcake
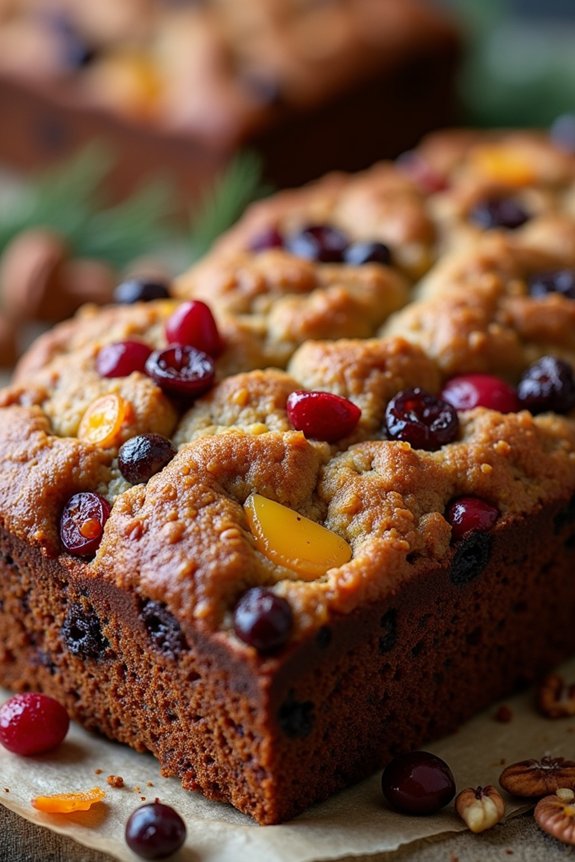
Christmas is the perfect time to indulge in the rich, flavorful tradition of a Classic Christmas Fruitcake. This festive dessert, packed with dried fruits, nuts, and a hint of holiday spices, is a beloved staple in many households. Its dense and moist texture, along with the aroma of spices and spirits, make it a perfect centerpiece for any holiday gathering.
Whether you’re a fan of traditional recipes or trying it for the first time, this fruitcake is sure to bring warmth and cheer to your celebrations.
Preparing a Classic Christmas Fruitcake involves a bit of planning and patience, as the flavors develop beautifully over time. It’s typically made a few weeks before Christmas to allow the cake to mature, making it richer and more flavorful. This recipe serves 4-6 people, guaranteeing everyone at your table can enjoy a generous slice of this holiday favorite.
Let’s explore the magic of making a fruitcake that will be cherished by all.
Ingredients (Serves 4-6)
- 1 cup mixed dried fruits (such as raisins, currants, apricots, and cherries)
- 1 cup mixed nuts (such as almonds, walnuts, and pecans)
- 1/2 cup unsalted butter, softened
- 1/2 cup brown sugar
- 2 large eggs
- 1 cup all-purpose flour
- 1/2 teaspoon baking powder
- 1/4 teaspoon ground cinnamon
- 1/4 teaspoon ground nutmeg
- 1/4 teaspoon ground allspice
- 1/4 cup brandy or rum (plus extra for feeding the cake)
- Zest of 1 orange
- Zest of 1 lemon
- 1/4 teaspoon salt
Cooking Instructions
- Prepare the Fruit Mixture:
- Combine the mixed dried fruits and brandy (or rum) in a bowl. Stir well, cover, and let soak overnight or for at least a few hours to allow the fruits to absorb the liquid and plump up.
- Preheat the Oven and Prepare the Pan:
- Preheat your oven to 300°F (150°C). Grease a 6-inch round cake pan and line it with parchment paper to prevent sticking.
- Mix the Dry Ingredients:
- In a medium bowl, whisk together the flour, baking powder, cinnamon, nutmeg, allspice, and salt. Set aside.
- Cream the Butter and Sugar:
- In a large mixing bowl, cream the softened butter with the brown sugar until light and fluffy. This should take about 3-4 minutes using an electric mixer.
- Add Eggs and Zests:
- Beat in the eggs one at a time, guaranteeing each is fully incorporated before adding the next. Mix in the orange and lemon zests for a burst of citrus flavor.
- Combine Wet and Dry Ingredients:
- Gradually add the flour mixture to the butter mixture, mixing just until combined. Be careful not to overmix, as this can result in a tough cake.
- Add Fruits and Nuts:
- Fold in the soaked fruits and the mixed nuts gently with a spatula until evenly distributed throughout the batter.
- Bake the Cake:
- Pour the batter into the prepared cake pan, smoothing the top with a spatula. Bake in the preheated oven for 1.5 to 2 hours, or until a toothpick inserted into the center comes out clean.
- Cool and Mature the Cake:
- Allow the cake to cool in the pan for 10 minutes, then transfer to a wire rack to cool completely. Once cooled, wrap the cake in parchment paper and aluminum foil. Store in a cool, dry place.
- Feed the cake by brushing it with a little more brandy or rum every few days until ready to serve.
Extra Tips
For an enhanced flavor, consider making this fruitcake several weeks in advance. The longer it sits, the more the flavors will develop, resulting in a richer cake.
When feeding the cake, be certain it’s not overly saturated—just enough to keep it moist. Additionally, you can customize the dried fruits and nuts according to your preference or what you have on hand, making each fruitcake unique to your taste.
Enjoy this classic holiday treat with a warm cup of tea or coffee.
White Chocolate Cranberry Cake
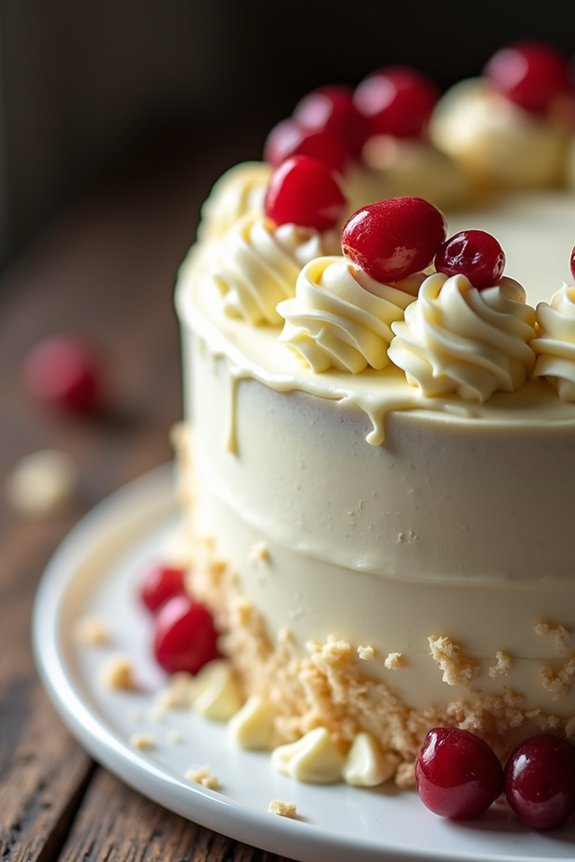
White Chocolate Cranberry Cake is a delightful and festive treat that perfectly captures the essence of the holiday season. The combination of rich white chocolate and tart cranberries creates a harmonious blend of flavors that’s both indulgent and invigorating.
This cake isn’t only delicious but also visually stunning, making it a perfect centerpiece for your Christmas dessert table. Whether you’re hosting a holiday party or simply enjoying a cozy evening at home, this cake is sure to impress your family and friends.
This recipe yields a cake that serves 4-6 people, making it ideal for small gatherings or intimate family dinners. With its moist and tender crumb, creamy white chocolate frosting, and juicy cranberries, every bite of this cake is like a celebration of the season.
Follow the instructions carefully to create a masterpiece that will leave everyone asking for seconds.
Ingredients:
- 1 1/2 cups all-purpose flour
- 1 teaspoon baking powder
- 1/2 teaspoon baking soda
- 1/4 teaspoon salt
- 1/2 cup unsalted butter, softened
- 1 cup granulated sugar
- 2 large eggs
- 1 teaspoon vanilla extract
- 1/2 cup sour cream
- 3/4 cup fresh or frozen cranberries
- 3/4 cup white chocolate chips
For the frosting:
- 1/2 cup unsalted butter, softened
- 1 1/2 cups powdered sugar
- 1 teaspoon vanilla extract
- 2 tablespoons milk
- 1/2 cup white chocolate chips, melted
Instructions:
- Preheat the Oven: Start by preheating your oven to 350°F (175°C). Grease and flour a 9-inch round cake pan, ensuring it’s well-coated to prevent sticking.
- Mix Dry Ingredients: In a medium bowl, whisk together the flour, baking powder, baking soda, and salt. Set aside this dry mixture for later use.
- Cream Butter and Sugar: In a large mixing bowl, beat the softened butter and granulated sugar together until light and fluffy. This should take about 3 minutes using an electric mixer.
- Add Eggs and Vanilla: Beat in the eggs one at a time, making sure each is fully incorporated before adding the next. Mix in the vanilla extract.
- Combine Wet and Dry Ingredients: Gradually add the flour mixture to the wet ingredients, alternating with the sour cream. Begin and end with the flour mixture, mixing until just combined. Be careful not to overmix.
- Fold in Cranberries and Chocolate: Gently fold in the cranberries and white chocolate chips until evenly distributed throughout the batter.
- Bake the Cake: Pour the batter into the prepared cake pan, smoothing the top with a spatula. Bake for 30-35 minutes or until a toothpick inserted into the center comes out clean.
- Cool the Cake: Let the cake cool in the pan for 10 minutes, then transfer it to a wire rack to cool completely.
- Prepare the Frosting: For the frosting, beat the butter until creamy. Gradually add the powdered sugar, mixing well after each addition. Stir in the vanilla extract and milk until smooth, then fold in the melted white chocolate.
- Frost the Cake: Once the cake is completely cooled, spread the frosting evenly over the top and sides. Decorate with additional cranberries or white chocolate shavings if desired.
Extra Tips:
For a more intense cranberry flavor, consider soaking the cranberries in a bit of orange juice before adding them to the batter. This adds a subtle citrus note that complements the cake beautifully.
If you find that your frosting is too thick, add a little more milk, one teaspoon at a time, until you reach the desired consistency.
Finally, make sure the cake is completely cooled before frosting to avoid melting the frosting. Enjoy your White Chocolate Cranberry Cake with a hot cup of cocoa or coffee for the ultimate holiday treat!
Gingerbread Layer Cake
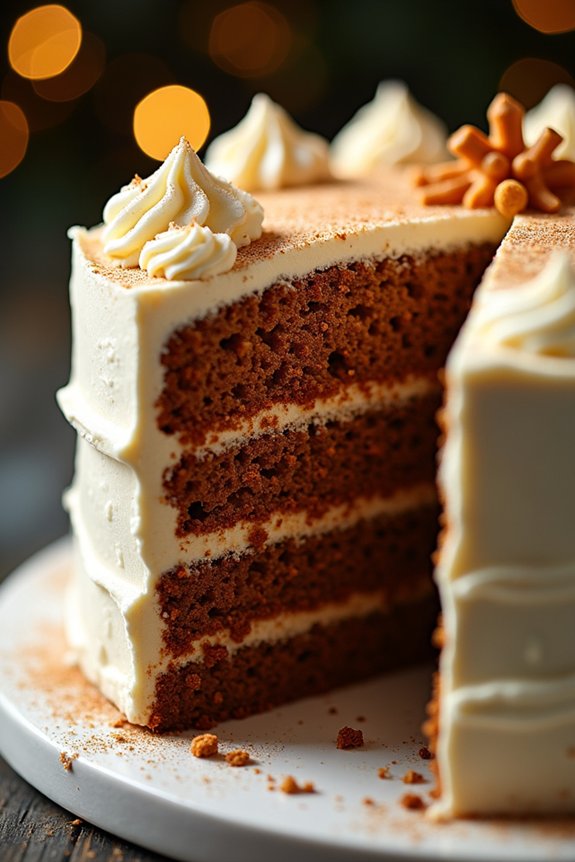
Gingerbread Layer Cake is a delightful festive treat that embodies the rich, warming flavors of molasses, ginger, and spices, perfectly capturing the essence of the holiday season. This multi-layered cake is moist, aromatic, and offers a beautiful combination of sweetness and spice.
Paired with a luscious cream cheese frosting, each slice of this cake is a celebration of traditional holiday flavors, making it a perfect centerpiece for any Christmas gathering.
Crafting the Gingerbread Layer Cake involves creating a beautifully spiced cake that’s both light and indulgent. The cake layers are made with a blend of robust ingredients like molasses and a variety of spices such as cinnamon, nutmeg, and cloves. The cream cheese frosting adds a velvety finish, balancing the spices with a creamy sweetness.
The following recipe will guide you through making this festive cake, serving 4-6 people, and guaranteeing everyone gets a generous slice of holiday cheer.
Ingredients:
- 2 1/2 cups all-purpose flour
- 1 1/2 teaspoons baking powder
- 1 teaspoon baking soda
- 1 tablespoon ground ginger
- 1 teaspoon ground cinnamon
- 1/2 teaspoon ground nutmeg
- 1/4 teaspoon ground cloves
- 1/2 teaspoon salt
- 1/2 cup unsalted butter, softened
- 1/2 cup granulated sugar
- 1/2 cup dark brown sugar, packed
- 2 large eggs
- 1 cup unsulfured molasses
- 1 cup hot water
- 1 teaspoon vanilla extract
For the cream cheese frosting:
- 8 ounces cream cheese, softened
- 1/2 cup unsalted butter, softened
- 4 cups powdered sugar
- 1 teaspoon vanilla extract
Instructions:
- Preheat and Prepare Pans: Preheat your oven to 350°F (175°C). Grease and line two 9-inch round cake pans with parchment paper to prevent sticking.
- Mix Dry Ingredients: In a large bowl, whisk together the flour, baking powder, baking soda, ground ginger, cinnamon, nutmeg, cloves, and salt. This guarantees the spices are evenly distributed throughout the cake.
- Cream Butter and Sugars: In a separate bowl, cream the softened butter, granulated sugar, and dark brown sugar until light and fluffy. This should take about 3-4 minutes with an electric mixer.
- Add Eggs and Molasses: Beat in the eggs one at a time, ensuring each is fully incorporated before adding the next. Mix in the molasses and vanilla extract until well combined.
- Combine Wet and Dry Ingredients: Gradually add the dry ingredients to the molasses mixture, alternating with the hot water. Begin and end with the dry ingredients, mixing just until combined after each addition.
- Bake the Cakes: Divide the batter evenly between the prepared cake pans. Bake for 25-30 minutes or until a toothpick inserted into the center comes out clean. Allow the cakes to cool in the pans for about 10 minutes before transferring to a wire rack to cool completely.
- Make the Frosting: While the cakes are cooling, prepare the frosting. Beat the cream cheese and butter together until smooth. Gradually add the powdered sugar, one cup at a time, beating well after each addition. Stir in the vanilla extract.
- Assemble the Cake: Once the cakes are completely cool, place one layer on a serving platter. Spread a generous amount of cream cheese frosting over the top. Place the second cake layer on top and cover the entire cake with the remaining frosting.
Extra Tips:
For the best flavor, make the cake a day ahead, allowing the spices to meld and develop overnight. When applying the frosting, consider chilling the cake briefly after the crumb coat (a thin layer of frosting to catch crumbs) to make the final application smoother.
If you wish to add a decorative touch, consider garnishing the cake with candied ginger or a light dusting of cinnamon before serving. Enjoy this cake with a warm beverage to heighten the festive experience!
Red Velvet Peppermint Cake
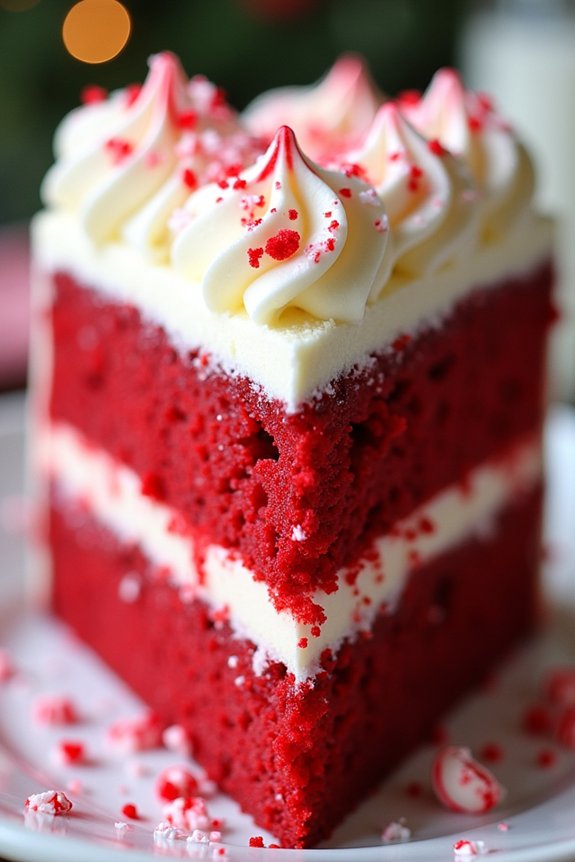
Indulge in the festive flavors of the season with our Red Velvet Peppermint Cake. This delightful dessert marries the classic taste of rich red velvet with a rejuvenating hint of peppermint, creating a perfect harmony of flavors that embody the spirit of Christmas.
Whether you’re hosting a holiday gathering or simply treating your family to a special dessert, this cake is sure to impress with its vibrant color and unique taste. Perfect for serving 4-6 people, this Red Velvet Peppermint Cake isn’t only visually stunning but also incredibly delicious.
The moist layers of red velvet are complemented by a creamy peppermint frosting, adding a cool and minty finish to every bite. With this easy-to-follow recipe, you’ll be able to create a show-stopping cake that will leave your guests asking for seconds.
Ingredients:
- 2 ½ cups all-purpose flour
- 1 ½ cups granulated sugar
- 1 teaspoon baking soda
- 1 teaspoon salt
- 1 teaspoon cocoa powder
- 1 ½ cups vegetable oil
- 1 cup buttermilk, room temperature
- 2 large eggs, room temperature
- 2 tablespoons red food coloring
- 1 teaspoon vanilla extract
- 1 teaspoon white vinegar
- 1 teaspoon peppermint extract
- 8 oz cream cheese, softened
- ½ cup unsalted butter, softened
- 4 cups powdered sugar
- Crushed peppermint candies (for garnish)
Instructions:
- Preheat and Prepare Pans: Preheat your oven to 350°F (175°C). Grease and flour two 9-inch round cake pans.
- Mix Dry Ingredients: In a large bowl, whisk together the flour, sugar, baking soda, salt, and cocoa powder until well combined.
- Combine Wet Ingredients: In another bowl, mix the vegetable oil, buttermilk, eggs, food coloring, vanilla extract, white vinegar, and peppermint extract until smooth.
- Combine Mixtures: Gradually add the dry ingredients to the wet ingredients, mixing until just combined. Be careful not to over-mix to avoid a dense cake.
- Bake the Cakes: Divide the batter evenly between the prepared cake pans. Bake in the preheated oven for 25-30 minutes, or until a toothpick inserted in the center comes out clean.
- Cool: Allow the cakes to cool in the pans for about 10 minutes, then transfer them to a wire rack to cool completely.
- Prepare Frosting: In a large bowl, beat the cream cheese and butter together until smooth. Gradually add the powdered sugar, beating until the frosting is light and fluffy.
- Assemble the Cake: Once the cakes are completely cooled, place one layer on a serving plate. Spread a generous amount of frosting over the top, then place the second cake layer on top. Frost the top and sides of the cake with the remaining frosting.
- Garnish: Sprinkle crushed peppermint candies over the top of the cake for a festive touch.
Extra Tips:
To guarantee the cakes are moist and tender, make sure all your ingredients are at room temperature before starting. This will help them to mix more evenly.
When adding the food coloring, adjust the amount to achieve your desired shade of red. If you want to enhance the peppermint flavor, consider adding a few drops of peppermint extract to the frosting as well.
Finally, for a cleaner look, use a crumb coat – a thin layer of frosting – before applying the final layer to lock in any stray crumbs. Enjoy your holiday creation!
Eggnog Bundt Cake
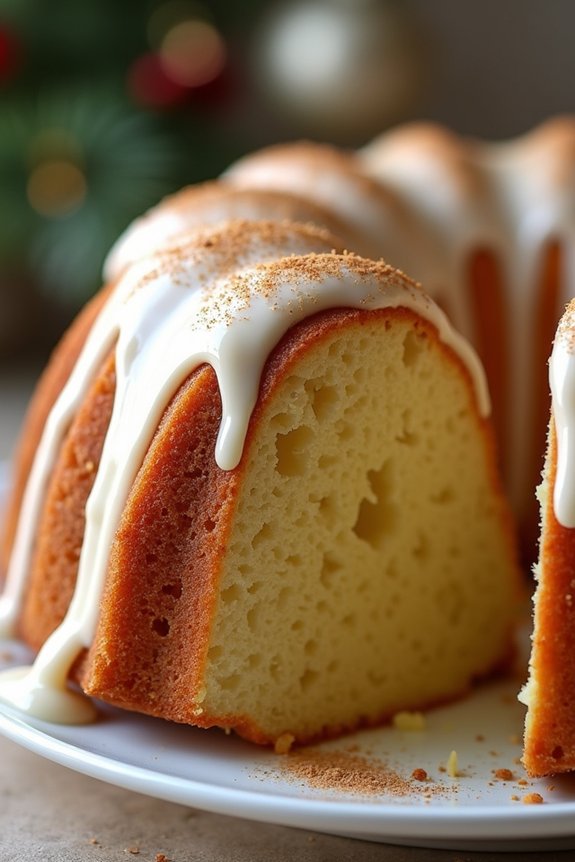
Eggnog Bundt Cake is a delightful holiday dessert that combines the rich flavors of traditional eggnog with the moist, tender crumb of a classic Bundt cake. This cake is perfect for serving at holiday gatherings or enjoying with a warm cup of coffee on a chilly winter evening.
Its aromatic spices and creamy glaze capture the essence of the season, making it a festive addition to any Christmas spread. The recipe yields a cake that serves approximately 4-6 people, making it an ideal choice for an intimate family gathering or a cozy holiday dinner.
The cake’s unique flavor comes from the combination of eggnog and classic holiday spices like nutmeg and cinnamon, which are blended into a smooth batter and baked to golden perfection. Topped with a sweet glaze, this Eggnog Bundt Cake is bound to impress your guests and become a cherished part of your Christmas traditions.
Ingredients:
- 2 1/2 cups all-purpose flour
- 2 teaspoons baking powder
- 1/2 teaspoon baking soda
- 1 teaspoon ground nutmeg
- 1/2 teaspoon ground cinnamon
- 1/2 teaspoon salt
- 1 cup unsalted butter, softened
- 1 1/2 cups granulated sugar
- 3 large eggs
- 1 teaspoon vanilla extract
- 1 cup eggnog
- 1/4 cup sour cream
For the Glaze:
- 1 cup powdered sugar
- 2 tablespoons eggnog
- 1/2 teaspoon vanilla extract
Instructions:
- Preheat Oven and Prepare Pan: Preheat your oven to 350°F (175°C). Grease and flour a Bundt pan to make sure the cake doesn’t stick.
- Mix Dry Ingredients: In a medium bowl, whisk together the flour, baking powder, baking soda, nutmeg, cinnamon, and salt. Set aside.
- Cream Butter and Sugar: In a large mixing bowl, beat the softened butter and granulated sugar together until light and fluffy using an electric mixer, about 3-4 minutes.
- Add Eggs and Vanilla: Add the eggs one at a time, beating well after each addition. Mix in the vanilla extract.
- Combine Wet and Dry Mixtures: Gradually add the dry ingredients to the butter mixture, alternating with the eggnog and sour cream. Begin and end with the dry ingredients. Mix until just combined, being careful not to overmix.
- Pour Batter into Pan: Pour the batter evenly into the prepared Bundt pan, smoothing the top with a spatula.
- Bake the Cake: Bake in the preheated oven for 40-45 minutes, or until a toothpick inserted into the center comes out clean. Allow the cake to cool in the pan for about 10 minutes before inverting onto a wire rack to cool completely.
- Prepare the Glaze: In a small bowl, whisk together the powdered sugar, eggnog, and vanilla extract until smooth. Adjust the consistency by adding more powdered sugar or eggnog as needed.
- Glaze the Cake: Once the cake is completely cooled, drizzle the glaze evenly over the top of the cake, allowing it to drip down the sides.
Extra Tips:
For the best flavor, use a high-quality eggnog that you enjoy drinking, as it will influence the taste of the cake greatly.
You can also sprinkle a bit of extra ground nutmeg over the glaze for added decoration and flavor. If you prefer a less sweet glaze, reduce the powdered sugar slightly.
To make the cake even more festive, consider adding a handful of chopped nuts or dried fruits into the batter before baking.
Chocolate Hazelnut Yule Log
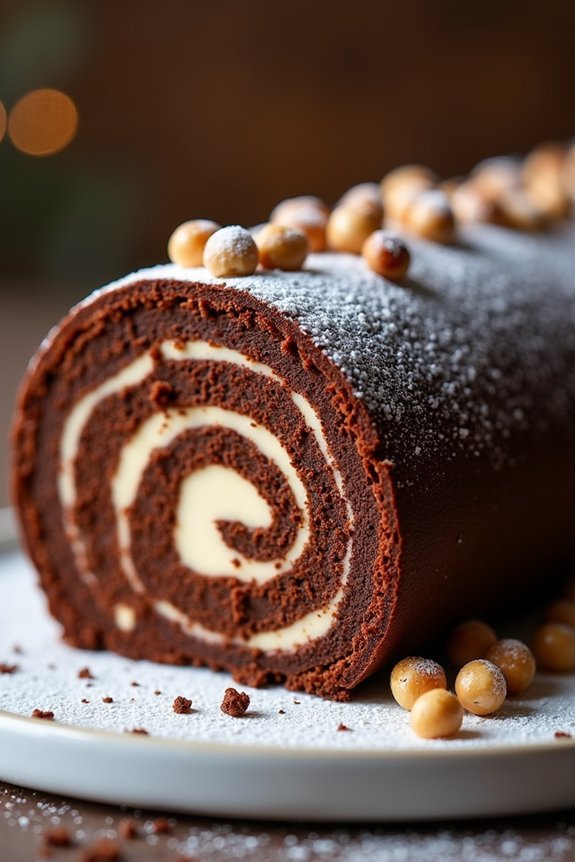
Chocolate Hazelnut Yule Log is a delightful and festive holiday dessert that combines rich chocolate with the nutty flavor of hazelnuts. This traditional Christmas treat, also known as a Bûche de Noël, is perfect for celebrating the season with family and friends.
The creamy chocolate filling and the soft sponge cake rolled into a log shape, then beautifully decorated to resemble a yule log, make it an impressive centerpiece for any holiday table.
The combination of flavors and textures in this Chocolate Hazelnut Yule Log is certain to please any crowd. The hazelnut cream filling provides a delightful contrast to the soft and moist chocolate sponge, while the chocolate ganache adds a luxurious finish.
With a little bit of patience and creativity, you can create a stunning dessert that will leave your guests in awe. This recipe serves 4-6 people, making it ideal for intimate holiday gatherings.
Ingredients:
- 3/4 cup all-purpose flour
- 1/4 cup cocoa powder
- 1 teaspoon baking powder
- 1/2 teaspoon salt
- 4 large eggs
- 3/4 cup granulated sugar
- 1 teaspoon vanilla extract
- 1/4 cup milk
- 1 cup heavy cream
- 1/2 cup hazelnut spread (such as Nutella)
- 1/2 cup chopped hazelnuts
- 1 cup dark chocolate, chopped
- 1/2 cup heavy cream (for ganache)
- Powdered sugar, for dusting
Instructions:
- Preheat and Prepare: Preheat your oven to 350°F (175°C). Line a 10×15 inch jelly roll pan with parchment paper and lightly grease it to prevent sticking.
- Make the Sponge Cake: In a medium bowl, sift together the flour, cocoa powder, baking powder, and salt. In a separate large bowl, beat the eggs and sugar with an electric mixer on high speed until pale and thick, about 5 minutes. Stir in the vanilla extract.
- Combine Ingredients: Gently fold the dry ingredients into the egg mixture until just combined. Add the milk and mix gently until smooth. Pour the batter into the prepared pan, spreading it evenly.
- Bake the Cake: Bake for 10-12 minutes, or until the cake springs back when lightly touched. Immediately turn the cake out onto a clean kitchen towel dusted with powdered sugar. Peel off the parchment paper.
- Roll the Cake: Starting at the short end, roll the cake and towel together into a log. Let it cool completely on a wire rack.
- Prepare the Filling: In a medium bowl, whip the heavy cream until soft peaks form. Fold in the hazelnut spread until well combined.
- Assemble the Yule Log: Carefully unroll the cooled cake and spread the hazelnut cream evenly over the surface. Sprinkle with chopped hazelnuts. Reroll the cake without the towel.
- Make the Ganache: In a small saucepan, heat the heavy cream until it just begins to simmer. Pour over the chopped dark chocolate in a bowl and let sit for a minute. Stir until smooth.
- Decorate the Log: Spread the chocolate ganache over the rolled cake, covering it completely. Use a fork to create a bark-like texture. Dust with powdered sugar for a snowy effect.
- Chill and Serve: Refrigerate the yule log for at least 1 hour before serving. Slice and enjoy!
Extra Tips:
For the best results, confirm that the eggs are at room temperature before beating them to achieve maximum volume. When rolling the cake, do so gently to prevent cracks.
If the cake does crack slightly, the ganache can help cover any imperfections. Feel free to get creative with decorations, such as using marzipan to create mushrooms or holly leaves to enhance the log’s appearance.
Enjoy your Chocolate Hazelnut Yule Log with a cup of coffee or a glass of milk for a delightful holiday treat.
Almond Amaretto Cake
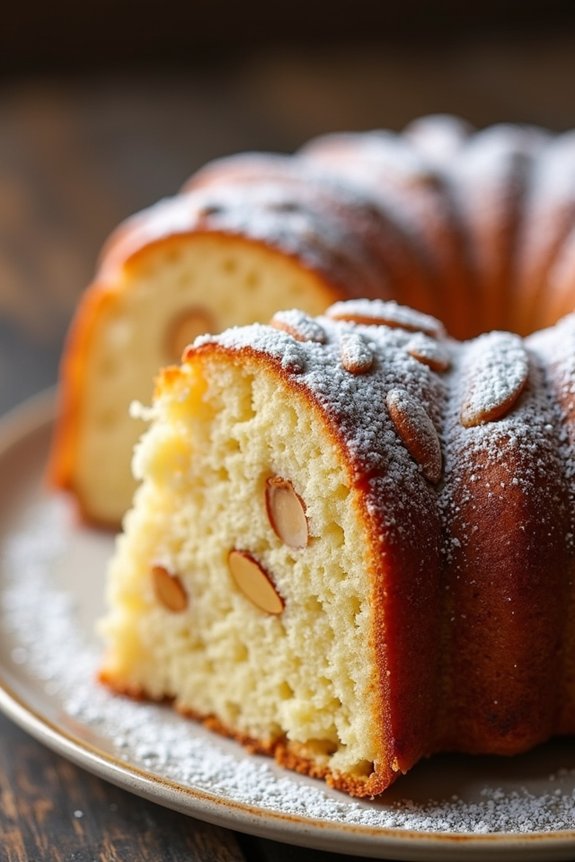
The holiday season is the perfect time to indulge in a delightful Almond Amaretto Cake, a luscious treat that combines the rich flavors of almonds and the distinct taste of Amaretto liqueur. This cake is a festive favorite, offering a moist texture and a sweet, nutty aroma that’s guaranteed to impress your guests.
The addition of Amaretto infuses the cake with a subtle warmth and depth, making it an ideal centerpiece for any Christmas gathering. This recipe is designed to serve 4-6 people, making it suitable for an intimate holiday celebration.
The Almond Amaretto Cake isn’t only delicious but also relatively simple to prepare, even for those who may not be seasoned bakers. With a few key ingredients and some patience, you’ll have a dessert that’s both elegant and comforting, capturing the essence of the season.
Ingredients (Serves 4-6)
- 1 1/2 cups all-purpose flour
- 1 cup granulated sugar
- 1/2 cup unsalted butter, softened
- 3 large eggs
- 1/2 cup almond milk
- 1/4 cup Amaretto liqueur
- 1 teaspoon almond extract
- 1 teaspoon vanilla extract
- 1 tablespoon baking powder
- 1/4 teaspoon salt
- 1/2 cup sliced almonds
- Powdered sugar for dusting
Instructions
- Preheat the Oven: Start by preheating your oven to 350°F (175°C). Grease and flour a 9-inch round cake pan to prevent the cake from sticking.
- Mix the Dry Ingredients: In a medium bowl, whisk together the flour, baking powder, and salt. Set this mixture aside for later use.
- Cream the Butter and Sugar: In a large mixing bowl, use an electric mixer to cream the softened butter and granulated sugar together until light and fluffy, about 3-4 minutes.
- Add Eggs and Flavorings: Beat in the eggs one at a time, guaranteeing each egg is fully incorporated before adding the next. Then, mix in the almond extract, vanilla extract, and Amaretto liqueur until well combined.
- Combine Wet and Dry Ingredients: Gradually add the dry ingredients to the wet mixture, alternating with the almond milk. Begin and end with the dry ingredients. Mix until just combined, being careful not to overmix.
- Fold in Almonds: Gently fold in the sliced almonds, ensuring they’re evenly distributed throughout the batter.
- Bake the Cake: Pour the batter into the prepared cake pan and smooth the top with a spatula. Bake in the preheated oven for 35-40 minutes, or until a toothpick inserted into the center comes out clean.
- Cool and Decorate: Allow the cake to cool in the pan for 10 minutes before transferring it to a wire rack to cool completely. Once cooled, dust the top with powdered sugar before serving.
Extra Tips
When making the Almond Amaretto Cake, make certain that all your ingredients are at room temperature before starting. This allows for better mixing and a more consistent texture.
If you prefer a stronger Amaretto flavor, consider adding an additional tablespoon of the liqueur. For a decorative touch, you can toast the sliced almonds before folding them into the batter, which will enhance their flavor and add a bit of crunch.
Finally, if you wish to store the cake, it can be kept in an airtight container at room temperature for up to three days, or refrigerated for up to a week.
Spiced Orange Olive Oil Cake
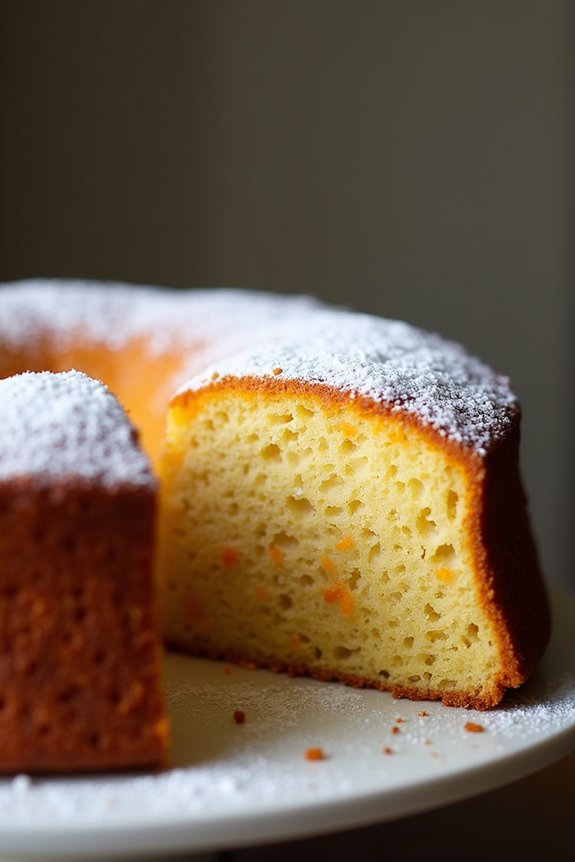
The Spiced Orange Olive Oil Cake is a delightful treat that blends the rich flavors of citrus with the unique, robust taste of olive oil, creating a moist and aromatic dessert perfect for the holiday season.
This cake stands out with its beautiful balance of spices, delivering a warmth that complements the freshness of the orange. It’s a great alternative to traditional Christmas cakes, offering a lighter and fruitier option that still feels indulgent and festive.
Whether you’re hosting a holiday dinner or simply looking to try something new, this cake is sure to impress your guests. It’s straightforward to make and doesn’t require any special equipment, making it accessible even for novice bakers.
The combination of olive oil and orange zest infuses the cake with a subtle complexity, while the spices add depth and warmth. Best of all, this cake can be enjoyed on its own or with a dollop of whipped cream or a scoop of vanilla ice cream.
Ingredients for Serving Size of 4-6 People:
- 1 ½ cups all-purpose flour
- 1 ½ teaspoons baking powder
- ½ teaspoon baking soda
- ½ teaspoon salt
- 1 teaspoon ground cinnamon
- ½ teaspoon ground nutmeg
- ½ teaspoon ground ginger
- ¾ cup extra virgin olive oil
- 1 cup granulated sugar
- 3 large eggs
- Zest of 2 oranges
- ½ cup freshly squeezed orange juice
- 1 teaspoon vanilla extract
- Confectioners’ sugar for dusting (optional)
Cooking Instructions:
- Preheat the Oven: Begin by preheating your oven to 350°F (175°C). Grease and flour a 9-inch round cake pan or line it with parchment paper.
- Mix Dry Ingredients: In a medium bowl, whisk together the all-purpose flour, baking powder, baking soda, salt, ground cinnamon, ground nutmeg, and ground ginger. Confirm the spices are well distributed throughout the flour mixture.
- Combine Wet Ingredients: In a large mixing bowl, whisk together the olive oil and granulated sugar until well combined. Add in the eggs one at a time, beating well after each addition until the mixture is light and slightly thickened. Stir in the orange zest, orange juice, and vanilla extract.
- Incorporate Dry Ingredients: Gradually add the dry ingredients to the wet mixture, mixing gently until just combined. Be careful not to overmix, as this can result in a dense cake.
- Pour and Bake: Pour the batter into the prepared cake pan, smoothing the top with a spatula. Bake in the preheated oven for about 35-40 minutes, or until a toothpick inserted into the center comes out clean.
- Cool and Serve: Allow the cake to cool in the pan for about 10 minutes before transferring it to a wire rack to cool completely. Once cooled, dust the top with confectioners’ sugar if desired, and serve.
Extra Tips: For the best flavor, use high-quality extra virgin olive oil and fresh oranges. The quality of these ingredients will greatly impact the taste and aroma of your cake.
If you prefer a more intense orange flavor, consider adding a tablespoon of orange liqueur or a few drops of orange extract to the batter. This cake also pairs beautifully with a light glaze made from orange juice and powdered sugar for added sweetness and shine.
Coconut Snowball Cake
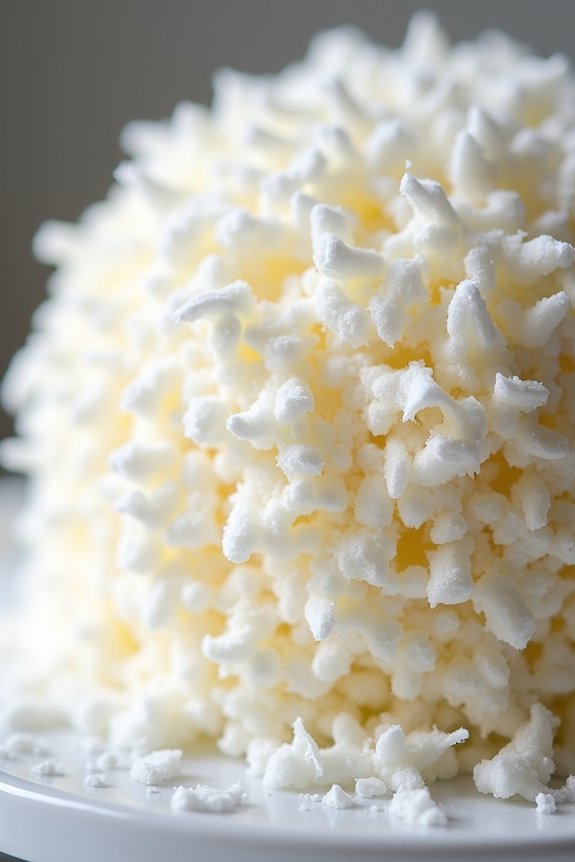
Indulge in the delightful flavors of a Coconut Snowball Cake, a perfect festive treat for your Christmas celebrations. This cake boasts a fluffy, moist texture that’s enhanced by the rich taste of coconut, making it a delightful centerpiece for your holiday table. With its snowy white appearance and delicious flavor profile, this cake is sure to impress family and friends alike.
Whether you’re an experienced baker or a novice in the kitchen, this recipe is straightforward and rewarding. The Coconut Snowball Cake is layered with coconut-flavored frosting, which adds a subtle sweetness and enhances the overall tropical flavor of the cake. The exterior of the cake is adorned with shredded coconut, creating the appearance of a snowball—a fitting homage to the winter season.
This recipe serves 4-6 people, guaranteeing there’s plenty to go around at your festive gathering.
Ingredients (Serves 4-6):
- 1 ½ cups all-purpose flour
- 1 ½ teaspoons baking powder
- ¼ teaspoon salt
- ½ cup unsalted butter, room temperature
- 1 cup granulated sugar
- 2 large eggs
- 1 teaspoon vanilla extract
- ¾ cup coconut milk
- 1 cup sweetened shredded coconut
For the Frosting:
- ½ cup unsalted butter, room temperature
- 3 cups powdered sugar
- ¼ teaspoon salt
- 1 teaspoon coconut extract
- 2 tablespoons coconut milk
- 2 cups sweetened shredded coconut (for decoration)
Cooking Instructions:
- Preheat the Oven: Start by preheating your oven to 350°F (175°C). Grease and flour two 8-inch round cake pans.
- Prepare the Dry Ingredients: In a medium mixing bowl, sift together the all-purpose flour, baking powder, and salt. Set aside.
- Cream Butter and Sugar: In a large mixing bowl, beat the unsalted butter and granulated sugar together using an electric mixer on medium speed until light and fluffy, about 3-4 minutes.
- Add Eggs and Vanilla: Add the eggs one at a time, beating well after each addition. Stir in the vanilla extract.
- Combine Wet and Dry Ingredients: Gradually add the dry ingredients to the wet mixture, alternating with the coconut milk, beginning and ending with the dry ingredients. Mix until just combined. Gently fold in the sweetened shredded coconut.
- Bake the Cake: Divide the batter evenly between the prepared cake pans. Bake for 25-30 minutes, or until a toothpick inserted into the center comes out clean. Allow cakes to cool in the pans for 10 minutes, then turn out onto wire racks to cool completely.
- Make the Frosting: In a clean bowl, beat the unsalted butter until creamy. Gradually add the powdered sugar and salt, beating until smooth. Mix in the coconut extract and coconut milk until the frosting is light and fluffy.
- Assemble the Cake: Place one layer of the cake on a serving platter. Spread a generous amount of frosting over the top. Place the second cake layer on top and frost the top and sides of the cake.
- Decorate the Cake: Gently press the sweetened shredded coconut onto the sides and top of the cake, making sure it’s fully covered, creating the snowball effect.
Extra Tips:
When making the Coconut Snowball Cake, verify all your ingredients are at room temperature before you begin, as this helps them to combine more smoothly and evenly.
If you find the frosting too stiff, add a little extra coconut milk until you reach the desired consistency. For a more intense coconut flavor, lightly toast the shredded coconut before applying it to the cake, but be sure to let it cool completely to maintain the cake’s snowy appearance.
Pistachio Cranberry Cake
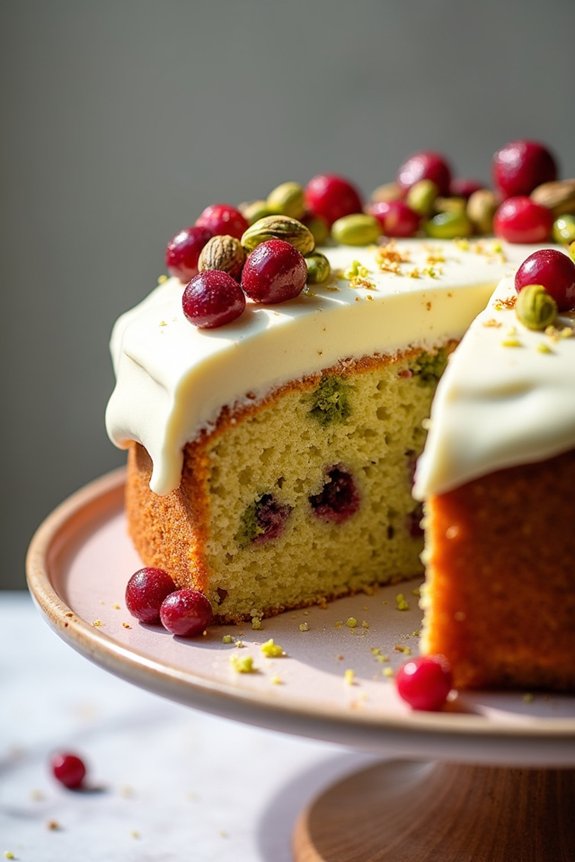
The Pistachio Cranberry Cake is a delightful holiday treat that combines the nutty flavor of pistachios with the tartness of cranberries. This cake is perfect for Christmas celebrations, offering a festive look with its green and red accents. The combination of pistachios and cranberries not only provides a rich taste but also adds a beautiful texture to the cake.
It’s a great addition to any holiday dessert table and is sure to captivate your guests with both its appearance and flavor. The moistness of the cake comes from the use of high-quality ingredients, including fresh cranberries and finely chopped pistachios. The cake is often frosted with a cream cheese frosting that complements the flavors beautifully.
With a serving size of 4-6 people, this cake is ideal for small gatherings or for a family dessert. By following the steps below, you can easily create this scrumptious Pistachio Cranberry Cake for your next holiday celebration.
Ingredients (serves 4-6 people):
- 1 cup unsalted butter, softened
- 1 cup granulated sugar
- 3 large eggs
- 1 teaspoon vanilla extract
- 1 ½ cups all-purpose flour
- 1 teaspoon baking powder
- ½ teaspoon baking soda
- ¼ teaspoon salt
- ½ cup sour cream
- ½ cup finely chopped pistachios
- ¾ cup fresh cranberries
- 1 cup cream cheese, softened
- ½ cup powdered sugar
- 1 teaspoon lemon juice
Instructions:
- Preheat the Oven: Preheat your oven to 350°F (175°C). Grease and flour an 8-inch round cake pan to prevent the cake from sticking.
- Cream Butter and Sugar: In a large mixing bowl, cream the softened butter and granulated sugar together until light and fluffy. This should take about 3-4 minutes using an electric mixer.
- Add Eggs and Vanilla: Add the eggs one at a time, beating well after each addition. Stir in the vanilla extract until the mixture is smooth and well combined.
- Mix Dry Ingredients: In a separate bowl, sift together the flour, baking powder, baking soda, and salt. This will guarantee even distribution of the leavening agents.
- Combine Wet and Dry Ingredients: Gradually add the dry ingredients to the creamed mixture, alternating with the sour cream. Start and end with the dry ingredients. Mix just until combined.
- Fold in Nuts and Berries: Gently fold in the chopped pistachios and cranberries, being careful not to overmix as this could make the cake dense.
- Bake the Cake: Pour the batter into the prepared cake pan and smooth the top with a spatula. Bake for 30-35 minutes, or until a toothpick inserted into the center comes out clean.
- Cool the Cake: Allow the cake to cool in the pan for 10 minutes before transferring it to a wire rack to cool completely.
- Prepare the Frosting: In a medium bowl, beat the softened cream cheese, powdered sugar, and lemon juice until smooth and creamy.
- Assemble the Cake: Once the cake is completely cool, spread the cream cheese frosting evenly over the top of the cake. Optionally, garnish with additional pistachios and cranberries for a festive presentation.
Extra Tips:
For the best results, make sure all your ingredients are at room temperature before you begin. This helps in achieving a smooth batter and even baking. If you prefer a sweeter cake, you can increase the amount of sugar slightly or add a tablespoon of honey.
Caramel Apple Spice Cake
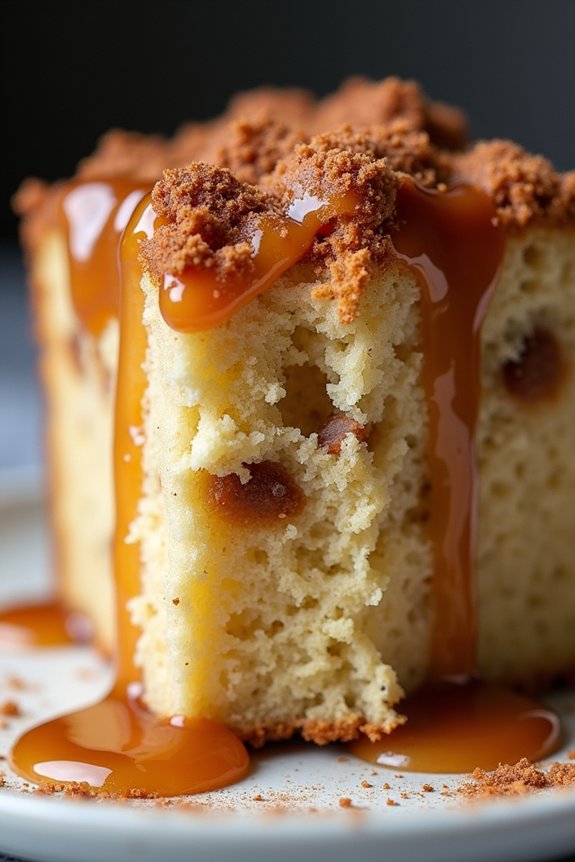
Caramel Apple Spice Cake is a delightful dessert that combines the comforting flavors of caramel and spiced apples into a moist, flavorful cake. Perfect for the holiday season, this cake features a rich caramel glaze that seeps into the cake, enhancing its sweetness and adding a luxurious touch. The warmth of cinnamon, nutmeg, and cloves complements the tartness of the apples, creating a harmonious balance of flavors that will leave your guests asking for seconds.
This cake isn’t only a treat for the taste buds but also a visually appealing addition to your holiday dessert table. The golden-brown cake, with its glossy caramel topping and slices of tender apples, makes for a stunning presentation. Whether you’re hosting a Christmas dinner or a cozy gathering with friends and family, this Caramel Apple Spice Cake is sure to be a hit.
Ingredients for Caramel Apple Spice Cake (Serves 4-6):
- 2 cups all-purpose flour
- 1 teaspoon baking powder
- 1/2 teaspoon baking soda
- 1/2 teaspoon salt
- 1 teaspoon ground cinnamon
- 1/2 teaspoon ground nutmeg
- 1/4 teaspoon ground cloves
- 1/2 cup unsalted butter, softened
- 1 cup granulated sugar
- 1/2 cup brown sugar, packed
- 2 large eggs
- 1 teaspoon vanilla extract
- 1 cup buttermilk
- 2 medium apples, peeled, cored, and chopped
- 1/2 cup caramel sauce, plus more for drizzling
Cooking Instructions:
- Preheat and Prepare: Preheat your oven to 350°F (175°C). Grease and flour a 9-inch round cake pan to prevent the cake from sticking.
- Mix Dry Ingredients: In a medium bowl, whisk together the flour, baking powder, baking soda, salt, cinnamon, nutmeg, and cloves until well combined. This will guarantee the spices are evenly distributed throughout the cake.
- Cream Butter and Sugars: In a large mixing bowl, beat the softened butter, granulated sugar, and brown sugar together with an electric mixer on medium speed until the mixture is light and fluffy, about 3-4 minutes.
- Add Eggs and Vanilla: Add the eggs one at a time, beating well after each addition. Mix in the vanilla extract until just combined.
- Combine Wet and Dry Ingredients: Gradually add the dry ingredient mixture to the wet ingredients, alternating with the buttermilk, beginning and ending with the dry ingredients. Mix until just combined, being careful not to overmix.
- Fold in Apples: Gently fold in the chopped apples using a spatula, making certain they’re evenly distributed in the batter.
- Bake the Cake: Pour the batter into the prepared cake pan and spread it evenly. Bake in the preheated oven for 30-35 minutes, or until a toothpick inserted into the center comes out clean.
- Cool and Add Caramel: Allow the cake to cool in the pan for about 10 minutes before transferring it to a wire rack. While the cake is still warm, drizzle the caramel sauce over the top, allowing it to soak into the cake.
- Serve and Enjoy: Once the cake has cooled completely, slice and serve. Drizzle additional caramel sauce over each serving if desired.
Extra Tips:
When selecting apples for this cake, opt for a firm variety such as Granny Smith or Honeycrisp, as they hold their shape well during baking. If you prefer a more pronounced caramel flavor, consider making a homemade caramel sauce using brown sugar and cream.
To enhance the presentation, you can garnish the cake with thin apple slices or a sprinkle of powdered sugar before serving. Store any leftover cake in an airtight container at room temperature for up to three days.
Chocolate Raspberry Truffle Cake
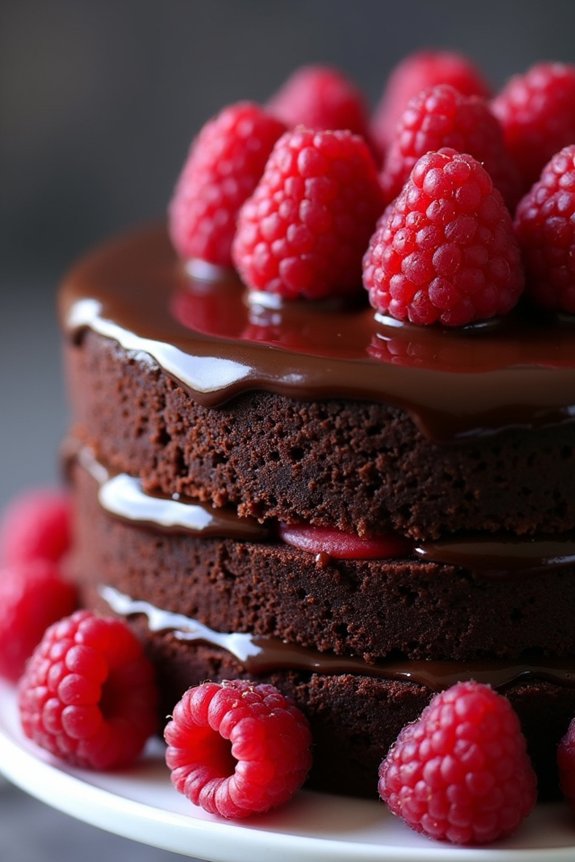
Indulge your taste buds this holiday season with a decadent Chocolate Raspberry Truffle Cake. This exquisite cake combines the rich, velvety texture of chocolate with the tart sweetness of raspberries, creating a harmonious blend of flavors that’s certain to impress your guests.
Whether you’re hosting a festive gathering or simply want to treat your loved ones, this cake is a splendid choice for any Christmas celebration. The luscious layers of chocolate sponge cake are filled with a luxurious raspberry truffle ganache, and the entire creation is topped with a glossy chocolate glaze and fresh raspberries, making it both a feast for the eyes and the palate.
This recipe is designed to serve 4-6 people, making it perfect for a small gathering or an intimate family dinner. The balance of flavors and textures in this cake is sublime, with the rich chocolate beautifully complementing the tangy raspberry undertones.
The cake is relatively simple to make, yet it carries an air of sophistication that will leave a lasting impression on those who are lucky enough to enjoy a slice. Follow the step-by-step instructions below to create this stunning centerpiece for your Christmas dessert table.
Ingredients:
- 1 cup all-purpose flour
- 1/4 cup cocoa powder
- 1 teaspoon baking powder
- 1/4 teaspoon salt
- 1/2 cup unsalted butter, softened
- 1 cup granulated sugar
- 2 large eggs
- 1 teaspoon vanilla extract
- 1/2 cup buttermilk
- 1/2 cup fresh raspberries
- 8 ounces semi-sweet chocolate, chopped
- 1 cup heavy cream
- 2 tablespoons raspberry liqueur (optional)
- 1/4 cup raspberry preserves
- Fresh raspberries for garnish
Instructions:
- Prepare the Baking Pans: Preheat your oven to 350°F (175°C). Grease and line two 8-inch round cake pans with parchment paper to facilitate easy removal of the cakes.
- Mix the Dry Ingredients: In a medium bowl, whisk together the flour, cocoa powder, baking powder, and salt. Set aside.
- Cream the Butter and Sugar: In a large mixing bowl, beat the softened butter and granulated sugar with an electric mixer on medium speed until light and fluffy, about 3-4 minutes.
- Add Eggs and Vanilla: Beat in the eggs one at a time, ensuring each is fully incorporated before adding the next. Stir in the vanilla extract.
- Combine Wet and Dry Ingredients: Gradually add the dry ingredients to the creamed mixture, alternating with buttermilk. Begin and end with the dry ingredients. Mix until just combined.
- Bake the Cakes: Divide the batter evenly between the prepared cake pans. Bake for 20-25 minutes, or until a toothpick inserted into the center comes out clean. Allow the cakes to cool in the pans for 10 minutes before transferring them to a wire rack to cool completely.
- Prepare the Raspberry Truffle Ganache: In a small saucepan, heat the heavy cream over medium heat until it begins to simmer. Remove from heat and pour over the chopped chocolate in a heatproof bowl. Let it sit for 2 minutes before stirring until smooth. Stir in the raspberry liqueur, if using. Allow the ganache to cool and thicken slightly before using.
- Assemble the Cake: Place one cake layer on a serving plate. Spread the raspberry preserves over the top, followed by a layer of the raspberry truffle ganache. Place the second cake layer on top and spread the remaining ganache over the entire cake.
- Decorate: Garnish the top with fresh raspberries, creating a decorative pattern if desired. Chill the cake for at least 1 hour to set the ganache before serving.
Extra Tips:
For an even more intense raspberry flavor, consider adding a layer of raspberry preserves between the cake layers. If fresh raspberries aren’t available, you can use thawed frozen raspberries. Just be sure to drain any excess liquid before using.
When making the ganache, confirm that the chocolate is finely chopped so that it melts smoothly with the cream. This cake can be made a day in advance and stored in the refrigerator to allow the flavors to meld beautifully.
Enjoy this luxurious dessert with a dollop of whipped cream or a scoop of vanilla ice cream for an extra special treat.
Lemon Rosemary Cake
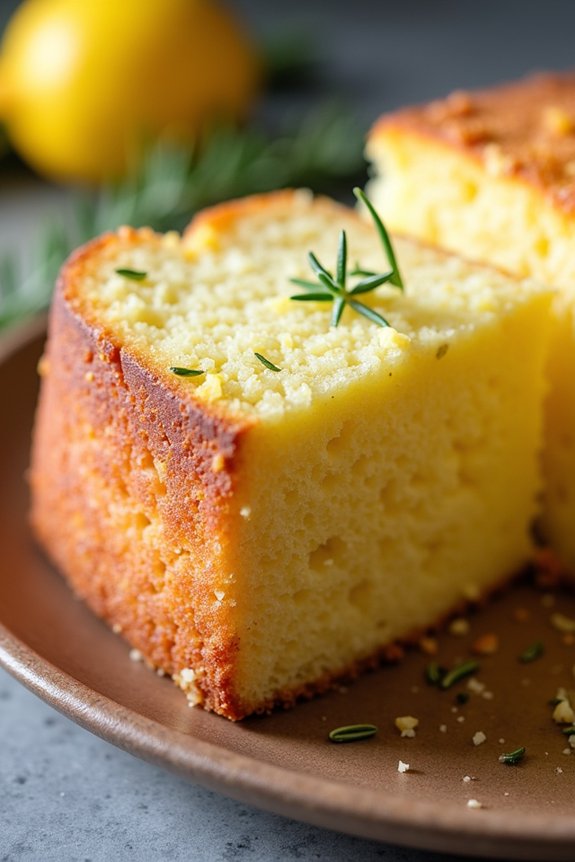
The Lemon Rosemary Cake is a delightful twist on the traditional Christmas cake, bringing a rejuvenating citrusy note paired with the aromatic essence of rosemary. This cake is perfect for those who appreciate the balance of sweet and savory flavors and are looking to add a unique touch to their holiday dessert table.
The moist cake, infused with lemon zest and fresh rosemary, offers a burst of flavor with each bite, making it a memorable treat for both family and guests. This cake serves 4-6 people and is ideal for a cozy holiday gathering.
The combination of lemon and rosemary not only enhances the flavor but also fills your kitchen with an inviting aroma as it bakes. Whether you’re an experienced baker or a novice, the Lemon Rosemary Cake is straightforward to make and is sure to impress with its elegant appearance and delightful taste.
Ingredients:
- 1 ½ cups all-purpose flour
- 1 teaspoon baking powder
- ½ teaspoon baking soda
- ¼ teaspoon salt
- ½ cup unsalted butter, softened
- 1 cup granulated sugar
- 2 large eggs
- Zest of 2 lemons
- 1 tablespoon fresh lemon juice
- 2 teaspoons finely chopped fresh rosemary
- ½ cup buttermilk
- 1 teaspoon vanilla extract
Instructions:
- Preheat the Oven: Start by preheating your oven to 350°F (175°C). Grease and flour a 9-inch round cake pan to guarantee the cake doesn’t stick.
- Mix Dry Ingredients: In a medium bowl, whisk together the flour, baking powder, baking soda, and salt. This guarantees that the baking agents are evenly distributed throughout the flour.
- Cream Butter and Sugar: In a large bowl, beat the softened butter and sugar together using an electric mixer on medium speed until light and fluffy, about 3-5 minutes. This step is essential for incorporating air into the batter, which helps the cake rise.
- Add Wet Ingredients: Beat in the eggs one at a time, confirming each is well incorporated before adding the next. Add the lemon zest, lemon juice, and chopped rosemary, mixing until combined.
- Combine Dry and Wet Mixtures: Gradually add the dry ingredients to the butter mixture, alternating with the buttermilk. Start and end with the flour mixture. Mix until just combined, being careful not to overmix to maintain a tender crumb.
- Bake the Cake: Pour the batter into the prepared cake pan, smoothing the top with a spatula. Bake in the preheated oven for 25-30 minutes, or until a toothpick inserted into the center comes out clean.
- Cool and Serve: Allow the cake to cool in the pan for 10 minutes before transferring it to a wire rack to cool completely. Once cooled, slice and serve.
Extra Tips:
When making the Lemon Rosemary Cake, use fresh rosemary rather than dried for the best flavor. Freshly grated lemon zest is key to a vibrant citrus flavor, so avoid pre-packaged zest.
If you prefer a more pronounced lemon taste, consider adding a lemon glaze or icing to the cooled cake. Simply mix powdered sugar with a little lemon juice until you reach your desired consistency.
Additionally, confirm your ingredients are at room temperature before you start mixing, as this helps them blend together more smoothly, resulting in a better texture.
Black Forest Christmas Cake
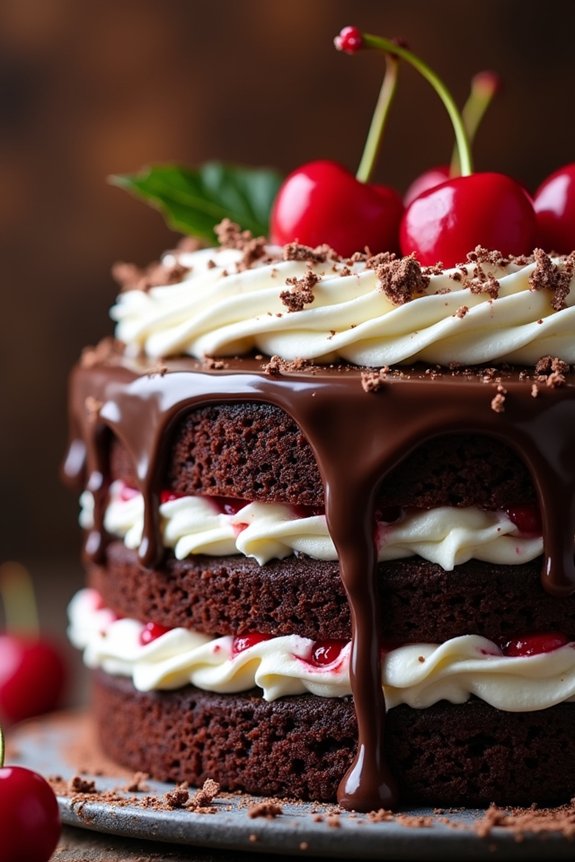
Black Forest Christmas Cake is a festive twist on the classic Black Forest gateau, perfect for adding a touch of elegance and indulgence to your holiday celebrations. This rich and decadent cake combines the traditional flavors of chocolate, cherries, and cream, with the added warmth of Christmas spices to create a show-stopping dessert for your family and friends.
The combination of moist chocolate cake layers, luscious cherry filling, and fluffy whipped cream, all enveloped in a chocolate ganache, promises a delightful treat that captures the essence of the holiday season.
This recipe is designed to serve 4-6 people, making it ideal for smaller gatherings or intimate family dinners. The cake isn’t only delicious but also visually stunning, making it a perfect centerpiece for your Christmas dessert table. Whether you’re a seasoned baker or a novice in the kitchen, this Black Forest Christmas Cake will surely impress your guests and leave them craving more.
Ingredients:
- 1 cup all-purpose flour
- 1 cup granulated sugar
- 1/2 cup unsweetened cocoa powder
- 1 teaspoon baking powder
- 1/2 teaspoon baking soda
- 1/2 teaspoon salt
- 1/2 teaspoon cinnamon
- 1/4 teaspoon nutmeg
- 2 large eggs
- 1/2 cup buttermilk
- 1/4 cup vegetable oil
- 1 teaspoon vanilla extract
- 1/2 cup boiling water
- 1 cup heavy cream
- 2 tablespoons powdered sugar
- 1 teaspoon vanilla extract
- 1 can (14 ounces) cherry pie filling
- 4 ounces dark chocolate, chopped
- 1/4 cup heavy cream
- Fresh cherries and chocolate shavings for garnish
Cooking Instructions:
- Prepare the Cake Batter: Preheat your oven to 350°F (175°C). Grease and line two 8-inch round cake pans. In a large bowl, sift together the flour, sugar, cocoa powder, baking powder, baking soda, salt, cinnamon, and nutmeg. Add the eggs, buttermilk, vegetable oil, and vanilla extract. Beat the mixture on medium speed for 2 minutes. Stir in the boiling water until the batter is smooth and well combined.
- Bake the Cakes: Divide the batter evenly between the prepared cake pans. Bake in the preheated oven for 25-30 minutes, or until a toothpick inserted into the center of the cakes comes out clean. Allow the cakes to cool in the pans for 10 minutes, then turn them out onto a wire rack to cool completely.
- Prepare the Whipped Cream: In a chilled mixing bowl, combine the heavy cream, powdered sugar, and vanilla extract. Whip the cream at high speed until stiff peaks form. Refrigerate until ready to use.
- Make the Chocolate Ganache: In a small saucepan, heat 1/4 cup of heavy cream over medium heat until it just begins to simmer. Remove from heat and pour over the chopped dark chocolate in a heatproof bowl. Let it sit for 5 minutes, then stir until the chocolate is completely melted and the ganache is smooth. Allow it to cool slightly.
- Assemble the Cake: Place one cake layer on a serving plate. Spread half of the cherry pie filling over the cake. Top with a layer of whipped cream. Place the second cake layer on top, and repeat with the remaining cherry filling and whipped cream. Pour the chocolate ganache over the top of the cake, allowing it to drip down the sides.
- Garnish and Serve: Decorate the cake with fresh cherries and chocolate shavings. Refrigerate the cake for at least 1 hour before serving to allow the flavors to meld and the ganache to set.
Extra Tips:
When baking the cake, make sure all your ingredients are at room temperature for a smoother batter. If you don’t have buttermilk, you can make a substitute by mixing 1 tablespoon of lemon juice or vinegar with 1 cup of milk and letting it sit for 5 minutes.
For the whipped cream, keep both the mixing bowl and beaters chilled to achieve the best volume. Finally, adjust the sweetness of the whipped cream to your liking by adding more or less powdered sugar. Enjoy this delectable Black Forest Christmas Cake with a hot cup of coffee or mulled wine for the ultimate holiday treat!