

As the holiday season approaches, the scent of a freshly baked Christmas cake is simply irresistible. I fondly recall my first taste of a Classic Fruitcake with its delightful citrusy rum flavor—a cherished family tradition. This year, let’s explore 13 enchanting recipes that are sure to delight your senses and add a special touch to your celebrations. Which cake will become the star of your holiday gathering?
Classic Fruitcake With a Modern Twist
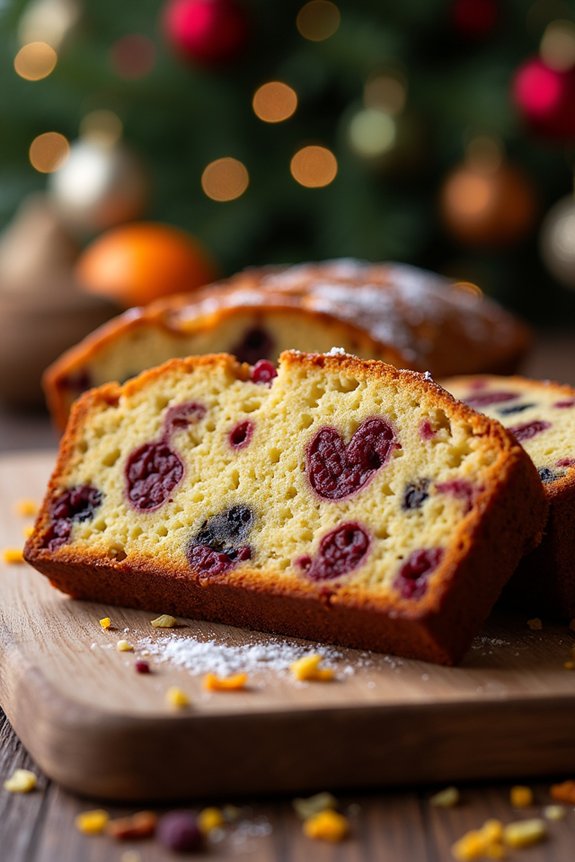
The classic fruitcake is a staple during the holiday season, known for its rich texture and deep, fruity flavors. However, this recipe introduces a modern twist that brings a fresh and exciting element to the traditional holiday favorite. By incorporating a splash of citrus and a hint of spice, this updated version of fruitcake will delight both traditionalists and those looking for something new.
This recipe is designed to serve 4-6 people, making it perfect for a small family gathering or a cozy holiday dinner. The combination of dried fruits, nuts, and spices, soaked in a citrus-infused rum, creates a harmonious blend of flavors that will leave your guests asking for seconds. The modern twist not only enhances the taste but also adds a vibrant aroma that fills the kitchen with the spirit of the season.
Ingredients:
- 1 cup mixed dried fruits (raisins, currants, cherries)
- 1/2 cup mixed nuts (walnuts, pecans, almonds), chopped
- 1/4 cup candied ginger, chopped
- 1/2 cup dark rum
- Zest and juice of 1 orange
- 1/2 cup unsalted butter, softened
- 1/2 cup brown sugar
- 2 large eggs
- 1 cup all-purpose flour
- 1/2 teaspoon baking powder
- 1/4 teaspoon salt
- 1/2 teaspoon ground cinnamon
- 1/4 teaspoon ground nutmeg
- 1/4 teaspoon ground allspice
Instructions:
- Prepare the Fruit Mixture: In a medium bowl, combine the mixed dried fruits, candied ginger, and chopped nuts. Pour over the dark rum, orange zest, and juice. Stir to combine and let the mixture soak for at least 1 hour, or preferably overnight, to guarantee that the fruits absorb the flavors.
- Preheat the Oven: Preheat your oven to 325°F (160°C). Grease and line a 9×5-inch loaf pan with parchment paper.
- Make the Batter: In a large mixing bowl, cream together the softened butter and brown sugar until light and fluffy. Beat in the eggs, one at a time, making sure each is fully incorporated before adding the next.
- Combine Dry Ingredients: In a separate bowl, whisk together the all-purpose flour, baking powder, salt, cinnamon, nutmeg, and allspice.
- Mix the Batter: Gradually fold the dry ingredients into the wet mixture, mixing until just combined. Be careful not to overmix.
- Add the Fruit Mixture: Drain any excess liquid from the soaked fruit mixture and gently fold it into the batter until evenly distributed.
- Bake the Cake: Pour the batter into the prepared loaf pan, smoothing the top with a spatula. Bake in the preheated oven for about 60-70 minutes, or until a skewer inserted into the center comes out clean.
- Cool and Serve: Allow the cake to cool in the pan for 10 minutes, then transfer it to a wire rack to cool completely. Slice and serve once cooled.
Extra Tips:
To enhance the flavor profile of this fruitcake, consider using a mix of your favorite dried fruits or nuts. Feel free to substitute the dark rum with brandy or whiskey for a different taste.
For an extra moist cake, wrap the cooled cake in plastic wrap and allow it to mature for a few days before serving. Additionally, brushing the cake with a bit of rum every few days can intensify the flavors and keep it moist.
Decadent Chocolate Peppermint Cake
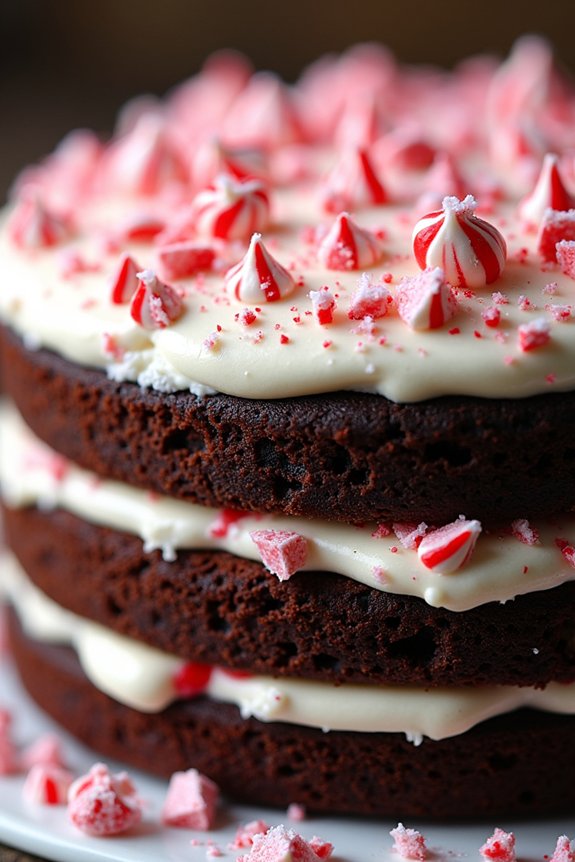
Indulge in the festive flavors of the season with this Decadent Chocolate Peppermint Cake, a perfect addition to your Christmas celebrations. This cake harmonizes the rich, velvety taste of chocolate with the invigorating zing of peppermint, creating a delightful dessert that will impress your family and friends.
The moist chocolate layers are complemented by a luscious peppermint-infused frosting, making each bite a heavenly experience. Whether you’re hosting a holiday gathering or simply treating yourself, this cake is sure to become a holiday favorite.
The Decadent Chocolate Peppermint Cake is designed to serve 4-6 people, making it an ideal choice for intimate gatherings or a small family dessert. The recipe requires a few simple ingredients that come together to create a show-stopping cake that not only looks stunning but also tastes divine.
With careful attention to detail and the right ingredients, this cake is surprisingly easy to make, allowing you to focus on enjoying the holiday season with your loved ones.
Ingredients:
- 1 1/2 cups all-purpose flour
- 1 cup granulated sugar
- 1/2 cup unsweetened cocoa powder
- 1 teaspoon baking powder
- 1/2 teaspoon baking soda
- 1/2 teaspoon salt
- 2 large eggs
- 1/2 cup whole milk
- 1/2 cup vegetable oil
- 1 teaspoon vanilla extract
- 1 teaspoon peppermint extract
- 1/2 cup boiling water
For the Frosting:
- 1 cup unsalted butter, softened
- 3 cups powdered sugar
- 1/4 cup heavy cream
- 1 teaspoon vanilla extract
- 1/2 teaspoon peppermint extract
- Crushed candy canes for garnish
Instructions:
1. Preheat and Prepare Pans: Preheat your oven to 350°F (175°C). Grease and flour two 8-inch round cake pans to prevent sticking.
2. Mix Dry Ingredients: In a large mixing bowl, whisk together the flour, sugar, cocoa powder, baking powder, baking soda, and salt until well combined.
3. Combine Wet Ingredients: In a separate bowl, beat the eggs, then add the milk, vegetable oil, vanilla extract, and peppermint extract. Mix until smooth.
4. Combine Wet and Dry Mixtures: Gradually add the wet ingredients to the dry ingredients, mixing on medium speed until just combined. Be careful not to overmix.
5. Add Boiling Water: Slowly add the boiling water to the batter, mixing on low speed until the batter is smooth and runny.
6. Bake the Cakes: Divide the batter evenly between the prepared cake pans. Bake in the preheated oven for 25-30 minutes, or until a toothpick inserted into the center comes out clean.
7. Cool the Cakes: Allow the cakes to cool in the pans for 10 minutes, then transfer them to a wire rack to cool completely.
8. Prepare the Frosting: In a large bowl, beat the softened butter until creamy. Gradually add the powdered sugar, one cup at a time, mixing well after each addition.
Add the heavy cream, vanilla extract, and peppermint extract, and beat until the frosting is smooth and fluffy.
9. Assemble the Cake: Once the cakes have cooled, place one layer on a serving platter. Spread a generous amount of frosting on top, then place the second layer on top. Frost the top and sides of the cake evenly.
10. Decorate: Sprinkle crushed candy canes over the top of the cake for a festive touch.
Extra Tips:
To guarantee the perfect texture, make sure all your ingredients are at room temperature before starting. If you find the frosting too thick, you can add a little more heavy cream to reach your desired consistency.
To crush candy canes, place them in a sealed plastic bag and gently crush them with a rolling pin. For an extra chocolatey experience, you can add chocolate shavings or mini chocolate chips as a garnish. Enjoy this delightful cake with a hot cup of cocoa for the ultimate holiday treat!
Spiced Gingerbread Layer Cake
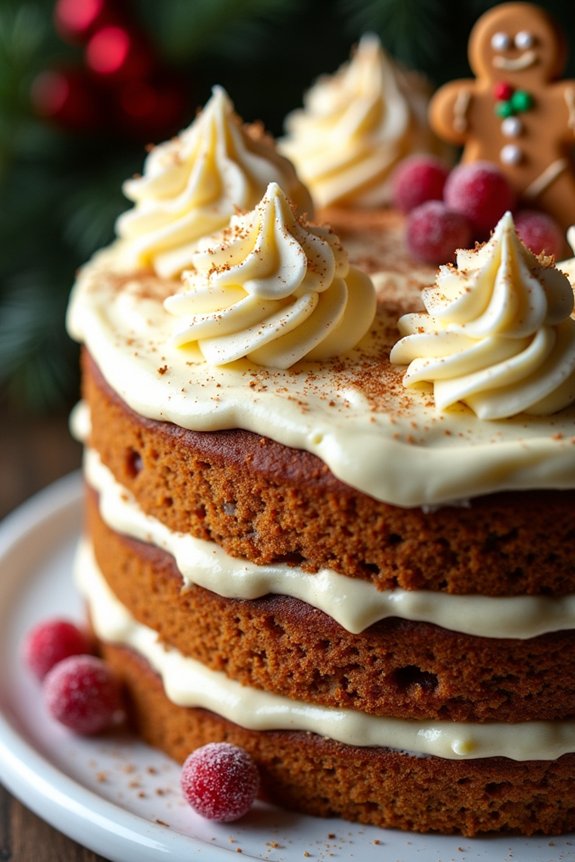
Spiced Gingerbread Layer Cake is a delightful holiday treat that captures the essence of Christmas with its aromatic spices and rich, moist texture. This cake is perfect for a festive gathering, offering layers of gingerbread cake filled with creamy frosting, creating a balance of flavors that will surely impress your guests.
The addition of warm spices such as cinnamon, nutmeg, and cloves gives this cake its distinctive seasonal taste, making it a must-have for any Christmas dessert table.
Preparing a Spiced Gingerbread Layer Cake involves creating a beautifully spiced batter and pairing it with a complementary frosting. The cake layers are baked to perfection before being stacked and frosted to create an impressive centerpiece. This recipe yields a cake that serves 4-6 people, making it an ideal choice for intimate holiday gatherings. Below are the ingredients and step-by-step instructions to guide you in making this festive cake.
Ingredients for Spiced Gingerbread Layer Cake (Serves 4-6):
- 2 cups all-purpose flour
- 1 teaspoon baking soda
- 1 teaspoon baking powder
- 1 tablespoon ground ginger
- 1 teaspoon ground cinnamon
- 1/2 teaspoon ground nutmeg
- 1/4 teaspoon ground cloves
- 1/4 teaspoon salt
- 1/2 cup unsalted butter, softened
- 1/2 cup brown sugar
- 1/2 cup molasses
- 2 large eggs
- 1 cup buttermilk
- 1 teaspoon vanilla extract
- 1 1/2 cups cream cheese frosting
Instructions:
- Preheat and Prepare Pans: Preheat your oven to 350°F (175°C). Grease and flour two 8-inch round cake pans to prevent the cake from sticking.
- Mix Dry Ingredients: In a medium bowl, whisk together the flour, baking soda, baking powder, ginger, cinnamon, nutmeg, cloves, and salt. Set aside.
- Cream Butter and Sugar: In a large bowl, use an electric mixer to beat the butter and brown sugar together until light and fluffy, about 3 minutes.
- Add Wet Ingredients: Add the molasses and eggs to the butter mixture one at a time, beating well after each addition. Mix in the vanilla extract.
- Combine Ingredients: Gradually add the dry ingredients to the wet mixture, alternating with the buttermilk, beginning and ending with the dry ingredients. Mix until just combined.
- Bake the Cakes: Divide the batter evenly between the prepared cake pans. Bake for 25-30 minutes, or until a toothpick inserted into the center of the cakes comes out clean.
- Cool the Cakes: Allow the cakes to cool in the pans for about 10 minutes, then turn them out onto a wire rack to cool completely.
- Frost the Cake: Once the cakes are completely cool, spread a layer of cream cheese frosting on top of one cake layer. Place the second cake layer on top and frost the top and sides of the cake.
- Serve and Enjoy: Slice and serve this delightful Spiced Gingerbread Layer Cake to your guests.
Extra Tips:
To enhance the flavor, consider adding a tablespoon of freshly grated ginger to the batter for an extra kick of spice. If you want to make your cake even more festive, decorate the top with gingerbread cookies or sugared cranberries.
When frosting the cake, make certain that it’s completely cool to prevent the frosting from melting. Store any leftovers in an airtight container in the refrigerator for up to three days, allowing the flavors to develop further.
Cranberry Orange Bundt Cake
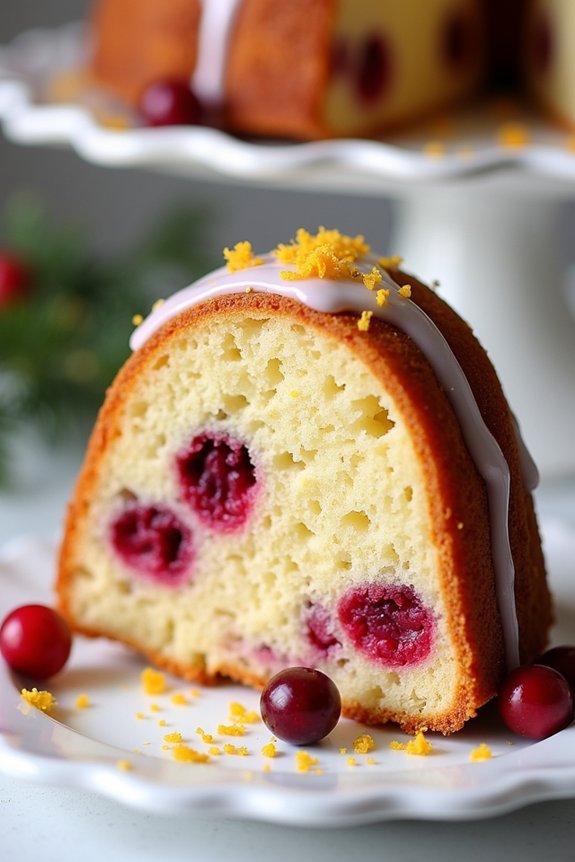
Cranberry Orange Bundt Cake is a delightful dessert that combines the tartness of cranberries with the zesty brightness of orange. This festive cake is perfect for the holiday season, offering a beautiful centerpiece for your Christmas gathering.
The moist, tender crumb is complemented by a sweet orange glaze, making each slice a burst of holiday flavor. Whether you’re a seasoned baker or a beginner, this recipe is straightforward and rewarding, guaranteeing that your efforts result in an impressive dessert.
This cake serves 4-6 people, making it ideal for a small family celebration or an intimate holiday gathering. The vibrant colors of the cranberries and orange zest make it visually appealing, while the flavors are sure to please everyone’s palate.
The following recipe provides step-by-step instructions to help you achieve a perfect Cranberry Orange Bundt Cake that will have your guests coming back for seconds.
Ingredients:
- 1 1/2 cups all-purpose flour
- 1/2 teaspoon baking powder
- 1/4 teaspoon baking soda
- 1/4 teaspoon salt
- 1/2 cup unsalted butter, softened
- 1 cup granulated sugar
- 2 large eggs
- 1 teaspoon vanilla extract
- Zest of 1 large orange
- 1/4 cup fresh orange juice
- 1/2 cup buttermilk
- 1 cup fresh or frozen cranberries
- For the glaze:
- 1 cup powdered sugar
- 2 tablespoons fresh orange juice
Instructions:
- Preheat and Prepare the Pan: Preheat your oven to 350°F (175°C). Grease a 6-cup bundt pan well with butter or non-stick spray, making sure all crevices are coated to prevent sticking.
- Mix Dry Ingredients: In a medium bowl, whisk together the flour, baking powder, baking soda, and salt. Set this mixture aside for later use.
- Cream Butter and Sugar: In a large bowl, using an electric mixer, cream the softened butter and granulated sugar together on medium speed until light and fluffy, about 3 minutes.
- Add Wet Ingredients: Beat in the eggs one at a time, making sure each is incorporated before adding the next. Add the vanilla extract, orange zest, and orange juice, and mix until combined.
- Combine Wet and Dry Mixtures: Gradually add the dry ingredients to the wet mixture, alternating with the buttermilk, beginning and ending with the dry ingredients. Mix until just combined, being careful not to overmix.
- Fold in Cranberries: Gently fold in the cranberries using a spatula, distributing them evenly throughout the batter.
- Bake the Cake: Pour the batter into the prepared bundt pan, smoothing the top with a spatula. Bake for 40-45 minutes, or until a toothpick inserted into the center comes out clean.
- Cool the Cake: Allow the cake to cool in the pan for about 10 minutes before inverting it onto a wire rack to cool completely.
- Prepare the Glaze: In a small bowl, whisk together the powdered sugar and orange juice to create a smooth glaze.
- Glaze the Cake: Once the cake is completely cooled, drizzle the orange glaze over the top, letting it drip down the sides for a beautiful finish.
Extra Tips:
For best results, make sure all your ingredients, particularly the butter, eggs, and buttermilk, are at room temperature before starting. This will help in achieving a smooth and even batter.
If using frozen cranberries, don’t thaw them before adding to the batter to prevent them from bleeding into the cake. Additionally, feel free to adjust the sweetness of the glaze by adding more or less powdered sugar to suit your taste.
Enjoy your Cranberry Orange Bundt Cake with a warm beverage for the ultimate holiday treat!
Rich Red Velvet Christmas Cake
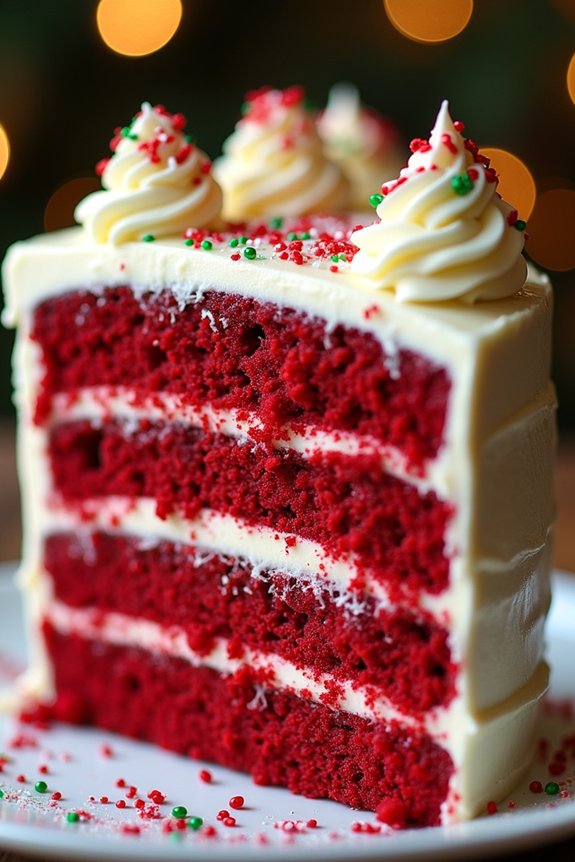
Bring a touch of elegance to your Christmas celebrations with this Rich Red Velvet Christmas Cake. Known for its vibrant red hue and smooth texture, this cake is a delightful blend of sweet vanilla and slightly tangy cocoa flavors that are certain to impress your guests. Topped with a creamy cream cheese frosting, it’s a festive dessert that’s both beautiful and delectable.
This recipe is perfect for serving 4-6 people, making it an ideal choice for small gatherings or family dinners. The cake’s moist crumb and velvety texture are achieved by using buttermilk and a hint of white vinegar, which react with the cocoa powder to create the signature red color. Follow these steps to create a stunning centerpiece dessert that will leave your guests craving for more.
Ingredients:
- 1 1/4 cups all-purpose flour
- 1 cup granulated sugar
- 1 tablespoon unsweetened cocoa powder
- 1/2 teaspoon baking soda
- 1/2 teaspoon salt
- 1 large egg
- 1/2 cup vegetable oil
- 1/2 cup buttermilk
- 1 tablespoon red food coloring
- 1/2 teaspoon vanilla extract
- 1/2 teaspoon white vinegar
For Cream Cheese Frosting:
- 1/2 cup unsalted butter, softened
- 8 oz cream cheese, softened
- 2 cups powdered sugar
- 1 teaspoon vanilla extract
Instructions:
- Preheat and Prepare Pans: Preheat your oven to 350°F (175°C). Grease and flour two 8-inch round cake pans to prevent the cake from sticking.
- Mix Dry Ingredients: In a medium bowl, whisk together the flour, sugar, cocoa powder, baking soda, and salt. Confirm the cocoa powder is fully combined to avoid any lumps.
- Combine Wet Ingredients: In a large bowl, beat the egg, then add the vegetable oil, buttermilk, red food coloring, vanilla extract, and vinegar. Mix until well combined.
- Create the Batter: Gradually add the dry ingredients to the wet ingredients, mixing gently until just combined. Be careful not to overmix, as this can make the cake dense.
- Bake the Cake: Divide the batter evenly between the prepared cake pans. Bake for 25-30 minutes, or until a toothpick inserted into the center comes out clean.
- Cool and Prepare Frosting: Allow the cakes to cool in the pans for 10 minutes before transferring them to a wire rack to cool completely. Meanwhile, prepare the frosting by beating the softened butter and cream cheese together until smooth. Gradually add the powdered sugar and vanilla extract, mixing until creamy and well blended.
- Assemble the Cake: Place one cake layer on a serving platter and spread a generous amount of cream cheese frosting on top. Place the second layer on top and cover the entire cake with the remaining frosting, smoothing it out with a spatula.
- Decorate: If desired, decorate the cake with festive sprinkles or edible glitter for a holiday touch.
Extra Tips:
When mixing the batter, make sure all ingredients are at room temperature. This helps them combine more easily and results in a smoother batter. If your frosting is too soft to spread, chill it in the refrigerator for 15-20 minutes to firm it up.
For an extra festive touch, consider adding crushed peppermint candies or a sprinkle of cinnamon to your frosting. Store any leftover cake in an airtight container in the refrigerator for up to three days.
Eggnog Cheesecake With Gingerbread Crust

Eggnog Cheesecake With Gingerbread Crust is a delightful holiday dessert that combines the creamy richness of eggnog with the spicy warmth of gingerbread. This cheesecake is perfect for festive gatherings, offering a unique twist on traditional holiday flavors.
The gingerbread crust provides a firm and flavorful base, while the eggnog-infused cheesecake layer brings a smooth and luscious texture that’s sure to impress your family and friends. This recipe is ideal for serving 4-6 people and is great for those looking to add a special touch to their Christmas dessert spread.
The preparation is straightforward, and the result is a show-stopping cheesecake that embodies the spirit of the season. Whether you’re a seasoned baker or a beginner, this Eggnog Cheesecake With Gingerbread Crust will be a delightful addition to your holiday menu.
Ingredients:
- 1 1/2 cups gingerbread cookie crumbs
- 1/4 cup unsalted butter, melted
- 2 (8-ounce) packages cream cheese, softened
- 3/4 cup granulated sugar
- 2 tablespoons all-purpose flour
- 1/4 teaspoon salt
- 1/2 teaspoon ground nutmeg
- 1/2 teaspoon ground cinnamon
- 1 cup eggnog
- 2 large eggs
- 1 teaspoon vanilla extract
- Whipped cream, for serving (optional)
Instructions:
- Prepare the Crust:
- Preheat your oven to 325°F (165°C).
- In a medium bowl, combine the gingerbread cookie crumbs and melted butter. Mix until the crumbs are evenly coated.
- Press the mixture firmly into the bottom of a 9-inch springform pan to form the crust. Set aside.
- Make the Cheesecake Filling:
- In a large mixing bowl, beat the cream cheese until smooth and creamy. Add the granulated sugar, flour, salt, nutmeg, and cinnamon, and continue to mix until well combined.
- Gradually add the eggnog, mixing on low speed until the mixture is smooth and no lumps remain.
- Beat in the eggs, one at a time, guaranteeing each is fully incorporated before adding the next.
- Stir in the vanilla extract.
- Assemble and Bake:
- Pour the cheesecake filling over the prepared gingerbread crust in the springform pan.
- Place the pan on a baking sheet and bake in the preheated oven for 45-50 minutes, or until the center is set and slightly wobbly.
- Turn off the oven, crack the door, and let the cheesecake cool in the oven for 1 hour.
- Chill and Serve:
- Remove the cheesecake from the oven and let it cool to room temperature. Then, refrigerate for at least 4 hours or overnight to allow it to set completely.
- Before serving, remove the cheesecake from the springform pan. Slice and serve with a dollop of whipped cream if desired.
Extra Tips:
For the best results, verify all your ingredients are at room temperature before starting. This helps achieve a smoother cheesecake batter.
Additionally, to prevent cracks, avoid overmixing the batter and be gentle when incorporating the eggs. If you prefer a stronger gingerbread flavor, consider adding a pinch of ground ginger to the crust mixture.
Finally, if you find the top of your cheesecake browning too quickly in the oven, you can tent it with aluminum foil during the last few minutes of baking. Enjoy this festive, flavorful dessert that brings together two holiday favorites in one delicious dish!
White Chocolate Raspberry Swirl Cake

White Chocolate Raspberry Swirl Cake is a delightful dessert that combines the smooth, creamy taste of white chocolate with the tartness of raspberries. This cake is perfect for the holiday season, offering a balance of flavors that will impress both family and friends.
The beautiful swirl pattern not only enhances its visual appeal but also guarantees that every bite is packed with flavor. This cake is ideal for a festive gathering and serves 4-6 people, making it a great choice for a small holiday party or an intimate Christmas dinner.
The preparation involves creating a rich white chocolate cake batter and swirling it with a vibrant raspberry sauce. Finished with a drizzle of melted white chocolate or a dusting of powdered sugar, this cake is as beautiful as it’s delicious.
Ingredients:
- 1 1/2 cups all-purpose flour
- 1 cup granulated sugar
- 1/2 cup unsalted butter, softened
- 3 large eggs
- 1/2 cup whole milk
- 1 teaspoon vanilla extract
- 1 teaspoon baking powder
- 1/4 teaspoon salt
- 4 ounces white chocolate, melted and slightly cooled
- 1 cup fresh or frozen raspberries
- 2 tablespoons sugar (for the raspberries)
- 1 tablespoon cornstarch
- 1 tablespoon water
Instructions:
1. Prepare the Raspberry Swirl: In a small saucepan over medium heat, combine the raspberries, 2 tablespoons of sugar, and 1 tablespoon of water. Stir occasionally until the raspberries break down and the mixture starts to thicken.
Mix in the cornstarch and continue to cook for another 2 minutes. Remove from heat and allow it to cool.
2. Preheat the Oven: Preheat your oven to 350°F (175°C). Grease and flour a 9-inch round cake pan or line it with parchment paper to prevent sticking.
3. Make the Cake Batter: In a large mixing bowl, cream together the softened butter and granulated sugar until light and fluffy. Add the eggs one at a time, mixing well after each addition. Stir in the vanilla extract.
4. Incorporate Dry Ingredients****: In a separate bowl, whisk together the flour, baking powder, and salt. Gradually add this mixture to the wet ingredients, alternating with the milk. Mix until just combined.
5. Add White Chocolate: Gently fold in the melted white chocolate until the batter is smooth and well incorporated.
6. Assemble the Cake: Pour half of the cake batter into the prepared pan. Spoon half of the raspberry mixture over the batter and use a knife to swirl it gently.
Add the remaining cake batter on top, followed by the rest of the raspberry mixture, and swirl again to create a marbled effect.
7. Bake the Cake: Bake in the preheated oven for 30-35 minutes or until a toothpick inserted into the center comes out clean. Allow the cake to cool in the pan for 10 minutes before transferring it to a wire rack to cool completely.
8. Decorate and Serve: Once cooled, drizzle melted white chocolate over the top or dust with powdered sugar before serving.
Extra Tips:
For best results, make sure all your ingredients are at room temperature before beginning the baking process, as this helps in achieving a smoother batter.
When swirling the raspberry sauce, avoid over-mixing to maintain the distinct swirl pattern. If the raspberries are particularly tart, you can adjust the sugar in the raspberry swirl to your taste.
Finally, for an added touch of elegance, garnish the cake with fresh raspberries and white chocolate shavings before serving.
Sticky Toffee Pudding Cake
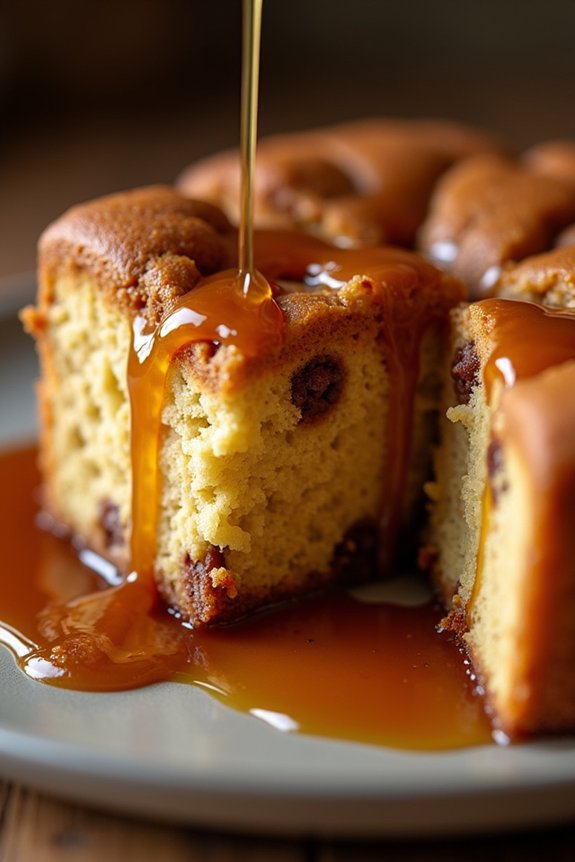
Sticky Toffee Pudding Cake is a classic British dessert that’s rich, moist, and utterly decadent. This cake is a perfect blend of sweet dates, aromatic spices, and a luscious toffee sauce that will make your holiday gatherings even more special. Ideal for the Christmas season, this cake isn’t only delicious but also comforting, making it a warm and inviting addition to your festive table.
The Sticky Toffee Pudding Cake is a delightful treat that combines the texture of a soft, spongy cake with the indulgent flavors of caramel and toffee. It’s a dessert that can easily impress your guests with its rich taste and beautiful presentation. Whether you’re hosting a holiday party or simply enjoying a cozy family dinner, this cake will certainly be a crowd-pleaser.
Ingredients for 4-6 servings:
- 1 cup pitted dates, chopped
- 1 cup boiling water
- 1 teaspoon baking soda
- 2 1/2 tablespoons unsalted butter, softened
- 3/4 cup granulated sugar
- 2 large eggs
- 1 teaspoon vanilla extract
- 1 1/4 cups all-purpose flour
- 1 teaspoon baking powder
- A pinch of salt
For the Toffee Sauce:
- 1/2 cup unsalted butter
- 1 cup packed brown sugar
- 3/4 cup heavy cream
- 1 teaspoon vanilla extract
Cooking Instructions:
1. Preheat and Prepare Dates:
Preheat your oven to 350°F (175°C). Grease an 8-inch square baking dish or a similar-sized cake pan. In a medium bowl, combine the chopped dates and boiling water. Stir in the baking soda and let the mixture sit for about 10 minutes until the dates soften.
2. Cream Butter and Sugar:
In a large mixing bowl, cream together the softened butter and granulated sugar until light and fluffy. This process should take about 3-4 minutes using an electric mixer on medium speed.
3. Add Eggs and Vanilla:
Add the eggs one at a time, beating well after each addition. Stir in the vanilla extract until combined.
4. Combine Dry Ingredients:
In a separate bowl, sift together the all-purpose flour, baking powder, and a pinch of salt. Gradually add the dry ingredients to the wet mixture, mixing until just combined.
5. Incorporate Dates:
Gently fold in the date mixture, including any remaining liquid, until the batter is smooth and well combined.
6. Bake the Cake:
Pour the batter into the prepared baking dish. Bake for 30-35 minutes, or until a toothpick inserted into the center of the cake comes out clean.
7. Prepare the Toffee Sauce:
While the cake is baking, make the toffee sauce. In a small saucepan over medium heat, melt the butter. Stir in the brown sugar and heavy cream. Bring to a simmer and cook for about 5 minutes, stirring frequently, until the sauce thickens slightly. Remove from heat and stir in the vanilla extract.
8. Serve:
Once the cake is done, remove it from the oven and let it cool for a few minutes. Cut the cake into squares and serve warm, drizzled generously with the toffee sauce.
Extra Tips:
For an extra touch of flavor, consider adding a pinch of cinnamon or nutmeg to the cake batter. If you prefer a smoother toffee sauce, you can strain it before serving to remove any sugar crystals. Sticky Toffee Pudding Cake is best enjoyed warm, but it can be reheated in the microwave for a quick treat. If you have leftovers, store the cake and sauce separately in airtight containers in the refrigerator for up to three days.
Almond Amaretto Christmas Cake
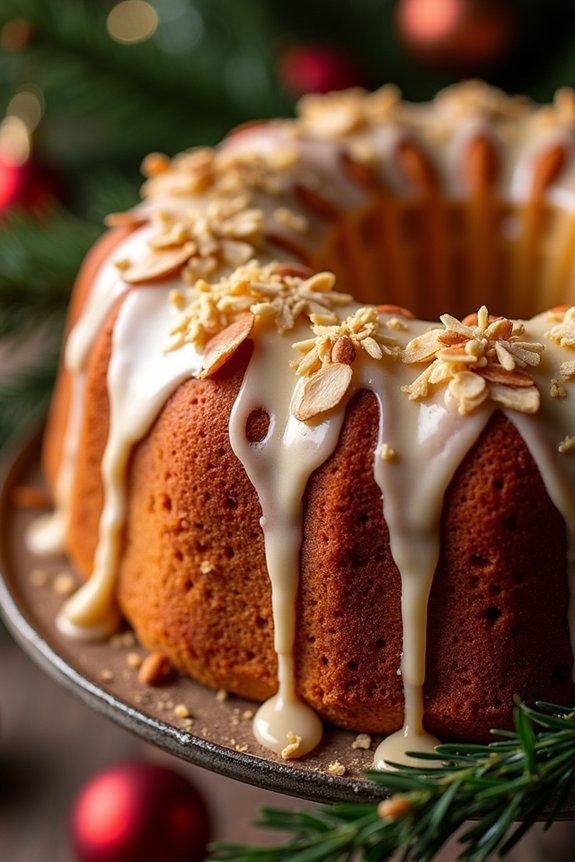
Almond Amaretto Christmas Cake is a delightful indulgence that combines the rich, nutty flavor of almonds with the sweet, smooth taste of Amaretto liqueur. This cake is perfect for the festive season, offering a sophisticated twist on the traditional Christmas cake. The combination of ground almonds and almond extract guarantees a moist and flavorful sponge, while the Amaretto adds a subtle warmth and depth, making it a truly special treat for any holiday gathering.
This cake isn’t only delicious but also visually appealing, with its golden-brown crust and optional glaze or decoration. Whether served as a dessert at your holiday dinner or as a sweet treat with a cup of coffee, the Almond Amaretto Christmas Cake is sure to impress your family and friends. With a few simple steps, you can create a cake that captures the essence of the season, bringing joy and celebration to your table.
Ingredients (serves 4-6):
- 1 cup unsalted butter, softened
- 1 cup granulated sugar
- 4 large eggs
- 1 teaspoon almond extract
- 1/4 cup Amaretto liqueur
- 1 1/2 cups all-purpose flour
- 1/2 cup ground almonds
- 1 1/2 teaspoons baking powder
- 1/4 teaspoon salt
- 1/2 cup milk
- Sliced almonds, for topping (optional)
Cooking Instructions:
- Preheat the Oven: Begin by preheating your oven to 350°F (175°C). Grease and line a 9-inch round cake pan with parchment paper to guarantee the cake doesn’t stick.
- Cream the Butter and Sugar: In a large mixing bowl, cream together the softened butter and granulated sugar using an electric mixer until the mixture is light and fluffy. This should take about 3-5 minutes.
- Add Wet Ingredients: Beat in the eggs one at a time, guaranteeing each egg is fully incorporated before adding the next. Stir in the almond extract and Amaretto liqueur, mixing well to combine.
- Combine Dry Ingredients: In a separate bowl, whisk together the all-purpose flour, ground almonds, baking powder, and salt.
- Mix the Batter: Gradually add the dry ingredients to the wet mixture, alternating with the milk. Begin and end with the dry ingredients, mixing until just combined. Be careful not to overmix to maintain a light texture.
- Pour and Bake: Pour the batter into the prepared cake pan, smoothing the top with a spatula. Sprinkle sliced almonds evenly over the top if desired. Bake in the preheated oven for 35-40 minutes or until a toothpick inserted into the center of the cake comes out clean.
- Cool and Serve: Allow the cake to cool in the pan for about 10 minutes before transferring it to a wire rack to cool completely. Once cooled, serve the cake as is or with a dusting of powdered sugar or a light glaze.
Extra Tips:
To enhance the flavor, you can soak the cake in a bit more Amaretto after baking. Just poke a few holes in the cake with a skewer and drizzle a small amount of the liqueur over the top, allowing it to soak in. This will add extra moisture and a deeper Amaretto flavor.
If you prefer a non-alcoholic version, you can substitute the Amaretto with almond-flavored syrup. Additionally, storing the cake in an airtight container for a day before serving can help the flavors to meld beautifully.
Festive Pecan Praline Cake
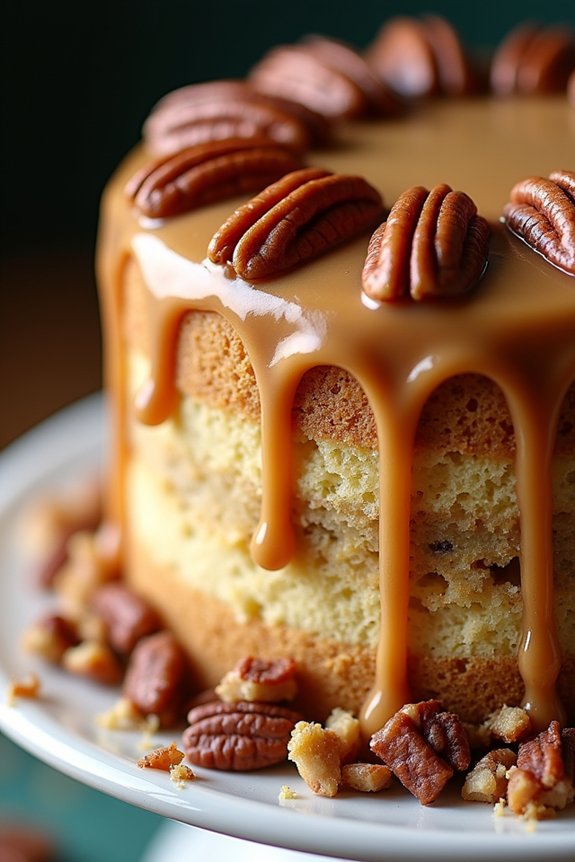
Indulge in the rich, nutty flavors of a Festive Pecan Praline Cake this holiday season. This cake is a delightful combination of moist, buttery cake layers and a sweet, crunchy pecan praline topping. Perfect for a Christmas celebration, this dessert not only offers a delicious taste but also fills your home with a warm, inviting aroma that embodies the spirit of the festive season.
With its elegant presentation and irresistible taste, this cake is sure to become a family favorite, earning its place at the center of your holiday table. This recipe is designed to serve 4-6 people, making it an ideal choice for intimate holiday gatherings or as a special treat for your immediate family.
The cake itself is relatively straightforward to prepare, with a few key steps to guarantee a perfect result. The combination of simple ingredients and a touch of holiday magic makes the Festive Pecan Praline Cake a must-try for anyone looking to add a special touch to their Christmas dessert menu.
Ingredients:
- 1 cup all-purpose flour
- 1 cup granulated sugar
- 1/2 cup unsalted butter, softened
- 2 large eggs
- 1/2 cup whole milk
- 1 teaspoon vanilla extract
- 1 1/2 teaspoons baking powder
- 1/4 teaspoon salt
- 1 cup chopped pecans
- 1/2 cup brown sugar
- 1/3 cup heavy cream
- 2 tablespoons unsalted butter
- 1/2 teaspoon vanilla extract (for praline)
Cooking Instructions:
- Preheat the Oven: Start by preheating your oven to 350°F (175°C). Grease and flour an 8-inch round cake pan to prevent the cake from sticking.
- Prepare the Cake Batter: In a large mixing bowl, cream together the softened butter and granulated sugar until light and fluffy. Add the eggs one at a time, beating well after each addition. Stir in the vanilla extract.
- Combine Dry Ingredients: In a separate bowl, whisk together the flour, baking powder, and salt. Gradually add these dry ingredients to the wet mixture, alternating with the milk, beginning and ending with the flour mixture. Mix until just combined.
- Bake the Cake: Pour the batter into the prepared cake pan, smoothing the top with a spatula. Bake in the preheated oven for 25-30 minutes, or until a toothpick inserted into the center comes out clean. Allow the cake to cool in the pan for about 10 minutes, then transfer to a wire rack to cool completely.
- Make the Pecan Praline Topping: While the cake cools, prepare the praline topping. In a medium saucepan over medium heat, combine the brown sugar, heavy cream, and butter. Stir continuously until the mixture begins to bubble. Let it simmer for about 2 minutes, then remove from heat and stir in the pecans and vanilla extract.
- Assemble the Cake: Once the cake has cooled completely, place it on a serving platter. Pour the warm pecan praline mixture evenly over the top of the cake, allowing it to drizzle down the sides. Let it cool for a few minutes to set before serving.
Extra Tips:
When making the praline topping, be sure to monitor the heat closely to prevent the sugar from burning. Use a heavy-bottomed saucepan to distribute the heat evenly.
For added flavor, try toasting the pecans beforehand. Simply spread them on a baking sheet and toast in the oven at 350°F (175°C) for about 7-10 minutes, or until they’re fragrant. This will enhance the nutty flavor of the praline topping, making your Festive Pecan Praline Cake even more irresistible.
Vegan Chocolate Yule Log
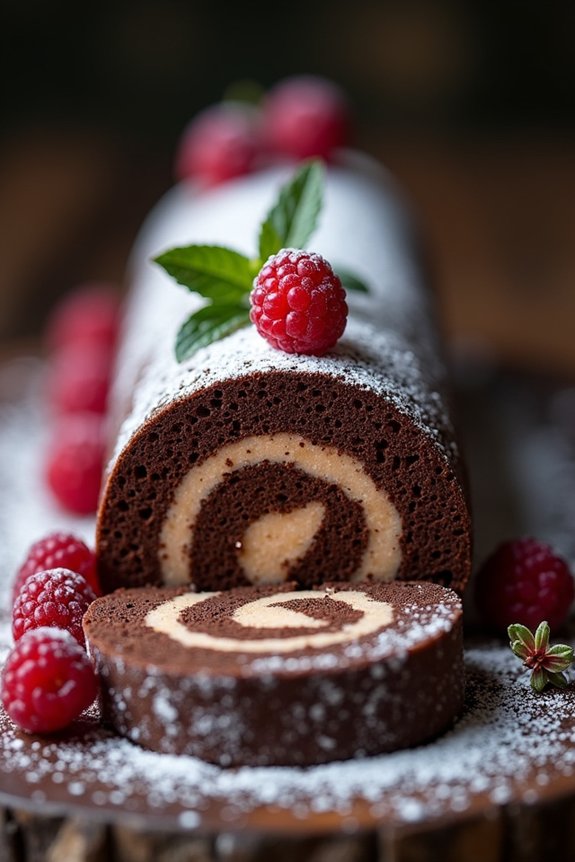
The Vegan Chocolate Yule Log is a delightful twist on the traditional holiday dessert that brings the warmth of Christmas into your kitchen with a plant-based approach. This decadent dessert, with its rich chocolate sponge and creamy filling, is perfect for those looking to enjoy the festive season without compromising their dietary preferences.
Crafted with simple yet wholesome ingredients, this Yule Log isn’t only delicious but also cruelty-free, making it a perfect centerpiece for your Christmas table.
This recipe is designed to serve 4-6 people, making it an ideal option for a cozy family gathering or a small festive party. The Vegan Chocolate Yule Log combines a moist chocolate sponge cake with a luscious vegan chocolate cream filling, all wrapped up and decorated to mimic a traditional log.
Follow the steps below to create this indulgent treat that’s sure to impress vegans and non-vegans alike.
Ingredients:
- 1 cup all-purpose flour
- 1/3 cup cocoa powder
- 1 teaspoon baking powder
- 1/2 teaspoon baking soda
- 1/4 teaspoon salt
- 1/2 cup almond milk
- 1/2 cup granulated sugar
- 1/4 cup vegetable oil
- 1 teaspoon vanilla extract
- 1 tablespoon apple cider vinegar
For the Filling and Decoration:
- 1 cup vegan whipping cream
- 1/4 cup powdered sugar
- 1 teaspoon vanilla extract
- 1/3 cup vegan dark chocolate, melted
- Powdered sugar for dusting
- Fresh berries or mint leaves for decoration (optional)
Instructions:
- Preheat and Prepare: Preheat your oven to 350°F (175°C). Line a 10×15 inch (25×38 cm) jelly roll pan with parchment paper ensuring the sides are covered.
- Mix Dry Ingredients: In a large mixing bowl, sift together the all-purpose flour, cocoa powder, baking powder, baking soda, and salt. Mix well to guarantee even distribution.
- Add Wet Ingredients: In a separate bowl, combine the almond milk, sugar, vegetable oil, vanilla extract, and apple cider vinegar. Whisk until the sugar is dissolved and the mixture is smooth.
- Combine Mixtures: Gradually add the wet ingredients to the dry ingredients, stirring gently until just combined. Be careful not to overmix to keep the batter light.
- Bake the Sponge: Pour the batter evenly into the prepared pan and smooth the top with a spatula. Bake in the preheated oven for 12-15 minutes, or until the sponge springs back when lightly pressed.
- Roll the Cake: While the cake is still warm, place the cake on a clean kitchen towel dusted with cocoa powder. Gently roll the cake with the towel from one short end to the other. Let it cool completely in this rolled shape.
- Prepare the Filling: In a mixing bowl, whip the vegan whipping cream with powdered sugar and vanilla extract until stiff peaks form. Gently fold in the melted vegan dark chocolate until well combined.
- Assemble the Log: Unroll the cooled cake carefully. Spread the chocolate cream filling evenly over the surface. Roll the cake back up without the towel, ensuring the seam is at the bottom.
- Decorate: Dust the log with powdered sugar. Optionally, decorate with fresh berries or mint leaves for added festive flair.
Extra Tips:
When making your Vegan Chocolate Yule Log, make sure to handle the sponge cake gently, especially during the rolling process, to prevent it from cracking.
If cracks do appear, they can be disguised with additional dusting of powdered sugar or decorations. To enhance the chocolate flavor, consider adding a teaspoon of espresso powder to the dry ingredients.
For the best texture, chill the log in the refrigerator for at least an hour before serving, allowing the flavors to meld together beautifully.
Lemon and Blueberry Christmas Cake
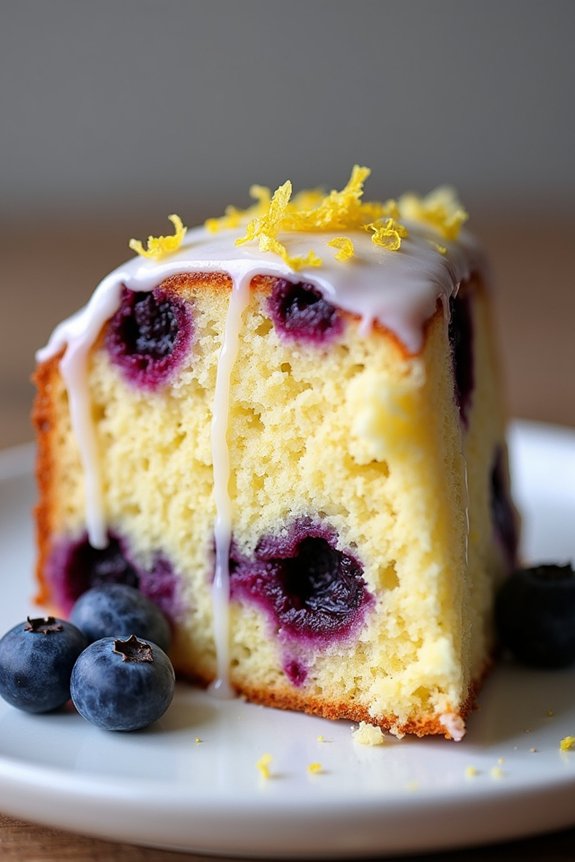
Lemon and Blueberry Christmas Cake is a delightful twist on the traditional holiday dessert. Bursting with the zesty flavor of lemon and the sweet juiciness of blueberries, this cake offers a rejuvenating change to your festive table. It’s perfect for those who appreciate a balance of sweet and tart, and it pairs beautifully with a hot cup of tea or coffee.
Whether you’re hosting a holiday party or looking for a unique dessert to share with family, this cake is sure to impress your guests with its vibrant flavors.
The preparation of Lemon and Blueberry Christmas Cake involves a moist, buttery sponge cake infused with fresh lemon juice and zest, coupled with plump blueberries that add a burst of color and flavor. The cake is then topped with a luscious lemon glaze that enhances its citrusy profile.
This recipe serves 4-6 people, making it an ideal choice for a small gathering or as a special treat for your immediate family during the festive season.
Ingredients:
- 1 1/2 cups all-purpose flour
- 1 teaspoon baking powder
- 1/2 teaspoon baking soda
- 1/4 teaspoon salt
- 1/2 cup unsalted butter, softened
- 3/4 cup granulated sugar
- 2 large eggs
- 1 teaspoon vanilla extract
- 1/2 cup sour cream
- Zest of 2 lemons
- 2 tablespoons fresh lemon juice
- 1 cup fresh or frozen blueberries
For the Lemon Glaze:
- 1 cup powdered sugar
- 2 tablespoons fresh lemon juice
- 1 teaspoon lemon zest
Cooking Instructions:
- Preheat and Prepare: Preheat your oven to 350°F (175°C). Grease a 9-inch round cake pan and line the bottom with parchment paper for easy removal.
- Mix Dry Ingredients: In a medium-sized bowl, whisk together the flour, baking powder, baking soda, and salt. Set aside.
- Cream Butter and Sugar: In a large bowl, beat the softened butter and granulated sugar together using an electric mixer on medium speed until light and fluffy, about 3 minutes.
- Add Eggs and Flavorings: Add the eggs one at a time, beating well after each addition. Mix in the vanilla extract, lemon zest, and lemon juice until combined.
- Combine Wet and Dry Ingredients: Gradually add the dry ingredients to the wet ingredients, alternating with the sour cream. Begin and end with the dry ingredients, mixing just until combined.
- Fold in Blueberries: Gently fold in the blueberries using a spatula, making sure they’re evenly distributed throughout the batter.
- Bake the Cake: Pour the batter into the prepared cake pan, smoothing the top with a spatula. Bake for 30-35 minutes, or until a toothpick inserted into the center of the cake comes out clean.
- Cool and Glaze: Allow the cake to cool in the pan for 10 minutes before transferring it to a wire rack to cool completely. Once cooled, whisk together the powdered sugar, lemon juice, and lemon zest to make the glaze. Drizzle the glaze evenly over the cake.
Extra Tips:
To make sure your blueberries are evenly distributed and don’t sink to the bottom of the cake, toss them in a tablespoon of flour before folding them into the batter. This will help them stay suspended throughout the cake.
If using frozen blueberries, don’t thaw them before adding to the batter to prevent them from bleeding color into the cake. For an added touch, garnish the cake with a few fresh lemon slices or extra blueberries before serving.
Caramel Apple Spice Cake
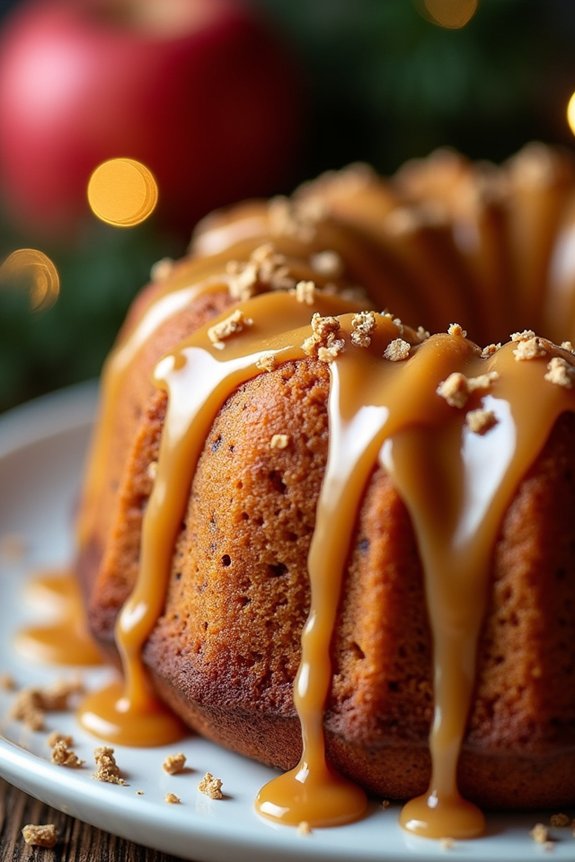
Caramel Apple Spice Cake is the perfect indulgence for the holiday season, combining the warm, comforting flavors of spiced apples and rich caramel. This cake is a delightful centerpiece for any Christmas gathering, offering layers of moist apple-infused cake and a luscious caramel glaze that gently seeps into every crevice, enhancing the flavor with every bite.
Whether you’re an experienced baker or a novice in the kitchen, this cake is sure to impress your family and friends with its aromatic spices and deliciously sweet finish. This recipe yields a cake that can comfortably serve 4-6 people, making it ideal for intimate holiday celebrations or a cozy family dinner.
The combination of tart apples and sweet caramel is perfectly balanced, while the spices add a festive touch. To achieve the best results, be sure to use fresh, crisp apples and high-quality caramel. Follow these instructions to create a holiday dessert that will leave everyone asking for seconds.
Ingredients:
- 2 cups all-purpose flour
- 1 teaspoon baking soda
- 1/2 teaspoon baking powder
- 1 teaspoon ground cinnamon
- 1/2 teaspoon ground nutmeg
- 1/2 teaspoon salt
- 1 cup unsalted butter, softened
- 1 cup granulated sugar
- 1/2 cup packed brown sugar
- 2 large eggs
- 1 teaspoon vanilla extract
- 1/2 cup buttermilk
- 2 cups peeled and chopped apples
- 1 cup caramel sauce (store-bought or homemade)
- 1/2 cup chopped pecans (optional)
Cooking Instructions:
- Preheat and Prepare Pans: Preheat your oven to 350°F (175°C). Grease and flour a 9-inch round cake pan to prevent sticking.
- Mix Dry Ingredients: In a medium bowl, whisk together the flour, baking soda, baking powder, cinnamon, nutmeg, and salt until well combined.
- Cream Butter and Sugars: In a large mixing bowl, beat the softened butter, granulated sugar, and brown sugar together using an electric mixer until the mixture is light and fluffy, about 3-4 minutes.
- Add Eggs and Vanilla: Add the eggs one at a time, beating well after each addition. Stir in the vanilla extract until fully incorporated.
- Combine Wet and Dry Ingredients: Gradually add the dry ingredients to the creamed mixture, alternating with the buttermilk. Begin and end with the dry ingredients, mixing just until combined.
- Fold in Apples: Gently fold in the chopped apples and pecans (if using) until evenly distributed throughout the batter.
- Bake the Cake: Pour the batter into the prepared cake pan and smooth the top with a spatula. Bake in the preheated oven for 35-40 minutes, or until a toothpick inserted into the center of the cake comes out clean.
- Cool and Glaze: Allow the cake to cool in the pan for about 10 minutes, then transfer it to a wire rack. While the cake is still warm, pour the caramel sauce over the top, letting it soak into the cake.
- Serve: Once the cake has cooled and the caramel has set slightly, slice and serve. Enjoy it on its own or with a scoop of vanilla ice cream for an extra treat.
Extra Tips:
For a deeper flavor, allow the caramel apple spice cake to sit for a few hours or overnight; this gives the spices and caramel time to meld and intensify.
If preferred, you can use a bundt pan for a more decorative presentation. When peeling and chopping apples, try using varieties like Granny Smith or Honeycrisp for the best texture and flavor.
For a homemade caramel sauce, simply melt sugar over low heat, stirring continuously, and add cream and butter once the sugar has melted and turned amber.