

The holiday season is almost here, and I can’t wait to share some delightful Christmas dessert platter ideas with you. These 13 sweet inspirations will turn any gathering into a festive celebration. Picture the aroma of a Classic Cookie Collection or the vibrant colors of a Festive Fruit Medley. From Decadent Chocolate Delights to a Vegan and Gluten-Free Selection, there’s truly something for everyone. Get ready to create a memorable dessert spread that’ll leave your guests in awe.
Classic Cookie Collection
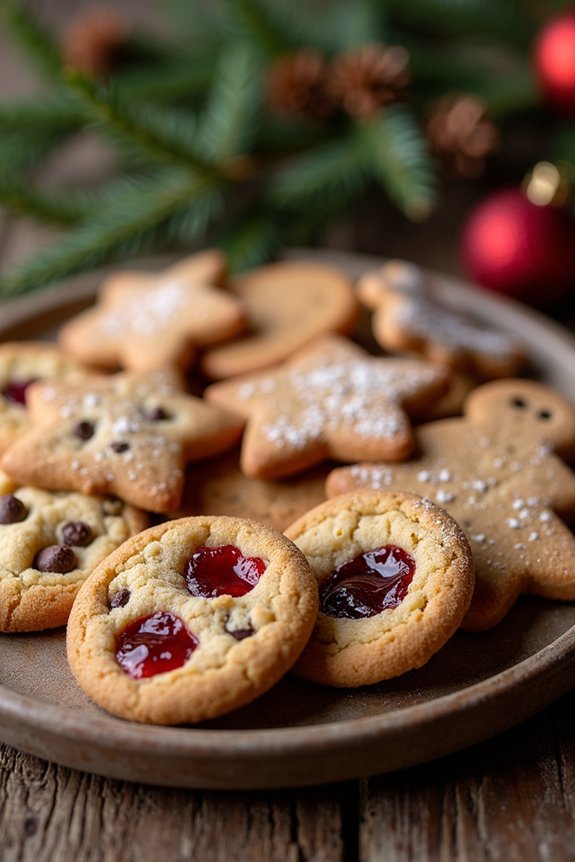
The Classic Cookie Collection is a delightful assortment of your favorite holiday cookies, perfect for any Christmas dessert platter. This collection includes a variety of classic cookies that are beloved by all ages, making it the perfect treat to share with family and friends during the festive season. The combination of flavors and textures from these cookies will add a festive touch to your holiday gatherings and leave everyone asking for more.
To create this Classic Cookie Collection, we’ll be making four types of cookies: Chocolate Chip, Snickerdoodles, Gingerbread, and Thumbprint Cookies. Each cookie type brings its unique flavor and charm, guaranteeing that there’s something for everyone on your Christmas dessert platter. This recipe yields enough cookies to serve 4-6 people, making it ideal for small gatherings or as a delightful homemade gift.
Ingredients for Chocolate Chip Cookies:
- 1 cup unsalted butter, softened
- 1 cup granulated sugar
- 1 cup packed brown sugar
- 2 large eggs
- 2 teaspoons vanilla extract
- 3 cups all-purpose flour
- 1 teaspoon baking soda
- 1/2 teaspoon baking powder
- 1/2 teaspoon salt
- 2 cups semi-sweet chocolate chips
Ingredients for Snickerdoodles:
- 1 cup unsalted butter, softened
- 1 1/2 cups granulated sugar
- 2 large eggs
- 2 3/4 cups all-purpose flour
- 2 teaspoons cream of tartar
- 1 teaspoon baking soda
- 1/4 teaspoon salt
- 2 tablespoons granulated sugar (for rolling)
- 2 teaspoons ground cinnamon (for rolling)
Ingredients for Gingerbread Cookies:
- 3/4 cup unsalted butter, softened
- 3/4 cup packed brown sugar
- 2/3 cup molasses
- 1 large egg
- 3 1/2 cups all-purpose flour
- 1 teaspoon baking soda
- 1 tablespoon ground ginger
- 1 tablespoon ground cinnamon
- 1/2 teaspoon ground cloves
- 1/2 teaspoon salt
Ingredients for Thumbprint Cookies:
- 1 cup unsalted butter, softened
- 2/3 cup granulated sugar
- 1 large egg yolk
- 1 teaspoon vanilla extract
- 2 cups all-purpose flour
- 1/4 teaspoon salt
- 1/2 cup fruit preserves (your choice of flavor)
Cooking Instructions:
- Prepare the Doughs:
- Chocolate Chip Cookies: In a large bowl, cream together the butter, granulated sugar, and brown sugar until light and fluffy. Beat in the eggs, one at a time, then stir in the vanilla. Combine the flour, baking soda, baking powder, and salt; gradually blend into the creamed mixture. Stir in the chocolate chips. Cover, and chill dough for at least 1 hour.
- Snickerdoodles: Cream together the butter and sugar until smooth. Beat in the eggs one at a time. Combine the flour, cream of tartar, baking soda, and salt; stir into the creamed mixture until well blended. Chill dough for 1 hour.
- Gingerbread Cookies: In a large bowl, cream together the butter and brown sugar until smooth. Stir in molasses and egg. Combine the flour, baking soda, ginger, cinnamon, cloves, and salt; stir into the molasses mixture. Wrap dough in plastic wrap and chill for at least 2 hours.
- Thumbprint Cookies: Cream together the butter and sugar until smooth. Mix in the egg yolk and vanilla. Blend in the flour and salt. Shape dough into a ball, wrap in plastic wrap, and chill for 30 minutes.
- Baking the Cookies:
- Chocolate Chip Cookies: Preheat oven to 350°F (175°C). Drop dough by rounded tablespoons onto ungreased baking sheets. Bake for 10-12 minutes or until edges are golden. Cool on wire racks.
- Snickerdoodles: Preheat oven to 400°F (200°C). Mix 2 tablespoons sugar and 2 teaspoons cinnamon in a small bowl. Shape dough into 1-inch balls, roll in cinnamon sugar, and place on ungreased baking sheets. Bake 8-10 minutes or until set. Cool on wire racks.
- Gingerbread Cookies: Preheat oven to 350°F (175°C). Roll dough to 1/4 inch thickness on a floured surface. Cut into desired shapes with cookie cutters. Place on ungreased baking sheets and bake 8-10 minutes. Cool on wire racks.
- Thumbprint Cookies: Preheat oven to 350°F (175°C). Shape dough into 1-inch balls and place on ungreased baking sheets. Make an indentation in the center of each ball with your thumb. Fill each with 1/2 teaspoon of preserves. Bake for 12-15 minutes or until edges are golden. Cool on wire racks.
Extra Tips:
For the best results, verify that all your ingredients, especially butter, are at room temperature before starting the recipe. This will help in achieving the right texture for the cookies.
Be cautious not to overbake any of the cookies; they should be set but not overly browned to maintain a soft and chewy texture. If you wish to prepare the doughs ahead of time, they can be made and stored in the refrigerator for up to 3 days, or frozen for up to a month. Just bring them back to room temperature before baking.
Enjoy customizing the Thumbprint Cookies with different fruit preserves for a variety of flavors.
Festive Fruit Medley
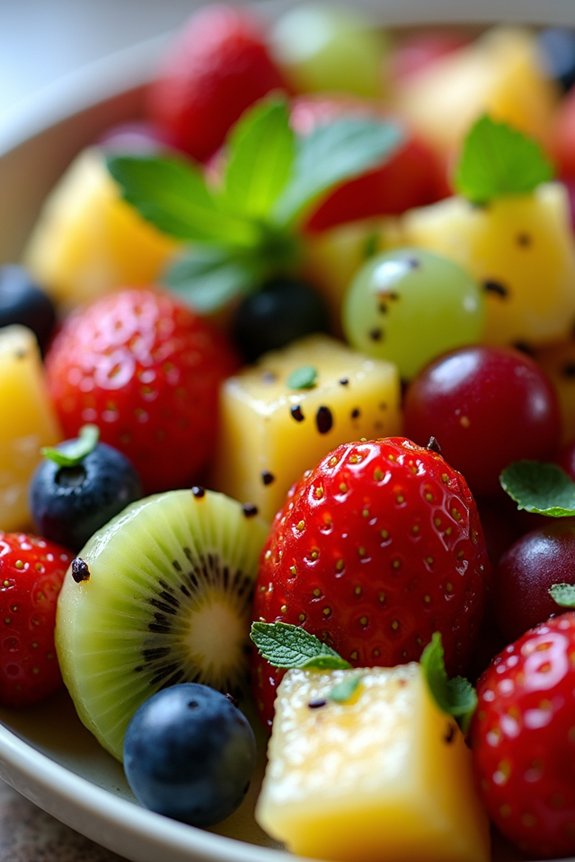
This Christmas, bring a burst of color and nutrition to your dessert table with a Festive Fruit Medley. This invigorating and vibrant dish combines a variety of seasonal fruits, making it both visually appealing and deliciously satisfying.
Perfect for those who want a lighter dessert option, the Festive Fruit Medley is easy to prepare and can be made in advance, freeing you up to enjoy the holiday festivities with your loved ones.
The medley is a delightful mix of fresh fruits, enhanced with a hint of citrus and a touch of mint for added vibrancy. The variety of textures and flavors will captivate your taste buds, making it a standout addition to your Christmas dessert platter.
Whether served on its own or alongside other treats, this dish is sure to be a hit with guests of all ages.
Ingredients (Serves 4-6):
- 1 cup fresh strawberries, hulled and halved
- 1 cup red grapes, halved
- 1 cup green grapes, halved
- 1 cup fresh pineapple, diced
- 1 cup fresh blueberries
- 2 kiwis, peeled and sliced
- 1 orange, juiced
- 2 tablespoons honey
- 1 tablespoon fresh mint leaves, chopped
Cooking Instructions:
- Prepare the Fruits: Start by washing all the fruits thoroughly. Hull and halve the strawberries, halve the grapes, dice the pineapple, slice the kiwis, and then set all the fruits aside in a large mixing bowl.
- Juice the Orange: Squeeze the juice from one orange into a small bowl. Verify there are no seeds in the juice, as these could disrupt the smooth texture of the medley.
- Create the Dressing: In the small bowl with the orange juice, add 2 tablespoons of honey and whisk them together until well combined. The honey will add a natural sweetness to the medley, enhancing the flavors of the fruit.
- Combine the Ingredients: Pour the orange and honey dressing over the prepared fruits in the large mixing bowl. Gently toss the fruits with a large spoon to evenly coat them with the dressing. Be careful not to crush any of the softer fruits, like the strawberries or blueberries.
- Add Freshness: Sprinkle the chopped mint leaves over the fruit medley and give it a final gentle toss. The mint will provide an invigorating lift to the overall flavor profile, making the dish even more delightful.
- Chill and Serve: Cover the bowl with plastic wrap and refrigerate the medley for at least 30 minutes before serving. This chilling period allows the flavors to meld together beautifully. Serve the Festive Fruit Medley in individual bowls or as part of a larger dessert platter.
Extra Tips:
When preparing the Festive Fruit Medley, feel free to substitute or add your favorite fruits based on availability and personal preference.
Fruits like mango, pomegranate seeds, or even a ripe banana can be excellent additions. If you prefer a sweeter medley, consider adding a bit more honey. For a more citrusy punch, add some zest from the orange to the dressing.
This dish is highly versatile, so tailor it to your taste and enjoy the invigorating quality it brings to your holiday celebrations!
Decadent Chocolate Delights
Indulge in the rich and sumptuous flavors of these Decadent Chocolate Delights, perfect for adorning your Christmas dessert platter. These chocolatey treats are sure to impress your guests with their luxurious taste and presentation.
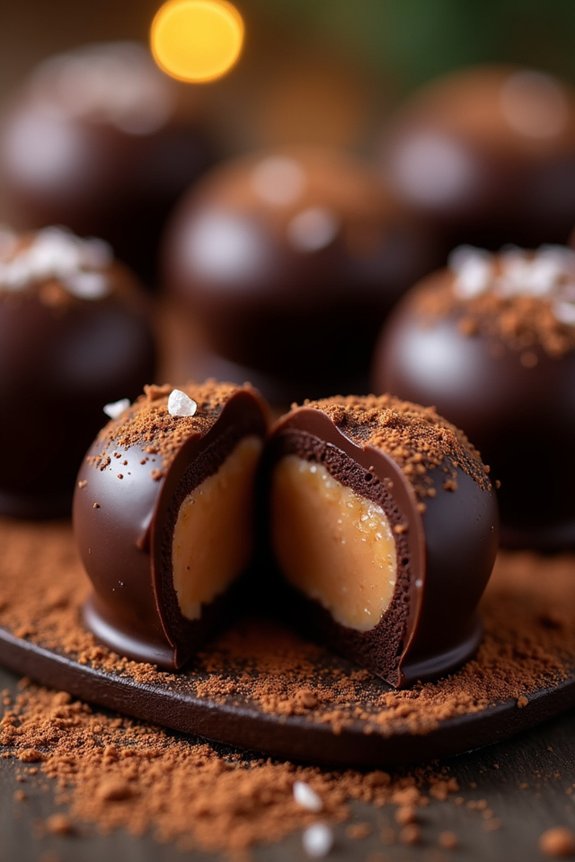
With a luscious chocolate ganache filling wrapped in a delicate chocolate shell, these delights are a must-have addition to your festive celebrations. Easy to make yet irresistibly delicious, they’re ideal for serving alongside other Christmas confections.
The recipe yields enough for 4-6 people, making it perfect for small gatherings or as part of a larger spread. The preparation involves creating a smooth chocolate ganache, which is then encased in a delightful chocolate mold. The result is a rich, creamy center surrounded by a crisp chocolate shell, offering a delightful contrast in textures.
Serve these treats with a sprinkle of sea salt or a dusting of cocoa powder for an added touch of elegance.
Ingredients:
- 12 oz (340 g) high-quality dark chocolate (70% cocoa)
- 1 cup (240 ml) heavy cream
- 2 tbsp (28 g) unsalted butter
- 1 tsp vanilla extract
- 1/4 cup (60 ml) corn syrup
- Pinch of sea salt
- Optional: Cocoa powder or sea salt flakes for garnish
Cooking Instructions:
- Prepare the Chocolate Molds: Start by selecting your preferred chocolate molds. Clean and dry them thoroughly to guarantee a smooth finish on your chocolate shells.
- Melt the Chocolate: Finely chop 8 oz (226 g) of the dark chocolate. Place it in a heatproof bowl and melt it over a double boiler, stirring continuously until smooth. Be careful not to overheat it.
- Create the Shells: Pour the melted chocolate into the molds, tilting them to evenly coat the sides. Tap the molds gently to remove any air bubbles. Invert the molds over a baking sheet to let excess chocolate drip out. Chill the molds in the refrigerator until the chocolate sets.
- Make the Ganache Filling: In a saucepan, heat the heavy cream until it begins to simmer. Remove from heat and add the remaining 4 oz (114 g) of chopped chocolate, butter, and corn syrup. Let it sit for 5 minutes, then stir until smooth. Add vanilla extract and a pinch of sea salt, and mix well.
- Fill the Shells: Once the chocolate shells have set, spoon the ganache into each shell, leaving a small space at the top. Tap the molds gently to level the ganache and remove air pockets.
- Seal the Delights: Re-melt any remaining chocolate and pour a thin layer over the filled molds to seal the ganache. Use a spatula to scrape off any excess chocolate. Chill in the refrigerator until completely set.
- Unmold and Serve: Carefully remove the chocolates from the molds. Arrange them on a serving platter. Optionally, dust with cocoa powder or sprinkle with sea salt flakes for garnish before serving.
Extra Tips:
When working with chocolate, maintain a steady, gentle heat to prevent it from seizing. If the chocolate becomes too thick while coating the molds, re-melt it gently.
Make sure your molds are completely dry before pouring in the chocolate to avoid any unwanted moisture. For a flavor twist, consider infusing the ganache with a few drops of peppermint or orange extract.
Store the finished delights in a cool, dry place until ready to serve, as refrigeration can cause the chocolate to bloom, affecting its appearance.
Nutty and Spiced Assortment
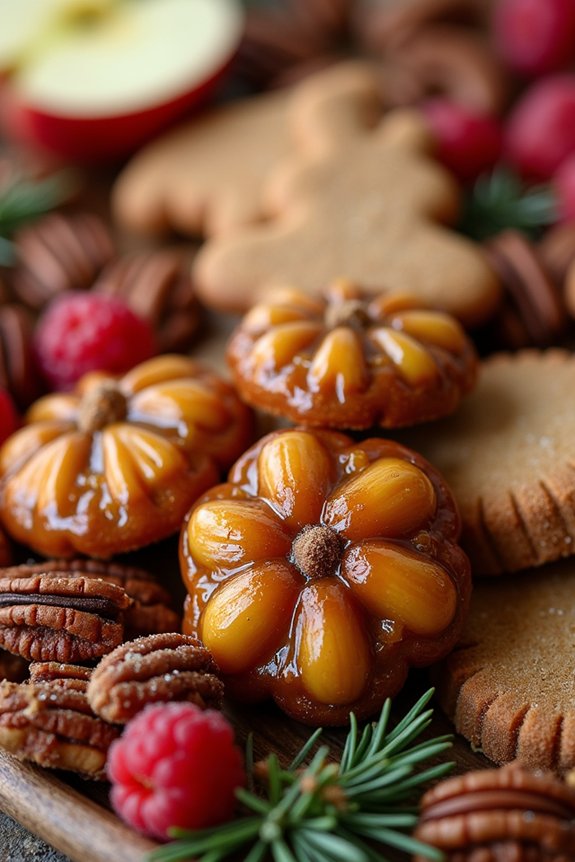
Create a delightful Christmas Dessert Platter with a Nutty and Spiced Assortment that will leave your guests in awe. This recipe brings together the warm, comforting flavors of the holiday season with a mix of nuts and spices, providing a perfect balance of sweetness and spice.
With a variety of textures and tastes, this dessert platter is an excellent choice for a family gathering or festive party. The Nutty and Spiced Assortment includes spiced nut clusters, gingerbread cookies, and cinnamon sugared pecans. Each element of the platter is simple to prepare and can be made ahead of time, allowing you to enjoy the festivities without spending too much time in the kitchen.
This recipe serves 4-6 people, making it an ideal choice for a cozy holiday celebration.
Ingredients for Nutty and Spiced Assortment (Serves 4-6):
- 1 cup mixed nuts (almonds, cashews, walnuts)
- 1 tablespoon honey
- 1 teaspoon ground cinnamon
- 1/2 teaspoon ground nutmeg
- 1/4 teaspoon ground cloves
- 1/4 teaspoon salt
- 12 gingerbread cookies
- 1 cup pecan halves
- 2 tablespoons granulated sugar
- 1 tablespoon unsalted butter, melted
Cooking Instructions:
- Prepare the Spiced Nut Clusters:
- Preheat your oven to 350°F (175°C).
- In a mixing bowl, combine the mixed nuts, honey, 1/2 teaspoon of cinnamon, ground nutmeg, ground cloves, and salt. Stir until the nuts are well coated.
- Spread the nut mixture evenly on a baking sheet lined with parchment paper.
- Bake for 10-12 minutes, stirring halfway through, until the nuts are golden and fragrant. Allow to cool completely before breaking into clusters.
- Bake the Gingerbread Cookies:
- If using store-bought gingerbread dough, cut into desired shapes and bake according to package instructions.
- If making from scratch, prepare your favorite gingerbread cookie dough, roll out, cut into shapes, and bake until golden brown. Let them cool on a wire rack.
- Make Cinnamon Sugared Pecans:
- In a small bowl, mix the remaining 1/2 teaspoon of cinnamon with the granulated sugar.
- Toss the pecan halves with the melted butter in a separate bowl, ensuring they’re fully coated.
- Sprinkle the cinnamon sugar mixture over the pecans and toss to coat evenly.
- Spread the pecans on a lined baking sheet and bake at 350°F (175°C) for 8-10 minutes until the sugar is caramelized and the pecans are crisp.
- Assemble the Platter:
- Arrange the spiced nut clusters, gingerbread cookies, and cinnamon sugared pecans on a large platter.
- Optionally, add some fresh fruits like sliced apples or berries for additional color and flavor contrast.
Extra Tips:
To enhance the flavors of your Nutty and Spiced Assortment, consider using freshly ground spices for a more intense aroma.
When baking the nuts and pecans, keep a close eye on them to prevent burning, as nuts can quickly go from perfectly toasted to overdone.
Feel free to customize the mix of nuts to suit your taste preferences or dietary needs. For a touch of decadence, drizzle some melted dark chocolate over the spiced nut clusters before they cool, adding an extra layer of indulgence to your festive platter.
Mini Cheesecake Extravaganza

This Mini Cheesecake Extravaganza is the perfect addition to your Christmas dessert platter, offering a delightful assortment of flavors and textures that will surely impress your guests.
These bite-sized cheesecakes aren’t only visually appealing but also incredibly delicious, making them a festive treat that everyone will love. The rich and creamy cheesecake filling sits atop a buttery graham cracker crust, with each mini cheesecake featuring a unique topping such as fresh berries, chocolate ganache, or caramel sauce, allowing guests to choose their favorite.
Perfect for a serving size of 4-6 people, this recipe provides the versatility to customize toppings according to your preference, guaranteeing a personalized touch to your dessert platter.
Whether you’re hosting a large gathering or a cozy family dinner, these mini cheesecakes are the ideal way to end your Christmas feast on a sweet note.
Ingredients:
- 1 cup graham cracker crumbs
- 3 tablespoons unsalted butter, melted
- 2 tablespoons granulated sugar
- 16 ounces cream cheese, softened
- 1/2 cup granulated sugar
- 1 teaspoon vanilla extract
- 2 large eggs
- 1/4 cup sour cream
- Assorted toppings (e.g., fresh berries, chocolate ganache, caramel sauce, crushed nuts)
Cooking Instructions:
- Preheat and Prepare: Preheat your oven to 325°F (163°C). Line a muffin tin with paper liners or grease the tin well to guarantee easy removal of the mini cheesecakes.
- Make the Crust: In a small bowl, combine the graham cracker crumbs, melted butter, and 2 tablespoons of sugar. Mix until the crumbs are evenly coated with butter. Press about 1 tablespoon of the crumb mixture firmly into the bottom of each muffin cup to form the crust.
- Prepare the Cheesecake Filling: In a large mixing bowl, beat the softened cream cheese until smooth and creamy. Gradually add the 1/2 cup of sugar and continue to beat until well combined. Mix in the vanilla extract and eggs, one at a time, beating well after each addition. Finally, add the sour cream and mix until the filling is smooth and creamy.
- Assemble and Bake: Divide the cheesecake filling evenly among the prepared muffin cups, filling each about 3/4 full. Bake in the preheated oven for 18-20 minutes, or until the centers are set and the edges are slightly puffed.
- Cool and Chill: Remove the cheesecakes from the oven and let them cool in the pan for about 10 minutes. Then transfer them to a wire rack to cool completely. Once cooled, refrigerate the mini cheesecakes for at least 2 hours, or until they’re thoroughly chilled and set.
- Add Toppings: Before serving, top each mini cheesecake with your choice of toppings. Arrange the assorted toppings artfully to create an enticing and colorful display on your dessert platter.
Extra Tips:
To guarantee the perfect texture for your mini cheesecakes, make sure all the ingredients, particularly the cream cheese and eggs, are at room temperature before you begin mixing. This will help achieve a smooth and creamy filling without lumps.
Additionally, for a more diverse dessert platter, consider offering a variety of toppings so that guests can enjoy different flavors with each bite. If you plan to make these cheesecakes ahead of time, they can be stored in the refrigerator for up to 2 days, making them a convenient option for holiday entertaining.
Gingerbread Wonderland

Embrace the festive spirit with a Gingerbread Wonderland Platter that will delight your family and guests alike. This platter is a creative and delicious way to showcase the timeless charm of gingerbread during the holiday season. The combination of warm spices, sweet molasses, and a hint of vanilla will fill your kitchen with the cozy aroma of Christmas. Perfect for serving as a centerpiece dessert, this platter not only looks spectacular but also offers a delightful assortment of textures and flavors.
To create the Gingerbread Wonderland Platter, you’ll craft gingerbread cookies in various shapes, and build a small gingerbread house for an extra touch of whimsy. These treats are complemented by an assortment of decorative icings and candies that let you and your guests personalize their own sweet creations. This recipe serves 4-6 people and provides a fun, interactive experience for everyone involved.
Ingredients:
- 3 cups all-purpose flour
- 3/4 cup packed dark brown sugar
- 1 tablespoon ground ginger
- 1 tablespoon ground cinnamon
- 1 teaspoon baking soda
- 1/4 teaspoon ground cloves
- 1/4 teaspoon salt
- 3/4 cup unsalted butter, softened
- 3/4 cup molasses
- 1 large egg
- 1 teaspoon vanilla extract
- Assorted candies (e.g., gumdrops, candy canes, sprinkles)
- Royal icing:
- 3 cups powdered sugar
- 2 large egg whites
- 1 teaspoon lemon juice
- Food coloring (optional)
Cooking Instructions:
1. Prepare the Dough: In a large bowl, whisk together the flour, brown sugar, ginger, cinnamon, baking soda, cloves, and salt. Add the softened butter, molasses, egg, and vanilla extract. Mix until the dough is smooth and well combined.
Divide the dough into two disks, wrap them in plastic wrap, and refrigerate for at least 1 hour.
2. Preheat the Oven: Preheat your oven to 350°F (175°C) and line two baking sheets with parchment paper.
3. Roll and Cut the Dough: On a lightly floured surface, roll out one disk of dough to about 1/4-inch thickness. Use cookie cutters to create shapes such as gingerbread men, stars, and trees. Transfer the cookies to the prepared baking sheets.
4. Bake the Cookies: Bake in the preheated oven for 8-10 minutes, or until the edges are firm. Let the cookies cool on the baking sheets for 5 minutes before transferring them to a wire rack to cool completely.
5. Prepare the Royal Icing: In a mixing bowl, beat the powdered sugar, egg whites, and lemon juice until smooth and glossy. If desired, add food coloring to create different icing colors.
6. Assemble the Gingerbread House: Use some of the dough to create small house pieces (e.g., walls and roof). Bake and cool these pieces as you did the cookies. Use royal icing as adhesive to assemble the house, allowing it to set for at least 1 hour.
7. Decorate the Platter: Arrange the gingerbread cookies and house on a large platter. Provide bowls of royal icing and candies for guests to decorate their cookies as they please.
Extra Tips:
When rolling out the dough, make certain it’s chilled enough to prevent sticking and tearing. If the dough becomes too soft while working, pop it back in the fridge for a few minutes.
For smoother icing, sift the powdered sugar before mixing, and keep the royal icing covered with a damp cloth to prevent it from hardening while decorating. If you’re short on time, pre-made gingerbread house kits can be a convenient alternative, allowing you to focus more on the decorating fun!
Holiday Cupcake Tower
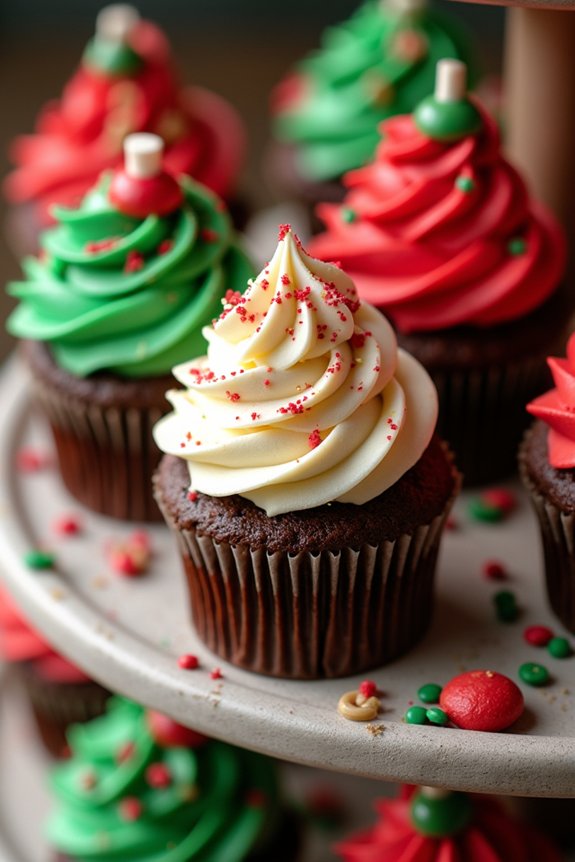
Create an impressive centerpiece for your Christmas dessert platter with a Holiday Cupcake Tower. This festive arrangement not only pleases the eye but also delights the taste buds, offering a variety of flavors and textures. Whether it’s the rich chocolate cupcakes, the zesty lemon, or the classic vanilla, there’s something for everyone. This recipe guides you through creating a tower of delectable cupcakes adorned with holiday-themed decorations, perfect for your family gathering or holiday party.
Building a Holiday Cupcake Tower involves baking several batches of cupcakes, decorating them with festive frostings and toppings, and arranging them in a visually appealing way. The tower can be customized to match your holiday theme, using colors and decorations that represent the season. This recipe yields approximately 24 cupcakes, enough to serve 4-6 people, guaranteeing everyone gets a taste of the holiday spirit.
Ingredients (Serves 4-6):
- 12 vanilla cupcakes
- 12 chocolate cupcakes
- 2 cups unsalted butter, softened
- 4 cups confectioners’ sugar
- 1 tablespoon vanilla extract
- 2-3 tablespoons milk
- Red and green food coloring
- Festive sprinkles and edible decorations
- Cupcake tower stand
Instructions:
- Bake the Cupcakes: Preheat your oven to 350°F (175°C). Prepare two separate batches of cupcakes, one vanilla and one chocolate, using your preferred recipes or store-bought mixes. Line cupcake pans with liners and fill each with batter about two-thirds full. Bake for 18-20 minutes or until a toothpick inserted in the center comes out clean. Allow to cool completely on a wire rack.
- Prepare the Frosting: In a large bowl, beat the softened butter with an electric mixer until smooth and creamy. Gradually add the confectioners’ sugar, one cup at a time, mixing well after each addition. Add the vanilla extract and mix. Add milk, one tablespoon at a time, until you reach the desired consistency.
- Color the Frosting: Divide the frosting into three bowls. Leave one bowl white, and add a few drops of red food coloring to the second bowl and green food coloring to the third, mixing until fully incorporated.
- Decorate the Cupcakes: Using a piping bag and your preferred tips, frost the cupcakes with the different colored frostings. Get creative with your designs—swirls, stars, or simple dollops. Add festive sprinkles and edible decorations to enhance the holiday theme.
- Assemble the Cupcake Tower: Place the cupcake tower stand on your serving table. Start arranging the cupcakes from the bottom tier up, alternating between the different flavors and colors. Confirm they’re securely placed on the stand.
- Final Touches: Once all the cupcakes are arranged, step back and adjust as necessary for a balanced look. Add any additional decorations around the base or on the tiers for extra festivity.
Extra Tips:
For a more elaborate display, consider adding a few mini cupcakes or cake pops to the tower. You can also incorporate holiday-themed cupcake liners and toppers to enhance the festive look. If you want to add a touch of elegance, use gold or silver edible glitter.
Elegant Eclair Display

If you’re looking to impress your guests this holiday season, an Elegant Eclair Display will surely do the trick. This classic French dessert is elevated to a show-stopping centerpiece that’s perfect for a Christmas dessert platter. With their delicate choux pastry shells filled with rich, creamy custard and topped with glossy chocolate ganache, these eclairs are as beautiful as they’re delicious.
Creating this display involves making a batch of perfect eclairs, arranging them artistically, and garnishing them with festive touches like edible glitter or silver dragees. This recipe will guide you through the process of making approximately 12-16 eclairs, suitable for serving 4-6 people. The result is a stunning platter that captures the essence of the holiday spirit while offering a delightful treat for the taste buds.
Ingredients:
- For the Choux Pastry:
- 1 cup water
- 1/2 cup unsalted butter
- 1 tablespoon sugar
- 1/4 teaspoon salt
- 1 cup all-purpose flour
- 4 large eggs
- For the Vanilla Custard Filling:
- 2 cups whole milk
- 1/2 cup granulated sugar
- 1 vanilla bean or 1 tablespoon vanilla extract
- 4 large egg yolks
- 1/4 cup cornstarch
- 2 tablespoons unsalted butter
- For the Chocolate Ganache:
- 1/2 cup heavy cream
- 4 ounces dark chocolate, finely chopped
- Optional Garnishes:
- Edible glitter
- Silver dragees
Cooking Instructions:
- Prepare the Choux Pastry:
- Preheat your oven to 425°F (220°C) and line a baking sheet with parchment paper.
- In a medium saucepan, combine water, butter, sugar, and salt. Bring to a boil over medium heat.
- Remove from heat and add the flour all at once, stirring vigorously with a wooden spoon until the mixture forms a ball and pulls away from the sides of the pan.
- Return the pan to medium heat and cook the dough for 1-2 minutes, stirring constantly, to dry it out slightly.
- Transfer the dough to a mixing bowl and let it cool for a few minutes. Beat in the eggs one at a time, making sure each is fully incorporated before adding the next, until the dough is smooth and glossy.
- Spoon the dough into a piping bag fitted with a large round tip and pipe 4-inch-long strips onto the prepared baking sheet.
- Bake for 10 minutes at 425°F, then reduce the temperature to 375°F (190°C) and bake for an additional 20-25 minutes until golden brown and crisp. Let them cool completely.
- Make the Vanilla Custard Filling:
- In a saucepan, heat the milk and vanilla bean (if using) until just simmering. If using vanilla extract, add it later.
- In a separate bowl, whisk together sugar, egg yolks, and cornstarch until pale and thick.
- Gradually whisk the hot milk into the egg mixture, then return the mixture to the saucepan.
- Cook over medium heat, stirring constantly, until thickened and bubbling. Remove from heat, stir in butter and vanilla extract (if using), and cool completely.
- Assemble the Eclairs:
- Once eclairs are cooled, make a small hole at one end of the eclair with a piping tip.
- Fill a piping bag fitted with a small round tip with the cooled custard. Pipe the custard filling into each eclair until full.
- Prepare the Chocolate Ganache:
- In a small saucepan, heat the heavy cream until just simmering.
- Pour over the chopped chocolate in a bowl, let sit for 2 minutes, then stir until smooth.
- Dip the top of each filled eclair into the ganache to coat and set them back on the baking sheet.
- Decorate and Serve:
- Arrange the eclairs on a serving platter. Optionally, dust with edible glitter or scatter silver dragees for a festive touch.
- Allow the ganache to set before serving.
Extra Tips:
When making the choux pastry, verify all ingredients are measured accurately and the eggs are at room temperature for best results.
Keep an eye on the consistency of the dough; it should be smooth and pipeable but not too runny.
To prevent the custard from developing a skin, cover it with plastic wrap directly on the surface while it cools.
For the ganache, make sure the chocolate is finely chopped to help it melt evenly.
If you’re preparing these eclairs ahead of time, store them in the refrigerator, but bring them to room temperature before serving for the best flavor and texture.
Caramel and Toffee Temptations
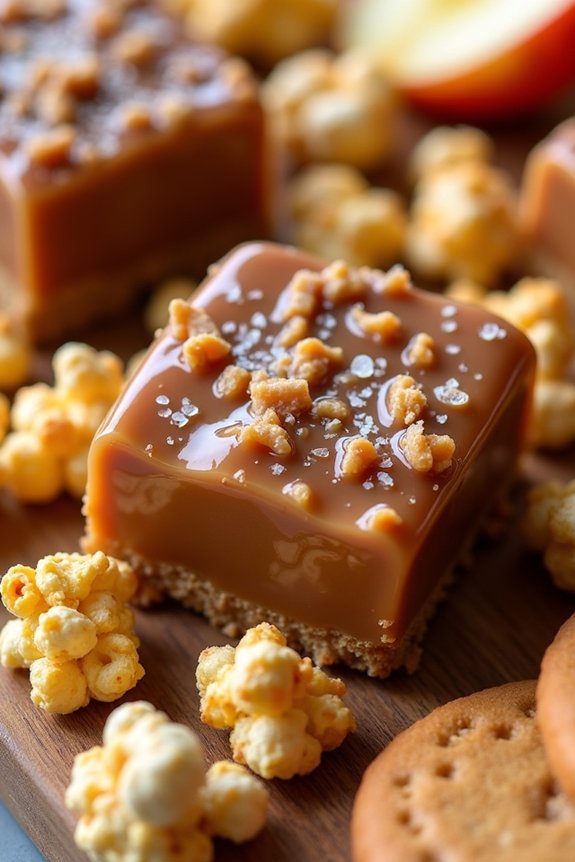
Indulge your guests this holiday season with a decadent Salted Caramel and Toffee Dessert Platter, a sumptuous treat that combines the rich flavors of caramel and the buttery goodness of toffee. This delightful platter features a variety of caramel and toffee-inspired sweets, perfect for satisfying sweet cravings and adding a touch of elegance to your Christmas dessert spread.
With a combination of different textures and flavors, this dessert platter is certain to be the star of your holiday gathering. The Salted Caramel and Toffee Dessert Platter includes homemade salted caramel sauce, chewy toffee squares, and a selection of caramel and toffee-infused treats such as caramel popcorn, toffee cookies, and caramel-dipped fruit.
Each component is designed to complement the others, creating a harmonious balance of sweet, salty, and buttery flavors. This recipe is perfect for serving 4-6 people, making it an ideal choice for small gatherings or intimate holiday dinners.
Ingredients (serving size: 4-6 people)
- 1 cup granulated sugar
- 6 tablespoons unsalted butter, cubed
- 1/2 cup heavy cream
- 1 teaspoon sea salt
- 1 cup light brown sugar
- 1/2 cup light corn syrup
- 1/2 cup sweetened condensed milk
- 1 teaspoon vanilla extract
- 1 cup crushed toffee bits
- 1/2 cup caramel popcorn
- 12 toffee cookies
- 1/2 cup caramel-dipped apple slices
Instructions
- Prepare Salted Caramel Sauce: In a medium saucepan over medium heat, melt 1 cup of granulated sugar, stirring constantly with a heat-resistant spatula. Once melted, add 6 tablespoons of unsalted butter, stirring until fully incorporated. Gradually pour in 1/2 cup of heavy cream, allowing it to boil for 1 minute. Remove from heat and stir in 1 teaspoon of sea salt. Let it cool slightly before transferring to a serving dish.
- Make Chewy Toffee Squares: In another saucepan, combine 1 cup of light brown sugar, 1/2 cup of light corn syrup, and 1/2 cup of sweetened condensed milk. Heat the mixture over medium-low heat, stirring continuously until it reaches a soft-ball stage (about 235°F on a candy thermometer). Stir in 1 teaspoon of vanilla extract and remove from heat. Pour the mixture into a greased baking dish, sprinkle with crushed toffee bits, and let it cool completely. Cut into squares once set.
- Assemble the Platter: Arrange the salted caramel sauce, chewy toffee squares, caramel popcorn, toffee cookies, and caramel-dipped apple slices on a large serving platter. Confirm an even distribution to allow guests to enjoy a variety of flavors.
Extra Tips
When making the caramel sauce, be sure to keep a close eye on the sugar as it melts to prevent burning. Constant stirring is key to achieving a smooth and velvety texture.
If you prefer a more intense salty flavor, consider adjusting the amount of sea salt to suit your taste. For additional variety, you can incorporate other caramel and toffee-inspired treats like chocolate-covered toffee pieces or salted caramel truffles.
Remember to store any leftovers in an airtight container to maintain freshness.
Traditional Yule Log
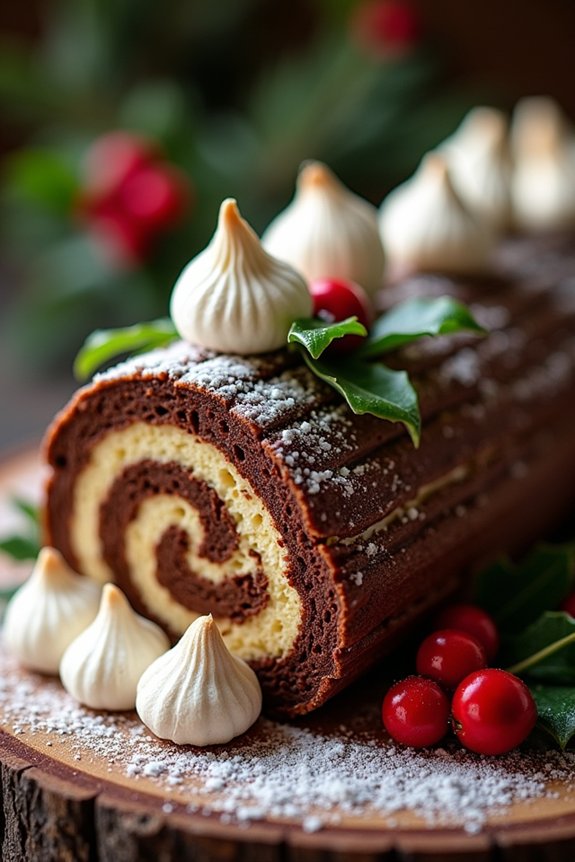
The Traditional Yule Log, also known as Bûche de Noël, is a classic Christmas dessert that brings festive cheer to any holiday dessert platter. This delightful cake is inspired by the ancient tradition of burning a wooden Yule log to celebrate the winter solstice.
The dessert version is a light and fluffy sponge cake, filled with creamy chocolate or buttercream, and rolled to resemble a log. It’s often finished with a dusting of powdered sugar to mimic snow, and can be decorated with festive elements like chocolate shavings, meringue mushrooms, or holly leaves.
To make this delicious festive treat, you’ll need to prepare a delicate sponge cake that’s both light and flexible enough to roll without cracking. The filling can be customized to your taste, but a rich chocolate ganache or a smooth coffee-flavored buttercream are traditional favorites.
Once rolled, the Yule log is covered with a luscious layer of frosting that can be textured to resemble bark, adding to the authentic appearance of this Christmas specialty. Whether you’re a seasoned baker or trying it for the first time, this Traditional Yule Log is certain to impress your guests and become a cherished holiday tradition.
Ingredients (Serves 4-6 people):
- 1/2 cup all-purpose flour
- 1/4 cup unsweetened cocoa powder
- 1 teaspoon baking powder
- 1/4 teaspoon salt
- 4 large eggs
- 2/3 cup granulated sugar
- 1 teaspoon vanilla extract
- 1/4 cup confectioners’ sugar (for dusting)
- 1 cup heavy cream
- 1/4 cup powdered sugar
- 1 teaspoon instant coffee granules (optional)
- 1/2 teaspoon vanilla extract
- 2/3 cup semisweet chocolate, finely chopped
Cooking Instructions:
- Preheat and Prepare: Preheat your oven to 350°F (175°C). Line a 15×10-inch jelly roll pan with parchment paper, making sure the paper extends over the edges for easy removal.
- Mix Dry Ingredients: In a small bowl, sift together the flour, cocoa powder, baking powder, and salt. Set aside.
- Prepare Egg Mixture: In a large bowl, beat the eggs with an electric mixer on high speed until thick and pale, about 5 minutes. Gradually add granulated sugar and continue beating until the mixture is light and fluffy. Stir in the vanilla extract.
- Combine and Spread: Gently fold the dry ingredients into the egg mixture until just incorporated. Spread the batter evenly into the prepared pan, smoothing the top with a spatula.
- Bake the Cake: Bake in the preheated oven for 12-15 minutes, or until the cake springs back when lightly touched in the center. Don’t overbake.
- Roll the Cake: Immediately upon removing from the oven, dust the top of the cake with confectioners’ sugar. Place a clean kitchen towel over the cake, and carefully invert it onto the towel. Gently peel off the parchment paper. Starting at a short end, roll the cake and towel together into a spiral. Allow it to cool completely on a wire rack.
- Prepare the Filling: In a medium saucepan, heat the heavy cream over medium heat until it begins to simmer. Remove from heat and stir in the instant coffee granules (if using) and the chopped chocolate. Stir until smooth and allow to cool to room temperature. Beat in powdered sugar and vanilla extract until light and fluffy.
- Fill and Roll: Unroll the cooled cake and spread the filling evenly over the surface. Re-roll the cake without the towel, and place seam-side down on a serving platter.
- Decorate: Frost the outside of the log with any remaining filling or a separate chocolate frosting. Use a fork to create a bark-like texture, and decorate with seasonal embellishments like powdered sugar, meringue mushrooms, or holly leaves.
Extra Tips:
When making the Traditional Yule Log, verify that your sponge cake isn’t overbaked to maintain its flexibility for rolling. If the cake cracks slightly, don’t worry, as the frosting will help to hide minor imperfections.
Be sure to roll the cake while it’s warm to help prevent cracking. For added flavor, the filling can be infused with different extracts, such as almond or orange, to complement the chocolate. Decorate creatively and enjoy this beautiful dessert centerpiece that’s perfect for sharing with family and friends during the holiday season.
Macaron Magic
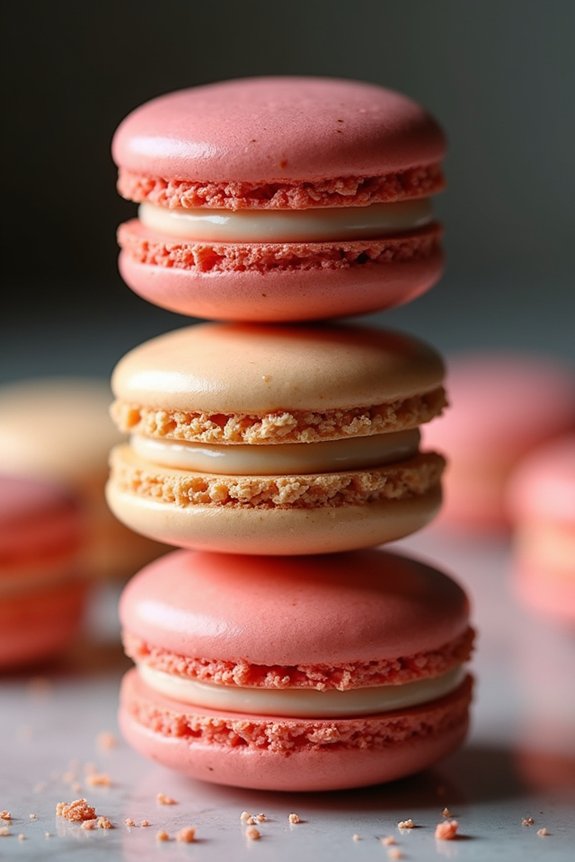
Macarons are a delightful addition to any Christmas dessert platter, offering a touch of elegance and a burst of flavor. These delicate French confections, with their crisp exterior and chewy interior, can be customized with a variety of fillings to suit any holiday theme.
Whether you opt for classic flavors like vanilla and chocolate or venture into festive options like peppermint or cranberry, macarons are bound to impress your guests.
Creating the perfect macaron requires precision and patience, but the end result is well worth the effort. These almond meringue-based cookies are sandwiched together with flavorful fillings, making them a versatile treat that can be adapted to any occasion.
With a little practice and attention to detail, you’ll be able to craft beautiful macarons that will be the star of your Christmas dessert spread.
Ingredients (Serves 4-6):
- 120g almond flour
- 200g powdered sugar
- 100g egg whites (approximately 3 large eggs)
- 50g granulated sugar
- Pinch of salt
- Gel food coloring (optional)
- 100g unsalted butter, softened
- 150g powdered sugar (for filling)
- 1 tsp vanilla extract (or other flavor of choice)
Cooking Instructions:
1. Prepare the Dry Ingredients**: Sift the almond flour and powdered sugar together into a large mixing bowl to guarantee there are no lumps. This will help achieve the smooth texture** macarons are known for.
2. Whip the Egg Whites: In a separate clean, dry bowl, beat the egg whites with a pinch of salt using an electric mixer on medium speed until frothy. Gradually add the granulated sugar and increase the speed to high, continuing to beat until stiff peaks form.
If desired, add a few drops of gel food coloring at this stage and mix until fully incorporated.
3. Fold the Mixture: Gently fold the sifted almond flour and powdered sugar into the whipped egg whites using a spatula. Be careful not to overmix; the batter should be smooth and glossy, and it should flow like lava when lifted with the spatula.
4. Pipe the Macarons: Transfer the batter into a piping bag fitted with a round tip. Pipe small circles (about 1.5 inches in diameter) onto a baking sheet lined with parchment paper. Tap the baking sheet firmly on the counter a few times to release any air bubbles.
5. Rest the Batter: Allow the piped macarons to sit at room temperature for 30-60 minutes, or until a skin forms on the surface. This step is essential for achieving the signature macaron “feet” during baking.
6. Bake the Macarons: Preheat the oven to 300°F (150°C). Bake the macarons for 15-18 minutes, rotating the baking sheet halfway through to guarantee even baking. The macarons are done when they come off the parchment paper cleanly and have developed a firm shell.
7. Prepare the Filling: While the macarons cool, make the filling by beating the softened butter until creamy. Gradually add the powdered sugar and vanilla extract (or other flavoring), beating until smooth and fluffy.
8. Assemble the Macarons: Once the macarons have cooled completely, pair them up by size. Pipe a small amount of filling onto the flat side of one shell and gently sandwich with another shell.
9. Mature the Macarons: For the best flavor and texture, refrigerate the assembled macarons in an airtight container for at least 24 hours before serving. Allow them to come to room temperature before enjoying.
Extra Tips:
Making macarons can be tricky, so don’t be discouraged if your first batch isn’t perfect. Consistency is key, so make sure your batter flows slowly but steadily off the spatula.
Also, verify the egg whites are at room temperature for better volume when whipping. If you experience cracked tops, it might indicate that the macarons didn’t rest long enough before baking.
Practice will help you perfect these festive treats, and soon you’ll be whipping up batches with ease for any holiday occasion!
Peppermint and Candy Cane Creations
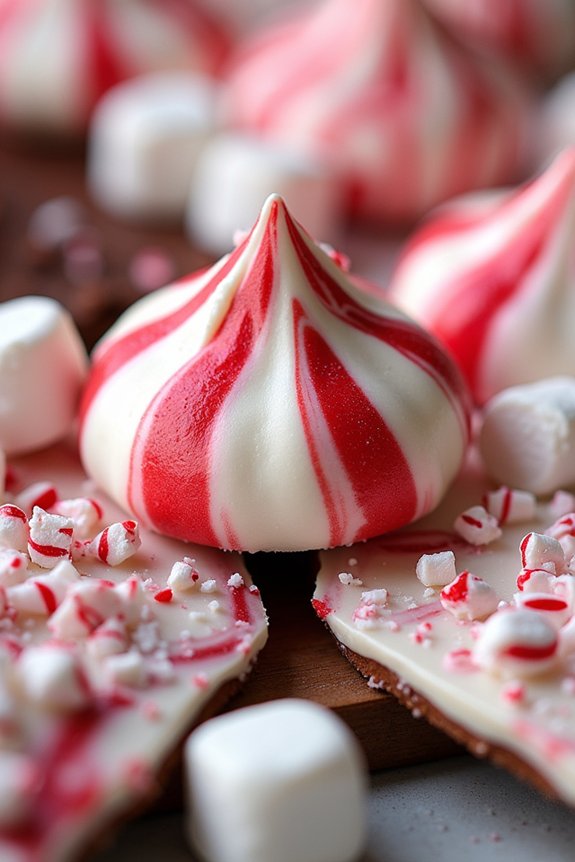
Delight your friends and family with a festive Peppermint and Candy Cane Dessert Platter. This sweet creation is perfect for the holiday season, combining the nostalgic flavors of peppermint and candy cane with a variety of textures that will satisfy every sweet tooth at the table.
From creamy peppermint bark to delicate candy cane meringues, this platter offers a balanced assortment of treats that are visually stunning and deliciously enticing. Presenting a blend of homemade goodies, this dessert platter is designed to serve 4-6 people, making it a suitable option for small gatherings or a cozy family dessert night.
The key is in the preparation of each element, guaranteeing that the flavors of peppermint and candy cane shine through in every bite. Below, you’ll find the ingredients and instructions needed to create this festive treat, along with some helpful tips to finalize your dessert platter is a hit.
Ingredients (Serving Size: 4-6 people):
- 200g white chocolate
- 100g dark chocolate
- 1/2 teaspoon peppermint extract
- 1 cup crushed candy canes
- 3 egg whites
- 3/4 cup granulated sugar
- Red food coloring
- 1/2 cup mini marshmallows
- 1/2 cup candy cane pieces (for garnish)
Cooking Instructions:
- Prepare the Peppermint Bark:
- Melt the white chocolate in a heatproof bowl set over a pan of simmering water, stirring occasionally until smooth. Remove from heat and stir in the peppermint extract.
- On a baking sheet lined with parchment paper, spread the melted white chocolate evenly. Sprinkle half of the crushed candy canes over the top.
- Melt the dark chocolate using the same method and drizzle it over the white chocolate layer. Use a toothpick to swirl the chocolates together gently.
- Sprinkle the remaining crushed candy canes on top and refrigerate until set, about 1 hour. Once firm, break into pieces.
- Make the Candy Cane Meringues:
- Preheat your oven to 200°F (93°C) and line a baking sheet with parchment paper.
- Whip the egg whites in a clean, dry bowl until soft peaks form. Gradually add the sugar, continuing to beat until stiff peaks form.
- Add a few drops of red food coloring and gently fold it into the mixture to create a marbled effect.
- Transfer the meringue mixture to a piping bag fitted with a star nozzle and pipe small meringue kisses onto the prepared baking sheet.
- Sprinkle the top with candy cane pieces and bake for 1.5 to 2 hours, until the meringues are dry and can easily be lifted from the paper. Allow to cool completely.
- Assemble the Dessert Platter:
- Arrange the peppermint bark pieces and candy cane meringues on a large platter.
- Add mini marshmallows and additional candy cane pieces for garnish.
- Serve and enjoy the festive flavors!
Extra Tips:
To guarantee your Peppermint and Candy Cane Dessert Platter is a success, use high-quality chocolate for the best flavor and texture.
When making the meringues, make sure all utensils are clean and free of any grease, as this can affect the egg whites’ ability to whip properly.
Be gentle when folding in the food coloring to achieve a beautiful marbled effect without deflating the meringue.
Finally, store any leftover treats in an airtight container to maintain their freshness and crunch.
Vegan and Gluten-Free Selection

This Vegan and Gluten-Free Christmas Dessert Platter is a delightful assortment of sweet treats that are both indulgent and accommodating to dietary restrictions. Perfect for holiday gatherings, this platter includes a variety of festive goodies that will satisfy everyone’s sweet tooth.
From rich chocolate truffles to fruity coconut macaroons and spiced gingerbread bites, this platter is a celebration of flavor and texture. The recipe serves 4-6 people and includes a selection of vegan and gluten-free desserts. Each component can be prepared in advance, allowing you to focus on enjoying the festivities.
This platter isn’t only visually appealing but also packed with delicious flavors, guaranteeing that everyone can partake in the seasonal joy without any dietary worries.
Ingredients:
*Chocolate Truffles:*
- 1 cup vegan dark chocolate chips
- 1/2 cup full-fat coconut milk
- 1 teaspoon vanilla extract
- 1/4 cup unsweetened cocoa powder (for rolling)
Coconut Macaroons:
- 2 cups unsweetened shredded coconut
- 1/2 cup almond flour
- 1/3 cup maple syrup
- 1/4 cup melted coconut oil
- 1 teaspoon vanilla extract
- Pinch of salt
Gingerbread Bites:
- 1 1/2 cups almond flour
- 1/3 cup coconut sugar
- 1/4 cup molasses
- 1 teaspoon ground ginger
- 1 teaspoon ground cinnamon
- 1/4 teaspoon ground nutmeg
- 1/4 teaspoon baking soda
- Pinch of salt
Instructions:
- Chocolate Truffles:
- In a small saucepan, heat the coconut milk over medium heat until it just begins to simmer. Remove from heat and add the vegan dark chocolate chips, stirring until completely melted and smooth. Stir in the vanilla extract.
- Chill the mixture in the refrigerator for about 1-2 hours, or until firm enough to scoop. Once firm, use a small scoop or spoon to form small balls, rolling them between your hands for a smooth finish.
- Roll each truffle in cocoa powder for a velvety coating. Arrange on a plate and store in the refrigerator until serving.
- Coconut Macaroons:
- Preheat your oven to 350°F (175°C) and line a baking sheet with parchment paper.
- In a large bowl, mix together the shredded coconut, almond flour, maple syrup, melted coconut oil, vanilla extract, and salt until well combined.
- Scoop tablespoon-sized mounds of the mixture onto the prepared baking sheet. Bake for 12-15 minutes, or until the edges are golden brown. Allow to cool completely before serving.
- Gingerbread Bites:
- Preheat your oven to 350°F (175°C) and line a baking sheet with parchment paper.
- In a mixing bowl, combine almond flour, coconut sugar, ground ginger, cinnamon, nutmeg, baking soda, and salt.
- Add in the molasses and stir until a dough forms. Roll the dough into small balls and place them on the baking sheet, flattening slightly with your fingers.
- Bake for 10-12 minutes, or until the edges are set. Let them cool on the baking sheet for a few minutes before transferring to a wire rack to cool completely.
Extra Tips:
When preparing the dessert platter, consider the order in which you make the treats. Begin with the chocolate truffles as they require chilling time.
While they set, you can prepare and bake the coconut macaroons and gingerbread bites. This will facilitate a smooth cooking process and give each dessert adequate time to cool or chill.
For added holiday flair, consider garnishing the platter with fresh mint leaves or a sprinkle of powdered sugar. This won’t only enhance the presentation but also add a festive touch to your Christmas dessert platter.