

The holiday season is right around the corner, and with it comes the perfect excuse to whip up some festive treats. Think gingerbread cookies filling your home with warmth and the irresistible taste of eggnog cheesecake bars. Each dessert in this roundup is designed to add a special touch to your celebrations, making every bite a delightful experience. Ready to get started? Let’s explore these sweet Christmas dessert recipes that are perfect for parties.
Classic Gingerbread Cookies

Classic Gingerbread Cookies are a quintessential holiday treat, bringing warmth and festive cheer to any gathering. The delightful aroma of spices like ginger, cinnamon, and cloves wafting through the kitchen is sure to evoke cherished Christmas memories.
These cookies aren’t only delicious but also make for a fun and creative activity, as you can decorate them with icing and candies to your heart’s content. Whether you’re baking with family or preparing a batch to give as gifts, these cookies are a must-have for your holiday celebrations.
Making Classic Gingerbread Cookies from scratch might seem intimidating, but with the right ingredients and a bit of patience, you’ll have beautifully spiced cookies ready to enjoy. This recipe yields about 24 cookies, perfect for serving 4-6 people.
Gather your family and friends in the kitchen, roll up your sleeves, and enjoy the process of creating delightful holiday treats that everyone will love.
Ingredients (serving size: 4-6 people):
- 3 cups all-purpose flour
- 3/4 cup packed brown sugar
- 3/4 cup molasses
- 1 tablespoon ground ginger
- 1 tablespoon ground cinnamon
- 1/2 teaspoon ground cloves
- 1/2 teaspoon baking soda
- 1/2 teaspoon salt
- 3/4 cup unsalted butter, softened
- 1 large egg
Instructions:
- Prepare the Dough: In a large mixing bowl, whisk together the flour, ginger, cinnamon, cloves, baking soda, and salt. In a separate bowl, cream the softened butter and brown sugar until light and fluffy. Add the egg and molasses to the butter mixture and mix until well combined.
- Combine Ingredients: Gradually add the dry ingredients to the wet ingredients, mixing until a dough forms. The dough should be smooth and slightly sticky.
- Chill the Dough: Divide the dough into two equal portions and flatten them into discs. Wrap each disc in plastic wrap and chill in the refrigerator for at least 1 hour. Chilling the dough helps the cookies maintain their shape during baking.
- Preheat the Oven: Preheat your oven to 350°F (175°C). Line baking sheets with parchment paper or silicone baking mats.
- Roll Out the Dough: On a lightly floured surface, roll out one disc of dough to about 1/4 inch thickness. Use gingerbread cookie cutters to cut out shapes and place them on the prepared baking sheets.
- Bake the Cookies: Bake the cookies in the preheated oven for 8-10 minutes, or until the edges are slightly firm. Keep an eye on them to prevent over-baking.
- Cool and Decorate: Allow the cookies to cool on the baking sheets for 5 minutes before transferring them to a wire rack to cool completely. Once cooled, decorate with icing and candies as desired.
Extra Tips: When rolling out the dough, sprinkle a little flour on the rolling pin to prevent sticking. If the dough becomes too soft while cutting shapes, simply pop it back in the fridge for a few minutes to firm up.
For an extra festive touch, consider adding a pinch of nutmeg or allspice to the dough. Remember, the cookies will continue to firm up as they cool, so don’t worry if they seem slightly soft when you take them out of the oven.
Enjoy your beautifully decorated gingerbread cookies with a warm cup of cocoa or mulled wine for the perfect holiday treat.
Peppermint Bark Fudge
Peppermint Bark Fudge is a delightful twist on traditional holiday treats, combining the rich, creamy texture of fudge with the invigorating crunch of peppermint. This dessert is perfect for family gatherings or festive parties, offering a sweet, minty flavor that evokes the spirit of the season.
The combination of chocolate and peppermint is a classic holiday pairing that never fails to please, making this fudge a must-have addition to your Christmas dessert repertoire. This recipe is designed to serve 4-6 people, providing enough for everyone to enjoy a piece or two.
The use of high-quality chocolate and real peppermint extract guarantees that each bite is decadent and flavorful. This Peppermint Bark Fudge is simple to make, requiring only a few ingredients and minimal preparation time. It’s the perfect choice for a quick and easy dessert that doesn’t compromise on taste or holiday cheer.
Ingredients:
- 2 cups semi-sweet chocolate chips
- 1 cup white chocolate chips
- 1 can (14 ounces) sweetened condensed milk
- 1 teaspoon pure peppermint extract
- 1/2 cup crushed candy canes
- 1/4 teaspoon salt
- Optional: additional crushed candy canes for topping
Cooking Instructions:
- Prepare the Baking Dish: Line an 8×8 inch baking dish with parchment paper, leaving some overhang on the sides for easy removal of the fudge later. This will prevent sticking and make cleanup a breeze.
- Melt the Chocolate: In a medium saucepan over low heat, combine the semi-sweet chocolate chips, white chocolate chips, and sweetened condensed milk. Stir constantly until the chocolate is completely melted and the mixture is smooth and creamy. Be sure to keep the heat low to prevent the chocolate from burning.
- Add Flavorings: Once the chocolate mixture is melted, remove it from the heat. Stir in the peppermint extract and salt until fully incorporated. This step is essential for confirming that the fudge has a balanced flavor profile.
- Mix in Candy Canes: Gently fold in the crushed candy canes, distributing them evenly throughout the fudge mixture. The candy canes will add both texture and a burst of peppermint flavor to each piece.
- Pour and Set: Pour the fudge mixture into the prepared baking dish, spreading it evenly with a spatula. If desired, sprinkle additional crushed candy canes on top for added decoration and crunch.
- Chill the Fudge: Refrigerate the fudge for at least 2 hours, or until it’s firm enough to cut. The cooling process allows the fudge to set so that it can be sliced cleanly.
- Slice and Serve: Once the fudge is set, lift it out of the baking dish using the parchment paper overhang. Cut it into small squares or rectangles, and serve. Store any leftovers in an airtight container in the refrigerator.
Extra Tips:
To achieve the best results, use high-quality chocolate chips, as they’ll melt more smoothly and create a creamier texture. If you prefer a stronger peppermint flavor, you can slightly increase the amount of peppermint extract.
Be cautious, though, as too much can overpower the chocolate. Additionally, if you don’t have candy canes, peppermint hard candies can be used as a substitute. Just be sure to crush them into small pieces to maintain the right consistency in the fudge.
Enjoy this festive treat during holiday gatherings or as a sweet gift for friends and family!
Eggnog Cheesecake Bars
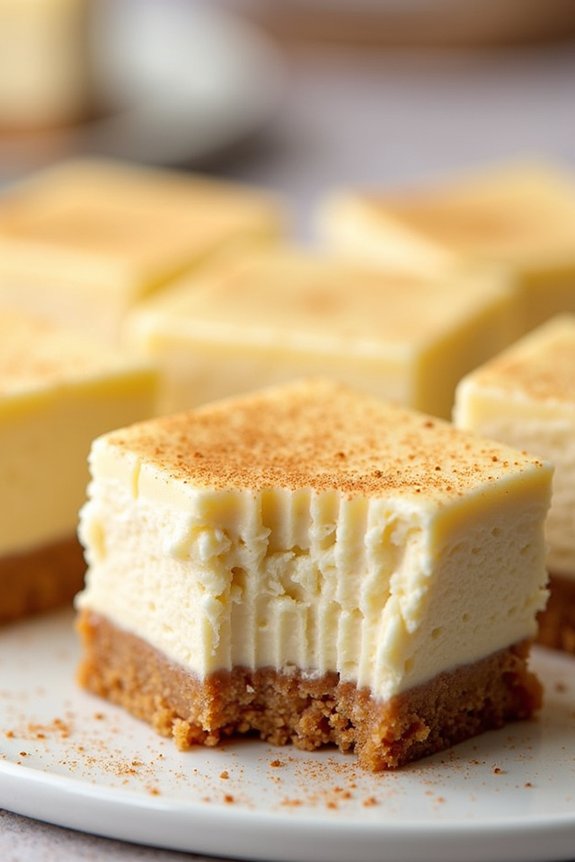
Eggnog Cheesecake Bars are a delightful treat that merges the creamy richness of cheesecake with the festive flavor of eggnog. Perfect for holiday gatherings, these bars offer a unique twist on traditional cheesecake, making them an ideal dessert for Christmas celebrations.
With a smooth and velvety texture topped with a hint of nutmeg, these bars are certain to impress your family and friends. These bars are designed to serve 4-6 people, making them a perfect choice for intimate gatherings or as a special indulgence for a small group.
The combination of spices and creamy filling against a buttery graham cracker crust creates a symphony of flavors that celebrate the essence of the season. Easy to prepare, they can be made in advance, allowing more time to enjoy the festivities with your loved ones.
Ingredients:
- 1 1/2 cups graham cracker crumbs
- 1/4 cup granulated sugar
- 1/2 cup unsalted butter, melted
- 16 oz cream cheese, softened
- 1 cup granulated sugar
- 3 large eggs
- 1 cup eggnog
- 1 tablespoon all-purpose flour
- 1 teaspoon vanilla extract
- 1/2 teaspoon ground nutmeg
- 1/4 teaspoon ground cinnamon
Cooking Instructions:
1. Preheat the Oven: Start by preheating your oven to 325°F (160°C) to guarantee it reaches the correct temperature for baking the cheesecake bars.
2. Prepare the Crust: In a medium bowl, combine the graham cracker crumbs and 1/4 cup granulated sugar. Stir in the melted butter until the mixture resembles wet sand. Press the mixture firmly into the bottom of a greased 9×9-inch baking pan to form an even layer.
Bake for about 10 minutes until the crust is lightly golden. Remove from the oven and let it cool while you prepare the filling.
3. Make the Filling: In a large mixing bowl, beat the softened cream cheese and 1 cup of granulated sugar with an electric mixer until smooth and creamy. Add the eggs one at a time, beating well after each addition.
Then, mix in the eggnog, flour, vanilla extract, nutmeg, and cinnamon until fully combined and smooth.
4. Assemble and Bake: Pour the cream cheese mixture over the cooled crust, spreading it evenly. Place the pan in the preheated oven and bake for 40-45 minutes or until the center is set and only slightly jiggly.
5. Cool and Chill: Remove the bars from the oven and let them cool to room temperature on a wire rack. Once cooled, cover the pan with plastic wrap and refrigerate for at least 4 hours or overnight to allow the bars to set completely.
6. Serve: Once the bars are fully chilled, cut them into squares and serve. Optionally, sprinkle a little extra nutmeg on top before serving for added flavor.
Extra Tips:
For the best results, confirm the cream cheese is at room temperature before starting, as this will make it much easier to blend smoothly with the sugar.
If you prefer a stronger eggnog flavor, you can increase the amount of ground nutmeg slightly, but be cautious not to overpower it. Additionally, you can line your baking pan with parchment paper for easier removal and cutting of the bars once they’ve set.
Chocolate Yule Log
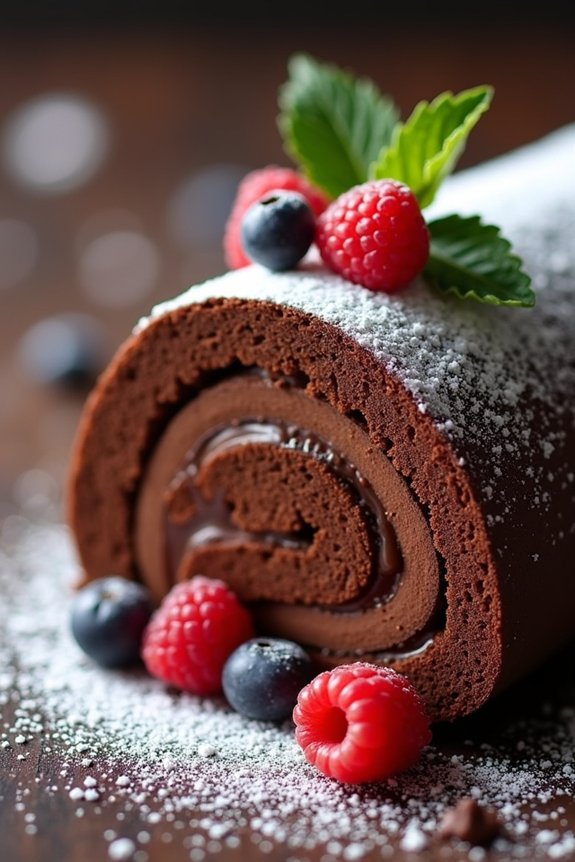
Nothing says festive dessert quite like a classic Chocolate Yule Log. A centerpiece for any Christmas feast, this delicious dessert combines a light and airy chocolate sponge cake rolled with a rich and creamy chocolate buttercream filling. Also known as a Bûche de Noël, this dessert is a nod to the traditional log burned on Christmas Eve in the hearth.
Creating a Chocolate Yule Log is an art that balances elegance with decadence. The process involves baking a thin sheet of sponge cake, filling it with a luscious chocolate cream, and then carefully rolling it to mimic the appearance of a log. The final touch is a generous layer of chocolate ganache, which is textured to resemble bark, and garnished with powdered sugar to simulate snow. This recipe serves 4-6 people and is sure to impress your holiday guests.
Ingredients (Serves 4-6):
- 4 large eggs
- 2/3 cup granulated sugar
- 1/2 cup all-purpose flour
- 1/3 cup unsweetened cocoa powder
- 1 teaspoon baking powder
- 1/2 teaspoon salt
- 1 teaspoon vanilla extract
- 1/2 cup heavy cream
- 4 ounces dark chocolate, chopped
- 1/2 cup unsalted butter, softened
- 1 cup powdered sugar
- 1 tablespoon coffee liqueur (optional)
- 1 cup heavy cream (for ganache)
- 8 ounces dark chocolate, chopped (for ganache)
- Powdered sugar for dusting
- Fresh berries or mint leaves for decoration (optional)
Instructions:
- Preheat and Prepare: Preheat your oven to 350°F (175°C). Line a 15×10 inch jelly roll pan with parchment paper, making sure the sides are covered as well.
- Make the Sponge Cake: In a large bowl, beat the eggs and granulated sugar together until thick and pale, about 5 minutes. Gently fold in the vanilla extract. In a separate bowl, sift together the flour, cocoa powder, baking powder, and salt. Gradually fold the dry ingredients into the egg mixture until just combined.
- Bake the Cake: Spread the batter evenly into the prepared jelly roll pan. Bake for 10-12 minutes or until the cake springs back when lightly touched.
- Roll the Cake: While the cake is still warm, dust a clean kitchen towel with powdered sugar. Turn the cake out onto the towel, peel off the parchment paper, and roll the cake with the towel from the short end. Let it cool completely in this rolled position.
- Prepare the Filling: In a saucepan, heat the 1/2 cup of heavy cream until it simmers. Pour it over the 4 ounces of chopped dark chocolate. Let it sit for a minute, then stir until smooth. In a separate bowl, beat the butter and powdered sugar until fluffy, then mix in the melted chocolate mixture and coffee liqueur (if using).
- Fill the Cake: Unroll the cooled cake and spread the chocolate filling evenly over the surface. Carefully roll the cake back up without the towel, maintaining the log shape.
- Make the Ganache: Heat the 1 cup of heavy cream until it simmers. Pour it over the 8 ounces of chopped dark chocolate. Let it sit for a minute, then stir until smooth. Let it cool slightly before spreading it over the rolled cake.
- Decorate: Using a fork, create bark-like textures on the ganache and dust with powdered sugar to resemble snow. Optionally, decorate with fresh berries or mint leaves.
Extra Tips:
When rolling the cake, do so gently to prevent cracking. If any cracks do appear, the ganache will cover them up beautifully. The key to a smooth roll is making certain the cake is pliable, so roll it while it’s warm and allow it to cool completely before filling.
The coffee liqueur is optional but adds a lovely depth to the chocolate flavor. Allow the ganache to cool slightly before applying to ensure a thicker consistency that will hold its texture better.
Cranberry Orange Bundt Cake

Cranberry Orange Bundt Cake is a delightful festive dessert that combines the tartness of cranberries with the invigorating zest of orange. This cake is a perfect centerpiece for your holiday table, bringing together warm flavors and a moist, tender crumb that will please any crowd.
Whether you’re hosting a holiday dinner or attending a Christmas party, this cake is sure to impress with its beautiful presentation and delicious taste. The combination of cranberries and oranges gives this bundt cake a unique flavor profile that’s both sweet and tangy.
The cranberries add a burst of tartness, while the orange zest and juice provide a revitalizing citrus aroma. This cake isn’t only flavorful but also visually appealing, thanks to its golden exterior and the vibrant red cranberries peeking through. Serve it with a dusting of powdered sugar or a simple glaze to enhance its festive appearance.
Ingredients (Serves 4-6)
- 2 cups all-purpose flour
- 1 teaspoon baking powder
- 1/2 teaspoon baking soda
- 1/4 teaspoon salt
- 1/2 cup unsalted butter, softened
- 1 cup granulated sugar
- 2 large eggs
- 1 teaspoon vanilla extract
- 1/2 cup sour cream
- Zest of 1 orange
- 1/4 cup fresh orange juice
- 1 cup fresh or frozen cranberries
- 1/2 cup powdered sugar (for optional glaze)
- 2 tablespoons orange juice (for optional glaze)
Cooking Instructions
- Prepare the Oven and Pan: Preheat your oven to 350°F (175°C). Generously grease and flour a bundt cake pan to make sure the cake releases easily after baking.
- Mix Dry Ingredients: In a medium bowl, whisk together the all-purpose flour, baking powder, baking soda, and salt. Set aside.
- Cream Butter and Sugar: In a large mixing bowl, beat the softened butter and granulated sugar together using an electric mixer until the mixture is light and fluffy, about 3-4 minutes.
- Add Eggs and Flavorings: Add the eggs one at a time, beating well after each addition. Mix in the vanilla extract, orange zest, and orange juice until well combined.
- Combine with Dry Ingredients: Gradually add the dry ingredients to the wet ingredients, alternating with the sour cream. Begin and end with the dry ingredients, mixing just until combined.
- Incorporate Cranberries: Gently fold the cranberries into the batter using a spatula, making sure they’re evenly distributed.
- Bake the Cake: Pour the batter into the prepared bundt pan and smooth the top. Bake in the preheated oven for 45-55 minutes, or until a toothpick inserted into the center comes out clean.
- Cool and Glaze: Allow the cake to cool in the pan for 15 minutes before inverting onto a wire rack to cool completely. If desired, whisk together powdered sugar and orange juice to create a glaze and drizzle over the cooled cake.
Extra Tips
For the best results, make sure all your ingredients are at room temperature before beginning the recipe. This will help the batter to mix more evenly and result in a better-textured cake.
If using frozen cranberries, don’t thaw them before adding to the batter, as this can cause them to bleed into the cake. Additionally, to prevent the cranberries from sinking to the bottom of the cake, you can toss them in a little flour before folding them into the batter.
Finally, if you want a more pronounced orange flavor, consider adding a teaspoon of orange extract to the batter.
Sugar Cookie Christmas Trees
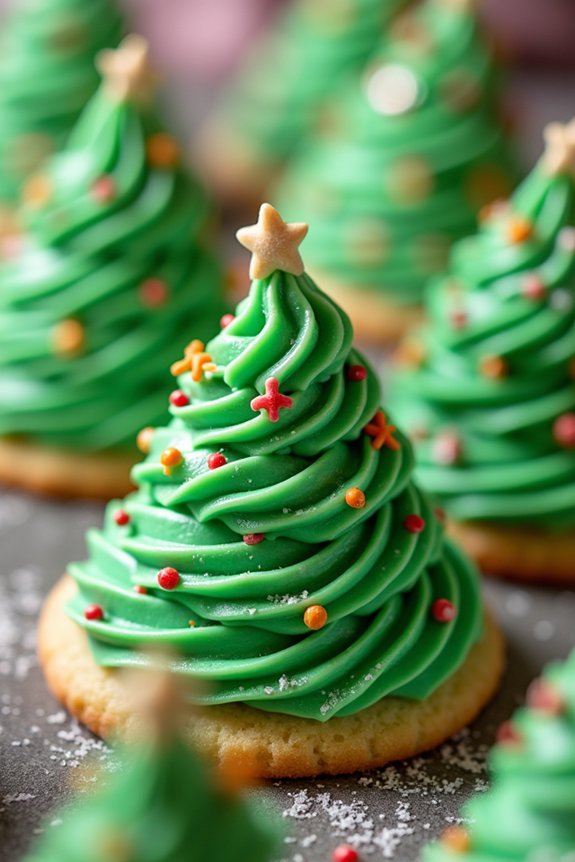
Indulge in the festive spirit this holiday season with delightful Sugar Cookie Christmas Trees. These adorable and delicious treats are perfect for both children and adults, adding a touch of fun and creativity to your holiday gatherings.
The sugar cookies are crafted to resemble miniature Christmas trees, beautifully decorated with colorful icing and sprinkles to mimic the festive lights and ornaments typically adorning real trees. Whether you’re looking to surprise your guests with a whimsical dessert or seeking a fun baking activity to enjoy with family, these Sugar Cookie Christmas Trees are bound to be a hit.
With a serving size of 4-6 people, this recipe provides enough cookies for everyone to enjoy. The buttery, sweet flavor of the sugar cookies pairs perfectly with the smooth and creamy icing, making every bite a delightful experience.
Gather your ingredients, prepare your kitchen, and get ready to create a batch of festive treats that won’t only taste amazing but also serve as a charming centerpiece for your holiday table.
Ingredients:
- 2 1/2 cups all-purpose flour
- 1 teaspoon baking powder
- 1/2 teaspoon salt
- 1 cup unsalted butter, softened
- 1 cup granulated sugar
- 1 large egg
- 1 teaspoon vanilla extract
- 1/2 teaspoon almond extract
- Green food coloring
- Assorted sprinkles
- 2 cups confectioners’ sugar
- 3-4 tablespoons milk
- 1/2 teaspoon vanilla extract (for icing)
Instructions:
- Prepare the Dough: In a medium bowl, whisk together the flour, baking powder, and salt. Set aside. In a large mixing bowl, beat together the softened butter and granulated sugar until light and fluffy. Add the egg, vanilla extract, and almond extract, and mix well until combined.
- Mix Dry and Wet Ingredients: Gradually add the dry ingredients to the wet mixture, beating until the dough comes together. Add green food coloring to the dough, a few drops at a time, until the desired shade of green is achieved. Wrap the dough in plastic wrap and refrigerate for at least 1 hour, or until firm.
- Preheat and Prepare Baking Sheet: Preheat your oven to 350°F (175°C). Line a baking sheet with parchment paper.
- Roll and Cut the Dough: On a lightly floured surface, roll out the dough to about 1/4 inch thickness. Use a Christmas tree-shaped cookie cutter to cut out the cookies and place them on the prepared baking sheet, leaving some space between each cookie.
- Bake the Cookies: Bake in the preheated oven for 8-10 minutes, or until the edges are lightly golden. Remove from the oven and allow the cookies to cool on the baking sheet for 5 minutes before transferring them to a wire rack to cool completely.
- Prepare the Icing: In a small bowl, combine the confectioners’ sugar, milk, and vanilla extract. Stir until smooth and creamy. If the icing is too thick, add more milk, a teaspoon at a time, until the desired consistency is reached.
- Decorate the Cookies: Once the cookies are completely cool, use the icing to decorate them. You can pipe the icing using a piping bag or spread it using a small spoon. Add sprinkles to the icing while it’s still wet to resemble ornaments and lights on the tree.
- Allow to Set: Let the decorated cookies sit at room temperature until the icing is set before serving.
Extra Tips:
For the best results, make sure that your butter is softened to room temperature before beginning the recipe. This will help achieve a smooth and creamy cookie dough.
If you don’t have a Christmas tree-shaped cutter, you can easily create a template from cardboard and use a knife to cut around it. Additionally, feel free to get creative with your decorations by using different colored icings and a variety of sprinkles to personalize each cookie tree.
These Sugar Cookie Christmas Trees also make excellent gifts when wrapped in cellophane and tied with a festive ribbon. Enjoy the process and happy baking!
Spiced Apple Cider Doughnuts
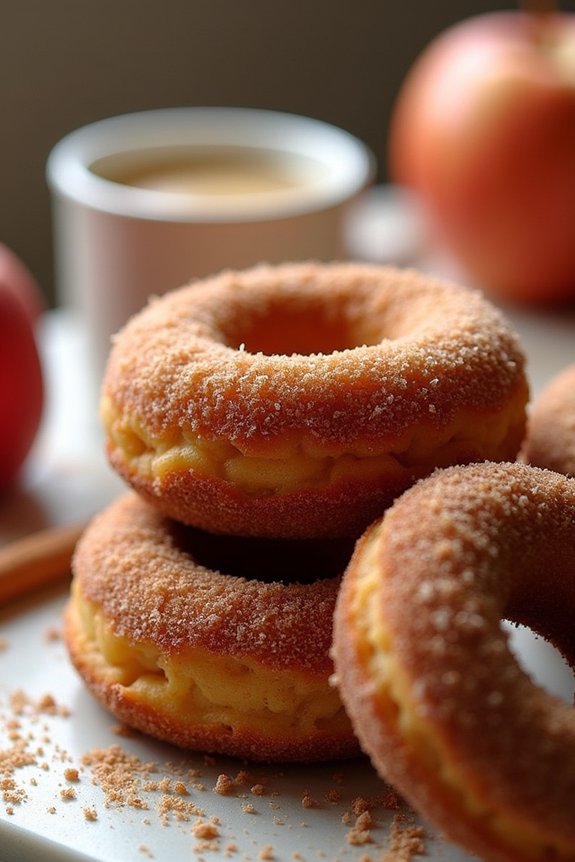
Spiced Apple Cider Doughnuts are a delightful treat perfect for the holiday season. These doughnuts combine the warmth of spices with the sweet and tangy flavor of apple cider, creating a deliciously comforting dessert. Whether you’re serving them as a sweet breakfast option or as a dessert after a festive meal, these doughnuts are bound to be a hit among family and friends.
Their soft, cake-like texture and the aromatic blend of cinnamon, nutmeg, and cloves make them a quintessential holiday indulgence. The secret to these scrumptious doughnuts lies in reducing the apple cider to concentrate its flavor, which is then infused into the dough. Served warm and dusted with cinnamon sugar, they’re best enjoyed fresh out of the fryer.
The combination of spices and apple cider in the dough gives these doughnuts a uniquely festive flavor, reminiscent of cozy winter nights. Making around a dozen doughnuts, this recipe is perfect for serving 4-6 people, making sure everyone gets to enjoy this holiday delight.
Ingredients:
- 1 cup apple cider
- 2 cups all-purpose flour
- 1/2 cup granulated sugar
- 1/2 cup brown sugar, packed
- 1 teaspoon baking powder
- 1/4 teaspoon baking soda
- 1 teaspoon ground cinnamon
- 1/2 teaspoon ground nutmeg
- 1/4 teaspoon ground cloves
- 1/2 teaspoon salt
- 2 tablespoons unsalted butter, melted
- 1 large egg
- 1/2 cup buttermilk
- 1 teaspoon vanilla extract
- Vegetable oil, for frying
Cooking Instructions:
- Reduce the Apple Cider: In a small saucepan, bring the apple cider to a boil over medium-high heat. Reduce the heat and simmer until the cider is reduced to about 1/4 cup, approximately 15-20 minutes. Set aside to cool.
- Mix Dry Ingredients: In a large bowl, whisk together the all-purpose flour, granulated sugar, brown sugar, baking powder, baking soda, ground cinnamon, ground nutmeg, ground cloves, and salt, making certain all ingredients are well combined.
- Combine Wet Ingredients: In a separate bowl, whisk together the melted butter, egg, buttermilk, vanilla extract, and the cooled, reduced apple cider until smooth.
- Form the Dough: Gradually add the wet ingredients to the dry ingredients, mixing gently until a sticky dough forms. Be careful not to overmix.
- Prepare for Frying: Lightly flour a clean surface and roll out the dough to about 1/2-inch thickness. Use a doughnut cutter to cut out doughnut shapes. Gather scraps, re-roll, and cut out additional doughnuts as necessary.
- Heat the Oil: In a large, deep saucepan, heat the vegetable oil to 375°F (190°C). Use a thermometer to monitor the temperature to guarantee consistent frying.
- Fry the Doughnuts: Carefully place a few doughnuts at a time into the hot oil, frying each side for about 1-2 minutes or until golden brown. Use a slotted spoon to remove the doughnuts and place them on a paper towel-lined plate to drain.
- Coat with Cinnamon Sugar: While the doughnuts are still warm, toss them in a mixture of cinnamon and sugar to coat evenly.
Extra Tips:
Confirm your oil is at the right temperature before frying to avoid greasy doughnuts. A too-cool oil will make the doughnuts absorb more oil, while too hot will cook them too quickly on the outside, leaving the inside undercooked.
It’s also important to monitor the consistency of the dough; if it’s too sticky, lightly flour your hands to make it more manageable. Finally, serve the doughnuts warm for the best taste and texture, but they can be reheated in the oven at a low temperature if needed.
Red Velvet Trifle
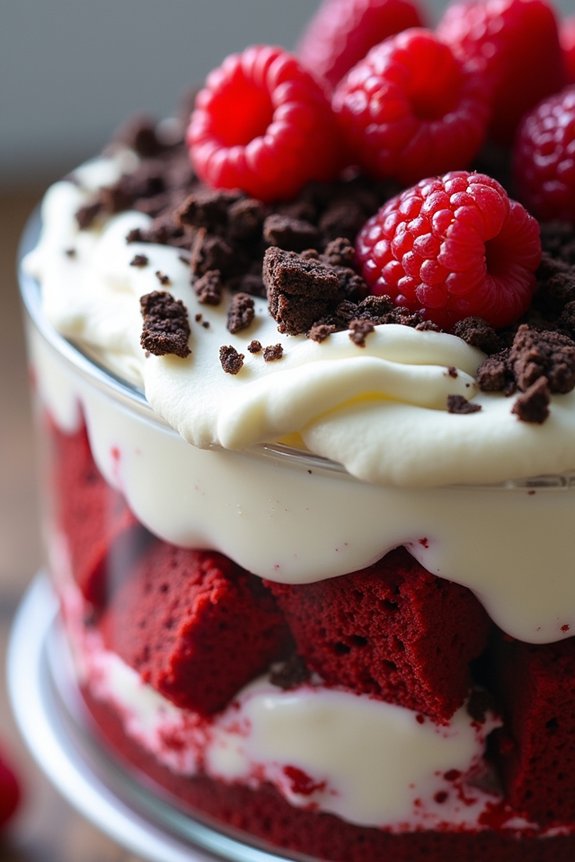
Red Velvet Trifle is a show-stopping dessert that combines layers of rich red velvet cake, creamy cheesecake filling, and a hint of chocolate crunch.
It’s not just a treat for the taste buds but also a feast for the eyes with its striking layers and vibrant colors. This trifle is perfect for Christmas gatherings, bringing a touch of elegance and joy to your festive table. Not only is it delicious, but it also offers a stunning visual appeal that will leave your guests in awe.
This delightful dessert is versatile and can be prepared in advance, making it an ideal choice for holiday parties where time is of the essence. The contrasting flavors and textures in the Red Velvet Trifle create a harmonious balance that’s both decadent and invigorating.
Whether you’re an experienced baker or a novice in the kitchen, this recipe is straightforward and easy to follow, guaranteeing that your trifle will be the star of the dessert table.
Ingredients (serving size: 4-6 people):
- 1 box of red velvet cake mix
- Ingredients required for cake mix (as per box instructions)
- 1 cup heavy cream
- 8 oz cream cheese, softened
- 1/2 cup powdered sugar
- 1 teaspoon vanilla extract
- 1 cup chocolate cookie crumbs
- Red food coloring (if needed)
- Fresh raspberries or strawberries for garnish (optional)
Cooking Instructions:
- Prepare the Red Velvet Cake: Follow the instructions on the red velvet cake mix box to bake the cake. Once baked, allow it to cool completely. Once cooled, cut the cake into small cubes.
- Make the Cheesecake Filling: In a large mixing bowl, beat the softened cream cheese until smooth. Gradually add the powdered sugar and vanilla extract, mixing until well combined and creamy.
- Whip the Cream: In a separate bowl, whip the heavy cream until stiff peaks form. Gently fold the whipped cream into the cream cheese mixture until fully integrated and smooth.
- Assemble the Trifle: In a large trifle bowl or individual serving glasses, start by layering a portion of the red velvet cake cubes at the bottom. Next, add a layer of the cheesecake filling over the cake. Sprinkle a layer of chocolate cookie crumbs over the cream cheese mixture. Repeat the layers until you reach the top of the bowl or glass, finishing with a layer of cheesecake filling.
- Chill and Garnish: Refrigerate the trifle for at least 2 hours to allow the flavors to meld together. Before serving, garnish with fresh raspberries or strawberries if desired.
Extra Tips:
For an even more festive flair, consider adding a few drops of red food coloring to the cream cheese mixture to enhance the red hue of the dessert.
You can also add a splash of liqueur such as Grand Marnier or Amaretto to the cheesecake filling for an adult twist. When layering the trifle, be gentle to maintain the distinct layers which contribute to its visual appeal.
Finally, confirm your cake is completely cooled before assembling the trifle to prevent the cream cheese filling from melting.
Pecan Pie Bars
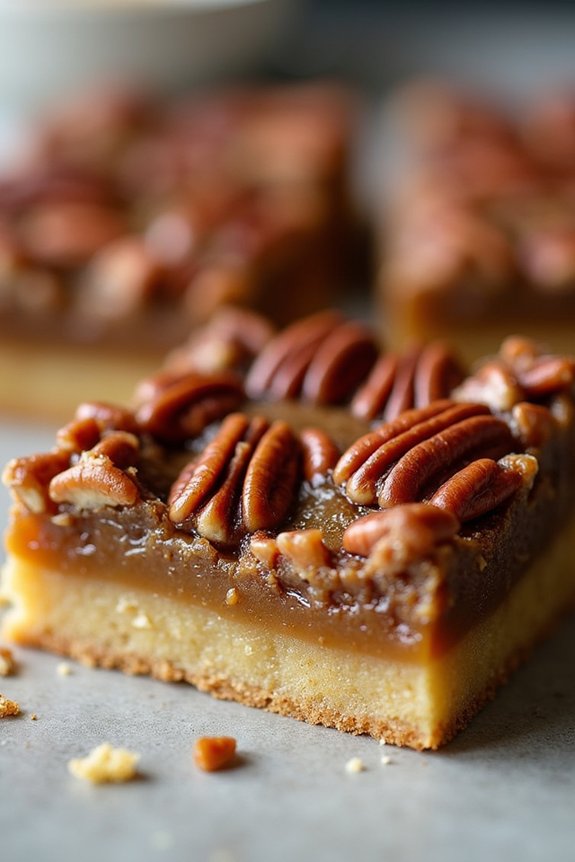
Pecan Pie Bars are a delightful twist on the classic pecan pie, offering all the rich, nutty, and gooey flavors in a more convenient, handheld form. These bars are perfect for holiday gatherings, allowing guests to easily serve themselves and enjoy a sweet treat without the need for cutlery.
The buttery crust provides a perfect foundation for the sweet and sticky pecan filling, making these bars an irresistible addition to your Christmas dessert lineup.
Whether you’re a seasoned baker or a novice in the kitchen, these Pecan Pie Bars are simple to make and certain to impress. The combination of crunchy pecans, creamy filling, and a tender crust creates a harmonious blend of textures and flavors. Ideal for serving 4-6 people, this recipe guarantees everyone gets their share of holiday cheer and sweetness.
Ingredients (serves 4-6 people):
- 1 cup all-purpose flour
- 1/3 cup packed brown sugar
- 1/4 teaspoon salt
- 1/2 cup unsalted butter, softened
- 2 large eggs
- 1 cup light corn syrup
- 1/2 cup granulated sugar
- 1 teaspoon vanilla extract
- 1 1/2 cups chopped pecans
Instructions:
- Prepare the Crust: Preheat your oven to 350°F (175°C). In a medium bowl, combine the flour, brown sugar, and salt. Cut in the softened butter using a pastry blender or fork until the mixture resembles coarse crumbs.
- Bake the Crust: Press the crumb mixture firmly into the bottom of a greased 9×9-inch baking pan. Bake in the preheated oven for 15 minutes, or until the edges are lightly golden. Remove from the oven and set aside to cool slightly.
- Prepare the Filling: While the crust is baking, whisk together the eggs, corn syrup, granulated sugar, and vanilla extract in a large bowl until smooth. Stir in the chopped pecans.
- Assemble the Bars: Pour the pecan filling over the partially baked crust, spreading it evenly with a spatula to guarantee all corners are covered.
- Bake the Bars: Return the pan to the oven and bake for an additional 25-30 minutes, or until the filling is set and the pecans are golden brown.
- Cool and Serve: Allow the bars to cool completely in the pan on a wire rack. Once cooled, cut into squares and serve.
Extra Tips:
For best results, use fresh pecans to guarantee maximum flavor. If you prefer a thicker crust, you can double the crust ingredients.
These bars can be stored in an airtight container at room temperature for up to 3 days or refrigerated for up to a week. To make serving easier, use parchment paper to line the baking pan, allowing you to lift the entire batch out for cutting.
If you’re looking for a twist, consider adding a sprinkle of sea salt on top for a sweet and salty flavor combination.
White Chocolate Snowball Truffles
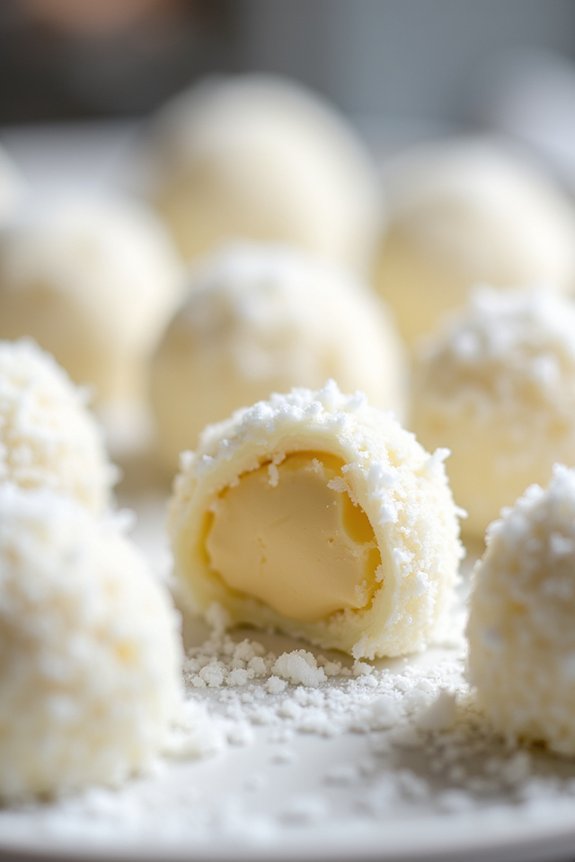
Indulge in the delightful taste of festive White Chocolate Snowball Truffles, a perfect dessert to celebrate the joyous season of Christmas. These truffles are a delicious blend of creamy white chocolate and rich coconut, resulting in a soft, melt-in-your-mouth treat that resembles the charm of fresh-fallen snow.
Whether you’re serving these truffles at a holiday party or gifting them to loved ones, they’re sure to be a hit with their elegant appearance and irresistible taste.
Creating these White Chocolate Snowball Truffles is a fun and rewarding process that brings the joy of the holidays into your kitchen. With a few simple ingredients and easy-to-follow steps, you can whip up a batch of these delicious truffles in no time.
Perfect for a serving size of 4-6 people, this recipe guarantees everyone gets a taste of these delightful treats.
Ingredients:
- 8 ounces white chocolate, chopped
- 1/4 cup heavy cream
- 1 teaspoon vanilla extract
- 1/2 cup unsweetened shredded coconut
- 1/4 cup finely chopped nuts (optional)
- Additional shredded coconut for rolling
Instructions:
1. Melt the White Chocolate: Begin by placing the chopped white chocolate in a heatproof bowl. In a small saucepan, heat the heavy cream over medium heat until it just begins to simmer.
Pour the hot cream over the chopped white chocolate and let it sit for a minute to allow the chocolate to soften.
2. Stir and Combine: After a minute, gently stir the mixture until the white chocolate is completely melted and smooth.
Add in the vanilla extract and mix well. If you’re using nuts, fold them into the mixture at this stage.
3. Chill the Mixture: Cover the bowl with plastic wrap and refrigerate the mixture for about 2 hours, or until it’s firm enough to handle.
4. Shape the Truffles: Once the mixture has set, use a small scoop or a teaspoon to portion out small amounts of the mixture.
Roll each portion between your palms to form smooth, round balls.
5. Coat with Coconut: Spread additional shredded coconut on a plate.
Roll each truffle in the coconut until fully coated, pressing gently to confirm the coconut adheres to the surface.
6. Chill and Store: Place the coated truffles on a baking sheet lined with parchment paper and refrigerate for at least 30 minutes to set.
Store the truffles in an airtight container in the refrigerator until ready to serve.
Extra Tips:
For a burst of flavor, consider experimenting with different extracts such as almond or peppermint to replace the vanilla.
If you prefer a nuttier texture, toasted nuts like almonds or hazelnuts can be added to the truffle mixture.
When shaping the truffles, lightly oil your hands to prevent sticking.
For a festive touch, consider using colored shredded coconut for the coating.
Enjoy these truffles with a warm cup of cocoa for the ultimate holiday treat!
Holiday Tiramisu
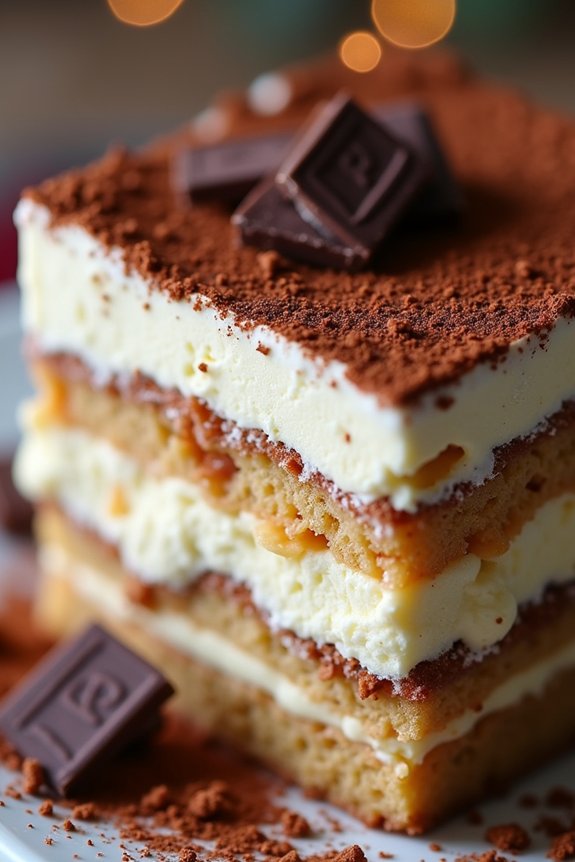
Holiday Tiramisu is a festive twist on the classic Italian dessert, perfect for adding a touch of elegance to your Christmas celebrations. This version incorporates the rich flavors of coffee and cocoa, layered with creamy mascarpone cheese and delicate ladyfingers.
Unlike the traditional tiramisu, this holiday version introduces a hint of cinnamon and nutmeg to evoke the nostalgic warmth of the season. It’s an indulgent treat that’s certain to impress your guests with its blend of flavors and beautiful presentation.
This recipe for Holiday Tiramisu serves 4-6 people, making it ideal for an intimate holiday gathering. The preparation involves layering the ingredients in a dish, allowing the flavors to meld together beautifully as it chills.
The key to a perfect tiramisu is to let it rest in the refrigerator for several hours, or even overnight, to achieve the ideal consistency and flavor depth. With this recipe, you’ll create a dessert that’s not only visually appealing but also a delicious representation of the spirit of the holiday season.
Ingredients:
- 1 cup strong brewed coffee, cooled
- 2 tablespoons coffee liqueur (optional)
- 2 tablespoons sugar
- 1 teaspoon cinnamon
- 1/2 teaspoon nutmeg
- 16-18 ladyfingers
- 4 large eggs, separated
- 1 cup mascarpone cheese
- 1 cup heavy cream
- 1/2 cup powdered sugar
- 2 teaspoons vanilla extract
- Cocoa powder, for dusting
- Dark chocolate shavings, for garnish (optional)
Instructions:
- Prepare the Coffee Mixture: In a shallow dish, combine the cooled brewed coffee, coffee liqueur (if using), 2 tablespoons of sugar, cinnamon, and nutmeg. Stir until the sugar is dissolved. Set aside to allow the flavors to meld.
- Whip the Egg Yolks: In a large bowl, beat the egg yolks and powdered sugar until thick and pale. Add the mascarpone cheese and vanilla extract, and mix until smooth.
- Whip the Cream: In a separate bowl, whip the heavy cream until stiff peaks form. Gently fold the whipped cream into the mascarpone mixture until well combined.
- Whip the Egg Whites: In another clean bowl, beat the egg whites until soft peaks form. Carefully fold the egg whites into the mascarpone mixture for added volume and a light texture.
- Assemble the Tiramisu: Quickly dip each ladyfinger into the coffee mixture, making sure they’re soaked but not soggy. Arrange a layer of soaked ladyfingers at the bottom of your serving dish.
- Layer the Cream: Spread half of the mascarpone mixture over the layer of ladyfingers. Repeat the process with another layer of soaked ladyfingers and the remaining mascarpone mixture.
- Chill the Dessert: Cover the dish with plastic wrap and refrigerate for at least 6 hours, preferably overnight, to allow the flavors to develop and the dessert to set properly.
- Finish and Serve: Just before serving, dust the top with cocoa powder and garnish with dark chocolate shavings if desired. Serve chilled and enjoy the creamy, rich layers.
Extra Tips:
When preparing the Holiday Tiramisu, make certain your coffee is strong and freshly brewed for a robust flavor. Use high-quality mascarpone cheese for the creamiest results.
When folding the whipped cream and egg whites into the mascarpone mixture, do so gently to maintain the mixture’s lightness. If you have time, make the tiramisu a day in advance to allow the flavors to meld perfectly.
For an added festive touch, consider adding a sprinkle of ground ginger or cloves to the coffee mixture.
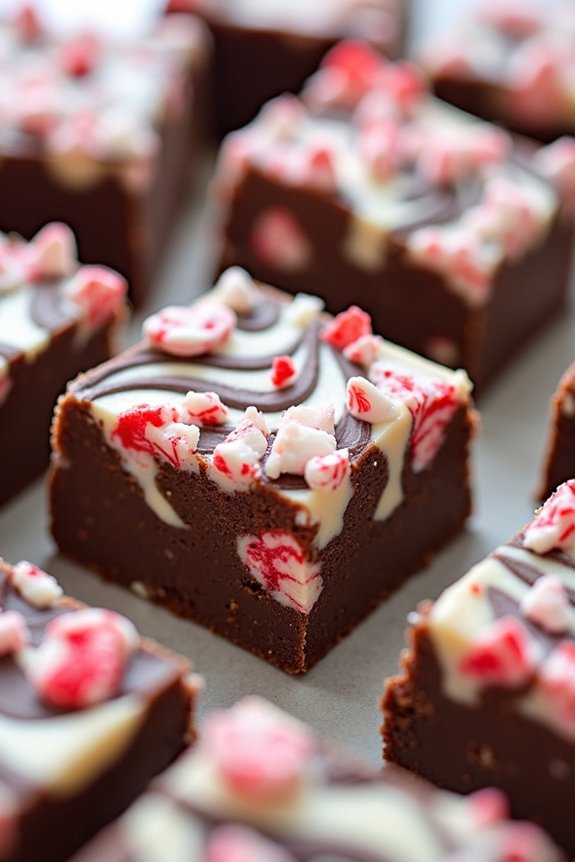
Candy Cane Brownies
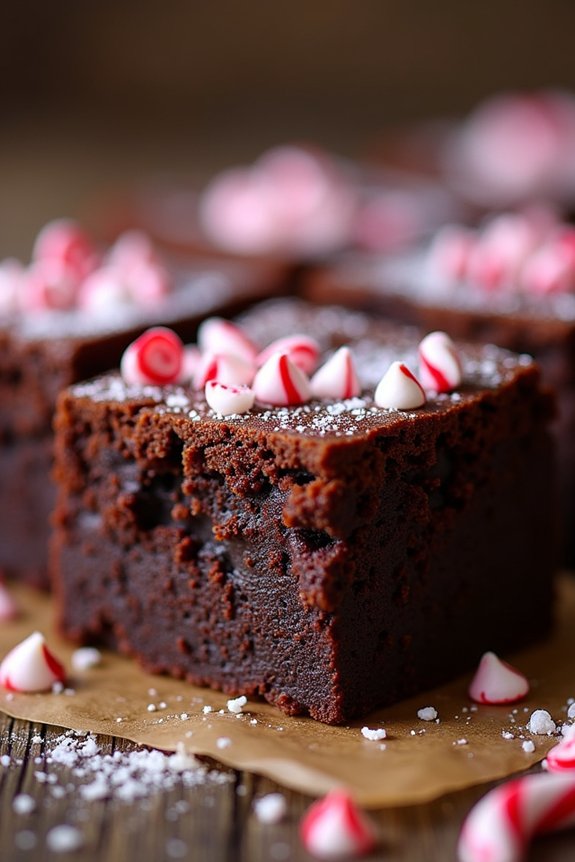
Candy Cane Brownies are a festive and delicious holiday treat that combines the rich, fudgy goodness of classic brownies with the invigorating crunch of peppermint candy canes. Perfect for any Christmas celebration, these brownies bring together the best of both worlds, creating a dessert that’s both indulgent and invigorating. The combination of chocolate and mint not only delights the taste buds but also leaves a lingering holiday cheer with every bite.
These brownies are ideal for gatherings with family and friends, where the aroma of baking chocolate fills the air, and the sight of crushed candy canes sprinkled on top evokes the joy and excitement of the season. Whether you’re an experienced baker or a novice in the kitchen, this recipe is straightforward and rewarding, making it an excellent choice for sharing with loved ones.
Let’s explore the ingredients and instructions to create this delightful Christmas dessert for 4-6 people.
Ingredients:
- 1 cup (2 sticks) unsalted butter
- 2 cups granulated sugar
- 4 large eggs
- 1 teaspoon vanilla extract
- 1 cup all-purpose flour
- 1 cup unsweetened cocoa powder
- 1/2 teaspoon salt
- 1/2 teaspoon baking powder
- 1 cup semi-sweet chocolate chips
- 1/2 cup crushed candy canes (plus extra for garnish)
Instructions:
- Preheat and Prepare the Baking Dish: Preheat your oven to 350°F (175°C). Grease a 9×13-inch baking dish with butter or non-stick spray, and line it with parchment paper, leaving an overhang on the sides for easy removal after baking.
- Melt the Butter and Sugar: In a medium saucepan, melt the butter over medium heat. Once melted, remove from heat and add the granulated sugar, stirring until the mixture is smooth and combined.
- Mix the Wet Ingredients: In a large mixing bowl, beat the eggs one at a time into the butter and sugar mixture, ensuring each egg is fully incorporated before adding the next. Stir in the vanilla extract.
- Combine Dry Ingredients: In a separate bowl, whisk together the flour, cocoa powder, salt, and baking powder. Gradually add this dry mixture to the wet ingredients, stirring until fully combined and smooth.
- Add Chocolate Chips and Candy Canes: Fold in the semi-sweet chocolate chips and 1/2 cup of crushed candy canes into the brownie batter, ensuring they’re evenly distributed.
- Bake the Brownies: Pour the brownie batter into the prepared baking dish, spreading it evenly. Bake in the preheated oven for 30-35 minutes or until a toothpick inserted into the center comes out with a few moist crumbs.
- Cool and Garnish: Allow the brownies to cool in the pan on a wire rack. Once cooled, lift the brownies out using the parchment overhang, and cut them into squares. Sprinkle additional crushed candy canes over the top for garnish.
Extra Tips:
For a more intense peppermint flavor, consider adding a teaspoon of peppermint extract to the batter along with the vanilla extract. If you prefer your brownies to be extra fudgy, slightly underbake them, as they’ll continue to set while cooling.
To easily crush candy canes, place them in a zip-lock bag and use a rolling pin to gently pound them into smaller pieces. Make sure to store any leftover brownies in an airtight container to maintain their freshness and prevent the candy cane topping from becoming sticky.
Enjoy your Candy Cane Brownies with a scoop of vanilla ice cream or a dollop of whipped cream for an extra special treat!
Fruitcake Cookies
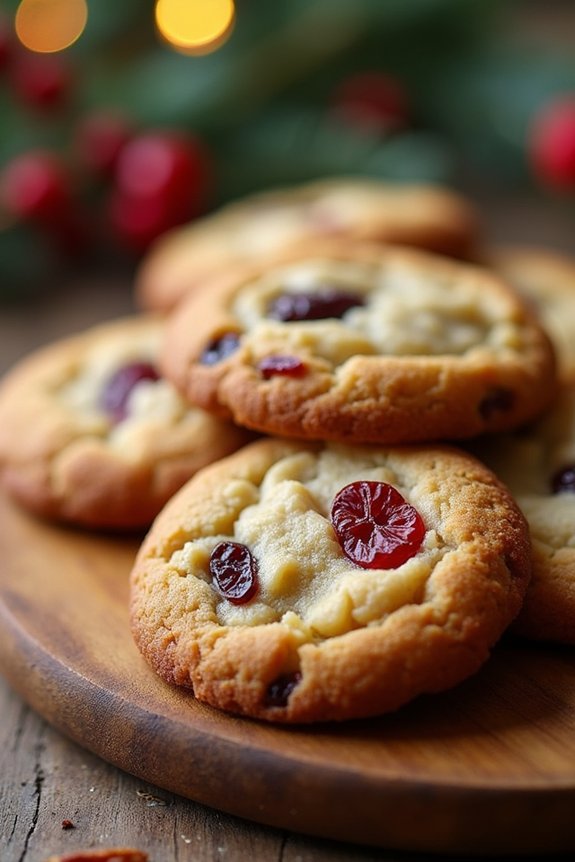
Fruitcake Cookies are a delightful twist on the traditional holiday fruitcake, offering a modern and convenient way to enjoy the rich flavors of dried fruits, nuts, and warm spices. These cookies are perfect for those who love the taste of fruitcake but prefer a more manageable and shareable option.
With a chewy texture and bursts of flavor in every bite, Fruitcake Cookies are bound to become a holiday favorite in your household. These cookies are packed with a variety of dried fruits and nuts, making them both delicious and nutritious.
They’re easy to make and can be prepared in advance, making them perfect for holiday gatherings or as a thoughtful homemade gift. Follow this recipe to create a batch of Fruitcake Cookies that will delight your family and friends during the festive season.
Ingredients (serving size: 4-6 people):
- 1 cup all-purpose flour
- 1/2 teaspoon baking soda
- 1/4 teaspoon salt
- 1/2 teaspoon ground cinnamon
- 1/4 teaspoon ground nutmeg
- 1/4 cup unsalted butter, softened
- 1/2 cup brown sugar, packed
- 1 large egg
- 1 tablespoon vanilla extract
- 1 tablespoon orange zest
- 1 cup mixed dried fruits (such as raisins, cranberries, cherries, apricots)
- 1/2 cup chopped nuts (such as walnuts, pecans, almonds)
- 2 tablespoons dark rum or orange juice
Instructions:
- Preheat the Oven: Begin by preheating your oven to 350°F (175°C) to guarantee it reaches the correct temperature by the time the cookies are ready to bake.
- Prepare the Baking Sheet: Line a baking sheet with parchment paper or a silicone baking mat to prevent the cookies from sticking and to make cleanup easier.
- Mix Dry Ingredients: In a medium-sized bowl, whisk together the flour, baking soda, salt, ground cinnamon, and ground nutmeg. This guarantees that the spices are evenly distributed throughout the cookie dough.
- Cream Butter and Sugar: In a large mixing bowl, cream the softened butter and brown sugar together using an electric mixer on medium speed until the mixture is light and fluffy, about 2-3 minutes.
- Add Wet Ingredients: Beat in the egg, vanilla extract, and orange zest until well combined. This will add moisture and flavor to your cookies.
- Combine with Dry Ingredients: Gradually add the dry ingredients to the wet mixture, beating on low speed just until combined. Avoid overmixing to keep the cookies tender.
- Fold in Fruits and Nuts: Using a spatula, fold in the mixed dried fruits and chopped nuts, along with the dark rum or orange juice. Confirm that the fruits and nuts are evenly distributed throughout the dough.
- Shape the Cookies: Drop rounded tablespoons of dough onto the prepared baking sheet, spacing them about 2 inches apart to allow for spreading during baking.
- Bake: Place the baking sheet in the preheated oven and bake for 10-12 minutes, or until the edges of the cookies are golden brown. The centers may appear slightly underbaked, but they’ll firm up as they cool.
- Cool the Cookies: Remove the cookies from the oven and allow them to cool on the baking sheet for 5 minutes before transferring them to a wire rack to cool completely.
Extra Tips:
To enhance the flavor of your Fruitcake Cookies, consider soaking the dried fruits in the dark rum or orange juice overnight. This will plump them up and infuse the cookies with extra flavor.
If you prefer a non-alcoholic version, simply use orange juice instead of dark rum. These cookies can be stored in an airtight container at room temperature for up to a week, or frozen for longer storage. Enjoy them with a cup of tea or coffee for a festive treat.