

When it comes to holiday treats, few things are as comforting as a batch of homemade fudge. I’ve been whipping up some festive fudge recipes that promise to delight your taste buds. Think rich chocolate, refreshing peppermint, and a dash of gingerbread spicing up your kitchen. These recipes put a fun twist on the classic, making them ideal for sharing or gifting. Get ready to enjoy these delectable Christmas fudge creations!
Classic Chocolate Fudge
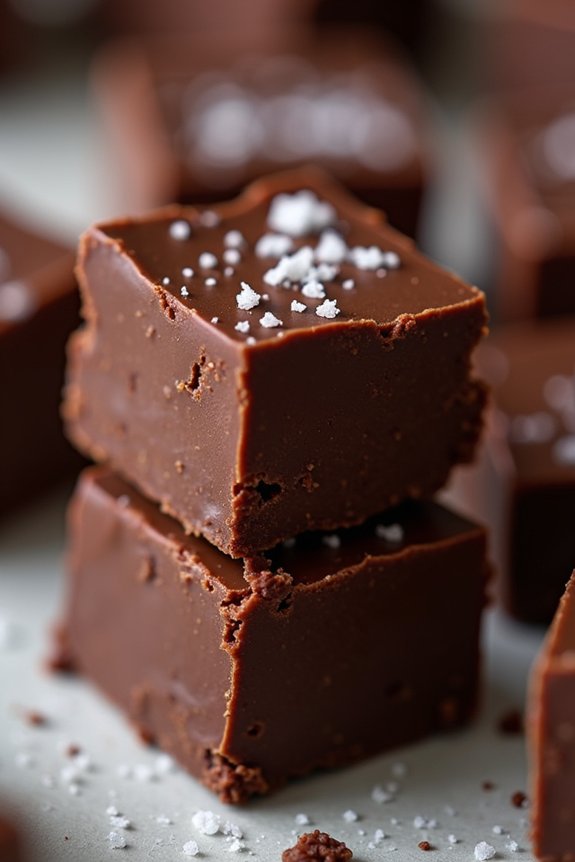
There’s nothing quite like the rich, creamy taste of classic chocolate fudge to bring a touch of sweetness to your holiday celebrations. This timeless treat is a favorite for its smooth texture and intense chocolate flavor.
Whether you’re gifting it to friends and family or indulging in a piece (or two) yourself, this classic chocolate fudge recipe is sure to become a go-to holiday tradition. Perfect for sharing, this recipe yields a serving size suitable for 4-6 people, making it a delightful addition to your festive dessert table.
With just a few simple ingredients and a bit of patience, you’ll have a batch of delicious fudge that captures the essence of the holiday spirit.
Ingredients:
- 2 cups granulated sugar
- 1/2 cup unsweetened cocoa powder
- 1 cup whole milk
- 1/4 cup unsalted butter
- 1 teaspoon vanilla extract
- 1/4 teaspoon salt
Instructions:
- Prepare the Pan: Line an 8-inch square baking dish with aluminum foil or parchment paper, leaving some overhang on the sides to make it easier to lift the fudge out later. Lightly grease the foil or paper with butter to prevent sticking.
- Mix Dry Ingredients: In a medium saucepan, combine the granulated sugar, cocoa powder, and salt. Stir them together until they’re well mixed, guaranteeing there are no lumps in the cocoa.
- Add Wet Ingredients: Pour the milk into the saucepan with the dry ingredients. Stir the mixture constantly over medium heat until the sugar dissolves, and the mixture is smooth.
- Boil the Mixture: Increase the heat to medium-high and bring the mixture to a rapid boil. Allow it to boil without stirring until it reaches a temperature of 234°F (112°C) on a candy thermometer. This should take about 10-15 minutes.
- Add Butter and Vanilla: Remove the saucepan from heat and immediately add the butter and vanilla extract. Don’t stir; simply let them sit on top of the hot mixture.
- Cool the Mixture: Allow the mixture to cool to approximately 110°F (43°C). This can take about 30 to 40 minutes. Don’t disturb or stir during this cooling period.
- Beat the Fudge: Once cooled, beat the mixture with a wooden spoon until it thickens and loses its gloss. This will take about 5 to 10 minutes and requires some elbow grease, but it’s worth the effort!
- Pour and Set: Quickly pour the fudge mixture into the prepared baking dish, spreading it evenly to the edges. Let the fudge cool completely at room temperature until firm. This can take about 1 to 2 hours.
- Cut and Serve: Once set, lift the fudge out of the pan using the overhang. Cut it into small squares and serve.
Extra Tips:
To guarantee the best results, it’s important not to stir the fudge while it’s boiling, as this can cause the sugar to crystallize and result in a grainy texture.
Additionally, make sure the mixture cools to the proper temperature before beating, as this step is vital for achieving the right consistency. If you find the fudge is too soft when cutting, try refrigerating it for a short time to firm it up.
Enjoy your classic chocolate fudge as a delightful treat or gift during the holiday season!
Peppermint Swirl Fudge
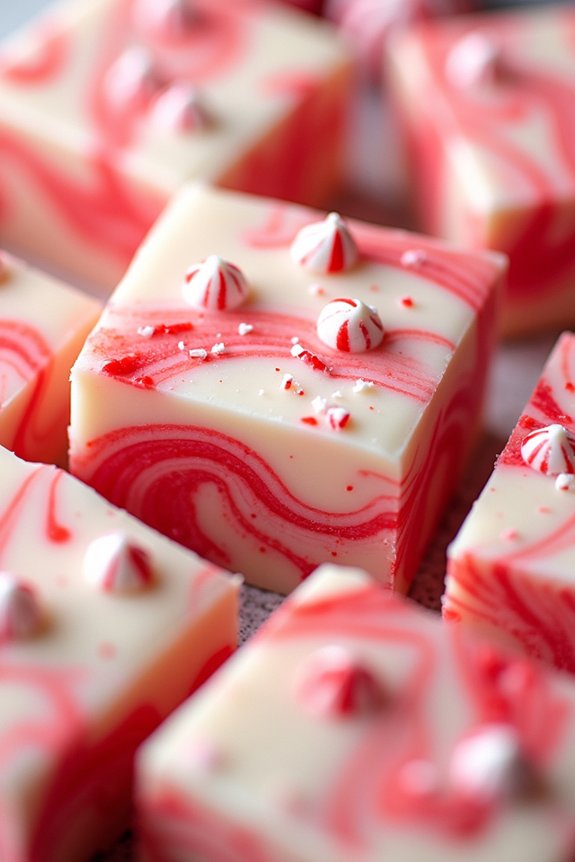
Peppermint Swirl Fudge is a delightful and festive treat perfect for the holiday season. This creamy, smooth fudge is infused with peppermint flavor and features a beautiful swirl of red and white, making it not only delicious but also visually appealing.
It’s a fantastic addition to any Christmas dessert spread and is sure to be a hit with both kids and adults alike. This recipe yields enough fudge to serve 4-6 people, making it ideal for small gatherings or as a gift for friends and family.
The combination of rich white chocolate, sweetened condensed milk, and invigorating peppermint creates a harmonious blend of flavors that will leave everyone asking for more. Let’s get started on making this holiday favorite!
Ingredients:
- 2 cups white chocolate chips
- 1 can (14 ounces) sweetened condensed milk
- 1/4 teaspoon peppermint extract
- 1/4 teaspoon vanilla extract
- Red food coloring
- Crushed peppermint candies for garnish (optional)
Cooking Instructions:
- Prepare the Pan: Line an 8×8 inch square baking dish with parchment paper, leaving some overhang on the sides to easily lift the fudge out later. This will guarantee that the fudge doesn’t stick to the pan and is easy to remove.
- Melt the Chocolate: In a medium saucepan over low heat, combine the white chocolate chips and sweetened condensed milk. Stir continuously until the chocolate is completely melted and the mixture is smooth. Make sure to keep the heat low to prevent the chocolate from burning.
- Flavor the Mixture: Once the chocolate is melted, remove the saucepan from the heat. Stir in the peppermint extract and vanilla extract until well combined. These extracts will give the fudge its signature peppermint flavor.
- Create the Swirl: Divide the fudge mixture into two separate bowls. Add a few drops of red food coloring to one bowl and gently stir until you achieve your desired shade of red. Be careful not to overmix, as you want a distinct red color for the swirl.
- Pour and Swirl: Pour alternating spoonfuls of the white and red mixtures into the prepared pan. Using a knife, gently swirl the mixtures together to create a marbled effect. Avoid over-swishing to maintain the swirl pattern.
- Garnish and Set: If desired, sprinkle crushed peppermint candies on top of the fudge for an extra festive touch. Press them lightly into the surface. Place the pan in the refrigerator and let the fudge set for at least 2 hours or until firm.
- Serve: Once set, lift the fudge out of the pan using the parchment paper overhang. Cut into small squares and serve. Enjoy the creamy, peppermint-flavored fudge with family and friends!
Extra Tips:
For a more intense peppermint flavor, you can adjust the amount of peppermint extract to your liking, but be cautious as it can easily become overpowering.
If you prefer a less sweet fudge, consider using a mix of semi-sweet and white chocolate chips. When cutting the fudge, use a sharp knife for clean, precise squares.
If the fudge is too hard to cut, let it sit at room temperature for a few minutes to soften slightly. Store any leftovers in an airtight container in the refrigerator for up to two weeks.
White Chocolate Cranberry Fudge
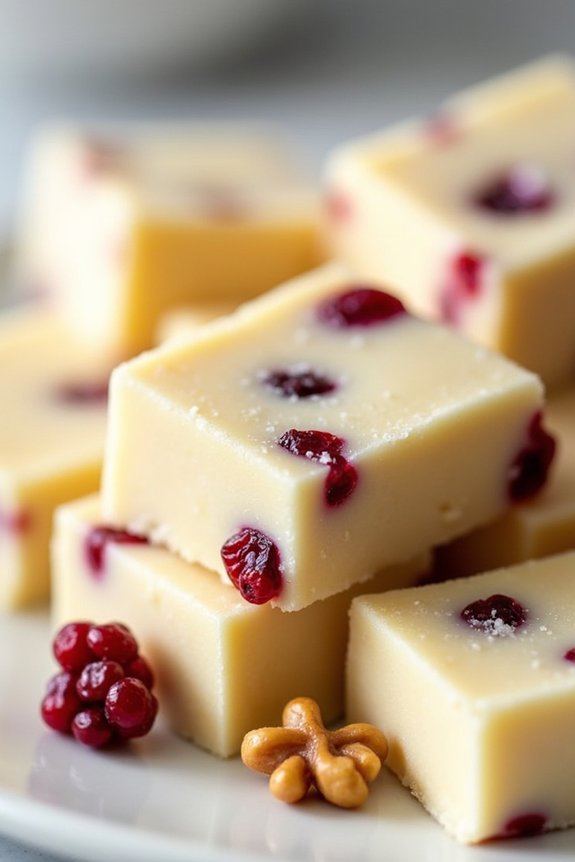
White Chocolate Cranberry Fudge is a delightful treat that combines the creamy richness of white chocolate with the tartness of dried cranberries. This festive fudge is perfect for holiday gatherings or as a homemade gift for loved ones. The contrasting flavors and smooth texture make it an irresistible dessert that’s both easy to make and impressive to serve.
Whether you’re a seasoned candy maker or a beginner, this recipe is straightforward and requires no special equipment. This fudge is perfect for those who enjoy a touch of elegance in their desserts. The cranberries not only add a burst of flavor but also a pop of color, making each piece visually appealing.
The preparation involves simple ingredients that come together beautifully, resulting in a luscious treat that melts in your mouth. This recipe yields enough to serve 4-6 people, making it an ideal choice for small gatherings or intimate holiday dinners.
Ingredients (Serves 4-6):
- 2 cups white chocolate chips
- 1 can (14 ounces) sweetened condensed milk
- 1 teaspoon vanilla extract
- 1/2 teaspoon salt
- 1 cup dried cranberries
- 1/2 cup chopped walnuts (optional)
Instructions:
- Prepare the Pan: Line an 8-inch square baking dish with parchment paper, leaving some overhang on the sides for easy removal later. This will prevent the fudge from sticking and make it easier to lift out once set.
- Melt the Chocolate: In a medium saucepan, combine the white chocolate chips and sweetened condensed milk. Place the saucepan over low heat and stir continuously until the chocolate is completely melted and the mixture is smooth. Be careful not to overheat, as white chocolate can scorch easily.
- Add Flavorings: Remove the saucepan from the heat and stir in the vanilla extract and salt. This will enhance the overall flavor of the fudge.
- Incorporate Cranberries and Nuts: Gently fold in the dried cranberries and walnuts (if using) until they’re evenly distributed throughout the chocolate mixture.
- Pour and Set: Pour the mixture into the prepared baking dish, spreading it evenly with a spatula. Press down lightly to guarantee an even surface. Allow the fudge to cool at room temperature for about an hour, then transfer it to the refrigerator to set completely, about 2 hours.
- Cut and Serve: Once the fudge is firm, use the parchment paper overhang to lift it out of the pan. Cut the fudge into small squares using a sharp knife. Serve immediately or store in an airtight container in the refrigerator.
Extra Tips:
- For a smoother texture, make sure to stir the chocolate mixture continuously while melting to prevent any lumps or scorching.
- If you prefer a sweeter fudge, you can add a tablespoon of honey or maple syrup to the chocolate mixture before setting.
- For added flavor, try sprinkling a pinch of cinnamon or nutmeg into the mixture for a warm, holiday spice touch.
- This fudge can be stored in the refrigerator for up to two weeks, making it a convenient make-ahead treat for busy holiday seasons.
Eggnog Fudge
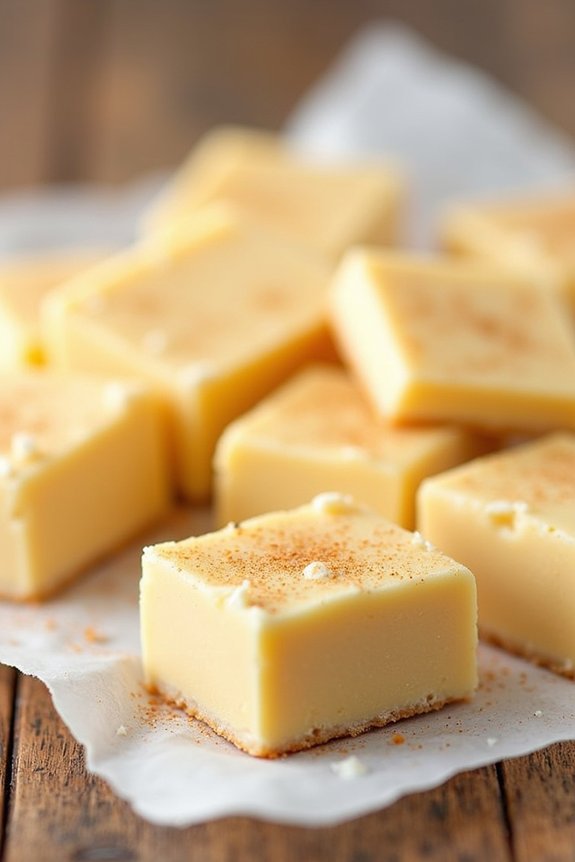
Eggnog Fudge is a delightful holiday treat that combines the rich flavors of traditional eggnog with creamy fudge for a perfect festive indulgence. This sweet confection is ideal for holiday gatherings, gift-giving, or simply enjoying at home. The smooth, velvety texture and the subtle hint of nutmeg and vanilla make it a standout dessert during the Christmas season.
Whether you’re a seasoned fudge maker or a beginner, this recipe is both simple and rewarding. The process of making Eggnog Fudge involves a few basic ingredients that come together to create something truly special. The key is to use high-quality eggnog, which infuses the fudge with its distinct flavor. A touch of nutmeg adds warmth, while white chocolate chips guarantee the fudge is creamy and luscious. The result is a melt-in-your-mouth treat that captures the essence of Christmas in every bite.
Ingredients (Serving Size: 4-6 people):
- 2 cups granulated sugar
- 1/2 cup unsalted butter
- 3/4 cup eggnog
- 1 teaspoon ground nutmeg
- 1 teaspoon vanilla extract
- 12 oz white chocolate chips
- 7 oz marshmallow creme
- Optional: additional ground nutmeg for garnish
Instructions:
- Prepare the Pan: Line an 8×8-inch baking dish with aluminum foil or parchment paper, allowing some overhang on the sides for easy removal. Lightly grease the lining with butter or non-stick spray.
- Combine Ingredients: In a medium-sized saucepan, combine the granulated sugar, unsalted butter, and eggnog. Place the saucepan over medium heat and stir continuously until the butter melts and the sugar dissolves.
- Boil the Mixture: Bring the mixture to a boil, stirring occasionally. Once it reaches a rolling boil, let it continue to boil for 10 minutes without stirring. This step is vital for setting the fudge properly.
- Remove from Heat: After 10 minutes, remove the saucepan from heat. Immediately stir in the ground nutmeg and vanilla extract, mixing well to incorporate the flavors.
- Add Chocolate and Marshmallow: Stir in the white chocolate chips until they’re fully melted and the mixture is smooth. Then fold in the marshmallow creme until completely combined and the mixture is creamy.
- Pour and Set: Quickly pour the fudge mixture into the prepared baking dish, spreading it evenly with a spatula. If desired, sprinkle a pinch of ground nutmeg on top for garnish.
- Cool and Chill: Allow the fudge to cool at room temperature for about 30 minutes. Then transfer it to the refrigerator and let it chill for at least 2 hours, or until firm.
- Cut and Serve: Once set, lift the fudge out of the pan using the foil or parchment overhang. Cut into small squares and serve.
Extra Tips:
When making Eggnog Fudge, it’s important to maintain a steady heat when boiling the mixture to avoid burning or crystallizing the sugar. Using a candy thermometer can help confirm the mixture reaches the correct temperature (234°F or soft-ball stage) for ideal results.
If the fudge seems too soft after chilling, it can be placed back in the refrigerator for additional time to firm up. Enjoy your Eggnog Fudge with a cup of festive eggnog or hot chocolate for an extra special holiday treat.
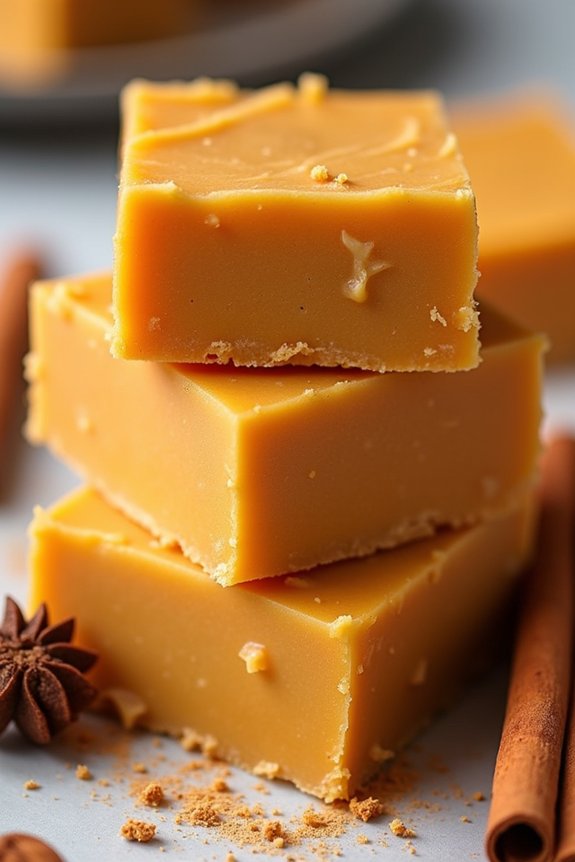
Gingerbread Fudge
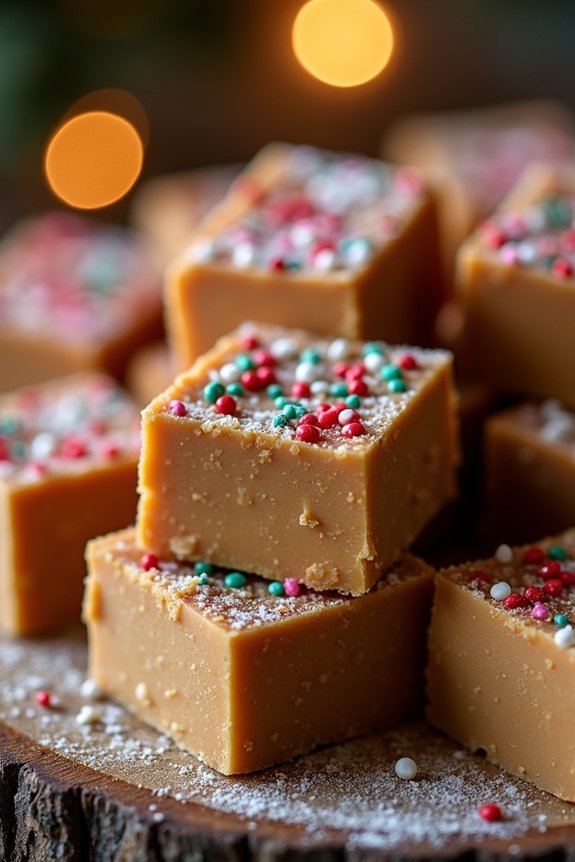
Gingerbread Fudge is the perfect holiday treat that combines the classic flavors of gingerbread cookies with the creamy texture of fudge. This festive dessert isn’t only visually appealing with its warm, spiced color but also incredibly delicious with a rich blend of spices that evoke the cozy feeling of Christmas.
Whether you’re making it for a holiday gathering or as a sweet gift for loved ones, Gingerbread Fudge is sure to be a favorite.
This fudge is surprisingly easy to make and only requires a few ingredients, making it an ideal choice for both novice and experienced home cooks. The recipe incorporates traditional gingerbread spices like cinnamon, ginger, and nutmeg, which are complemented by the smoothness of white chocolate and sweetened condensed milk.
The result is a melt-in-your-mouth treat that captures the essence of Christmas in every bite.
Ingredients for 4-6 servings:
- 2 cups white chocolate chips
- 1 can (14 ounces) sweetened condensed milk
- 1 tablespoon molasses
- 1 teaspoon vanilla extract
- 1 teaspoon ground ginger
- 1 teaspoon ground cinnamon
- 1/4 teaspoon ground nutmeg
- 1/4 teaspoon ground cloves
- A pinch of salt
- Optional: festive sprinkles or crushed gingerbread cookies for topping
Cooking Instructions:
- Prepare the Pan: Line an 8×8 inch square baking dish with parchment paper, leaving some overhang on the sides to easily lift the fudge out later.
- Melt the Chocolate: In a medium saucepan, combine the white chocolate chips and sweetened condensed milk over low heat. Stir constantly until the chocolate is completely melted and the mixture is smooth.
- Add Flavorings: Remove the saucepan from the heat. Stir in the molasses, vanilla extract, ground ginger, cinnamon, nutmeg, cloves, and a pinch of salt. Mix until all ingredients are well combined and the mixture is smooth and uniform.
- Pour and Spread: Pour the fudge mixture into the prepared baking dish. Use a spatula to spread it evenly. If desired, sprinkle festive sprinkles or crushed gingerbread cookies on top for a decorative touch.
- Chill: Place the baking dish in the refrigerator and let the fudge set for at least 2 hours, or until firm.
- Cut and Serve: Once the fudge is set, use the parchment paper overhang to lift it out of the pan. Cut into small squares or bars and serve.
Extra Tips:
For the best results, use high-quality white chocolate chips, as this will make a significant difference in the texture and flavor of the fudge.
If you prefer a stronger gingerbread flavor, consider increasing the spices slightly to suit your taste. This fudge can be stored in an airtight container in the refrigerator for up to two weeks, making it an excellent make-ahead treat for holiday festivities.
Additionally, try experimenting with different toppings like chopped nuts or a drizzle of dark chocolate for a unique twist.
Salted Caramel Fudge
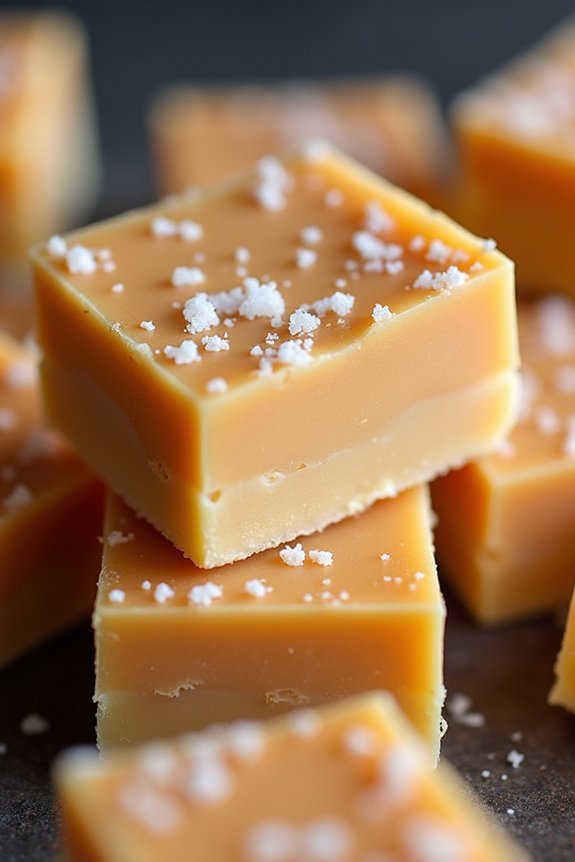
Salted Caramel Fudge is a decadent treat that perfectly blends the creamy sweetness of caramel with a hint of saltiness. This rich and buttery fudge is an indulgence that’s sure to delight your taste buds and impress your family and friends.
Whether you’re preparing it for a holiday gathering or as a homemade gift, this fudge is a wonderful addition to any festive occasion. The smooth texture and balanced flavors make it a favorite among those who love a sweet and salty combination.
Crafting Salted Caramel Fudge requires a bit of patience and attention to detail, but the result is well worth the effort. The key to achieving the perfect consistency lies in cooking the caramel to the right temperature and allowing the fudge to set completely before serving.
The luscious caramel flavor is enhanced by the addition of sea salt, which not only elevates the taste but also adds a delightful contrast to the sweetness. This recipe yields enough fudge to serve 4-6 people, making it an ideal choice for small gatherings or as a special treat for your loved ones.
Ingredients:
- 2 cups granulated sugar
- 3/4 cup unsalted butter
- 2/3 cup evaporated milk
- 2 cups white chocolate chips
- 1 jar (7 oz) marshmallow creme
- 1 teaspoon vanilla extract
- 1 cup caramel sauce
- 1 teaspoon sea salt (plus extra for sprinkling)
Instructions:
- Prepare the Pan: Line an 8×8 inch baking dish with parchment paper, leaving some overhang on the sides for easy removal of the fudge once set. Lightly grease the parchment paper to prevent sticking.
- Create the Base Mixture: In a medium saucepan, combine the granulated sugar, unsalted butter, and evaporated milk. Cook over medium heat, stirring constantly, until the mixture comes to a boil.
- Cook the Mixture: Continue to boil for approximately 4 minutes, stirring continuously to prevent burning. The mixture should reach a temperature of about 234°F (112°C) on a candy thermometer.
- Remove from Heat: Take the saucepan off the heat and quickly stir in the white chocolate chips, marshmallow creme, and vanilla extract. Mix until the chocolate is completely melted and the mixture is smooth and creamy.
- Add Caramel and Salt: Gently fold in the caramel sauce and 1 teaspoon of sea salt until well incorporated.
- Pour and Set: Pour the fudge mixture into the prepared baking dish, spreading it evenly with a spatula. Sprinkle a little extra sea salt over the top for added flavor.
- Chill: Allow the fudge to cool at room temperature for about 30 minutes, then transfer it to the refrigerator for at least 2 hours or until firm.
- Slice and Serve: Once set, lift the fudge out of the pan using the parchment paper overhang. Cut into small squares and serve.
Extra Tips:
When making Salted Caramel Fudge, it’s essential to monitor the temperature closely while cooking the sugar mixture to guarantee proper setting. Using a candy thermometer can help achieve the ideal consistency.
If you prefer a softer fudge, you can slightly reduce the cooking time by a minute. For a more intense caramel flavor, consider using homemade caramel sauce.
Additionally, feel free to experiment with different types of salt, such as fleur de sel, for unique flavor variations. Store any leftover fudge in an airtight container at room temperature for up to a week, or refrigerate for longer shelf life.
Red Velvet Fudge
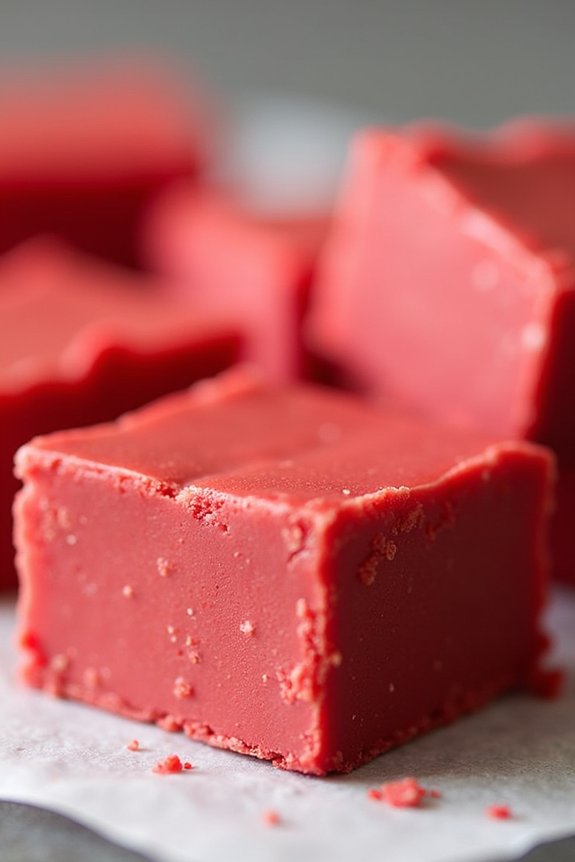
Red Velvet Fudge is a delightful twist on the classic chocolate treat, combining the rich flavors of red velvet cake with the creamy texture of fudge. This festive confection is perfect for holiday gatherings, adding a splash of color and a burst of flavor to your dessert table.
The smooth, velvety texture of the fudge melts in your mouth, while the hint of cocoa and the tangy cream cheese frosting create a harmonious blend that’s certain to please any sweet tooth. It’s an easy-to-make recipe that brings warmth and joy to any Christmas celebration.
Crafting Red Velvet Fudge is a simple yet rewarding process, making it an ideal choice for both novice and seasoned bakers. With just a few ingredients, you can whip up a batch of this decadent treat in no time.
The key to achieving the perfect balance of flavors lies in the quality of your ingredients, so be certain to choose the best available. This recipe yields a serving size of 4-6 people, making it perfect for intimate gatherings or as a special homemade gift for loved ones.
Ingredients:
- 2 cups white chocolate chips
- 1/2 cup sweetened condensed milk
- 1/4 cup unsalted butter
- 1 teaspoon vanilla extract
- 1 tablespoon unsweetened cocoa powder
- Red gel food coloring
- 1/4 cup cream cheese, softened
- 2 cups powdered sugar
- 1/2 teaspoon lemon juice
- 1/4 teaspoon salt
Cooking Instructions:
- Prepare the Baking Dish: Line an 8×8 inch baking dish with parchment paper, leaving some overhang on the sides for easy removal of the fudge later.
- Melt the Chocolate: In a medium saucepan, combine the white chocolate chips, sweetened condensed milk, and unsalted butter. Heat over low-medium heat, stirring constantly until fully melted and smooth.
- Add Cocoa and Color: Once the mixture is smooth, remove the saucepan from heat. Stir in the vanilla extract, unsweetened cocoa powder, and a few drops of red gel food coloring. Mix until the color is evenly distributed and you achieve the desired red velvet hue.
- Incorporate Cream Cheese: In a separate bowl, beat the softened cream cheese until smooth. Gradually add the powdered sugar, lemon juice, and salt, beating until the mixture is creamy and well-combined.
- Combine Mixtures: Gently fold the cream cheese mixture into the chocolate mixture until fully integrated. Confirm there are no streaks for a uniform appearance.
- Set the Fudge: Pour the combined fudge mixture into the prepared baking dish, spreading it evenly with a spatula. Refrigerate for at least 2 hours, or until firm.
- Cut and Serve: Once set, use the parchment paper overhang to lift the fudge out of the dish. Cut into small squares and serve chilled.
Extra Tips:
For the best results, use gel food coloring as it provides a more vibrant color with less liquid, making certain the fudge sets properly. If you prefer a deeper red, adjust the amount of food coloring to your liking.
Make sure the cream cheese is at room temperature before mixing to avoid lumps. Store any leftovers in an airtight container in the refrigerator for up to a week, keeping them fresh and flavorful. Enjoy your Red Velvet Fudge as a sweet treat during the holiday season or as a delightful gift for friends and family.
Hot Cocoa Fudge

Hot Cocoa Fudge is a delightful treat that captures the rich and comforting flavors of a classic cup of hot cocoa in a creamy, melt-in-your-mouth fudge form. Perfect for the holiday season, this indulgent dessert combines the deep, chocolatey essence of cocoa with a smooth, velvety texture that’s certain to please any chocolate lover’s palate.
Whether you’re sharing it with family and friends or enjoying a piece with a warm beverage by the fire, Hot Cocoa Fudge makes for an irresistible holiday confection that embodies the spirit of Christmas.
This particular recipe for Hot Cocoa Fudge is designed to serve 4-6 people, making it an ideal choice for small gatherings or a special family treat. The ingredients are simple and straightforward, guaranteeing that even novice bakers can produce a batch of fudge that’s both delicious and visually appealing.
With just a few pantry staples and some easy-to-follow steps, you’ll be well on your way to creating a holiday dessert that’s certain to become a new favorite.
Ingredients:
- 2 cups semisweet chocolate chips
- 1 cup sweetened condensed milk
- 1/4 cup unsalted butter
- 1/4 cup unsweetened cocoa powder
- 1 teaspoon vanilla extract
- 1/4 teaspoon salt
- 1 cup mini marshmallows
- 1/4 cup crushed peppermint candies (optional)
Instructions:
- Prepare the Baking Dish: Line an 8×8 inch baking dish with aluminum foil, leaving some overhang on the sides to make it easier to lift the fudge out later. Lightly grease the foil with a non-stick cooking spray to guarantee easy removal.
- Melt the Chocolate: In a medium saucepan over low heat, combine the semisweet chocolate chips, sweetened condensed milk, and unsalted butter. Stir continuously until the mixture is fully melted and smooth, taking care not to overheat the chocolate as it can seize or burn.
- Add Cocoa and Flavorings: Once the chocolate mixture is smooth, sift in the unsweetened cocoa powder, and add the vanilla extract and salt. Stir well to guarantee the cocoa powder is fully incorporated and the mixture is evenly combined.
- Incorporate Marshmallows: Remove the saucepan from the heat, and gently fold in the mini marshmallows until they’re evenly distributed throughout the fudge mixture. The marshmallows will add a delightful chewy texture reminiscent of a cup of hot cocoa.
- Pour and Set: Pour the fudge mixture into the prepared baking dish, spreading it evenly with a spatula. If desired, sprinkle the crushed peppermint candies over the top for a festive touch. Gently press them into the surface of the fudge.
- Chill and Serve: Refrigerate the fudge for at least 2 hours, or until it’s firm enough to cut. Once set, lift the fudge out of the baking dish using the foil overhang, and cut it into squares. Serve and enjoy the festive flavors.
Extra Tips:
For the best results, use high-quality chocolate chips to guarantee a smooth and rich flavor. If you prefer a creamier texture, you can substitute half of the semisweet chocolate chips with milk chocolate chips.
The crushed peppermint candies are optional, but they add a lovely holiday flair and a revitalizing contrast to the rich chocolate. Store any leftovers in an airtight container in the fridge for up to two weeks, guaranteeing you can savor this holiday treat for days to come.
Nutty Maple Fudge
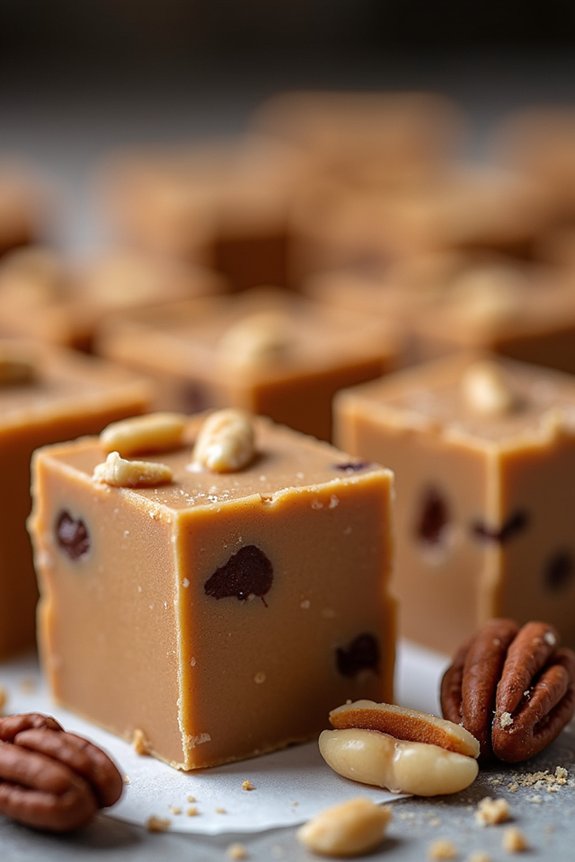
Nutty Maple Fudge is a delightful holiday treat that combines the rich sweetness of maple syrup with the satisfying crunch of mixed nuts. This fudge is perfect for sharing with family and friends during the festive season or as a homemade gift. Its smooth and creamy texture, paired with the nutty goodness, makes it a standout among holiday confections.
Prepare to wow your guests with this simple yet indulgent recipe that doesn’t require any baking or special equipment.
The secret to a great Nutty Maple Fudge lies in the quality of the ingredients and the careful attention to timing when cooking the mixture. Using pure maple syrup is vital to achieve the deep, authentic flavor that sets this fudge apart.
Also, the choice of nuts can be tailored to personal preference, whether it be pecans, walnuts, or almonds, each adding its unique character to the treat. With just a few steps and some patience, you can create a fudge that’s both delicious and unforgettable.
Ingredients (serving size for 4-6 people):
- 1 cup pure maple syrup
- 1 cup heavy cream
- 1/4 cup unsalted butter
- 1/4 teaspoon salt
- 1 teaspoon vanilla extract
- 1 1/2 cups mixed nuts (pecans, walnuts, and almonds), roughly chopped
Cooking Instructions:
- Prepare the Baking Dish: Line an 8×8-inch baking dish with parchment paper, leaving some overhang on the sides for easy removal. Lightly grease the paper with butter to prevent sticking.
- Cook the Maple Mixture: In a medium-sized saucepan, combine the maple syrup, heavy cream, unsalted butter, and salt. Place the saucepan over medium heat and stir the ingredients together until the butter melts and everything is well combined.
- Boil and Stir: Once the mixture is combined, bring it to a gentle boil. Attach a candy thermometer to the side of the pan, ensuring it doesn’t touch the bottom. Continue to cook, stirring occasionally, until the mixture reaches 235°F (soft-ball stage).
- Cool and Beat: Remove the saucepan from the heat and let the mixture cool without stirring until it reaches about 110°F. Add the vanilla extract and beat the mixture with a wooden spoon until it thickens and loses its gloss.
- Add Nuts and Pour: Stir in the chopped mixed nuts until well distributed. Quickly pour the fudge mixture into the prepared baking dish, spreading it evenly with a spatula.
- Set the Fudge: Allow the fudge to cool completely at room temperature until firm. This can take about 2 to 3 hours. Once set, lift the fudge out of the pan using the parchment paper overhang and cut it into squares.
Extra Tips:
When making Nutty Maple Fudge, be patient during the cooling process before beating the mixture; this step is essential for achieving the right consistency.
Avoid overbeating, as this can result in a crumbly texture. Also, use freshly opened nuts for the best flavor and texture. If you prefer a smoother fudge, consider chopping the nuts finely or substituting with a creamy nut butter.
Store your fudge in an airtight container at room temperature to keep it fresh and delicious.
Spiced Pumpkin Fudge
Spiced Pumpkin Fudge is a delightful twist on the traditional fudge, combining the rich, creamy texture of fudge with the warm, autumnal flavors of spiced pumpkin. This decadent treat is perfect for the holiday season, bringing together the comforting notes of pumpkin and spices such as cinnamon, nutmeg, and cloves.
It’s an indulgent dessert that can be enjoyed by both pumpkin lovers and fudge enthusiasts alike, making it an ideal choice for festive gatherings or as a homemade gift.
The process of making Spiced Pumpkin Fudge is relatively straightforward, allowing even novice cooks to achieve professional-tasting results. It involves melting and mixing ingredients to create a smooth, velvety texture that captures the essence of the season.
The key to a successful Spiced Pumpkin Fudge lies in the careful balance of flavors and the proper timing of each step, guaranteeing that the fudge sets perfectly and captures the aromatic spices in every bite.
Ingredients (Serves 4-6):
- 2 cups granulated sugar
- 1 cup packed light brown sugar
- 3/4 cup unsalted butter
- 2/3 cup evaporated milk
- 1/2 cup canned pumpkin puree
- 1 teaspoon ground cinnamon
- 1/2 teaspoon ground nutmeg
- 1/4 teaspoon ground cloves
- 2 cups white chocolate chips
- 1 jar (7 ounces) marshmallow creme
- 1 teaspoon vanilla extract
Cooking Instructions:
- Prepare the Pan: Line a 9-inch square baking pan with aluminum foil or parchment paper, allowing some overhang on the sides for easy removal. Lightly grease the foil or paper with butter or cooking spray.
- Cook the Sugar Mixture: In a heavy saucepan over medium heat, combine the granulated sugar, brown sugar, butter, evaporated milk, and pumpkin puree. Stir the mixture continuously until the sugars are dissolved and the mixture comes to a boil.
- Boil and Stir: Allow the mixture to boil, stirring constantly, until it reaches a temperature of 234°F (soft-ball stage) on a candy thermometer, which should take about 10-12 minutes. This step is essential for the fudge to set properly.
- Add Spices and Chocolate: Remove the saucepan from the heat, then quickly stir in the cinnamon, nutmeg, and cloves. Add the white chocolate chips and stir until they’re completely melted and the mixture is smooth.
- Incorporate Marshmallow and Vanilla: Stir in the marshmallow creme and vanilla extract until well combined. The mixture should be thick, smooth, and creamy.
- Pour and Set: Pour the fudge mixture into the prepared pan, spreading it evenly with a spatula. Allow the fudge to cool at room temperature until it sets, which may take about 2-3 hours.
- Cut and Serve: Once set, use the overhanging foil or parchment to lift the fudge out of the pan. Cut into small squares and serve.
Extra Tips:
For the best results, verify that your candy thermometer is accurate, as the temperature is critical for achieving the right texture. If you don’t have a candy thermometer, test the fudge by dropping a small amount into a glass of cold water; it should form a soft ball.
Store the fudge in an airtight container at room temperature for up to two weeks. If you prefer a firmer fudge, you can refrigerate it for a few hours before serving. Adjust the amount of spices to suit your taste, and consider adding a pinch of salt to enhance the flavors.
Cookies and Cream Fudge
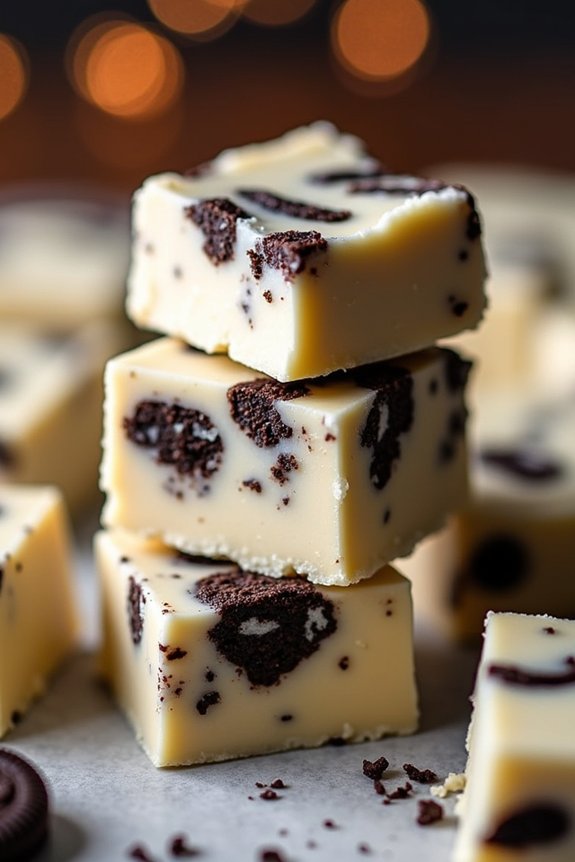
Indulge your taste buds with the decadent and delightful Cookies and Cream Fudge, a perfect treat for the holiday season. This creamy and smooth fudge, infused with chunks of chocolate sandwich cookies, is bound to be a hit at any Christmas gathering. Not only is it extremely easy to make, but it also requires minimal ingredients and time, making it an ideal last-minute addition to your festive dessert table.
This recipe yields enough fudge to serve 4-6 people, making it an excellent choice for small family gatherings or intimate holiday parties. The combination of rich white chocolate and crunchy cookies creates a flavor and texture profile that’s both satisfying and irresistible. Whether you’re a seasoned cook or a novice in the kitchen, this foolproof recipe will guide you in making the perfect batch of Cookies and Cream Fudge.
Ingredients for 4-6 servings:
- 2 cups white chocolate chips
- 1 can (14 ounces) sweetened condensed milk
- 1 teaspoon vanilla extract
- 15 chocolate sandwich cookies, coarsely chopped
- 1 tablespoon unsalted butter
Cooking Instructions:
- Prepare the Baking Pan: Start by lining an 8×8-inch square baking pan with parchment paper or aluminum foil, allowing some overhang on the sides for easy removal later. Lightly grease the lined pan with butter or non-stick spray.
- Melt the Chocolate: In a medium-sized, microwave-safe bowl, combine the white chocolate chips and unsalted butter. Microwave on medium power for 1 minute, then stir. Continue microwaving in 30-second intervals, stirring in between, until the chocolate is fully melted and smooth.
- Combine Ingredients: Add the sweetened condensed milk and vanilla extract to the melted chocolate. Stir until the mixture is well combined and smooth.
- Add the Cookies: Gently fold in the chopped chocolate sandwich cookies, making sure they’re evenly distributed throughout the fudge mixture.
- Pour and Chill: Pour the fudge mixture into the prepared baking pan, spreading it evenly with a spatula. Press down lightly to guarantee the top surface is smooth. Refrigerate the fudge for at least 2 hours, or until firm.
- Slice and Serve: Once the fudge has set, use the overhanging parchment paper to lift it out of the pan. Transfer it to a cutting board and cut it into small squares. Serve immediately or store in an airtight container in the refrigerator for up to one week.
Extra Tips:
For an added festive touch, consider sprinkling crushed peppermint candies or drizzling melted dark chocolate over the top of the fudge before chilling. If you prefer a softer fudge, reduce the chilling time slightly, but be cautious of it becoming too soft to hold its shape.
Remember to chop the cookies coarsely to maintain the signature crunchy texture in each bite. Enjoy your homemade Cookies and Cream Fudge as a sweet treat or a delightful gift for loved ones during the holiday season.
Pecan Pie Fudge
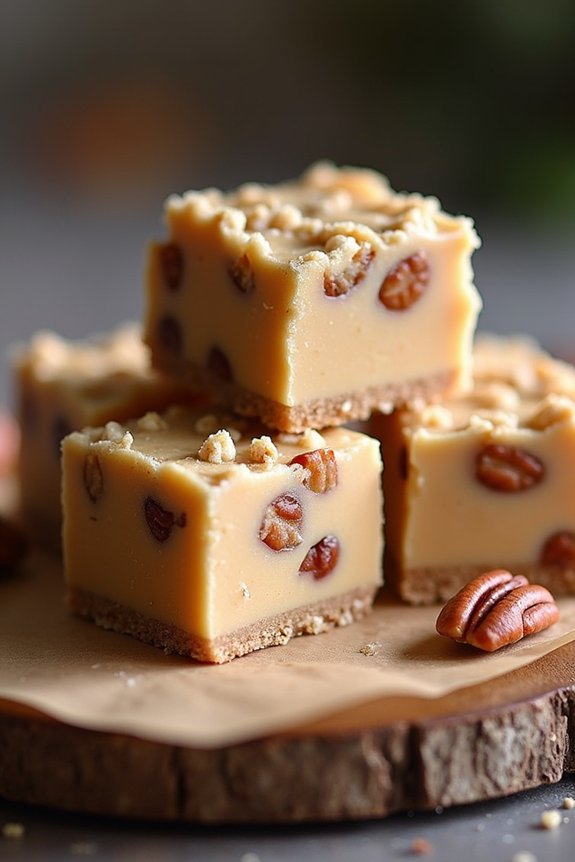
Pecan Pie Fudge is a delightful twist on the classic pecan pie, perfect for adding a sweet touch to your holiday celebrations. This fudge combines the rich, nutty flavors of pecan pie with the creamy, indulgent texture of fudge. It’s an easy-to-make treat that can be prepared in advance, making it a convenient option for holiday gatherings or as a homemade gift for friends and family.
The combination of toasted pecans, buttery caramel, and smooth fudge creates a harmonious blend of flavors that’s certain to please any crowd. This recipe yields a serving size suitable for 4-6 people, making it an excellent choice for small gatherings or as a special treat for your loved ones.
The key to nailing this recipe is in the preparation of the caramel layer and guaranteeing the fudge is set properly. By following these straightforward steps, you’ll have a batch of Pecan Pie Fudge that tastes as good as it looks.
Ingredients:
- 1 1/2 cups pecans, chopped
- 1/2 cup unsalted butter
- 1 can (14 ounces) sweetened condensed milk
- 1/2 cup packed brown sugar
- 1/4 cup light corn syrup
- 1/4 teaspoon salt
- 1 teaspoon vanilla extract
- 2 cups white chocolate chips
Cooking Instructions:
- Prepare the Pecans: Preheat your oven to 350°F (175°C). Spread the chopped pecans evenly on a baking sheet and toast them in the oven for about 8-10 minutes, or until they’re fragrant and lightly browned. Stir them halfway through to guarantee even toasting. Once done, set aside to cool.
- Make the Caramel Base: In a medium saucepan over medium heat, combine the unsalted butter, sweetened condensed milk, brown sugar, corn syrup, and salt. Stir continuously as the mixture heats up, ensuring all ingredients are well combined. Bring the mixture to a gentle boil and continue to cook for about 5 minutes, stirring frequently to prevent burning.
- Add Vanilla and Chocolate: Remove the saucepan from the heat and stir in the vanilla extract. Add the white chocolate chips and continue stirring until the chocolate is completely melted and the mixture is smooth.
- Combine with Pecans: Gently fold in the toasted pecans until they’re evenly distributed throughout the fudge mixture.
- Set the Fudge: Line an 8×8-inch baking dish with parchment paper or lightly grease it. Pour the fudge mixture into the prepared dish, smoothing the top with a spatula. Allow the fudge to cool at room temperature for about 30 minutes, then transfer it to the refrigerator to set for at least 2 hours.
- Cut and Serve: Once the fudge is firm, remove it from the dish using the parchment paper. Cut the fudge into small squares or bars, and serve.
Extra Tips: To guarantee the best texture for your Pecan Pie Fudge, make sure to stir the caramel mixture continuously while it’s boiling to prevent any sticking or burning.
When cutting the fudge, use a sharp knife for clean edges, and wipe the blade between cuts for neat pieces. If you’re making the fudge in advance, store it in an airtight container in the refrigerator to maintain its freshness. For an extra touch, you can drizzle melted chocolate over the top of the fudge before setting it in the refrigerator.
Cherry Almond Fudge
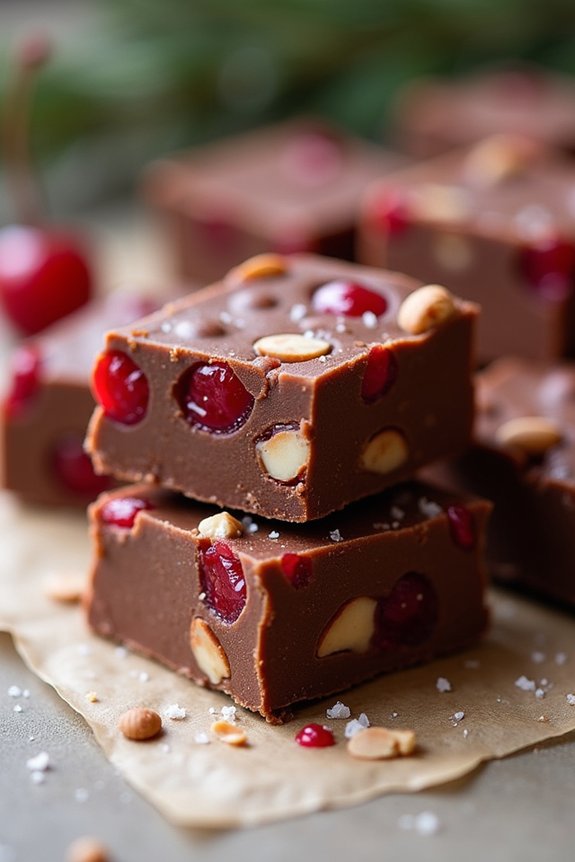
Cherry Almond Fudge is a delightful holiday treat that combines the rich, creamy texture of classic fudge with the sweet and slightly tart flavor of cherries, accompanied by the nutty crunch of almonds.
This fudge recipe is perfect for adding a festive touch to your Christmas dessert table, or for giving as a homemade gift to friends and family. The medley of flavors and textures in this fudge is sure to be a hit, capturing the essence of the holiday season with each bite.
Making Cherry Almond Fudge is a simple process, requiring only a few ingredients and minimal preparation time. The key to achieving the perfect fudge is in the timing and temperature, so be certain to follow the instructions carefully.
The combination of sweetened condensed milk and chocolate creates a smooth base, while the cherries and almonds add a delightful contrast that makes this fudge irresistible. This recipe yields enough fudge to serve 4-6 people, guaranteeing there’s plenty to share or savor yourself.
Ingredients for Cherry Almond Fudge (serving size: 4-6 people):
- 2 cups semi-sweet chocolate chips
- 1 can (14 ounces) sweetened condensed milk
- 1 teaspoon vanilla extract
- 1/2 cup chopped maraschino cherries, drained
- 1/2 cup chopped almonds
- 1/4 teaspoon almond extract
- Pinch of salt
Cooking Instructions:
- Prepare the Pan: Line an 8×8 inch baking dish with parchment paper, leaving some overhang on the sides for easy removal of the fudge later. Set the pan aside.
- Melt the Chocolate: In a medium saucepan over low heat, combine the semi-sweet chocolate chips and sweetened condensed milk. Stir continuously until the chocolate is fully melted and the mixture is smooth and glossy.
- Add Flavorings: Remove the saucepan from heat. Stir in the vanilla extract, almond extract, and a pinch of salt until well combined.
- Incorporate the Mix-ins: Gently fold in the chopped maraschino cherries and chopped almonds, making sure they’re evenly distributed throughout the fudge mixture.
- Transfer to Pan: Pour the fudge mixture into the prepared baking dish, spreading it evenly with a spatula. Smooth the top to guarantee an even layer.
- Chill the Fudge: Place the baking dish in the refrigerator and allow the fudge to set for at least 2 hours or until firm.
- Cut and Serve: Once set, use the parchment paper overhang to lift the fudge out of the pan. Cut into squares or desired shapes using a sharp knife. Serve immediately or store in an airtight container.
Extra Tips:
For the best results, make sure the maraschino cherries are well-drained to prevent excess moisture from affecting the fudge’s texture.
If you prefer a more intense almond flavor, consider lightly toasting the almonds before adding them to the mixture. This can be done by spreading them on a baking sheet and toasting in a preheated oven at 350°F (175°C) for about 5-7 minutes, just until they’re lightly golden and fragrant.
Additionally, you can experiment with different types of chocolate or add a sprinkle of sea salt on top for a gourmet touch. Enjoy your festive Cherry Almond Fudge as a delightful holiday treat!