

Waking up on Christmas morning to the delightful aroma of freshly baked goods is truly heartwarming. The kitchen, filled with the scents of gooey cinnamon rolls and chai spiced coffee cake, feels like a hug from home. Each recipe in this collection whispers nostalgia and brings back cherished memories with loved ones. There’s a certain magic in these smells that invites you to gather around the table. Let’s explore these cozy Christmas morning baking recipes that warm the heart and soul.
Classic Cinnamon Rolls
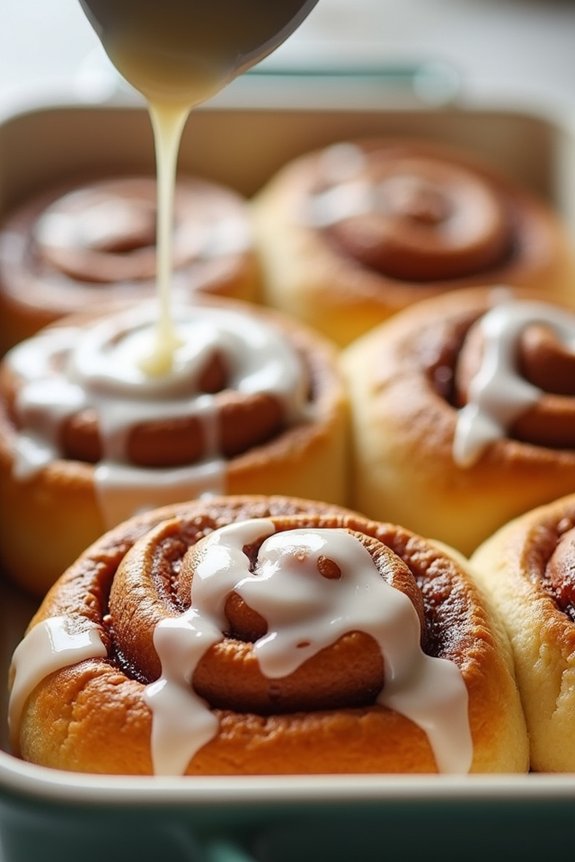
Classic Cinnamon Rolls are a quintessential holiday treat that fills your home with the warm, spicy aroma of cinnamon and sugar. Perfect for a cozy Christmas morning or as a delightful dessert, these rolls are soft, fluffy, and decadently sweet. The dough is enriched with butter and milk, creating a tender crumb that complements the gooey cinnamon filling. Topped with a creamy vanilla glaze, these cinnamon rolls are an irresistible indulgence that promises to bring joy and warmth to your festive celebrations.
Made from scratch, these Classic Cinnamon Rolls are surprisingly easy to prepare. The process involves preparing a simple yeast dough, rolling it out, and filling it with a cinnamon-sugar mixture before baking to golden perfection. Whether you enjoy them fresh from the oven with a cup of coffee or as a sweet finish to your holiday meal, these rolls are sure to become a family favorite. The following recipe serves 4-6 people, making it perfect for a small gathering or a cozy family breakfast.
Ingredients:
- 2 1/4 teaspoons active dry yeast
- 1 cup warm milk (110°F/45°C)
- 1/2 cup granulated sugar
- 1/3 cup unsalted butter, melted
- 1 teaspoon salt
- 2 large eggs
- 4 cups all-purpose flour
- 3/4 cup brown sugar, packed
- 2 1/2 tablespoons ground cinnamon
- 1/3 cup unsalted butter, softened
- 1/2 cup cream cheese, softened
- 1 1/2 cups powdered sugar
- 1/4 cup unsalted butter, softened
- 1/2 teaspoon vanilla extract
- Pinch of salt
Cooking Instructions:
- Prepare the Dough: In a large mixing bowl, dissolve the yeast in warm milk. Add the granulated sugar, melted butter, salt, eggs, and 2 cups of flour. Mix until smooth, then gradually stir in the remaining flour to form a soft dough.
- Knead the Dough: Turn the dough onto a floured surface and knead for about 5-7 minutes until it’s smooth and elastic. Place the dough in a lightly oiled bowl, cover it with a cloth, and let it rise in a warm place until doubled in size (about 1-2 hours).
- Prepare the Filling: In a small bowl, combine the brown sugar and cinnamon. Punch down the risen dough and roll it out on a floured surface into a rectangle about 16×21 inches in size.
- Fill and Roll the Dough: Spread the softened butter evenly over the dough. Sprinkle the cinnamon-sugar mixture on top. Starting from one long side, tightly roll up the dough, pinching the seam to seal.
- Cut and Arrange the Rolls: Cut the roll into 12 even slices and place them in a greased 9×13 inch baking dish. Cover the rolls and let them rise again until doubled (about 30 minutes).
- Bake the Rolls: Preheat your oven to 350°F (175°C). Bake the rolls for 20-25 minutes, or until golden brown.
- Make the Glaze: While the rolls are baking, beat together the cream cheese, powdered sugar, 1/4 cup softened butter, vanilla extract, and a pinch of salt until smooth and creamy.
- Glaze and Serve: Once the rolls are out of the oven, let them cool slightly before drizzling the glaze over the top. Serve warm and enjoy!
Extra Tips:
For the best results, verify your yeast is fresh and the milk is at the right temperature to activate the yeast. If you prefer your rolls extra soft, you can brush the tops with melted butter as soon as they come out of the oven.
For an even more decadent treat, consider adding raisins or chopped nuts to the filling. If you’re preparing these rolls for Christmas morning, you can prepare them the night before and let them do their second rise in the fridge overnight. Simply bring them to room temperature before baking.
Gingerbread Pancakes
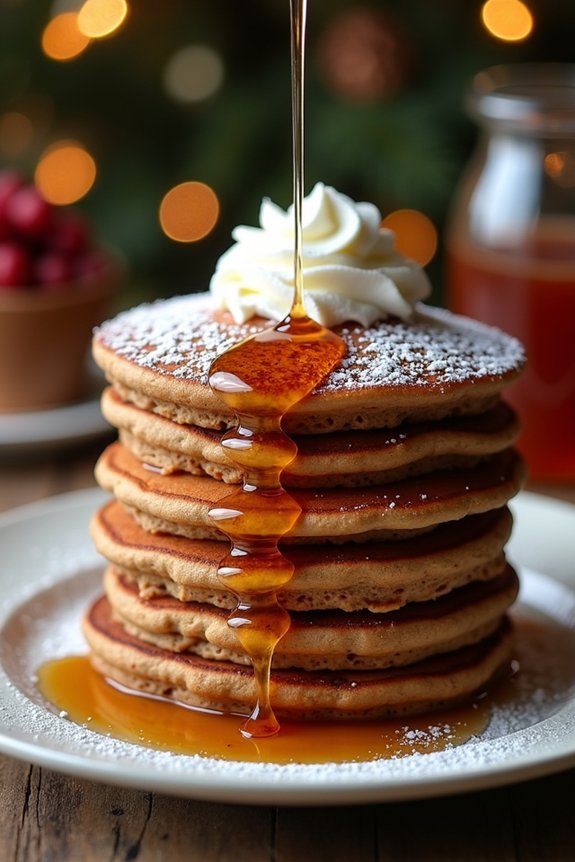
Gingerbread Pancakes are a delightful twist on the traditional breakfast pancake, infused with the warm spices of gingerbread that perfectly capture the cozy essence of the holiday season. These pancakes are soft, fluffy, and have just the right amount of spice, making them an ideal choice for a festive breakfast or brunch.
They aren’t only delicious but also fill your kitchen with a comforting aroma that brings the spirit of Christmas alive. Perfect for serving 4-6 people, these Gingerbread Pancakes are easy to prepare and can be enjoyed with a drizzle of maple syrup, a dusting of powdered sugar, or a dollop of whipped cream.
Whether you’re preparing a holiday breakfast for your family or hosting a Christmas brunch, this recipe is sure to impress and bring joy to your table.
Ingredients:
- 1 ½ cups all-purpose flour
- 2 teaspoons baking powder
- ½ teaspoon baking soda
- 1 teaspoon ground ginger
- 1 teaspoon ground cinnamon
- ¼ teaspoon ground cloves
- ¼ teaspoon salt
- 2 tablespoons brown sugar
- 2 large eggs
- 1 ¼ cups buttermilk
- ¼ cup molasses
- 3 tablespoons melted butter
- 1 teaspoon vanilla extract
Instructions:
- Prepare the dry ingredients: In a large mixing bowl, whisk together the flour, baking powder, baking soda, ginger, cinnamon, cloves, salt, and brown sugar until well combined. This guarantees that the spices are evenly distributed throughout the batter.
- Mix the wet ingredients: In another bowl, beat the eggs lightly and then whisk in the buttermilk, molasses, melted butter, and vanilla extract. Mix until all the wet ingredients are fully combined and smooth.
- Combine wet and dry ingredients: Create a well in the center of the dry ingredients and pour the wet mixture into it. Gently stir together with a spatula or wooden spoon until just combined. Be careful not to overmix; a few lumps in the batter are perfectly fine.
- Preheat and grease the pan: Heat a non-stick skillet or griddle over medium heat. Lightly grease with butter or cooking spray to prevent sticking.
- Cook the pancakes: Pour about ¼ cup of batter onto the skillet for each pancake. Cook until bubbles form on the surface and the edges appear set, about 2-3 minutes. Carefully flip the pancakes and cook until the other side is golden brown, about 1-2 minutes more. Adjust the heat as necessary to prevent burning.
- Serve warm: Transfer the pancakes to a plate and keep warm while you cook the rest of the batter. Serve the pancakes with your choice of toppings such as maple syrup, whipped cream, or powdered sugar.
Extra Tips:
For a richer flavor, consider adding a pinch of nutmeg or a splash of rum extract to the batter. If you prefer a lighter pancake, you can replace half of the all-purpose flour with whole wheat flour.
To guarantee all pancakes are served warm, you can keep them in a preheated oven set to 200°F until ready to serve. Remember not to overcook the pancakes as they can dry out; the key is to cook them gently over medium heat. Enjoy these Gingerbread Pancakes with a cup of hot chocolate or coffee for the ultimate cozy Christmas morning.
Cranberry Orange Scones
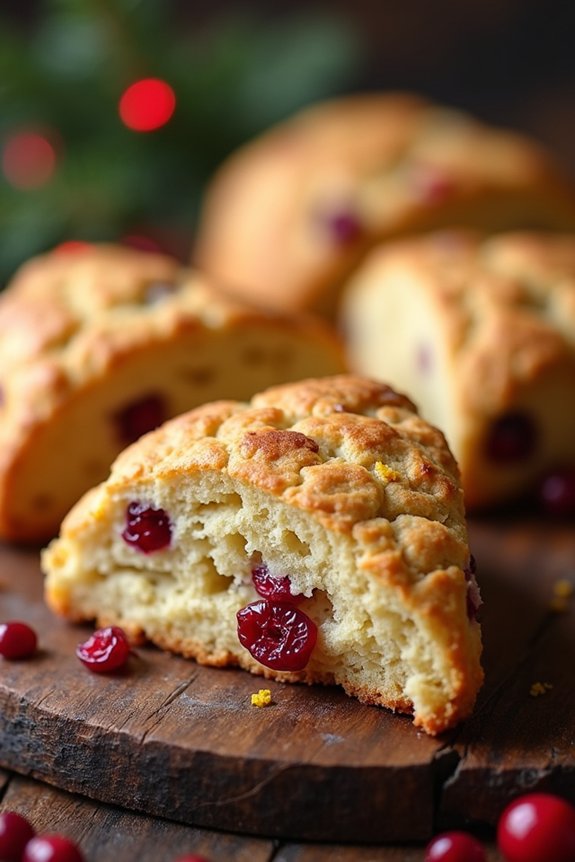
Nothing says cozy Christmas mornings quite like the aroma of freshly baked scones wafting through the house. These Cranberry Orange Scones are a delightful combination of tangy cranberries and zesty orange, making them the perfect festive treat to enjoy with a steaming cup of tea or coffee. Ideal for a holiday breakfast or brunch, these scones are light, flaky, and bursting with flavor, guaranteeing a delightful start to your day.
Whether you’re an experienced baker or just starting out, this recipe is simple and straightforward, assured to bring a touch of holiday cheer to your kitchen. The combination of cranberries and orange zest not only offers a revitalizing taste but also fills your home with the invigorating scent of citrus.
So, gather your ingredients, preheat your oven, and get ready to create a batch of these mouthwatering scones that will be a hit with family and friends.
Ingredients for 4-6 Servings:
- 2 cups all-purpose flour
- 1/3 cup granulated sugar
- 1 tablespoon baking powder
- 1/2 teaspoon salt
- 1/2 cup unsalted butter, cold and cubed
- 1/2 cup dried cranberries
- 1 tablespoon orange zest
- 2/3 cup heavy cream, plus more for brushing
- 1 large egg
- 1 teaspoon vanilla extract
Cooking Instructions:
- Preheat the Oven: Start by preheating your oven to 400°F (200°C) and line a baking sheet with parchment paper for easy cleanup.
- Mix Dry Ingredients: In a large mixing bowl, whisk together the all-purpose flour, granulated sugar, baking powder, and salt until well combined.
- Cut in the Butter: Add the cold, cubed butter to the flour mixture. Using a pastry cutter or your fingertips, blend the butter into the dry ingredients until the mixture resembles coarse crumbs.
- Add Flavor: Stir in the dried cranberries and orange zest, making sure they’re evenly distributed throughout the dough.
- Combine Wet Ingredients: In a separate bowl, whisk together the heavy cream, egg, and vanilla extract until smooth.
- Form Dough: Pour the wet ingredients into the dry ingredients and gently mix with a spatula or wooden spoon until just combined. Avoid over-mixing to keep the scones tender.
- Shape the Scones: Transfer the dough onto a lightly floured surface and knead gently for a few seconds. Pat the dough into a circle about 1-inch thick. Using a sharp knife or a dough cutter, cut the circle into 8 wedges.
- Prepare for Baking: Place the scone wedges onto the prepared baking sheet, about 2 inches apart. Brush the tops with a little heavy cream for a golden finish.
- Bake Scones: Bake in the preheated oven for 15-20 minutes or until the scones are golden brown and a toothpick inserted into the center comes out clean.
- Cool and Serve: Allow the scones to cool on the baking sheet for a few minutes before transferring them to a wire rack. Serve warm or at room temperature.
Extra Tips:
For best results, make sure that the butter is very cold before incorporating it into the flour mixture; this creates the flaky texture scones are known for.
If you prefer fresh cranberries, chop them coarsely and increase the sugar slightly to balance the tartness. Don’t skip the cream brushing step; it adds a lovely golden color to the scones.
Finally, scones are best enjoyed the day they’re made but can be stored in an airtight container for up to two days. Enjoy your festive Cranberry Orange Scones with a generous spread of butter or clotted cream!
Eggnog French Toast Casserole

Eggnog French Toast Casserole is a delightful and festive breakfast dish that combines the classic flavors of eggnog with the comforting texture of French toast. Perfect for Christmas morning or any holiday gathering, this casserole is prepared the night before and baked fresh in the morning, allowing you to spend more time with loved ones instead of being stuck in the kitchen.
The rich and creamy eggnog mixture soaks into the bread overnight, creating a custardy interior and a deliciously crispy top when baked.
This recipe is designed to serve 4-6 people, making it ideal for a small family gathering or holiday brunch. The sweet, spiced flavor of eggnog pairs beautifully with traditional French toast ingredients, creating a dish that’s both nostalgic and indulgent. Serve it with a drizzle of maple syrup or a dusting of powdered sugar for an extra touch of sweetness.
Ingredients (Serves 4-6):
- 1 loaf of French bread, cut into 1-inch cubes
- 6 large eggs
- 2 cups eggnog
- 1/2 cup milk
- 1/4 cup granulated sugar
- 1 tablespoon vanilla extract
- 1 teaspoon ground cinnamon
- 1/2 teaspoon ground nutmeg
- 1/4 teaspoon salt
- 2 tablespoons unsalted butter, melted
- Optional toppings: maple syrup, powdered sugar, fresh berries
Instructions:
- Prepare the Bread: Grease a 9×13-inch baking dish with butter or non-stick spray. Place the cubed French bread evenly into the dish, making sure it’s distributed evenly.
- Make the Eggnog Mixture: In a large bowl, whisk together the eggs, eggnog, milk, sugar, vanilla extract, cinnamon, nutmeg, and salt until fully combined and smooth.
- Combine Bread and Mixture: Pour the eggnog mixture evenly over the bread cubes in the prepared baking dish. Gently press down on the bread cubes to guarantee they’re fully submerged in the liquid.
- Chill Overnight: Cover the baking dish with plastic wrap or aluminum foil and refrigerate for at least 4 hours, preferably overnight. This allows the bread to absorb the eggnog mixture thoroughly.
- Preheat and Prepare: Preheat your oven to 350°F (175°C) when ready to bake. Remove the casserole from the refrigerator and let it sit at room temperature while the oven heats.
- Bake: Remove the cover from the baking dish and drizzle the melted butter over the top. Bake in the preheated oven for 45-50 minutes, or until the top is golden brown and the center is set.
- Serve: Allow the casserole to cool slightly before serving. Slice and serve warm with optional toppings like maple syrup, powdered sugar, or fresh berries.
Extra Tips:
For a richer flavor, consider using a flavored eggnog such as vanilla or cinnamon. If you prefer a more custardy texture, use slightly less bread.
For added texture and flavor, you can sprinkle chopped nuts or brown sugar on top of the casserole before baking. If you find the top is browning too quickly, cover it loosely with foil during the last 10-15 minutes of baking.
Enjoy this dish fresh out of the oven for the best texture and flavor!
Chocolate Peppermint Muffins
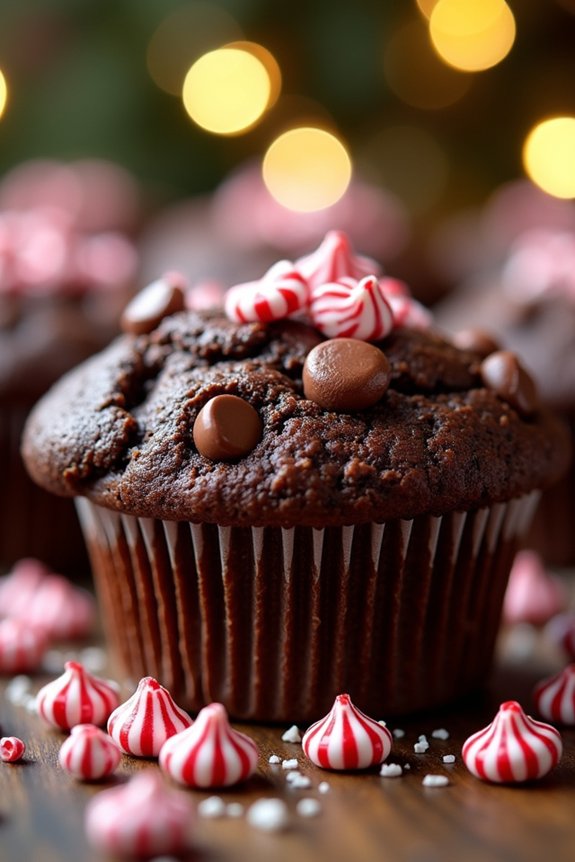
Transform your kitchen into a winter wonderland with these delightful Chocolate Peppermint Muffins. Perfect for cozy gatherings or a sweet treat during the festive season, these muffins pair the richness of chocolate with the invigorating zing of peppermint.
Their soft, moist texture and the comforting aroma of peppermint make them an irresistible addition to any holiday baking repertoire. Whether you’re hosting a holiday brunch or simply indulging in a quiet night by the fireplace, these muffins are sure to bring a touch of holiday magic to your table.
A serving size of this recipe accommodates 4-6 people, making it ideal for intimate gatherings or for those who simply can’t resist a second helping. These muffins are straightforward to make, yet they deliver a gourmet flavor that will leave you and your guests craving more.
With a few simple ingredients and a bit of holiday cheer, you’ll have a batch of delightful muffins ready to enjoy.
Ingredients:
- 1 3/4 cups all-purpose flour
- 1/2 cup unsweetened cocoa powder
- 1 cup granulated sugar
- 2 teaspoons baking powder
- 1/2 teaspoon baking soda
- 1/4 teaspoon salt
- 2 large eggs
- 1 cup whole milk
- 1/4 cup unsalted butter, melted
- 1 teaspoon vanilla extract
- 1 teaspoon peppermint extract
- 1/2 cup semisweet chocolate chips
- 1/4 cup crushed peppermint candies
Instructions:
- Preheat the oven and prepare the muffin tin: Start by preheating your oven to 350°F (175°C). Line a standard 12-cup muffin tin with paper liners or lightly grease the cups to prevent sticking.
- Mix dry ingredients: In a large mixing bowl, whisk together the all-purpose flour, unsweetened cocoa powder, granulated sugar, baking powder, baking soda, and salt. This guarantees that the dry ingredients are well combined and helps to distribute the leavening agents evenly.
- Prepare wet ingredients: In a separate bowl, beat the eggs lightly. Add the whole milk, melted butter, vanilla extract, and peppermint extract. Stir until the wet ingredients are well combined.
- Combine wet and dry ingredients: Gradually add the wet ingredients to the dry mixture, stirring gently with a spatula until just combined. Be careful not to overmix, as this can make the muffins tough.
- Fold in chocolate chips: Gently fold in the semisweet chocolate chips. This will add pockets of chocolaty goodness throughout the muffins.
- Fill muffin cups: Divide the batter evenly among the prepared muffin cups, filling each about three-quarters full.
- Add crushed peppermint: Sprinkle the crushed peppermint candies on top of each muffin for a festive touch and extra peppermint flavor.
- Bake: Place the muffin tin in the preheated oven and bake for 18-20 minutes, or until a toothpick inserted into the center of a muffin comes out clean.
- Cool and serve: Allow the muffins to cool in the tin for about 5 minutes before transferring them to a wire rack to cool completely. Serve warm or at room temperature.
Extra Tips:
For an extra festive presentation, you can drizzle melted white chocolate over the cooled muffins. This adds a beautiful contrast and a bit of sweetness that complements the minty flavor.
If you prefer a stronger peppermint flavor, consider adding an additional half teaspoon of peppermint extract. Store any leftover muffins in an airtight container at room temperature for up to three days, or freeze them for longer storage. Reheat gently before serving to enjoy them warm as if freshly baked.
Sticky Toffee Pudding Buns
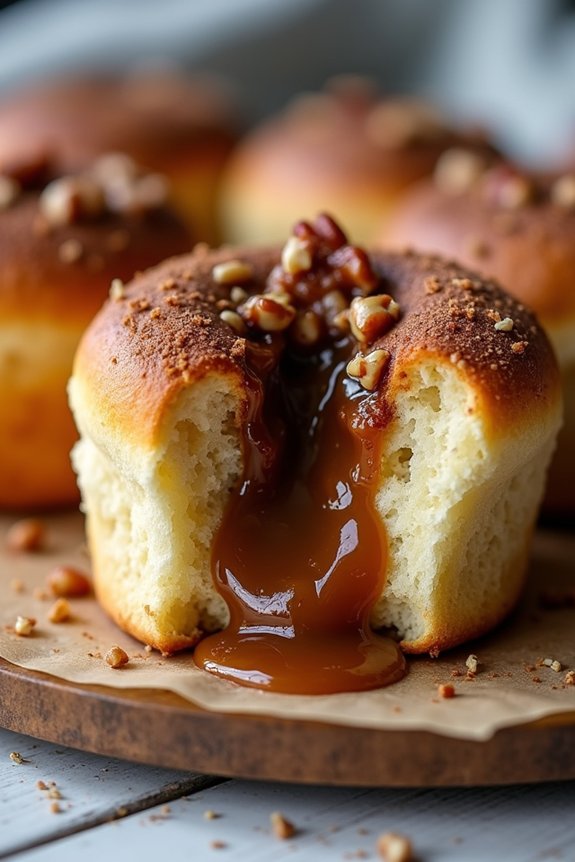
Sticky Toffee Pudding Buns are a delightful twist on the classic British dessert, combining the rich flavors of sticky toffee pudding with the comforting texture of a warm bun. Perfect for the holiday season, these buns are sweet, gooey, and filled with dates and a luscious toffee sauce, making them an irresistible treat for any Christmas gathering.
Whether you’re serving them for breakfast, dessert, or a festive afternoon tea, these buns are sure to impress your family and friends.
The magic of these buns lies in their combination of flavors and textures. The tender dough is infused with a hint of warmth from the spices, while the sticky toffee sauce adds a decadent richness. As you pull apart each bun, the sweet, sticky filling oozes out, creating a mouthwatering experience with every bite.
Enjoy these buns fresh from the oven to fully appreciate their gooey center and soft, pillowy texture.
Ingredients (Serves 4-6)
- 2 cups all-purpose flour
- 1 teaspoon baking powder
- 1/2 teaspoon salt
- 1/2 teaspoon ground cinnamon
- 1/4 teaspoon ground nutmeg
- 1/2 cup unsalted butter, softened
- 1/2 cup brown sugar
- 1 large egg
- 1 teaspoon vanilla extract
- 3/4 cup chopped dates
- 3/4 cup milk
- 1/2 cup toffee sauce (store-bought or homemade)
- 1/4 cup chopped pecans (optional)
Cooking Instructions
- Prepare the Dough: In a large mixing bowl, whisk together the flour, baking powder, salt, cinnamon, and nutmeg. In a separate bowl, cream together the softened butter and brown sugar until light and fluffy. Add the egg and vanilla extract to the butter mixture and mix well.
- Combine Ingredients: Gradually add the dry ingredients to the wet mixture, alternating with the milk, until a soft dough forms. Stir in the chopped dates until evenly distributed throughout the dough.
- Shape the Buns: Preheat your oven to 350°F (175°C). Lightly flour your work surface and roll out the dough to a rectangle about 1/4-inch thick. Spread the toffee sauce over the dough, leaving a small border around the edges. If using, sprinkle the chopped pecans over the sauce.
- Roll and Cut: Roll the dough tightly into a log, starting from one of the long edges. Slice the log into equal pieces, about 1 to 1.5 inches thick, and place the slices cut-side up in a greased baking dish.
- Bake: Bake the buns in the preheated oven for 20-25 minutes or until golden brown and cooked through. Remove from the oven and let them cool slightly in the pan before serving.
- Serve: Drizzle any remaining toffee sauce over the buns before serving. Enjoy them warm for the best flavor and texture.
Extra Tips
For the best results, make sure your butter is fully softened before starting the recipe, as this will help create a lighter dough.
Feel free to experiment with different nuts or even add a handful of chocolate chips for extra decadence. If you’re making your own toffee sauce, you can prepare it a day in advance to save time.
Finally, these buns are best enjoyed fresh out of the oven, but they can be reheated in the microwave for a few seconds to regain their softness if needed.
Almond Biscotti With White Chocolate Drizzle
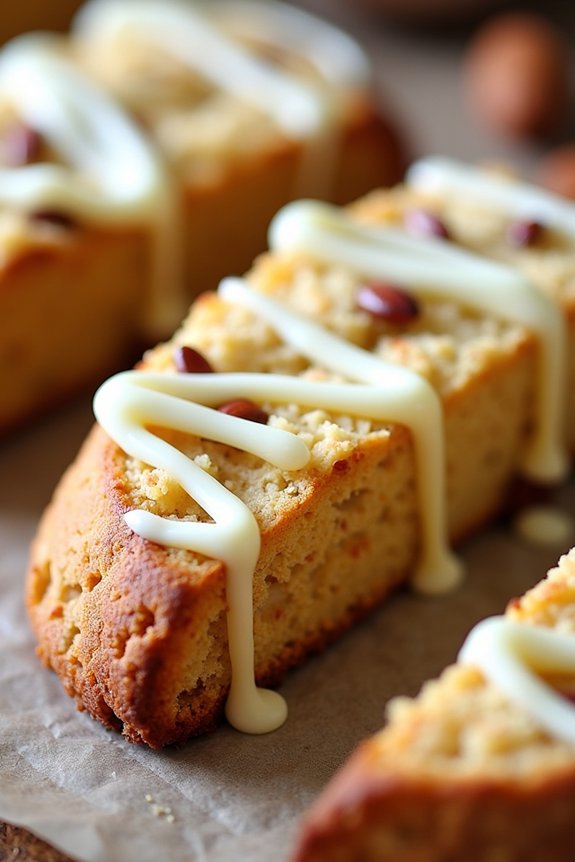
Almond Biscotti with White Chocolate Drizzle is a delightful addition to any holiday baking list, offering a perfect blend of nutty almonds and sweet white chocolate. These twice-baked Italian cookies are crisp and flavorful, making them an ideal treat to enjoy with a warm cup of coffee or tea during the cozy Christmas season.
Their crunchy texture and elegant presentation also make them a perfect gift for friends and family who appreciate homemade goodies.
To prepare these delectable Almond Biscotti, you’ll start by making a simple dough that combines the richness of almonds with the fragrant zest of vanilla and almond extracts. After baking the dough into logs, you’ll slice them into individual cookies and bake again to achieve that classic biscotti crispness.
A drizzle of melted white chocolate adds a touch of sweetness and sophistication, making them not only delicious but also visually appealing. This recipe serves 4-6 people, guaranteeing there’s enough to share or enjoy throughout the holiday festivities.
Ingredients:
- 1 cup whole almonds, toasted and coarsely chopped
- 3/4 cup granulated sugar
- 1/2 cup unsalted butter, softened
- 2 large eggs
- 1 teaspoon vanilla extract
- 1 teaspoon almond extract
- 2 cups all-purpose flour
- 1 1/2 teaspoons baking powder
- 1/4 teaspoon salt
- 4 ounces white chocolate, melted
Instructions:
- Preheat the Oven: Start by preheating your oven to 350°F (175°C). Line a baking sheet with parchment paper or a silicone baking mat.
- Prepare the Dough: In a large mixing bowl, cream together the sugar and butter until light and fluffy. Beat in the eggs one at a time, followed by the vanilla and almond extracts.
- Combine Dry Ingredients: In a separate bowl, whisk together the flour, baking powder, and salt. Gradually add the dry ingredients to the wet mixture, mixing until just combined. Fold in the chopped almonds.
- Shape the Biscotti Logs: Divide the dough in half and shape each portion into a log approximately 12 inches long and 2 inches wide. Place the logs on the prepared baking sheet.
- First Bake: Bake the logs in the preheated oven for 25-30 minutes, or until they’re lightly golden and firm to the touch. Remove from the oven and let cool for about 10 minutes.
- Slice and Second Bake: Reduce the oven temperature to 325°F (160°C). Using a serrated knife, cut the logs diagonally into 1/2-inch thick slices. Arrange the slices cut-side down on the baking sheet. Return to the oven and bake for an additional 10-12 minutes per side, until the biscotti are crisp and golden.
- Drizzle with White Chocolate: Once the biscotti are cooled, melt the white chocolate in a microwave or double boiler. Drizzle the melted chocolate over the biscotti using a fork or piping bag. Allow the chocolate to set before serving or storing.
Extra Tips: To guarantee your biscotti achieve the perfect crunch, make sure to slice the logs while they’re still slightly warm, which will minimize crumbling.
For a festive touch, consider adding a sprinkle of chopped dried cranberries or pistachios to the melted white chocolate drizzle. Store the biscotti in an airtight container to maintain their crispness for up to two weeks. Enjoy them as part of your holiday breakfast or as a delightful accompaniment to a cozy evening beverage.
Spiced Apple and Walnut Bread
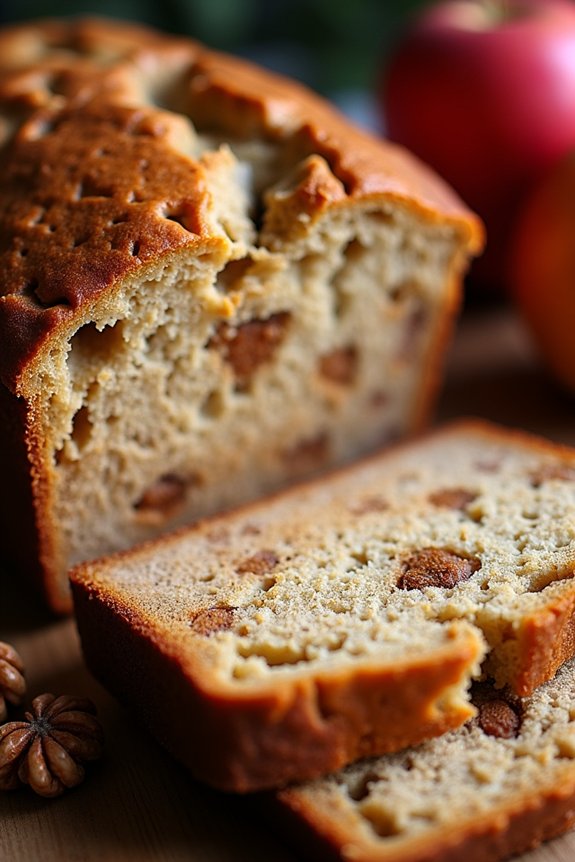
Warm up your home with the comforting aroma of Spiced Apple and Walnut Bread during the holiday season. This delightful bread combines the natural sweetness of apples with the crunchy texture of walnuts, all enhanced by a medley of warming spices.
It’s perfect for a cozy breakfast or an afternoon snack with a cup of tea. Not only is this bread simple to make, but it also fills your kitchen with the enticing scent of cinnamon, nutmeg, and cloves, making it an essential addition to your Christmas baking repertoire.
This Spiced Apple and Walnut Bread is an excellent way to celebrate the flavors of the season. The bread is moist and flavorful, thanks to the juicy apples and rich walnuts, while the spices bring a festive touch that makes it impossible to resist.
Gather your family and friends around the table to share a slice of this delicious bread, and create lasting memories with every bite. Whether you’re an experienced baker or a beginner, this recipe is sure to become a holiday favorite.
Ingredients (Serves 4-6):
- 2 cups all-purpose flour
- 1 teaspoon baking soda
- 1/2 teaspoon baking powder
- 1/2 teaspoon salt
- 1 teaspoon ground cinnamon
- 1/2 teaspoon ground nutmeg
- 1/4 teaspoon ground cloves
- 1/2 cup unsalted butter, softened
- 1 cup granulated sugar
- 2 large eggs
- 1 teaspoon vanilla extract
- 1 cup applesauce
- 1 cup finely chopped apples (preferably Granny Smith or Honeycrisp)
- 1 cup chopped walnuts
Cooking Instructions:
1. Preheat the Oven:
Preheat your oven to 350°F (175°C). Grease a 9×5 inch loaf pan with butter or non-stick cooking spray and set aside.
2. Mix Dry Ingredients:
In a medium-sized bowl, whisk together the flour, baking soda, baking powder, salt, cinnamon, nutmeg, and cloves until well combined. This guarantees the spices and leavening agents are evenly distributed throughout the bread.
3. Cream Butter and Sugar:
In a large mixing bowl, use an electric mixer to cream the softened butter and granulated sugar until light and fluffy. This should take about 3 minutes.
4. Add Eggs and Vanilla:
Beat in the eggs one at a time, making sure each is fully incorporated before adding the next. Mix in the vanilla extract, blending until smooth.
5. Incorporate Applesauce and Apples:
Gradually mix in the applesauce until well combined. Fold in the finely chopped apples using a spatula or wooden spoon.
6. Combine Dry and Wet Ingredients:
Slowly add the dry ingredient mixture to the wet ingredients, stirring gently until just combined. Avoid overmixing, as this can make the bread dense.
7. Fold in Walnuts:
Gently fold in the chopped walnuts, ensuring they’re evenly distributed throughout the batter.
8. Transfer to Loaf Pan:
Pour the batter into the prepared loaf pan, smoothing the top with a spatula.
9. Bake:
Bake in the preheated oven for 50-60 minutes, or until a toothpick inserted into the center of the bread comes out clean. If the top is browning too quickly, cover loosely with foil halfway through baking.
10. Cool and Serve:
Allow the bread to cool in the pan for about 10 minutes before transferring it to a wire rack to cool completely. Slice and serve warm or at room temperature.
Extra Tips:
For a deeper flavor, consider toasting the walnuts before adding them to the batter. Simply spread them on a baking sheet and toast in the oven at 350°F (175°C) for about 5-7 minutes, or until they’re fragrant.
Be sure to let them cool before folding into the batter. Additionally, for a more festive presentation, dust the top of the finished bread with a light sprinkle of powdered sugar or drizzle with a simple glaze made from powdered sugar and milk.
Enjoy your Spiced Apple and Walnut Bread with a spread of butter or cream cheese for an extra indulgent treat.
Vanilla Bean Sugar Cookies
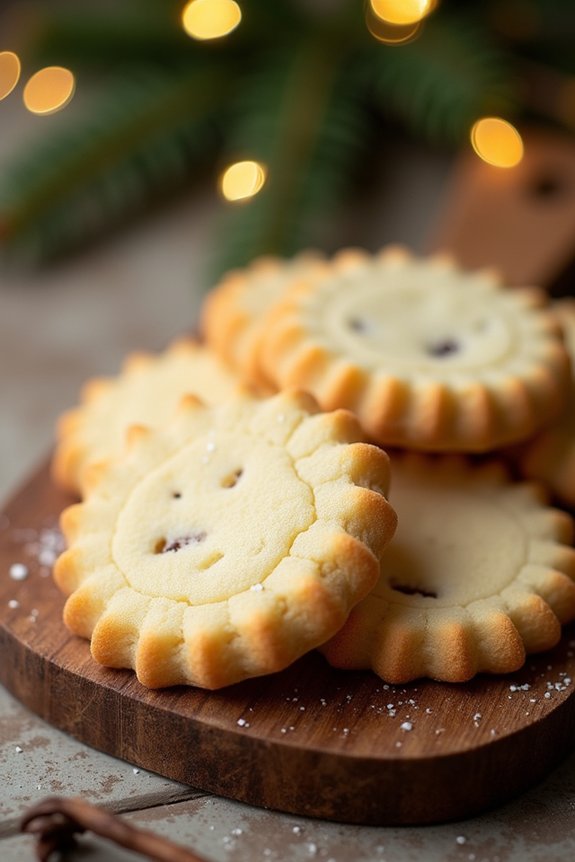
Vanilla Bean Sugar Cookies are a delightful treat perfect for the holiday season. These cookies aren’t only easy to make but also bring the comforting aroma of vanilla to your kitchen, making them an ideal choice for Christmas gatherings and festive gifting.
The recipe combines the classic sugar cookie dough with a rich hint of vanilla bean, providing a melt-in-your-mouth experience that both kids and adults will adore. Decorate them with icing or leave them plain; either way, they’re destined to be a hit.
Creating a batch of these cookies is a fun and straightforward process, suitable for bakers of all levels. With a serving size of 4-6 people, this recipe yields enough cookies to share with family and friends or to enjoy over a few cozy evenings.
The key to achieving the perfect Vanilla Bean Sugar Cookie lies in the balance of ingredients and careful attention to baking time to guarantee they’re soft yet slightly crisp on the edges.
Ingredients for 4-6 servings:
- 2 3/4 cups all-purpose flour
- 1 teaspoon baking soda
- 1/2 teaspoon baking powder
- 1 cup unsalted butter, softened
- 1 1/2 cups granulated sugar
- 1 egg
- 1 teaspoon vanilla extract
- 1 vanilla bean, seeds scraped
- 1/4 teaspoon salt
Cooking Instructions:
- Preheat the Oven: Start by preheating your oven to 350°F (175°C). Line two baking sheets with parchment paper.
- Mix Dry Ingredients: In a medium bowl, whisk together the all-purpose flour, baking soda, baking powder, and salt. Set aside.
- Cream Butter and Sugar: In a large bowl, use an electric mixer to cream the softened butter and granulated sugar together until light and fluffy, about 2-3 minutes.
- Add Egg and Vanilla: Beat in the egg, vanilla extract, and vanilla bean seeds until well combined.
- Combine Wet and Dry Ingredients: Gradually add the dry ingredients to the wet mixture, mixing on low speed until a dough forms.
- Form Cookies: Using a tablespoon or cookie scoop, drop rounded tablespoons of dough onto the prepared baking sheets, leaving about 2 inches between each cookie.
- Bake: Place the baking sheets in the preheated oven and bake for 8-10 minutes, or until the edges are lightly golden. Be careful not to overbake.
- Cool: Remove from the oven and allow the cookies to cool on the baking sheet for 5 minutes before transferring them to a wire rack to cool completely.
Extra Tips:
For the best texture and flavor, make sure your butter is at room temperature before you begin mixing. This guarantees that the sugar and butter cream together properly, giving the cookies a light and airy texture.
If you can’t find vanilla beans, you can substitute with an additional teaspoon of vanilla extract, but the flavor will be slightly different. Additionally, keep an eye on the cookies as they bake; ovens can vary, and you want to prevent them from browning too much to maintain that perfect softness.
Enjoy your Vanilla Bean Sugar Cookies with a glass of milk or a cup of your favorite holiday tea!
Pecan Pie Bars
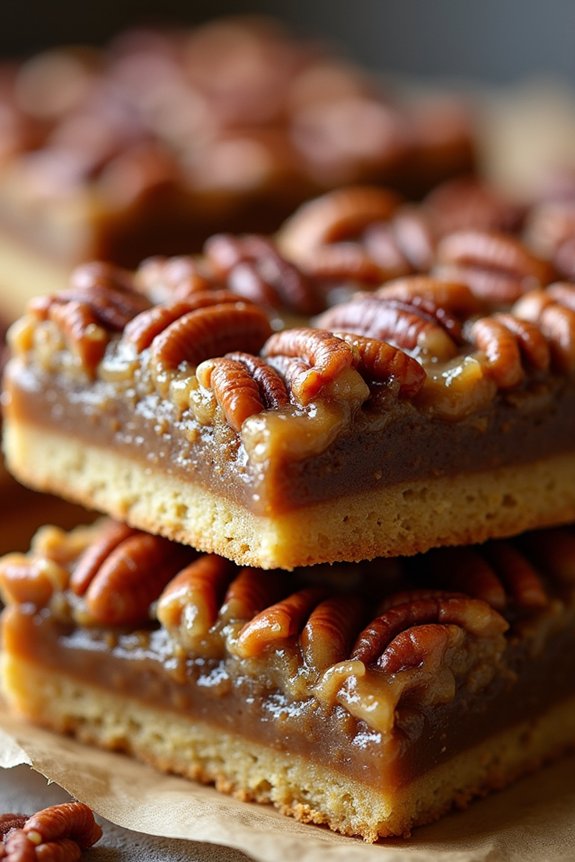
Pecan Pie Bars are a delightful twist on the classic pecan pie, offering the same rich and nutty flavors in a convenient, handheld form. Perfect for sharing during the holiday season, these bars are a cozy Christmas baking treat that will surely impress your family and friends.
With a buttery shortbread crust and a sweet, gooey filling loaded with crunchy pecans, these bars capture the essence of pecan pie with a fraction of the effort and time. Plus, their bar shape makes them easy to serve at gatherings or to include in a festive dessert platter.
The key to perfect Pecan Pie Bars is achieving the right balance between the buttery crust and the gooey pecan topping. The crust should be firm enough to hold the filling without crumbling, while the pecan layer should be rich and sticky, with just the right amount of sweetness.
When baked to perfection, these bars have a satisfying crunch from the pecans and a melt-in-your-mouth quality from the shortbread base. This recipe serves 4-6 people, making it ideal for a cozy family gathering or a small holiday party.
Ingredients:
- 1 cup unsalted butter, softened
- 2 cups all-purpose flour
- 1/2 cup granulated sugar
- 1/4 teaspoon salt
- 1 cup light corn syrup
- 1 cup packed light brown sugar
- 4 large eggs
- 1 teaspoon vanilla extract
- 2 cups pecan halves
Instructions:
- Preheat the Oven: Begin by preheating your oven to 350°F (175°C). Line a 9×13-inch baking pan with parchment paper, leaving some overhang on the sides for easy removal.
- Prepare the Crust: In a large mixing bowl, cream together the softened butter, flour, granulated sugar, and salt until the mixture resembles coarse crumbs. Press this mixture evenly into the bottom of the prepared baking pan to form the crust.
- Bake the Crust: Place the crust in the preheated oven and bake for 15-20 minutes, or until it’s lightly golden. Remove from the oven and set aside to cool slightly while you prepare the filling.
- Make the Filling: In another large bowl, whisk together the corn syrup, brown sugar, eggs, and vanilla extract until smooth. Stir in the pecan halves, making certain they’re evenly coated with the mixture.
- Assemble the Bars: Pour the pecan mixture over the pre-baked crust, spreading it evenly with a spatula. Make sure the pecans are distributed uniformly across the top.
- Bake the Bars: Return the pan to the oven and bake for an additional 25-30 minutes, or until the filling is set and slightly bubbling around the edges. The center should no longer jiggle when gently shaken.
- Cool and Serve: Allow the bars to cool completely in the pan on a wire rack. Once cooled, use the parchment paper overhang to lift the bars out of the pan. Cut into squares and serve.
Extra Tips:
For the best texture, verify that the crust is fully baked before adding the pecan filling, as this will prevent it from becoming soggy.
If you prefer, you can toast the pecans lightly before adding them to the filling for an extra depth of flavor.
When cutting the bars, use a sharp knife and clean it between slices for neat edges.
If you want to prepare these bars ahead of time, they can be stored in an airtight container at room temperature for up to three days or refrigerated for up to a week.
Maple Glazed Donuts
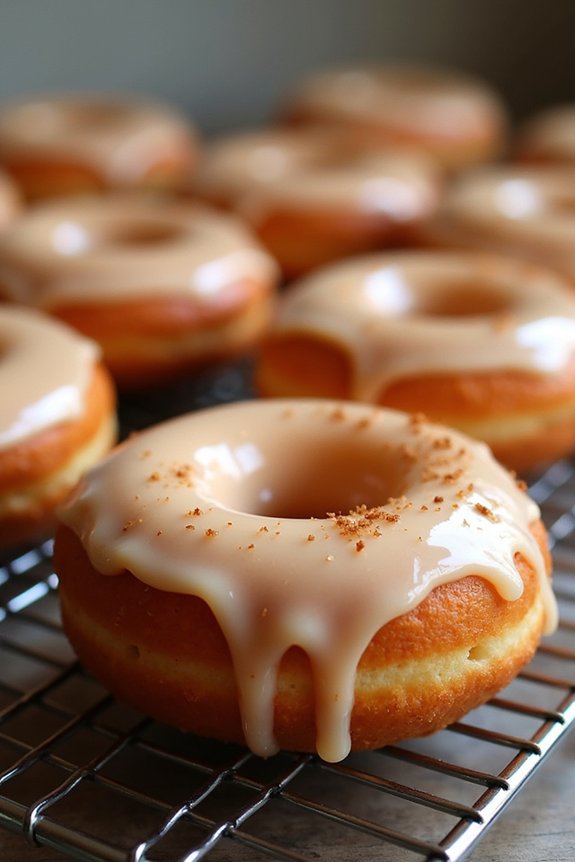
As the holiday season approaches, nothing warms the heart and home quite like the aroma of freshly baked treats. One such delight that perfectly captures the essence of Christmas is the Maple Glazed Donut. These soft, fluffy donuts are a heavenly combination of sweet, rich maple glaze and a light, airy dough. Perfect for a cozy winter morning or an indulgent afternoon snack, these donuts are sure to become a festive favorite among friends and family.
Creating Maple Glazed Donuts from scratch is a rewarding experience that brings out the best of holiday baking. This recipe is designed to serve 4-6 people, making it ideal for a small gathering or family breakfast. The process involves making the dough, frying the donuts to golden perfection, and then finishing them off with a luscious maple glaze. With a few simple ingredients and some time, you too can enjoy this delicious treat that embodies the spirit of Christmas.
Ingredients (Serves 4-6):
- 2 cups all-purpose flour
- 1/2 cup granulated sugar
- 1 tablespoon baking powder
- 1/2 teaspoon salt
- 1/2 teaspoon ground cinnamon
- 1/4 teaspoon ground nutmeg
- 1/2 cup milk
- 2 tablespoons unsalted butter, melted
- 1 teaspoon vanilla extract
- 2 large eggs
- Vegetable oil, for frying
For the Maple Glaze:
- 1 1/2 cups powdered sugar
- 1/3 cup pure maple syrup
- 2 tablespoons milk
- 1/4 teaspoon vanilla extract
Instructions:
- Prepare the Dry Ingredients: In a large mixing bowl, whisk together the flour, granulated sugar, baking powder, salt, cinnamon, and nutmeg. This guarantees that all the dry ingredients are evenly distributed, resulting in a well-balanced donut.
- Mix Wet Ingredients: In a separate bowl, combine the milk, melted butter, vanilla extract, and eggs. Whisk until well blended. Gradually add the wet ingredients to the dry ingredients, stirring until a sticky dough forms. Be careful not to overmix, as this can make the donuts tough.
- Shape the Donuts: On a lightly floured surface, roll out the dough to about 1/2-inch thickness. Using a donut cutter or two different-sized round cutters, cut out donut shapes. Gather the scraps and repeat the process until all the dough is used.
- Heat the Oil: In a deep, heavy-bottomed pot or fryer, heat the vegetable oil to 350°F (175°C). Use a thermometer to maintain the temperature, as this is key to achieving donuts that are crispy on the outside and soft on the inside.
- Fry the Donuts: Carefully place a few donuts in the hot oil, being sure not to overcrowd the pot. Fry for about 2-3 minutes on each side, or until golden brown. Remove with a slotted spoon and drain on paper towels.
- Prepare the Maple Glaze: While the donuts are cooling slightly, make the glaze by whisking together the powdered sugar, maple syrup, milk, and vanilla extract in a small bowl until smooth.
- Glaze the Donuts: Once the donuts have cooled slightly but are still warm, dip the tops into the maple glaze, allowing any excess to drip off. Place on a wire rack to set.
- Serve and Enjoy: These Maple Glazed Donuts are best enjoyed fresh, but they can be stored in an airtight container for a day or two if necessary.
Extra Tips:
To guarantee the perfect fluffy texture, be mindful of the dough consistency; it should be sticky but manageable. If the dough feels too dry, add a little more milk, a tablespoon at a time. Likewise, if it’s too wet, sprinkle in a bit more flour.
When frying, keep an eye on the oil temperature, as fluctuating heat can lead to unevenly cooked donuts. Finally, for an extra festive touch, consider sprinkling a bit of cinnamon or nutmeg on the glaze just before it sets. Enjoy these delightful homemade treats with a warm cup of coffee or hot chocolate for the ultimate cozy Christmas experience.
Chai Spiced Coffee Cake
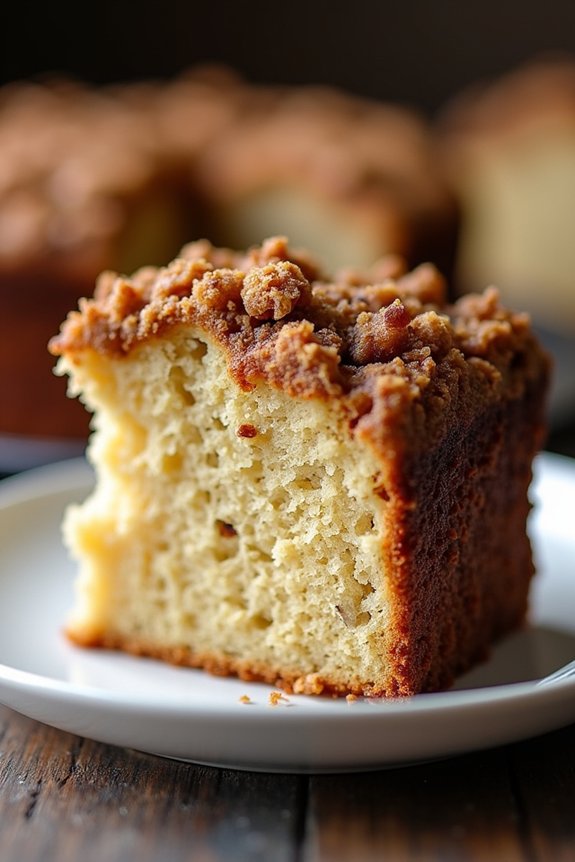
Chai Spiced Coffee Cake is a delightful and aromatic treat that combines the warm, spicy flavors of chai tea with the classic comfort of a coffee cake. Perfect for cozy winter mornings or as a sweet addition to your holiday brunch spread, this cake will fill your kitchen with the enticing aroma of spices like cinnamon, ginger, and cardamom.
Its tender crumb, topped with a crunchy streusel, makes it an irresistible choice for those who love both tea and coffee cakes. The subtle yet distinct chai spice blend elevates this coffee cake to a new level of deliciousness, making it a favorite for gatherings and family get-togethers during the festive season.
Whether paired with a hot cup of coffee or a steaming mug of tea, the Chai Spiced Coffee Cake is certain to become a beloved holiday tradition.
Ingredients for Chai Spiced Coffee Cake (serves 4-6):
- 1 cup all-purpose flour
- 1/2 cup granulated sugar
- 1/4 cup brown sugar, packed
- 1/2 teaspoon baking powder
- 1/4 teaspoon baking soda
- 1/2 teaspoon ground cinnamon
- 1/4 teaspoon ground ginger
- 1/4 teaspoon ground cardamom
- 1/4 teaspoon ground nutmeg
- 1/4 teaspoon salt
- 1/2 cup unsalted butter, softened
- 1 large egg
- 1/2 cup sour cream
- 1 teaspoon vanilla extract
For the Streusel Topping:
- 1/3 cup all-purpose flour
- 1/4 cup brown sugar, packed
- 1/2 teaspoon ground cinnamon
- 1/4 teaspoon ground cardamom
- 1/4 cup unsalted butter, cold and cubed
Cooking Instructions:
- Preheat the Oven: Start by preheating your oven to 350°F (175°C). Grease an 8-inch square baking pan or line it with parchment paper for easy removal.
- Prepare the Streusel Topping: In a small bowl, combine the flour, brown sugar, cinnamon, and cardamom. Add the cold, cubed butter and use a pastry cutter or your fingers to mix until the mixture forms a crumbly texture. Set aside.
- Mix the Dry Ingredients: In a medium bowl, whisk together the flour, granulated sugar, brown sugar, baking powder, baking soda, cinnamon, ginger, cardamom, nutmeg, and salt.
- Cream the Butter: In a large bowl, beat the softened butter until creamy and smooth. Add the egg, sour cream, and vanilla extract, and mix until well combined.
- Combine the Mixtures: Gradually add the dry ingredient mixture to the wet ingredients, stirring just until combined. Be careful not to overmix to guarantee a tender crumb.
- Transfer to Baking Pan: Pour the batter into the prepared baking pan and spread it evenly. Sprinkle the prepared streusel topping evenly over the batter.
- Bake the Cake: Place the pan in the preheated oven and bake for 30-35 minutes, or until a toothpick inserted in the center comes out clean. The top should be golden brown and the cake should spring back when lightly touched.
- Cool and Serve: Allow the cake to cool in the pan for about 10 minutes before slicing and serving. Enjoy warm or at room temperature.
Extra Tips:
For an even more pronounced chai flavor, consider adding a teaspoon of loose chai tea or a chai tea bag to the dry ingredients. If you prefer a less sweet cake, you can reduce the amount of sugar in the batter slightly.
This cake can be stored at room temperature for up to two days, or it can be wrapped tightly and frozen for longer storage. To reheat, simply warm slices in the oven or microwave before serving.