

Looking for dairy-free dessert ideas that everyone can enjoy this holiday season? I’ve got you covered with a collection of festive treats that are not only delicious but also cater to various dietary preferences. Think rich Chocolate Avocado Mousse and refreshing Lemon Sorbet that will delight your taste buds. These recipes promise to impress without compromising on flavor. Let’s explore these scrumptious possibilities together!
Chocolate Avocado Mousse
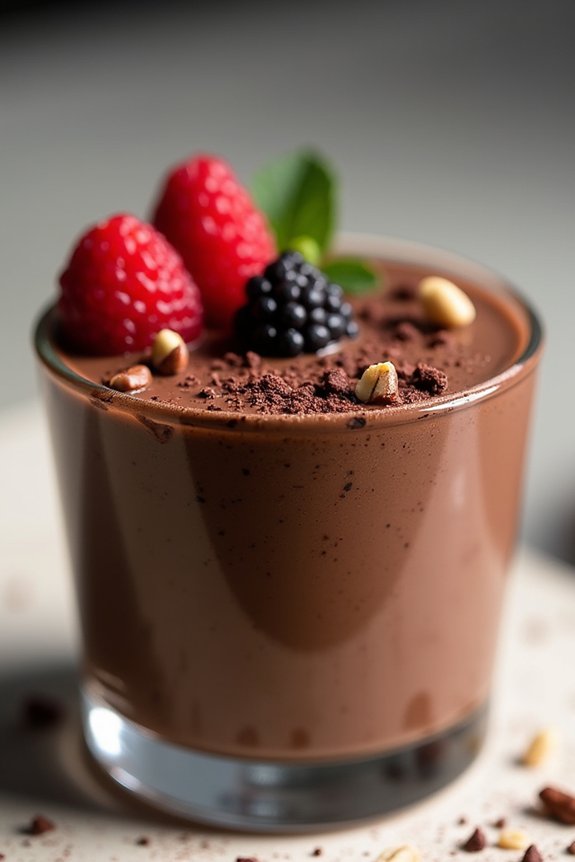
Indulge in a rich and creamy holiday treat with this delightful Chocolate Avocado Mousse. Perfect for those seeking a dairy-free option, this mousse offers a velvety texture and decadent chocolate flavor without any cream or milk. The secret lies in the combination of ripe avocados and cocoa powder, creating a luscious dessert that’s both satisfying and guilt-free.
Whether you’re serving it as part of a festive feast or simply enjoying a sweet treat by the fire, this mousse is sure to impress with its smooth consistency and intense chocolate taste.
This Chocolate Avocado Mousse isn’t only quick and easy to prepare but also packed with nutrients. Avocados provide a healthy dose of monounsaturated fats, fiber, and essential vitamins, while cocoa powder adds antioxidants and a rich chocolate flavor. Sweetened with natural ingredients like maple syrup, this dessert is both wholesome and delicious.
Ideal for serving 4-6 people, this mousse can be made ahead of time, making it a convenient choice for holiday gatherings. With minimal effort, you can create a stunning dessert that everyone will love.
Ingredients (for 4-6 servings):
- 3 ripe avocados, peeled and pitted
- 1/2 cup unsweetened cocoa powder
- 1/2 cup maple syrup
- 1/4 cup almond milk (or any non-dairy milk)
- 1 tablespoon vanilla extract
- A pinch of salt
- Optional toppings: fresh berries, shaved dark chocolate, or chopped nuts
Instructions:
- Prepare the Avocados: Begin by cutting the ripe avocados in half, removing the pits, and scooping the flesh into a food processor or blender. Confirm that the avocados are ripe for the best creamy texture.
- Add the Dry Ingredients: Add the unsweetened cocoa powder and a pinch of salt to the food processor. The cocoa powder will give the mousse its rich chocolate flavor, while the salt enhances the overall taste.
- Incorporate the Wet Ingredients: Pour in the maple syrup, almond milk, and vanilla extract. These ingredients will sweeten and smooth the mousse, balancing the flavors perfectly.
- Blend Until Smooth: Blend all the ingredients together until the mixture is completely smooth and creamy. You may need to stop occasionally to scrape down the sides of the processor to confirm everything is well combined.
- Adjust Consistency if Necessary: If the mousse is too thick, add a little more almond milk, one tablespoon at a time, until you reach your desired consistency.
- Chill the Mousse: Transfer the mousse into individual serving cups or a large bowl, then refrigerate for at least 30 minutes to allow the flavors to meld and the texture to firm up slightly.
- Serve and Garnish: Just before serving, garnish the mousse with optional toppings such as fresh berries, shaved dark chocolate, or chopped nuts for extra flavor and texture.
Extra Tips: For the best results, confirm that your avocados are perfectly ripe, as this will greatly affect the mousse’s texture and taste.
If you’re pressed for time, the mousse can be made a day in advance and stored in the refrigerator until ready to serve. Feel free to experiment with different non-dairy milk options like coconut or oat milk to suit your preference.
Finally, adjust the sweetness to your liking by varying the amount of maple syrup used.
Vegan Gingerbread Cookies

Vegan Gingerbread Cookies are a delightful addition to your dairy-free Christmas dessert menu. These cookies aren’t only free from dairy, but they’re also entirely plant-based, making them a perfect treat for those who follow a vegan lifestyle. The warm spices of ginger, cinnamon, and cloves create a festive aroma and flavor that beautifully capture the essence of the holiday season.
Whether you’re preparing these cookies for a holiday gathering or simply enjoying them with a warm cup of tea, they’re certain to spread joy and cheer.
These Vegan Gingerbread Cookies are wonderfully chewy with just the right amount of sweetness. The use of molasses adds a rich depth of flavor and a beautiful color to the cookies, while the almond milk keeps them moist. Plus, they’re easy to make, allowing you to spend less time in the kitchen and more time enjoying the holiday festivities with your loved ones.
This recipe serves 4-6 people, making it ideal for a small gathering or family treat.
Ingredients (Serves 4-6):
- 2 1/4 cups all-purpose flour
- 1/2 teaspoon baking soda
- 1/2 teaspoon baking powder
- 1 tablespoon ground ginger
- 1 teaspoon ground cinnamon
- 1/4 teaspoon ground cloves
- 1/4 teaspoon salt
- 1/2 cup coconut oil, solid (not melted)
- 1/3 cup brown sugar
- 1/3 cup molasses
- 1/4 cup unsweetened almond milk
- 1 teaspoon vanilla extract
Instructions:
- Preheat the Oven: Begin by preheating your oven to 350°F (175°C). Line two baking sheets with parchment paper to prevent sticking.
- Prepare the Dry Ingredients: In a medium-sized bowl, whisk together the all-purpose flour, baking soda, baking powder, ground ginger, ground cinnamon, ground cloves, and salt. This will guarantee that the spices and leavening agents are evenly distributed throughout the dough.
- Mix the Wet Ingredients: In a separate large bowl, beat the solid coconut oil and brown sugar together until light and fluffy. Add in the molasses, almond milk, and vanilla extract, and mix until well combined.
- Combine Wet and Dry Ingredients: Gradually add the dry ingredients to the wet ingredients, mixing gently with a spatula or wooden spoon until a dough forms. Be careful not to overmix as it can make the cookies tough.
- Chill the Dough: Wrap the dough in plastic wrap and refrigerate for at least 1 hour. Chilling the dough helps to firm it up and makes it easier to handle.
- Roll and Cut the Cookies: Once chilled, roll out the dough on a lightly floured surface to about 1/4 inch thickness. Use cookie cutters to cut out shapes and place them on the prepared baking sheets, leaving some space between each cookie.
- Bake: Bake the cookies in the preheated oven for 8-10 minutes, or until the edges are slightly golden. Be careful not to overbake as they’ll continue to firm up as they cool.
- Cool and Decorate: Allow the cookies to cool on the baking sheets for a few minutes before transferring them to a wire rack to cool completely. If desired, decorate with vegan icing or sprinkles once completely cooled.
Extra Tips: When making these Vegan Gingerbread Cookies, remember that the dough can be quite sticky, so flour your rolling pin and surface generously to prevent sticking. If you find that the dough is too sticky to handle, you can chill it for an additional 30 minutes.
These cookies can also be stored in an airtight container for up to a week, making them a great option for make-ahead holiday treats. Enjoy these festive cookies with a warm beverage for the ultimate holiday indulgence!
Coconut Milk Rice Pudding
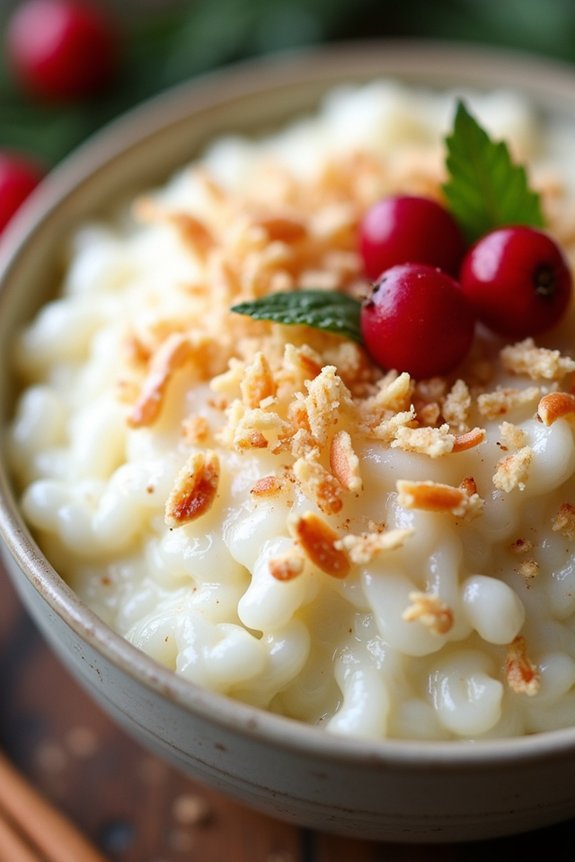
Coconut Milk Rice Pudding is a delightful dairy-free dessert perfect for the festive season. It’s creamy, rich, and lightly spiced, making it an excellent choice for those who want to enjoy a comforting sweet treat without dairy. Infused with the tropical essence of coconut milk, this pudding is both satisfying and indulgent, bringing a touch of warmth to your Christmas festivities.
The dish is simple to prepare and can be made ahead of time, which is ideal for the busy holiday period. This recipe combines the natural sweetness of coconut milk with the aromatic flavors of vanilla and a hint of cinnamon. The pudding is then topped with a sprinkle of nutmeg to enhance its festive flair.
Its versatility allows you to customize it with your choice of toppings, such as toasted coconut flakes, chopped nuts, or fresh fruit, adding a personal touch to your holiday dessert menu. Enjoy this comforting Coconut Milk Rice Pudding with family and friends for a memorable and mouth-watering Christmas celebration.
Ingredients (Serves 4-6):
- 1 cup arborio rice
- 4 cups coconut milk
- 1/2 cup granulated sugar
- 1 teaspoon vanilla extract
- 1/2 teaspoon ground cinnamon
- 1/4 teaspoon salt
- Nutmeg for garnish (optional)
- Toasted coconut flakes, chopped nuts, or fresh fruit for topping (optional)
Instructions:
- Prepare the Ingredients: Gather all your ingredients and measure them accurately. Rinse the arborio rice under cold water until the water runs clear to remove excess starch and prevent the pudding from becoming overly sticky.
- Cook the Rice: In a large saucepan, combine the rinsed rice, coconut milk, sugar, vanilla extract, ground cinnamon, and salt. Stir well to guarantee everything is mixed thoroughly.
- Simmer the Mixture: Place the saucepan over medium heat and bring the mixture to a gentle simmer. Once it starts simmering, reduce the heat to low and cover the pot with a lid, leaving a small crack for steam to escape. Stir occasionally to prevent the rice from sticking to the bottom of the pan.
- Cook Until Thickened: Continue cooking the rice pudding for about 25-30 minutes, or until the rice is tender and the mixture has thickened. Keep stirring occasionally to maintain even cooking and prevent burning.
- Adjust Consistency: If you prefer a creamier consistency, you can add a little more coconut milk. Stir well and let it cook for an additional 5 minutes to reach your desired thickness.
- Serve and Garnish: Once the rice pudding is ready, remove it from heat. Spoon the pudding into serving bowls and sprinkle a pinch of nutmeg on top for a festive touch. Add your choice of toppings such as toasted coconut flakes, chopped nuts, or fresh fruit.
- Chill or Warm: You can serve the rice pudding warm or let it cool to room temperature before refrigerating it to serve chilled.
Extra Tips:
To enhance the flavors of your Coconut Milk Rice Pudding, consider toasting the rice in a dry pan for a few minutes before cooking. This will bring out a nutty flavor that complements the coconut milk beautifully.
If you like a bit of texture in your pudding, add a handful of raisins or dried cranberries to the mixture during the last 5 minutes of cooking. For an extra festive twist, consider adding a splash of almond or rum extract along with the vanilla.
If you’re making this dessert ahead of time, you may need to stir in a little extra coconut milk before serving to loosen the pudding, as it tends to thicken further when chilled.
Almond Flour Brownies
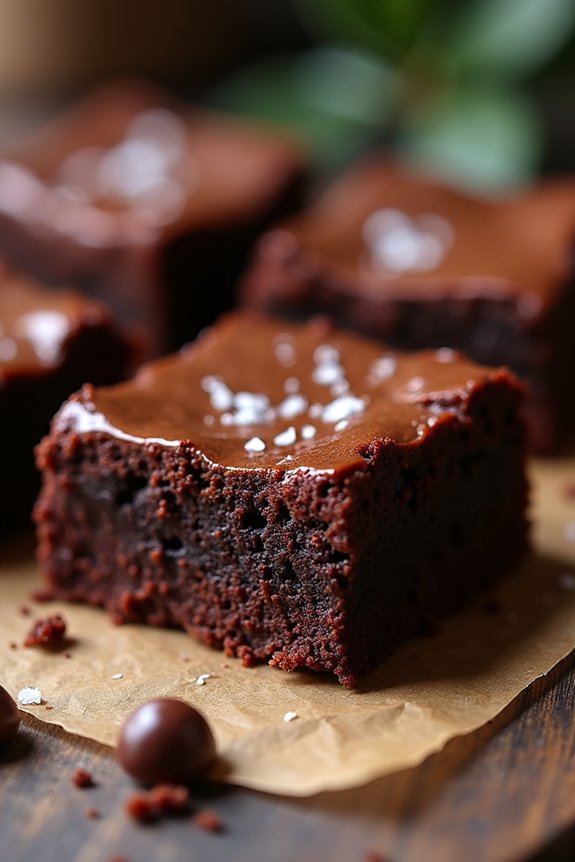
Indulge in the rich, fudgy goodness of Almond Flour Brownies this holiday season. Perfect for those seeking a dairy-free dessert option, these brownies offer a delightful twist on a classic treat. Almond flour not only makes these brownies gluten-free but also adds a subtle nutty flavor that complements the deep chocolate taste.
Whether you’re catering to dietary restrictions or simply looking to try something new, these brownies are certain to be a hit at your Christmas gathering.
The beauty of Almond Flour Brownies lies in their simplicity and versatility. Made with wholesome ingredients, this recipe can be easily adapted to suit your taste preferences or dietary needs. Enjoy them on their own or pair them with a scoop of dairy-free ice cream for an extra touch of decadence.
This recipe is designed to serve 4-6 people, making it ideal for intimate holiday celebrations or as a sweet ending to a family dinner.
Ingredients for Serving 4-6 People:
- 1 cup almond flour
- 1/3 cup unsweetened cocoa powder
- 1/2 teaspoon baking soda
- 1/4 teaspoon salt
- 2 large eggs
- 1/2 cup coconut sugar
- 1/4 cup melted coconut oil
- 1 teaspoon vanilla extract
- 1/2 cup dairy-free chocolate chips
Cooking Instructions:
- Preheat the Oven: Start by preheating your oven to 350°F (175°C). Line an 8×8 inch baking dish with parchment paper or lightly grease it with coconut oil to prevent sticking.
- Mix Dry Ingredients: In a medium-sized bowl, whisk together the almond flour, unsweetened cocoa powder, baking soda, and salt. Ascertain there are no lumps and everything is evenly distributed.
- Combine Wet Ingredients: In another large bowl, whisk together the eggs, coconut sugar, melted coconut oil, and vanilla extract until well combined. The mixture should be smooth and slightly thick.
- Create the Batter: Gradually add the dry ingredients to the wet ingredients, stirring gently until just combined. Be careful not to overmix, as this can affect the texture of the brownies.
- Fold in Chocolate Chips: Gently fold in the dairy-free chocolate chips with a spatula, ensuring they’re evenly distributed throughout the batter.
- Pour and Spread: Pour the brownie batter into the prepared baking dish, using a spatula to spread it evenly across the pan.
- Bake: Place the dish in the preheated oven and bake for 20-25 minutes, or until a toothpick inserted into the center comes out with a few moist crumbs attached. Avoid overbaking to maintain the fudgy texture.
- Cool and Serve: Allow the brownies to cool in the pan for about 10-15 minutes before slicing. Serve warm or at room temperature, and enjoy!
Extra Tips:
For even more flavor, consider adding a sprinkle of sea salt on top of the brownies before baking. This addition enhances the chocolate flavor and provides a delightful contrast to the sweetness.
If you prefer a more pronounced almond taste, you can incorporate a teaspoon of almond extract along with the vanilla extract. Additionally, you can customize the brownies by mixing in nuts, such as chopped almonds or walnuts, or by drizzling melted dairy-free chocolate on top after baking for an extra festive touch.
Lemon Sorbet
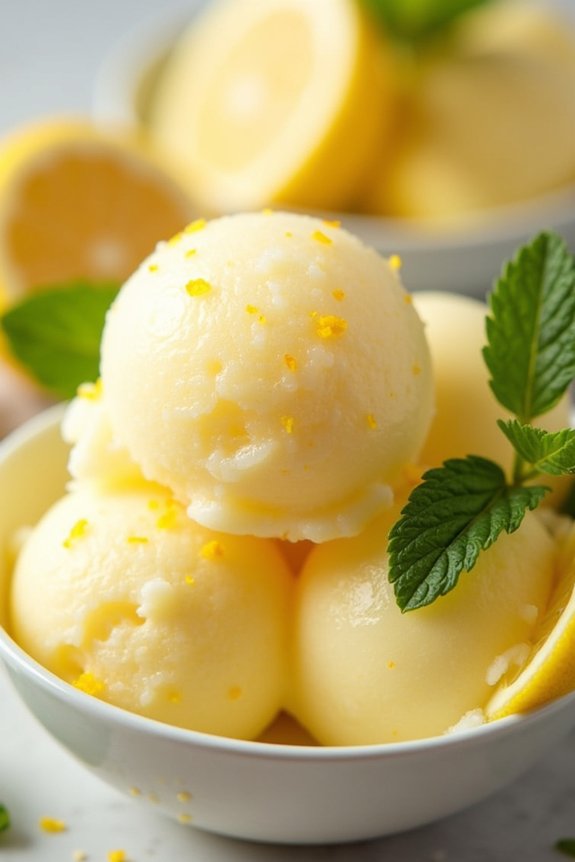
Lemon Sorbet is a delightful and invigorating dairy-free dessert that’s perfect for the festive season. Its bright and zesty flavor makes it a great palate cleanser after a hearty holiday meal. The simplicity of lemon sorbet allows the citrusy lemon to shine, making it a wonderful treat for those who prefer a lighter dessert option during Christmas. Not to mention, it’s also vegan-friendly, gluten-free, and incredibly easy to make, requiring just a few ingredients and minimal effort.
This homemade lemon sorbet recipe is perfect for serving 4-6 people, and it’s sure to impress your guests with its vibrant flavor and smooth texture. You’ll need fresh lemons for a truly authentic taste, as well as some sugar and water to create a simple syrup that balances the tartness of the lemons. With just a few simple steps, you can whip up this delightful dessert and add an invigorating touch to your Christmas festivities.
Ingredients:
- 1 cup fresh lemon juice (from about 4-6 lemons)
- 1 tablespoon lemon zest
- 1 cup sugar
- 1 cup water
- Pinch of salt
Instructions:
- Prepare the Lemons: Begin by washing the lemons thoroughly. Using a grater or zester, carefully zest the lemons to collect about 1 tablespoon of zest. Make sure to only zest the yellow part, avoiding the bitter white pith. After zesting, juice the lemons to obtain 1 cup of fresh lemon juice. Strain the juice to remove any seeds or pulp for a smooth sorbet.
- Make the Simple Syrup: In a small saucepan, combine 1 cup of sugar and 1 cup of water. Place the saucepan over medium heat and stir until the sugar completely dissolves. Once dissolved, bring the mixture to a gentle simmer and then remove it from the heat. Allow the syrup to cool to room temperature.
- Combine Ingredients: In a large mixing bowl, combine the cooled simple syrup, fresh lemon juice, lemon zest, and a pinch of salt. Stir the mixture until all ingredients are well incorporated. The salt helps to enhance the lemon flavor and balance the sweetness.
- Chill the Mixture: Cover the bowl with plastic wrap or a lid and refrigerate for at least 2 hours, or until the mixture is thoroughly chilled. This step is essential as it guarantees the sorbet freezes evenly.
- Freeze the Sorbet: Once the mixture is chilled, pour it into an ice cream maker and churn according to the manufacturer’s instructions until it reaches a soft-serve consistency. If you don’t have an ice cream maker, pour the mixture into a shallow baking dish and freeze. Stir every 30 minutes with a fork to break up ice crystals until the sorbet is firm and smooth.
- Serve: Transfer the sorbet to an airtight container and freeze for at least an additional hour before serving. This allows the sorbet to firm up to the perfect scoopable consistency. Serve in chilled bowls or glasses for an extra invigorating experience.
Extra Tips:
For a more intense lemon flavor, consider adding a bit more zest or a splash of lemon extract during the mixing stage. If you prefer your sorbet a bit less sweet, you can reduce the sugar slightly, but keep in mind that sugar helps with the texture of the sorbet. Using fresh, high-quality lemons will make a significant difference in the taste of your sorbet.
For a festive touch, garnish the sorbet with fresh mint leaves or a twist of lemon peel before serving. Enjoy your homemade lemon sorbet as a delightful end to your Christmas feast!
Cashew Cheesecake
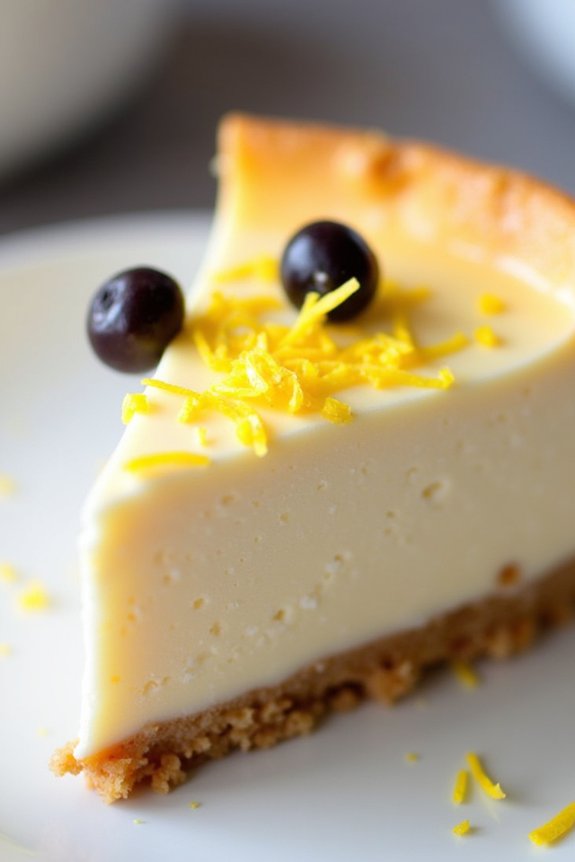
Indulge in the creamy decadence of a Dairy-Free Cashew Cheesecake, a delightful dessert perfect for your Christmas celebrations. This cheesecake not only caters to those with dietary restrictions but also delivers a rich and creamy texture that rivals traditional cheesecakes.
Made primarily from nutrient-rich cashews, this dessert is both satisfying and guilt-free, making it an excellent choice for a festive gathering that includes a variety of dietary preferences.
This cheesecake is adorned with a delicious blend of natural flavors, including a hint of vanilla and a touch of citrus, which together create a harmonious taste that’s both revitalizing and indulgent. By using a selection of wholesome ingredients, you’ll guarantee a dessert that’s not only kind to those with lactose intolerance but also surprisingly easy to prepare.
Gather your loved ones around and enjoy this delightful treat that’s sure to become a holiday favorite for years to come.
Ingredients (Serves 4-6):
- 1 1/2 cups raw cashews (soaked overnight)
- 1/4 cup coconut oil, melted
- 1/4 cup maple syrup
- 1/4 cup lemon juice
- 1 teaspoon vanilla extract
- 1/4 cup coconut milk
- Pinch of salt
- 1 1/2 cups almond flour
- 1/4 cup dates, pitted and chopped
- 1/4 cup shredded coconut
- Zest of 1 lemon
Instructions:
- Prepare the Crust: In a food processor, combine the almond flour, dates, and shredded coconut. Pulse until the mixture is well combined and sticky in texture. Press the mixture evenly into the bottom of a lined 8-inch springform pan, forming the base of your cheesecake. Set aside.
- Create the Filling: Drain the soaked cashews and add them to a high-speed blender along with the melted coconut oil, maple syrup, lemon juice, vanilla extract, coconut milk, and a pinch of salt. Blend the ingredients until they form a smooth, creamy consistency.
- Assemble the Cheesecake: Pour the cashew filling over the prepared crust in the springform pan. Use a spatula to smooth the top, ensuring an even layer. Sprinkle the lemon zest over the top to add a burst of flavor and a festive touch.
- Set the Cheesecake: Place the cheesecake in the freezer for at least 4 hours or until it’s firm to the touch. Before serving, allow it to thaw at room temperature for about 15 minutes to achieve the perfect creamy texture.
- Serve and Enjoy: Carefully remove the cheesecake from the springform pan, slice, and serve to your guests. Enjoy this delicious dairy-free alternative to traditional cheesecake, and savor the compliments from your delighted guests.
Extra Tips:
When preparing your Dairy-Free Cashew Cheesecake, make sure to soak the cashews overnight to guarantee they blend smoothly into the filling. This step is essential for achieving the creamy texture that defines this dessert.
If you’re short on time, a quick soak in hot water for about 1 hour can suffice. Additionally, feel free to customize your cheesecake with your favorite toppings, such as fresh berries or a drizzle of chocolate sauce, to add a personal touch and enhance the festive presentation.
Raspberry Chia Seed Pudding
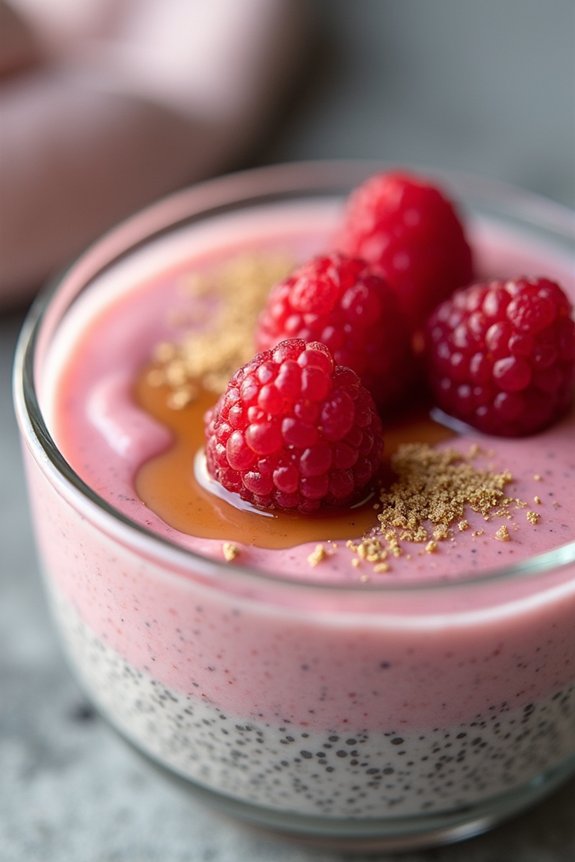
Raspberry Chia Seed Pudding is a delightful and festive dairy-free dessert that’s perfect for the holiday season. It’s a beautiful combination of fresh raspberries, creamy coconut milk, and nutrient-packed chia seeds, creating a treat that’s both delicious and healthy.
This pudding isn’t only quick and easy to prepare but also naturally sweetened with maple syrup, making it a guilt-free indulgence for Christmas gatherings or any celebration. Its vibrant color and luscious texture are sure to impress your family and friends.
This recipe serves 4-6 people and can be made ahead of time, saving you from last-minute holiday stress. The chia seeds absorb the coconut milk, creating a pudding-like consistency that’s both satisfying and nourishing. Plus, the addition of raspberries adds a revitalizing tartness that balances the sweetness perfectly.
Whether you’re serving it as a dessert or a special breakfast treat, this Raspberry Chia Seed Pudding is sure to be a hit.
Ingredients:
- 1 cup fresh raspberries (plus extra for garnish)
- 1/4 cup chia seeds
- 2 cups coconut milk (full fat or light)
- 1/4 cup maple syrup
- 1 teaspoon vanilla extract
- Pinch of salt
Instructions:
- Prepare the Raspberry Puree: In a blender, combine 1 cup of fresh raspberries and blend until smooth. If you prefer a seedless puree, strain it through a fine-mesh sieve into a bowl, discarding the seeds. This will guarantee a smooth and silky pudding texture.
- Mix the Ingredients: In a large mixing bowl, combine the raspberry puree, chia seeds, coconut milk, maple syrup, vanilla extract, and a pinch of salt. Stir thoroughly until all the chia seeds are evenly distributed and the mixture is well combined. The salt helps to enhance the flavors.
- Refrigerate the Mixture: Cover the bowl with plastic wrap or transfer the mixture to an airtight container. Place it in the refrigerator for at least 4 hours or overnight. This allows the chia seeds to absorb the liquid and thicken into a pudding-like consistency.
- Stir and Serve: Before serving, give the pudding a good stir to guarantee an even texture. Spoon the pudding into individual serving glasses or bowls. Garnish with additional fresh raspberries on top for a festive touch.
- Enjoy: Serve the Raspberry Chia Seed Pudding chilled. It’s a revitalizing, light, and flavorful dessert that’s perfect for any holiday celebration.
Extra Tips:
To add a little more depth of flavor, consider mixing in a tablespoon of lemon juice with the raspberry puree. This will enhance the tartness and complement the sweetness of the maple syrup.
If you want a thicker pudding, adjust the chia seed amount to 1/3 cup. For added texture, top the pudding with shredded coconut or slivered almonds before serving.
Pumpkin Spice Cupcakes
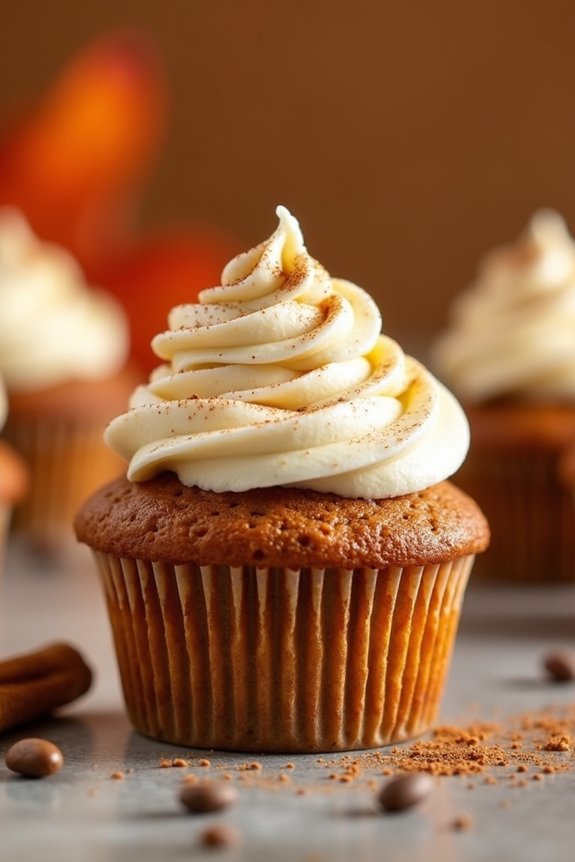
If you’re looking for a festive and delicious dessert that caters to a dairy-free diet, these Pumpkin Spice Cupcakes are the perfect choice. With the warm flavors of pumpkin and spices, these cupcakes capture the essence of the holiday season without the need for dairy ingredients.
Whether you’re serving them at a holiday party or enjoying them as a treat for yourself, these cupcakes are sure to satisfy your sweet tooth while accommodating dietary restrictions.
These Dairy-Free Pumpkin Spice Cupcakes aren’t only delightful to eat but also easy to make. The recipe uses simple substitutions to replace traditional dairy ingredients, guaranteeing that everyone can enjoy them.
The result is a moist and flavorful cupcake with a soft crumb and rich pumpkin flavor, topped with a creamy dairy-free frosting that complements the spices perfectly. This recipe yields enough cupcakes to serve 4-6 people, making it an ideal choice for a small gathering or intimate dinner.
Ingredients (Serves 4-6):
- 1 cup pumpkin puree
- 1/2 cup vegetable oil
- 1 cup granulated sugar
- 1/4 cup almond milk (or any dairy-free milk)
- 1 teaspoon vanilla extract
- 1 1/2 cups all-purpose flour
- 1 teaspoon baking powder
- 1/2 teaspoon baking soda
- 1/2 teaspoon salt
- 1 teaspoon ground cinnamon
- 1/2 teaspoon ground ginger
- 1/4 teaspoon ground nutmeg
- 1/4 teaspoon ground cloves
For the Frosting:
- 1/2 cup dairy-free butter, softened
- 2 cups powdered sugar
- 1/2 teaspoon vanilla extract
- 2 tablespoons almond milk (or any dairy-free milk)
Instructions:
- Preheat the oven: Start by preheating your oven to 350°F (175°C). Line a cupcake tin with paper liners to prepare for the batter.
- Mix wet ingredients: In a large mixing bowl, combine the pumpkin puree, vegetable oil, granulated sugar, almond milk, and vanilla extract. Whisk together until the mixture is smooth and well combined.
- Combine dry ingredients: In a separate bowl, sift together the all-purpose flour, baking powder, baking soda, salt, cinnamon, ginger, nutmeg, and cloves. This will guarantee that the spices are evenly distributed throughout the batter.
- Combine wet and dry mixtures: Gradually add the dry ingredients to the wet mixture, stirring gently until just combined. Be careful not to overmix, as this can result in dense cupcakes.
- Fill the cupcake liners: Using a scoop or spoon, divide the batter evenly among the prepared cupcake liners, filling each about two-thirds full.
- Bake: Place the cupcake tin in the preheated oven and bake for 18-20 minutes, or until a toothpick inserted into the center of a cupcake comes out clean. Let the cupcakes cool in the tin for a few minutes before transferring them to a wire rack to cool completely.
- Make the frosting: In a medium bowl, beat the dairy-free butter until creamy. Gradually add the powdered sugar, vanilla extract, and almond milk, beating until smooth and fluffy.
- Frost the cupcakes: Once the cupcakes are completely cooled, use a piping bag or a spatula to frost the cupcakes with the dairy-free frosting.
Extra Tips:
For the best results, confirm that all ingredients are at room temperature before you start baking; this helps them blend more easily and evenly.
When measuring flour, use the spoon-and-level method to avoid packing it too tightly, which can lead to dense cupcakes.
If you want to add a little extra flair to your cupcakes, consider sprinkling some cinnamon on top of the frosting or adding a few dairy-free chocolate chips into the batter before baking.
Enjoy your Dairy-Free Pumpkin Spice Cupcakes with a warm cup of dairy-free latte for the ultimate holiday treat!
Apple Crisp With Oat Topping

Apple Crisp with Oat Topping is a delightful dairy-free dessert that combines the natural sweetness of apples with a crunchy, wholesome oat topping. This dish is perfect for the holiday season, providing a warm, comforting treat for those who are avoiding dairy. Its simplicity makes it a great option for a festive gathering or a cozy night in.
The dessert is naturally sweetened with maple syrup, bringing out the flavors of the apples without overpowering them, while the oat topping adds a satisfying texture that complements the tender fruit beneath. Ideal for serving 4-6 people, this apple crisp is a wonderful way to enjoy the flavors of the season without the need for butter or milk.
The combination of spices adds warmth and depth, turning simple ingredients into a memorable dish. Whether served on its own or with a scoop of dairy-free ice cream, this apple crisp is sure to become a holiday favorite.
Ingredients:
- 6 medium apples (such as Granny Smith or Honeycrisp), peeled, cored, and sliced
- 1 tablespoon lemon juice
- 1/4 cup maple syrup
- 1 teaspoon ground cinnamon
- 1/2 teaspoon ground nutmeg
- 1/4 teaspoon ground allspice
- 1 cup rolled oats
- 1/2 cup almond flour
- 1/3 cup coconut oil, melted
- 1/4 cup brown sugar
- 1/4 teaspoon salt
Instructions:
- Preheat the Oven: Begin by preheating your oven to 350°F (175°C). This guarantees that the oven is at the right temperature once you’re ready to bake the apple crisp.
- Prepare the Apples: In a large mixing bowl, combine the sliced apples with the lemon juice, maple syrup, cinnamon, nutmeg, and allspice. Toss the mixture until the apples are evenly coated with the spices and syrup.
- Arrange the Apples: Transfer the spiced apple mixture into a 9×13-inch baking dish, spreading them out evenly to guarantee even cooking.
- Make the Oat Topping: In a separate bowl, mix together the rolled oats, almond flour, melted coconut oil, brown sugar, and salt. Stir until the ingredients are well combined and the mixture becomes crumbly.
- Add the Topping: Sprinkle the oat mixture evenly over the apples in the baking dish, ensuring that the apples are fully covered. This will create a delicious, crunchy topping as it bakes.
- Bake the Crisp: Place the baking dish in the preheated oven and bake for 40-45 minutes, or until the topping is golden brown and the apples are bubbling and tender.
- Cool and Serve: Allow the apple crisp to cool for a few minutes before serving. Enjoy it warm, perhaps with a scoop of dairy-free ice cream or a dollop of coconut whipped cream.
Extra Tips:
For the best results, choose apples that are firm and slightly tart, such as Granny Smith or Honeycrisp, as they hold their shape well during baking. If you prefer your topping less sweet, you can reduce the amount of brown sugar or substitute it with coconut sugar for a different flavor profile.
Additionally, for an even richer taste, consider adding a handful of chopped nuts, like pecans or walnuts, to the oat topping. This Apple Crisp with Oat Topping isn’t only easy to make but also customizable, allowing you to adjust the sweetness and spices to your liking.
No-Bake Peanut Butter Bars
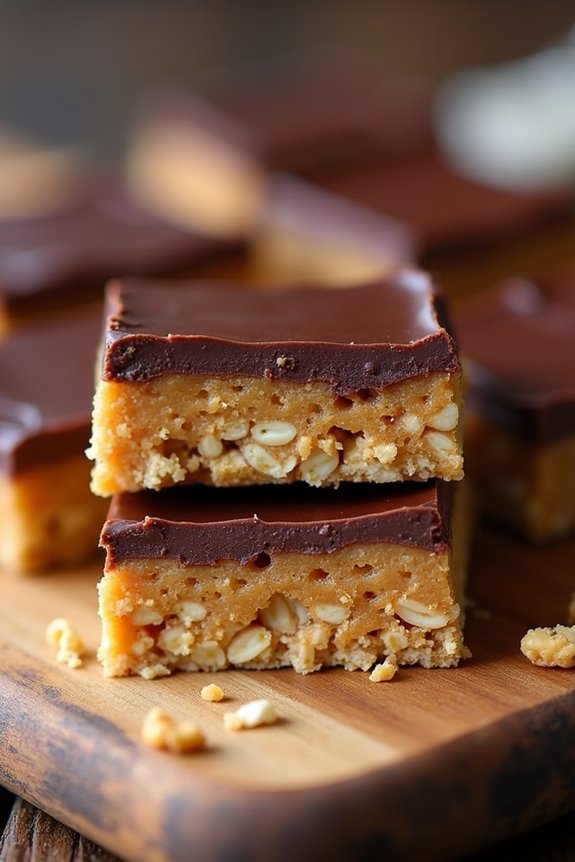
No-Bake Peanut Butter Bars are the perfect dairy-free treat to indulge in during the Christmas season. These delightful bars offer a rich and creamy texture with a satisfying peanut butter flavor that can be enjoyed by both kids and adults alike.
Without the need for an oven, this recipe isn’t only simple but also quick to prepare, making it an ideal choice for those busy holiday times. Whether you’re entertaining guests or simply looking for a sweet snack to share with family, these bars are sure to be a hit.
The combination of peanut butter and chocolate is a classic pairing that never fails to impress. By eliminating dairy products, this recipe caters to those with dietary restrictions without sacrificing taste or quality.
These No-Bake Peanut Butter Bars maintain their deliciousness while being entirely plant-based. With a few pantry staples and minimal preparation time, you can create a dessert that everyone will enjoy. Get ready to impress your loved ones with this irresistible and easy-to-make treat.
Ingredients (Serving Size: 4-6 people):
- 1 cup smooth peanut butter
- 1/4 cup maple syrup
- 1/4 cup coconut oil
- 2 cups rolled oats
- 1 cup dairy-free chocolate chips
- 1 teaspoon vanilla extract
- Pinch of salt
Instructions:
- Prepare the Peanut Butter Mixture: In a medium-sized saucepan over low heat, combine the peanut butter, maple syrup, and coconut oil. Stir continuously until the mixture is smooth and well combined. Remove from heat and add the vanilla extract and a pinch of salt, stirring to incorporate.
- Combine with Oats: In a large mixing bowl, pour the melted peanut butter mixture over the rolled oats. Use a spatula or spoon to mix until the oats are fully coated and the mixture is evenly combined.
- Prepare Baking Dish: Line an 8×8 inch square baking dish with parchment paper, leaving some overhang on the sides for easy removal later. Transfer the oat and peanut butter mixture into the prepared dish, spreading it out evenly and pressing it down firmly with the back of a spoon or spatula to create a solid base layer.
- Melt the Chocolate: In a microwave-safe bowl, add the dairy-free chocolate chips. Heat in the microwave in 30-second intervals, stirring in between, until the chocolate is completely melted and smooth.
- Top with Chocolate Layer: Pour the melted chocolate over the pressed oat base, spreading it evenly with a spatula to cover the entire surface. Confirm the chocolate layer is smooth and even.
- Chill the Bars: Place the baking dish in the refrigerator for at least 2 hours, or until the bars are completely set and firm. For quicker results, you can also chill them in the freezer for about 30-60 minutes.
- Slice and Serve: Once set, remove the bars from the baking dish using the parchment paper overhang. Place them on a cutting board and use a sharp knife to slice into bars or squares of your desired size. Serve chilled and enjoy!
Extra Tips:
For best results, use high-quality dairy-free chocolate chips to guarantee a smooth and glossy chocolate layer. You can also add a sprinkle of sea salt on top of the chocolate before chilling for an extra touch of flavor.
If you prefer a chunkier texture, you can substitute half of the rolled oats with chopped nuts or seeds. Store any leftovers in an airtight container in the refrigerator for up to a week, or freeze them for longer storage. Remember, these bars are best enjoyed cold, as they can soften at room temperature.
Peppermint Chocolate Bark
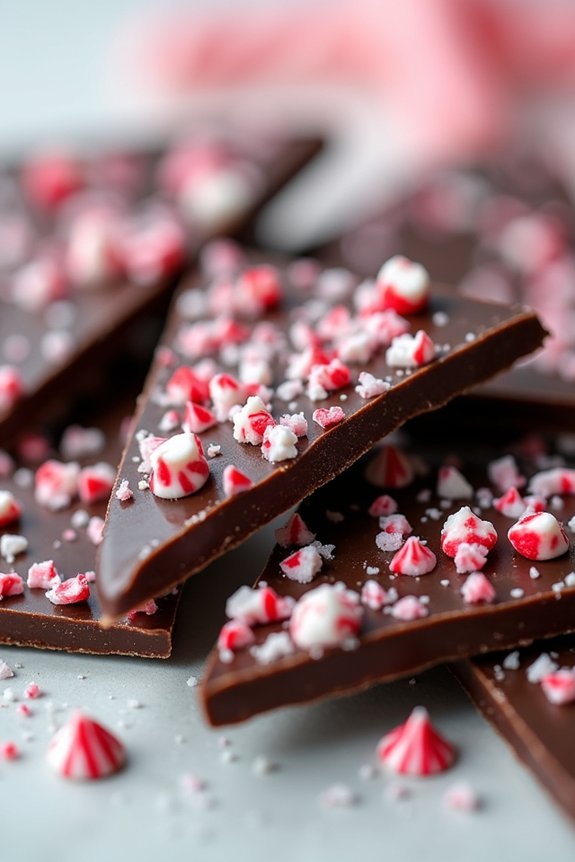
This holiday season, delight your loved ones with a festive treat that’s as visually stunning as it’s delicious: Peppermint Chocolate Bark. Perfect for those who are avoiding dairy, this simple yet indulgent dessert combines the rich flavors of dark chocolate with the cool, invigorating taste of peppermint. It’s the perfect balance of sweet and minty, making it a crowd-pleaser for gatherings or a thoughtful homemade gift.
Plus, it’s incredibly easy to make, requiring just a few ingredients and minimal time in the kitchen, so you can focus on enjoying the festivities.
Creating this Peppermint Chocolate Bark is all about layering flavors and textures. Begin with a base of high-quality dairy-free dark chocolate, which provides a smooth and decadent canvas for the peppermint. Crushed candy canes or peppermint candies are then sprinkled on top, adding a festive crunch and a burst of color.
This bark not only satisfies a sweet tooth but also adds a touch of elegance to your holiday dessert table. Whether you’re serving it at a party or wrapping it up as a thoughtful edible gift, this bark is sure to be a hit.
Ingredients (Serves 4-6):
- 12 ounces dairy-free dark chocolate chips or chunks
- 1 teaspoon peppermint extract
- 1/2 cup crushed candy canes or peppermint candies
- Optional: 2 tablespoons coconut oil (for smoother chocolate)
Instructions:
- Prepare the Baking Sheet: Line a baking sheet with parchment paper. This will prevent the chocolate from sticking and make it easier to break the bark into pieces later.
- Melt the Chocolate: In a microwave-safe bowl, combine the dairy-free dark chocolate and coconut oil (if using). Microwave in 30-second intervals, stirring in between until the chocolate is completely melted and smooth. Alternatively, you can melt the chocolate using a double boiler on the stove.
- Add Peppermint Flavor: Once the chocolate is melted, stir in the peppermint extract. Make sure to mix thoroughly to evenly distribute the peppermint flavor throughout the chocolate.
- Spread the Chocolate: Pour the melted chocolate onto the prepared baking sheet. Use a spatula to spread it into an even layer, about 1/4 inch thick.
- Add the Toppings: Sprinkle the crushed candy canes or peppermint candies evenly over the chocolate. Press them lightly into the chocolate to guarantee they adhere.
- Chill the Bark: Place the baking sheet in the refrigerator for about 1-2 hours, or until the chocolate is completely set and firm.
- Break into Pieces: Once the chocolate is set, remove the baking sheet from the refrigerator. Use your hands to break the bark into irregular pieces. Serve immediately or store in an airtight container.
Extra Tips:
For best results, use high-quality dairy-free chocolate to guarantee a smooth taste and texture. If you prefer a bit of saltiness to balance the sweetness, consider sprinkling a pinch of sea salt over the chocolate before it sets.
Additionally, to avoid the chocolate seizing when melting, guarantee that all utensils and bowls are completely dry before use. If gifting, wrap the bark in cellophane bags tied with festive ribbon for a charming presentation. Enjoy your Peppermint Chocolate Bark as a delightful treat during the holiday season!
Coconut Macaroons
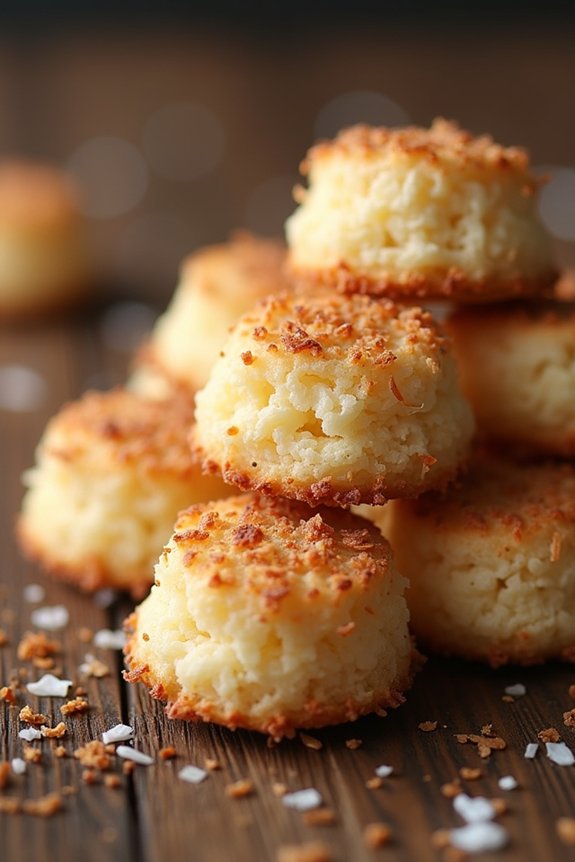
Coconut Macaroons are a delightful dairy-free treat perfect for your Christmas dessert menu. These chewy, sweet confections are made primarily from shredded coconut, making them a wonderful option for those avoiding dairy. Their simplicity and rich coconut flavor make them a standout on any festive table.
With just a few ingredients, you can whip up a batch of these delicious macaroons in no time, allowing you to focus on other holiday preparations.
The beauty of Coconut Macaroons lies in their versatility. They pair beautifully with a variety of flavors, from vanilla to almond, and can even be dipped in dark chocolate for an extra touch of indulgence. Plus, they’re naturally gluten-free, making them an inclusive option for guests with dietary restrictions.
Whether you serve them as part of a dessert spread or as a standalone treat, these macaroons are sure to be a hit at your Christmas gathering.
Ingredients (Serves 4-6):
- 3 cups shredded unsweetened coconut
- 3/4 cup granulated sugar
- 1/2 cup egg whites (approximately 4 large egg whites)
- 1 teaspoon vanilla extract
- 1/4 teaspoon salt
Cooking Instructions:
1. Preheat the Oven:
Preheat your oven to 325°F (163°C). Line a baking sheet with parchment paper or a silicone baking mat to prevent the macaroons from sticking.
2. Mix Ingredients:
In a large mixing bowl, combine the shredded coconut, granulated sugar, egg whites, vanilla extract, and salt. Stir until all ingredients are thoroughly mixed and the coconut is evenly coated with the egg mixture.
3. Shape the Macaroons:
Using a tablespoon or a small ice cream scoop, form the coconut mixture into small mounds and place them onto the prepared baking sheet, spacing them about 1 inch apart.
4. Bake:
Place the baking sheet in the preheated oven and bake for 18-20 minutes, or until the tops of the macaroons are golden brown. Keep an eye on them to prevent burning.
5. Cool:
Remove the macaroons from the oven and allow them to cool on the baking sheet for 5 minutes. Then transfer them to a wire rack to cool completely.
6. Optional: Chocolate Dip:
If you wish to add a chocolate layer, melt some dairy-free dark chocolate in a microwave or double boiler. Dip the bottoms of the cooled macaroons into the chocolate and place them back on the parchment paper to set.
Extra Tips:
For the best texture, make sure to use unsweetened shredded coconut, as sweetened coconut can make the macaroons too sweet and alter the consistency.
If you don’t have a silicone baking mat, parchment paper works just as well and helps in easy removal. When mixing the ingredients, verify the coconut is well coated with the egg mixture to help the macaroons hold their shape.
If you’re adding a chocolate layer, let the macaroons cool completely before dipping to avoid melting mishaps. Enjoy these macaroons with your favorite holiday beverage for an extra festive treat!
Banana Nice Cream
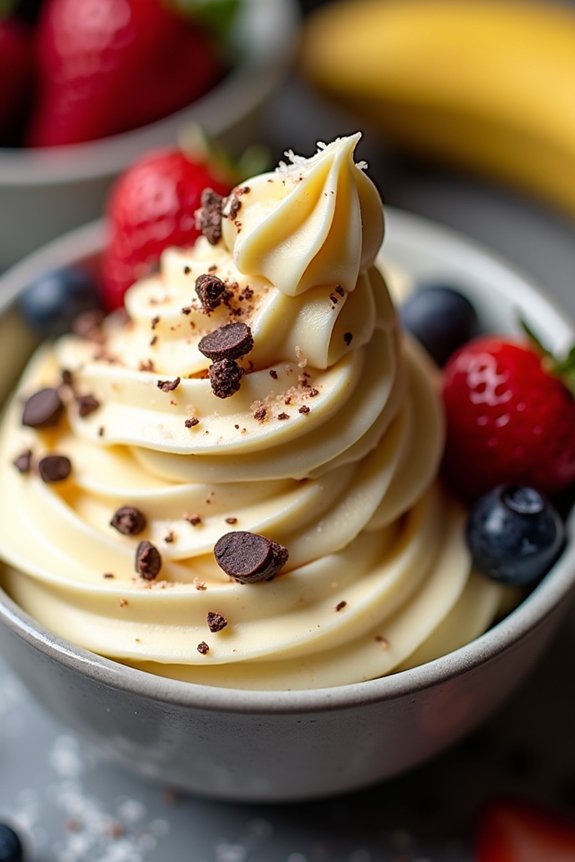
The holiday season is a wonderful time to gather with family and friends, and what better way to celebrate than with a delicious and guilt-free dessert? Banana Nice Cream is the perfect alternative for those looking to enjoy a creamy, ice cream-like treat without the dairy. This dessert isn’t only simple to make but also incredibly healthy, as it uses just a few natural ingredients. The creamy texture of bananas provides a smooth and luscious base, making it a delightful choice for a festive gathering.
Banana Nice Cream is versatile and can be customized with various toppings and flavors to suit your holiday taste preferences. Whether you’re catering to a crowd with dietary restrictions or simply want to enjoy a lighter dessert, this recipe is sure to satisfy. It’s also a fantastic way to use up ripe bananas, turning them into something special and indulgent. Gather your loved ones, whip up this delightful treat, and enjoy a dairy-free Christmas dessert that everyone can savor.
Ingredients for 4-6 servings:
- 6 ripe bananas
- 1 teaspoon vanilla extract
- 2 tablespoons almond milk (or any plant-based milk of your choice)
- Optional toppings: chopped nuts, shredded coconut, chocolate chips, or fresh berries
Instructions:
- Prepare the Bananas:
- Peel the ripe bananas and slice them into thin rounds. Place the banana slices in a single layer on a baking sheet lined with parchment paper. Freeze them for at least 2 hours, or until they’re completely solid.
- Blend the Ingredients:
- Once the banana slices are frozen, transfer them to a high-speed blender or food processor. Add the vanilla extract and almond milk. Blend on high until the mixture becomes smooth and creamy. You may need to pause and scrape down the sides of the container to guarantee an even blend.
- Serve the Nice Cream:
- Scoop the Banana Nice Cream into bowls and serve immediately for a soft-serve consistency. If you prefer a firmer texture, transfer the mixture to a container and freeze for an additional 30 minutes to an hour before serving.
- Add Your Favorite Toppings:
- Personalize your Banana Nice Cream with a variety of toppings. Sprinkle chopped nuts, shredded coconut, chocolate chips, or fresh berries over the top for added texture and flavor.
Extra Tips:
For the creamiest Banana Nice Cream, make sure your bananas are ripe, as they’ll be sweeter and blend more easily. If your blender is struggling with the frozen bananas, add a little extra almond milk to help it along.
Feel free to experiment with different flavor combinations by adding ingredients like cocoa powder for a chocolate version or a spoonful of peanut butter for added richness. This dessert is best enjoyed fresh, but leftovers can be stored in an airtight container in the freezer for up to a week. Just remember to let it soften on the counter for a few minutes before scooping. Enjoy this festive, dairy-free treat with loved ones this holiday season!