

The holiday season is here, and I’m thrilled to share 10 easy Christmas baking recipes that will make your kitchen the coziest spot in the house.
From classic sugar cookies to crunchy holiday biscotti, these recipes are perfect for bakers of all levels.
Each treat is crafted to add a sprinkle of joy and warmth to your festivities.
Are you ready to start baking some holiday cheer?
Let’s get those aprons on and ovens preheated!
Classic Sugar Cookies
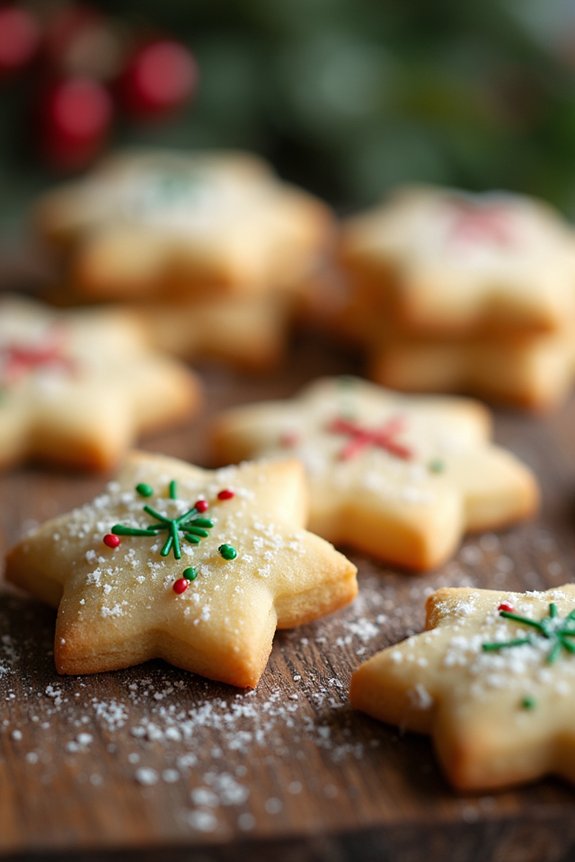
Classic Sugar Cookies are a timeless treat that brings joy to the holiday season. These cookies are perfect for cutting into festive shapes and decorating with icing or sprinkles, making them a fun and engaging activity for the whole family. The buttery, sweet flavor of sugar cookies evokes nostalgic memories of Christmases past, while their smooth texture makes them a delightful addition to any holiday cookie platter.
Whether you’re a baking novice or a seasoned pro, these cookies are bound to be a hit at any holiday gathering. This recipe for Classic Sugar Cookies is designed to yield enough cookies for 4-6 people, making it ideal for a small family or intimate holiday celebration. The dough is simple to make and can be prepared ahead of time, allowing you to focus on the fun part – decorating!
With a crisp edge and a soft, tender center, these cookies are perfect for dunking in a glass of milk or enjoying on their own. Gather your ingredients, roll up your sleeves, and let the holiday baking begin!
Ingredients (Serving Size: 4-6 people):
- 2 3/4 cups all-purpose flour
- 1 teaspoon baking soda
- 1/2 teaspoon baking powder
- 1 cup unsalted butter, softened
- 1 1/2 cups granulated sugar
- 1 egg
- 1 teaspoon vanilla extract
- 1/2 teaspoon almond extract (optional)
- 3 to 4 tablespoons buttermilk
- Assorted sprinkles or decorative sugar (optional)
Cooking Instructions:
- Preheat the Oven: Begin by preheating your oven to 375°F (190°C). This guarantees that your oven is at the right temperature when you’re ready to bake, allowing the cookies to cook evenly.
- Mix Dry Ingredients: In a medium-sized bowl, whisk together the flour, baking soda, and baking powder. This helps to evenly distribute the leavening agents, which are essential for the cookies to rise properly.
- Cream Butter and Sugar: In a large bowl, cream together the softened butter and granulated sugar until the mixture is light and fluffy. This should take about 2-3 minutes and is important for incorporating air into the dough for a lighter texture.
- Add Wet Ingredients: Beat in the egg, vanilla extract, and almond extract (if using) into the creamed butter and sugar. Mix until well combined, making sure that the flavors are evenly distributed throughout the dough.
- Combine Dry and Wet Mixtures: Gradually add the dry ingredients to the wet mixture, beating on low speed until just combined. Be careful not to overmix, as this can result in tough cookies.
- Add Buttermilk: Stir in the buttermilk one tablespoon at a time until the dough reaches a smooth and pliable consistency that’s easy to roll out.
- Roll and Cut Dough: On a floured surface, roll out the dough to about 1/4 inch thickness. Use cookie cutters to cut out shapes and place them on a baking sheet lined with parchment paper.
- Decorate: If you wish to decorate your cookies with sprinkles or decorative sugar, sprinkle them on before baking.
- Bake: Bake the cookies in the preheated oven for 8-10 minutes, or until the edges are just beginning to turn golden. Keep an eye on them to prevent overbaking.
- Cool: Remove the cookies from the oven and let them cool on the baking sheet for a couple of minutes before transferring them to a wire rack to cool completely.
Extra Tips:
When rolling out your cookie dough, use parchment paper or a silicone mat to prevent sticking, and confirm even thickness by using rolling pin rings or guides. If you’re making intricate shapes, chill the dough in the refrigerator for about 10 minutes before cutting to help the cookies hold their shape better during baking.
If you find your dough is too sticky to work with, sprinkle a little more flour on your work surface or chill the dough for a short period. For an extra festive touch, consider making a simple royal icing for decorating once the cookies are fully cooled.
Gingerbread Men

Gingerbread men are a classic holiday treat that brings warmth and festive cheer to any kitchen. These delightful cookies, with their aromatic blend of spices like ginger, cinnamon, and cloves, are perfect for decorating with family and friends.
Baking these cookies not only fills your home with the comforting scent of the holidays, but also creates cherished memories of laughter and creativity as you bring each gingerbread character to life with icing and candies.
To create a batch of gingerbread men that serves 4-6 people, you’ll need a good mix of pantry staples and festive spices. This recipe yields cookies that are crisp on the edges but soft in the middle, perfect for enjoying with a mug of hot cocoa or leaving out for Santa on Christmas Eve.
Follow the steps below to commence a fun and delicious holiday baking adventure.
Ingredients:
- 3 cups all-purpose flour
- 3/4 cup brown sugar, packed
- 3/4 cup molasses
- 1/2 cup unsalted butter, softened
- 1 large egg
- 1 teaspoon baking soda
- 1/2 teaspoon salt
- 1 tablespoon ground ginger
- 1 tablespoon ground cinnamon
- 1/2 teaspoon ground cloves
- 1/2 teaspoon ground nutmeg
- Assorted decorations (icing, candy, sprinkles)
Cooking Instructions:
- Prepare the Dough: In a large mixing bowl, cream together the softened butter and brown sugar until light and fluffy. This should take about 2-3 minutes with an electric mixer. Add the egg and molasses, and beat until well combined.
- Mix Dry Ingredients: In a separate bowl, whisk together the flour, baking soda, salt, ginger, cinnamon, cloves, and nutmeg.
- Combine Wet and Dry Ingredients: Gradually add the dry ingredients to the wet ingredients, mixing on low speed until a dough forms. Make sure all the flour is incorporated.
- Chill the Dough: Divide the dough into two portions, wrap each in plastic wrap, and refrigerate for at least 2 hours. Chilling helps the dough firm up and makes it easier to roll out.
- Preheat and Prepare: Preheat your oven to 350°F (175°C). Line two baking sheets with parchment paper.
- Roll and Cut: On a lightly floured surface, roll out one portion of dough to about 1/4 inch thick. Use gingerbread men cookie cutters to cut out shapes, and place them on the prepared baking sheets about 1 inch apart.
- Bake: Bake in the preheated oven for 8-10 minutes, or until the edges are firm and the centers are set. Be careful not to overbake, as they’ll harden as they cool.
- Cool and Decorate: Allow the cookies to cool on the baking sheets for 5 minutes before transferring to a wire rack to cool completely. Once cooled, decorate with icing and candies as desired.
Extra Tips:
For the best results, make sure your butter is at room temperature before starting the recipe; this guarantees it mixes smoothly with the sugar.
If you prefer softer cookies, reduce the baking time slightly and keep an eye on them as they bake.
When decorating, let your creativity shine! Use a variety of colored icings and candies to give each gingerbread man a unique personality.
If you have leftover dough, you can store it in the refrigerator for up to a week or freeze it for up to three months, ready for another day of holiday baking fun.
Chocolate Crinkle Cookies
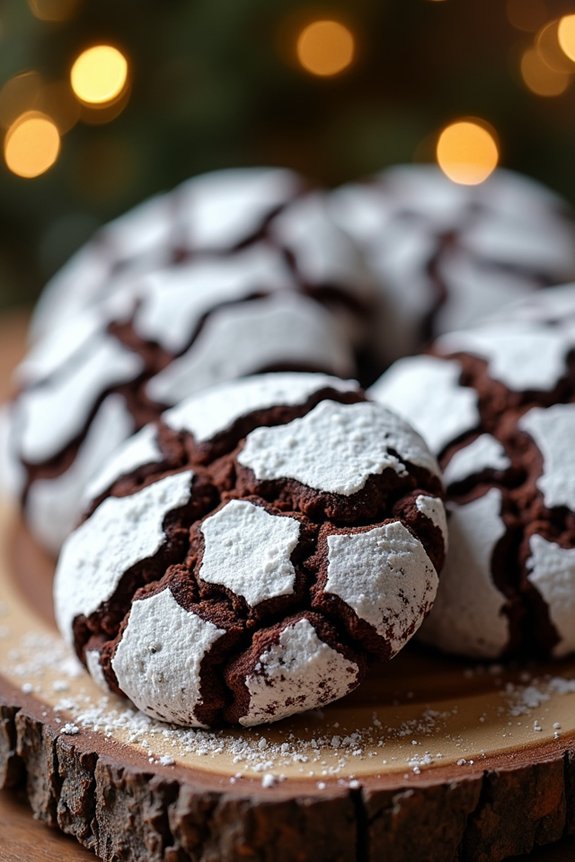
Chocolate Crinkle Cookies are a delightful treat that perfectly encapsulates the festive spirit of Christmas. These cookies are characterized by their rich, fudgy interior and signature crackled appearance, which is achieved by rolling the dough in powdered sugar before baking. The contrast between the dark chocolatey cookie base and the white sugar coating gives them a unique and festive look, making them a popular choice for holiday gatherings.
Not only do they look impressive, but their combination of crispy edges and soft, chewy centers make them irresistible to chocolate lovers. Perfect for a serving size of 4-6 people, this recipe guarantees that everyone gets their fill of these delectable cookies. Whether you’re baking them as a gift, for a holiday party, or simply to enjoy at home with a warm cup of cocoa, these cookies are sure to be a hit.
The preparation is simple, requiring just a few staple ingredients, and the process is straightforward enough for even novice bakers to achieve great results. Here’s how you can make these classic Christmas treats.
Ingredients:
- 1 cup unsweetened cocoa powder
- 2 cups granulated sugar
- 1/2 cup vegetable oil
- 4 large eggs
- 2 teaspoons vanilla extract
- 2 cups all-purpose flour
- 2 teaspoons baking powder
- 1/2 teaspoon salt
- 1 cup powdered sugar
Instructions:
- Prepare the Dough: In a large mixing bowl, combine the cocoa powder, granulated sugar, and vegetable oil. Mix until the ingredients are well combined and the mixture is smooth. Add the eggs one at a time, beating well after each addition. Stir in the vanilla extract.
- Mix Dry Ingredients: In a separate bowl, whisk together the all-purpose flour, baking powder, and salt. Gradually add the dry ingredients to the cocoa mixture, stirring just until the dough comes together.
- Chill the Dough: Cover the bowl with plastic wrap and refrigerate the dough for at least 3 hours or overnight. Chilling the dough is essential as it makes it easier to handle and helps the cookies develop their crinkled appearance.
- Preheat the Oven: Preheat your oven to 350°F (175°C) and line baking sheets with parchment paper.
- Shape the Cookies: Once the dough is chilled, roll it into 1-inch balls. Roll each ball in powdered sugar until fully coated.
- Bake the Cookies: Place the coated dough balls onto the prepared baking sheets, spacing them about 2 inches apart. Bake in the preheated oven for 10 to 12 minutes. The cookies should be soft and slightly puffed, with a crackled surface.
- Cool the Cookies: Remove the baking sheets from the oven and let the cookies cool on the sheets for a few minutes before transferring them to a wire rack to cool completely.
Extra Tips:
For the best crinkle effect, confirm that the dough is thoroughly chilled before rolling it in powdered sugar. This helps maintain the shape of the cookies and enhances the crinkling effect as they bake.
Additionally, avoid overbaking the cookies; they should be soft and fudgy in the center to achieve the desired texture. If you prefer a more intense chocolate flavor, consider adding a handful of chocolate chips to the dough before chilling. Enjoy your Chocolate Crinkle Cookies with a warm cup of milk or your favorite holiday beverage!
Peppermint Bark
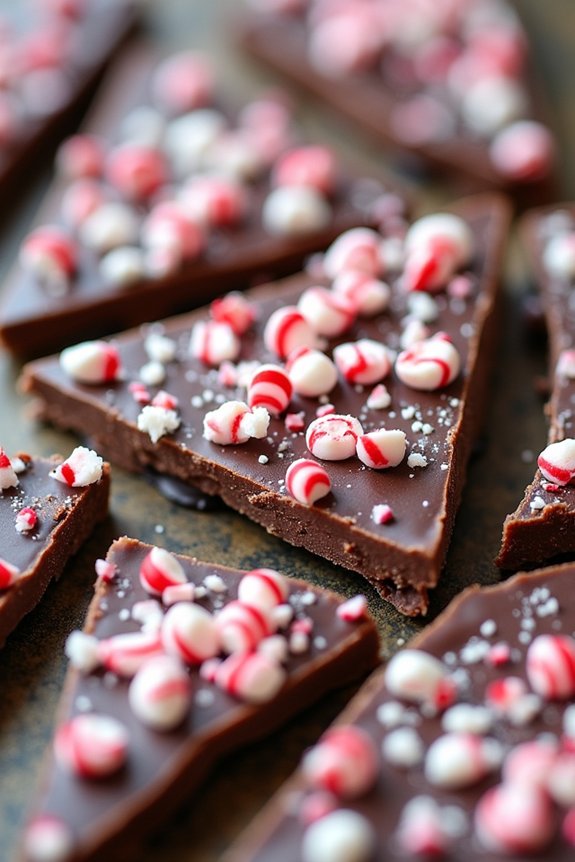
Peppermint Bark is a delightful and festive treat that captures the essence of the holiday season. With its invigorating peppermint flavor paired with rich layers of chocolate, this dessert isn’t only delicious but also visually appealing with its striking contrast of colors.
Making peppermint bark at home isn’t only fun but also allows you to customize it to your liking, whether you prefer your bark with a thicker layer of white chocolate or a more pronounced peppermint flavor. Ideal for gifting or sharing with family and friends, this peppermint bark recipe is a must-try during the Christmas season.
The beauty of peppermint bark lies in its simplicity and the ease with which it can be prepared. Even if you’re not a seasoned baker, this recipe is straightforward and requires minimal ingredients. Plus, it’s a no-bake treat, which means you can whip it up quickly without having to worry about oven temperatures or baking times.
With just a few steps, you’ll have a tray of peppermint bark ready to enjoy or share. Follow this recipe for a serving size of 4-6 people, and bring a touch of holiday cheer to your dessert table.
Ingredients:
- 12 ounces of semi-sweet chocolate chips
- 12 ounces of white chocolate chips
- 1 teaspoon of peppermint extract
- 6 candy canes, crushed
- 1 tablespoon of vegetable oil
Instructions:
- Prepare the Baking Sheet: Line a 9×13 inch baking sheet with parchment paper, making sure it covers the entire surface and hangs over the edges slightly for easy removal later.
- Melt the Semi-Sweet Chocolate: In a microwave-safe bowl, combine the semi-sweet chocolate chips and 1/2 tablespoon of vegetable oil. Microwave in 30-second intervals, stirring after each, until the mixture is smooth and completely melted. Stir in 1/2 teaspoon of peppermint extract.
- Spread the Chocolate: Pour the melted semi-sweet chocolate onto the prepared baking sheet. Use a spatula to spread it evenly, creating a smooth layer. Place the baking sheet in the refrigerator for about 20 minutes, or until the chocolate is firm.
- Melt the White Chocolate: In a new microwave-safe bowl, combine the white chocolate chips and the remaining 1/2 tablespoon of vegetable oil. Melt in the microwave in 30-second intervals, stirring after each, until smooth. Stir in the remaining 1/2 teaspoon of peppermint extract.
- Layer the White Chocolate: Once the semi-sweet chocolate layer is firm, remove the baking sheet from the refrigerator. Pour the melted white chocolate over the semi-sweet chocolate layer, spreading it evenly with a spatula.
- Add the Candy Canes: Immediately sprinkle the crushed candy canes over the white chocolate layer, pressing them gently into the chocolate so they adhere as it cools.
- Chill the Bark: Return the baking sheet to the refrigerator and chill for about 1 hour, or until the bark is completely set and firm.
- Break and Serve: Once set, lift the parchment paper to remove the peppermint bark from the baking sheet. Break the bark into pieces of your desired size and serve.
Extra Tips:
To guarantee your peppermint bark has a smooth finish, make sure each layer of chocolate is completely set before adding the next. If you prefer a thinner bark, use a larger baking sheet to spread the chocolate layers more thinly.
For a more intense peppermint flavor, consider adding extra peppermint extract to the chocolate, but be cautious as too much can overpower the sweetness. Store any leftover peppermint bark in an airtight container at room temperature or in the refrigerator to maintain its freshness and crispness.
Easy Fruitcake
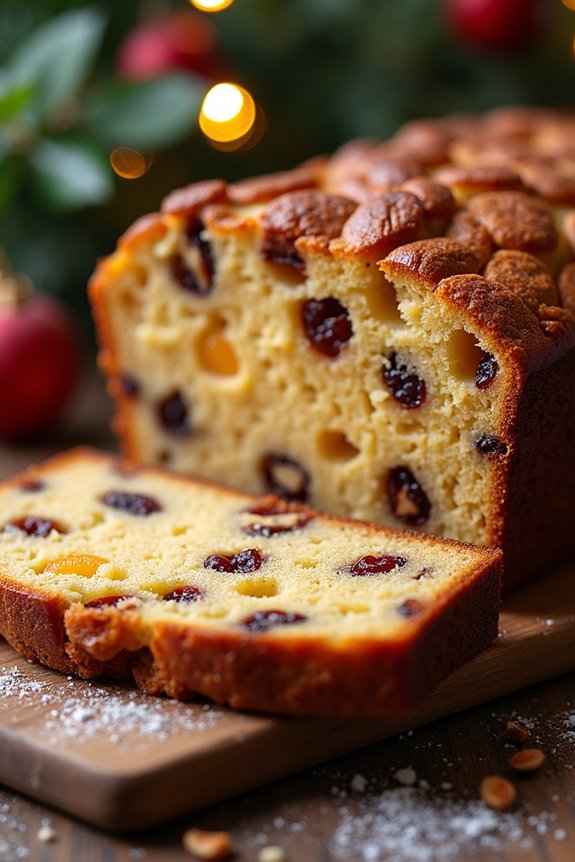
Fruitcake is a classic holiday treat that has been enjoyed for generations. Known for its dense texture and rich flavors, it’s a delightful addition to any Christmas celebration. This Easy Fruitcake recipe simplifies the traditional method, making it accessible for both novice and experienced bakers. The use of mixed dried fruits and nuts guarantees a festive touch, while a hint of warm spices evokes the cozy essence of the holiday season.
This cake is deliciously moist and can be made well in advance, allowing the flavors to deepen as it rests. Perfect for sharing, this Easy Fruitcake recipe serves 4-6 people and is ideal for a small gathering or family dessert. The recipe uses readily available ingredients that are easy to find in most grocery stores. With just a few simple steps, you’ll have a holiday favorite ready to enjoy in no time.
Whether you’re serving it at a festive dinner or gifting it to loved ones, this fruitcake promises to be a highlight of your Christmas baking.
Ingredients (Serves 4-6):
- 1 cup mixed dried fruits (such as raisins, currants, and chopped dried apricots)
- 1/2 cup mixed nuts (such as walnuts and almonds), chopped
- 1/2 cup unsalted butter, softened
- 1/2 cup brown sugar
- 2 large eggs
- 1 cup all-purpose flour
- 1/2 teaspoon baking powder
- 1/4 teaspoon salt
- 1/2 teaspoon ground cinnamon
- 1/4 teaspoon ground nutmeg
- 1/4 cup milk
- 1/4 cup brandy or orange juice
- Zest of 1 orange
Instructions:
- Prepare the Fruit Mix: In a bowl, combine the mixed dried fruits, mixed nuts, and the brandy or orange juice. Stir well to guarantee the fruits are evenly coated. Let this mixture sit for at least an hour, allowing the fruits to soak up the liquid and plump up.
- Preheat and Prepare the Pan: Preheat your oven to 325°F (160°C). Grease and line a 9×5-inch loaf pan with parchment paper, guaranteeing there’s some overhang on the sides for easy removal later.
- Cream Butter and Sugar: In a large mixing bowl, cream together the softened butter and brown sugar until light and fluffy. This should take about 3-4 minutes with an electric mixer on medium speed.
- Add Eggs and Zest: Beat in the eggs one at a time, ensuring each is fully incorporated before adding the next. Add the orange zest and mix until combined.
- Combine Dry Ingredients: In a separate bowl, whisk together the flour, baking powder, salt, cinnamon, and nutmeg. Gradually add this dry mixture to the creamed butter and sugar, alternating with the milk. Begin and end with the flour mixture, mixing just until combined.
- Fold in Fruit Mix: Gently fold the soaked fruit and nut mixture into the batter, ensuring everything is evenly distributed. Be careful not to overmix.
- Bake the Cake: Transfer the batter into the prepared loaf pan, smoothing the top with a spatula. Bake in the preheated oven for 60-70 minutes, or until a toothpick inserted into the center comes out clean.
- Cool and Serve: Allow the fruitcake to cool in the pan for about 15 minutes, then use the parchment paper overhang to lift it out onto a wire rack to cool completely. For best results, wrap the cooled cake in plastic wrap and let it sit for a day before slicing and serving.
Extra Tips:
For an even more flavorful fruitcake, consider soaking the dried fruits overnight. This allows them to absorb more of the liquid, resulting in a moister cake. If you prefer a non-alcoholic version, orange juice is an excellent substitute for brandy.
Additionally, the fruitcake can be stored in an airtight container for up to two weeks, and its flavor will continue to improve over time. Feel free to customize your fruitcake with your favorite dried fruits and nuts, making it a personal holiday tradition.
Thumbprint Cookies
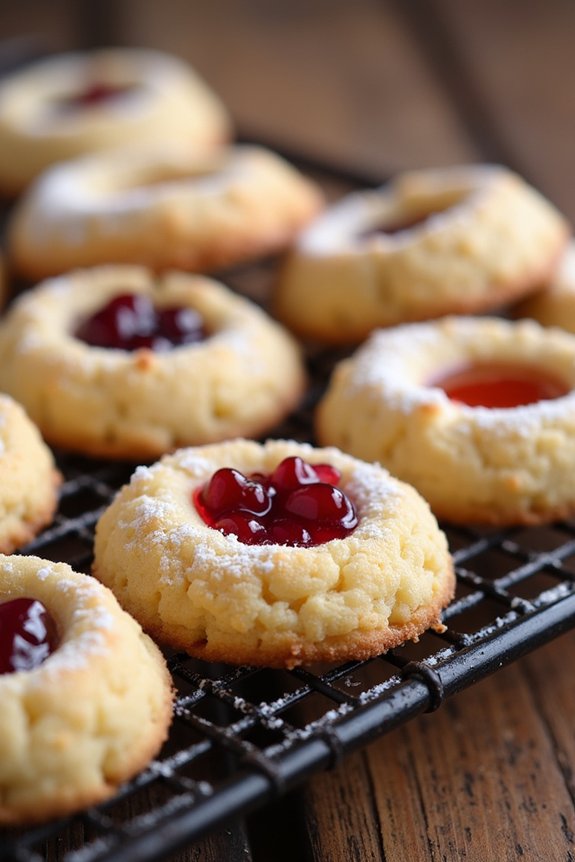
Thumbprint cookies are a classic holiday treat that combines the buttery goodness of shortbread with the tangy sweetness of your favorite jams or preserves. These delightful cookies are perfect for Christmas gatherings, as they not only taste delicious but also add a festive touch to any dessert table. Their name comes from the simple technique used to create a small indentation in each cookie, which is then filled with a dollop of jam before baking.
Easy to make and loved by all ages, thumbprint cookies are a must-try for your holiday baking list. These cookies are incredibly versatile, allowing you to experiment with different flavors of jam to suit your taste. Whether you prefer the tartness of raspberry, the brightness of apricot, or the classic appeal of strawberry, thumbprint cookies offer endless possibilities.
Their slightly crumbly texture and sweet, jam-filled center make them an irresistible treat. This recipe serves 4-6 people, making it perfect for sharing with friends and family.
Ingredients:
- 1 cup (2 sticks) unsalted butter, softened
- 2/3 cup granulated sugar
- 1/2 teaspoon vanilla extract
- 2 cups all-purpose flour
- 1/2 teaspoon salt
- 1/2 cup assorted jams or preserves (such as raspberry, apricot, or strawberry)
- Optional: powdered sugar for dusting
Instructions:
- Preheat the Oven: Preheat your oven to 350°F (175°C) and line two baking sheets with parchment paper or silicone baking mats.
- Cream the Butter and Sugar: In a large bowl, cream together the softened butter and granulated sugar until the mixture is light and fluffy. This should take about 2-3 minutes using an electric mixer on medium speed.
- Add Vanilla: Stir in the vanilla extract until fully incorporated.
- Combine Dry Ingredients: In a separate bowl, whisk together the all-purpose flour and salt. Gradually add these dry ingredients to the butter mixture, mixing until just combined. The dough should be soft but not sticky.
- Shape the Cookies: Roll the dough into 1-inch balls and place them about 2 inches apart on the prepared baking sheets.
- Create Indentations: Use your thumb or the back of a teaspoon to gently press an indentation into the center of each dough ball.
- Fill with Jam: Spoon about 1/2 teaspoon of your chosen jam into each indentation, being careful not to overfill.
- Bake: Bake the cookies in the preheated oven for 12-15 minutes, or until the edges are lightly golden. Keep an eye on them to guarantee they don’t overbake.
- Cool and Serve: Allow the cookies to cool on the baking sheets for a few minutes before transferring them to a wire rack to cool completely. If desired, dust the cooled cookies with powdered sugar before serving.
Extra Tips:
For best results, verify that your butter is at room temperature before you start baking; this will help it cream more easily with the sugar. If your dough feels too sticky, you can chill it in the refrigerator for 15-20 minutes before shaping the cookies.
Remember to use high-quality jams for the best flavor. If the cookies spread too much during baking, you can gently reshape the indentations with a spoon while they’re still warm. Happy baking!
Shortbread Wedges
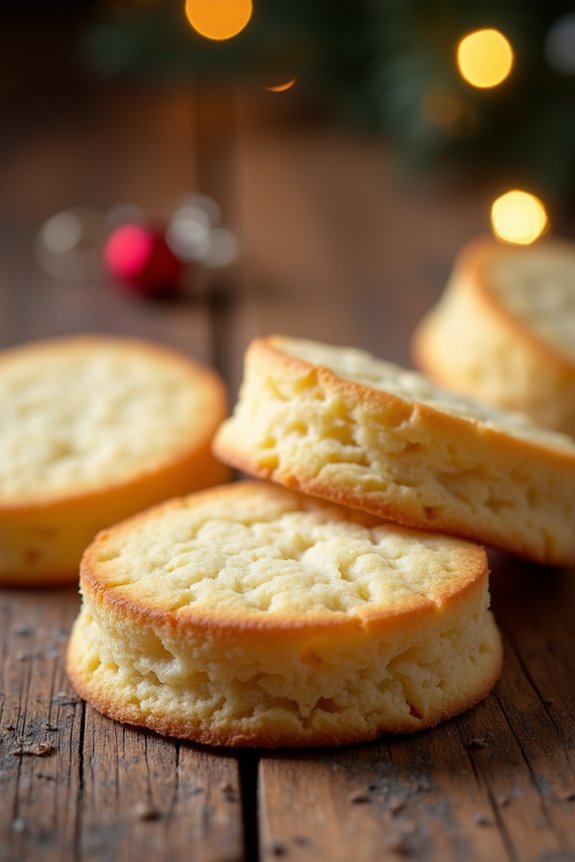
Indulge in the buttery goodness of Christmas Shortbread Wedges, a classic treat that perfectly complements the festive season. These delightful cookies aren’t only easy to make but also bring a traditional holiday flavor to your table. With their rich, melt-in-your-mouth texture and subtle sweetness, shortbread wedges are a timeless favorite that can be enjoyed by everyone.
Serve them alongside a cup of tea or coffee for a perfect holiday afternoon snack or wrap them up as a thoughtful homemade gift.
The beauty of this recipe lies in its simplicity, requiring minimal ingredients and effort to achieve a delicious result. Shortbread wedges are traditionally made with butter, sugar, and flour, resulting in a tender crumb and a delicate flavor reminiscent of the holidays. This recipe yields 4-6 servings, making it ideal for small gatherings or for indulging with family.
Whether you’re an experienced baker or a novice in the kitchen, these shortbread wedges are sure to impress and delight.
Ingredients for 4-6 servings:
- 1 cup (2 sticks) unsalted butter, softened
- 1/2 cup granulated sugar
- 1 teaspoon vanilla extract
- 2 cups all-purpose flour
- 1/4 teaspoon salt
Cooking Instructions:
- Preheat the Oven: Begin by preheating your oven to 325°F (163°C). This will guarantee that your shortbread wedges bake evenly and to perfection.
- Prepare the Dough: In a large mixing bowl, cream together the softened butter and granulated sugar using an electric mixer on medium speed until the mixture is light and fluffy. This should take about 3-4 minutes.
- Add Vanilla: Mix in the vanilla extract, ensuring it’s fully incorporated into the butter and sugar mixture.
- Combine Dry Ingredients: In a separate bowl, whisk together the all-purpose flour and salt. Gradually add the dry ingredients to the butter mixture, mixing on low speed until a soft dough forms.
- Shape the Dough: Transfer the dough to a lightly floured surface. Shape it into a ball, then flatten it into a disc. Roll out the dough to about 1/2-inch thickness.
- Cut into Wedges: Using a sharp knife or a pizza cutter, cut the disc into 8-12 wedges, like slicing a pizza. Place the wedges on a baking sheet lined with parchment paper, leaving space between each piece.
- Bake the Shortbread: Bake in the preheated oven for 20-25 minutes, or until the edges are lightly golden. Avoid overbaking to prevent the shortbread from becoming too dry.
- Cool and Serve: Remove the shortbread from the oven and allow it to cool on the baking sheet for a few minutes before transferring to a wire rack to cool completely. Serve once cooled.
Extra Tips:
To enhance the flavor of your Christmas Shortbread Wedges, consider adding a pinch of cinnamon or nutmeg to the dough for a festive touch. If you prefer a sweeter treat, you can sprinkle a bit of sugar on top of the wedges before baking.
For a decorative finish, drizzle melted chocolate over the cooled shortbread or dip the edges in chocolate for a more indulgent presentation. Remember, the key to perfect shortbread isn’t to overwork the dough, as this can result in a tough texture.
Enjoy your homemade shortbread with loved ones this holiday season!
Red Velvet Cupcakes
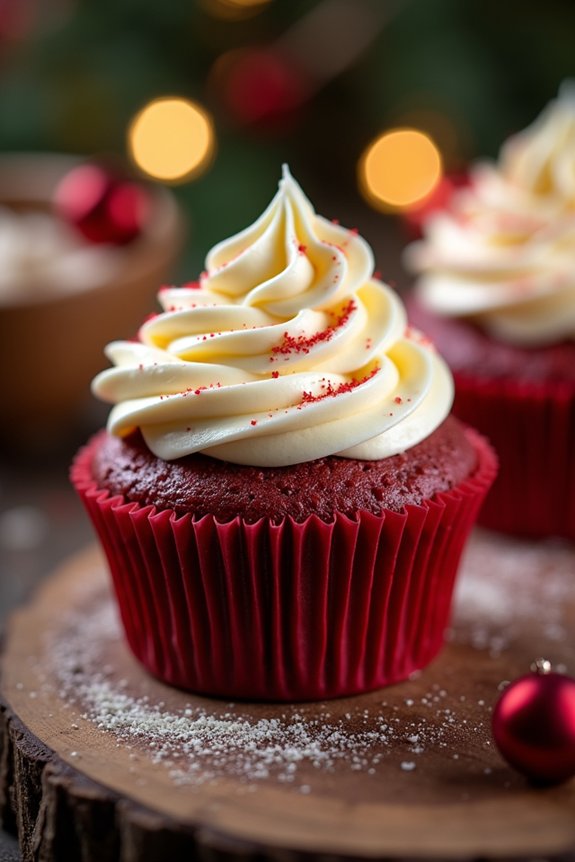
Red Velvet Cupcakes are a classic holiday treat that combines the rich taste of cocoa with a hint of vanilla, all wrapped up in a beautiful, deep red hue. These cupcakes are perfect for Christmas gatherings, adding a touch of elegance to your dessert spread. The moist and fluffy texture of the cake, paired with a smooth and creamy cream cheese frosting, creates a delightful contrast that’s certain to impress your guests.
Whether you’re an experienced baker or a novice in the kitchen, this recipe is simple to follow and yields delicious results every time. Baking these festive Red Velvet Cupcakes not only fills your home with the aroma of the holidays but also provides a wonderful opportunity to share joy and warmth with family and friends.
The deep red color is achieved through the use of food coloring, which is complemented by the subtle chocolate flavor from the cocoa powder. Topped with a luscious cream cheese frosting, these cupcakes are both visually appealing and indulgently delicious. Gather your ingredients, preheat your oven, and get ready to bake a batch of these delightful treats that are perfect for any Christmas celebration.
Ingredients for Red Velvet Cupcakes (serves 4-6):
- 1 1/4 cups all-purpose flour
- 1 cup granulated sugar
- 1/2 teaspoon baking soda
- 1/2 teaspoon salt
- 1 tablespoon unsweetened cocoa powder
- 1/2 cup vegetable oil
- 1/2 cup buttermilk, room temperature
- 1 large egg, room temperature
- 1 tablespoon red food coloring
- 1/2 teaspoon vanilla extract
- 1/2 teaspoon white vinegar
- 1/2 cup unsalted butter, softened
- 8 ounces cream cheese, softened
- 4 cups powdered sugar
- 1 teaspoon vanilla extract
Cooking Instructions:
- Preheat the Oven: Start by preheating your oven to 350°F (175°C). Line a muffin tin with cupcake liners to prepare for baking.
- Mix Dry Ingredients: In a medium bowl, sift together the flour, sugar, baking soda, salt, and cocoa powder. This guarantees even distribution and helps prevent lumps.
- Combine Wet Ingredients: In a large bowl, whisk together the vegetable oil, buttermilk, egg, red food coloring, vanilla extract, and vinegar until well combined.
- Blend Dry and Wet Mixtures: Gradually add the dry ingredients to the wet ingredients, mixing gently until just combined. Be careful not to overmix, as this can result in dense cupcakes.
- Fill Cupcake Liners: Evenly divide the batter among the prepared cupcake liners, filling each about two-thirds full to allow room for rising.
- Bake: Place the muffin tin in the preheated oven and bake for 18-22 minutes, or until a toothpick inserted into the center of a cupcake comes out clean.
- Cool: Remove the cupcakes from the oven and let them cool in the pan for about 5 minutes. Then transfer them to a wire rack to cool completely.
- Prepare Frosting: In a large bowl, beat the softened butter and cream cheese together until creamy and smooth. Gradually add the powdered sugar, one cup at a time, beating well after each addition. Mix in the vanilla extract until fully incorporated.
- Frost Cupcakes: Once the cupcakes are completely cool, use a piping bag or spatula to frost each cupcake with the cream cheese frosting.
- Serve: Decorate the cupcakes with festive sprinkles or edible glitter to add a holiday touch before serving.
Extra Tips:
When making Red Velvet Cupcakes, be sure to use gel food coloring for the best intensity of red color. If you prefer a more natural approach, you can use beet juice as a natural dye, although the color may be less vibrant.
To ascertain your cupcakes are tender and moist, avoid overmixing the batter, which can lead to a tough texture. Additionally, make sure your butter and cream cheese are softened to room temperature for a smooth and creamy frosting. Enjoy your festive baking!
Cinnamon Roll Cake
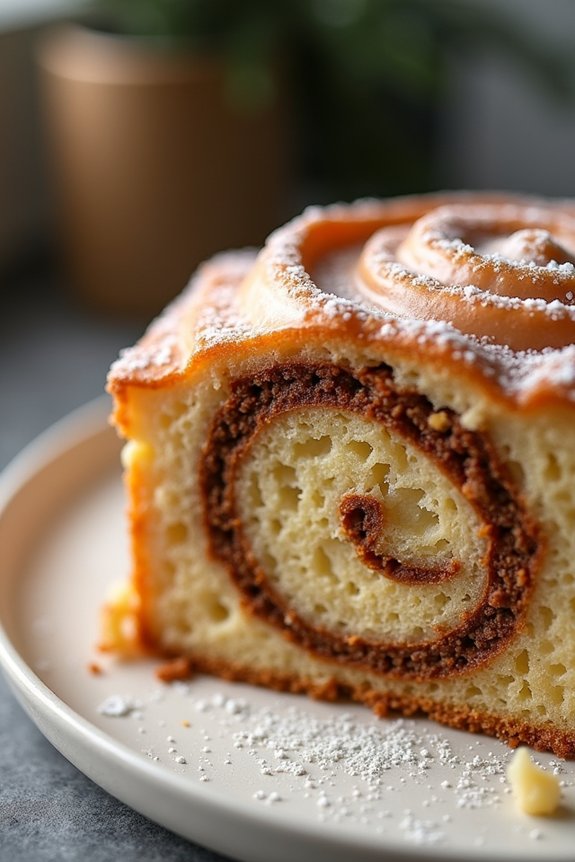
Cinnamon Roll Cake is a delightful fusion of the classic cinnamon roll and a moist, tender cake, perfect for the holiday season. Imagine the aroma of cinnamon wafting through your home as this cake bakes to perfection, filling every corner with warmth and holiday cheer. With its gooey cinnamon-sugar swirls and a luscious glaze drizzled on top, this cake is sure to become a festive favorite.
It’s an ideal treat for brunch, a holiday breakfast, or even as a cozy dessert paired with a steaming cup of coffee or hot chocolate.
This Cinnamon Roll Cake recipe is designed to serve 4-6 people, making it perfect for a small family gathering or an intimate holiday celebration. The cake is simple to prepare, yet it delivers on flavor and comfort, embodying the spirit of Christmas baking.
Whether you’re a seasoned baker or a beginner in the kitchen, this recipe is straightforward and satisfying, guaranteeing that you can bring a little bit of holiday magic to your table with ease.
Ingredients:
- 1 ½ cups all-purpose flour
- ½ cup granulated sugar
- 2 teaspoons baking powder
- ½ cup milk
- ¼ cup unsalted butter, melted
- 1 teaspoon vanilla extract
- 1 large egg
- ¼ cup unsalted butter, softened (for the cinnamon topping)
- ½ cup light brown sugar (for the cinnamon topping)
- 1 tablespoon ground cinnamon (for the cinnamon topping)
- 1 cup powdered sugar (for the glaze)
- 2 tablespoons milk (for the glaze)
- ½ teaspoon vanilla extract (for the glaze)
Instructions:
- Preheat and Prepare the Pan: Preheat your oven to 350°F (175°C). Grease an 8×8-inch baking dish to prevent the cake from sticking.
- Mix the Dry Ingredients: In a mixing bowl, combine the all-purpose flour, granulated sugar, and baking powder. Stir these ingredients together until well blended.
- Combine Wet Ingredients: In a separate bowl, mix the milk, melted butter, vanilla extract, and egg. Whisk together until smooth.
- Create the Batter: Pour the wet ingredients into the dry ingredients. Gently fold them together with a spatula until the batter is just combined. Avoid overmixing to guarantee the cake remains tender.
- Prepare the Cinnamon Topping: In a small bowl, blend the softened butter, brown sugar, and ground cinnamon until you achieve a smooth, spreadable mixture.
- Assemble the Cake: Pour the batter into the prepared baking dish. Drop spoonfuls of the cinnamon topping mixture over the batter. Use a knife to swirl the topping into the batter, creating a marbled effect.
- Bake: Place the dish in the preheated oven and bake for 25-30 minutes, or until a toothpick inserted into the center comes out clean. The cake should be golden brown and fragrant.
- Make the Glaze: While the cake is baking, prepare the glaze by mixing the powdered sugar, milk, and vanilla extract in a small bowl until smooth and pourable.
- Finish and Serve: Once the cake is done baking, remove it from the oven and let it cool slightly. Drizzle the glaze over the warm cake. Serve the cake warm or at room temperature.
Extra Tips:
For best results, make sure your ingredients are at room temperature before you start baking; this helps them combine more easily and uniformly.
If you prefer a stronger cinnamon flavor, feel free to add an extra half tablespoon of cinnamon to the topping. This cake is best enjoyed fresh, but it can be stored in an airtight container at room temperature for up to two days.
Reheat slices in the microwave for a few seconds to enjoy that fresh-baked warmth once more.
Holiday Biscotti
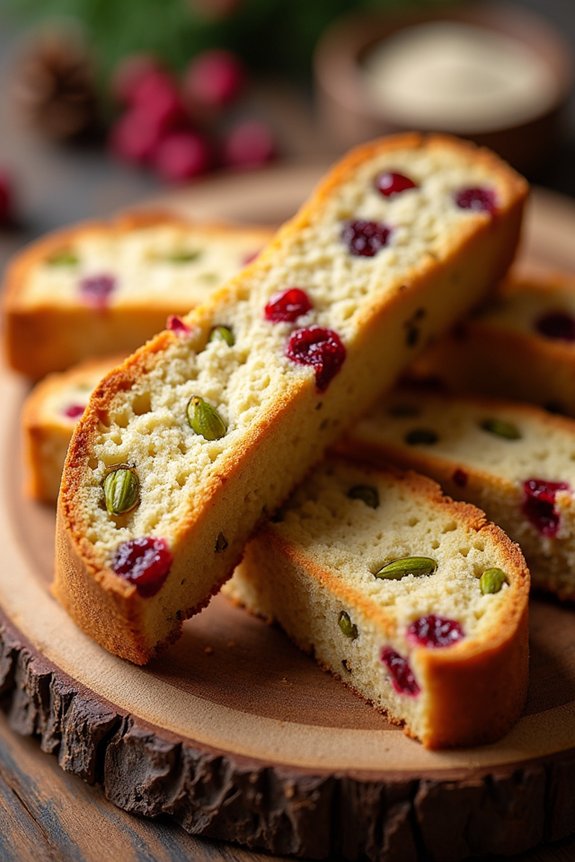
There’s something truly delightful about the aroma of freshly baked biscotti wafting through the house during the holiday season. Perfectly crisp and deliciously flavorful, these Holiday Biscotti are an ideal treat for festive gatherings or as a thoughtful homemade gift. With a delightful combination of cranberries, pistachios, and a hint of citrus, these biscotti are sure to become a holiday favorite.
Paired beautifully with a hot cup of coffee or tea, they make for a cozy and comforting treat that captures the essence of the season. Biscotti are a type of Italian cookie known for their crunchy texture, achieved by baking them twice. The first bake sets the dough into a loaf shape, and the second bake creates the classic crispiness.
This recipe yields biscotti that are wonderfully balanced in flavor—not too sweet, with just the right amount of tartness from the cranberries and a subtle nuttiness from the pistachios. The citrus zest adds a revitalizing brightness that complements the other ingredients perfectly. This recipe serves 4-6 people, making it perfect for a small holiday gathering or as a sweet indulgence to enjoy throughout the week.
Ingredients (Serves 4-6):
- 2 cups all-purpose flour
- 1 cup granulated sugar
- 1 teaspoon baking powder
- 1/4 teaspoon salt
- 3 large eggs
- 1 teaspoon vanilla extract
- 1 teaspoon almond extract
- 1 tablespoon orange zest
- 3/4 cup dried cranberries
- 3/4 cup shelled pistachios
Instructions:
- Preheat and Prepare: Preheat your oven to 350°F (175°C). Line a baking sheet with parchment paper or a silicone baking mat to prevent sticking.
- Mix Dry Ingredients: In a large bowl, whisk together the flour, sugar, baking powder, and salt until thoroughly combined.
- Combine Wet Ingredients: In a separate bowl, beat the eggs, vanilla extract, almond extract, and orange zest together until well mixed.
- Form the Dough: Gradually add the wet ingredients to the dry ingredients, mixing until a dough begins to form. It will be slightly sticky.
- Incorporate Add-ins: Fold the dried cranberries and pistachios into the dough, making sure they’re evenly distributed.
- Shape the Dough: Divide the dough in half. On a lightly floured surface, shape each half into a log about 12 inches long and 2 inches wide. Place the logs on the prepared baking sheet.
- First Bake: Bake in the preheated oven for 25-30 minutes or until the logs are lightly golden and firm. Allow them to cool on the baking sheet for about 10 minutes.
- Slice the Biscotti: Carefully transfer the logs to a cutting board. Using a serrated knife, slice them diagonally into 1/2-inch thick slices.
- Second Bake: Place the slices cut-side down on the baking sheet. Bake for an additional 10-12 minutes, flipping them halfway through, until they’re crisp and golden brown.
- Cool and Serve: Remove the biscotti from the oven and allow them to cool completely on a wire rack. Serve with your favorite hot beverage.
Extra Tips:
For the best texture, make sure that your biscotti logs are cooled slightly before slicing to prevent crumbling. If you prefer a softer biscotti, you can reduce the second bake time slightly.
Feel free to experiment with different nuts or dried fruits to customize the flavor to your liking. Store the biscotti in an airtight container at room temperature to maintain their crispness for up to two weeks. Enjoy these festive bites and consider gifting them wrapped in a decorative tin for a charming homemade holiday gift.