

I’m absolutely giddy about Halloween, and what better way to celebrate than with some frightfully fun and easy recipes? Whether you’re hosting a party or simply want to surprise the family, these 13 simple dishes will add a spooky touch to your festivities. From Spider Cupcakes to Mummy Hot Dogs, each recipe is crafted to be both delicious and easy to whip up. Ready to sprinkle some spooktacular fun on your menu? Let’s get started!
Spooky Spider Cupcakes

Celebrate Halloween with a sweet treat that’s as delightful as it’s frightful! Spooky Spider Cupcakes are the perfect addition to any Halloween party table, making them both a fun activity to create and a delicious dessert to devour.
These cupcakes are adorned with chocolatey spider decorations, guaranteed to spin a web of excitement among your guests. Not only are they visually appealing, but they also bring a rich blend of flavors with a moist chocolate base and creamy icing on top.
Whether you’re hosting a Halloween bash or simply enjoying a festive night in, these cupcakes are sure to impress both kids and adults alike. The recipe is designed to serve 4-6 people, making it ideal for a small gathering or as a special treat for your family.
So, grab your mixing bowls and let’s get started on crafting these spooktacular cupcakes that are as fun to make as they’re to eat!
Ingredients (Serves 4-6):
- 1 cup all-purpose flour
- 1 cup granulated sugar
- 1/2 cup unsweetened cocoa powder
- 1 teaspoon baking powder
- 1/2 teaspoon baking soda
- 1/4 teaspoon salt
- 1/2 cup milk
- 1/4 cup vegetable oil
- 1 large egg
- 1 teaspoon vanilla extract
- 1/2 cup boiling water
- 1 cup chocolate frosting
- 12 black licorice ropes
- 24 candy eyes
- 12 chocolate truffles
Cooking Instructions:
- Preheat the Oven: Begin by preheating your oven to 350°F (175°C). Line a 12-cup muffin tin with cupcake liners to prepare for baking.
- Mix Dry Ingredients: In a large bowl, whisk together the flour, sugar, cocoa powder, baking powder, baking soda, and salt until well combined.
- Combine Wet Ingredients: In another bowl, mix the milk, vegetable oil, egg, and vanilla extract. Beat these ingredients together until they’re thoroughly combined and smooth.
- Create Batter: Gradually add the wet mixture to the dry ingredients, stirring gently. Once combined, slowly pour in the boiling water and mix until the batter is smooth and runny.
- Bake the Cupcakes: Pour the batter evenly into the prepared muffin tin. Bake in the preheated oven for 18-20 minutes, or until a toothpick inserted into the center of a cupcake comes out clean. Allow the cupcakes to cool completely on a wire rack.
- Decorate the Cupcakes: Once cooled, spread a generous amount of chocolate frosting on each cupcake. Place one chocolate truffle in the center of each cupcake to form the spider’s body.
- Add Spider Legs and Eyes: Cut the black licorice ropes into pieces about 2 inches long, creating 8 legs for each spider. Insert the licorice pieces into the frosting around each truffle. Attach two candy eyes to the front of each truffle using a small dab of frosting.
Extra Tips:
For an extra creepy touch, consider using red or green licorice ropes to give your spiders a more colorful and eerie appearance.
If you want your cupcakes to have a different flavor profile, try using a vanilla or peanut butter frosting as an alternative to chocolate.
Make sure to keep your cupcakes in a cool place to prevent the frosting from melting and the spider decorations from sliding off.
Finally, get creative with your decorations — you can add edible glitter or sprinkles to enhance the spooky effect!
Witch’s Hat Cookies

Witch’s Hat Cookies are a festive and fun treat perfect for Halloween celebrations. These whimsical cookies not only look enchanting but also offer a delightful mix of flavors and textures. With a base of crunchy cookies and a rich chocolate topping, these cookies are guaranteed to be a hit with both kids and adults alike.
Ideal for Halloween parties or a spooky night in, Witch’s Hat Cookies add a splash of magic to any dessert table. Crafting these cookies is as enjoyable as it’s simple, making them an excellent choice for involving little ones in the kitchen. The recipe uses convenient store-bought items, which means you can focus more on the decoration and creativity rather than spending too much time in preparation.
Plus, the ingredients are easy to find at your local grocery store, assuring that you can whip up these treats at a moment’s notice.
Ingredients for 4-6 servings:
- 24 chocolate wafer cookies
- 24 chocolate Hershey’s Kisses
- 1 cup of semi-sweet chocolate chips
- 1 tablespoon of butter
- 1 tube of orange decorating icing
- 1/4 cup of Halloween-colored sprinkles (optional)
Cooking Instructions:
- Prepare the Chocolate: In a small saucepan, melt the semi-sweet chocolate chips and butter over low heat, stirring continuously until smooth. Alternatively, you can melt the chocolate in a microwave-safe bowl by heating it in 30-second intervals and stirring in between until completely melted.
- Assemble the Cookies: Lay out the chocolate wafer cookies on a flat surface. Using a spoon, carefully spread a dollop of melted chocolate onto the center of each cookie.
- Attach the Kisses: Place an unwrapped Hershey’s Kiss onto the center of each chocolate-covered wafer, pressing gently to adhere. Allow the chocolate to set for a few minutes to guarantee the Kiss stays in place.
- Decorate the Hat: Use the tube of orange decorating icing to pipe a thin band around the base of each Hershey’s Kiss, covering the point where it meets the wafer. This will create the band of the witch’s hat.
- Add Sprinkles: If desired, sprinkle Halloween-colored sprinkles over the orange icing to add extra flair and color to your witch’s hats.
- Let Them Set: Allow the decorated cookies to sit at room temperature until the chocolate is fully set, or place them in the refrigerator for quicker setting.
Extra Tips:
For a more personalized touch, try using different colored icing to match your Halloween theme or events. You can also experiment with different types of cookies as the base, such as sugar cookies or graham crackers, to vary the flavor.
To prevent the chocolate from hardening too quickly during assembly, work in small batches and keep the chocolate warm either over a double boiler or by returning it to the microwave for a few seconds. Enjoy creating these delightful Witch’s Hat Cookies that are sure to enchant your Halloween gathering!
Ghostly Marshmallow Pops
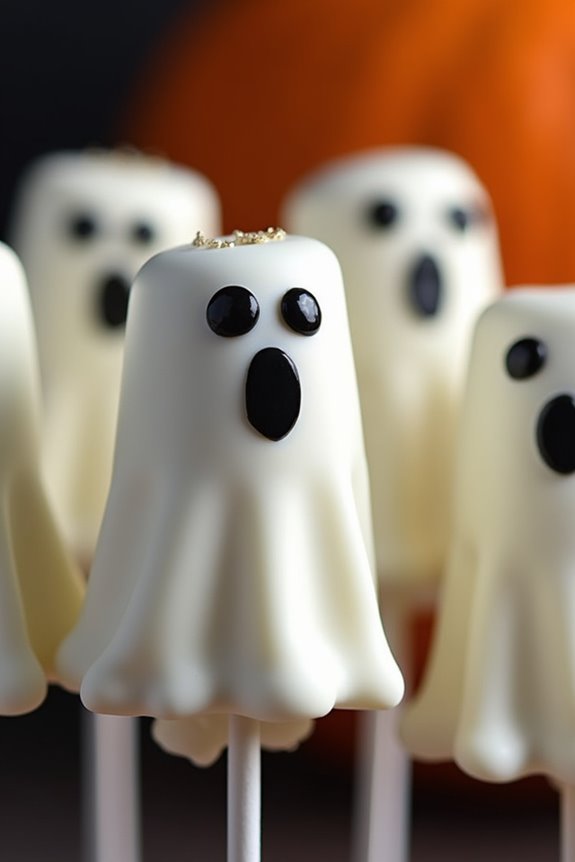
Halloween is a time for spooky decorations, fun costumes, and most importantly, delicious treats! One such treat that’s perfect for this spooky season is Ghostly Marshmallow Pops. These delightful confections aren’t only easy to make but also add a touch of ghostly charm to your Halloween party.
Imagine a marshmallow on a stick, dipped in white chocolate and decorated to resemble cute little ghosts. They’re perfect for kids and adults alike, providing a sweet and playful addition to your Halloween festivities.
Whether you’re hosting a party or looking for a fun activity to do with your kids, Ghostly Marshmallow Pops are a great choice. They’re simple enough that even novice cooks can whip them up with ease. Plus, they make for a creative and interactive experience as you get to decorate each marshmallow ghost with its unique spooky face.
This recipe serves 4-6 people, allowing everyone to enjoy a couple of these delightful treats.
Ingredients:
- 12 large marshmallows
- 12 lollipop sticks or wooden skewers
- 2 cups white chocolate chips
- 2 tablespoons coconut oil (or vegetable oil)
- Black edible gel or food coloring pens
- Optional: sprinkles or edible glitter for decoration
Instructions:
1. Prepare the Marshmallows:
Insert a lollipop stick or skewer into each marshmallow, pushing it about halfway through so it’s secure. Set these aside on a parchment-lined baking sheet.
2. Melt the Chocolate:
In a microwave-safe bowl, combine the white chocolate chips and coconut oil. Microwave in 30-second increments, stirring after each, until the chocolate is completely melted and smooth.
3. Dip the Marshmallows:
Hold each marshmallow by the stick and dip it into the melted chocolate, making sure to coat it entirely. Allow excess chocolate to drip off before placing it back on the parchment paper to set.
4. Decorate the Ghosts:
Once the chocolate is slightly set but still soft, use black edible gel or food coloring pens to draw spooky faces on each marshmallow. Get creative with different expressions!
5. Optional Decorations:
If desired, sprinkle edible glitter or other decorations onto the chocolate before it fully sets for extra spooky flair.
6. Let Them Set:
Allow the marshmallow pops to set completely. You can speed up the process by placing them in the refrigerator for about 15-20 minutes.
Extra Tips:
For best results, verify your chocolate is smoothly melted and not overheated, as this can cause it to seize. If the chocolate begins to harden while you’re working, reheat it gently.
Be creative with your ghost faces and remember that imperfections add to their charm! Additionally, you can experiment with different chocolate colors or add flavor extracts to the white chocolate for an extra twist.
Enjoy crafting these delightful Ghostly Marshmallow Pops and have a spook-tacular Halloween!
Mummy Hot Dogs
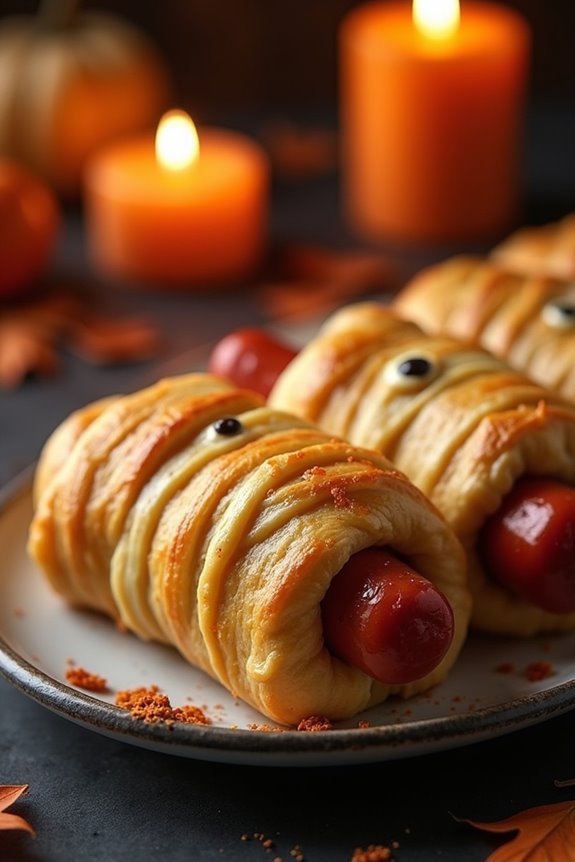
Mummy Hot Dogs are a fun and spooky treat perfect for Halloween gatherings. This delightful dish combines the simplicity of hot dogs with the playful theme of mummies, making it a hit with both kids and adults. The crispy pastry wrapping gives the hot dogs a charming appearance resembling a bandaged mummy, while the juicy interior is a savory delight.
These mummified snacks aren’t only visually appealing but also deliciously easy to prepare, making them an excellent choice for your Halloween menu. This recipe is designed to serve 4-6 people, offering just the right amount for a small party or family dinner. With minimal ingredients and straightforward preparation, Mummy Hot Dogs can be whipped up in no time, allowing you to focus on other Halloween festivities.
Whether you’re hosting a party or just want a themed meal for the night, these Mummy Hot Dogs will bring a touch of whimsy and festivity to your table.
Ingredients:
- 8 hot dogs
- 1 package of refrigerated crescent roll dough or puff pastry
- Mustard or ketchup for decoration
- Cooking spray or parchment paper
Cooking Instructions:
- Preheat the Oven: Begin by preheating your oven to 375°F (190°C). This guarantees that when you put the Mummy Hot Dogs in, they cook evenly and the dough crisps up nicely.
- Prepare the Dough: Unroll the crescent roll dough or puff pastry on a clean, flat surface. Use a knife or pizza cutter to slice the dough into thin strips, approximately 1/4 inch wide. These will become the mummy’s “bandages.”
- Wrap the Hot Dogs: Take each hot dog and begin wrapping it with the dough strips. Start from one end and spiral the dough around the hot dog, leaving a small gap at one end for the mummy’s “face.” Make sure to overlap the strips slightly to create the look of bandages. Continue until all hot dogs are wrapped.
- Place on Baking Sheet: Prepare a baking sheet by spraying it with cooking spray or lining it with parchment paper. Arrange the wrapped hot dogs on the sheet, leaving space between each to guarantee even cooking.
- Bake: Place the baking sheet in the preheated oven and bake for 12-15 minutes, or until the dough is golden brown and cooked through.
- Decorate: Once baked, remove the Mummy Hot Dogs from the oven and let them cool slightly. Use mustard or ketchup to add dots for eyes on the visible hot dog area left for the face. You can use a toothpick for precision.
- Serve: Arrange the Mummy Hot Dogs on a platter and serve them warm. They can be accompanied by extra mustard or ketchup for dipping.
Extra Tips:
For a creative twist, consider using different types of sausages or even vegetarian hot dogs to cater to different dietary preferences. If using puff pastry instead of crescent roll dough, remember to handle it gently, as it can be more delicate.
Additionally, if you want to add more flavor, consider seasoning the dough strips with garlic powder or herbs before wrapping the hot dogs. Finally, make sure not to wrap the dough too tightly around the hot dogs, as they may not cook evenly. Enjoy the spooky fun with these delicious Mummy Hot Dogs!
Frankenstein Rice Krispie Treats
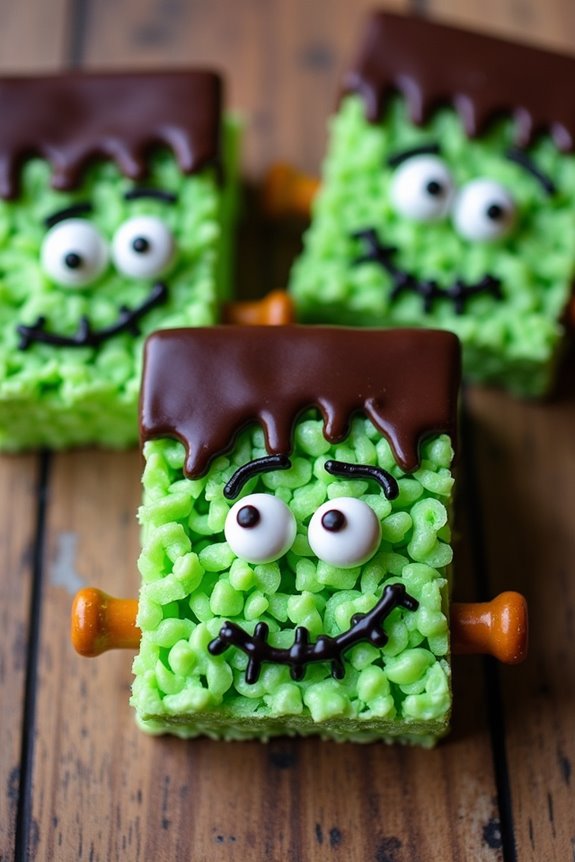
Frankenstein Rice Krispie Treats are a fun and spooky twist on the classic treat, perfect for Halloween festivities. These delicious bars aren’t only easy to make but also offer a creative way to engage with the holiday spirit.
With a vibrant green hue and quirky features, they’re sure to be a hit at any Halloween gathering, delighting kids and adults alike. This recipe makes use of simple and readily available ingredients, transforming them into a whimsically monstrous delight.
By following these steps, you’ll produce a batch of Frankenstein Rice Krispie Treats that will serve 4-6 people. These treats aren’t only visually appealing but also offer a delightful crunch with every bite.
Ingredients:
- 6 cups Rice Krispies cereal
- 4 tablespoons unsalted butter
- 10 ounces mini marshmallows
- Green food coloring
- 1 cup chocolate chips
- Black icing or gel frosting
- Candy eyes
- Pretzel sticks
Instructions:
1. Prepare Your Workspace: Line a 9×13 inch baking dish with parchment paper, guaranteeing some overhang for easy removal later.
2. Melt the Butter: In a large saucepan over medium heat, melt the unsalted butter. Stir occasionally to guarantee even melting and prevent it from burning.
3. Add Marshmallows: Once the butter has melted, add the mini marshmallows to the saucepan. Stir continuously until the marshmallows are fully melted and smooth.
4. Color the Mixture: Remove the saucepan from heat and add a few drops of green food coloring to the melted marshmallow mixture. Stir until you achieve your desired shade of green.
5. Combine with Cereal: Gradually add the Rice Krispies cereal to the green marshmallow mixture. Stir well to guarantee all the cereal is evenly coated.
6. Transfer to Baking Dish: Pour the mixture into the prepared baking dish. Use a spatula or your hands (greased with a bit of butter) to press the mixture evenly into the pan.
7. Cool and Set: Allow the mixture to cool at room temperature for at least 30 minutes, or until set.
8. Decorate Frankenstein Faces: Remove the set mixture from the pan using the parchment overhang and cut it into rectangles. Melt the chocolate chips in a microwave or double boiler, then use it to create Frankenstein’s hair on the top of each rectangle.
Use black icing to draw a mouth and other facial features as desired. Place candy eyes onto each treat and insert pretzel sticks on either side to resemble bolts.
9. Serve: Once decorated, allow the chocolate to set before serving your spooky Frankenstein Rice Krispie Treats.
Extra Tips:
When melting the marshmallows, make sure to keep the heat medium to low to prevent them from burning. If your marshmallow mixture becomes too hard while shaping the treats, microwave it for a few seconds to soften it.
Be creative with the decorating—feel free to add scars or stitches with black icing to give each Frankenstein treat its own personality. These treats can be stored in an airtight container for up to two days, making them a great make-ahead option for parties.
Creepy Crawly Deviled Eggs
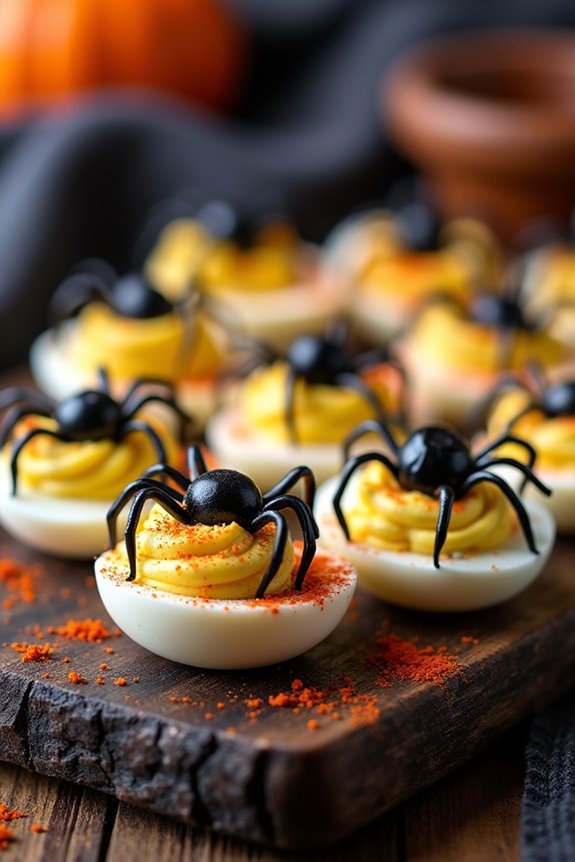
Creepy Crawly Deviled Eggs are a spooktacular addition to your Halloween festivities. This ghoulish twist on a classic appetizer will delight both children and adults with its eerie presentation and delicious taste. Perfect for parties or a family gathering, these deviled eggs are decorated to resemble creepy crawlers, making them a fun and festive treat. With just a bit of creativity and some simple ingredients, you can transform ordinary deviled eggs into a spooky centerpiece for your Halloween table.
The key to making Creepy Crawly Deviled Eggs is in the details. Starting with hard-boiled eggs, the yolks are mixed with mayonnaise, mustard, and a touch of paprika to create a creamy filling. The deviled egg halves are then topped with black olives to create spider-like creatures that will creep across your plate. Not only are these eggs visually striking, but they’re also packed with flavor, making them a hit with guests of all ages.
Ingredients for 4-6 servings:
- 6 large eggs
- 1/4 cup mayonnaise
- 1 teaspoon Dijon mustard
- 1/2 teaspoon white vinegar
- Salt and pepper to taste
- Paprika for garnish
- 12 black olives
Instructions:
- Boil the Eggs: Place the eggs in a saucepan and cover them with cold water. Bring the water to a rolling boil over medium-high heat. Once boiling, cover the saucepan, remove it from heat, and let the eggs sit for 10-12 minutes.
- Peel the Eggs: After the eggs have cooked, transfer them to a bowl of ice water to cool for at least 5 minutes. Once cooled, gently peel the eggs under running water to remove the shells without damaging the eggs.
- Prepare the Filling: Slice each egg in half lengthwise and carefully remove the yolks, placing them in a mixing bowl. Set the egg whites aside.
- Mix the Yolks: Mash the yolks with a fork until smooth. Add mayonnaise, Dijon mustard, white vinegar, salt, and pepper. Mix until the filling is creamy and well combined.
- Fill the Egg Halves: Using a spoon or a piping bag, fill each egg white half with the yolk mixture, making sure the filling is slightly mounded.
- Create the Spiders: Slice the black olives in half. Use one half for the spider’s body and cut the other half into thin strips to form the legs. Arrange them on top of the filled eggs to resemble spiders.
- Garnish and Serve: Lightly sprinkle paprika over the deviled eggs for added flavor and color. Arrange them on a platter and serve immediately or refrigerate until ready to serve.
When preparing Creepy Crawly Deviled Eggs, make certain that the eggs are cooked perfectly by following the boiling and cooling steps carefully to avoid overcooking.
To make the spiders, use a small knife for precision when slicing the olives, and consider using a piping bag for a more professional look when filling the eggs. If you’re making these in advance, keep them chilled in the refrigerator to maintain freshness.
Have fun with the presentation by arranging the eggs on a Halloween-themed platter or garnishing with additional spooky decorations.
Pumpkin Patch Brownies

Pumpkin Patch Brownies are a delightful treat perfect for Halloween festivities, combining the rich and fudgy texture of brownies with the festive look of a pumpkin patch. These brownies aren’t only visually appealing but also offer a delicious combination of chocolate and pumpkin flavors that will impress your guests, young and old alike.
When you serve these at your Halloween party, they’ll surely be a hit as they bring the spirit of the season to your dessert table.
These brownies are topped with a creamy pumpkin frosting and decorated with cute little candy pumpkins and green icing vines, making them look like a miniature pumpkin patch. The vibrant orange and green colors add a fun and whimsical element to your Halloween spread.
Whether you’re hosting a party or just want to surprise your family with a special treat, Pumpkin Patch Brownies are a creative and tasty dessert option that captures the essence of fall.
Ingredients for Pumpkin Patch Brownies (serves 4-6):
- 1 cup all-purpose flour
- 1/2 cup unsweetened cocoa powder
- 1/2 teaspoon baking powder
- 1/4 teaspoon salt
- 1/2 cup unsalted butter, melted
- 1 cup granulated sugar
- 2 large eggs
- 1 teaspoon vanilla extract
- 1/2 cup canned pumpkin puree
- 1/4 cup mini chocolate chips
- 1 cup cream cheese, softened
- 1/4 cup canned pumpkin puree (for frosting)
- 2 cups powdered sugar
- 1/2 teaspoon ground cinnamon
- Orange and green food coloring
- Candy pumpkins
Cooking Instructions:
1. Preheat the Oven: Start by preheating your oven to 350°F (175°C). Grease an 8×8 inch square baking pan or line it with parchment paper for easy removal of the brownies.
2. Prepare the Brownie Batter****: In a medium bowl, whisk together the flour, cocoa powder, baking powder, and salt. In a separate large bowl, mix the melted butter and sugar until well combined.
Add the eggs, vanilla extract, and pumpkin puree, and mix until smooth. Gradually add the dry ingredients to the wet mixture, stirring until just combined. Finally, fold in the mini chocolate chips.
3. Bake the Brownies: Pour the brownie batter into the prepared baking pan, spreading it evenly. Bake in the preheated oven for 25-30 minutes or until a toothpick inserted into the center comes out with a few moist crumbs.
Allow the brownies to cool completely in the pan.
4. Make the Pumpkin Frosting: In a mixing bowl, beat together the cream cheese, 1/4 cup pumpkin puree, powdered sugar, and ground cinnamon until smooth and creamy.
Add a few drops of orange food coloring and mix until you achieve the desired shade of orange.
5. Decorate the Brownies: Once the brownies are cool, spread the pumpkin frosting evenly over the top. Use green food coloring mixed with a small amount of frosting to create vines.
Place candy pumpkins on top of the frosted brownies to mimic a pumpkin patch.
6. Serve and Enjoy: Cut the brownies into squares, serve, and enjoy your festive Pumpkin Patch Brownies with friends and family!
Extra Tips: For a more intense pumpkin flavor, consider adding a bit of pumpkin spice to the brownie batter.
Also, be sure to let the brownies cool completely before frosting to prevent the frosting from melting. If you can’t find candy pumpkins, you can use orange jelly beans or other orange candies for decoration.
The green icing vines can be made using a piping bag or a plastic bag with the corner snipped off for precision.
Monster Mouths Apple Slices

Monster Mouths Apple Slices are a fun and spooky treat that’s perfect for Halloween parties or any festive gathering. These delightful snacks are both healthy and delicious, making them a hit with both kids and adults alike. The combination of crisp apples, creamy peanut butter, and sweet marshmallows not only makes for a tasty treat but also a visually striking one that resembles monstrous mouths with teeth.
Easy to prepare and assemble, these Monster Mouths are sure to be a crowd-pleaser at your Halloween event. To create these ghoulish goodies, you’ll need just a few simple ingredients and some creativity. The process involves slicing apples, spreading peanut butter, and adding marshmallows to mimic teeth.
This recipe is ideal for making with children, as it encourages them to participate in the kitchen and have fun while preparing a healthy snack. The following recipe serves 4-6 people, making it perfect for a small gathering or a family treat during the spooky season.
Ingredients:
- 4 medium apples (red or green)
- 1 cup creamy peanut butter
- 1 cup mini marshmallows
- Lemon juice (optional, to prevent browning)
Instructions:
- Prepare the Apples:
- Wash the apples thoroughly. Cut each apple into quarters and remove the core and seeds. Then, slice each quarter into 2 or 3 wedges, depending on the size of the apple.
- If desired, brush the apple slices with a little lemon juice to prevent them from browning.
- Assemble the Monster Mouths:
- Spread a thin layer of peanut butter on one side of each apple slice.
- Take one apple slice and place a row of mini marshmallows along the peanut butter side to create the “teeth.”
- Top with another peanut butter-coated apple slice, peanut butter side down, to form a “mouth.”
- Finishing Touches:
- Repeat the process with the remaining apple slices and marshmallows until you have assembled all the Monster Mouths.
- Arrange the completed Monster Mouths on a platter for serving.
Extra Tips:
For a fun twist, try using different nut butters such as almond or sunflower seed butter if you have peanut allergies. You can also add chocolate chips or edible eyes on top of the apple slices to give the monsters an even spookier appearance.
If you’re preparing these in advance, store the assembled mouths in an airtight container in the refrigerator to keep them fresh until serving. Enjoy creating and eating these playful Halloween treats!
Vampire Bat Wings

Vampire Bat Wings are a spooky yet delicious addition to your Halloween festivities. These wings are marinated in a rich, dark sauce that gives them a mysterious and enticing appearance, perfect for a Halloween-themed gathering. The combination of soy sauce, garlic, and a hint of sweetness creates a balanced flavor profile that will leave your guests craving more.
Serve them as an appetizer or a main dish, and watch as these wings disappear as quickly as a vampire in the night. The recipe is designed to cater to a group of 4-6 people, making it ideal for small parties or family gatherings. The preparation process is straightforward, allowing even novice cooks to achieve impressive results.
With a few simple ingredients and easy-to-follow instructions, you’ll have a platter of Vampire Bat Wings ready to impress your guests in no time. Let’s jump into the ingredients you’ll need to bring this spooky dish to life.
Ingredients (serves 4-6):
- 3 pounds of chicken wings
- 1 cup of soy sauce
- 1/2 cup of honey
- 1/4 cup of balsamic vinegar
- 4 cloves of garlic, minced
- 1 tablespoon of ground ginger
- 1 tablespoon of sesame oil
- 1 teaspoon of smoked paprika
- 1/2 teaspoon of black pepper
- Fresh parsley for garnish
Cooking Instructions:
- Prepare the Marinade: In a large mixing bowl, combine soy sauce, honey, balsamic vinegar, minced garlic, ground ginger, sesame oil, smoked paprika, and black pepper. Stir the mixture well until the honey is fully dissolved and all ingredients are integrated.
- Marinate the Wings: Place the chicken wings in a large resealable plastic bag or a shallow dish. Pour the marinade over the wings, ensuring they’re thoroughly coated. Seal the bag or cover the dish and refrigerate for at least 2 hours, or overnight for the best flavor.
- Preheat the Oven: Once the wings have marinated, preheat your oven to 400°F (200°C). Line a baking sheet with aluminum foil and place a wire rack on top. This will allow the wings to cook evenly and become crispy.
- Arrange the Wings: Remove the wings from the marinade, allowing any excess liquid to drip off, and arrange them in a single layer on the prepared wire rack. Reserve the marinade for basting.
- Bake the Wings: Place the baking sheet in the preheated oven and bake for 25 minutes. After 25 minutes, remove the wings from the oven and brush them with the reserved marinade.
- Continue Baking: Return the wings to the oven and bake for an additional 20-25 minutes, basting once more halfway through, until the wings are cooked through and have a dark, caramelized exterior.
- Garnish and Serve: Once the wings are cooked, remove them from the oven and let them rest for a few minutes. Garnish with fresh parsley before serving.
Extra Tips:
For an even deeper flavor, consider marinating the wings overnight. This allows the marinade to fully penetrate the meat, resulting in more robust taste.
Be sure to keep an eye on the wings in the final minutes of baking to prevent burning, as the sugars in the marinade can caramelize quickly. If you prefer a spicier version, add a pinch of cayenne pepper or a splash of hot sauce to the marinade. Enjoy your Vampire Bat Wings with a side of dipping sauce or as part of a Halloween buffet spread.
Bloody Finger Pretzels
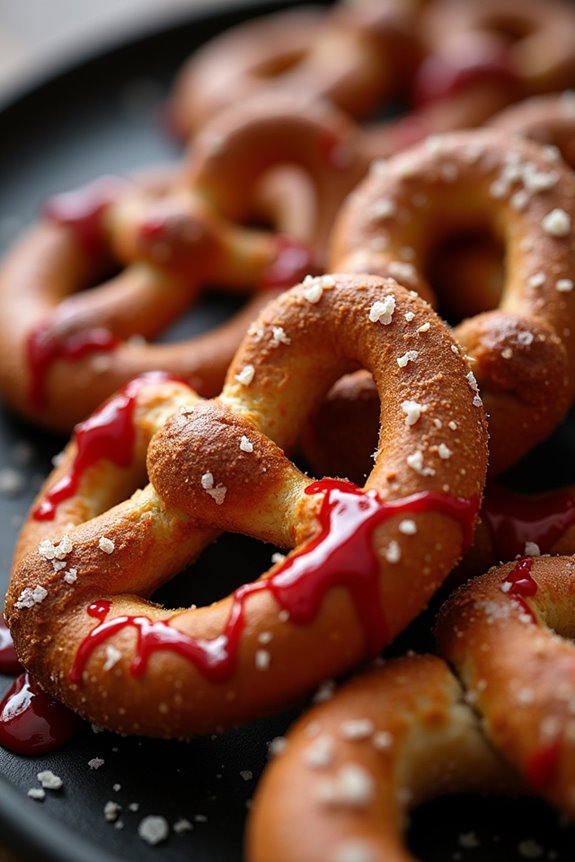
This recipe is easy to prepare and fun to make, especially if you involve children in the process. Not only do they enjoy shaping the dough into finger-like lengths, but they also love decorating them to look as ghastly as possible.
With some simple ingredients and a bit of creativity, you can whip up a batch of these gruesome snacks in no time. The following recipe will yield enough Bloody Finger Pretzels to serve 4-6 people, making it perfect for a small gathering or family treat.
Ingredients for 4-6 people:
- 1 package of refrigerated breadstick dough or homemade pretzel dough
- 1 egg, beaten
- 1 tablespoon water
- Sliced almonds (for fingernails)
- Red food coloring
- Ketchup or red gel icing
- Coarse salt
Cooking Instructions:
- Preheat the Oven: Start by preheating your oven to 375°F (190°C). This will guarantee that your pretzels bake evenly and achieve a nice golden color.
- Prepare the Dough: Open the package of refrigerated breadstick dough or prepare your homemade pretzel dough. Roll each piece into a long, thin strip about the length of a finger.
- Shape the Fingers: To create the finger appearance, gently press the dough in several places to form knuckles. Use a knife to make small slits in the dough at the knuckle areas for added realism.
- Add the Fingernails: Press a sliced almond into one end of each dough strip to resemble a fingernail.
- Egg Wash: In a small bowl, whisk together the beaten egg and tablespoon of water. Brush this mixture over the dough fingers to give them a shiny finish.
- Salt the Pretzels: Sprinkle coarse salt lightly over the fingers for flavor and texture.
- Bake the Pretzels: Place the dough fingers on a baking sheet lined with parchment paper, and bake in the preheated oven for about 12-15 minutes, or until golden brown.
- Add the Blood Effect: Once baked, remove the pretzels from the oven and allow them to cool slightly. Use a small brush or toothpick to apply red food coloring around the almond fingernail to create a bloody effect. Use ketchup or red gel icing to add more “blood” to the base of the fingers or wherever desired.
Extra Tips:
For an even more realistic appearance, consider adding small cuts or texture to the dough before baking to mimic wrinkles and skin texture.
If you’re using homemade pretzel dough, you can boil the shaped fingers in a baking soda solution for a few seconds before baking to achieve a more traditional pretzel texture.
If you want to make the fingers look even more grotesque, you can experiment with adding green or purple food coloring to parts of the dough. This will give the fingers a bruised, decayed look that can really enhance the Halloween theme.
Eyeball Pasta Salad

Get ready to serve a spooky treat with this Eyeball Pasta Salad, perfect for your Halloween festivities. This dish combines the classic appeal of pasta salad with a ghoulish twist, making it a fun and tasty addition to your Halloween party spread.
With delicious pasta, fresh vegetables, and eerie eyeball decorations, this salad will be the center of attention on your Halloween table. This recipe is designed to serve between 4 to 6 people, making it ideal for a small gathering or family dinner.
It’s a versatile dish that you can prepare ahead of time, allowing you to enjoy the festivities without spending too much time in the kitchen. The combination of flavors and textures will delight both kids and adults, while the creepy eyeball design will surely elicit some gasps and giggles.
Ingredients:
- 12 oz rotini or fusilli pasta
- 1 cup cherry tomatoes, halved
- 1 cup black olives, pitted and sliced
- 1 green bell pepper, diced
- 1/2 red onion, finely chopped
- 1 cup mozzarella balls (bocconcini)
- 1/4 cup fresh basil leaves, chopped
- 1/2 cup Italian dressing
- Salt and pepper to taste
- 6 olives, whole (for eyeballs)
- 1 tablespoon cream cheese or ricotta (for eyeballs)
- Red food coloring
Cooking Instructions:
- Cook the Pasta: Begin by cooking the pasta according to the package instructions until al dente. Once cooked, drain and rinse under cold water to stop the cooking process. This will also help cool down the pasta for the salad.
- Prepare the Vegetables: While the pasta is cooking, wash and prepare your vegetables. Halve the cherry tomatoes, slice the black olives, dice the green bell pepper, and finely chop the red onion. Set these aside in a large mixing bowl.
- Make the Eyeballs: To create the eyeball effect, take the mozzarella balls and use a small melon baller or your fingers to create a small indentation. Fill this indentation with a tiny amount of cream cheese or ricotta. Place a whole olive on top, pressing slightly to create the appearance of an eyeball. Add a drop of red food coloring to mimic bloodshot eyes.
- Combine Ingredients: Add the cooked and cooled pasta to the bowl of vegetables. Add the sliced olives, chopped basil leaves, and the prepared mozzarella eyeballs.
- Dress the Salad: Pour the Italian dressing over the pasta salad mixture. Toss everything gently to confirm the dressing coats all ingredients evenly. Season with salt and pepper to taste.
- Chill and Serve: Cover the salad with plastic wrap and refrigerate for at least 30 minutes to let the flavors meld together. Serve chilled and enjoy your spooky creation.
Extra Tips:
For an added eerie effect, consider using different colored pasta, such as spinach or beetroot pasta, to add more Halloween-themed colors to your dish.
You can also adjust the level of spookiness by varying the amount of red food coloring on the mozzarella eyeballs. If you’re serving this dish to a crowd, consider doubling the recipe and serving it in a large, hollowed-out pumpkin for an extra festive presentation.
Ghoulish Guacamole

With Halloween fast approaching, it’s time to prepare some spine-chilling treats for your festivities. One of the simplest yet spookiest dishes to serve at your Halloween party is Ghoulish Guacamole. This eerie twist on a classic favorite isn’t only delicious but also visually enchanting, resembling a bubbling cauldron of green goo. It’s a perfect addition to your party spread, enhancing the Halloween spirit with its creepy presentation and vibrant color.
Ghoulish Guacamole is a crowd-pleaser that appeals to both kids and adults, making it an excellent choice for gatherings of all sizes. Its fresh and flavorful ingredients, combined with a few creative touches, transform traditional guacamole into a hauntingly delightful dish. The recipe is straightforward, allowing you to whip up a batch in no time, so you can focus on enjoying the festivities and the company of your guests.
Ingredients for 4-6 servings:
- 3 ripe avocados
- 1 lime, juiced
- 1 teaspoon salt
- 1/2 cup diced red onion
- 2 Roma tomatoes, diced
- 1 tablespoon chopped cilantro
- 1 clove garlic, minced
- 1 jalapeño pepper, seeded and minced (optional)
- Black olives (for decoration)
- 1 package of blue corn tortilla chips (optional, for serving)
Instructions:
- Prepare the Avocados: Start by cutting the avocados in half, removing the pits, and scooping the flesh into a mixing bowl. Use a fork to mash the avocados to your desired consistency. For a smoother texture, you can use a blender, but a fork will give you a chunkier, more traditional guacamole.
- Mix the Base Ingredients: Add the lime juice and salt to the mashed avocados. The lime juice not only adds flavor but also helps to prevent the avocados from browning too quickly.
- Incorporate Vegetables: Stir in the diced red onion, Roma tomatoes, chopped cilantro, and minced garlic. If you prefer a bit of heat, mix in the minced jalapeño pepper as well. This step adds both color and texture to the guacamole.
- Decorate for Halloween: For a ghoulish effect, slice black olives into thin rings and arrange them on top of the guacamole to resemble creepy eyes or other eerie designs. You can use your creativity here to make it as spooky as you like.
- Serve with Style: Transfer the Ghoulish Guacamole to a festive bowl or a carved-out pumpkin for a Halloween touch. Serve it alongside blue corn tortilla chips for an extra eerie effect.
Extra Tips:
To keep your Ghoulish Guacamole fresh and vibrant for longer, cover it tightly with plastic wrap, ensuring the wrap touches the surface of the guacamole to minimize exposure to air. This helps prevent browning.
Additionally, you can experiment with the level of spiciness by adjusting the amount of jalapeño or adding a dash of hot sauce for those who like more heat.
And remember, presentation is key, so feel free to add other Halloween-themed garnishes such as small plastic spiders or ghost-shaped tortilla chips for an added spooky touch.
Haunted House Popcorn Mix
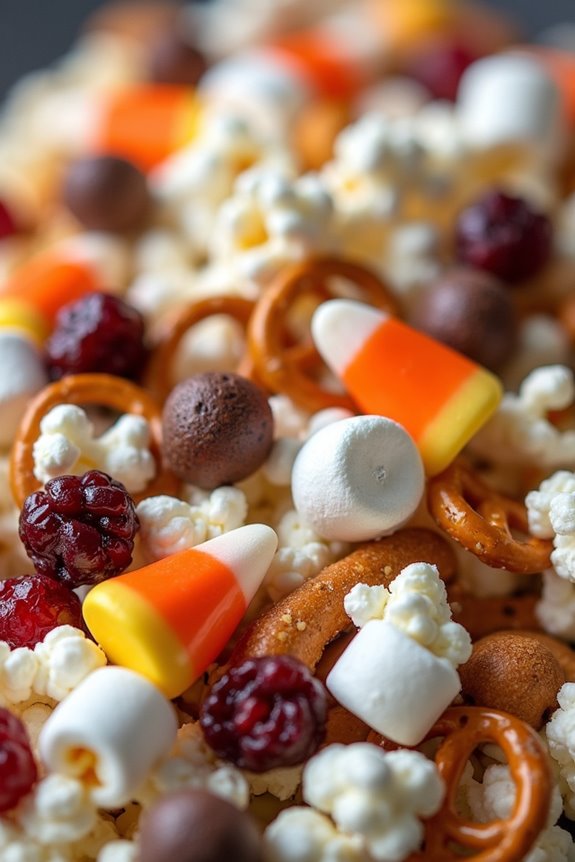
Transform your Halloween party into a spooky affair with this Haunted House Popcorn Mix. This delightful treat brings together a blend of sweet and salty flavors, perfect for both kids and adults. With its vibrant colors and tasty ingredients, it’s sure to be a hit at any gathering.
Whether you’re hosting a haunted house or simply enjoying a cozy night in, this popcorn mix will add a touch of Halloween magic to your festivities.
The Haunted House Popcorn Mix combines classic popcorn with an assortment of candies and snacks, creating a whimsical blend that looks as good as it tastes. It’s incredibly simple to prepare, requiring minimal cooking time, and can be made ahead of time for convenience. This recipe serves 4-6 people, making it ideal for small gatherings or family movie nights.
Ingredients:
- 8 cups of popped popcorn
- 1 cup of pretzel twists
- 1 cup of candy corn
- 1 cup of mini marshmallows
- 1 cup of chocolate-covered peanuts
- 1 cup of Halloween-themed chocolate candies (like M&M’s)
- 1/2 cup of dried cranberries
- 1/4 cup of melted butter
- 1 teaspoon of salt
- 1 teaspoon of cinnamon
Instructions:
- Pop the Popcorn: Start by popping 8 cups of popcorn using your preferred method, either on the stovetop, in a popcorn maker, or in the microwave. Once popped, transfer the popcorn to a large mixing bowl.
- Prepare the Mix-Ins: In a separate bowl, combine the pretzel twists, candy corn, mini marshmallows, chocolate-covered peanuts, Halloween-themed chocolate candies, and dried cranberries. Mix these ingredients until they’re well combined.
- Combine Ingredients: Pour the mix-ins over the popcorn in the large mixing bowl. Gently toss the popcorn and mix-ins together using your hands or a large spoon, ensuring the mix-ins are evenly distributed throughout the popcorn.
- Add Flavor: In a small saucepan, melt 1/4 cup of butter over low heat. Once melted, stir in the salt and cinnamon until fully combined. Drizzle the butter mixture over the popcorn mix, tossing everything together until the popcorn is lightly coated.
- Serve: Transfer the Haunted House Popcorn Mix to a large serving bowl or individual treat bags. Enjoy immediately or store in an airtight container for up to two days.
Extra Tips:
To enhance the spooky feel of your Haunted House Popcorn Mix, consider adding a few drops of food coloring to the melted butter for a fun and festive touch.
You can also customize this recipe by adding your favorite nuts or dried fruits, or by adjusting the candy and snack mix-ins to suit your personal taste. For an extra crunch, try adding some roasted pumpkin seeds.
Remember to store any leftovers in an airtight container to keep the popcorn fresh and crunchy.