

As Halloween draws near, I can’t help but get excited about creating a potluck spread that’s both festive and easy for everyone. I’ve put together 15 spooktacular ideas that are simple yet delightfully eerie. Think creepy deviled eggs with spiders and ghostly cheese and crackers to add charm to your table. Mummy hot dogs and witch’s broomstick snacks are sure to capture imaginations. And let’s not forget the sweet treats and vibrant drinks to complete the scene.
Spooky Spider Deviled Eggs
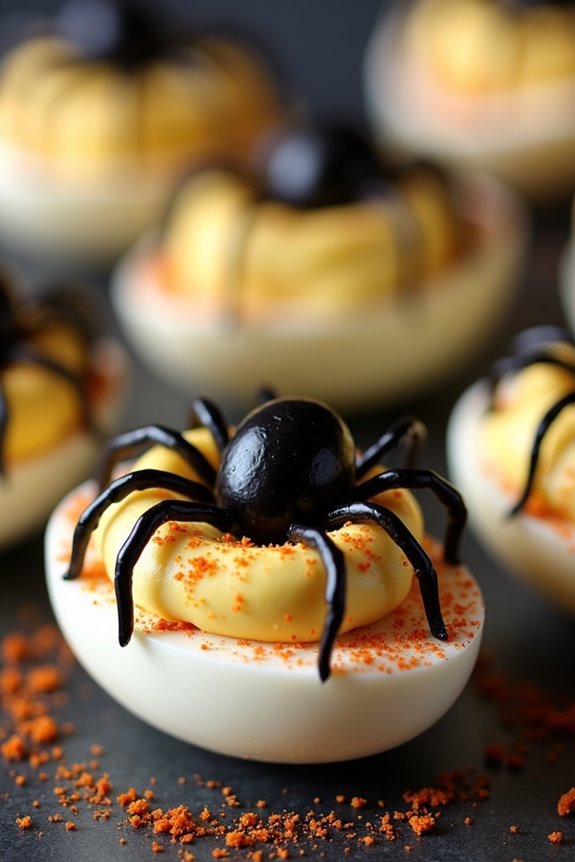
In this recipe, hard-boiled eggs are transformed into a savory appetizer with a creamy filling and an olive spider on top. The filling is a classic deviled egg mixture of egg yolks, mayonnaise, mustard, and spices, while the spiders are crafted from black olives. This dish serves 4-6 people, making it ideal for a small gathering or as part of a larger buffet.
Ingredients for 4-6 people:
- 6 large eggs
- 1/4 cup mayonnaise
- 1 teaspoon Dijon mustard
- 1/2 teaspoon white vinegar
- Salt and pepper to taste
- Paprika for garnish
- 12 black olives (pitted)
Cooking Instructions:
- Boil the Eggs: Place the eggs in a single layer in a saucepan and cover them with water. Bring the water to a boil over medium-high heat. Once boiling, remove the pan from heat and cover it with a lid. Let the eggs sit in the hot water for about 10-12 minutes.
- Cool and Peel the Eggs: After the eggs have cooked, drain the hot water and transfer the eggs to a bowl of ice water. Let them cool for at least 5 minutes. Once cooled, gently tap the eggs on a hard surface and peel off the shells.
- Prepare the Egg Halves: Slice each egg in half lengthwise. Carefully remove the yolks and place them in a separate bowl, setting the egg whites aside on a serving platter.
- Make the Filling: Mash the egg yolks with a fork until they’re crumbly. Add the mayonnaise, Dijon mustard, white vinegar, salt, and pepper. Mix until the filling is smooth and creamy.
- Fill the Egg Whites: Spoon or pipe the yolk mixture into the hollowed-out egg whites, mounding slightly.
- Create the Olive Spiders: Cut the olives in half. Use one half of an olive for the spider’s body, and slice the remaining half into thin strips to create the legs. Arrange one half-olive on top of each filled egg as the spider’s body. Place 4 olive strips on each side of the body to form the legs.
- Garnish and Serve: Lightly sprinkle paprika over the deviled eggs for an added touch of color and flavor. Serve immediately or refrigerate until ready to serve.
Extra Tips:
To guarantee perfectly cooked eggs, it’s essential to use eggs that aren’t too fresh, as slightly older eggs are easier to peel.
For an extra spooky effect, you can dye the egg whites with food coloring after boiling by soaking them briefly in water mixed with desired food coloring.
Additionally, make sure to dry the olives thoroughly before placing them on the eggs to prevent sliding.
Enjoy your Spooky Spider Deviled Eggs as a creepy yet delicious addition to your Halloween festivities!
Mummy Hot Dogs
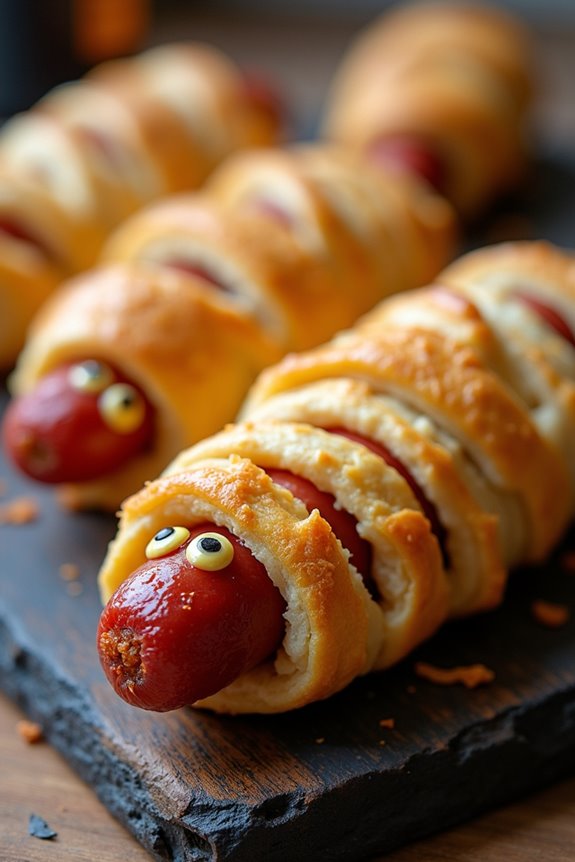
Creating Mummy Hot Dogs involves a few basic ingredients and a touch of creativity. The hot dogs are wrapped in strips of dough to mimic the bandages on a mummy and then baked until golden brown. Adding small dots of mustard or ketchup for eyes completes the look. This recipe serves 4-6 people, making it perfect for a small group or family gathering.
Let’s explore the ingredients and steps to make this frightfully delightful dish!
Ingredients:
- 1 can of refrigerated crescent roll dough
- 8 hot dogs
- Mustard or ketchup for eyes
- Cooking spray or parchment paper
Instructions:
1. Preheat the Oven: Begin by preheating your oven to 375°F (190°C). This will guarantee that it’s hot enough to bake the mummy hot dogs evenly.
2. Prepare the Dough: Unroll the crescent roll dough on a clean surface. Using a pizza cutter or sharp knife, cut the dough into thin strips, approximately 1/4 inch wide. These strips will be used to wrap the hot dogs.
3. Wrap the Hot Dogs: Take a hot dog and start wrapping it with the dough strips, leaving a small gap near one end for the mummy’s face. Continue wrapping until the hot dog is mostly covered, resembling a mummy.
Repeat this process with the remaining hot dogs.
4. Arrange on Baking Sheet: Place the wrapped hot dogs on a baking sheet lined with parchment paper or lightly sprayed with cooking spray. Make sure they’re spaced evenly to allow for even baking.
5. Bake: Place the baking sheet in the oven and bake for 12-15 minutes or until the dough turns golden brown and crispy.
6. Add Eyes: Once baked, remove the mummy hot dogs from the oven and let them cool slightly. Use mustard or ketchup to dot small eyes on the exposed part of each hot dog to complete the mummy look.
Extra Tips:
For an extra spooky touch, consider using different types of sausages like bratwurst or chicken sausages instead of regular hot dogs.
You can also experiment with flavored dough, such as garlic or herb-flavored crescent rolls, to add a unique twist. If you prefer a vegetarian option, use veggie dogs as a substitute.
Finally, for an added Halloween flair, serve these mummy hot dogs with a side of “bloody” marinara sauce for dipping. Enjoy your festive and delicious creation!
Witch’s Broomstick Snacks

Witch’s Broomstick Snacks are a whimsical and tasty addition to any Halloween potluck. These fun and spooky treats not only look festive but are also incredibly easy to make, making them a perfect last-minute addition to your Halloween party menu.
These snacks combine the salty crunch of pretzel sticks with the creamy goodness of cheese, creating a delightful balance of flavors and textures that both kids and adults will love. Plus, their broomstick-like appearance is sure to get everyone into the Halloween spirit.
These Witch’s Broomstick Snacks are surprisingly simple to assemble, requiring only a few ingredients and minimal prep time. They’re a great option for those looking to serve something unique without spending hours in the kitchen.
Whether you’re hosting a Halloween gathering or attending one, these snacks are bound to be a hit. Ready in minutes, they’re the perfect finger food for guests to enjoy while mingling.
Ingredients for 4-6 people:
- 12 pretzel sticks
- 6 string cheese sticks
- 12 fresh chives
Cooking Instructions:
- Prepare the String Cheese: Begin by unwrapping the string cheese sticks. Cut each stick in half to create two shorter pieces. Each piece will form the bristles of your broomstick.
- Create Cheese Bristles: Using a knife, carefully make vertical cuts around one end of each cheese piece, about halfway up, to create the appearance of broom bristles. Be gentle to avoid breaking the cheese.
- Assemble the Broomsticks: Insert one pretzel stick into the uncut end of each cheese piece. Push the pretzel gently into the cheese until it feels secure, ensuring it doesn’t break through the cheese.
- Tie with Chives: Take a fresh chive and wrap it around the top of the cheese, where it meets the pretzel stick, to give the appearance of a broom handle. Tie the chive into a small knot to secure it in place.
- Arrange and Serve: Once all broomsticks are assembled, arrange them on a serving platter. You can serve them immediately or refrigerate them for up to an hour before serving.
Extra Tips:
When cutting the cheese to form bristles, a sharp knife will help you make clean cuts without tearing. If you find the chives too slippery to tie, try wetting your fingers slightly to get a better grip.
For added flavor, you can experiment with different types of cheese, such as cheddar or mozzarella, depending on your preference. These snacks are best served the same day, as the pretzels may soften if stored for too long.
Enjoy these fun treats and watch them disappear quickly at your Halloween potluck!
Ghostly Cheese and Crackers
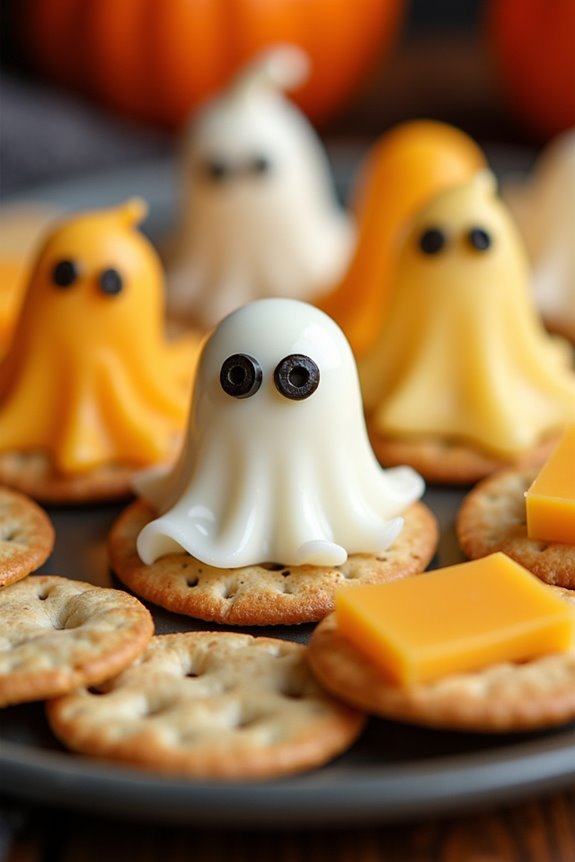
Halloween is the perfect time to get creative in the kitchen, and Ghostly Cheese and Crackers is a delightful and easy-to-make dish that will bring a spooky yet fun vibe to your potluck. This dish combines the classic pairing of cheese and crackers with a Halloween twist, making it ideal for both kids and adults. The ghostly theme is achieved by shaping slices of cheese into ghost shapes, which are then placed onto crackers. This simple yet effective presentation will surely be a hit at any Halloween gathering.
To make Ghostly Cheese and Crackers, you’ll need a variety of cheeses that can be easily sliced and shaped, such as cheddar, mozzarella, or Swiss. The key is to use a ghost-shaped cookie cutter to create the ghostly appearance. You can use an assortment of crackers to complement the cheeses, such as whole wheat, multigrain, or any of your favorites. Decorate each ghost with tiny edible eyes made from black olives or peppercorns to give them character. This dish isn’t only visually appealing but also offers a variety of flavors and textures that will please every palate.
Ingredients (serves 4-6 people):
- 12 slices of cheese (cheddar, mozzarella, or Swiss)
- 24 assorted crackers
- 1/4 cup black olives or whole peppercorns
- Optional: cream cheese or soft spreadable cheese for additional flavor
Cooking Instructions:
- Prepare the Cheese: Lay out the cheese slices on a cutting board. Using a ghost-shaped cookie cutter, press firmly into each slice to cut out ghost shapes. Carefully remove the excess cheese around each ghost shape.
- Prepare the Crackers: Place the crackers on a large serving platter. You can use a mix of different types of crackers to add variety.
- Assemble the Ghosts: Gently place a cheese ghost onto each cracker. Make sure they’re centered and stable.
- Add the Eyes: Slice the black olives into small pieces or use whole peppercorns. Place two pieces onto each cheese ghost to create eyes. If needed, use a small dab of cream cheese to help them stick.
- Optional Flavoring: If desired, spread a thin layer of cream cheese or any soft spreadable cheese on the crackers before placing the cheese ghosts on them. This adds an extra layer of flavor.
Extra Tips:
When creating your Ghostly Cheese and Crackers, make sure the cheese is cold, as it will be easier to cut and maintain its shape. If you don’t have a ghost-shaped cookie cutter, you can carefully use a knife to hand-cut the shapes.
Additionally, feel free to get creative with the eyes, using small pieces of bell pepper or capers as alternatives. To keep the cheese from drying out, cover the platter with plastic wrap and refrigerate until ready to serve. This dish is best served fresh but can be prepared a few hours in advance to save time on the day of your potluck.
Pumpkin Patch Brownies
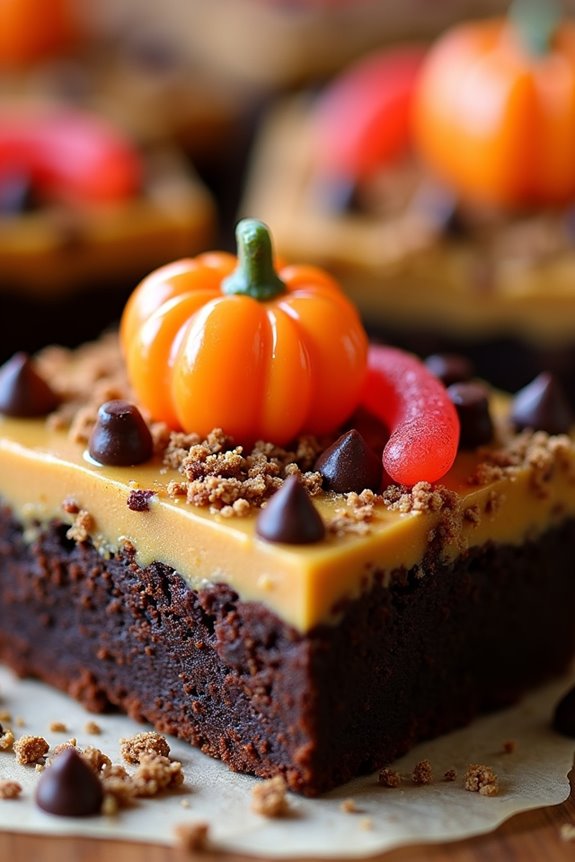
Pumpkin Patch Brownies are a delightful treat that perfectly embody the spirit of Halloween. These rich, chocolatey brownies are topped with a creamy pumpkin layer, creating a harmonious blend of flavors that will impress your friends and family at any Halloween potluck.
With a spooky yet delicious twist, they offer both the classic taste of brownies and the seasonal flavor of pumpkin, making them an irresistible addition to any Halloween spread.
The unique aspect of Pumpkin Patch Brownies is their decorative element, which allows for creativity in presentation. The top layer can be adorned with gummy worms, candy pumpkins, or even a dusting of crushed cookies to resemble dirt, giving the illusion of a miniature pumpkin patch.
These brownies aren’t only a treat for the taste buds but also a feast for the eyes, making them a crowd-pleaser for people of all ages. With this recipe, you can easily serve 4 to 6 people, ensuring everyone at the potluck gets to enjoy a piece of this spooky delight.
Ingredients:
- 1 cup all-purpose flour
- 1/2 cup unsweetened cocoa powder
- 1/4 teaspoon baking powder
- 1/4 teaspoon salt
- 1/2 cup unsalted butter, melted
- 1 cup granulated sugar
- 2 large eggs
- 1 teaspoon vanilla extract
- 1 cup canned pumpkin puree
- 1/2 teaspoon ground cinnamon
- 1/4 teaspoon ground nutmeg
- 1/4 teaspoon ground ginger
- 1/4 cup semi-sweet chocolate chips
- Halloween-themed candy decorations (e.g., gummy worms, candy pumpkins)
Instructions:
- Preheat the Oven: Start by preheating your oven to 350°F (175°C). Grease a 9×9 inch baking dish with butter or non-stick spray and set it aside.
- Mix Dry Ingredients: In a medium-sized bowl, whisk together the flour, cocoa powder, baking powder, and salt. This mixture will form the base of your brownie batter.
- Prepare Wet Ingredients: In a separate large bowl, combine the melted butter and sugar. Mix well until the sugar is fully dissolved. Then, add in the eggs, one at a time, mixing thoroughly after each addition. Stir in the vanilla extract.
- Combine Batters: Gradually add the dry ingredients to the wet ingredients, mixing just until combined. Be careful not to overmix, as this can make the brownies tough.
- Pumpkin Layer: In another bowl, mix together the pumpkin puree, ground cinnamon, nutmeg, and ginger. Spread this pumpkin mixture evenly over the brownie batter in the baking dish.
- Add Chocolate Chips: Sprinkle the semi-sweet chocolate chips evenly over the pumpkin layer.
- Bake: Place the baking dish in the preheated oven and bake for 25-30 minutes, or until a toothpick inserted into the center comes out with a few moist crumbs.
- Decorate: Once baked, allow the brownies to cool completely in the pan. Once cooled, decorate with Halloween-themed candies to create a pumpkin patch effect.
- Serve: Cut into squares and serve these spooky treats at your Halloween potluck!
Extra Tips: For a more intense chocolate flavor, consider adding a teaspoon of espresso powder to the dry ingredients. This will enhance the taste of the chocolate without adding any coffee flavor.
Additionally, if you’re looking to make these brownies gluten-free, you can replace the all-purpose flour with a gluten-free flour blend. Finally, for a fun twist, try using different types of candy or decorations that suit your theme, such as candy eyes or edible glitter for a magical pumpkin patch effect.
Monster Eyeball Punch

Monster Eyeball Punch is the perfect spooky drink to serve at your Halloween potluck. This eerily delicious beverage is sure to be a hit with both kids and adults alike. Featuring a mix of fruity flavors and a creepy garnish of floating “eyeballs,” it not only tastes great but also adds a fun, festive touch to your party table. The punch’s vibrant color and whimsical decoration make it an eye-catching centerpiece that will have your guests coming back for more.
Creating Monster Eyeball Punch is both simple and fun, making it an ideal choice for hosts who want to prepare something special without too much fuss. The punch combines a mix of fruit juices and soda to create a revitalizing, bubbly drink, while the floating “eyeballs” add a playful and slightly spooky element. With just a few ingredients and minimal preparation time, you can whip up this crowd-pleasing punch in no time, leaving you more time to enjoy your Halloween festivities.
Ingredients for Serving Size: 4-6 People:
- 2 cups pineapple juice
- 2 cups cranberry juice
- 2 cups lemon-lime soda
- 1 cup club soda
- 1 cup lychee fruit (canned or fresh)
- 1/2 cup blueberries
- 1 cup ice cubes
- Green food coloring (optional)
Cooking Instructions:
- Prepare the Lychee “Eyeballs”: Drain the lychee fruit if using canned. Insert a blueberry into the hollow center of each lychee to create the “eyeballs.” Set these aside.
- Mix the Punch Base: In a large punch bowl, combine the pineapple juice and cranberry juice. Stir well to confirm the flavors are evenly mixed.
- Add the Fizz: Slowly pour in the lemon-lime soda and club soda. Stir gently to maintain the carbonation while confirming everything is well combined.
- Color the Punch (Optional): If you desire a more vibrant green color, add a few drops of green food coloring to the punch. Stir until the color is evenly distributed.
- Chill the Punch: Add the ice cubes to the punch bowl to chill the mixture before serving.
- Add the “Eyeballs”: Gently place the prepared lychee “eyeballs” into the punch. They’ll float on top, creating the monster eyeball effect.
- Serve and Enjoy: Ladle the punch into glasses, ensuring each serving gets a couple of “eyeballs” for the full spooky effect.
Extra Tips:
For an added touch of creepiness, consider freezing some of the lychee “eyeballs” before adding them to the punch. This won’t only help keep the punch chilled but will also create a chilling surprise for those who sip their drinks.
If you prefer a sweeter punch, you can add a little more pineapple juice or a touch of grenadine syrup for added sweetness and color depth. Adjust the amount of food coloring based on your desired shade of green, and remember, a little goes a long way!
Creepy Crawly Cupcakes
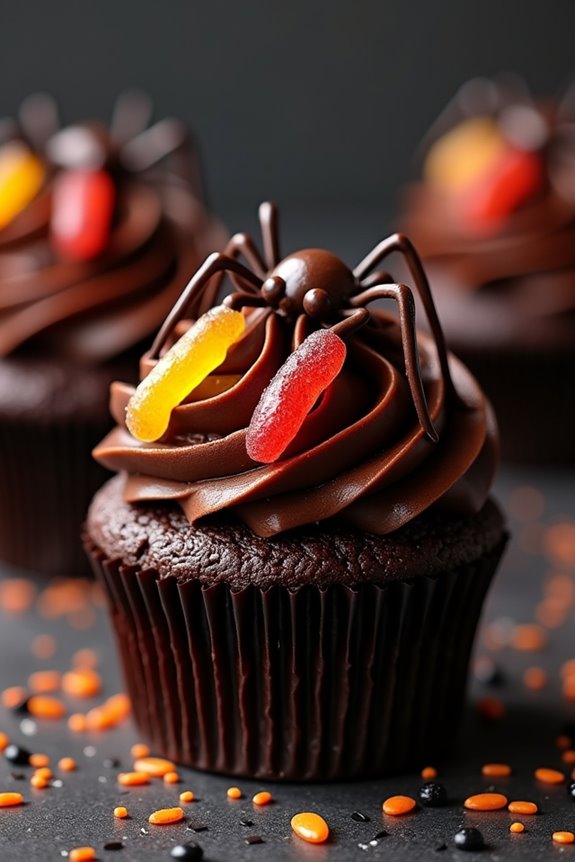
Looking to add a spooky twist to your Halloween potluck? Creepy Crawly Cupcakes are the perfect treat to delight both kids and adults alike. These cupcakes aren’t only delicious but also bring a touch of the eerie with their fun decorations that mimic creepy crawlers.
Whether you’re hosting a Halloween party or attending one, these cupcakes are sure to be a hit with their combination of rich chocolate flavor and visually striking design.
These Creepy Crawly Cupcakes are made with a moist chocolate base and topped with a rich, dark chocolate frosting. The cupcakes are then adorned with gummy worms, chocolate spiders, and other creepy decorations to create a dessert that’s both festive and delicious.
This recipe makes 12 cupcakes, serving 4-6 people, and can easily be doubled for larger gatherings.
Ingredients:
- 1 cup all-purpose flour
- 1 cup granulated sugar
- 1/3 cup unsweetened cocoa powder
- 1/2 teaspoon baking soda
- 1/4 teaspoon baking powder
- 1/4 teaspoon salt
- 1/2 cup unsalted butter, melted
- 2 large eggs
- 1 teaspoon vanilla extract
- 1/2 cup buttermilk
- 1/2 cup hot water
- 1 cup dark chocolate chips
- 1 tub (16 oz) dark chocolate frosting
- Gummy worms, for decoration
- Chocolate spiders, for decoration (optional)
- Black and orange sprinkles, for decoration
Cooking Instructions:
- Preheat the Oven: Begin by preheating your oven to 350°F (175°C). Line a 12-cup muffin tin with paper cupcake liners.
- Mix Dry Ingredients: In a large bowl, whisk together the flour, sugar, cocoa powder, baking soda, baking powder, and salt until well combined.
- Blend Wet Ingredients: In a separate bowl, mix together the melted butter, eggs, and vanilla extract. Add the buttermilk and mix until smooth.
- Combine Mixtures: Gradually add the wet ingredients to the dry ingredients, stirring until just combined. Slowly pour in the hot water, mixing until the batter is smooth. Fold in the dark chocolate chips.
- Fill and Bake: Divide the batter evenly among the cupcake liners, filling each about two-thirds full. Bake in the preheated oven for 18-20 minutes, or until a toothpick inserted into the center of a cupcake comes out clean.
- Cool: Allow the cupcakes to cool in the pan for about 10 minutes, then transfer them to a wire rack to cool completely.
- Frost and Decorate: Once the cupcakes are completely cooled, frost them generously with the dark chocolate frosting. Decorate each cupcake with gummy worms and chocolate spiders, and sprinkle with black and orange sprinkles for an extra spooky touch.
Extra Tips:
For an even more eerie effect, consider using black cupcake liners and adding a few drops of black food coloring to the frosting for a darker hue.
If you can’t find chocolate spiders, you can easily make them by melting a bit of chocolate and piping it into spider shapes on parchment paper. Allow them to harden in the refrigerator before using as decoration.
Graveyard Taco Dip
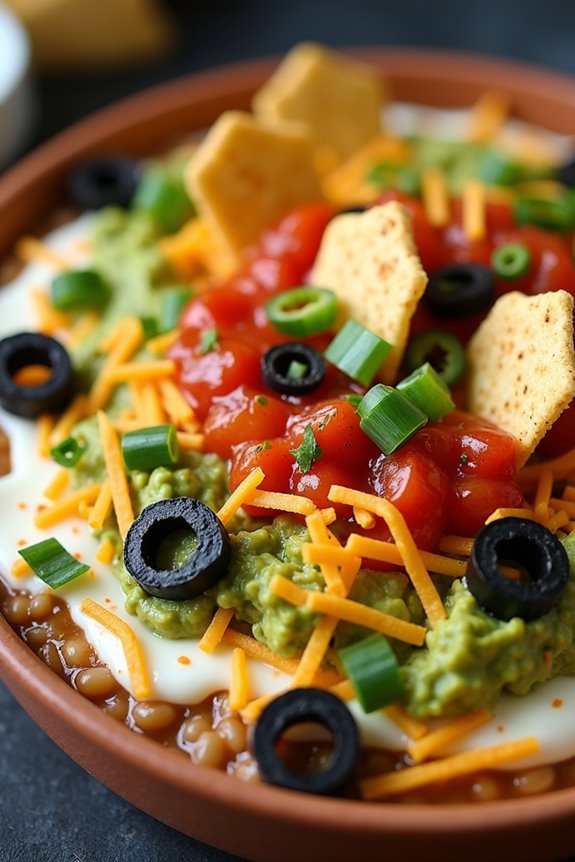
Graveyard Taco Dip is the perfect Halloween potluck dish that combines spooky fun with delectable flavors. This layered dip isn’t only visually impressive, resembling a graveyard scene, but is also packed with the classic Tex-Mex flavors that everyone loves.
It’s a great way to add a festive touch to your Halloween gathering while satisfying your guests’ appetites with its rich combination of beans, cheese, and fresh toppings. This dish is served cold, making it incredibly easy to prepare ahead of time and allowing you to focus on other party preparations.
The Graveyard Taco Dip serves 4-6 people, making it an ideal dish for small gatherings. It’s a versatile recipe that can be adjusted to suit vegetarian preferences or spiced up for those who enjoy a bit of heat. The final presentation, complete with “tombstone” tortilla chips, is a guaranteed conversation starter and will have everyone reaching for more.
Ingredients for 4-6 people:
- 1 can (16 oz) refried beans
- 1 packet (1 oz) taco seasoning mix
- 1 cup sour cream
- 1 cup guacamole
- 1 cup salsa
- 2 cups shredded cheddar cheese
- 1/2 cup sliced black olives
- 1/4 cup chopped green onions
- Tortilla chips (for “tombstones” and serving)
- Optional: diced tomatoes, jalapeños, and chopped cilantro for garnish
Cooking Instructions:
- Prepare the Beans: In a medium bowl, mix the refried beans with the taco seasoning until well combined. Spread this mixture evenly at the bottom of a 9×13 inch serving dish. This will form the first layer of your taco dip.
- Layer the Ingredients: Carefully spread the sour cream over the bean layer using a spatula to create a smooth surface. Follow this with a layer of guacamole, ensuring it covers the sour cream evenly. Next, pour the salsa over the guacamole, spreading it to the edges of the dish.
- Add the Cheese and Olives: Sprinkle the shredded cheddar cheese generously over the salsa layer. Evenly distribute the sliced black olives on top of the cheese, mimicking scattered graveyard stones.
- Garnish and Decorate: Sprinkle the chopped green onions over the dip for added flavor and color. If desired, add optional garnishes like diced tomatoes, jalapeños, and cilantro for extra flavor and a pop of color.
- Create Tombstone Chips: Using a sharp knife or cookie cutter, cut some tortilla chips into tombstone shapes. Carefully place them standing upright at intervals in the dip to resemble a spooky graveyard.
- Chill and Serve: Refrigerate the dip for at least an hour before serving to allow the flavors to meld together. Serve with additional tortilla chips on the side for dipping.
Extra Tips:
For an added festive touch, decorate the “tombstones” with edible markers to write spooky messages or names. You can also use Halloween cookie cutters to shape the tortilla chips into bats or ghosts.
If you’re looking to save time, use store-bought guacamole and salsa, but homemade versions will add a fresh, personalized touch to the dish. Confirm your dish is firm enough to hold the weight of the tortilla “tombstones” by chilling it adequately before serving.
Adjust the spiciness by choosing mild or hot salsa and customizing the amount of jalapeños used.
Ghoulish Guacamole
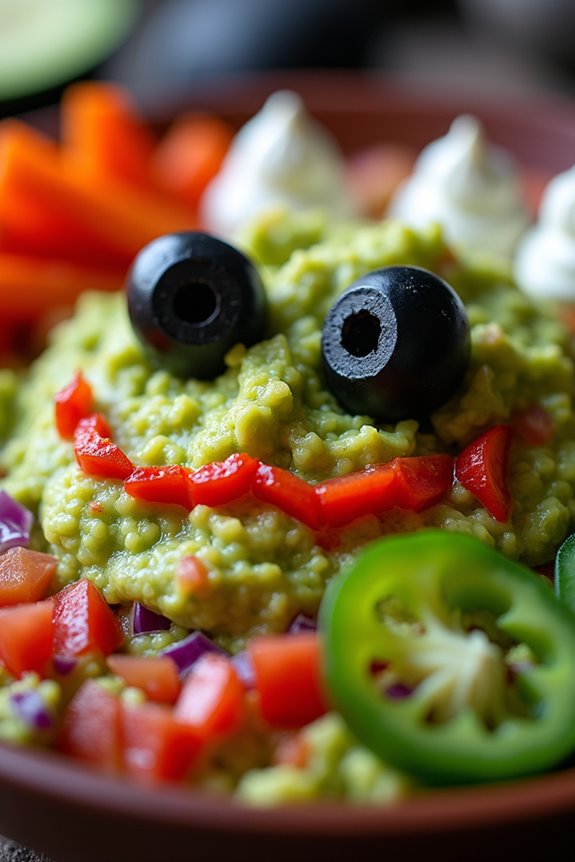
Transform your traditional guacamole into a hauntingly delicious dish perfect for a Halloween potluck. Ghoulish Guacamole isn’t just a tasty dip; it’s a spooky centerpiece that will capture the attention of all your guests. By incorporating a few creative decorations, you can turn an ordinary bowl of guacamole into an eerie delight that brings a fun twist to your Halloween spread.
This recipe serves 4-6 people, making it perfect for a small gathering. The creamy texture of ripe avocados combined with the zesty hints of lime and the fiery undertones from jalapeños will have your guests coming back for more. The addition of some creative garnishes will give your guacamole the perfect Halloween touch, guaranteeing it stands out on the potluck table.
Ingredients:
- 4 ripe avocados
- 1 medium tomato, diced
- 1/2 medium red onion, finely chopped
- 1-2 jalapeños, seeded and minced
- 2 tablespoons fresh lime juice
- Salt to taste
- Black olives, sliced (for decoration)
- Red bell pepper (for decoration)
- Sour cream (for decoration)
Instructions:
- Prepare the Avocados: Start by cutting the avocados in half and removing the pits. Scoop the flesh into a large bowl. Using a fork, mash the avocados until they reach your desired level of smoothness. Some prefer it chunky, while others like it smoother.
- Mix the Ingredients: Add the diced tomato, chopped red onion, and minced jalapeños to the mashed avocados. Pour in the lime juice and add salt to taste. Stir all the ingredients together until they’re well combined.
- Decorate the Guacamole: Transfer the guacamole to a shallow serving dish, spreading it out evenly. For a ghoulish effect, use the black olives to create eyes, and the red bell pepper strips to form a mouth or creepy scars. Add dollops of sour cream to create ghostly shapes or spiderweb designs.
- Chill: Cover the guacamole with plastic wrap, pressing it directly onto the surface to prevent browning. Chill in the refrigerator for at least 30 minutes to let the flavors meld together.
- Serve: Before serving, rearrange any decorations that may have shifted. Serve your Ghoulish Guacamole with tortilla chips or vegetable sticks, and watch your guests dig into this spooky delight.
Extra Tips:
To prevent your guacamole from turning brown, guarantee that the plastic wrap touches the entire surface of the guacamole. If you prefer a spicier dip, feel free to add more jalapeños or even a pinch of cayenne pepper.
When decorating, consider using cookie cutters for precise shapes with the red bell peppers or olives. If you’re in a rush and need to prepare in advance, the guacamole can be made a day ahead and stored in the refrigerator, with decorations added just before serving.
Bloody Pretzel Sticks
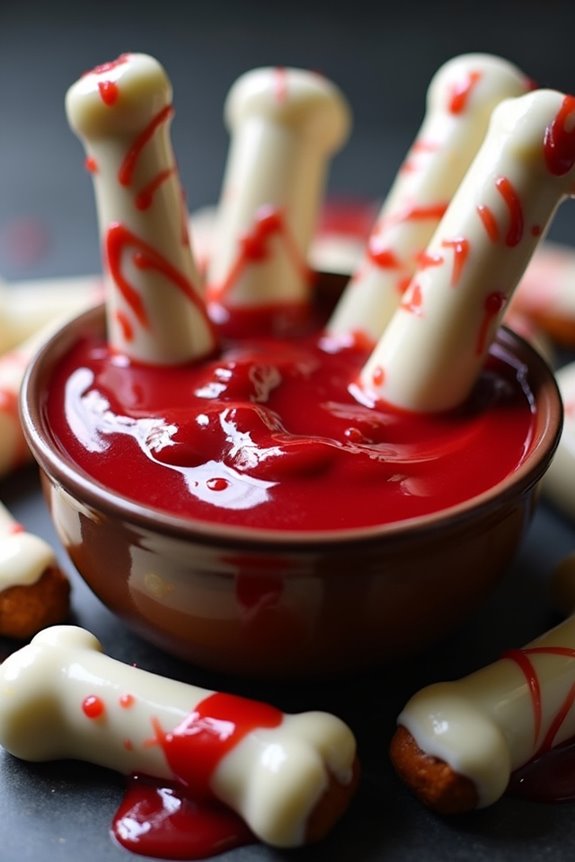
Indulge in the eerie charm of Halloween with these Bloody Pretzel Sticks, a spine-chilling yet delicious treat perfect for a potluck. These pretzel sticks aren’t only simple to make but also a fantastic option to bring a touch of spooky fun to your Halloween festivities.
The combination of salty pretzels with a sweet and tangy “bloody” dip will enchant both kids and adults at your gathering. The presentation of the Bloody Pretzel Sticks is what truly makes this dish stand out. By creating a bright red dipping sauce and using white chocolate to coat the pretzels, you mimic the look of bones with blood, adding a gory yet playful touch to your Halloween spread.
Serve them as an appetizer or a snack, and watch as your guests are drawn to their creepy allure.
Ingredients for 4-6 People:
- 24 pretzel sticks
- 1 cup white chocolate chips
- 1 tablespoon coconut oil
- 1 cup strawberry or raspberry jam
- Red food coloring
Cooking Instructions:
1. Prepare the Pretzel Coating: Begin by melting the white chocolate chips in a microwave-safe bowl. Heat them in 30-second intervals, stirring after each, until the chocolate is fully melted and smooth.
Add the coconut oil to the melted chocolate and stir until well combined. The oil helps the chocolate to set with a shiny finish.
2. Coat the Pretzels: Dip each pretzel stick into the melted white chocolate, covering about two-thirds of the stick. Allow any excess chocolate to drip off, then place the coated pretzels on a parchment-lined baking sheet.
Leave them to set for about 15 minutes, or until the chocolate hardens completely.
3. Prepare the Bloody Dip: In a small saucepan, heat the strawberry or raspberry jam over low heat until it becomes more liquid. If desired, add a few drops of red food coloring to enhance the “bloody” look.
Stir the mixture until it’s smooth and well-combined. Remove from heat and let it cool slightly.
4. Presentation: Pour the bloody dip into a serving bowl and arrange the white chocolate-coated pretzels around it. For added effect, you can drizzle some of the “blood” over the pretzels for a more dramatic look.
Extra Tips:
When working with white chocolate, be sure to melt it slowly to avoid burning, as white chocolate can scorch easily. If you prefer a less sweet option, consider using dark chocolate, which offers a nice contrast to the sweet jam.
To keep the pretzels fresh and crunchy, store them in an airtight container if you plan to prepare them in advance. Adjust the food coloring to achieve your desired level of “bloodiness” for the dipping sauce.
These Bloody Pretzel Sticks are perfect for adding a touch of whimsy and fright to any Halloween table. Enjoy!
Vampire Bat Wings
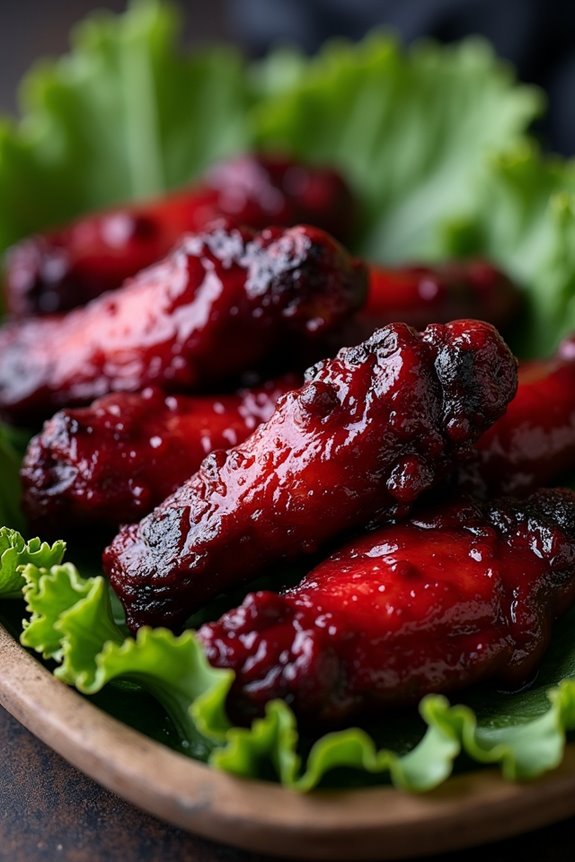
Get ready to spook and delight your Halloween potluck guests with these delicious Vampire Bat Wings! Inspired by the dark and mysterious creatures of the night, these wings are coated in a rich, smoky sauce that gives them a sinister appearance while packing a punch of flavor. Perfect as a party appetizer or a main dish, these wings will be the highlight of your Halloween spread.
The deep red color is achieved through the use of rich spices and a hint of beet juice, giving the wings an eerie yet tantalizing look that’s sure to impress. The Vampire Bat Wings aren’t only visually striking but are also incredibly easy to prepare. With a perfect balance of sweet, savory, and spicy, they cater to a variety of palates.
This recipe serves 4-6 people, making it an ideal choice for a small gathering. Whether you’re hosting a Halloween bash or attending a potluck, these wings provide a fun and festive twist on a classic favorite. So, roll up your sleeves and get ready to sink your teeth into these devilishly delicious wings!
Ingredients:
- 2 lbs chicken wings
- 1 cup ketchup
- 1/4 cup soy sauce
- 1/4 cup honey
- 2 tablespoons Worcestershire sauce
- 1 tablespoon smoked paprika
- 1 tablespoon garlic powder
- 1 teaspoon onion powder
- 1 teaspoon ground black pepper
- 1/2 teaspoon cayenne pepper
- 1 tablespoon beet juice (for color)
- 1 tablespoon olive oil
Cooking Instructions:
- Preheat the Oven: Preheat your oven to 400°F (200°C). Line a baking sheet with aluminum foil and lightly grease it with olive oil to prevent sticking.
- Prepare the Wings: Rinse the chicken wings under cold water and pat them dry with paper towels. Place the wings in a large mixing bowl.
- Make the Sauce: In another bowl, mix together the ketchup, soy sauce, honey, Worcestershire sauce, smoked paprika, garlic powder, onion powder, black pepper, cayenne pepper, and beet juice. Stir until well combined and you achieve a smooth consistency.
- Coat the Wings: Pour the sauce over the chicken wings in the mixing bowl. Toss the wings until they’re fully coated in the sauce, ensuring each wing is evenly covered.
- Arrange on Baking Sheet: Place the coated wings on the prepared baking sheet in a single layer, making sure they aren’t overcrowded to allow for even cooking.
- Bake: Place the baking sheet in the preheated oven and bake for 35-40 minutes, turning the wings halfway through, until they’re fully cooked and have a nice caramelized color.
- Serve: Remove the Vampire Bat Wings from the oven and let them rest for a few minutes before serving. Enjoy them hot with your choice of dipping sauce or on their own.
Extra Tips:
For an extra crispy texture, you can broil the wings for an additional 2-3 minutes after baking. Keep a close watch to prevent burning. If you prefer a milder spice level, reduce or omit the cayenne pepper.
Feel free to adjust the sweetness by adding more or less honey according to your taste. To make the wings even more eerie, serve them on a platter lined with fresh kale or lettuce for a striking presentation. Enjoy your Vampire Bat Wings as a frightfully fun addition to your Halloween festivities!
Haunted Haystack Cookies
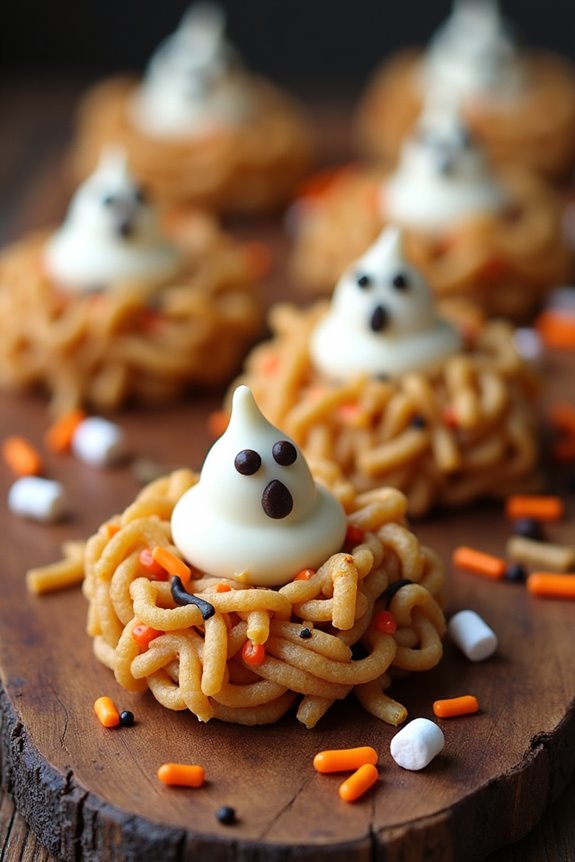
Halloween is the perfect time to get creative with treats that are both delicious and spooky. Haunted Haystack Cookies are a fun twist on the classic no-bake haystack cookies, with an eerie touch perfect for your Halloween potluck. These cookies combine the savory crunch of chow mein noodles with the sweetness of butterscotch chips and peanut butter, all transformed into a spooky treat with the addition of ghostly decorations.
Easy to make and even easier to eat, these cookies are sure to be a hit with both kids and adults alike. The beauty of Haunted Haystack Cookies lies in their simplicity and versatility. With minimal ingredients and no baking required, you can whip these up in no time.
You can customize them with your favorite Halloween-themed candies or sprinkles to add an extra layer of fun. Whether you’re hosting a spooky gathering or attending a Halloween potluck, these cookies are the perfect eerie addition to your treat table. Let’s explore how to make a batch for 4-6 people.
Ingredients:
- 2 cups chow mein noodles
- 1 cup butterscotch chips
- 1/2 cup creamy peanut butter
- 1/2 cup mini marshmallows
- 1/4 cup Halloween-themed sprinkles
- 1/2 cup white chocolate chips (for ghost decorations)
- Candy eyes or small chocolate chips (for ghost faces)
Cooking Instructions:
- Prepare the Work Area: Line a baking sheet with parchment paper. This will be where you place your cookies to set after assembling them.
- Melt the Butterscotch and Peanut Butter: In a medium-sized microwave-safe bowl, combine the butterscotch chips and peanut butter. Microwave in 30-second intervals, stirring in between, until the mixture is smooth and fully melted.
- Mix the Ingredients Together: Once the butterscotch mixture is smooth, add the chow mein noodles and mini marshmallows. Stir gently until all ingredients are well coated with the butterscotch mixture.
- Form the Cookies: Using a tablespoon, scoop portions of the mixture onto the prepared parchment paper, creating small haystack shapes. Leave some space between each cookie to prevent them from sticking together.
- Decorate the Haystacks: While the haystacks are still wet, sprinkle the Halloween-themed sprinkles over them.
- Create the Ghost Decorations: Melt the white chocolate chips in a small microwave-safe bowl, stirring until smooth. Use a spoon or a piping bag to create small ghost shapes on the parchment paper. Place candy eyes or small chocolate chips on the ghosts to create faces.
- Attach the Ghosts: Carefully place a white chocolate ghost on top of each haystack, pressing gently so they adhere to the cookie.
- Set and Cool: Allow the cookies to cool and set at room temperature for about 30 minutes, or until the butterscotch mixture has hardened.
Extra Tips:
To make the process even smoother, prepare all your ingredients and decorations before you start melting the butterscotch and peanut butter. This way, you can work quickly while the mixture is still warm and pliable.
If you want to add a bit more color or flavor, consider mixing in some pretzel sticks or colored candy melts. Remember to store any leftover cookies in an airtight container to keep them fresh and crunchy. Enjoy your eerie and tasty Haunted Haystack Cookies!
Frankenstein Rice Krispie Treats
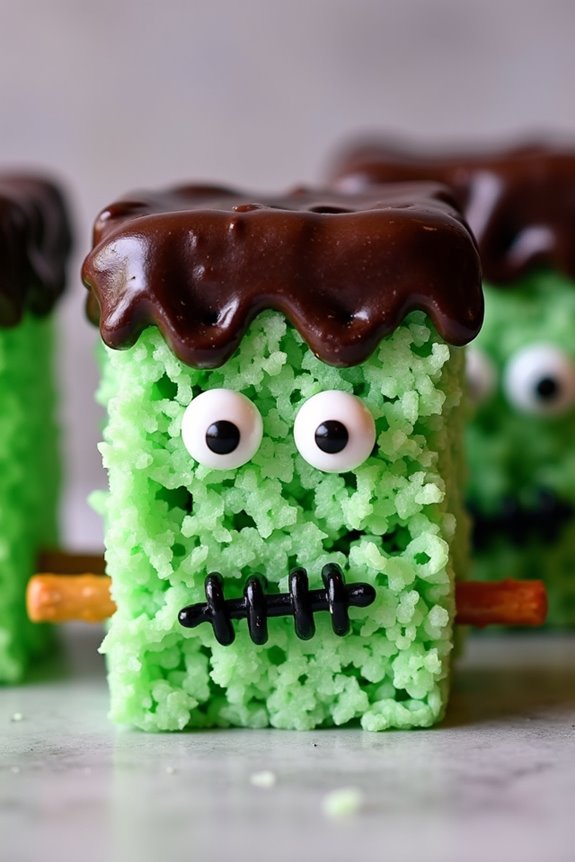
Frankenstein Rice Krispie Treats are a fun and festive way to celebrate the Halloween season. These delightful treats combine the classic, beloved taste of Rice Krispie squares with a spooky twist, turning them into miniature Frankensteins that will charm both kids and adults at any Halloween potluck.
With their bright green color, chocolate hair, and candy eyes, these treats are as much a feast for the eyes as they’re for the taste buds. Whether you’re hosting a party or simply want to surprise your family with a special dessert, these Frankenstein Rice Krispie Treats are bound to be a hit.
The recipe is simple and quick, making it perfect for a last-minute addition to your Halloween spread. The ingredients are basic and likely already in your pantry, and the decorating aspect is where the creativity and Halloween spirit come alive.
With a little food coloring and some candy embellishments, you can transform a plain snack into something extraordinary. These treats are designed for a serving size of 4-6 people, making them ideal for smaller gatherings or personal indulgence.
Ingredients (Serves 4-6)
- 4 cups Rice Krispies cereal
- 3 tablespoons unsalted butter
- 1 package (10 oz) mini marshmallows
- Green food coloring
- 1 cup semi-sweet chocolate chips
- Candy eyes
- Black decorating gel
- Small pretzel sticks
Cooking Instructions
- Prepare the Base: In a large saucepan, melt the butter over low heat. Once melted, add the mini marshmallows and stir continuously until they’re completely melted and the mixture is smooth.
- Color the Mixture: Remove the saucepan from the heat and add green food coloring to the melted marshmallow mixture. Stir well until you achieve the desired shade of Frankenstein green.
- Mix with Cereal: Quickly add the Rice Krispies cereal to the green marshmallow mixture. Stir until all the cereal is well-coated with the green marshmallow.
- Shape the Treats: Grease a 9×13-inch baking dish and press the mixture into the dish evenly. Allow it to cool slightly, then cut into rectangles to form the body of Frankenstein.
- Create Frankenstein’s Hair: In a microwave-safe bowl, melt the chocolate chips in 30-second intervals, stirring after each until smooth. Dip one end of each rectangle into the melted chocolate to form Frankenstein’s hair. Let the chocolate set.
- Decorate the Faces: Use candy eyes to give your Frankensteins some character by pressing them gently onto the green section just below the chocolate hair. Use the black decorating gel to draw a mouth and other facial features as desired.
- Add Bolts: Break pretzel sticks in half and insert them into the sides of the rectangles to resemble Frankenstein’s bolts.
Extra Tips
To guarantee your Frankenstein Rice Krispie Treats come out perfect, work quickly when mixing the cereal with the marshmallow mixture to prevent it from hardening before fully combined.
If the mixture becomes too sticky, lightly butter your hands or spatula to help press the mixture into the baking dish. For a more vibrant green color, start with a small amount of food coloring and gradually add more until you reach the desired hue.
These treats are best enjoyed fresh, but they can be stored in an airtight container for a couple of days if needed.
Skeleton Veggie Platter
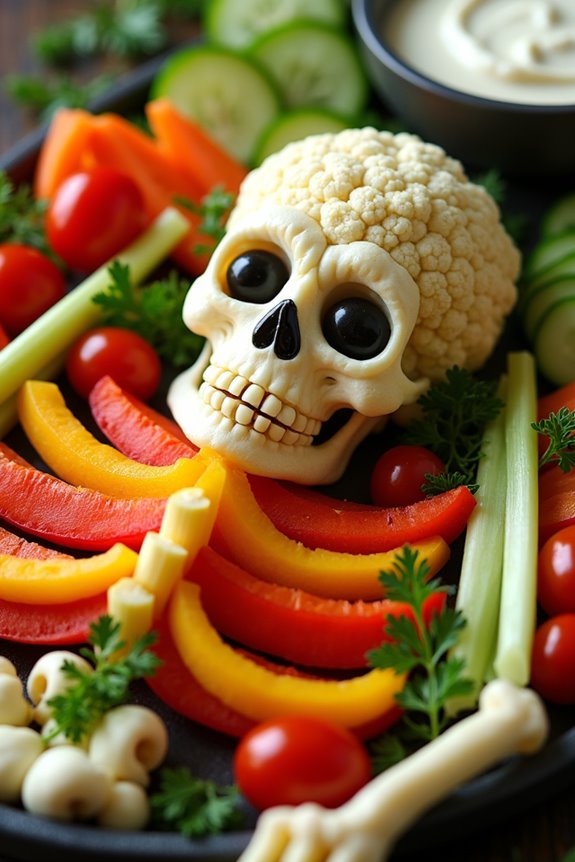
A Skeleton Veggie Platter is a fun and healthy option for any Halloween potluck. Not only does it provide a colorful array of vegetables, but it also adds a bit of spooky fun to your table spread. This platter is arranged to resemble a skeleton, with different vegetables representing different parts of the body. It’s a great way to promote kids and adults alike to munch on some healthy snacks while enjoying the festive spirit of Halloween.
Creating this platter isn’t only simple but also allows for creativity. You can customize the choice of vegetables based on what you have available or what your guests prefer. The key is to use a variety of colors and shapes to make the skeleton come to life on the platter. It’s perfect for serving 4-6 people, making it an ideal choice for a small gathering.
Ingredients for 4-6 servings:
- 1 large head of cauliflower
- 2 red bell peppers
- 1 yellow bell pepper
- 1 cucumber
- 1 bunch of celery
- 1 pint cherry tomatoes
- 1 cup baby carrots
- 1 cup black olives
- 1 small bunch of parsley
- 1 cup of your favorite vegetable dip
Instructions:
- Prepare the Platter Base:
- Begin by washing all the vegetables thoroughly and patting them dry. This guarantees they stay fresh and crisp.
- Create the Skeleton Head:
- Cut the cauliflower into florets. Arrange them in an oval shape at the top of the platter to form the skeleton’s skull. Use a few black olives to make the eyes and nose holes.
- Form the Skeleton Body:
- Slice the red and yellow bell peppers into strips. Use these strips to create the ribcage by placing them below the cauliflower skull in a row formation.
- Design the Arms and Legs:
- For the arms, use celery sticks. Arrange them extending from the ribcage on each side.
- For the legs, use baby carrots. Place them extending downward from the bottom of the ribcage.
- Add the Hands and Feet:
- Use cherry tomatoes for the hands and feet. Arrange three to four tomatoes at the end of each celery arm and carrot leg.
- Decorate with Additional Vegetables:
- Slice the cucumber into rounds and layer them along the sides of the platter.
- Sprinkle parsley around the platter for an added touch of green and freshness.
- Serve with Dip:
- Place a small bowl of your favorite vegetable dip near the platter for easy access.
Extra Tips:
To make the Skeleton Veggie Platter even more appealing, consider using a variety of colorful vegetables, such as purple cauliflower or orange bell peppers, to give it a unique twist.
For added detail, use a small knife to carve some of the vegetables into fun shapes. Make sure the dip is thick enough to hold the vegetables when dipped. You can also provide toothpicks to make it easier for guests to pick up the vegetables.
This dish is best served cold, so prepare it just before your guests arrive or keep it refrigerated until it’s time to serve.
Zombie Finger Breadsticks

Zombie Finger Breadsticks are a spooky and delicious addition to any Halloween potluck. These eerie treats aren’t only fun to make but also a delight to eat, providing a crunchy and flavorful experience that resembles a severed zombie finger. The perfect blend of crispy breadstick and savory flavoring, these breadsticks are sure to be a hit among guests of all ages.
Whether you’re hosting a Halloween party or attending one, these breadsticks will certainly add a ghoulish charm to the food table.
The process of making Zombie Finger Breadsticks is straightforward and enjoyable, allowing for creativity in shaping and decorating each breadstick to resemble a ghastly zombie finger. Using simple ingredients that are likely already in your pantry, you can whip up a batch of these spooky snacks in no time.
Once baked to perfection, the breadsticks can be served warm or at room temperature, making them a versatile dish for any Halloween gathering.
Ingredients for Zombie Finger Breadsticks (Serves 4-6):
- 1 can (13.8 oz) refrigerated pizza dough
- 3 tablespoons butter, melted
- 1 teaspoon garlic powder
- 1 teaspoon dried oregano
- 1 teaspoon dried rosemary
- 24 sliced almonds (for fingernails)
- Red food coloring or ketchup (optional, for blood effect)
- Salt, to taste
Instructions:
- Preheat the Oven: Begin by preheating your oven to 375°F (190°C). Line a baking sheet with parchment paper to prevent the breadsticks from sticking.
- Prepare the Dough: Roll out the refrigerated pizza dough on a lightly floured surface to about 1/4-inch thickness. Using a knife or pizza cutter, slice the dough into strips, approximately 1/2 inch wide and 5 inches long.
- Shape the Fingers: Take each strip and roll it slightly between your hands to round out the edges. Pinch one end of each strip to form a tapered fingertip, resembling a finger. Use the back of a knife to make small indentations to mimic knuckles.
- Add the Ingredients: In a small bowl, combine the melted butter, garlic powder, oregano, and rosemary. Brush the mixture generously over each breadstick. Press a sliced almond into the tip of each breadstick to create a fingernail.
- Bake the Breadsticks: Place the breadsticks on the prepared baking sheet. Bake in the preheated oven for 12-15 minutes, or until golden brown and crisp.
- Create the Bloody Effect: If desired, use a toothpick to apply a small amount of red food coloring or ketchup around the almond for a bloody effect, enhancing the spooky appearance.
- Season and Serve: Once baked, remove the breadsticks from the oven and sprinkle lightly with salt while still warm. Allow them to cool slightly before serving.
Extra Tips:
For an added layer of flavor, consider mixing a small amount of Parmesan cheese into the butter mixture before brushing it onto the breadsticks. This will give the breadsticks a cheesy undertone that complements the herbs beautifully.
Additionally, if you’re preparing these ahead of time for a party, you can reheat them in the oven at a low temperature for a few minutes before serving to maintain their crispness. Don’t be afraid to get creative with the shape and size of the fingers to add variety and a more authentic look to your batch of Zombie Finger Breadsticks.