

There’s something magical about baking in the farmhouse kitchen during Christmas. The scent of apple cinnamon pie wafting through the house brings such a comforting feel. I’m excited to share these delightful farmhouse Christmas baking ideas with you. From gingerbread men to spiced molasses cookies, each treat has its own special touch. Get ready to enjoy the coziness of warm scones on a chilly morning.
Rustic Apple Cinnamon Pie
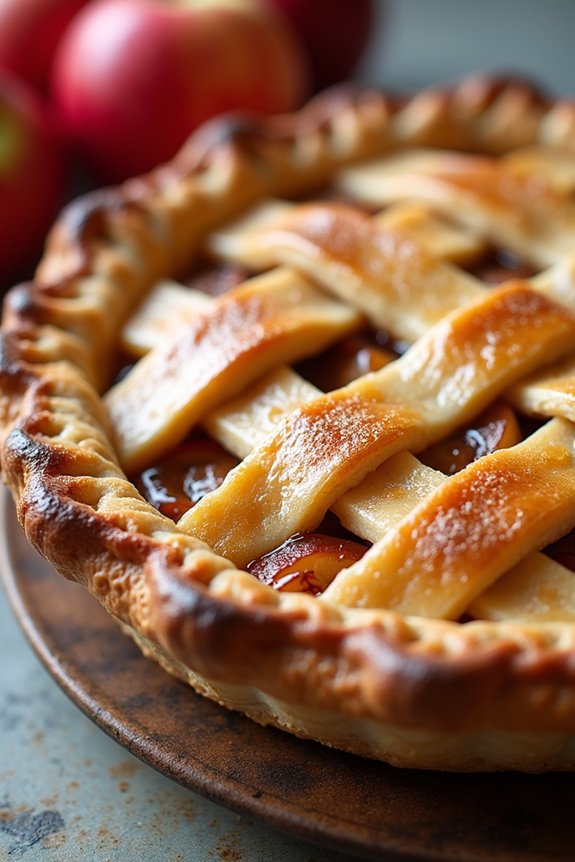
Embrace the cozy warmth of the holiday season with a delightful Rustic Apple Cinnamon Pie. This farmhouse-style pie encapsulates the essence of Christmas with its rich flavors and charming appearance. The aroma of freshly baked apples and cinnamon will fill your kitchen, creating a festive atmosphere that’s perfect for gathering loved ones.
The rustic nature of this pie means it’s not only delicious but also accommodating in its presentation, allowing for a homemade touch that speaks of comfort and tradition. This pie is made with tender, juicy apples, enveloped in a cinnamon-spiced filling, all encased in a flaky, buttery crust. Its rustic charm comes from its simple yet satisfying design, making it an ideal dessert for any Christmas celebration.
Whether you’re an experienced baker or a novice, this pie is straightforward to prepare and will surely become a family favorite. Serve it warm with a scoop of vanilla ice cream for an indulgent treat.
Ingredients (Serves 4-6)
- 5 cups of peeled and sliced apples (use a mix of tart and sweet varieties)
- 3/4 cup granulated sugar
- 2 tablespoons all-purpose flour
- 1 teaspoon ground cinnamon
- 1/4 teaspoon ground nutmeg
- 1 tablespoon lemon juice
- 1/2 teaspoon vanilla extract
- 1 tablespoon unsalted butter, cut into small pieces
- 1 package of refrigerated pie crusts (or homemade if preferred)
- 1 egg, beaten
- 1 tablespoon coarse sugar (optional, for topping)
Instructions
- Preheat Oven: Begin by preheating your oven to 425°F (220°C) to guarantee it’s hot and ready when your pie is assembled and ready to bake.
- Prepare the Filling: In a large mixing bowl, combine the sliced apples, granulated sugar, flour, cinnamon, nutmeg, lemon juice, and vanilla extract. Toss the ingredients together until the apples are well coated and the mixture is evenly distributed.
- Prepare the Crust: Roll out one of the pie crusts and fit it into a 9-inch pie dish, pressing it gently against the sides and bottom. Trim any excess dough hanging over the edges.
- Fill the Pie: Pour the apple mixture into the prepared pie crust, spreading it out evenly. Dot the filling with small pieces of butter to add richness to the pie.
- Top the Pie: Roll out the second pie crust and place it over the apples. Trim the excess dough and crimp the edges of the crusts together to seal. Make several small slits in the top crust to allow steam to escape during baking.
- Add the Finishing Touches: Brush the top crust with the beaten egg to give it a golden sheen. If desired, sprinkle coarse sugar over the top for added texture and sweetness.
- Bake: Place the pie on the middle rack of the preheated oven. Bake for 45-50 minutes, or until the crust is golden brown and the filling is bubbly. If the edges of the crust begin to brown too quickly, cover them with strips of aluminum foil.
- Cool: Once baked, remove the pie from the oven and allow it to cool on a wire rack for at least 2 hours to set. This will make slicing easier.
Extra Tips
For best results, use a combination of apple varieties to achieve a balance of tart and sweet flavors. Granny Smith and Honeycrisp apples work well together.
If you prefer a slightly thicker filling, increase the flour by an additional tablespoon. To guarantee the bottom crust is perfectly cooked and not soggy, place the pie on a lower oven rack and consider using a glass or metal pie dish for even heat distribution.
Classic Gingerbread Men
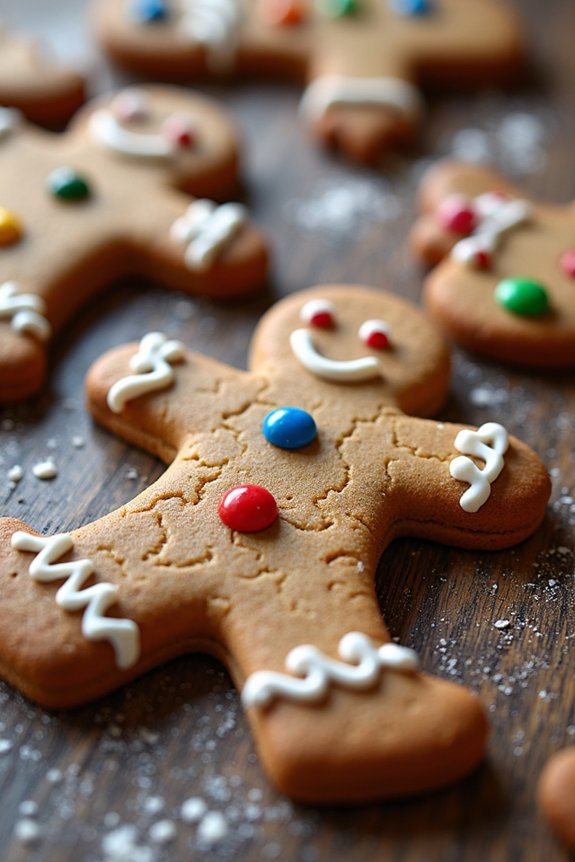
Gingerbread men are a quintessential part of Christmas baking, bringing a touch of nostalgia and warmth to the holiday season. Their spicy aroma and the fun of decorating them make these cookies a delightful family activity.
These classic gingerbread men aren’t only delicious but also perfect for gifting or hanging on your Christmas tree as edible ornaments. Made from a combination of warming spices like ginger, cinnamon, and cloves, these cookies are sure to be a hit with both kids and adults alike.
Creating gingerbread men is a fun and creative way to get into the holiday spirit. The dough is easy to work with, allowing you to cut out various shapes and sizes. Once baked, these cookies are ready for decoration with royal icing, candies, or any other toppings you fancy.
Whether you’re an experienced baker or a novice, this recipe is simple yet rewarding, and it brings the joy of Christmas to your kitchen.
Ingredients (Serves 4-6 people):
- 3 cups all-purpose flour
- 3/4 teaspoon baking soda
- 1 tablespoon ground ginger
- 1 tablespoon ground cinnamon
- 1/2 teaspoon ground cloves
- 1/2 teaspoon salt
- 1/4 teaspoon finely ground black pepper
- 1/2 cup unsalted butter, softened
- 1/2 cup packed dark-brown sugar
- 1 large egg
- 1/2 cup unsulfured molasses
- 2 teaspoons pure vanilla extract
- Royal icing and assorted candies for decorating
Cooking Instructions:
- Prepare the Dry Ingredients: In a medium bowl, whisk together the all-purpose flour, baking soda, ground ginger, ground cinnamon, ground cloves, salt, and black pepper. Set aside.
- Mix the Wet Ingredients: In a large bowl, beat the unsalted butter and dark-brown sugar together with an electric mixer on medium speed until light and fluffy, about 3 minutes. Add the egg, molasses, and vanilla extract, and mix until well combined.
- Combine Wet and Dry Ingredients: Gradually add the dry ingredients to the wet mixture, mixing on low speed until just combined and the dough begins to pull away from the sides of the bowl.
- Chill the Dough: Divide the dough into two discs, wrap each in plastic wrap, and refrigerate for at least 1 hour or until firm. This helps the dough hold its shape when cutting out the cookies.
- Preheat the Oven: Preheat your oven to 350°F (175°C). Line two baking sheets with parchment paper.
- Roll and Cut the Dough: On a lightly floured surface, roll out one disc of dough to about 1/4-inch thickness. Use gingerbread men cookie cutters to cut out shapes. Transfer the cutouts to the prepared baking sheets, leaving about 1 inch between each cookie.
- Bake the Cookies: Bake in the preheated oven for 8-10 minutes, or until the edges are firm and the centers are set. Be careful not to overbake, as they’ll continue to firm up as they cool.
- Cool and Decorate: Allow the cookies to cool on the baking sheets for 5 minutes before transferring to a wire rack to cool completely. Once cooled, decorate with royal icing and assorted candies as desired.
Extra Tips:
For the best results, make sure to chill your dough thoroughly before rolling it out; this prevents spreading during baking. If you find your dough sticking when rolling, lightly flour your rolling pin and surface.
When decorating, use a small piping bag or a squeeze bottle for more precise icing designs. Store your gingerbread men in an airtight container at room temperature for up to a week, or freeze for longer storage. Enjoy the process and have fun with the decorations, making each gingerbread man unique!
Old-Fashioned Sugar Cookies
Old-Fashioned Sugar Cookies are a delightful treat that encapsulate the warmth and charm of farmhouse Christmas traditions. These cookies are perfect for a cozy family gathering or as a sweet gift to share with friends. With their crisp edges and soft centers, these sugar cookies are versatile enough to be enjoyed plain, dusted with sugar, or decorated with your favorite icing and sprinkles.
The nostalgic flavor of these cookies comes from a combination of simple ingredients that many bakers may already have in their pantry. This recipe yields approximately 24 cookies, making it ideal for serving a group of 4-6 people. Whether you’re a seasoned baker or new to the art of cookie making, this recipe is straightforward and rewarding, producing cookies that are certain to become a cherished holiday tradition.
Ingredients for Old-Fashioned Sugar Cookies (Serves 4-6):
- 2 3/4 cups all-purpose flour
- 1 teaspoon baking soda
- 1/2 teaspoon baking powder
- 1 cup unsalted butter, softened
- 1 1/2 cups granulated sugar
- 1 large egg
- 1 teaspoon vanilla extract
- 1/2 teaspoon almond extract (optional)
- 3 tablespoons milk
- Additional sugar for rolling
Cooking Instructions:
- Preheat the Oven: Begin by preheating your oven to 375°F (190°C). Line two baking sheets with parchment paper or silicone baking mats to prevent the cookies from sticking.
- Mix Dry Ingredients: In a medium-sized bowl, whisk together the flour, baking soda, and baking powder. This helps to evenly distribute the leavening agents throughout the flour.
- Cream Butter and Sugar: In a large mixing bowl, beat the softened butter and granulated sugar together with an electric mixer on medium speed until light and fluffy, about 2-3 minutes. This will incorporate air into the mixture, giving the cookies a tender texture.
- Add Wet Ingredients: Beat in the egg, vanilla extract, and almond extract (if using) until well combined. Follow with the milk, mixing until smooth.
- Combine Ingredients: Gradually add the dry ingredients to the wet mixture, stirring just until the dough comes together. Avoid overmixing to prevent tough cookies.
- Shape Cookies: Roll the dough into tablespoon-sized balls, then roll each ball in additional granulated sugar. Place the balls onto the prepared baking sheets, leaving about 2 inches of space between each one to allow for spreading.
- Bake: Bake the cookies in the preheated oven for 8-10 minutes, or until the edges are lightly golden. The centers should look slightly underbaked; they’ll continue to set as they cool.
- Cool: Remove the cookies from the oven and allow them to cool on the baking sheets for 5 minutes before transferring them to a wire rack to cool completely.
Extra Tips:
To guarantee your Old-Fashioned Sugar Cookies have the perfect texture, make sure your butter is softened to room temperature before starting. This allows for easier creaming with the sugar.
If you like your cookies with a bit of sparkle, sprinkle a little extra sugar on top right before baking. For a festive touch, consider using colored sugar or decorating the cookies with royal icing once they’ve cooled completely.
Spiced Molasses Cookies
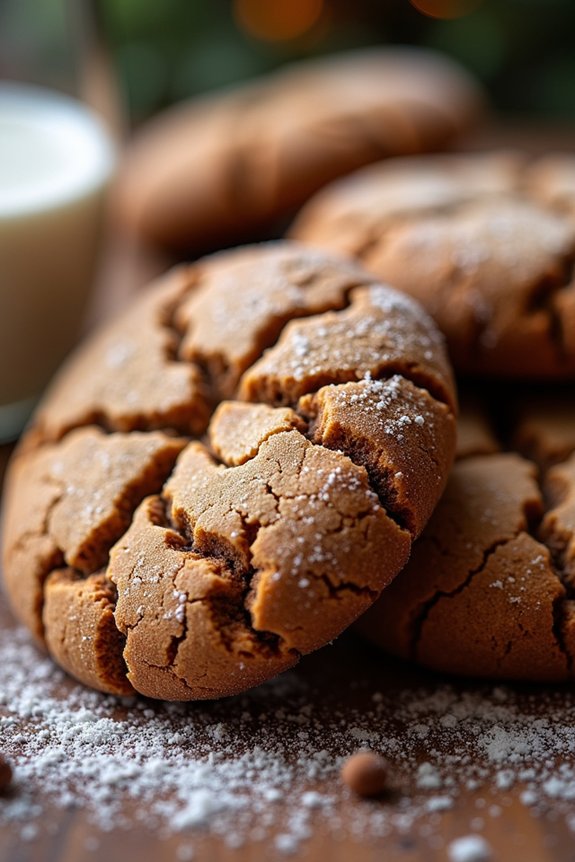
Nothing says farmhouse Christmas quite like the warm, inviting aroma of freshly baked Spiced Molasses Cookies wafting through the kitchen. These cookies, rich with the deep flavors of molasses and a cozy blend of spices, are perfect for sharing with family and friends during the holiday season.
With their soft, chewy centers and slightly crisp edges, they offer a delightful contrast that makes them hard to resist. Perfect for enjoying with a mug of hot cocoa or a glass of milk, these cookies are sure to become a holiday favorite.
The magic of these cookies lies in their simplicity and the balance of spices that evoke holiday warmth. The combination of cinnamon, ginger, cloves, and nutmeg creates a symphony of flavors that enhance the rich sweetness of molasses, bringing out its full-bodied taste.
Whether you’re an experienced baker or a novice in the kitchen, following this recipe will yield 4-6 servings of deliciously spiced cookies that will make your holiday gatherings even more memorable.
Ingredients (Serves 4-6):
- 2 1/4 cups all-purpose flour
- 2 teaspoons baking soda
- 1/2 teaspoon salt
- 1 teaspoon ground cinnamon
- 1 teaspoon ground ginger
- 1/2 teaspoon ground cloves
- 1/4 teaspoon ground nutmeg
- 3/4 cup unsalted butter, softened
- 1 cup dark brown sugar, packed
- 1 large egg
- 1/4 cup molasses
- 1 teaspoon vanilla extract
- 1/4 cup granulated sugar (for rolling)
Cooking Instructions:
- Preheat the Oven: Start by preheating your oven to 350°F (175°C) and line two baking sheets with parchment paper to guarantee the cookies bake evenly and don’t stick.
- Mix Dry Ingredients: In a medium bowl, whisk together the all-purpose flour, baking soda, salt, cinnamon, ginger, cloves, and nutmeg. This guarantees that the spices are evenly distributed throughout the dough.
- Cream Butter and Sugar: In a large mixing bowl, beat the softened butter and dark brown sugar together with an electric mixer on medium speed until light and fluffy, about 3 minutes. This step is essential for the texture of the cookies.
- Add Wet Ingredients: Add the egg, molasses, and vanilla extract to the butter-sugar mixture. Beat until well combined, scraping down the sides of the bowl as needed to guarantee everything is evenly incorporated.
- Combine Dry and Wet Ingredients: Gradually add the dry ingredients to the wet mixture, mixing on low speed until just combined. Be careful not to over-mix, as this can make the cookies tough.
- Shape the Cookies: Using a tablespoon, scoop the dough and roll it into balls. Then, roll each ball in granulated sugar to coat it evenly. This adds a lovely crunch to the exterior once baked.
- Bake: Place the dough balls on the prepared baking sheets, spacing them about 2 inches apart. Bake in the preheated oven for 10-12 minutes, or until the edges are set and the tops are just beginning to crack.
- Cool the Cookies: Remove from the oven and allow the cookies to cool on the baking sheets for about 5 minutes before transferring them to a wire rack to cool completely. This step helps them firm up and develop their chewy texture.
Extra Tips:
To enhance the flavor and aroma of your Spiced Molasses Cookies, consider letting the dough rest in the refrigerator for at least an hour before shaping and baking. This allows the spices to meld and the dough to firm up, making it easier to handle.
If you prefer a slightly crispier cookie, simply bake them a couple of minutes longer. For an added festive touch, drizzle a simple icing made of powdered sugar and milk over the cooled cookies or sprinkle with sparkling sugar before baking.
Enjoy these cookies fresh, or store them in an airtight container for up to a week to maintain their freshness.
Cranberry Orange Scones

Cranberry Orange Scones are a delightful farmhouse Christmas baking treat that perfectly combines the tartness of cranberries with the fresh, zesty flavor of oranges. These scones are an ideal addition to your holiday breakfast or brunch table, offering a warm and inviting aroma that fills your kitchen with the spirit of Christmas.
Tender and flaky, these scones are best enjoyed fresh from the oven, with a cup of hot tea or coffee to complement their rich flavors. This recipe yields a serving size of 4-6 people, perfect for a small gathering or family breakfast. The scones are made using simple ingredients, yet they deliver a burst of flavor that’s both comforting and festive.
With a golden crust and a moist interior dotted with cranberries, these scones are a must-try for any holiday baking enthusiast. Follow the steps below to create a batch of these delicious Cranberry Orange Scones.
Ingredients (serving size: 4-6 people):
- 2 cups all-purpose flour
- 1/3 cup granulated sugar
- 1 tablespoon baking powder
- 1/2 teaspoon salt
- 1/2 cup unsalted butter, cold and cubed
- 1/2 cup dried cranberries
- Zest of 1 large orange
- 1/2 cup heavy cream
- 1 large egg
- 1 teaspoon vanilla extract
- 2 tablespoons orange juice
- Extra sugar for sprinkling (optional)
Instructions:
- Preheat Oven: Preheat your oven to 400°F (200°C) and line a baking sheet with parchment paper.
- Mix Dry Ingredients: In a large bowl, whisk together the flour, sugar, baking powder, and salt. This guarantees that all the dry ingredients are evenly distributed.
- Cut in Butter: Add the cold, cubed butter to the flour mixture. Using a pastry cutter or your fingertips, cut the butter into the flour until the mixture resembles coarse crumbs.
- Add Cranberries and Zest: Stir in the dried cranberries and orange zest, distributing them evenly throughout the flour and butter mixture.
- Prepare Wet Ingredients: In a separate bowl, whisk together the heavy cream, egg, vanilla extract, and orange juice until well combined.
- Combine Mixtures: Gradually add the wet ingredients to the dry ingredients, stirring gently until the dough comes together. Be careful not to overmix.
- Shape the Dough: Transfer the dough onto a lightly floured surface and pat it into a circle roughly 1-inch thick. Cut the circle into 8 wedges and place them on the prepared baking sheet.
- Bake the Scones: If desired, sprinkle the tops of the scones with extra sugar for a sweet, crunchy finish. Bake for 15-20 minutes, or until the scones are golden brown and cooked through.
- Cool and Serve: Remove the scones from the oven and let them cool slightly on a wire rack before serving warm.
Extra Tips:
To guarantee your scones are as light and flaky as possible, handle the dough gently and avoid overworking it. Cold butter is key to achieving the perfect texture, so work quickly to prevent it from softening too much.
If you want to enhance the orange flavor, consider adding a glaze made from powdered sugar and orange juice drizzled over the top. These scones can be stored in an airtight container for up to two days, but they’re best enjoyed fresh.
Pecan Pie Bars
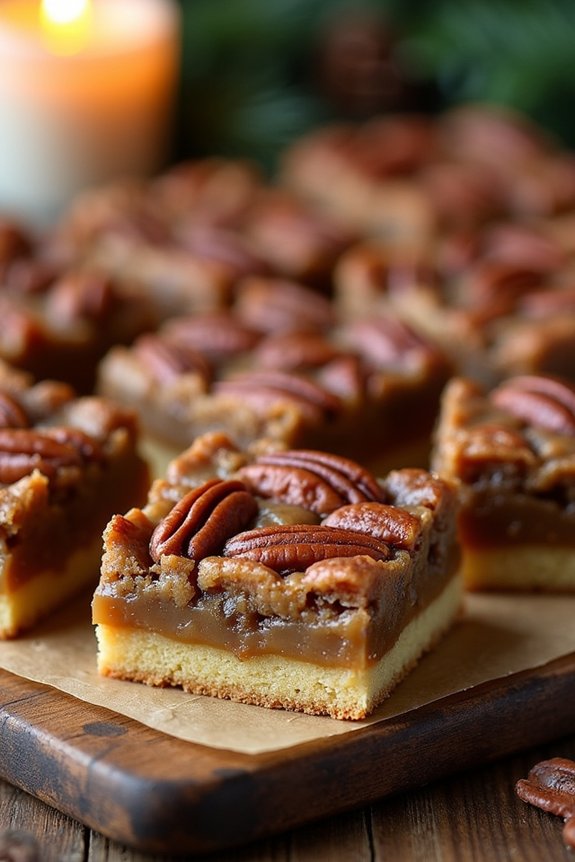
Capture the essence of a cozy farmhouse Christmas with these delectable Pecan Pie Bars. Perfectly balancing the rich, nutty flavor of pecans with a buttery shortbread crust, these bars are an irresistible addition to your holiday baking repertoire.
Whether you’re serving them at a festive gathering or enjoying a quiet night by the fireplace, these Pecan Pie Bars deliver the traditional taste of pecan pie in a convenient, easy-to-serve format. Their sweet, gooey filling and crunchy topping bring the warmth of the season to every bite.
Designed to serve 4-6 people, this recipe guarantees that everyone gets a taste of holiday cheer. The preparation is straightforward, making it a great option even for novice bakers. With just a few simple ingredients and steps, you can have these delightful bars ready to impress your family and friends.
So, preheat those ovens, gather your ingredients, and get ready to fill your home with the heavenly aroma of these Farmhouse Christmas Pecan Pie Bars.
Ingredients:
- 1 cup all-purpose flour
- 1/3 cup packed light brown sugar
- 1/4 cup unsalted butter, softened
- 1/4 teaspoon salt
- 2 large eggs
- 1 cup light corn syrup
- 2/3 cup granulated sugar
- 1 teaspoon vanilla extract
- 1 1/2 cups chopped pecans
Cooking Instructions:
- Preheat and Prepare the Baking Dish: Preheat your oven to 350°F (175°C). Line a 9-inch square baking dish with parchment paper, allowing some extra paper to hang over the sides for easy removal later.
- Create the Shortbread Crust: In a medium mixing bowl, combine the flour, brown sugar, softened butter, and salt. Use a pastry cutter or your fingers to blend until the mixture resembles coarse crumbs. Press this mixture evenly into the bottom of the prepared baking dish.
- Bake the Crust: Place the baking dish in the preheated oven and bake the crust for about 10-12 minutes, or until it’s set and lightly golden. Remove from the oven and set aside to cool slightly.
- Prepare the Pecan Filling: In another mixing bowl, whisk together the eggs, corn syrup, granulated sugar, and vanilla extract until well combined. Stir in the chopped pecans until they’re evenly distributed throughout the mixture.
- Assemble the Bars: Pour the pecan filling over the partially baked crust, making sure it spreads evenly across the entire surface. Use a spatula if necessary to distribute the pecans.
- Bake the Bars: Return the baking dish to the oven and bake for an additional 25-30 minutes, or until the filling is set and golden brown. A toothpick inserted into the center should come out mostly clean.
- Cool and Serve: Allow the bars to cool completely in the baking dish on a wire rack. Once cooled, use the parchment paper overhang to lift the bars out of the dish. Cut into squares or rectangles, and serve.
Extra Tips:
For a more intense nutty flavor, consider toasting the pecans before adding them to the filling. Simply spread them on a baking sheet and toast in the oven at 350°F (175°C) for about 5-7 minutes, or until fragrant. Keep a close eye on them to prevent burning.
Also, if you prefer a less sweet bar, you can reduce the amount of granulated sugar in the filling slightly. In conclusion, these bars can be made a day ahead, as the flavors intensify overnight, making them even more delicious when served.
Chocolate Peppermint Bark
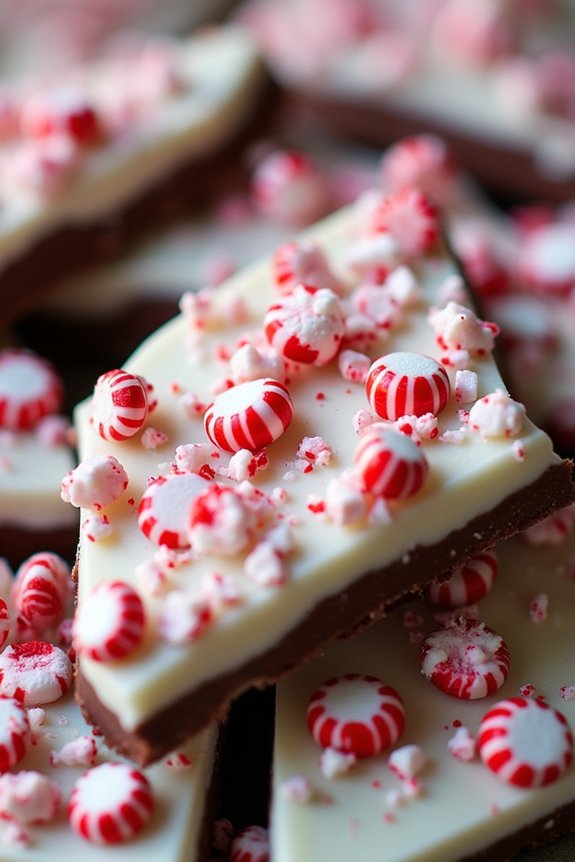
Chocolate Peppermint Bark is a delightful and festive treat that embodies the essence of Christmas. The combination of rich, smooth chocolate and invigorating peppermint is sure to bring holiday cheer to your farmhouse kitchen. Perfect for gifting or simply enjoying with family and friends, this easy-to-make treat captures the spirit of the season with its classic flavors and charming appearance.
This recipe yields enough Chocolate Peppermint Bark to serve 4-6 people, making it ideal for small gatherings or sweet indulgences. With just a few ingredients and simple steps, you’ll have a delicious homemade treat that’s as beautiful as it’s tasty. The contrasting layers of dark and white chocolate, adorned with crushed peppermint candy, create a visually appealing dessert that adds a touch of elegance to any holiday spread.
Ingredients:
- 12 ounces of high-quality dark chocolate
- 12 ounces of high-quality white chocolate
- 1 teaspoon of peppermint extract
- 1/2 cup of crushed peppermint candies or candy canes
Cooking Instructions:
- Prepare the Baking Sheet: Line a large baking sheet with parchment paper, making sure it covers the entire surface to prevent the chocolate from sticking.
- Melt the Dark Chocolate: In a microwave-safe bowl, melt the dark chocolate in 30-second intervals, stirring well between each interval until smooth. Alternatively, you can melt it using a double boiler on the stovetop.
- Add Peppermint Extract: Once the dark chocolate is fully melted, stir in 1/2 teaspoon of peppermint extract to infuse it with a minty flavor.
- Spread the Dark Chocolate: Pour the melted dark chocolate onto the prepared baking sheet and spread it evenly using a spatula. Aim for a thickness of about 1/4 inch. Place the tray in the refrigerator to set for about 20 minutes.
- Melt the White Chocolate: Repeat the melting process with the white chocolate, using the microwave or double boiler method. Be careful not to overheat it to prevent seizing.
- Add Peppermint Extract to White Chocolate: Stir in the remaining 1/2 teaspoon of peppermint extract into the melted white chocolate.
- Layer the White Chocolate: Remove the baking sheet with the dark chocolate layer from the refrigerator. Carefully pour and spread the white chocolate over the hardened dark chocolate layer, ensuring it covers evenly.
- Add Crushed Peppermint: While the white chocolate is still soft, sprinkle the crushed peppermint candies evenly over the top. Press them gently into the chocolate so they adhere.
- Chill Until Set: Place the tray back in the refrigerator and allow the Chocolate Peppermint Bark to set completely, about 30 minutes to 1 hour.
- Break into Pieces: Once the bark is fully hardened, remove it from the refrigerator and break it into pieces of your desired size. Serve immediately or store in an airtight container.
Extra Tips:
To achieve a glossy finish on your chocolate, consider tempering it before spreading it onto the baking sheet. This process stabilizes the chocolate, preventing it from becoming dull or developing a white film known as bloom.
Additionally, make sure that the peppermint extract is oil-based, as water-based extracts can cause the chocolate to seize. If you prefer a sweeter bark, feel free to adjust the dark and white chocolate ratios to your liking.
Finally, for a decorative touch, drizzle some melted dark chocolate over the top layer after adding the peppermint candies.
Traditional Fruitcake

There’s nothing quite like the comforting aroma of a traditional fruitcake baking in the oven to evoke the warm, cozy spirit of a farmhouse Christmas. This classic holiday dessert, dense with dried fruits and nuts, is often infused with a splash of your favorite spirit, adding a rich depth of flavor that perfectly complements the sweetness of the cake.
Perfect for sharing, this fruitcake is a labor of love, requiring a bit of time and attention, but the result is a delectable treat that captures the essence of Christmas. The traditional fruitcake is a staple in many holiday celebrations, and this recipe is designed to serve 4-6 people.
It’s filled with a medley of dried fruits soaked in brandy, rum, or even orange juice for a non-alcoholic version, which keeps the cake moist and flavorful. This recipe will guide you through each step, guaranteeing that your fruitcake is bursting with festive flavors and ready to grace your holiday table.
Ingredients:
- 1 cup mixed dried fruits (such as raisins, currants, sultanas, and chopped dried apricots)
- 1/4 cup brandy or rum (or orange juice for a non-alcoholic version)
- 1/2 cup unsalted butter, softened
- 1/2 cup brown sugar
- 2 large eggs
- 1 cup all-purpose flour
- 1/2 teaspoon baking powder
- 1/4 teaspoon salt
- 1/2 teaspoon ground cinnamon
- 1/4 teaspoon ground nutmeg
- 1/4 cup chopped nuts (such as walnuts or pecans)
- 1 tablespoon grated orange zest
- 1/4 cup chopped candied peel
- 1 teaspoon vanilla extract
Instructions:
- Prepare the Fruits: In a bowl, combine the mixed dried fruits with the brandy or rum (or orange juice). Cover and let them soak overnight, or at least for a few hours, to allow the fruits to absorb the liquid and plump up.
- Preheat Oven and Prepare Pan: Preheat your oven to 325°F (160°C). Line a 6-inch round cake pan with parchment paper and lightly grease it to prevent sticking.
- Cream Butter and Sugar: In a large mixing bowl, cream the softened butter and brown sugar together until light and fluffy. This process incorporates air into the mixture, which helps the cake to rise.
- Add Eggs: Beat in the eggs, one at a time, guaranteeing each is fully incorporated before adding the next. Stir in the vanilla extract for flavor.
- Combine Dry Ingredients: In a separate bowl, sift together the flour, baking powder, salt, cinnamon, and nutmeg. These dry ingredients will form the base of your cake.
- Mix Wet and Dry Ingredients: Gradually add the dry ingredients to the butter mixture, mixing until just combined. Avoid overmixing to guarantee the cake remains tender.
- Fold in Fruits and Nuts: Gently fold in the soaked fruits, along with any remaining liquid, chopped nuts, orange zest, and candied peel. Ensure they’re evenly distributed throughout the batter.
- Bake the Cake: Pour the batter into the prepared cake pan, smoothing the top with a spatula. Bake in the preheated oven for 1 to 1.5 hours, or until a skewer inserted into the center comes out clean.
- Cool and Store: Allow the cake to cool in the pan for about 10 minutes before transferring it to a wire rack to cool completely. For best flavor, wrap the cooled cake in foil and store it in an airtight container for a few days before serving.
Extra Tips:
To guarantee your cake stays moist and packed with flavor, consider brushing it with additional brandy or rum every few days if you’re storing it for an extended period. This not only enhances the taste but also preserves the cake.
If you’re making the cake in advance, it can be wrapped and stored for several weeks in a cool, dry place. For a more festive appearance, decorate the top with whole nuts and dried fruit before serving. This traditional fruitcake can be a delightful gift or a centerpiece for your holiday dessert table.
Buttery Shortbread Cookies
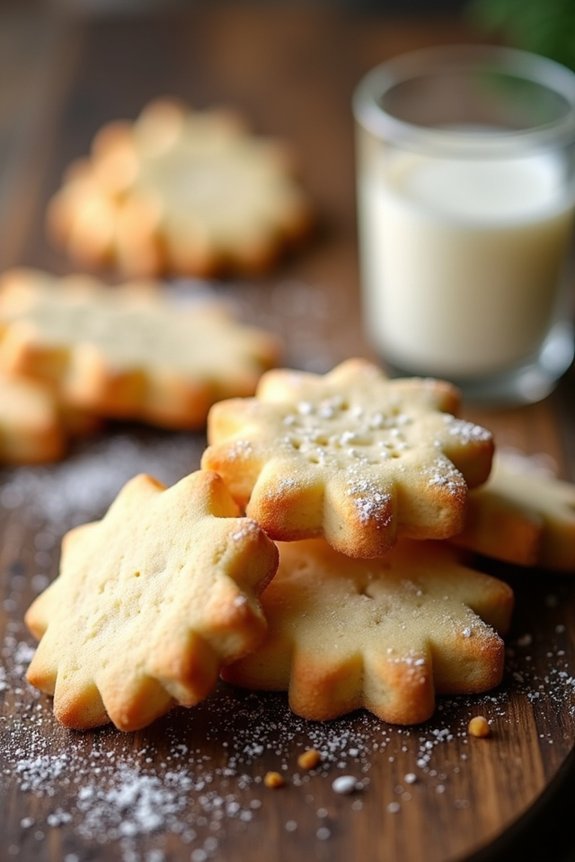
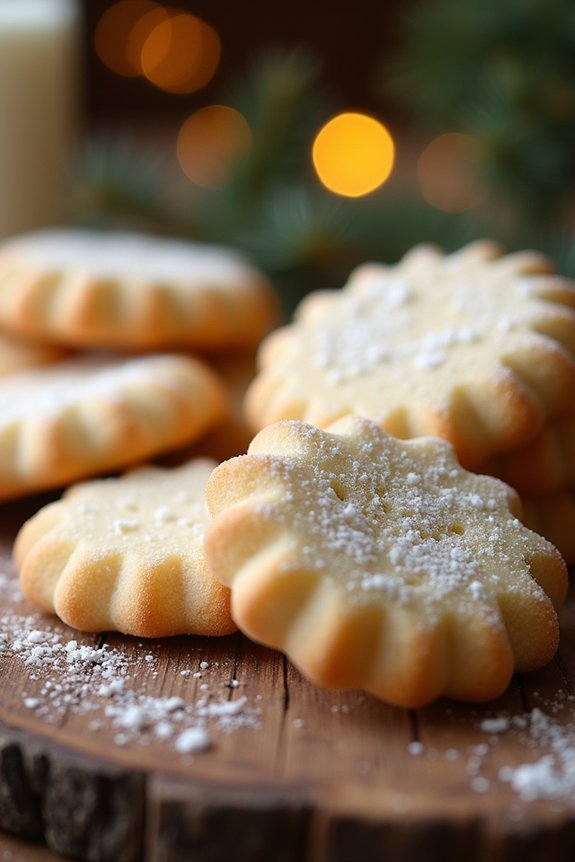
Nothing evokes the warmth and nostalgia of a farmhouse Christmas quite like the smell of freshly baked buttery shortbread cookies wafting through the kitchen. These classic treats are a staple of festive gatherings, offering a perfect balance of rich buttery flavor and a delectably crumbly texture. Ideal for sharing with family and friends, these cookies are simple to make yet deliver a touch of elegance with every bite.
Shortbread cookies are a timeless holiday favorite, beloved for their simplicity and versatility. Whether you’re serving them plain or decorating with festive sprinkles and dips, this recipe guarantees a delightful treat that pairs perfectly with a cozy cup of hot cocoa or tea. Baking these cookies isn’t only a culinary experience but also a cherished tradition that can be shared with loved ones during the holiday season.
Ingredients (Serves 4-6):
- 1 cup (2 sticks) unsalted butter, softened
- 3/4 cup powdered sugar
- 1 teaspoon vanilla extract
- 2 cups all-purpose flour
- 1/4 teaspoon salt
Cooking Instructions:
- Preheat the Oven: Begin by preheating your oven to 325°F (160°C). Line a baking sheet with parchment paper to guarantee the cookies don’t stick and cook evenly.
- Cream the Butter and Sugar: In a large mixing bowl, use an electric mixer to cream the softened butter and powdered sugar together until the mixture is light and fluffy. This should take about 2-3 minutes.
- Add Vanilla: Mix in the vanilla extract until it’s fully incorporated into the butter and sugar mixture.
- Combine Dry Ingredients: In a separate bowl, whisk together the all-purpose flour and salt. Gradually add this to the creamed mixture, mixing on low speed until the dough begins to come together. Be careful not to overmix.
- Form the Cookies: Transfer the dough to a lightly floured surface and gently knead it into a smooth ball. Roll the dough out to about 1/4 inch thickness. Use cookie cutters of your choice to cut out shapes and place them on the prepared baking sheet.
- Chill the Dough: Once the cookies are on the baking sheet, refrigerate them for about 15 minutes. This helps the cookies maintain their shape while baking.
- Bake the Cookies: Bake in the preheated oven for 15-20 minutes, or until the edges are just beginning to turn a light golden brown. Keep a close eye on them to prevent over-baking.
- Cool and Serve: Allow the cookies to cool on the baking sheet for 5 minutes before transferring them to a wire rack to cool completely. Enjoy them plain or with a dusting of powdered sugar.
Extra Tips:
For an extra festive touch, consider dipping one half of each cookie in melted chocolate and sprinkling with crushed candy canes or chopped nuts.
If you’re using salted butter, remember to omit the added salt in the recipe. Shortbread dough can also be prepared in advance and stored in the refrigerator for up to a week, or frozen for up to a month. This allows you to bake fresh cookies whenever the holiday spirit strikes.
Caramel Pecan Sticky Buns

Indulge in the delightful experience of making Caramel Pecan Sticky Buns, a quintessential farmhouse Christmas treat that infuses your home with the warm scents of caramel and spiced pecans.
These sticky buns are a perfect blend of soft, fluffy dough wrapped around a rich, buttery filling of cinnamon and sugar, all topped with a luscious caramel pecan glaze. Ideal for a festive breakfast or a cozy afternoon snack, these buns will add a touch of rustic charm to your holiday celebrations.
Prepare to delight your family and friends with this irresistible combination of textures and flavors. The recipe yields a serving size of 4-6 people, making it perfect for a small gathering or family breakfast.
The process involves creating a smooth dough, crafting a sweet and spicy filling, and finally, assembling everything with a golden, nutty topping. With a little patience and attention to detail, you can recreate this classic farmhouse treat that captures the essence of Christmas warmth and comfort.
Ingredients:
- 1 cup warm milk (110°F)
- 2 1/4 teaspoons active dry yeast
- 1/3 cup granulated sugar
- 1/2 cup unsalted butter, softened
- 2 large eggs
- 1 teaspoon salt
- 4 cups all-purpose flour
- 1 cup brown sugar, packed
- 2 tablespoons ground cinnamon
- 1/2 cup unsalted butter, melted (for filling)
- 1 cup pecans, chopped
- 1 cup heavy cream
- 3/4 cup brown sugar (for caramel topping)
- 1/2 cup unsalted butter (for caramel topping)
- 1 teaspoon vanilla extract
Instructions:
- Prepare the Dough:
- In a large mixing bowl, combine warm milk, yeast, and granulated sugar. Stir gently and let it sit for about 5 minutes until the mixture is frothy.
- Add softened butter, eggs, and salt to the yeast mixture. Gradually add the flour, mixing until a soft dough forms. Knead the dough on a floured surface for about 5-7 minutes until it’s smooth and elastic.
- Place the dough in a greased bowl, cover with a clean cloth, and let it rise in a warm place for about 1 hour or until doubled in size.
- Prepare the Filling:
- In a small bowl, mix together brown sugar and cinnamon. Set aside.
- Once the dough has risen, roll it out on a floured surface into a large rectangle, approximately 16×12 inches.
- Brush the rolled-out dough with melted butter and sprinkle evenly with the cinnamon sugar mixture.
- Assemble the Buns:
- Tightly roll the dough from the long side into a log and cut it into 12 even slices.
- In a saucepan, combine heavy cream, brown sugar, butter, and vanilla over medium heat. Stir until the mixture is smooth, then pour it into a greased 9×13 inch baking dish. Sprinkle with chopped pecans.
- Arrange the sliced rolls on top of the caramel pecan mixture. Cover and let them rise for another 30 minutes.
- Bake the Buns:
- Preheat your oven to 350°F (175°C). Bake the buns for 25-30 minutes, or until they’re golden brown and the caramel is bubbling.
- Remove from the oven and let them cool in the pan for about 5 minutes. Carefully invert the baking dish onto a serving platter so that the caramel pecan topping is on top.
Extra Tips:
For the best results, make sure all your ingredients are at room temperature before starting. This guarantees that the yeast activates properly and the dough rises well.
You can prepare the dough the night before and let it rise slowly in the refrigerator overnight to save time in the morning. Just bring it to room temperature before proceeding with the filling and baking.
If you like extra gooey buns, feel free to double the caramel topping recipe. Enjoy these sticky buns warm for the ultimate holiday treat!
Pumpkin Spice Bundt Cake
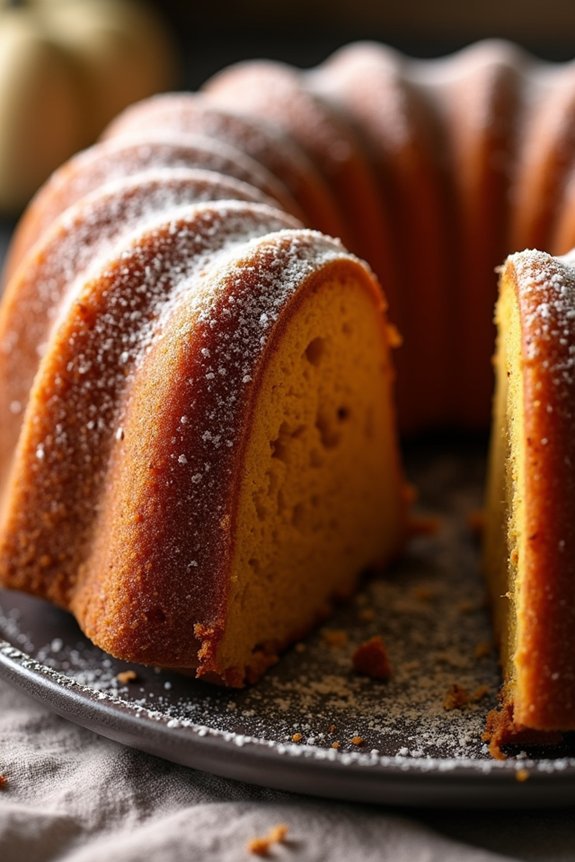
The Pumpkin Spice Bundt Cake is a delightful treat that captures the essence of festive farmhouse baking. Perfectly moist and infused with warming spices, this cake is ideal for the holiday season. The rich pumpkin flavor combined with the aromatic notes of cinnamon, nutmeg, and cloves makes it a favorite for gatherings and family celebrations.
Served with a drizzle of sweet glaze or a dusting of powdered sugar, this cake is a wonderful centerpiece for any dessert table.
Baking this Pumpkin Spice Bundt Cake isn’t just about creating a delicious dessert; it’s about crafting a warm, inviting atmosphere in your home. The scent of spices wafting through the kitchen will surely evoke memories of holiday gatherings and cozy winter nights.
Whether you’re a seasoned baker or a novice, this recipe is straightforward and rewarding, making it a perfect choice for spreading holiday cheer.
Ingredients (Serves 4-6)
- 2 ½ cups all-purpose flour
- 1 ½ teaspoons baking powder
- 1 teaspoon baking soda
- 2 teaspoons ground cinnamon
- 1 teaspoon ground nutmeg
- ½ teaspoon ground cloves
- ½ teaspoon salt
- 1 cup unsalted butter, softened
- 1 ½ cups granulated sugar
- 4 large eggs
- 1 cup canned pumpkin puree
- 1 teaspoon vanilla extract
- ½ cup buttermilk
Cooking Instructions
- Preheat and Prepare Pan: Preheat your oven to 350°F (175°C). Grease a Bundt pan generously with butter and dust it with flour to prevent sticking.
- Mix Dry Ingredients: In a medium bowl, whisk together the flour, baking powder, baking soda, cinnamon, nutmeg, cloves, and salt. Set aside.
- Cream Butter and Sugar: In a large mixing bowl, beat the softened butter and granulated sugar together with an electric mixer on medium speed until light and fluffy, about 3-5 minutes.
- Add Eggs: Add the eggs one at a time to the butter-sugar mixture, beating well after each addition until fully incorporated.
- Incorporate Pumpkin and Vanilla: Mix in the pumpkin puree and vanilla extract until the mixture is smooth and well combined.
- Combine with Dry Ingredients: Gradually add the dry ingredients to the wet mixture, alternating with the buttermilk. Start and end with the dry ingredients, mixing on low speed until just combined. Don’t overmix.
- Pour Into Pan: Pour the batter evenly into the prepared Bundt pan, smoothing the top with a spatula.
- Bake: Place in the preheated oven and bake for 50-60 minutes, or until a toothpick inserted into the center of the cake comes out clean.
- Cool and Serve: Allow the cake to cool in the pan for about 15 minutes. Then, carefully invert it onto a wire rack to cool completely before serving.
Extra Tips
For an extra festive touch, consider adding a glaze made from powdered sugar, milk, and a hint of vanilla extract to drizzle over the cooled cake. Additionally, this cake pairs beautifully with a dollop of whipped cream or a scoop of vanilla ice cream.
If you prefer a denser texture, you can substitute half of the all-purpose flour with whole wheat flour. Remember, the key to a moist Bundt cake isn’t to over-bake it, so keep a close eye on it as it nears the end of the baking time.
Enjoy the process and the delightful aroma filling your kitchen!
Homemade Cinnamon Rolls
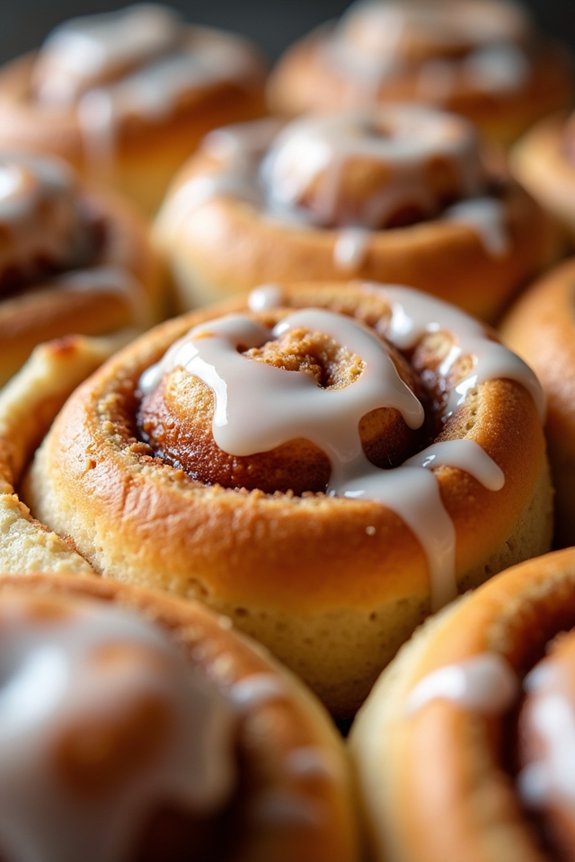
There’s nothing quite like the smell of freshly baked cinnamon rolls wafting through your home during the holiday season. These Farmhouse Christmas Homemade Cinnamon Rolls are the perfect treat to make your festivities extra special. Soft, gooey, and generously filled with a cinnamon-sugar mixture, these rolls are best enjoyed fresh out of the oven, perhaps with a steaming cup of cocoa or coffee.
This recipe is designed to bring a sense of warmth and nostalgia to your Christmas morning, making it a delightful tradition for you and your loved ones.
This recipe serves 4-6 people and is relatively simple to follow, even for those new to baking. With a little patience and precision, you’ll be rewarded with sweet, tender rolls that melt in your mouth. The secret to these cinnamon rolls lies in allowing the dough enough time to rise, creating the perfect fluffy texture.
So, roll up your sleeves, preheat your oven, and get ready to create a batch of these irresistible treats that everyone will love.
Ingredients:
- 3 ½ cups all-purpose flour
- 1 packet (2 ¼ teaspoons) active dry yeast
- 1 cup whole milk
- ⅓ cup unsalted butter
- ⅓ cup granulated sugar
- ½ teaspoon salt
- 2 large eggs
- ¾ cup packed brown sugar
- 2 tablespoons ground cinnamon
- ⅓ cup unsalted butter, softened
- 1 cup powdered sugar
- ½ teaspoon vanilla extract
- 2 tablespoons milk
Instructions:
1. Prepare the Dough:
In a small saucepan, heat milk, ⅓ cup butter, granulated sugar, and salt over medium heat until the butter is melted. Let it cool until lukewarm. In a large mixing bowl, combine 1 ½ cups of flour and yeast. Add the lukewarm milk mixture and eggs to the flour mixture. Beat with an electric mixer on low speed until combined. Stir in the remaining flour, one cup at a time, to form a soft dough.
2. Knead the Dough:
Turn the dough out onto a floured surface. Knead the dough for about 5 minutes or until it becomes smooth and elastic. Place the dough in a greased bowl, turning it once to grease the surface. Cover and let it rise in a warm place until it doubles in size, about 1 to 1 ½ hours.
3. Prepare the Filling:
In a small bowl, mix the brown sugar and cinnamon. Punch down the dough and roll it out on a floured surface into a rectangle about 12×18 inches. Spread softened butter over the dough, then sprinkle the cinnamon-sugar mixture evenly over the top.
4. Roll and Cut the Dough:
Starting from a long side, tightly roll up the dough into a log. Pinch the edges to seal. Using a sharp knife, cut the log into 12 equal pieces. Place each roll cut side up in a greased 9×13-inch baking dish.
5. Second Rise:
Cover the dish with a clean kitchen towel and let the rolls rise again until doubled, about 30 minutes. Preheat your oven to 350°F (175°C) during this time.
6. Bake:
Bake the rolls for 25-30 minutes or until they’re golden brown. Remove from the oven and let them cool slightly in the dish.
7. Prepare the Icing:
In a small bowl, whisk together powdered sugar, vanilla extract, and 2 tablespoons of milk until smooth. Drizzle the icing over the warm rolls before serving.
Extra Tips:
To guarantee your cinnamon rolls turn out perfectly, make sure the milk mixture isn’t too hot when adding it to the yeast, as this can kill the yeast and prevent the dough from rising.
If you prefer your rolls extra gooey, consider adding a bit more butter and sugar in the filling. You can also customize the icing by adding a touch of cream cheese for a richer flavor.
Finally, don’t be afraid to prepare the rolls the night before and let them rise in the refrigerator overnight for a stress-free Christmas morning!
Maple Walnut Tart
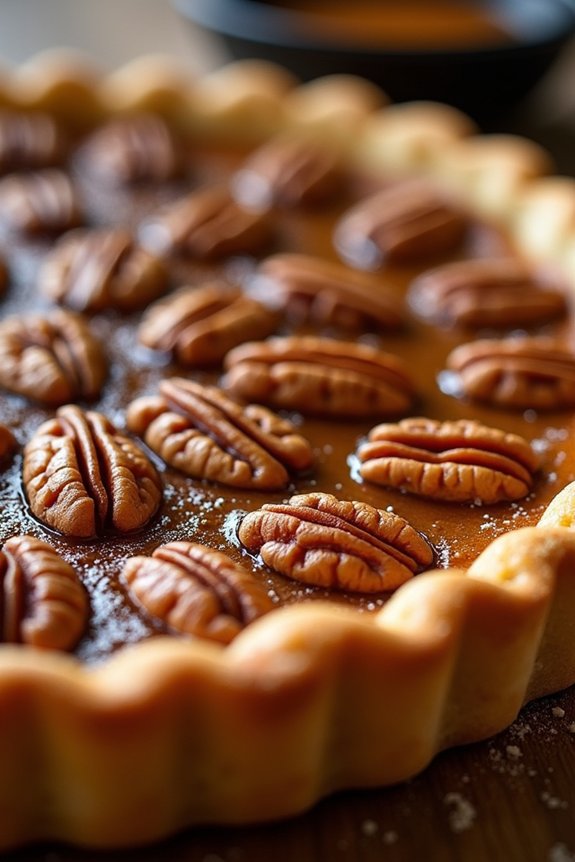
The Maple Walnut Tart is a delightful dessert that combines the rich, earthy flavors of walnuts with the sweet, comforting taste of maple syrup. This tart is perfect for a cozy farmhouse Christmas gathering, offering a rustic yet elegant addition to your holiday spread.
The buttery, flaky crust pairs beautifully with the nutty, syrupy filling, creating a harmonious balance of textures and flavors that will leave your guests asking for seconds.
This recipe is designed to serve 4-6 people, making it ideal for a small family gathering or an intimate holiday dinner. The tart can be made ahead of time, allowing you to enjoy the festivities without the stress of last-minute preparations.
Whether you serve it warm with a scoop of vanilla ice cream or at room temperature with a dollop of whipped cream, this Maple Walnut Tart is sure to be a festive favorite.
Ingredients:
- 1 1/2 cups all-purpose flour
- 1/2 cup unsalted butter, chilled and diced
- 1/4 cup granulated sugar
- 1/4 teaspoon salt
- 1/4 cup cold water
- 1 1/2 cups walnut halves
- 3/4 cup pure maple syrup
- 1/4 cup brown sugar
- 1/4 cup heavy cream
- 2 large eggs
- 1 teaspoon vanilla extract
- 1/4 teaspoon cinnamon
Instructions:
1. Prepare the Crust: In a large bowl, combine the flour, granulated sugar, and salt. Add the diced butter and use a pastry cutter or your fingers to blend until the mixture resembles coarse crumbs. Gradually add cold water, mixing until the dough holds together.
Form the dough into a disk, wrap it in plastic wrap, and refrigerate for at least 30 minutes.
2. Preheat the Oven: While the dough chills, preheat your oven to 350°F (175°C).
3. Roll Out the Dough: On a lightly floured surface, roll out the dough to fit a 9-inch tart pan. Press the dough into the pan, trimming any excess. Prick the bottom with a fork and line with parchment paper. Fill with pie weights or dried beans and bake for 15 minutes.
Remove the weights and bake for an additional 5 minutes until golden. Allow to cool.
4. Prepare the Filling: In a medium saucepan over medium heat, combine the maple syrup, brown sugar, and heavy cream. Stir until the sugar dissolves and the mixture is smooth.
Remove from heat and let cool slightly.
5. Mix the Filling: In a separate bowl, whisk together the eggs, vanilla extract, and cinnamon. Slowly add the cooled maple mixture, whisking constantly to prevent the eggs from cooking.
6. Assemble the Tart: Arrange the walnut halves evenly in the cooled tart shell. Pour the maple filling over the walnuts, ensuring they’re fully covered.
7. Bake the Tart: Place the tart on a baking sheet and bake in the preheated oven for 35-40 minutes, or until the filling is set and lightly golden.
Remove from oven and let cool on a wire rack.
8. Serve: Once the tart has cooled, slice it into wedges and serve with optional toppings like whipped cream or vanilla ice cream.
Extra Tips:
For the best results, use high-quality pure maple syrup to guarantee the rich flavor of this tart shines through. If you prefer a more pronounced nutty taste, toast the walnuts lightly before adding them to the tart shell.
Additionally, if you find the crust browning too quickly, cover the edges with foil to prevent burning. This tart can be stored at room temperature for up to two days, making it convenient to prepare in advance.