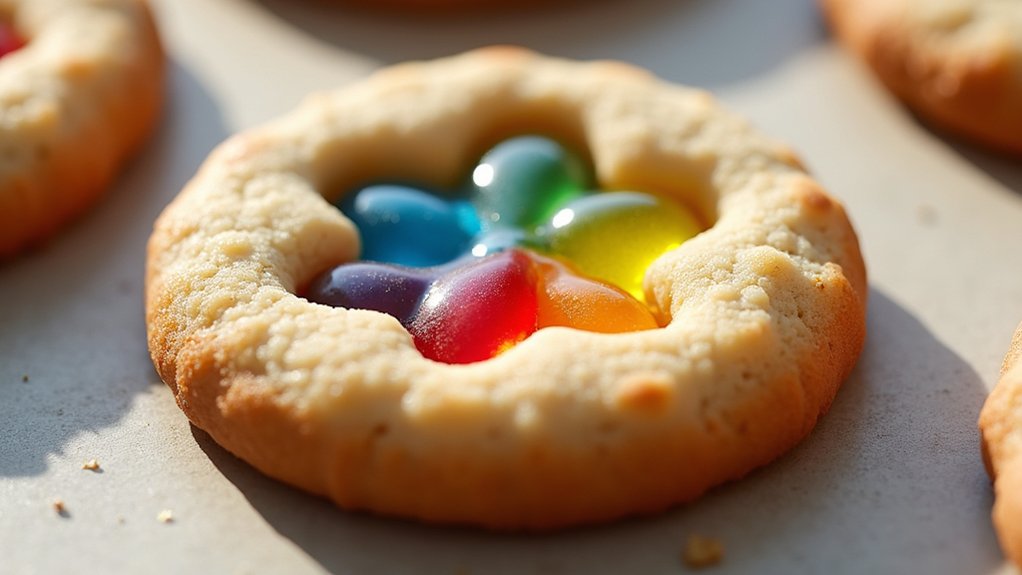
As the holiday season approaches, I’m thrilled to share 11 delightful Christmas baking ideas perfect for some family fun this weekend. Picture the kitchen filled with the warm aromas of classic gingerbread cookies and festive sugar cookie cutouts, ready for everyone to decorate. With a unique twist like red velvet thumbprint cookies or the cozy indulgence of chocolate-dipped biscotti, there’s something for everyone. Curious about more enchanting treats? Let’s explore these festive creations together!
Classic Gingerbread Cookies

Gingerbread cookies are a timeless holiday treat that brings warmth and joy to any festive celebration. With their spicy aroma and rich flavor, these cookies are perfect for baking with family and friends during the Christmas season.
The classic gingerbread cookie isn’t only delicious but also versatile, as it can be cut into various shapes and decorated with icing and candies to add a personal touch. Whether you hang them as ornaments on the Christmas tree or serve them as a delightful snack, gingerbread cookies are sure to bring a smile to everyone’s face.
This recipe for classic gingerbread cookies serves 4-6 people, making it ideal for a small gathering or family baking session. The key to perfect gingerbread cookies lies in balancing the spices and ensuring the dough is chilled before rolling it out. This helps maintain the shape of the cookies during baking and enhances their flavor.
Once baked to a golden perfection, these cookies can be decorated in any way you like, making them a fun and engaging activity for kids and adults alike.
Ingredients:
- 3 cups all-purpose flour
- 3/4 cup dark brown sugar
- 3/4 cup unsalted butter, softened
- 1/2 cup molasses
- 1 large egg
- 1 teaspoon baking soda
- 1 tablespoon ground ginger
- 1 tablespoon ground cinnamon
- 1/2 teaspoon ground cloves
- 1/2 teaspoon ground nutmeg
- 1/2 teaspoon salt
- Icing and candies for decoration (optional)
Cooking Instructions:
- Prepare the Dough: In a large mixing bowl, cream together the softened butter and dark brown sugar until the mixture is light and fluffy. Beat in the egg and molasses until well combined.
- Mix Dry Ingredients: In a separate bowl, whisk together the flour, baking soda, ground ginger, cinnamon, cloves, nutmeg, and salt. Gradually add the dry ingredients to the wet ingredients, mixing until a dough forms.
- Chill the Dough: Divide the dough into two equal parts, flatten into disks, wrap in plastic wrap, and refrigerate for at least 2 hours. This chilling process is essential for easy rolling and cutting.
- Preheat the Oven: Preheat your oven to 350°F (175°C) and line two baking sheets with parchment paper.
- Roll Out the Dough: On a lightly floured surface, roll out one disk of dough to about 1/4 inch thickness. Use cookie cutters to cut out desired shapes and place them on the prepared baking sheets, leaving a little space between each cookie.
- Bake the Cookies: Bake in the preheated oven for 8-10 minutes, or until the edges are firm and the cookies are slightly puffy. Be careful not to overbake, as they can become too hard.
- Cool and Decorate: Allow the cookies to cool on the baking sheets for a few minutes before transferring them to wire racks to cool completely. Once cooled, decorate with icing and candies as desired.
Extra Tips:
For best results, make sure to use fresh spices, as they’ll provide the most robust flavor. If your dough becomes too sticky while rolling, lightly flour the surface and rolling pin to make it more manageable.
Also, if you plan to hang the cookies as ornaments, remember to poke a hole at the top of each cookie with a straw before baking. This will make it easy to thread a ribbon through once they’re baked and decorated.
Enjoy the process and have fun creating your own gingerbread masterpieces!
Festive Sugar Cookie Cutouts

Festive Sugar Cookie Cutouts are the quintessential holiday treat that brings a burst of joy and creativity to your Christmas baking. These delightful cookies aren’t only delicious but also serve as a perfect canvas for your artistic flair.
Whether you prefer classic holiday shapes like stars, bells, and trees or decide to create your own whimsical designs, festive sugar cookie cutouts are a must-have for the holiday season. The buttery texture combined with the sweet icing will make these cookies a favorite for both kids and adults alike.
The beauty of these cookies lies in their versatility. You can customize the icing colors and decorations to match your holiday theme or let your imagination run wild with unique designs. This recipe is perfect for a family activity, allowing everyone to participate in cutting out, baking, and decorating their own cookies.
The aroma of freshly baked cookies will fill your home with warmth and cheer, making your holiday celebrations even more special. With this recipe, you’ll have enough cookies to serve 4-6 people, guaranteeing that everyone gets to indulge in these festive delights.
Ingredients:
- 3 cups all-purpose flour
- 1 teaspoon baking powder
- 1/2 teaspoon salt
- 1 cup unsalted butter, softened
- 1 cup granulated sugar
- 1 large egg
- 1 teaspoon vanilla extract
- 1/2 teaspoon almond extract
- Assorted food coloring
- Assorted sprinkles and edible decorations
Cooking Instructions:
- Prepare the Dough: In a medium-sized bowl, whisk together the all-purpose flour, baking powder, and salt. Set this mixture aside. In a large mixing bowl, beat the softened butter and granulated sugar with an electric mixer on medium speed until light and fluffy. This should take about 2-3 minutes.
- Mix in the Wet Ingredients: Add the egg, vanilla extract, and almond extract to the butter and sugar mixture. Beat well until everything is fully combined. Gradually add the dry ingredient mixture to the wet ingredients, beating on low speed until all ingredients are incorporated and a dough forms.
- Chill the Dough: Divide the dough in half, shape each half into a disk, wrap in plastic wrap, and refrigerate for at least 1 hour. This will make the dough easier to handle and help the cookies maintain their shape when baked.
- Preheat and Roll: Preheat your oven to 350°F (175°C). On a lightly floured surface, roll out one disk of dough to about 1/4-inch thickness. Keep the other disk refrigerated until you’re ready to use it.
- Cut Out the Cookies: Use cookie cutters to cut out desired shapes. Place the cutouts on a baking sheet lined with parchment paper, leaving some space between each cookie.
- Bake: Bake in the preheated oven for 8-10 minutes or until the edges are lightly golden. Remove from the oven and allow the cookies to cool on the baking sheet for a few minutes before transferring them to a wire rack to cool completely.
- Decorate: Once the cookies are completely cool, divide icing into small bowls and tint with desired food coloring. Use small piping bags or zip-top bags with a small corner snipped off to pipe icing onto the cookies. Decorate with sprinkles and edible decorations as desired.
Extra Tips: To achieve the best results, verify your butter is at room temperature before you start mixing. This will help create a smoother dough and prevent overworking the ingredients.
For a fun twist, try adding a pinch of cinnamon or nutmeg to the dough for a hint of spice. If you’re in a hurry, you can freeze the dough for 15 minutes instead of refrigerating it for an hour. Additionally, always make sure the cookies are completely cooled before decorating to prevent the icing from melting. Enjoy the process and have fun with your festive designs!
Peppermint Bark Brownies
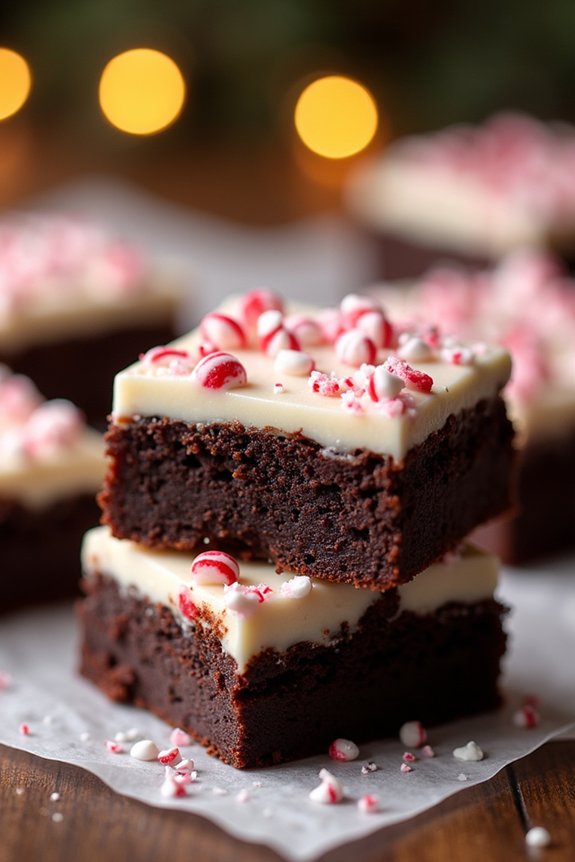
With the festive season just around the corner, there’s no better way to sweeten up your holiday gatherings than with a batch of Peppermint Bark Brownies.
These decadent treats combine rich, fudgy brownies with the invigorating crunch of peppermint bark, making them a perfect addition to your Christmas baking repertoire. Peppermint Bark Brownies aren’t only delicious but also a feast for the eyes, with their contrasting layers of deep chocolate and gleaming white peppermint.
Perfect for a serving size of 4-6 people, this recipe is designed to impress both in taste and presentation. Whether you’re hosting a holiday party or simply want to indulge in a festive dessert with your family, these brownies are sure to be a hit. They also make for a thoughtful homemade gift, wrapped up in a decorative box or tin.
Ingredients (Serves 4-6):
- 1/2 cup unsalted butter
- 1 cup granulated sugar
- 2 large eggs
- 1 teaspoon vanilla extract
- 1/3 cup unsweetened cocoa powder
- 1/2 cup all-purpose flour
- 1/4 teaspoon salt
- 1/4 teaspoon baking powder
- 1 cup white chocolate chips
- 1/2 teaspoon peppermint extract
- 1/2 cup crushed candy canes or peppermint candies
Instructions:
- Preheat the Oven: Begin by preheating your oven to 350°F (175°C). Grease a 9×9 inch baking pan or line it with parchment paper to prevent the brownies from sticking.
- Melt the Butter: In a medium saucepan over low heat, melt the butter. Once melted, remove the saucepan from the heat and stir in the granulated sugar, eggs, and vanilla extract until well combined.
- Prepare the Brownie Batter: In a separate bowl, sift together the cocoa powder, flour, salt, and baking powder. Gradually add the dry ingredients to the wet mixture in the saucepan, stirring until just combined to form a thick brownie batter.
- Add the Chocolate Chips: Stir in the white chocolate chips and peppermint extract, mixing gently until evenly distributed throughout the batter.
- Pour and Bake: Pour the brownie batter into the prepared baking pan, spreading it evenly. Bake in the preheated oven for 25-30 minutes, or until a toothpick inserted into the center comes out with a few moist crumbs.
- Prepare the Peppermint Topping: While the brownies are baking, crush the candy canes or peppermint candies by placing them in a ziplock bag and using a rolling pin to break them into small pieces.
- Add the Peppermint Crunch: As soon as the brownies are out of the oven, sprinkle the crushed peppermint candies over the top. Press them gently into the brownies with the back of a spoon to guarantee they adhere as the brownies cool.
- Cool and Serve: Allow the brownies to cool completely in the pan on a wire rack. Once cooled, cut them into squares and serve.
Extra Tips: For an extra layer of indulgence, you can drizzle melted white chocolate over the brownies once they’ve cooled, adding a touch of elegance and even more flavor.
If you prefer a more intense mint flavor, consider adding an extra dash of peppermint extract to the brownie batter. Additionally, chilling the brownies in the refrigerator for an hour before serving can enhance their fudgy texture and make them easier to cut.
Enjoy these Peppermint Bark Brownies with a cup of hot cocoa or coffee for a truly festive treat!
Holiday Spiced Eggnog Cake
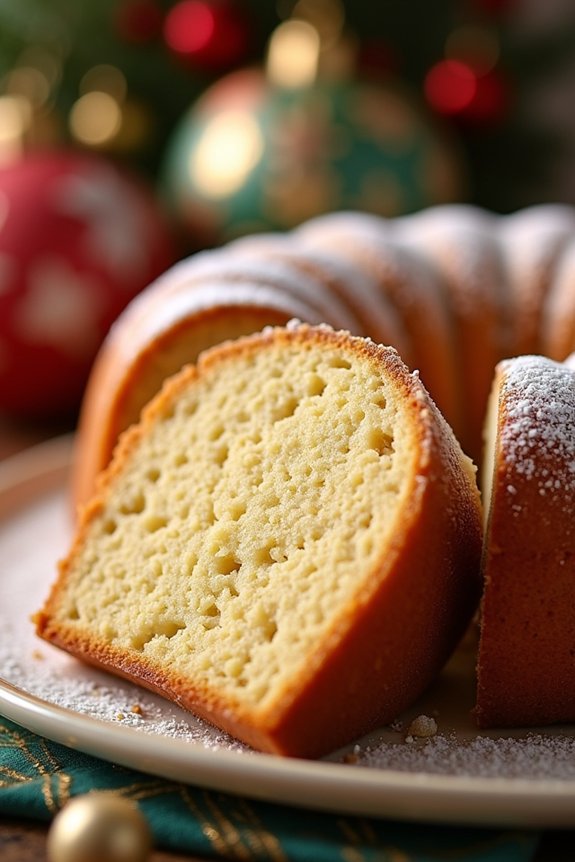
Holiday Spiced Eggnog Cake is a delightful festive treat that embodies the warmth and cheer of the holiday season. This cake combines the rich, creamy flavors of traditional eggnog with a medley of warming spices, creating a dessert that’s both nostalgic and invigoratingly unique.
Whether you’re hosting a holiday gathering or looking to indulge in a special dessert with family, this cake is sure to be a crowd-pleaser. Its moist texture and inviting aroma make it the perfect centerpiece for any holiday table.
The cake is simple to prepare and uses ingredients that are often already present in your pantry during the holiday season. The spiced eggnog provides a luscious base, while spices like nutmeg, cinnamon, and cloves add depth and complexity to each bite.
The cake can be served on its own or with a dusting of powdered sugar for a touch of elegance. Preparing this cake not only fills your home with the enchanting scent of the holidays but also offers a wonderful way to celebrate and share the spirit of the season with loved ones.
Ingredients (Serving Size: 4-6 people):
- 2 1/2 cups all-purpose flour
- 1 teaspoon baking powder
- 1/2 teaspoon baking soda
- 1/2 teaspoon salt
- 1 teaspoon ground cinnamon
- 1/2 teaspoon ground nutmeg
- 1/4 teaspoon ground cloves
- 1/2 cup unsalted butter, softened
- 1 cup granulated sugar
- 1/2 cup brown sugar
- 2 large eggs
- 1 teaspoon vanilla extract
- 1 cup eggnog
- 1/4 cup sour cream
Cooking Instructions:
- Preheat the Oven: Start by preheating your oven to 350°F (175°C). Grease and flour a 9-inch round cake pan or line it with parchment paper for easier removal.
- Prepare Dry Ingredients: In a medium bowl, whisk together the flour, baking powder, baking soda, salt, cinnamon, nutmeg, and cloves. This guarantees a consistent mix of dry ingredients throughout the cake batter.
- Cream Butter and Sugars: In a large mixing bowl, beat the softened butter, granulated sugar, and brown sugar together until light and fluffy. This usually takes about 2-3 minutes with an electric mixer set on medium speed.
- Add Eggs and Vanilla: Mix in the eggs one at a time, beating well after each addition. Stir in the vanilla extract, making sure everything is well incorporated.
- Combine with Eggnog and Sour Cream: Gradually add the dry ingredients to the butter mixture, alternating with the eggnog and sour cream. Begin and end with the flour mixture. Mix until just combined, being careful not to overmix the batter.
- Transfer to Cake Pan: Pour the batter into the prepared cake pan, smoothing the top with a spatula to guarantee even baking.
- Bake the Cake: Place the cake in the preheated oven and bake for 30-35 minutes or until a toothpick inserted into the center comes out clean. Allow the cake to cool in the pan for about 10 minutes before transferring it to a wire rack to cool completely.
- Serve and Enjoy: Once cooled, dust the top with powdered sugar if desired. Slice and serve to your family and friends.
Extra Tips:
For an extra moist cake, consider adding a tablespoon of rum or brandy to the batter for a more traditional eggnog flavor. Make sure all your ingredients are at room temperature before you begin mixing, as this will help them incorporate more smoothly, resulting in a better texture.
If you prefer a stronger spice profile, feel free to adjust the quantities of cinnamon, nutmeg, and cloves to suit your taste. Finally, always verify your cake is completely cooled before cutting to maintain its structure and presentation.
Chocolate-Dipped Biscotti
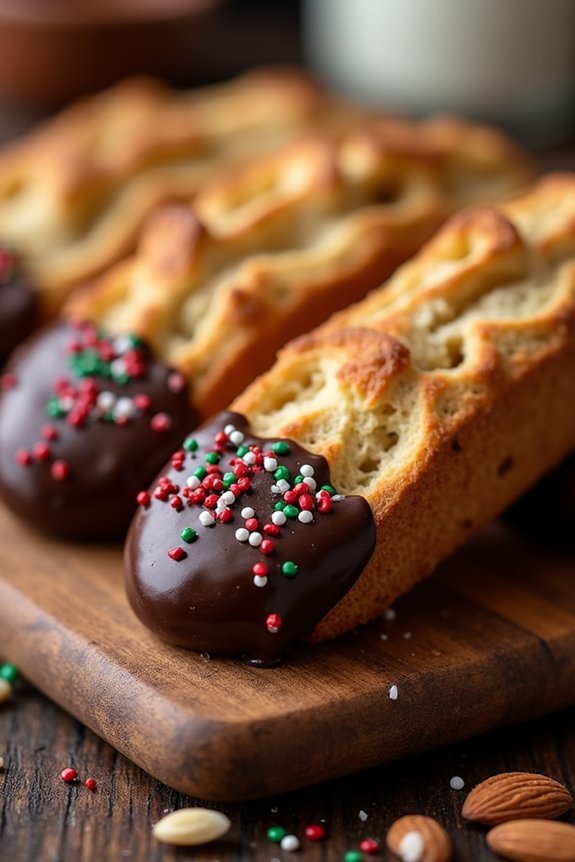
Biscotti, the classic Italian twice-baked cookies, are a delightful treat that can be enjoyed year-round, but they hold a special place during the festive Christmas season. Their crunchy texture and the ability to pair them with a warm cup of coffee or hot chocolate make them a perfect addition to your holiday baking list.
This recipe for Chocolate-Dipped Biscotti combines the traditional elements of biscotti with a decadent chocolate dip, adding a rich and festive twist to the classic cookie. This Chocolate-Dipped Biscotti recipe yields 24 to 30 pieces, making it an ideal choice for holiday gatherings or as a delectable homemade gift. Each biscotti is infused with the nutty aroma of almonds and the sweet hint of vanilla, then finished with a luscious layer of melted chocolate. The combination of flavors and textures will surely impress your friends and family.
Ingredients (Serves 4-6 people):
- 2 cups all-purpose flour
- 1 cup granulated sugar
- 1 teaspoon baking powder
- 1/4 teaspoon salt
- 3 large eggs
- 1 teaspoon vanilla extract
- 1 teaspoon almond extract
- 1 cup whole almonds, toasted and coarsely chopped
- 1 cup semisweet or dark chocolate chips
- 1 tablespoon vegetable oil
Instructions:
- Preheat and Prepare: Preheat your oven to 350°F (175°C). Line a baking sheet with parchment paper or a silicone baking mat to prevent the biscotti from sticking.
- Mix Dry Ingredients: In a medium-sized bowl, whisk together the all-purpose flour, granulated sugar, baking powder, and salt until well combined.
- Combine Wet Ingredients: In a separate large bowl, beat the eggs, vanilla extract, and almond extract together until the mixture is smooth and slightly frothy.
- Form Biscotti Dough: Gradually add the dry ingredients to the wet ingredients, mixing until a dough forms. It should be sticky but manageable. Fold in the chopped almonds until evenly distributed throughout the dough.
- Shape the Dough: Divide the dough in half and shape each half into a log approximately 10 inches long and 2 inches wide on the prepared baking sheet. Leave space between the logs to allow for spreading.
- First Bake: Bake in the preheated oven for about 25–30 minutes, or until the logs are golden brown and firm to the touch. Remove from the oven and allow them to cool for about 10 minutes.
- Slice and Second Bake: Once slightly cooled, use a sharp serrated knife to slice the logs diagonally into 1/2-inch thick slices. Lay the slices cut-side down back onto the baking sheet. Bake for an additional 10–12 minutes on each side, until the biscotti are crisp and golden.
- Prepare Chocolate Dip: While the biscotti cool completely, melt the chocolate chips and vegetable oil together in a microwave-safe bowl, stirring every 30 seconds until smooth.
- Dip in Chocolate: Dip one end of each biscotti into the melted chocolate. Allow the excess to drip off before placing the biscotti back onto the parchment paper to set. For a festive touch, sprinkle crushed almonds or holiday sprinkles over the wet chocolate.
- Set and Serve: Let the chocolate set completely at room temperature or in the refrigerator for faster results before serving or packaging.
Extra Tips: When making biscotti, verify that the dough logs are compact and well-shaped to prevent them from cracking during the first bake. If you prefer softer biscotti, reduce the second baking time slightly.
For an extra touch, consider adding dried fruit such as cranberries or cherries to the dough. Store the biscotti in an airtight container to maintain their crispness, and they’ll stay fresh for several weeks, allowing you to enjoy them throughout the holiday season.
Snowball Coconut Macaroons
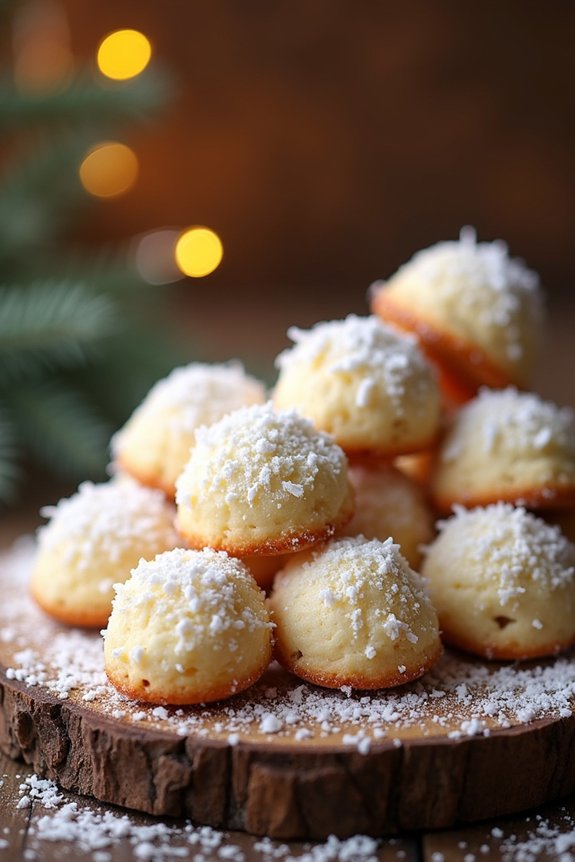
Snowball Coconut Macaroons are a delightful treat perfect for the festive season. These bite-sized goodies combine the tropical flavor of coconut with the sweetness of condensed milk, creating a chewy and satisfying texture that melts in your mouth. The “snowball” aspect of this recipe not only gives them a fun, wintry appearance but also makes them an ideal addition to any holiday dessert spread.
Whether you’re a seasoned baker or a novice, these macaroons are straightforward to make and are certain to be a hit with family and friends. These macaroons come together quickly, making them a convenient choice for last-minute holiday gatherings or gift-giving.
With just a few simple ingredients and minimal preparation time, you can have a batch of these festive treats ready to enjoy. The combination of coconut and a hint of vanilla creates a flavor profile that’s both comforting and reminiscent of classic holiday flavors.
Follow the recipe below to create a batch of Snowball Coconut Macaroons that serve 4-6 people.
Ingredients:
- 3 cups sweetened shredded coconut
- 1 cup sweetened condensed milk
- 1 teaspoon vanilla extract
- 1/4 teaspoon salt
- 2 large egg whites
- 1 cup powdered sugar (for dusting)
Instructions:
- Preheat the Oven: Preheat your oven to 325°F (163°C) and line a baking sheet with parchment paper to prevent the macaroons from sticking.
- Mix the Ingredients: In a large mixing bowl, combine the sweetened shredded coconut, sweetened condensed milk, vanilla extract, and salt. Stir until all ingredients are well blended.
- Beat the Egg Whites: In a separate bowl, beat the egg whites until they form stiff peaks. This step is essential as it helps provide structure and volume to the macaroons.
- Fold in the Egg Whites: Gently fold the beaten egg whites into the coconut mixture. Take care not to deflate the egg whites while folding, as this will guarantee the macaroons are light and airy.
- Shape the Macaroons: Use a tablespoon or a small cookie scoop to portion out the mixture onto the prepared baking sheet. Space them about an inch apart to allow for spreading during baking.
- Bake: Place the baking sheet in the preheated oven and bake for 20-25 minutes or until the macaroons are golden brown and firm to the touch.
- Cool and Dust: Allow the macaroons to cool on the baking sheet for a few minutes before transferring them to a wire rack to cool completely. Once cooled, generously dust them with powdered sugar to create the “snowball” effect.
Extra Tips:
Make sure that your egg whites are at room temperature before beating, as this will help them achieve the desired volume more easily. Additionally, when incorporating the egg whites into the coconut mixture, use a gentle folding technique to maintain the airiness of the macaroons.
If you prefer a less sweet macaroon, you can use unsweetened coconut instead, but you may need to adjust the amount of sugar to taste. Store any leftover macaroons in an airtight container to keep them fresh for several days. Enjoy these delightful treats with a warm cup of cocoa or coffee for a cozy holiday experience.
Candy Cane Chocolate Truffles

Candy Cane Chocolate Truffles are a delightful holiday treat that perfectly capture the spirit of Christmas with their rich chocolate flavor and invigorating minty touch.
These bite-sized indulgences aren’t only delicious but also visually appealing with their festive candy cane coating. Ideal for sharing with family and friends, these truffles make for an excellent homemade gift or a charming addition to your holiday dessert table.
The process of making Candy Cane Chocolate Truffles is surprisingly simple, yet the result is a luxurious confection that feels like a special occasion.
The combination of creamy chocolate ganache and the crisp, sweet peppermint of crushed candy canes creates a harmonious balance of flavors and textures. Whether you’re a seasoned baker or a beginner looking to try something new, this recipe is sure to impress.
Ingredients (Serving size: 4-6 people)
- 8 ounces semisweet chocolate chips
- 1/2 cup heavy cream
- 1/4 teaspoon peppermint extract
- 1/2 cup finely crushed candy canes
- 1/4 cup unsweetened cocoa powder
Cooking Instructions:
1. Prepare the Chocolate Ganache: Begin by placing the semisweet chocolate chips in a heatproof bowl. In a small saucepan, heat the heavy cream over medium heat until it begins to simmer. Don’t let it boil.
Once the cream is hot, pour it over the chocolate chips and let it sit for about 2-3 minutes. This will allow the chocolate to soften.
2. Mix and Flavor: Gently stir the chocolate and cream together until smooth and fully combined. Once the mixture is glossy and uniform, stir in the peppermint extract.
This will infuse the ganache with a subtle minty flavor that complements the chocolate perfectly.
3. Chill the Ganache: Cover the bowl with plastic wrap and refrigerate for about 1-2 hours, or until the ganache is firm enough to scoop.
Chilling helps the mixture solidify, making it easier to shape into truffles.
4. Shape the Truffles: Once the ganache is set, use a small cookie scoop or a spoon to scoop out portions of the ganache. Roll each portion between your palms to form smooth, round balls.
If the ganache becomes too sticky to handle, you can lightly dust your hands with cocoa powder.
5. Coat with Candy Canes: Spread the crushed candy canes on a shallow plate. Roll each truffle in the candy canes, pressing gently to make sure they adhere to the surface.
This will give the truffles a festive and crunchy exterior.
6. Final Touch: For a more decadent finish, you can roll the truffles in unsweetened cocoa powder after the candy cane coating.
This step is optional but adds a lovely contrast to the sweet candy coating.
Extra Tips: To make crushing candy canes easier, place them in a resealable plastic bag and gently crush them with a rolling pin.
Be sure to crush them finely so they adhere better to the truffles. If you prefer a smoother texture, you can sift out any larger pieces.
Store the truffles in an airtight container in the refrigerator for up to a week. Let them sit at room temperature for a few minutes before serving to enhance their creamy texture.
Cinnamon Roll Wreath
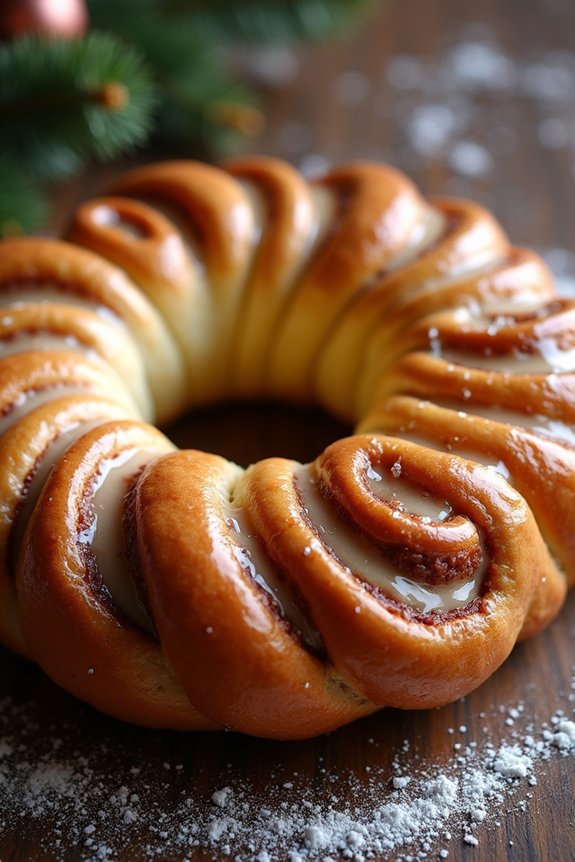
Cinnamon Roll Wreath is a delightful and festive twist on the classic cinnamon roll, perfect for holiday gatherings. This visually striking treat combines the warm, comforting flavors of cinnamon and sugar with a beautiful presentation that resembles a holiday wreath.
Ideal for serving as a centerpiece during Christmas breakfast or brunch, this dish is sure to impress your family and friends both in taste and appearance. The Cinnamon Roll Wreath isn’t only delicious but also fun to make, allowing you to get creative with its shape and decoration.
This recipe yields a serving size suitable for 4-6 people, making it perfect for small gatherings or family get-togethers. The sweet aroma of cinnamon filling your kitchen will surely evoke the holiday spirit, making this a memorable addition to your Christmas baking repertoire. By following these instructions, you’ll be able to create a stunning Cinnamon Roll Wreath that’s both festive and flavorful.
Ingredients (serving size: 4-6 people):
- 2 ¼ teaspoons active dry yeast
- ½ cup warm milk
- ¼ cup granulated sugar
- ¼ cup unsalted butter, melted
- 1 large egg
- ½ teaspoon salt
- 3 cups all-purpose flour
- 2 tablespoons unsalted butter, softened (for filling)
- ½ cup brown sugar (for filling)
- 2 tablespoons ground cinnamon (for filling)
- 1 cup powdered sugar (for glaze)
- 2 tablespoons milk (for glaze)
- ½ teaspoon vanilla extract (for glaze)
Instructions:
- Activate the Yeast: In a small bowl, combine the warm milk and active dry yeast. Let it sit for about 5-10 minutes until the mixture becomes frothy, indicating that the yeast is activated.
- Prepare the Dough: In a large mixing bowl, mix the melted butter, granulated sugar, egg, and salt. Add the activated yeast mixture and stir to combine. Gradually add the flour, one cup at a time, mixing until a soft dough forms.
- Knead the Dough: Transfer the dough to a lightly floured surface and knead for about 6-8 minutes until it’s smooth and elastic. If the dough is too sticky, sprinkle a little more flour as needed.
- First Rise: Place the dough in a greased bowl, cover it with a clean cloth or plastic wrap, and let it rise in a warm place for about 1 to 1 ½ hours, or until it has doubled in size.
- Prepare the Filling: In a small bowl, mix the softened butter, brown sugar, and ground cinnamon until you have a smooth paste.
- Roll Out the Dough: Once the dough has risen, punch it down to release the air. Roll it out into a large rectangle (approximately 12×18 inches) on a floured surface.
- Spread the Filling: Evenly spread the cinnamon-sugar mixture over the rolled-out dough, leaving a small border around the edges.
- Form the Wreath: Starting from one of the longer sides, roll the dough tightly into a log. Carefully shape the log into a circular wreath and pinch the ends together to seal.
- Second Rise: Place the wreath on a lined baking sheet. Using a sharp knife, make cuts around the wreath at 1-inch intervals, being careful not to cut all the way through. Gently twist each segment to expose the filling. Cover and let it rise again for about 30 minutes.
- Bake the Wreath: Preheat your oven to 350°F (175°C). Bake the cinnamon roll wreath for 25-30 minutes or until it’s golden brown on top.
- Prepare the Glaze: While the wreath is baking, mix the powdered sugar, milk, and vanilla extract in a small bowl until smooth.
- Glaze the Wreath: Once baked, remove the wreath from the oven and let it cool slightly. Drizzle the glaze over the top while it’s still warm.
Extra Tips:
When making a Cinnamon Roll Wreath, verify that your dough is kneaded well to achieve the right texture. Over-kneading can make the dough tough, so aim for a smooth and elastic consistency.
If your kitchen is cold, you can create a warm rising environment by preheating the oven to a low temperature, turning it off, and placing the covered dough inside. Additionally, you can personalize your wreath by adding raisins, nuts, or even a sprinkle of festive colored sugar to enhance its appearance and flavor.
Red Velvet Thumbprint Cookies

Red Velvet Thumbprint Cookies are a delightful treat that combines the rich flavor of red velvet with the classic thumbprint cookie style. Perfect for the holiday season, these cookies aren’t only visually appealing with their vibrant red color but also have a soft, chewy texture that melts in your mouth. The addition of a creamy white chocolate or cream cheese filling adds an extra layer of flavor, making them a festive favorite for Christmas baking.
These cookies are ideal for serving at holiday gatherings or as a special homemade gift for friends and family. The recipe is straightforward and can be a fun activity to do with kids, allowing them to help with the shaping and filling of the cookies. The aroma of these freshly baked cookies will fill your kitchen with the warmth and joy of the holiday season, making them an irresistible addition to your Christmas baking repertoire.
Ingredients (Serves 4-6 people):
- 1 and 3/4 cups all-purpose flour
- 1/4 cup unsweetened cocoa powder
- 1/4 teaspoon baking soda
- 1/4 teaspoon salt
- 1/2 cup unsalted butter, softened
- 2/3 cup granulated sugar
- 1 large egg yolk
- 1 tablespoon milk
- 1 teaspoon vanilla extract
- 1 teaspoon red food coloring
- 1/2 cup white chocolate chips or cream cheese for filling
- Optional: sprinkles or crushed candy canes for decoration
Cooking Instructions:
- Preheat and Prepare: Preheat your oven to 350°F (175°C). Line a baking sheet with parchment paper to prevent the cookies from sticking.
- Mix Dry Ingredients: In a medium bowl, whisk together the flour, cocoa powder, baking soda, and salt. This guarantees even distribution of the dry ingredients and helps prevent clumps.
- Cream Butter and Sugar: In a large bowl, beat the softened butter and granulated sugar together using an electric mixer on medium speed until light and fluffy, about 2-3 minutes.
- Add Wet Ingredients: Add the egg yolk, milk, vanilla extract, and red food coloring to the butter mixture. Beat until well combined and the mixture is a consistent red color.
- Combine Ingredients: Gradually add the dry ingredients to the wet ingredients, mixing on low speed until just combined. Be careful not to overmix, as this can make the cookies tough.
- Shape the Cookies: Roll tablespoons of dough into balls and place them on the prepared baking sheet, spacing them about 2 inches apart. Use your thumb to make an indentation in the center of each ball.
- Bake: Bake the cookies in the preheated oven for 10-12 minutes, or until the edges are set and the tops look dry.
- Prepare Filling: While the cookies are baking, melt the white chocolate chips in a microwave-safe bowl in 30-second intervals, stirring in between, until smooth. Alternatively, soften cream cheese for filling.
- Fill the Cookies: Once the cookies are out of the oven, immediately use the back of a teaspoon to redefine the indentations if needed. Allow to cool slightly, then fill each indentation with melted white chocolate or cream cheese.
- Decorate: If desired, sprinkle with festive sprinkles or crushed candy canes while the filling is still warm to guarantee they stick.
Extra Tips:
For best results, make sure all of your ingredients are at room temperature before you begin, especially the butter, to allow for better mixing. If using cream cheese as a filling, adding a bit of powdered sugar and vanilla extract can enhance the flavor.
Red food coloring can be adjusted to achieve your desired shade of red, and gel food coloring is recommended for a more vibrant color. Additionally, these cookies can be stored in an airtight container for up to a week, making them perfect for preparing in advance of holiday festivities.
Christmas Tree Cupcakes

Christmas Tree Cupcakes are a delightful and festive treat that will bring holiday cheer to any gathering. These whimsical cupcakes aren’t only visually appealing but also deliciously moist and flavorful. The cupcakes themselves are made from a rich, buttery cake batter, while the frosting is transformed into a vibrant green forest of Christmas trees using food coloring and a piping bag. Perfect as a dessert centerpiece or as a fun activity to enjoy with family and friends, these cupcakes are bound to be a hit.
The best part about Christmas Tree Cupcakes is their versatility. You can easily customize them to suit your preferences by adding flavors such as vanilla, chocolate, or even a hint of peppermint to the batter or frosting. The final touch involves decorating the trees with various edible ornaments like sprinkles, candies, or edible glitter, adding an extra layer of festivity.
Whether you’re a seasoned baker or a beginner, this recipe is straightforward and offers a creative way to celebrate the holiday season.
Ingredients (Serves 4-6)
- 1 1/2 cups all-purpose flour
- 1 cup granulated sugar
- 1/2 cup unsalted butter, softened
- 2 large eggs
- 1/2 cup milk
- 1 1/2 teaspoons baking powder
- 1 teaspoon vanilla extract
- 1/4 teaspoon salt
- Green food coloring
- 2 cups powdered sugar
- 1/2 cup unsalted butter, softened (for frosting)
- 2-3 tablespoons milk (for frosting)
- Colored sprinkles and candies for decoration
Cooking Instructions
- Preheat the Oven: Preheat your oven to 350°F (175°C). Line a muffin tin with cupcake liners to prepare for baking.
- Prepare the Batter: In a large mixing bowl, cream together the softened butter and granulated sugar until light and fluffy. Add the eggs one at a time, beating well after each addition. Stir in the vanilla extract.
- Combine Dry Ingredients: In another bowl, whisk together the flour, baking powder, and salt. Gradually add the dry ingredients to the wet mixture, alternating with the milk, beginning and ending with the flour mixture. Mix until just combined.
- Fill the Cupcake Liners: Divide the batter evenly among the prepared cupcake liners, filling each about two-thirds full.
- Bake the Cupcakes: Place the muffin tin in the preheated oven and bake for 18-20 minutes, or until a toothpick inserted into the center of a cupcake comes out clean. Allow the cupcakes to cool in the tin for 5 minutes before transferring them to a wire rack to cool completely.
- Make the Frosting: In a mixing bowl, beat together the softened butter and powdered sugar until smooth and creamy. Add milk, one tablespoon at a time, until the desired consistency is reached. Add green food coloring to achieve the desired shade of green.
- Decorate the Cupcakes: Fill a piping bag fitted with a star tip with the green frosting. Pipe tall swirls of frosting on top of each cupcake to resemble a Christmas tree. Decorate with colored sprinkles and candies to mimic ornaments.
Extra Tips
When making Christmas Tree Cupcakes, it’s important to ascertain your frosting is the right consistency for piping. If the frosting is too thick, add a little more milk; if too thin, add more powdered sugar.
To achieve a vibrant green color, start with a few drops of food coloring and adjust as needed. For added fun, incorporate different textures by using various sprinkles and candies as tree decorations.
Finally, allow the cupcakes to cool completely before frosting to prevent the buttercream from melting. Enjoy your festive creations!
Stained Glass Window Cookies
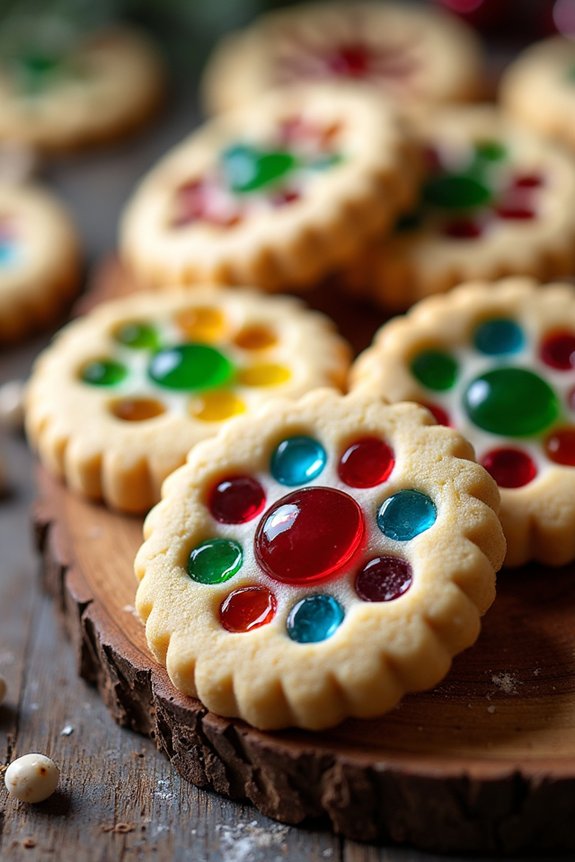
Stained Glass Window Cookies are a whimsical and festive treat that beautifully combines the traditional cookie with a colorful stained glass effect. These delightful cookies are perfect for the holiday season and can be used as edible ornaments for your Christmas tree or simply enjoyed with a cup of hot cocoa.
The process involves creating a simple cookie dough that’s then cut into shapes, with the center filled with crushed hard candies that melt into a vibrant, glass-like center during baking.
To make these cookies, you’ll start by preparing a basic sugar cookie dough. This dough is easy to work with and holds its shape well, making it ideal for cutting and decorating. Once the dough is prepared and chilled, you can roll it out and use cookie cutters to create your desired shapes.
Before baking, you’ll fill the center of each cookie with crushed candy pieces, which will melt and spread out to form the “glass” in your stained glass windows. This recipe makes enough cookies to serve 4-6 people, making it perfect for a small gathering or as a delightful gift for friends and family.
Ingredients:
- 2 3/4 cups all-purpose flour
- 1 teaspoon baking powder
- 1/2 teaspoon salt
- 1 cup unsalted butter, softened
- 1 cup granulated sugar
- 1 large egg
- 2 teaspoons vanilla extract
- Assorted colored hard candies (such as Jolly Ranchers or Life Savers), crushed
Cooking Instructions:
- Prepare the Dough: In a medium bowl, whisk together the flour, baking powder, and salt. In a large bowl, beat the softened butter and granulated sugar together until light and fluffy. Add the egg and vanilla extract, mixing until well combined. Gradually add the dry ingredients to the wet mixture, mixing just until the dough comes together.
- Chill the Dough: Divide the dough in half, flatten into disks, and wrap each in plastic wrap. Refrigerate for at least 1 hour, or until firm.
- Preheat the Oven: Preheat your oven to 350°F (175°C) and line two baking sheets with parchment paper.
- Roll Out the Dough: On a lightly floured surface, roll out one disk of dough to about 1/4 inch thickness. Use cookie cutters to cut out shapes from the dough and transfer them to the prepared baking sheets.
- Create the Windows: Use a smaller cookie cutter to cut out the center of each cookie. Reserve the center pieces for another use or re-roll them to make more cookies.
- Fill with Candy: Fill the center of each cookie with crushed hard candies, making sure the candy pieces are evenly distributed and not overflowing.
- Bake the Cookies: Bake in the preheated oven for 7-9 minutes, or until the cookies are lightly golden around the edges, and the candy has melted completely. Cool on the baking sheets for a few minutes before transferring to a wire rack to cool completely.
Extra Tips:
For the best results, verify that the hard candies are finely crushed so they melt evenly and fill the cookie centers without spilling over.
Using parchment paper or a silicone baking mat on your baking sheets will prevent the melted candy from sticking.
When crushing the candies, consider separating them by color for a more vibrant and distinct stained glass effect.
If you want to hang the cookies as ornaments, use a straw to make a small hole near the top of each cookie before baking.

