

As someone who adores adding a sprinkle of whimsy to my holiday celebrations, Grinch-themed Christmas baking ideas are a must-try. Whipping up Grinch Heart Cookies or Grinchy Green Hot Chocolate brings a touch of Dr. Seuss magic to your kitchen. These treats not only taste amazing but also make any holiday gathering extra special. I’m thrilled to share these joyful recipes with you. Curious about what else is on the list?
Grinch Heart Cookies
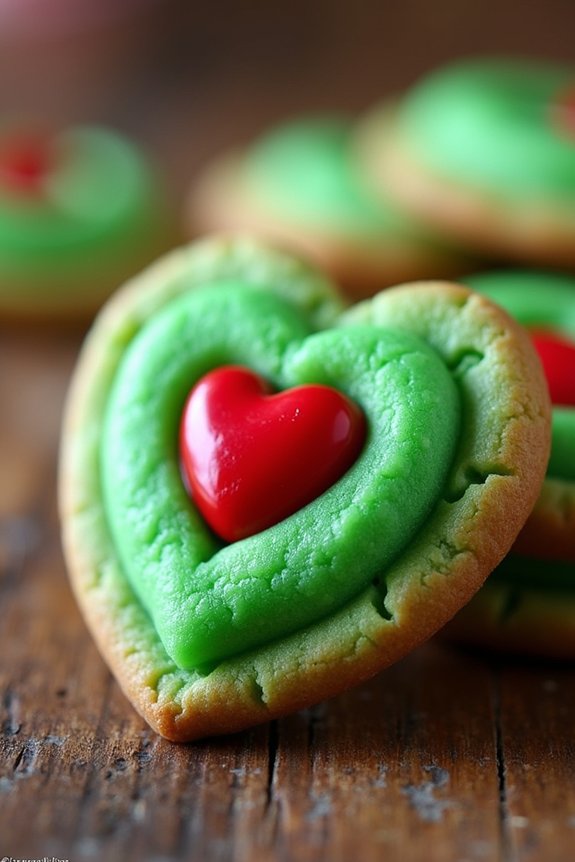
Grinch Heart Cookies are a festive treat that captures the whimsical spirit of the holiday season. Inspired by the classic tale of the Grinch, these cookies are both visually appealing and delightfully delicious. With a bright green hue and a single red heart at the center, they symbolize the Grinch’s transformation. Perfect for holiday gatherings or a cozy baking day at home, these cookies are certain to bring joy to anyone who sees or tastes them.
The recipe is straightforward and ideal for involving the little ones in the kitchen. The cookies are made using a simple sugar cookie base that’s dyed green, with a red candy heart placed on top to represent the Grinch’s growing heart. This recipe makes enough for 4-6 people, guaranteeing there’s plenty to go around. Whether you’re a fan of the Grinch or simply enjoy themed holiday treats, these Grinch Heart Cookies are a must-try this Christmas.
Ingredients (for 4-6 people):
- 2 3/4 cups all-purpose flour
- 1 teaspoon baking soda
- 1/2 teaspoon baking powder
- 1 cup unsalted butter, softened
- 1 1/2 cups granulated sugar
- 1 large egg
- 1 teaspoon vanilla extract
- Green food coloring
- Red heart-shaped candies or sprinkles
Instructions:
- Preheat and Prepare: Preheat your oven to 350°F (175°C). Line two baking sheets with parchment paper to prevent the cookies from sticking and guarantee even baking.
- Mix Dry Ingredients: In a medium-sized bowl, whisk together the all-purpose flour, baking soda, and baking powder. This will guarantee the leavening agents are evenly distributed throughout the flour.
- Cream Butter and Sugar: In a large mixing bowl, cream together the softened butter and granulated sugar using an electric mixer on medium speed until the mixture is light and fluffy. This should take about 2-3 minutes.
- Add Egg and Vanilla: Beat in the egg and vanilla extract until fully incorporated. This contributes to the flavor and structure of the cookies.
- Color the Dough: Gradually add green food coloring to the wet mixture, mixing thoroughly after each addition, until the desired Grinch-like shade is achieved.
- Combine Ingredients: Slowly add the dry ingredients to the wet mixture, mixing on low speed until a dough forms. Be careful not to overmix, as this can result in tough cookies.
- Shape the Cookies: Roll tablespoon-sized amounts of dough into balls and place them on the prepared baking sheets. Make sure to leave about 2 inches of space between each cookie to allow for spreading.
- Add the Heart: Gently press a red heart-shaped candy or sprinkle into the center of each dough ball. The candy should slightly indent the dough but remain visible.
- Bake: Bake in the preheated oven for 8-10 minutes or until the edges are set and the cookies have puffed slightly. Avoid over-baking to maintain a soft, chewy texture.
- Cool: Remove the cookies from the oven and allow them to cool on the baking sheets for 5 minutes before transferring them to a wire rack to cool completely.
Extra Tips:
For an extra festive touch, consider adding a few drops of peppermint extract to the cookie dough for a minty flavor that complements the theme. If you prefer a softer cookie, you can slightly under-bake them, keeping an eye out for the edges setting but the centers remaining soft.
Grinch Sugar Cookie Bars

Grinch Sugar Cookie Bars are a delightful and festive treat that captures the whimsy of the holiday season. These colorful bars are perfect for adding a cheerful touch to your dessert table, while also being a fun baking activity to enjoy with family and friends. The combination of soft, buttery sugar cookie dough and a rich, creamy frosting creates a scrumptious dessert that’s sure to please both the young and the young at heart.
Inspired by the classic Dr. Seuss character, these bars are adorned with Grinch-green frosting and a sprinkle of red heart-shaped candies to represent the Grinch’s small heart growing three sizes.
Ideal for serving a small gathering of 4-6 people, this recipe is simple yet decadent, and can be easily adjusted to accommodate larger crowds. With a few basic ingredients and a splash of food coloring, you’ll be on your way to creating these delightful Grinch Sugar Cookie Bars.
Whether you’re a seasoned baker or a beginner, this recipe is straightforward and rewarding, ensuring that your holiday celebrations are filled with creativity and joy.
Ingredients (serving size: 4-6 people):
- 1 cup unsalted butter, softened
- 1 cup granulated sugar
- 2 large eggs
- 2 teaspoons vanilla extract
- 2 ¾ cups all-purpose flour
- 1 teaspoon baking powder
- ½ teaspoon salt
- Green food coloring
- 1 cup unsalted butter, softened (for frosting)
- 4 cups powdered sugar
- 1 teaspoon vanilla extract (for frosting)
- 2-4 tablespoons milk
- Red heart-shaped sprinkles
Cooking Instructions:
- Prepare the Cookie Dough: Preheat your oven to 350°F (175°C) and line a 9×13 inch baking pan with parchment paper. In a large mixing bowl, cream together 1 cup of softened butter and 1 cup of granulated sugar until light and fluffy. Beat in the eggs, one at a time, along with 2 teaspoons of vanilla extract.
- Combine Dry Ingredients: In a separate bowl, whisk together the flour, baking powder, and salt. Gradually add the dry ingredients to the wet mixture, mixing until just combined.
- Add Color: Add green food coloring to the dough, mixing until you achieve the desired Grinch-like shade of green. Spread the dough evenly in the prepared baking pan.
- Bake the Bars: Bake in the preheated oven for 20-25 minutes or until the edges are lightly golden and a toothpick inserted into the center comes out clean. Allow the bars to cool completely in the pan on a wire rack.
- Make the Frosting: In a clean mixing bowl, beat 1 cup of softened butter until creamy. Gradually add the powdered sugar, one cup at a time, mixing well after each addition. Stir in 1 teaspoon of vanilla extract and 2-4 tablespoons of milk, until you reach a smooth, spreadable consistency.
- Frost the Bars: Once the cookie bars are completely cool, spread the frosting evenly over the top. Decorate with red heart-shaped sprinkles to mimic the Grinch theme.
- Cut and Serve: Cut the bars into squares and serve. Enjoy your festive Grinch Sugar Cookie Bars!
Extra Tips:
To achieve the perfect shade of Grinch green, start with a few drops of food coloring and gradually add more until you reach your desired color.
Be careful not to overmix the dough once the flour is added, as this can result in tougher cookie bars. If you prefer a thicker or thinner frosting, adjust the amount of milk accordingly.
These bars can be made ahead of time and stored in an airtight container for up to three days, making them a convenient choice for holiday gatherings. Enjoy the process and have fun with the decorations, as the holiday spirit is all about creativity and joy!
Grinch Cake Pops
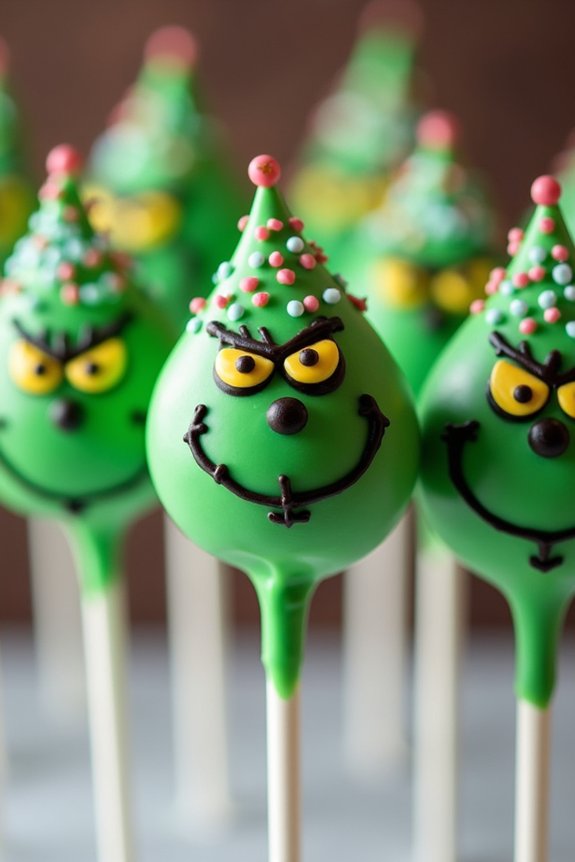
Grinch Cake Pops are a delightful way to bring some holiday cheer to your Christmas festivities. Inspired by the iconic character from Dr. Seuss’s “How the Grinch Stole Christmas,” these cake pops aren’t only adorable but also deliciously moist and chocolatey. Perfect for a family gathering or a holiday party, these treats will surely impress your guests with their vibrant green color and cute Grinch faces.
Whether you’re a seasoned baker or a novice in the kitchen, this recipe is simple to follow and fun to make. The key to achieving the perfect Grinch Cake Pops lies in the combination of a rich chocolate cake and a sweet vanilla frosting. Once formed into balls, these cake pops are dipped in a vibrant green candy coating and decorated with tiny heart sprinkles to resemble the Grinch’s growing heart.
This recipe yields approximately 24 cake pops, making it an ideal choice for serving 4-6 people at your next holiday event. With a little patience and creativity, you’ll have a batch of Grinch Cake Pops that are both eye-catching and delectable.
Ingredients (Serves 4-6):
- 1 box of chocolate cake mix
- 1 cup of water
- 1/3 cup of vegetable oil
- 3 large eggs
- 1 cup of vanilla frosting
- 24 oz of green candy melts
- 2 tablespoons of vegetable shortening
- 24 lollipop sticks
- Heart-shaped sprinkles
- Edible black gel pen
Cooking Instructions:
- Prepare the Cake: Preheat your oven to 350°F (175°C). In a large mixing bowl, combine the chocolate cake mix, water, vegetable oil, and eggs. Mix until the batter is smooth and well-combined. Pour the batter into a greased 9×13-inch baking dish and bake for 30-35 minutes, or until a toothpick inserted into the center comes out clean. Allow the cake to cool completely.
- Make the Cake Balls: Once cooled, crumble the cake into fine crumbs in a large mixing bowl. Add the vanilla frosting and mix until the mixture is well-combined and can hold its shape. Roll the mixture into 1-inch balls and place them on a baking sheet lined with parchment paper. Refrigerate for at least 1 hour to firm up.
- Melt the Candy Coating: In a microwave-safe bowl, melt the green candy melts with the vegetable shortening in 30-second intervals, stirring in between until smooth and fully melted.
- Assemble the Cake Pops: Dip the tip of each lollipop stick into the melted candy coating and insert it halfway into each cake ball. This helps the stick adhere to the cake pop. Allow the coating to set for a few minutes.
- Coat the Cake Pops: Dip each cake pop into the melted candy coating, making sure it’s fully covered. Gently tap off any excess coating and stand the cake pop upright in a styrofoam block or cake pop stand to dry.
- Decorate: Before the coating sets completely, press a heart-shaped sprinkle onto each cake pop to represent the Grinch’s heart. Once dry, use the edible black gel pen to draw a Grinch-like face on each cake pop.
Extra Tips:
To guarantee the candy coating is smooth and even, add a bit of vegetable shortening to the candy melts to thin it out and make it easier to work with. If the coating starts to harden while you’re working, simply reheat it in the microwave for a few seconds.
Be patient when decorating – let the coating dry completely before adding any details with the gel pen to prevent smudging. Finally, for an extra festive touch, serve these Grinch Cake Pops in a decorative arrangement, perhaps with some green and red ribbons tied to the sticks. Enjoy your holiday baking!
Grinchy Green Hot Chocolate

Indulge in a whimsical twist on a winter classic with Grinchy Green Hot Chocolate. This delightful concoction combines the rich, creamy goodness of traditional hot chocolate with a playful splash of green, inspired by the mischievous Grinch himself. Perfect for holiday gatherings or cozy nights by the fire, this recipe is certain to bring a smile to the faces of both kids and adults alike.
Serve it up with a dollop of whipped cream and a sprinkle of festive cheer, and you’ve got a holiday hit that warms the heart and tickles the imagination.
Our Grinchy Green Hot Chocolate is designed to serve 4-6 people, making it an ideal treat for small gatherings or family movie nights. The vibrant green hue is achieved through the addition of green food coloring, while white chocolate adds a sweet, creamy base. Whether it’s served as a standalone dessert or paired with cookies and other holiday treats, this hot chocolate is bound to become a seasonal favorite.
Ingredients (Serves 4-6):
- 4 cups whole milk
- 1 cup heavy cream
- 1 cup white chocolate chips
- 1 tablespoon vanilla extract
- Green food coloring (to preference)
- Whipped cream (for topping)
- Red sanding sugar or sprinkles (for decoration)
- Mini marshmallows (optional)
Instructions:
- Heat the Milk and Cream: In a medium-sized saucepan, combine the whole milk and heavy cream. Place the saucepan over medium heat and stir occasionally until the mixture is hot but not boiling. This should take about 5-7 minutes. Be careful not to bring it to a boil to prevent the cream from curdling.
- Melt the White Chocolate: Add the white chocolate chips to the hot milk and cream mixture. Stir continuously until the chocolate is completely melted and the mixture is smooth. This will create a rich, creamy base for your hot chocolate.
- Add Flavor and Color: Stir in the vanilla extract for added flavor. Then, gradually add green food coloring, one drop at a time, stirring well after each addition, until you achieve your desired shade of Grinchy green.
- Serve and Garnish: Pour the hot chocolate into mugs. Top each serving with a generous swirl of whipped cream. Sprinkle red sanding sugar or other festive sprinkles on top of the whipped cream. For an extra touch, you can add a few mini marshmallows.
- Enjoy: Serve immediately while hot. Enjoy the deliciously creamy and sweet Grinchy Green Hot Chocolate with family and friends, while delighting in the holiday spirit.
Extra Tips:
When preparing Grinchy Green Hot Chocolate, be mindful of the balance between the white chocolate and the food coloring. Too much food coloring can alter the taste, so add it gradually.
For a more decadent option, consider using half-and-half instead of whole milk, or substitute the white chocolate with green mint chocolate for a minty twist. If serving to a crowd, keep the hot chocolate warm in a slow cooker on a low setting. This guarantees it stays creamy and ready to serve throughout your gathering.
Grinch Fudge

Grinch Fudge is a delightful and fun holiday treat inspired by the iconic character from Dr. Seuss’s “How the Grinch Stole Christmas.” This vibrant green fudge isn’t only visually appealing but also deliciously creamy, making it a perfect addition to your festive dessert table. The recipe is simple and requires minimal ingredients, making it an ideal choice for both novice and experienced bakers alike.
Whether you’re hosting a Christmas party or simply looking to add a whimsical touch to your holiday baking, Grinch Fudge is sure to be a hit with both kids and adults. This Grinch-themed fudge captures the mischievous spirit of the Grinch with its bright green color and heart-shaped candies that symbolize the Grinch’s heart growing three sizes.
The fudge has a smooth and creamy texture with a subtle vanilla flavor that will melt in your mouth. This recipe serves 4-6 people, making it perfect for a small gathering or as a treat to share with family and friends. With just a few simple steps, you can whip up this festive fudge in no time.
Ingredients (serves 4-6):
- 2 cups white chocolate chips
- 1 cup sweetened condensed milk
- 1 teaspoon vanilla extract
- Green food coloring
- Red heart sprinkles or candies
Cooking Instructions:
- Prepare the Baking Dish: Line an 8×8-inch baking dish with parchment paper, leaving some overhang on the sides for easy removal of the fudge later.
- Melt the Chocolate: In a medium saucepan, combine the white chocolate chips and sweetened condensed milk. Cook over low heat, stirring constantly, until the chocolate is completely melted and the mixture is smooth.
- Add Flavor and Color: Remove the saucepan from the heat and stir in the vanilla extract. Add a few drops of green food coloring and mix until you achieve the desired shade of Grinch green.
- Pour and Set: Pour the green fudge mixture into the prepared baking dish, spreading it evenly with a spatula. Gently tap the dish on the counter to remove any air bubbles.
- Decorate: Immediately sprinkle the red heart candies or sprinkles over the top of the fudge, pressing them lightly into the surface so they adhere.
- Chill: Place the baking dish in the refrigerator and chill for at least 2 hours or until the fudge is firm and set.
- Cut and Serve: Once set, lift the fudge out of the dish using the parchment paper overhang. Cut the fudge into squares using a sharp knife, and serve.
Extra Tips: To achieve the perfect shade of green, start with a small amount of food coloring and gradually add more until you reach the desired color. If you prefer a different flavor, you can substitute the vanilla extract with peppermint extract for a minty twist.
Be sure to store any leftover fudge in an airtight container in the refrigerator to keep it fresh. If you plan to gift the fudge, consider wrapping individual pieces in festive cellophane bags tied with ribbon for a charming presentation.
Grinch Brownie Bites

Grinch Brownie Bites are a delightful and whimsical addition to any Christmas celebration, capturing the spirit of the Grinch in a sweet and festive treat. These bite-sized delights blend the rich, fudgy texture of brownies with a vibrant green topping reminiscent of the Grinch’s iconic hue. Perfect for holiday gatherings or as a special treat for children, these brownies are guaranteed to bring a smile to anyone’s face with their playful appearance and delicious taste.
Creating Grinch Brownie Bites is a fun and straightforward process that can be enjoyed by bakers of all skill levels. The base is a classic brownie recipe, enhanced with a touch of green food coloring and a hint of mint to capture the Grinch’s essence. The finishing touch is a dollop of green-tinted frosting and a small red heart candy, symbolizing the Grinch’s famously growing heart. This recipe serves 4-6 people, making it ideal for small parties or family get-togethers.
Ingredients:
- 1 cup all-purpose flour
- 1/2 cup unsweetened cocoa powder
- 1 cup granulated sugar
- 1/2 cup unsalted butter, melted
- 2 large eggs
- 1 teaspoon vanilla extract
- 1/2 teaspoon peppermint extract
- 1/4 teaspoon salt
- Green gel food coloring
- 1 cup green frosting
- Red heart-shaped candies
Instructions:
- Preheat and Prepare: Preheat your oven to 350°F (175°C) and line a mini muffin tin with paper liners or spray with non-stick cooking spray.
- Mix Dry Ingredients: In a medium bowl, whisk together the flour, cocoa powder, and salt until well combined.
- Blend Wet Ingredients: In a large mixing bowl, beat together the melted butter and sugar until smooth. Add the eggs one at a time, beating well after each addition. Stir in the vanilla and peppermint extracts.
- Combine and Color: Gradually add the dry ingredients to the wet ingredients, mixing just until combined. Stir in a few drops of green gel food coloring until the desired shade of Grinch green is achieved.
- Fill and Bake: Spoon the batter into the prepared mini muffin tins, filling each about 3/4 full. Bake for 10-12 minutes, or until a toothpick inserted into the center comes out with only a few moist crumbs attached. Let them cool in the tin for a few minutes before transferring to a wire rack to cool completely.
- Decorate: Once cooled, top each brownie bite with a dollop of green frosting. Place a red heart-shaped candy in the center of each frosted brownie to complete the Grinch theme.
Extra Tips:
For an even more Grinch-like appearance, consider using neon green gel food coloring to achieve a brighter hue. Confirm that the brownies are completely cooled before decorating to prevent the frosting from melting. If you prefer a less minty flavor, you can reduce the amount of peppermint extract or omit it entirely.
These brownies can be made a day in advance and stored in an airtight container, making them a convenient option for busy holiday schedules.
Grinch Cake Roll
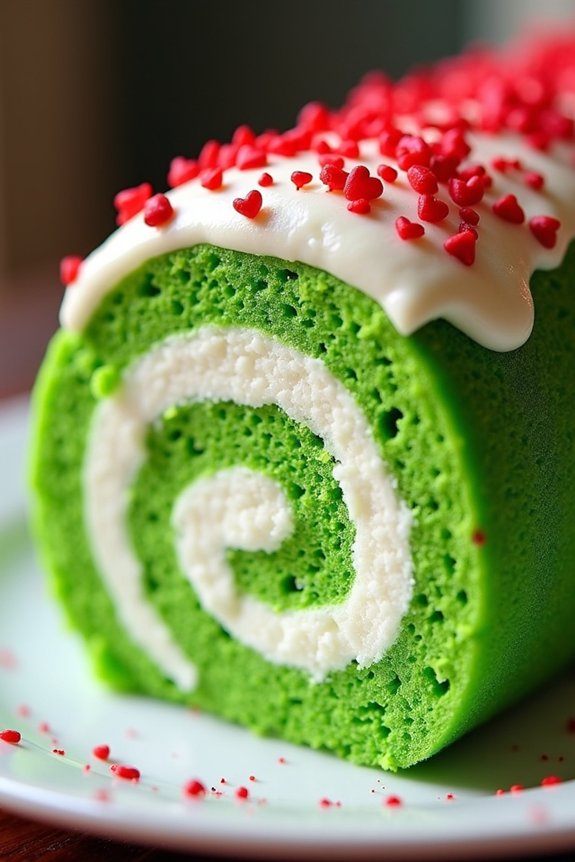
Grinch Cake Roll is a delightful and whimsical dessert inspired by the iconic Dr. Seuss character. This vibrant and colorful cake roll captures the mischievous spirit of the Grinch while delivering a delicious treat perfect for any Christmas gathering.
The Grinch Cake Roll features a bright green sponge cake filled with a creamy and sweet filling, all rolled up to create a striking swirl effect. Its playful appearance and delectable taste make it a hit with both kids and adults, guaranteeing that your holiday spread has a touch of fun and festivity.
Baking a Grinch Cake Roll involves a few steps, but the end result is well worth the effort. The key to achieving the perfect roll is to make certain the cake is flexible and evenly baked, allowing it to roll without cracking. The filling can be customized to your liking, whether you prefer a simple vanilla whipped cream or something richer like cream cheese or mascarpone.
Decorate the exterior of the roll with festive icing, sprinkles, or a dusting of powdered sugar to enhance its whimsical charm. This recipe will serve 4-6 people, making it an ideal addition to your holiday dessert table.
Ingredients:
- 4 large eggs
- 3/4 cup granulated sugar
- 1 teaspoon vanilla extract
- 3/4 cup all-purpose flour
- 1/4 teaspoon baking powder
- 1/4 teaspoon salt
- Green food coloring
- 1/2 cup heavy cream
- 2 tablespoons powdered sugar
- 1 teaspoon vanilla extract (for filling)
- Red heart-shaped sprinkles or candies
Instructions:
- Preheat and Prepare: Preheat your oven to 350°F (175°C). Line a 10×15 inch jelly roll pan with parchment paper, making sure the paper extends over the sides for easy removal.
- Make the Cake Batter: In a large mixing bowl, beat the eggs on high speed until thick and lemon-colored, about 5 minutes. Gradually add the granulated sugar and vanilla extract, continuing to beat until well combined.
- Add Dry Ingredients: In a separate bowl, sift together the flour, baking powder, and salt. Gently fold the dry ingredients into the egg mixture until just combined. Add green food coloring until the desired Grinch-like hue is achieved.
- Bake the Cake: Spread the batter evenly into the prepared pan. Bake for 10-12 minutes, or until the cake springs back when lightly touched. Don’t overbake.
- Roll the Cake: Immediately upon removal from the oven, place a clean kitchen towel on a flat surface and sprinkle it with powdered sugar. Turn the cake out onto the towel, peel off the parchment paper, and roll the cake up with the towel from the short side. Let it cool completely on a wire rack.
- Prepare the Filling: In a medium bowl, whip the heavy cream with powdered sugar and vanilla extract until stiff peaks form.
- Fill and Roll Again: Once the cake is completely cool, unroll it gently and spread the whipped cream filling evenly over the surface. Roll the cake up again, this time without the towel.
- Decoration: Place the roll seam-side down on a serving platter. Decorate with red heart-shaped sprinkles or candies, mimicking the Grinch’s heart that grew three sizes.
Extra Tips:
To prevent the cake from cracking, make sure to roll it while it’s still warm. This helps it mold into the rolled shape more easily.
If you find the cake is sticking to the towel, you can lightly dust the towel with additional powdered sugar before rolling. Be sure to chill the rolled cake in the refrigerator for at least an hour before serving to allow the filling to set and the flavors to meld.
For a more festive presentation, consider drizzling melted white chocolate or a thin layer of green icing over the top.
Grinch Marshmallow Treats
If you’re looking for a fun and festive way to bring some of the Grinch’s mischievous spirit into your holiday baking, these Grinch Marshmallow Treats are a perfect choice.
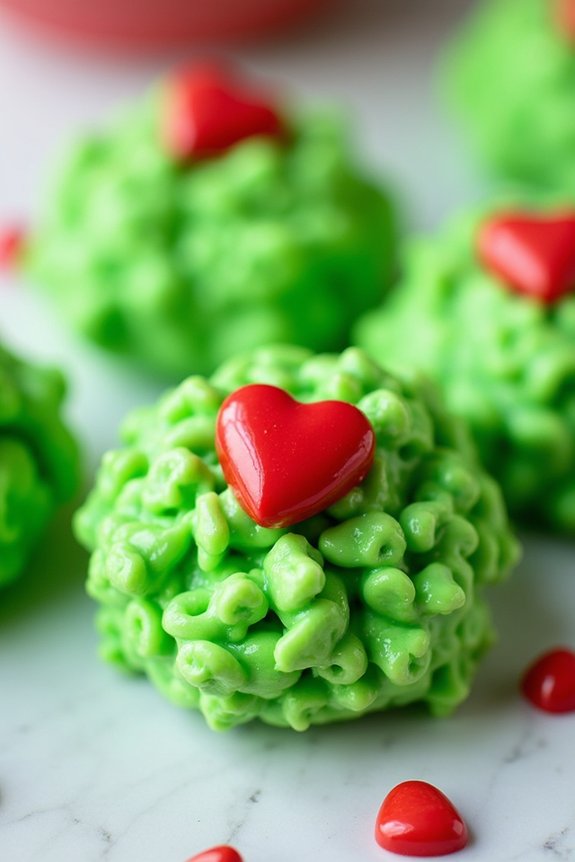
These delightful treats aren’t only a nod to the beloved Dr. Seuss character but also incredibly easy to make and guaranteed to be a hit at any Christmas gathering. The bright green color, fluffy texture, and sweet flavor make them a whimsical addition to your holiday dessert table, and they’re ideal for family baking sessions as well.
Perfect for a serving size of 4-6 people, these Grinch Marshmallow Treats require only a handful of ingredients and a little bit of creativity. The base of the treats is made from gooey marshmallows and crispy rice cereal, with a touch of green food coloring to capture the Grinch’s signature hue.
For a festive touch, a small red candy heart is placed on each square, symbolizing the Grinch’s heart growing three sizes. Let’s explore the ingredients and the simple steps needed to create these charming holiday treats.
Ingredients:
- 5 cups crispy rice cereal
- 4 cups mini marshmallows
- 3 tablespoons unsalted butter
- 1 teaspoon vanilla extract
- Green food coloring
- Red candy hearts (approximately 12-24 pieces)
- Non-stick cooking spray or parchment paper
Instructions:
- Prepare the Pan: Begin by lightly greasing a 9×13 inch pan with non-stick cooking spray or lining it with parchment paper. This will guarantee that the treats don’t stick and are easy to remove once cooled.
- Melt the Butter: In a large saucepan, melt the unsalted butter over low heat. This slow melting process prevents the butter from burning and helps to evenly coat the marshmallows in the next step.
- Add Marshmallows: Once the butter is melted, add the mini marshmallows to the saucepan. Stir continuously over low heat until the marshmallows are completely melted and combined with the butter.
- Color the Mix: Remove the saucepan from heat and quickly stir in the vanilla extract and a few drops of green food coloring. Mix thoroughly until the marshmallow mixture is evenly tinted with the desired shade of Grinch green.
- Combine with Cereal: Pour the crispy rice cereal into the saucepan with the green marshmallow mixture. Gently fold the cereal into the mixture until all pieces are well-coated and evenly mixed.
- Spread and Set: Pour the mixture into the prepared pan. Use a spatula or your hands (lightly greased with cooking spray or butter) to press the mixture evenly into the pan. Guarantee the surface is smooth and even.
- Add Heart Candies: Before the mixture fully sets, gently press the red candy hearts onto the surface of the treats. Space them evenly across the top to create a festive pattern.
- Cool and Cut: Allow the treats to cool completely in the pan, which should take about 30 minutes. Once cooled, cut them into squares or rectangles and serve.
Extra Tips:
To make the most of these Grinch Marshmallow Treats, consider adjusting the intensity of the green food coloring to match your preferred Grinch shade—some like a lighter, minty hue, while others might prefer a darker, richer green.
If you’re working with children, the step of adding the red candy hearts can be a fun way for them to get involved. Additionally, these treats can be stored in an airtight container at room temperature for up to three days, making them a convenient option for advance preparation.
Enjoy spreading some Grinchy cheer with these delightful holiday treats!
Grinch Meringue Cookies
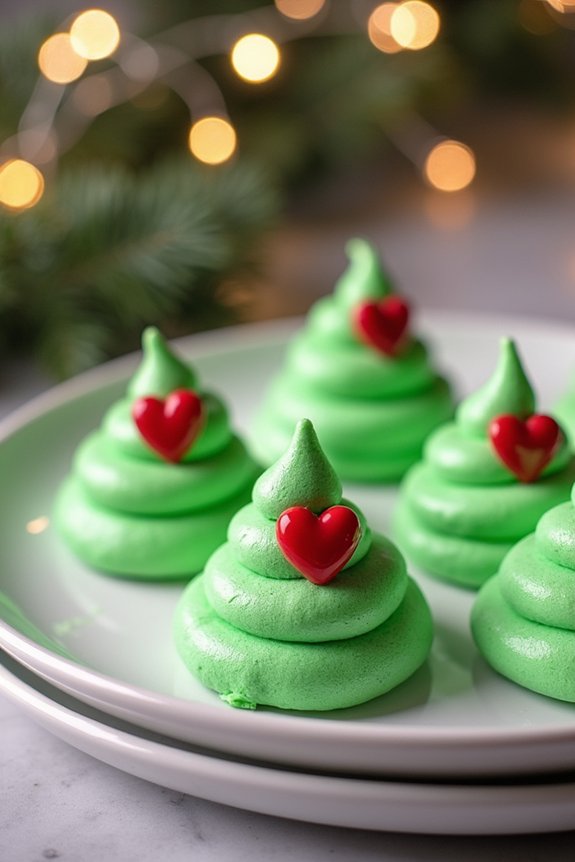
Grinch Meringue Cookies are a delightful and festive treat perfect for adding a whimsical touch to your Christmas baking repertoire.
These light and airy cookies not only taste delicious but also capture the mischievous spirit of the Grinch with their vibrant green color and a single red heart candy placed on top, symbolizing the heart that grew three sizes. Their crisp exterior and melt-in-your-mouth texture make them an excellent addition to any holiday dessert table and a fun activity to share with family and friends.
Perfect for serving 4-6 people, these cookies aren’t only visually appealing but also incredibly easy to make. With just a handful of ingredients, you can whip up a batch of these Grinch-inspired sweets in no time.
The key to achieving the ideal meringue texture lies in the careful whipping of egg whites and the gentle folding of ingredients. With a little patience and attention to detail, you’ll be able to create these charming cookies that are sure to impress both kids and adults alike.
Ingredients:
- 4 large egg whites
- 1 cup granulated sugar
- 1/4 teaspoon cream of tartar
- 1/4 teaspoon vanilla extract
- Green gel food coloring
- Red heart-shaped sprinkles or candies
Cooking Instructions:
- Preheat the Oven: Start by preheating your oven to 225°F (110°C). Line two baking sheets with parchment paper or silicone baking mats to prevent the meringue from sticking.
- Prepare the Egg Whites: In a clean, dry mixing bowl, add the egg whites and cream of tartar. Using an electric mixer on medium speed, beat the egg whites until they become foamy and start to hold soft peaks.
- Incorporate Sugar Gradually: Slowly add the granulated sugar, one tablespoon at a time, while continuing to beat the mixture. Increase the mixer speed to high and beat until the mixture is glossy and forms stiff peaks. This should take about 5-7 minutes.
- Add Flavor and Color: Gently fold in the vanilla extract and a few drops of green gel food coloring until evenly distributed. Be cautious not to deflate the meringue by over-mixing.
- Pipe the Meringue: Transfer the meringue mixture to a piping bag fitted with a large round tip. Pipe small mounds about 1 1/2 inches in diameter onto the prepared baking sheets, spacing them about an inch apart.
- Decorate: Carefully place a red heart-shaped sprinkle or candy on top of each meringue mound.
- Bake: Place the baking sheets in the preheated oven and bake for 1 1/2 to 2 hours, or until the meringues are dry and can be easily lifted off the parchment paper. Turn off the oven and let the meringues cool completely in the oven with the door slightly ajar.
Extra Tips:
To guarantee your meringue cookies have the perfect texture, make sure all your equipment is completely clean and free of any grease, as even a small amount of fat can prevent the egg whites from whipping properly.
Avoid making these cookies on a humid day, as moisture in the air can affect the meringue’s ability to dry out fully. If you don’t have a piping bag, you can use a zip-top plastic bag with the corner snipped off.
Finally, store the cooled cookies in an airtight container to keep them crisp for up to a week.
Grinch Whoopie Pies
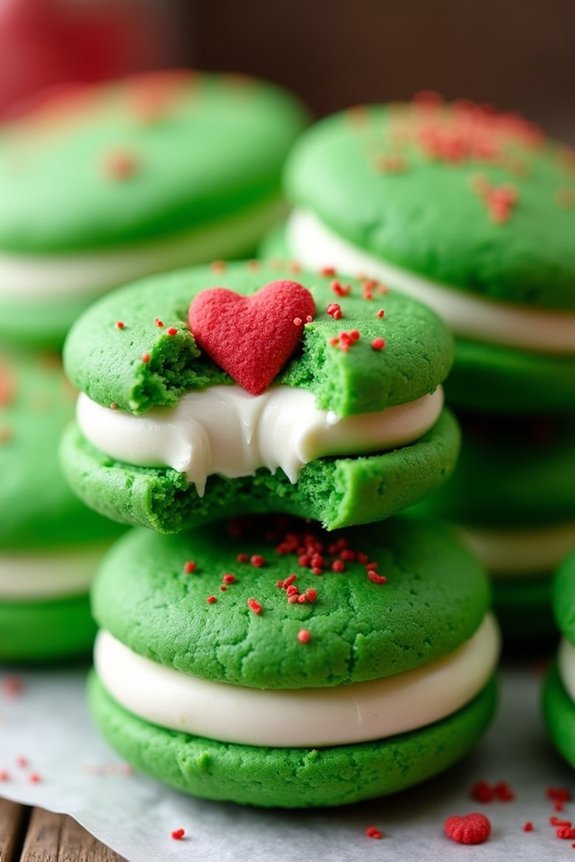
Grinch Whoopie Pies are a delightful and festive treat perfect for any holiday gathering. These vibrant green confections are inspired by the beloved character, the Grinch, bringing a touch of whimsy and fun to your Christmas dessert table. With their fluffy cake-like cookies and creamy filling, these whoopie pies are certain to be a hit with family and friends. Each bite of these sweet, soft sandwiches is filled with festive cheer, making them a wonderful addition to your holiday baking repertoire.
Ideal for serving 4-6 people, the Grinch Whoopie Pies aren’t only delicious but also visually striking. The vibrant green color of the cookies is reminiscent of the Grinch’s iconic hue, while a heart-shaped sprinkle serves as a nod to his famously “two sizes too small” heart that grows three sizes by the end of the story. With a little bit of creativity and some simple ingredients, you can whip up these playful treats that are both fun to make and even more fun to eat.
Ingredients:
- 2 cups all-purpose flour
- 1/2 cup unsweetened cocoa powder
- 1 teaspoon baking soda
- 1/2 teaspoon salt
- 1 cup granulated sugar
- 1/2 cup unsalted butter, softened
- 1 large egg
- 1 cup buttermilk
- 1 teaspoon vanilla extract
- Green food coloring
- 1 cup marshmallow fluff
- 1/2 cup unsalted butter, softened (for filling)
- 1 cup powdered sugar
- 1 teaspoon vanilla extract (for filling)
- Red heart-shaped sprinkles
Instructions:
- Preheat and Prepare: Preheat your oven to 350°F (175°C). Line two baking sheets with parchment paper to guarantee the cookies don’t stick during baking.
- Mix Dry Ingredients: In a medium bowl, sift together the flour, cocoa powder, baking soda, and salt. This will guarantee even distribution of the dry ingredients and prevent lumps.
- Cream Butter and Sugar: In a large mixing bowl, cream together the granulated sugar and 1/2 cup of softened butter until light and fluffy. This usually takes about 2-3 minutes using an electric mixer on medium speed.
- Add Egg and Buttermilk: Beat in the egg until well combined, then gradually add the buttermilk and vanilla extract. Mix until smooth.
- Incorporate Dry Ingredients: Gradually add the dry ingredient mixture to the wet ingredients, mixing on low speed until just combined. Be careful not to overmix.
- Add Food Coloring: Add green food coloring to the batter and mix until the desired shade of Grinch-like green is achieved. Adjust the amount as necessary to get the perfect hue.
- Scoop and Bake: Using a tablespoon or small ice cream scoop, drop mounds of batter onto the prepared baking sheets, spacing them about 2 inches apart. Bake for 10-12 minutes or until the cookies spring back when touched lightly.
- Cool: Remove from the oven and allow the cookies to cool on the baking sheets for about 5 minutes before transferring them to a wire rack to cool completely.
- Prepare the Filling: In a medium bowl, beat together the marshmallow fluff and 1/2 cup of softened butter until smooth. Gradually add the powdered sugar and 1 teaspoon vanilla extract, mixing until light and fluffy.
- Assemble Whoopie Pies: Once the cookies are completely cool, spread or pipe the filling onto the flat side of half of the cookies. Top with the remaining cookies, pressing gently to spread the filling to the edges.
- Decorate: Gently press a red heart-shaped sprinkle onto the top of each whoopie pie to give them the full Grinch effect.
Extra Tips:
To guarantee your Grinch Whoopie Pies are perfectly uniform, consider using a cookie scoop to portion out the batter evenly. If you want a deeper green color, use gel food coloring, which is more concentrated than liquid coloring.
Additionally, allowing the filled whoopie pies to chill slightly in the refrigerator for about 30 minutes before serving can help the filling set, making them easier to handle and enjoy. Remember, baking times may vary slightly depending on your oven, so keep an eye on the cookies as they bake to avoid overcooking.
Grinch Donuts
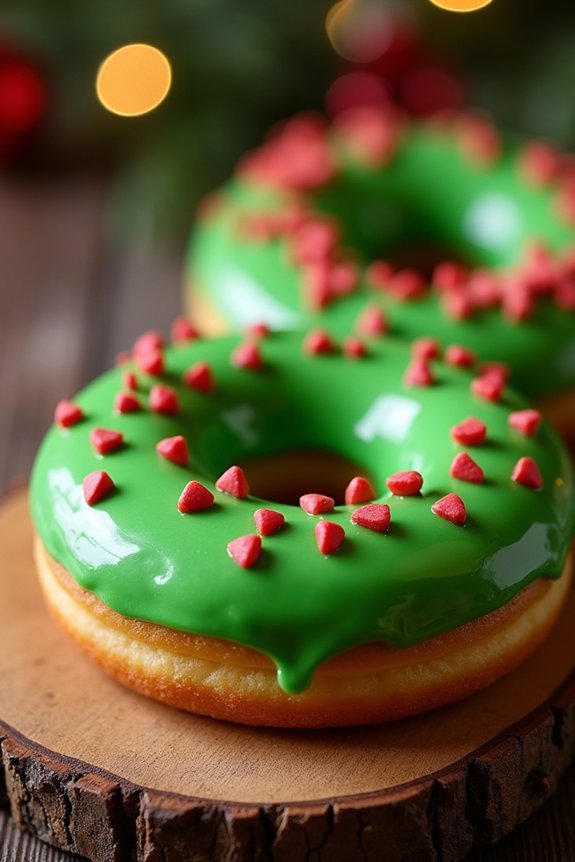
Transform your kitchen into a whimsical workshop this holiday season by creating Grinch Donuts, a delightful treat inspired by the infamous character himself. These donuts will add a splash of fun and color to your festive celebrations, perfect for both kids and adults who adore the mischievous green character. With their vibrant green glaze and a touch of sweetness, these Grinch Donuts will be the showstopper at your Christmas gatherings or morning brunches.
The magic of these Grinch Donuts lies in their simplicity combined with a touch of creativity. Whether you’re a seasoned baker or a novice in the kitchen, this recipe is straightforward and enjoyable to make. The fluffy, tender donuts are baked instead of fried, making them a slightly healthier option without compromising on taste. The secret to their Grinchy appearance is the vivid green glaze and the heart-shaped sprinkle that symbolizes the Grinch’s growing heart.
Gather your family and friends, don your aprons, and get ready to spread some holiday cheer with these delightful donuts.
Ingredients (Serves 4-6):
- 2 cups all-purpose flour
- 1/2 cup granulated sugar
- 2 teaspoons baking powder
- 1/4 teaspoon nutmeg
- 1/4 teaspoon salt
- 3/4 cup whole milk
- 2 large eggs
- 1 teaspoon vanilla extract
- 2 tablespoons unsalted butter, melted
- Green food coloring
- 1 cup powdered sugar
- 2-3 tablespoons milk (for glaze)
- Heart-shaped sprinkles
Cooking Instructions:
- Preheat and Prepare: Preheat your oven to 350°F (175°C). Lightly grease a donut pan with non-stick spray to guarantee easy removal of the donuts later.
- Mix Dry Ingredients: In a large mixing bowl, whisk together the flour, granulated sugar, baking powder, nutmeg, and salt until well combined.
- Combine Wet Ingredients: In a separate bowl, whisk together the milk, eggs, vanilla extract, and melted butter. Stir in a few drops of green food coloring until you achieve your desired shade of Grinch green.
- Create Batter: Gradually add the wet ingredients to the dry ingredients, stirring gently until just combined. Be careful not to overmix, as this can make the donuts tough.
- Fill the Pan: Using a spoon or a piping bag, fill each donut cavity in the prepared pan about 3/4 full with the batter.
- Bake the Donuts: Place the pan in the preheated oven and bake for 10-12 minutes, or until the donuts have risen and a toothpick inserted into the center comes out clean.
- Cool and Prepare Glaze: Allow the donuts to cool in the pan for a few minutes before transferring them to a wire rack to cool completely. In a small bowl, mix powdered sugar with 2-3 tablespoons of milk to create a smooth glaze. Stir in a few drops of green food coloring.
- Decorate the Donuts: Once the donuts are completely cooled, dip the top of each donut into the green glaze, allowing the excess to drip off. Immediately place a heart-shaped sprinkle on each donut while the glaze is still wet.
- Set and Serve: Allow the glaze to set for about 10 minutes before serving. Enjoy your Grinch Donuts with a cup of hot cocoa or milk.
Extra Tips:
When making the Grinch Donuts, verify that all your ingredients are at room temperature to achieve a smooth batter. If you don’t have a donut pan, you can use a muffin tin and create a donut shape by placing a ball of aluminum foil in the center.
Adjust the amount of food coloring to achieve your desired shade of green, and remember to add the heart-shaped sprinkles quickly before the glaze sets. These donuts are best enjoyed fresh but can be stored in an airtight container for up to two days.
Grinch Popcorn Mix
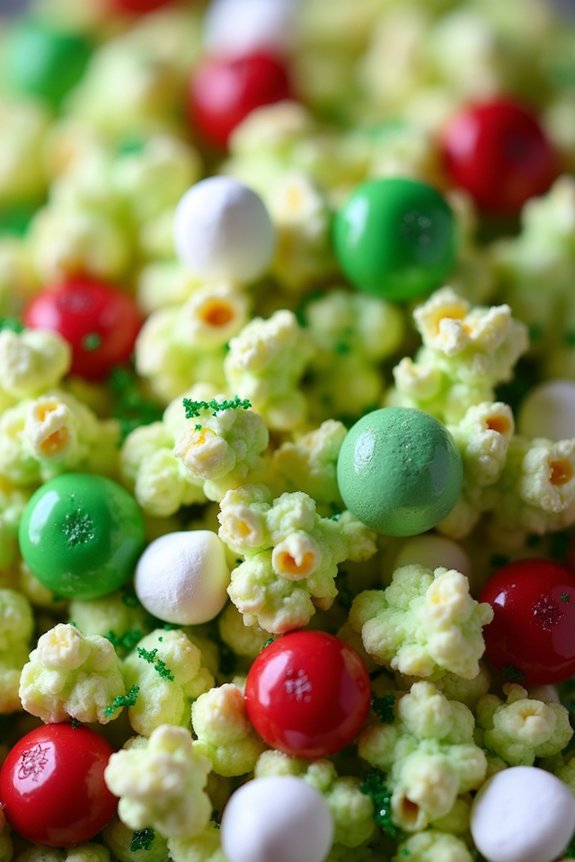
For a festive and whimsical treat that’s sure to bring some holiday cheer, try making Grinch Popcorn Mix. Inspired by the mischievous yet lovable character from Dr. Seuss’s “How the Grinch Stole Christmas!”, this snack is perfect for holiday movie nights or as a tasty gift. The combination of sweet and salty flavors, with a splash of green to honor the Grinch himself, makes this popcorn mix a hit among both kids and adults.
This recipe is simple and fun to prepare, making it a great activity to do with family or friends. You’ll start by making a base of popcorn and then dress it up with colorful candy melts, chocolate candies, and festive sprinkles. The Grinch Popcorn Mix can be customized to your liking with additional mix-ins or toppings, allowing you to create a unique and delicious treat that everyone will enjoy.
Ingredients for Grinch Popcorn Mix (serves 4-6):
- 8 cups of popped popcorn
- 1 cup of green candy melts
- 1/4 cup of red and green chocolate candies (such as M&Ms)
- 1/4 cup of mini marshmallows
- 2 tablespoons of butter
- 1/4 cup of green sprinkles
- 1/2 teaspoon of salt
Cooking Instructions:
- Prepare the Popcorn: Begin by popping your popcorn. You can use pre-packaged microwave popcorn, or pop your kernels on the stove or in an air popper. Aim for about 8 cups of popped popcorn. Once popped, spread the popcorn on a large baking sheet lined with parchment paper.
- Melt the Candy Melts: In a microwave-safe bowl, combine the green candy melts and butter. Microwave in 30-second intervals, stirring in between, until the mixture is completely melted and smooth.
- Mix the Popcorn: Drizzle the melted candy mixture over the popcorn. Use a spatula or your hands to gently toss the popcorn until it’s evenly coated with the candy.
- Add the Toppings: While the candy coating is still warm, quickly sprinkle the popcorn with salt, then add the red and green chocolate candies, mini marshmallows, and green sprinkles. Toss everything together gently to distribute the toppings throughout the mix.
- Set and Serve: Allow the Grinch Popcorn Mix to cool completely, letting the candy coating harden. Once set, break apart any large clusters and serve in a large bowl or package in individual bags for gifting.
Extra Tips:
For the best results, make sure your popcorn is fully cooled before adding the candy coating to prevent it from becoming soggy. You can also experiment with different types of sprinkles or candy to give your mix a personal touch.
If you prefer a more chocolatey flavor, consider adding a drizzle of melted white or dark chocolate before the candy coating sets. Store any leftovers in an airtight container to keep the popcorn fresh and crispy.
Grinch Cheesecake Cups
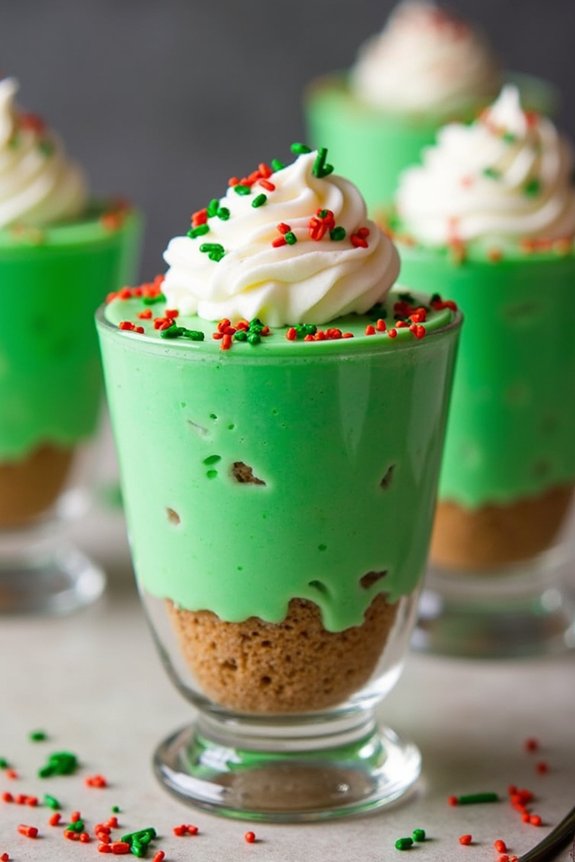
Grinch Cheesecake Cups are a delightful and whimsical dessert perfect for adding a touch of fun to your holiday celebrations. These vibrant green cheesecake cups capture the mischievous spirit of the Grinch, making them a hit with both kids and adults. The creamy cheesecake filling is infused with a hint of vanilla and lime, providing a revitalizing twist to the traditional cheesecake, while the festive colors and playful decorations bring the Grinch’s character to life.
Not only are Grinch Cheesecake Cups visually appealing, but they’re also incredibly easy to prepare, making them an ideal choice for a busy holiday season. With a simple graham cracker crust, a luscious green cheesecake layer, and a decorative topping, these cups can be whipped up in no time. Perfect for a serving size of 4-6 people, this recipe allows you to share the holiday joy with friends and family without the stress of complicated baking.
Ingredients:
- 1 cup graham cracker crumbs
- 3 tablespoons melted butter
- 2 tablespoons sugar
- 8 oz cream cheese, softened
- 1/2 cup powdered sugar
- 1 teaspoon vanilla extract
- 1 tablespoon lime juice
- Green food coloring
- 1 cup heavy whipping cream
- Grinch-themed sprinkles or decorations
Instructions:
- Prepare the crust: Mix the graham cracker crumbs, melted butter, and sugar in a medium bowl until the mixture resembles wet sand. Press the mixture evenly into the bottoms of 4-6 serving cups or small jars to form a crust layer. Set aside.
- Make the cheesecake filling: In a large mixing bowl, beat the softened cream cheese until smooth and creamy. Gradually add the powdered sugar, vanilla extract, and lime juice, beating until well combined.
- Add color and flavor: Add a few drops of green food coloring to the cream cheese mixture, stirring until the desired Grinch-like shade is achieved. Adjust the color as needed.
- Whip the cream: In a separate bowl, whip the heavy cream until stiff peaks form. Carefully fold the whipped cream into the green cream cheese mixture, creating a light and airy cheesecake filling.
- Assemble the cups: Spoon the cheesecake filling over the prepared crusts, filling each cup to the top. Smooth the tops with a spatula.
- Decorate: Sprinkle Grinch-themed decorations or sprinkles on top of each cheesecake cup. You can also add a dollop of whipped cream for extra flair.
- Chill: Refrigerate the cheesecake cups for at least 2 hours or until they’re set and firm.
Extra Tips:
To make your Grinch Cheesecake Cups even more festive, consider adding a few drops of lime or lemon zest to the cheesecake filling for an extra burst of citrus flavor.
If you prefer a more robust crust, simply double the graham cracker crust ingredients.
When mixing the green food coloring, start with a small amount and gradually add more to achieve your desired intensity, as food coloring can be potent.
Finally, for a smoother texture, verify that the cream cheese is at room temperature before mixing.
Grinch Cupcakes
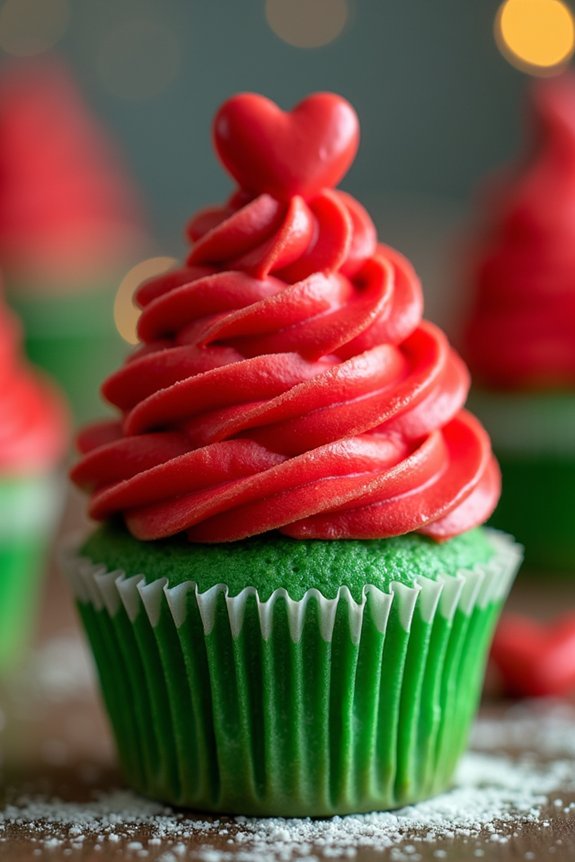
Transform your Christmas dessert spread into a whimsical wonderland with these delightful Grinch Cupcakes. Inspired by the beloved holiday character, these cupcakes are perfect for adding a playful touch to your festive gathering. The green-tinted cupcakes, topped with fluffy red frosting and a tiny heart candy, capture the essence of the Grinch’s transformation from a grouchy holiday hater to a warm-hearted friend.
These cupcakes aren’t only visually appealing but also absolutely scrumptious, making them a hit among both children and adults alike.
These Grinch Cupcakes aren’t only fun to make but also easy, guaranteeing that you can enjoy the holiday festivities without spending all your time in the kitchen. The base of the cupcake is a soft and moist green velvet cake, which is complemented by a rich and creamy red-tinted vanilla frosting. The addition of a small heart-shaped candy on top symbolizes the Grinch’s heart growing three sizes.
This recipe yields about 12-16 cupcakes, making it ideal for serving 4-6 people, depending on how many cupcakes each person enjoys.
Ingredients for Grinch Cupcakes (Serves 4-6):
- 1 ½ cups all-purpose flour
- 1 cup granulated sugar
- 1 teaspoon baking powder
- ½ teaspoon baking soda
- ¼ teaspoon salt
- ¼ cup unsweetened cocoa powder
- ¾ cup buttermilk
- ½ cup vegetable oil
- 2 large eggs
- 1 teaspoon vanilla extract
- Green food coloring
- 1 cup unsalted butter, softened (for frosting)
- 4 cups powdered sugar (for frosting)
- 2 teaspoons vanilla extract (for frosting)
- 2-3 tablespoons milk (for frosting)
- Red food coloring (for frosting)
- Heart-shaped candies
Cooking Instructions:
- Preheat the Oven: Start by preheating your oven to 350°F (175°C) and line a cupcake pan with cupcake liners.
- Mix Dry Ingredients: In a medium-sized bowl, whisk together the flour, sugar, baking powder, baking soda, salt, and cocoa powder until well combined.
- Prepare Wet Ingredients: In a separate large bowl, mix the buttermilk, vegetable oil, eggs, and vanilla extract. Once combined, add a few drops of green food coloring until you achieve the desired shade of Grinch green.
- Combine Ingredients: Gradually add the dry ingredients to the wet ingredients, mixing on low speed until just combined. Be careful not to overmix to guarantee the cupcakes remain light and fluffy.
- Fill Cupcake Liners: Divide the batter evenly among the cupcake liners, filling each about two-thirds full.
- Bake the Cupcakes: Place the cupcake tray in the preheated oven and bake for 18-20 minutes or until a toothpick inserted into the center of a cupcake comes out clean. Allow the cupcakes to cool in the pan for a few minutes before transferring them to a wire rack to cool completely.
- Prepare the Frosting: In a large bowl, beat the softened butter until creamy. Gradually add the powdered sugar, one cup at a time, mixing well after each addition. Add the vanilla extract and enough milk to achieve a spreadable consistency. Add red food coloring and mix until the frosting is evenly colored.
- Frost the Cupcakes: Once the cupcakes are fully cooled, use a piping bag fitted with a star tip to pipe the red frosting onto each cupcake.
- Decorate with Heart Candies: Finish by placing a heart-shaped candy on top of each cupcake to complete the Grinch theme.
Extra Tips:
When coloring your cupcakes and frosting, remember that the intensity of the color will deepen slightly as the cupcakes bake and the frosting sets, so aim for a slightly lighter shade than your desired final color.
Additionally, if you don’t have buttermilk on hand, you can make a substitute by combining ¾ cup of milk with 1 tablespoon of vinegar or lemon juice and letting it sit for 5 minutes before using.
Finally, to guarantee your cupcakes are perfectly moist, avoid overbaking by checking them a minute or two before the suggested baking time.