

With Halloween just around the corner, I’m absolutely buzzing with excitement to bring you some delightfully eerie dinner ideas that will add a seasonal twist to your spooky celebrations. Think ghostly mashed potatoes or pumpkin-stuffed ravioli, capturing the cozy essence of autumn and thrilling your guests at the same time. These dishes are far from ordinary, offering a creative flair that perfectly matches the eerie ambiance of the holiday. Curious to transform classic recipes into festive delights? Let’s get creative with these culinary tricks and treats.
Spider Web Dip

Spider Web Dip is a fun and spooky appetizer perfect for your Halloween dinner party. This dish combines layers of creamy refried beans, seasoned sour cream, guacamole, and fresh salsa, all topped with a decorative spider web made from sour cream. The dip isn’t only visually impressive but also delicious, offering a delightful blend of flavors and textures that will have your guests coming back for more.
The Spider Web Dip can be served with a variety of dippers such as tortilla chips, sliced vegetables, or even crispy pita chips. It’s the ideal way to kick off a night of Halloween festivities, providing a centerpiece that’s both festive and tasty. The dish is easy to prepare, and the web design is a simple yet eye-catching touch that adds to the Halloween theme.
Ingredients (serves 4-6 people):
- 1 can (15 oz) refried beans
- 1 packet taco seasoning mix
- 1 cup sour cream
- 1 cup guacamole
- 1 cup chunky salsa
- 1 cup shredded cheddar cheese
- 1 small tomato, diced
- 1/4 cup sliced black olives
- 2 green onions, chopped
- 1 resealable plastic bag
- Tortilla chips, for serving
Instructions:
- Prepare the Refried Beans Layer: In a medium saucepan over medium heat, combine the refried beans with half of the taco seasoning mix. Stir until the seasoning is thoroughly mixed into the beans. Once heated through, spread the refried beans evenly onto the bottom of a large serving platter or shallow dish.
- Create the Sour Cream Mixture: In a small bowl, mix half of the sour cream with the remaining taco seasoning. Spread this seasoned sour cream mixture over the layer of refried beans.
- Add the Guacamole Layer: Spread the guacamole evenly over the sour cream layer, ensuring it covers the entire surface.
- Top with Salsa: Gently layer the salsa over the guacamole, being careful not to mix the layers as you spread it out.
- Sprinkle Cheese and Vegetables: Evenly sprinkle the shredded cheddar cheese over the salsa. Follow with the diced tomatoes, sliced black olives, and chopped green onions.
- Create the Spider Web Design: To make the spider web design, fill a resealable plastic bag with the remaining sour cream. Cut a small tip off one corner of the bag. Starting from the center of the dip, pipe the sour cream in concentric circles outward. Use a toothpick to drag lines from the center to the outer edge, creating a web-like pattern.
- Serve: Serve the Spider Web Dip with tortilla chips on the side for dipping.
Extra Tips:
To make the web design easier, you can lightly draw circles on the dip with a toothpick before piping the sour cream lines. This will give you a guide to follow and help guarantee your web is even.
If you’re making the dip ahead of time, it’s best to prepare and refrigerate the layers without the web design and add the sour cream web just before serving to provide a fresh and clean look.
Don’t be afraid to get creative with your toppings; you can add jalapeños for a spicy kick or additional veggies for more color and flavor.
Mummy Meatballs

Transform your Halloween dinner into a spooky yet delicious affair with these fun and festive Mummy Meatballs. Perfect for both kids and adults alike, these meatballs are wrapped in strips of dough to resemble mini mummies, making them a delightful addition to your Halloween menu.
Whether you’re hosting a themed party or just want to surprise your family with a creative meal, these Mummy Meatballs are sure to be a hit. The meatballs themselves are juicy and flavorful, made with a mix of ground beef, breadcrumbs, and an array of aromatic spices.
The “mummy” effect is achieved by wrapping the meatballs with thin strips of crescent roll dough, which bakes to a golden perfection. Serve these with a side of marinara sauce for dipping, and watch as your guests delight in uncovering the tasty mummies hidden within.
Ingredients (Serves 4-6):
- 1 pound ground beef
- 1/2 cup breadcrumbs
- 1 egg
- 1/4 cup grated Parmesan cheese
- 2 cloves garlic, minced
- 1 teaspoon Italian seasoning
- 1/2 teaspoon salt
- 1/4 teaspoon black pepper
- 1 tube crescent roll dough
- 1/4 cup marinara sauce (for dipping)
- 12 small black olives, sliced for eyes
- Cooking spray
Instructions:
1. Preheat Oven: Preheat your oven to 375°F (190°C) and lightly grease a baking sheet with cooking spray.
2. Mix Meatball Ingredients: In a large bowl, combine the ground beef, breadcrumbs, egg, Parmesan cheese, minced garlic, Italian seasoning, salt, and black pepper. Mix everything together until just combined.
Don’t overmix as it can make the meatballs tough.
3. Form Meatballs: Shape the mixture into 12 equal-sized meatballs, about 1.5 inches in diameter, and place them on the prepared baking sheet.
4. Prepare Dough Strips: Roll out the crescent roll dough and cut it into thin strips, about 1/4 inch wide. Use these strips to wrap around each meatball, leaving small gaps for the “mummy” effect.
5. Add Eyes: Place two olive slices on each wrapped meatball to resemble eyes.
6. Bake: Bake the meatballs in the preheated oven for 15-20 minutes, or until the meatballs are cooked through and the dough is golden brown.
7. Serve: Remove from the oven and allow them to cool slightly. Serve warm with a side of marinara sauce for dipping.
Extra Tips:
For an extra flavor boost, consider adding a touch of Worcestershire sauce or a dash of hot sauce to the meatball mixture. You can also use ground turkey or chicken as a lighter alternative to beef.
If you’re short on time, pre-made frozen meatballs can be used instead; simply thaw them before wrapping in dough. For a fun presentation, use a toothpick to keep the mummy wraps in place during baking.
Enjoy crafting these whimsical treats, and have a hauntingly good Halloween meal!
Witch’s Brew Stew
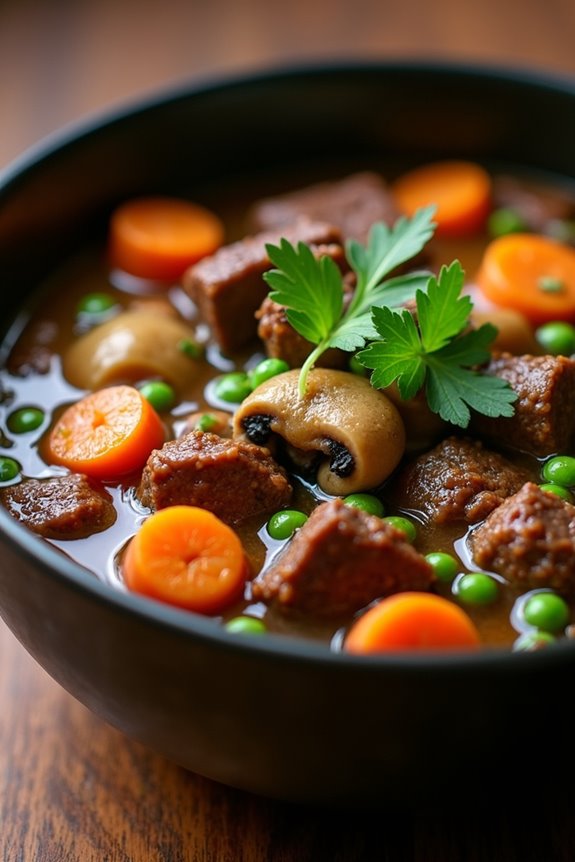
Bring a touch of magic to your Halloween dinner with a cauldron of Witch’s Brew Stew. This hearty and flavorful dish is perfect for a chilly October evening, with a rich combination of tender meat, vibrant vegetables, and aromatic herbs that will enchant your taste buds. Packed with nutrients and warmth, this stew is sure to become a spellbinding favorite among your family and friends.
Serve it alongside crusty bread or over a bed of mashed potatoes for a meal that’s as comforting as it’s bewitching.
The beauty of Witch’s Brew Stew lies in its versatility, allowing you to tailor the ingredients to suit your personal tastes or dietary preferences. Whether you choose to use beef, chicken, or a plant-based protein, this dish can easily accommodate your needs.
The simmering process melds the flavors together, creating a potion that’s both savory and satisfying. Perfect for a spooky supper, this stew will warm your soul and keep the chills at bay as the winds howl outside.
Ingredients for 4-6 servings:
- 2 tablespoons olive oil
- 1 ½ pounds beef stew meat, cubed (or chicken, or plant-based protein)
- Salt and pepper to taste
- 1 large onion, chopped
- 3 cloves garlic, minced
- 3 carrots, sliced
- 3 stalks celery, chopped
- 3 potatoes, peeled and diced
- 1 cup mushrooms, sliced
- 1 can (14.5 oz) diced tomatoes, undrained
- 4 cups beef or vegetable broth
- 2 tablespoons tomato paste
- 1 teaspoon dried thyme
- 1 teaspoon dried rosemary
- 2 bay leaves
- 1 tablespoon Worcestershire sauce
- 1 cup frozen peas
- Fresh parsley for garnish
Cooking Instructions:
- Prepare the Meat: Heat the olive oil in a large pot over medium-high heat. Season the beef stew meat with salt and pepper. Add the meat to the pot and brown on all sides, about 6-8 minutes. Remove the meat and set aside.
- Sauté the Aromatics: In the same pot, add the chopped onion and garlic. Sauté until the onion becomes translucent and fragrant, about 3 minutes.
- Add Vegetables: Stir in the sliced carrots, chopped celery, diced potatoes, and sliced mushrooms. Cook for another 5 minutes, allowing the vegetables to soften slightly.
- Combine Ingredients: Return the browned meat to the pot. Add the can of diced tomatoes, beef or vegetable broth, tomato paste, dried thyme, rosemary, bay leaves, and Worcestershire sauce. Stir well to combine all ingredients.
- Simmer the Stew: Bring the mixture to a boil, then reduce the heat to low. Cover the pot and let the stew simmer for 1.5 to 2 hours, or until the meat is tender and the flavors have melded beautifully.
- Finish with Peas: About 10 minutes before serving, add the frozen peas to the stew. Allow them to heat through, adding a pop of color and sweetness to the dish.
- Garnish and Serve: Remove the bay leaves and discard them. Serve the Witch’s Brew Stew hot, garnished with fresh parsley for an added touch of color and flavor.
Extra Tips:
To make your Witch’s Brew Stew even more enchanting, consider preparing it a day in advance. Stews often taste better after the flavors have had time to develop overnight in the refrigerator.
Additionally, you can customize the thickness of the stew by adjusting the amount of broth or by mashing some of the potatoes once they’re tender. For a vegetarian version, replace the meat with hearty mushrooms or legumes, and use vegetable broth instead of beef broth.
Enjoy this magical meal with your loved ones and make it a Halloween tradition!
Pumpkin Ricotta Ravioli

Pumpkin Ricotta Ravioli is a festive and delicious dish perfect for celebrating Halloween with a touch of elegance. This homemade pasta dish combines the earthy sweetness of pumpkin with the creamy richness of ricotta cheese, wrapped in delicate sheets of pasta. It’s an ideal meal for a cozy Halloween dinner, bringing together seasonal flavors that are both comforting and sophisticated.
Crafting ravioli from scratch can be a rewarding experience, allowing you to infuse your own creativity into the fillings and sauces. In this recipe, the ravioli is paired with a sage butter sauce, enhancing the warm, nutty flavors of the pumpkin and cheese filling. This dish serves 4-6 people, making it a great choice for a small gathering or family dinner.
Ingredients:
- 2 cups all-purpose flour
- 3 large eggs
- 1 cup pumpkin puree
- 1 cup ricotta cheese
- 1/2 cup grated Parmesan cheese
- 1/4 teaspoon nutmeg
- Salt and pepper to taste
- 1/2 cup unsalted butter
- 10 fresh sage leaves
- 1/2 cup pine nuts, toasted
- Extra flour for dusting
Instructions:
- Prepare the Dough: On a clean surface, mound the flour and make a well in the center. Crack the eggs into the well and gently incorporate the flour using a fork until a dough forms. Knead for about 8-10 minutes until smooth and elastic. Wrap in plastic wrap and let it rest for 30 minutes.
- Make the Filling: In a bowl, combine pumpkin puree, ricotta cheese, Parmesan cheese, nutmeg, salt, and pepper. Mix until smooth and well combined. Set aside.
- Roll Out the Dough: Divide the dough into four parts. Using a pasta machine, roll out each piece into thin sheets, dusting with flour as needed. Aim for sheets about 1/16-inch thick.
- Fill the Ravioli: Lay one sheet of pasta on a lightly floured surface. Place teaspoons of filling about 2 inches apart along the sheet. Brush around the filling with water, then top with another sheet of pasta. Press around each filling to seal and remove air bubbles. Use a ravioli cutter or knife to cut out individual ravioli.
- Cook the Ravioli: Bring a large pot of salted water to a boil. Gently add the ravioli and cook for about 3-4 minutes, until they float to the surface. Remove with a slotted spoon.
- Prepare the Sauce: In a large skillet, melt the butter over medium heat. Add the sage leaves and cook until the butter begins to brown and the sage becomes crispy. Add the cooked ravioli and pine nuts, tossing to coat in the butter sauce. Season with salt and pepper to taste.
- Serve: Arrange the ravioli on a serving platter, spooning any remaining sauce and sage leaves over the top. Serve immediately.
Extra Tips:
When making the pasta dough, patience is key. Kneading the dough thoroughly guarantees a smooth and elastic texture, which is essential for rolling out thin sheets. If your dough feels too sticky, dust it with a bit more flour. On the other hand, if it’s too dry, add a small amount of water, a teaspoon at a time.
For an extra kick of flavor, consider adding a pinch of cinnamon to the filling, which complements the sweetness of the pumpkin beautifully.
Bat Wing Chicken Wings

Halloween is a time for fun, creativity, and, of course, spooky-themed foods. One of the perfect dishes to serve at your Halloween dinner party is Bat Wing Chicken Wings. These wings aren’t only delicious but also visually striking, as they’re designed to mimic the creepy appearance of bat wings. To achieve this look, we use a combination of rich, dark, and flavorful ingredients that coat the wings in a blackened, glossy finish.
Whether you’re serving these as an appetizer or a main course, they’re sure to be a hit with both kids and adults.
The secret to these Bat Wing Chicken Wings lies in the marinade and cooking technique. The marinade combines soy sauce, balsamic vinegar, and dark food coloring to give the wings their dark hue, while garlic, ginger, and sesame oil infuse them with an irresistible aroma and taste. Once marinated, the wings are baked to perfection, resulting in a tender inside and a slightly charred, crispy exterior.
Serve them with a side of your favorite dipping sauce and watch your guests devour these spooky treats!
Ingredients for 4-6 People:
- 3 pounds chicken wings
- 1/2 cup soy sauce
- 1/4 cup balsamic vinegar
- 1 tablespoon dark brown sugar
- 1 tablespoon freshly grated ginger
- 3 cloves garlic, minced
- 2 tablespoons sesame oil
- 1 teaspoon black food coloring (gel or liquid)
- 1 tablespoon cornstarch
- 1 tablespoon water
- Salt and pepper to taste
- Sesame seeds (optional, for garnish)
- Chopped green onions (optional, for garnish)
Cooking Instructions:
- Prepare the Marinade: In a large mixing bowl, combine the soy sauce, balsamic vinegar, dark brown sugar, grated ginger, minced garlic, sesame oil, and black food coloring. Mix well until the sugar dissolves and the mixture is uniform in color.
- Marinate the Wings: Add the chicken wings to the bowl, making sure each piece is well coated with the marinade. Cover the bowl with plastic wrap and refrigerate for at least 2 hours, preferably overnight, to allow the flavors to fully penetrate the meat.
- Preheat the Oven: Preheat your oven to 400°F (200°C). Line a baking sheet with aluminum foil or parchment paper for easy cleanup and place a wire rack on top of the baking sheet.
- Prepare the Wings for Baking: Remove the wings from the marinade and arrange them on the wire rack, leaving space between each wing for even cooking. Reserve the marinade for later use.
- Bake the Wings: Place the baking sheet in the preheated oven and bake for 40-45 minutes, turning the wings halfway through to guarantee they cook evenly and develop a crispy exterior.
- Thicken the Marinade: While the wings are baking, pour the reserved marinade into a small saucepan. In a separate small bowl, mix the cornstarch and water to create a slurry. Add the slurry to the marinade and bring to a gentle boil over medium heat, stirring continuously until the sauce thickens.
- Coat and Serve: Once the wings are done baking, remove them from the oven and brush them with the thickened marinade for an extra layer of flavor. Garnish with sesame seeds and chopped green onions if desired, and serve hot with your favorite dipping sauce.
Extra Tips:
To achieve the best results, allow the wings to marinate overnight. This gives the flavors more time to develop and penetrate the meat.
When applying the black food coloring, start with a small amount and adjust as needed to guarantee the desired darkness. If you find the wings aren’t as crispy as you’d like, you can broil them for an additional 2-3 minutes at the end of baking. Just be sure to watch them closely to avoid burning.
Finally, using a wire rack is vital for even baking and achieving a crispy skin, as it allows air to circulate around the wings. Enjoy your spooky, delicious Bat Wing Chicken Wings!
Ghostly Stuffed Peppers

Ghostly Stuffed Peppers are a spooktacular addition to your Halloween dinner table. These adorable and slightly eerie stuffed peppers aren’t only a feast for the eyes but also a delicious and nutritious meal. The peppers are carved to resemble little ghostly faces, and they’re filled with a savory mixture of seasoned ground meat, rice, and vegetables. The dish is baked to perfection, creating a delightful blend of flavors and textures that will satisfy both the young and the young at heart.
Ideal for a party or a family gathering, this recipe serves 4-6 people, making it perfect for sharing the Halloween spirit. The playful presentation of the Ghostly Stuffed Peppers will surely spark conversations and add a touch of fun to your dining experience. Whether you’re hosting a Halloween dinner or simply looking to surprise your family with a themed meal, these stuffed peppers won’t disappoint.
Ingredients:
- 6 medium-sized bell peppers (orange, red, or yellow)
- 1 pound ground beef or turkey
- 1 cup cooked rice
- 1 medium onion, chopped
- 2 cloves garlic, minced
- 1 can (14.5 oz) diced tomatoes, drained
- 1 cup shredded mozzarella cheese
- 1 teaspoon Italian seasoning
- Salt and pepper to taste
- 2 tablespoons olive oil
- 1 cup water
Instructions:
- Preheat the Oven: Start by preheating your oven to 375°F (190°C) to make sure it’s ready for baking the stuffed peppers.
- Prepare the Peppers: Cut the tops off each bell pepper and remove the seeds and membranes. Using a small knife, carefully carve out ghostly faces on one side of each pepper. Set aside.
- Cook the Filling: In a large skillet, heat 2 tablespoons of olive oil over medium heat. Add the chopped onion and minced garlic, sauté until the onion becomes translucent, about 3-4 minutes.
- Brown the Meat: Add the ground beef or turkey to the skillet. Cook until browned, breaking it apart with a spatula, about 5-7 minutes. Drain any excess fat.
- Combine Ingredients: Stir in the cooked rice, drained diced tomatoes, Italian seasoning, salt, and pepper. Mix well and let the mixture cook for another 2-3 minutes to blend the flavors.
- Stuff the Peppers: Generously fill each carved pepper with the meat and rice mixture. Press down gently to make sure the filling is compact.
- Bake the Peppers: Place the stuffed peppers upright in a baking dish. Pour 1 cup of water into the bottom of the dish to prevent the peppers from drying out. Cover with foil and bake in the preheated oven for 25 minutes.
- Add Cheese: Remove the foil and sprinkle shredded mozzarella cheese over the tops of the peppers. Return to the oven and bake uncovered for an additional 10-15 minutes, or until the cheese is melted and bubbly.
- Serve: Allow the peppers to cool slightly before serving. Enjoy your Ghostly Stuffed Peppers while they’re warm.
Extra Tips:
For an extra spooky touch, use a variety of colored bell peppers to create a more vibrant display. If you prefer a vegetarian version, substitute the meat with a mix of black beans and corn.
To make the carving easier, choose peppers with a sturdy shape and thick walls. If you like your peppers softer, increase the initial baking time by an additional 10 minutes before adding the cheese.
Finally, feel free to adjust the seasoning to your preference or add a pinch of cayenne pepper for a hint of heat.
Frankenstein’s Monster Burgers

Frankenstein’s Monster Burgers are a delightfully spooky and delicious way to celebrate Halloween with family and friends. These burgers aren’t just fun to look at, but they’re also packed with flavor, making them a perfect main course for your Halloween dinner. By adding creative toppings and using vibrant ingredients, you can transform an ordinary burger into a monstrous masterpiece that would make even Frankenstein’s monster proud.
The key is in the presentation, where each burger becomes a work of art, complete with a unique set of eyes, a grimacing mouth, and even some “bolts” on the side.
To prepare these ghoulishly good burgers, you’ll need a variety of fresh ingredients and a bit of artistic flair. Whether you’re a seasoned chef or a kitchen novice, these burgers are simple to assemble and are sure to impress your guests with their eerie appearance and juicy taste. Perfect for a serving size of 4-6 people, this recipe will guide you through the steps needed to create a meal that’s as fun to make as it’s to eat.
Ingredients:
- 2 lbs ground beef
- 1 tsp salt
- 1 tsp black pepper
- 1/2 tsp garlic powder
- 1/2 tsp onion powder
- 6 hamburger buns
- 6 slices of cheese (preferably green-tinted cheese like cheddar or gouda)
- 12 black olives
- 6 lettuce leaves
- 1 tomato, sliced
- Ketchup and mustard for decorating
- 12 pretzel sticks
Cooking Instructions:
- Prepare the Patties: In a large bowl, combine the ground beef with salt, black pepper, garlic powder, and onion powder. Mix well until all ingredients are evenly distributed. Divide the mixture into 6 equal parts and shape them into patties.
- Cook the Patties: Heat a grill or skillet over medium-high heat. Cook the patties for about 4-5 minutes on each side, or until they reach your desired level of doneness. During the last minute of cooking, place a slice of green-tinted cheese on each patty to melt slightly.
- Prepare the Buns: While the patties are cooking, slice the hamburger buns in half and lightly toast them on a separate pan or grill for about 1 minute, or until they’re golden brown.
- Assemble the Burgers: Place a lettuce leaf on the bottom half of each bun, followed by a cheese-topped patty. Add a slice of tomato on top of the cheese.
- Decorate the Faces: Use ketchup and mustard to draw a face on the top half of each bun. Place it on the patty. Insert two black olives on top of each bun using toothpicks to create the eyes. Stick pretzel sticks on each side of the burger to mimic Frankenstein’s bolts.
- Serve and Enjoy: Arrange the Frankenstein’s Monster Burgers on a platter and serve them warm. Encourage guests to admire their creations before devouring them.
For extra tips, consider using food coloring to tint the cheese or buns for a more dramatic effect. You can also experiment with different toppings such as pickles for eyes or jalapeños for a spicy kick.
If you want to make the burgers even more monstrous, try shaping the patties with jagged edges to mimic a monster’s face. Remember to have fun with the process and encourage kids to participate in decorating their own burgers. Enjoy your monstrous meal!
Eyeball Pasta
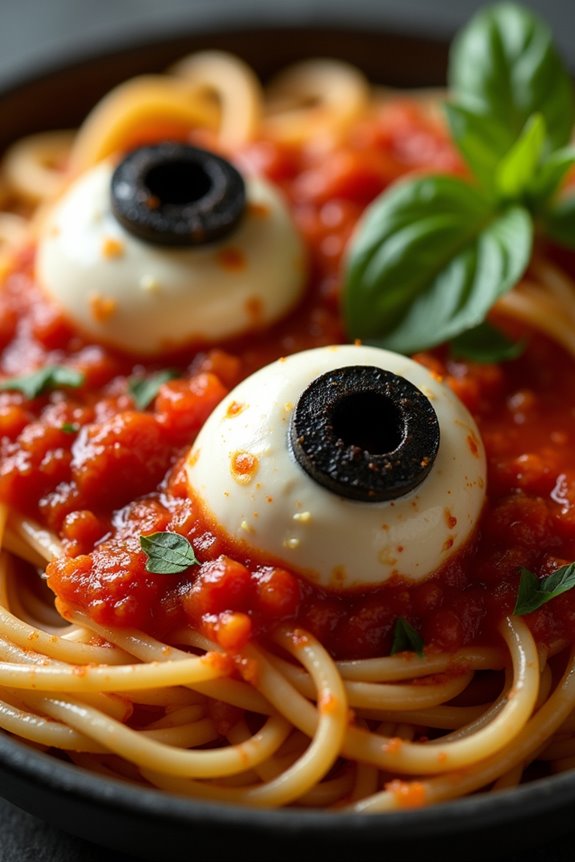
Get ready to transform your Halloween dinner into a spooky feast with Eyeball Pasta! This eerie dish will delight both your taste buds and your guests with its unique presentation. Perfect for a Halloween dinner party, this dish combines the deliciousness of pasta with the creepy factor of edible “eyeballs”. The recipe involves making a classic spaghetti dish topped with a flavorful tomato sauce and mozzarella “eyeballs”, each adorned with an olive slice to complete the look. It’s a fun and festive meal that kids and adults alike will enjoy.
Eyeball Pasta isn’t only a visual treat but also a comforting meal perfect for the cooler autumn weather. The richness of the tomato sauce, the smoothness of the mozzarella, and the playful yet spooky appearance make it a perfect centerpiece for your Halloween table. With a preparation time of around 45 minutes, this dish serves 4-6 people, making it ideal for a family dinner or small gathering.
Let’s plunge into the ingredients and the step-by-step instructions to create this ghoulish delight.
Ingredients (Serves 4-6):
- 1 pound (450g) spaghetti
- 2 tablespoons olive oil
- 1 medium onion, finely chopped
- 3 cloves garlic, minced
- 1 can (28 ounces) crushed tomatoes
- 1 teaspoon Italian seasoning
- Salt and pepper to taste
- 12 mini mozzarella balls (bocconcini)
- 6 pitted black olives, sliced into rings
- Fresh basil leaves for garnish (optional)
Cooking Instructions:
- Cook the Spaghetti: Fill a large pot with water and bring it to a boil. Add a generous pinch of salt and the spaghetti. Cook according to package instructions until al dente. Drain and set aside, reserving about 1/2 cup of the pasta water.
- Prepare the Sauce: In a large skillet, heat the olive oil over medium heat. Add the chopped onion and sauté until translucent, about 5 minutes. Stir in the minced garlic and cook for another minute.
- Add Tomatoes and Seasoning: Pour in the crushed tomatoes and add the Italian seasoning. Stir well and let the sauce simmer gently for about 15-20 minutes, allowing the flavors to meld. Season with salt and pepper to taste.
- Form the Eyeballs: While the sauce simmers, prepare the mozzarella “eyeballs”. Take each mini mozzarella ball and gently press a slice of black olive into it, forming the “pupil”.
- Combine Pasta and Sauce: Add the cooked spaghetti into the sauce, tossing gently to coat. If the sauce is too thick, add a bit of the reserved pasta water to reach your desired consistency.
- Plate the Dish: Divide the pasta among serving plates. Arrange the mozzarella “eyeballs” on top of the pasta.
- Garnish and Serve: Optionally, garnish with fresh basil leaves for added color and aroma. Serve immediately and enjoy your spooky Eyeball Pasta!
Extra Tips:
For added flavor, you can sprinkle some grated Parmesan cheese over the finished dish before serving. If you want to make the dish even more colorful, consider adding some roasted red pepper strips or chopped parsley as additional garnish.
Cauldron Chili

Halloween is the perfect time to serve up a dish that’s both delicious and thematically appropriate. Enter Cauldron Chili, a hearty and warming meal that will have everyone around the table feeling festive and full. This dish is designed to evoke the imagery of a bubbling witch’s cauldron, with its rich, savory ingredients simmering together to create a spellbinding aroma.
Not only is it a visual treat, but it also packs a punch in flavor, ideal for a Halloween dinner party or a cozy night in with family. This Cauldron Chili recipe is perfect for serving 4-6 people, making it a great option for medium-sized gatherings. The deep, complex flavors come from a mix of spices, beans, and vegetables, along with a choice of ground beef or turkey to make it a versatile option for those who prefer a lighter meat.
The chili can be served with a range of toppings, allowing guests to customize their bowls to their liking. Now, let’s explore the ingredients and cooking process for this bewitching meal.
Ingredients for Cauldron Chili (Serves 4-6):
- 2 tablespoons olive oil
- 1 large onion, chopped
- 3 cloves garlic, minced
- 1 pound ground beef or turkey
- 2 tablespoons chili powder
- 1 tablespoon cumin
- 1 teaspoon smoked paprika
- 1/2 teaspoon cayenne pepper
- 1 teaspoon salt
- 1/2 teaspoon black pepper
- 1 bell pepper, chopped
- 1 can (14.5 oz) diced tomatoes
- 1 can (15 oz) kidney beans, drained and rinsed
- 1 can (15 oz) black beans, drained and rinsed
- 1 cup beef or chicken broth
- 2 tablespoons tomato paste
- 1 teaspoon sugar
- 1 teaspoon Worcestershire sauce
Cooking Instructions:
- Prepare the Base: Start by heating the olive oil in a large pot or Dutch oven over medium heat. Once hot, add the chopped onion and minced garlic, sautéing until the onion becomes translucent and fragrant, approximately 5 minutes.
- Brown the Meat: Increase the heat to medium-high and add the ground beef or turkey. Cook, breaking apart with a spoon, until the meat is browned and cooked through. This should take about 7-10 minutes. Make sure to drain any excess fat if necessary.
- Spice it Up: Reduce the heat to medium and stir in the chili powder, cumin, smoked paprika, cayenne pepper, salt, and black pepper. Cook for another 2 minutes to let the spices bloom, filling your kitchen with a rich aroma.
- Add Vegetables and Liquids: Add the chopped bell pepper to the pot and cook for an additional 5 minutes. Then, stir in the diced tomatoes, kidney beans, black beans, broth, tomato paste, sugar, and Worcestershire sauce.
- Simmer: Bring the chili to a gentle boil, then reduce the heat to low. Cover the pot partially with a lid and let it simmer for 30-40 minutes, stirring occasionally to let the flavors meld together.
- Serve: Taste and adjust seasoning if necessary. Serve the Cauldron Chili hot, allowing guests to top their bowls with their choice of cheese, sour cream, chopped green onions, or jalapeños.
Extra Tips:
For an extra kick, feel free to add more cayenne pepper or a dash of hot sauce to the pot. If you prefer a thicker chili, let it simmer uncovered for the last 10-15 minutes to reduce the liquid further.
This dish can also be made a day ahead, as the flavors deepen and improve overnight. For those looking to make it vegetarian, simply omit the meat and add an extra can of beans or some mushrooms for texture. Enjoy your spooky yet satisfying Cauldron Chili!
Creepy Crawly Tacos

Halloween is a time for spooky fun, and what better way to celebrate than with a dish that brings a touch of fright to the dinner table? Creepy Crawly Tacos are the perfect blend of delicious and eerie, making them a hit with both kids and adults alike.
These tacos are designed to look like they’re infested with creepy crawlies, but don’t worry, they’re as tasty as they’re spooky. With a combination of seasoned ground beef, black beans, and a creative presentation, these tacos will be the highlight of your Halloween dinner.
The key to Creepy Crawly Tacos lies in both the flavor and the visual presentation. The tacos are filled with a savory mixture of ground beef and black beans, seasoned to perfection with classic taco spices.
To create the “crawly” effect, we use black olives and strips of bell peppers to resemble insects, making them both creepy and fun to eat. This dish serves 4-6 people, making it ideal for a small gathering or family dinner.
So put on your chef’s hat, gather your ingredients, and get ready to serve up some frightfully delightful tacos!
Ingredients (serves 4-6):
- 1 pound ground beef
- 1 can (15 ounces) black beans, drained and rinsed
- 1 packet taco seasoning mix
- 12 taco shells
- 1 cup shredded lettuce
- 1 cup shredded cheddar cheese
- 1 cup diced tomatoes
- 1/2 cup sliced black olives
- 1/2 cup sour cream
- 1 red bell pepper, cut into thin strips
- 1 tablespoon vegetable oil
Cooking Instructions:
- Prepare the Ground Beef: In a large skillet, heat the vegetable oil over medium heat. Add the ground beef and cook until fully browned, breaking it apart with a spoon as it cooks. This should take about 6-8 minutes.
- Season the Mixture: Once the beef is browned, drain any excess fat from the skillet. Add the taco seasoning mix and 1/4 cup of water. Stir well to combine and let it simmer for about 5 minutes to allow the flavors to meld together.
- Add the Black Beans: Stir in the black beans to the seasoned beef mixture. Cook for an additional 2-3 minutes, ensuring the beans are heated through. Remove the skillet from heat and set aside.
- Prepare the Taco Shells: While the meat mixture is resting, warm the taco shells according to the package instructions. This usually involves placing them in the oven for a few minutes or microwaving them briefly.
- Assemble the Tacos: Lay out each taco shell and fill it with a spoonful of the beef and bean mixture. Top with shredded lettuce, diced tomatoes, and shredded cheddar cheese.
- Create the Creepy Crawly Effect: Use the black olives and strips of red bell pepper to create “legs” and “antennae” that poke out from the tacos, giving them a creepy appearance. Place a dollop of sour cream on top for added flavor.
Extra Tips:
For an even spookier presentation, consider adding a few strips of green bell pepper to mimic different colored crawly creatures. You can also use ghost-shaped tortilla chips as a fun garnish on the side.
If you want to spice things up, add a dash of hot sauce or jalapeño slices for an extra kick. Remember, the key to these Creepy Crawly Tacos is creativity, so feel free to experiment with the toppings and presentation to make them as eerie and fun as possible!
Vampire Bite Bruschetta

Vampire Bite Bruschetta is the perfect spooky appetizer to add to your Halloween dinner spread. It’s a fun twist on the classic Italian bruschetta, featuring vibrant red tomatoes and a touch of garlic, alluding to the infamous vampire bites. The dish not only looks the part but also delivers a burst of flavors that will surely impress your guests.
With its simple preparation and delicious taste, this bruschetta will be a hit among both adults and kids at your Halloween party. The key to a successful Vampire Bite Bruschetta lies in the freshness of the ingredients. Using ripe tomatoes, fresh basil, and a good quality olive oil will enhance the flavor of the dish.
To give it that eerie Halloween look, you can add a drizzle of balsamic glaze, which mimics the appearance of blood. This recipe serves 4-6 people, making it ideal for a small gathering or as part of a larger buffet.
Ingredients:
- 1 French baguette
- 4 ripe tomatoes
- 2 cloves of garlic
- 1/4 cup fresh basil leaves
- 3 tablespoons olive oil
- Salt and pepper to taste
- Balsamic glaze for drizzling
Instructions:
- Prepare the Baguette: Preheat your oven to 375°F (190°C). Slice the French baguette into 1/2-inch thick slices. Arrange the slices on a baking sheet, and brush each slice lightly with olive oil. Place them in the oven and bake for about 8-10 minutes, or until they’re golden brown and crispy.
- Tomato Mixture: While the baguette is in the oven, dice the tomatoes into small cubes and place them in a mixing bowl. Mince the garlic cloves and add them to the tomatoes. Chop the fresh basil leaves finely and add them to the mixture. Drizzle with olive oil, and season with salt and pepper. Mix everything well to combine.
- Assemble the Bruschetta: Once the baguette slices are toasted, remove them from the oven and allow them to cool slightly. Spoon a generous amount of the tomato mixture onto each slice. Make certain that each piece has a good balance of tomatoes, garlic, and basil.
- Final Touches: Drizzle the balsamic glaze over the top of each bruschetta for a dramatic, blood-like effect. Serve immediately to enjoy the crisp texture of the bread with the fresh topping.
Extra Tips:
For the best flavor, allow the tomato mixture to sit for about 10 minutes before serving, as this lets the flavors meld together beautifully. If you want to add a bit of heat, consider adding a pinch of red pepper flakes to the tomato mixture. This will give your Vampire Bite Bruschetta an unexpected kick that might just scare your taste buds in the best way!
Additionally, using a serrated knife to slice the baguette will help you achieve even slices without crushing the bread.
Haunted Pumpkin Soup
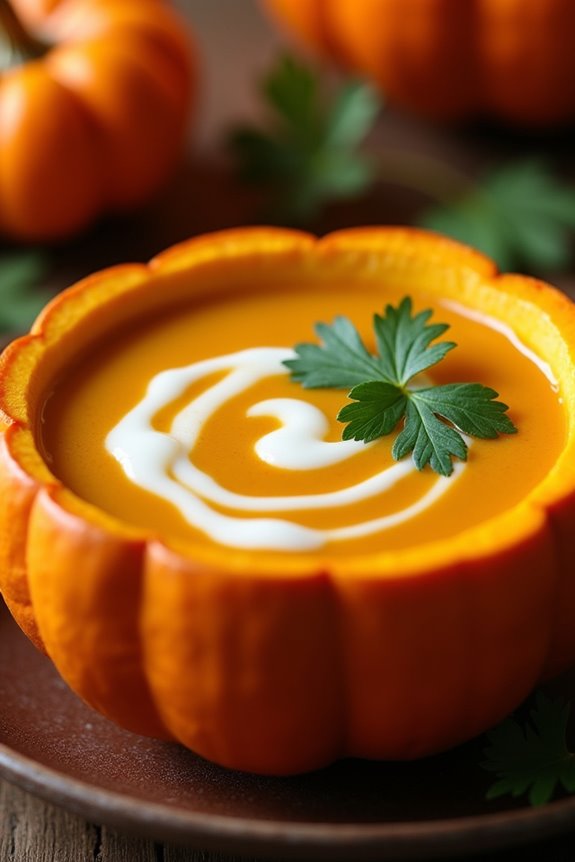
This Halloween, delight your guests with a spooktacular dish that’s both delicious and festive: Haunted Pumpkin Soup. This creamy, velvety soup is perfect for setting the mood at your Halloween dinner party. With roasted pumpkin, aromatic spices, and a touch of mystery, this soup isn’t only a treat for the taste buds but also a feast for the eyes.
Serve it in hollowed-out mini pumpkins for an extra eerily delightful presentation, and watch as your guests are enchanted by both the flavor and the aesthetics.
To create a truly haunting experience, this soup combines the earthy sweetness of pumpkin with the warmth of cinnamon, nutmeg, and ginger. A hint of garlic and onion provides depth, while a swirl of cream adds a ghostly touch of luxury. This rich and creamy soup is sure to warm the soul on a chilly Halloween night.
Perfect for a serving size of 4-6 people, it’s a dish that brings the spirit of Halloween right to your table.
Ingredients:
- 2 small pumpkins (about 3 pounds total)
- 2 tablespoons olive oil
- 1 medium onion, chopped
- 3 cloves garlic, minced
- 1 teaspoon ground cinnamon
- 1/2 teaspoon ground nutmeg
- 1/2 teaspoon ground ginger
- 4 cups vegetable broth
- 1 cup heavy cream
- Salt and pepper to taste
- Fresh parsley, for garnish (optional)
Cooking Instructions:
- Prepare the Pumpkins: Preheat your oven to 400°F (200°C). Cut the tops off the pumpkins and scoop out the seeds and stringy insides. Brush the inside of the pumpkins with olive oil and place them cut side down on a baking sheet lined with parchment paper. Roast in the oven for 35-40 minutes, or until the flesh is tender.
- Sauté Aromatics: While the pumpkins are roasting, heat 2 tablespoons of olive oil in a large pot over medium heat. Add the chopped onion and sauté until translucent, about 5 minutes. Add the minced garlic, cinnamon, nutmeg, and ginger, and cook for an additional minute until fragrant.
- Puree the Pumpkin: Once the pumpkins are roasted, scoop the flesh into the pot with the onions and spices. Pour in the vegetable broth and bring to a simmer. Use an immersion blender to puree the soup until smooth. Alternatively, you can transfer the mixture to a blender in batches, then return it to the pot.
- Finish the Soup: Stir in the heavy cream and season with salt and pepper to taste. Allow the soup to heat through, stirring occasionally, for about 5 minutes. If the soup is too thick, add more broth until the desired consistency is reached.
- Serve: Ladle the soup into bowls or hollowed-out mini pumpkins for a festive presentation. Garnish with fresh parsley if desired.
Extra Tips:
For an added touch of Halloween magic, consider topping the soup with roasted pumpkin seeds or a drizzle of balsamic reduction for a tangy contrast.
If you prefer a lighter version, substitute the heavy cream with coconut milk for a dairy-free option that adds a subtle sweetness.
Be sure to taste and adjust the seasoning before serving, as the sweetness of the pumpkin can vary. Finally, if you’re short on time, canned pumpkin puree can be used, but roasting fresh pumpkins elevates the flavor and adds to the authenticity of your Haunted Pumpkin Soup.
Bone-in Rib-Eye Steak
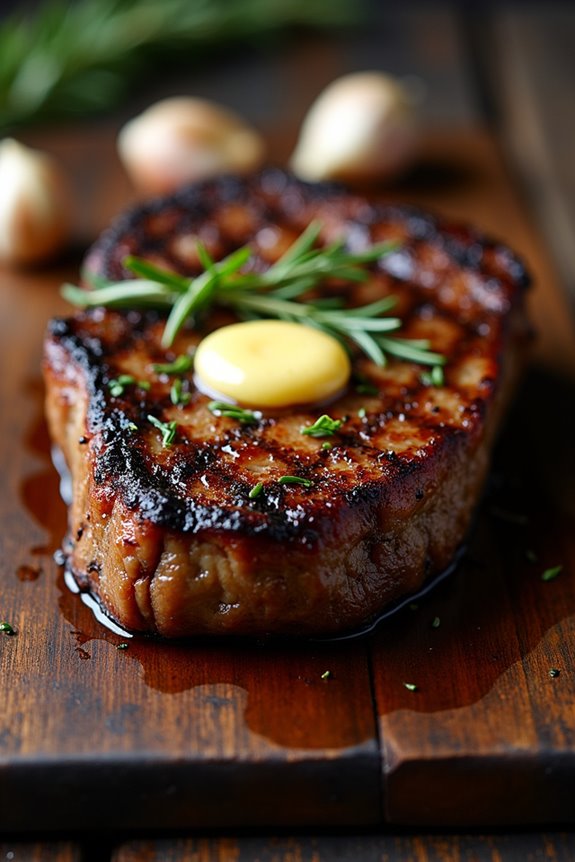
Celebrate Halloween with a hauntingly delicious dinner that will impress both ghouls and guests alike. The Bone-In Rib-Eye Steak is a classic choice that, when cooked to perfection, offers a succulent and flavorful experience. This robust cut of meat, with its marbling and bone, delivers a rich taste that pairs perfectly with the eerie ambiance of Halloween night.
Whether served with a side of roasted vegetables or a chilling garlic mashed potato, this steak will be the star of your spooky soirée. For a serving size of 4-6 people, you’ll need a few key ingredients to create the perfect Bone-In Rib-Eye Steak. This recipe will guide you through selecting the best cut, seasoning it to enhance its natural flavors, and cooking it to achieve a balance of tenderness and char.
With a little patience and attention to detail, you’ll serve a steak that not only looks impressive but tastes like a treat rather than a trick.
Ingredients:
- 4 bone-in rib-eye steaks (each about 1.5 inches thick)
- 4 tablespoons olive oil
- 6 cloves garlic, minced
- 2 tablespoons fresh rosemary, chopped
- 2 tablespoons fresh thyme, chopped
- Salt, to taste
- Freshly ground black pepper, to taste
- 4 tablespoons unsalted butter
Instructions:
- Preparation: Take the steaks out of the refrigerator and let them sit at room temperature for about 30 minutes before cooking. This guarantees even cooking.
- Seasoning: Rub each steak with olive oil, then generously season both sides with salt and freshly ground black pepper. Next, sprinkle the minced garlic, rosemary, and thyme over the steaks, pressing lightly to adhere the herbs to the meat.
- Preheat the Grill: Heat your grill to high heat, aiming for a temperature of around 450°F. If using a charcoal grill, let the coals burn until they’re covered with a thin layer of ash.
- Sear the Steaks: Place the steaks on the grill and sear for 4-5 minutes on each side. Aim for a nice crust to form, which will lock in the juices and enhance flavor.
- Cook to Desired Doneness: Move the steaks to a cooler part of the grill or reduce the heat to medium. Cook until desired doneness, using a meat thermometer: 125°F for rare, 135°F for medium-rare, 145°F for medium, and 155°F for medium-well. This usually takes an additional 3-5 minutes per side, depending on thickness.
- Butter Basting: In the final minute of cooking, add a tablespoon of butter on top of each steak. Allow it to melt and baste the steaks with this flavorful butter.
- Rest the Steaks: Remove the steaks from the grill and let them rest for at least 5 minutes before serving. This helps the juices redistribute throughout the meat, guaranteeing a juicy steak.
Extra Tips:
For the best results, choose rib-eye steaks with a good amount of marbling, as this fat content contributes to the flavor and tenderness of the steak.
Using a meat thermometer will help you achieve the perfect doneness without guesswork. If you prefer a smoky flavor, consider adding some wood chips to your grill.
Finally, while resting the steaks, tent them loosely with foil to keep them warm. Enjoy your Halloween feast with sides that complement the rich flavor of the rib-eye, such as roasted garlic potatoes or a fresh seasonal salad.
Devilish Deviled Eggs

If you’re looking for a spooky yet delicious appetizer to add to your Halloween dinner menu, search no further than Devilish Deviled Eggs. These aren’t your ordinary deviled eggs; they come with a Halloween twist that’s sure to delight both the eyes and the taste buds. The creamy yolk filling is enhanced with a hint of heat and a dash of paprika, giving the eggs a fiery appearance that fits perfectly with the theme of the holiday. You can easily customize the level of spice to suit your guests’ preferences, making this dish a versatile addition to your festive spread.
The presentation is just as important as the flavor in this Halloween treat. To create the devilish effect, the filling is piped back into the egg whites with precision, and garnished with black olive horns and a sprinkle of paprika for a devilish look. Not only does this add a touch of eerie elegance, but it also makes the eggs irresistibly appetizing. Whether you’re hosting a Halloween party or simply preparing a themed dinner for family and friends, these Devilish Deviled Eggs are sure to be a hit.
Ingredients for 4-6 servings:
- 12 large eggs
- 1/2 cup mayonnaise
- 1 tablespoon Dijon mustard
- 1 tablespoon white vinegar
- 1/2 teaspoon salt
- 1/4 teaspoon black pepper
- 1/4 teaspoon cayenne pepper
- Paprika for garnish
- Black olives for garnish (cut into small horn shapes)
- Chives for garnish (optional)
Cooking Instructions:
- Boil the Eggs: Place the eggs in a large saucepan and cover them with cold water by about an inch. Bring the water to a boil over medium-high heat. Once boiling, cover the saucepan with a lid and remove it from heat. Let the eggs sit in the hot water for 12 minutes.
- Cool and Peel: After 12 minutes, transfer the eggs to a bowl of ice water to cool them quickly and stop the cooking process. Once cooled, gently crack the shells and peel the eggs under running water to make peeling easier.
- Prepare the Filling: Slice each egg in half lengthwise and carefully remove the yolks, placing them in a medium bowl. Set the egg whites aside on a serving platter. Mash the yolks with a fork until they’re crumbly.
- Mix the Filling: Add mayonnaise, Dijon mustard, white vinegar, salt, black pepper, and cayenne pepper to the mashed yolks. Stir until the mixture is smooth and well combined. Taste and adjust the seasoning if necessary.
- Fill the Egg Whites: Use a spoon or a piping bag fitted with a star tip to fill each egg white half with the yolk mixture, creating a nice swirl on top.
- Garnish: Sprinkle a little paprika over the filled eggs for color. Add two small pieces of black olive to each egg to create horns. For added flair, you can also garnish with small pieces of chives.
Extra Tips:
To achieve perfectly boiled eggs, make sure not to overcook them as this can lead to a dark ring around the yolk and a rubbery texture. If you prefer a smokier flavor, consider using smoked paprika instead of regular paprika.
For a more devilish look, you can even add a drop of red food coloring to the yolk mixture to give the filling a fiery tint. Remember to keep the deviled eggs chilled until ready to serve, as they taste best when cold.
Midnight Black Risotto
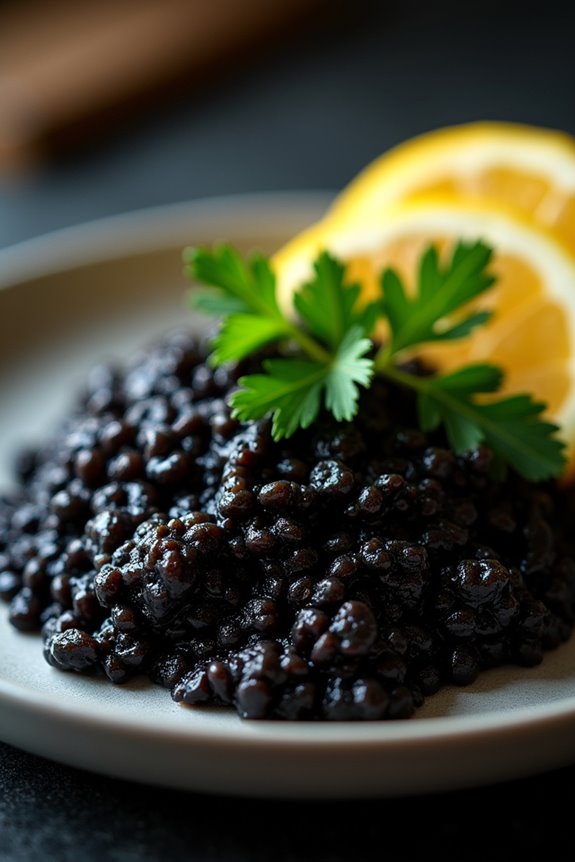
If you’re looking to impress your guests with a spooky yet elegant Halloween dinner, Midnight Black Risotto is the perfect dish to serve. This risotto gets its hauntingly dark hue from squid ink, giving it a mysterious appearance while delivering a rich, savory flavor.
The creamy texture of the risotto, combined with the deep umami taste of the ink and the subtle brininess from the seafood, creates a dish that’s both delicious and visually striking. Ideal for a Halloween gathering, this dish isn’t only a feast for the eyes but also a treat for the palate.
The key to a successful risotto is patience and consistent stirring, ensuring that the Arborio rice absorbs the flavorful broth gradually, resulting in a perfectly creamy consistency. Pair this dish with a crisp white wine to complement the seafood essence, and watch as your guests are captivated by this culinary masterpiece.
Ingredients for 4-6 servings:
- 2 tablespoons olive oil
- 1 medium onion, finely chopped
- 3 cloves garlic, minced
- 1 ½ cups Arborio rice
- ½ cup dry white wine
- 4 cups fish or vegetable stock, warmed
- 3 tablespoons squid ink
- Salt and pepper to taste
- 2 tablespoons unsalted butter
- ½ cup grated Parmesan cheese
- Fresh parsley, chopped, for garnish
- Lemon wedges, for serving
Cooking Instructions:
- Prepare the Base: In a large, deep pan, heat the olive oil over medium heat. Add the chopped onion and sauté until translucent, about 5 minutes. Stir in the minced garlic and cook for another minute until fragrant.
- Cook the Rice: Add the Arborio rice to the pan, stirring well to coat the rice with the oil, onion, and garlic mixture. Toast the rice for about 2 minutes until it becomes slightly translucent around the edges.
- Deglaze with Wine: Pour in the white wine and stir continuously until the wine is mostly absorbed by the rice. This step adds a depth of flavor to the risotto.
- Add the Broth Gradually: Begin adding the warmed stock to the rice, one ladle at a time. Stir frequently and allow each addition of stock to be absorbed before adding the next. Continue this process until the rice is cooked al dente, about 18-20 minutes.
- Incorporate the Squid Ink: Stir in the squid ink, ensuring it’s evenly distributed throughout the risotto. This will give the dish its signature black color.
- Finish the Risotto: Season the risotto with salt and pepper to taste. Remove the pan from heat and stir in the butter and grated Parmesan cheese until melted and creamy.
- Serve and Garnish: Spoon the risotto onto plates and garnish with fresh parsley. Serve with lemon wedges on the side for an extra burst of freshness.
Extra Tips:
When cooking Midnight Black Risotto, it’s important to use high-quality squid ink to achieve the best flavor and color. You can find squid ink at specialty food stores or online.
Make sure to keep the broth warm throughout the cooking process, as adding cold broth can slow down the cooking and affect the texture of the risotto. Additionally, keep an eye on the consistency of the risotto; it should be creamy and slightly loose, not dry or overly sticky.
Adjust the seasoning at the end, as the squid ink can be salty, so taste before adding extra salt. Enjoy this dramatic dish as the centerpiece of your Halloween feast!