

Planning a Halloween party can be such a treat, especially when you get to create snacks that everyone will love.
From whipping up Witch’s Broomstick Pretzels to baking Monster Eyeball Cookies, these festive delights add a magical touch to your spooky celebration.
Last year, those Mummy Hot Dogs disappeared in a flash, leaving everyone craving more.
Curious about crafting a menu that’ll have guests talking for days?
Let’s explore some of these creative concoctions together!
Witch’s Broomstick Pretzels
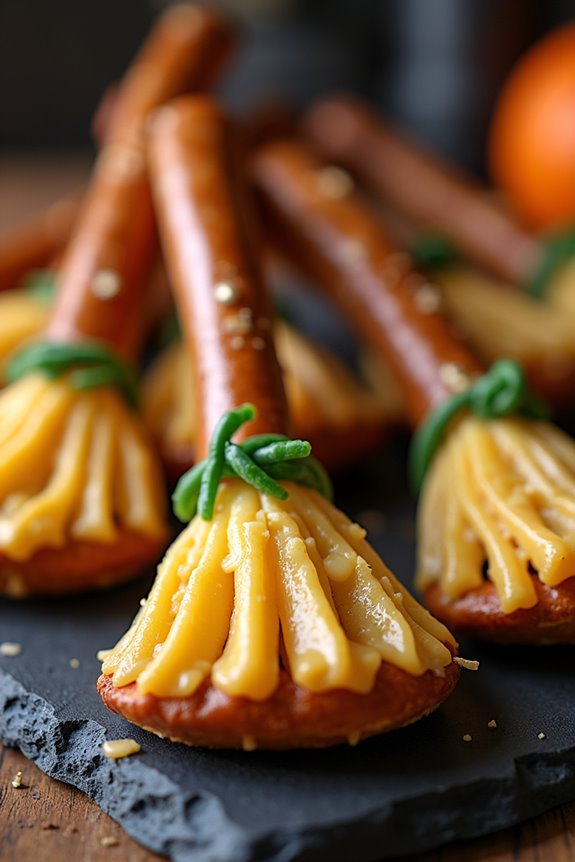
Witch’s Broomstick Pretzels are a delightful and spooky treat that will add a magical touch to any Halloween party. These charming snacks aren’t only visually appealing but also incredibly easy to make, making them the perfect addition to your Halloween snack table.
With their combination of salty pretzels and savory cheese, Witch’s Broomstick Pretzels offer a delightful balance of flavors that will please both kids and adults alike. Whether you’re hosting a Halloween bash or simply looking for a fun way to celebrate the season, these broomstick pretzels are sure to cast a spell on your guests.
Perfect for a serving size of 4-6 people, this recipe requires minimal ingredients and just a bit of creativity to assemble. The pretzel sticks act as the broom handles, while strips of cheese form the bristles. Tied together with a small piece of chive, these broomsticks look almost too good to eat.
So gather your ingredients and get ready to enchant your party guests with these easy-to-make Witch’s Broomstick Pretzels.
Ingredients (Serving Size: 4-6 people):
- 24 pretzel sticks
- 6 string cheese sticks
- 24 fresh chives
Cooking Instructions:
- Prepare the Cheese: Begin by unwrapping your string cheese sticks. Cut each stick into four equal pieces, giving you 24 shorter pieces of cheese. Each piece will serve as the bristles of the broomstick.
- Form the Broom Bristles: Take each piece of cheese and carefully pull apart the end to create a fringed effect, resembling broom bristles. Make sure to leave about a half-inch at the top unfringed to wrap around the pretzel stick.
- Assemble the Broomsticks: Insert one end of a pretzel stick into the unfringed end of a cheese piece. Gently press to secure it in place, making sure the cheese doesn’t crack.
- Tie with Chive: Wrap a chive around the top of the cheese where it meets the pretzel stick and tie it into a small knot. This will secure the cheese to the pretzel and complete the broomstick look.
- Repeat and Serve: Repeat the process with the remaining pretzel sticks, cheese pieces, and chives until you have 24 broomsticks. Arrange them on a platter and serve immediately.
Extra Tips:
For an extra touch of flavor, you can sprinkle some paprika or garlic powder on the cheese before inserting the pretzel stick.
If you find that the chives are difficult to tie, a quick dip in warm water can make them more pliable. Additionally, you can experiment with different types of cheese, such as cheddar or gouda, to give your broomsticks a unique taste.
Remember to serve these broomsticks fresh, as the pretzel sticks can lose their crunch if left out for too long.
Mummy Hot Dogs

Mummy Hot Dogs are a fun and festive treat perfect for a Halloween party. These adorable snacks not only add a spooky flair to your food table but are also incredibly easy to make, making them an ideal choice for hosts looking to impress without spending hours in the kitchen.
With just a few ingredients, you can transform ordinary hot dogs into mummies wrapped in deliciously flaky crescent roll bandages, sure to be a hit with both kids and adults alike.
The key to this recipe is in the presentation, as each hot dog is carefully wrapped to resemble a mummy, complete with little mustard or ketchup eyes peeking out. The combination of the savory hot dog and the buttery, golden-brown crescent roll creates a delightful taste experience.
Serve these Mummy Hot Dogs with a side of your favorite dipping sauces to complete the dish, and watch them disappear from the plate in no time.
Ingredients (for 4-6 people):
- 8 hot dogs
- 1 can (8 oz) refrigerated crescent roll dough
- Mustard (for eyes)
- Ketchup (optional, for dipping)
Cooking Instructions:
- Preheat the Oven: Begin by preheating your oven to 375°F (190°C) to guarantee it’s hot enough to bake the crescent rolls to a perfect golden brown.
- Prepare the Crescent Dough: Unroll the crescent roll dough and separate it into 8 triangles. Using a knife or a pizza cutter, slice each triangle into thin strips, about 1/4 inch wide.
- Wrap the Hot Dogs: Take one hot dog and start wrapping it with the dough strips to resemble a mummy. Leave a small space near one end of the hot dog for the face. Repeat this process for all hot dogs.
- Bake the Mummies: Place the wrapped hot dogs on an ungreased baking sheet. Bake them in the preheated oven for about 12-15 minutes or until the dough is golden brown and fully cooked.
- Add the Eyes: Remove the baked mummies from the oven and let them cool slightly. Use a small amount of mustard to dot eyes onto the exposed part of the hot dog.
- Serve and Enjoy: Arrange the Mummy Hot Dogs on a serving platter with ketchup or other dipping sauces on the side.
Extra Tips:
For extra flair, consider using edible candy eyes instead of mustard for a more realistic mummy look. If you want to make these in advance, you can assemble the mummies and refrigerate them until ready to bake.
Just increase the baking time slightly if baking from cold. Feel free to experiment with different types of sausages or add cheese under the dough for a gooey surprise.
Ghostly Popcorn Balls
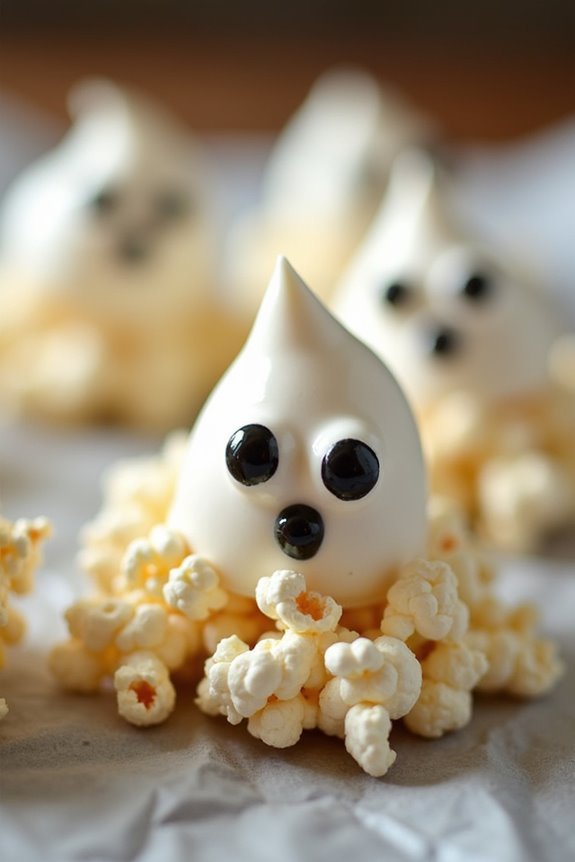
If you’re looking for a spooktacular treat to delight your Halloween party guests, Ghostly Popcorn Balls are the perfect choice. These sweet and salty snacks aren’t only delicious but also fun to make and eat. Shaped like little ghostly spheres, they bring a playful, supernatural twist to your Halloween spread.
Whether you’re hosting a gathering for kids, adults, or a mix of both, these popcorn balls will certainly be a hit, adding a spooky charm to your festive table. The recipe is simple and can be made in advance, allowing you to focus on other party preparations.
Made with marshmallows, butter, and popcorn, these ghostly snacks are easy to customize with your favorite flavors and decorations. You can even involve your little ones in the preparation process, making it a fun activity for the whole family.
Here’s how to make a batch of Ghostly Popcorn Balls for 4-6 people.
Ingredients:
- 10 cups popped popcorn
- 1 cup mini marshmallows
- 1/3 cup unsalted butter
- 1/2 cup granulated sugar
- 1/4 cup light corn syrup
- 1 teaspoon vanilla extract
- 1/4 teaspoon salt
- Edible black gel or candy eyes for decoration
Cooking Instructions:
- Prepare the Popcorn: Begin by popping your popcorn. You can use air-popped popcorn or microwave popcorn, whichever you prefer. Make sure to remove any un-popped kernels to avoid any unpleasant surprises.
- Create the Marshmallow Mixture: In a large saucepan, melt the butter over low heat. Add the mini marshmallows, sugar, and corn syrup. Stir continuously until the marshmallows are completely melted and the mixture is smooth.
- Add Flavoring: Remove the saucepan from heat and stir in the vanilla extract and salt. Mix well to guarantee the flavoring is evenly distributed throughout the marshmallow mixture.
- Combine Popcorn and Mixture: In a large mixing bowl, pour the marshmallow mixture over the popped popcorn. Using a spatula, gently fold the mixture into the popcorn until all kernels are evenly coated.
- Form the Popcorn Balls: Once the popcorn is cool enough to handle but still pliable, lightly butter your hands to prevent sticking. Shape the coated popcorn into small balls, approximately the size of a tennis ball, pressing firmly to make sure they hold together.
- Decorate: Place the shaped popcorn balls on a baking sheet lined with parchment paper. Using the edible black gel or candy eyes, create a ghostly face on each popcorn ball.
- Let Set: Allow the popcorn balls to set at room temperature for about 30 minutes before serving. This will help them hold their shape better.
Extra Tips:
For an extra spooky touch, try adding a few drops of food coloring to the marshmallow mixture before combining it with the popcorn to create different colored ghosts.
If you find the mixture too sticky to handle, keep a bowl of cold water nearby to dip your hands in periodically, which can help in shaping the balls. Additionally, feel free to experiment with different flavorings or add-ins, such as chocolate chips or nuts, to customize your Ghostly Popcorn Balls to suit your taste preferences.
Enjoy your hauntingly delightful treat!
Monster Eyeball Cookies
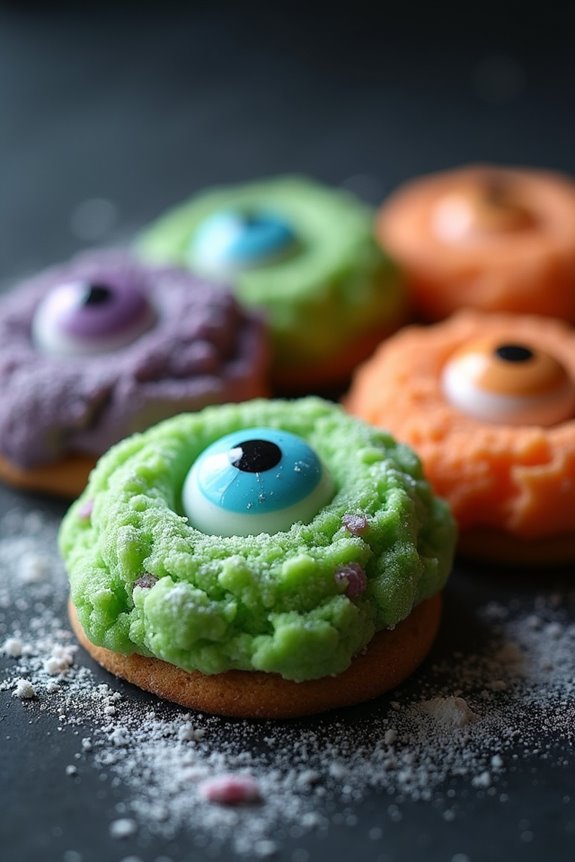
Monster Eyeball Cookies are a spooky and delicious treat perfect for Halloween parties. These cookies not only taste great but also add a fun and creepy vibe to your snack table. With their vivid colors and eye-catching (pun intended) design, they’ll surely be a hit with both kids and adults.
Made with a simple cookie dough and decorated with candy eyes, these cookies are easy to make and customize with different colors and flavors. Whether you’re hosting a party or attending one, Monster Eyeball Cookies are a fantastic choice for a festive dessert. The recipe yields around 24 cookies, which is perfect for serving 4-6 people.
Get ready to impress your guests with these delightful and slightly eerie treats!
Ingredients (for 4-6 people):
- 1 cup unsalted butter, softened
- 1 cup granulated sugar
- 1 large egg
- 1 teaspoon vanilla extract
- 2 ½ cups all-purpose flour
- ½ teaspoon baking powder
- ¼ teaspoon salt
- Green, purple, and orange food coloring
- 1 package candy eyeballs
- ½ cup powdered sugar
Instructions:
- Preheat and Prepare: Preheat your oven to 350°F (175°C). Line two baking sheets with parchment paper to prevent sticking.
- Mix Wet Ingredients: In a large bowl, cream together the softened butter and granulated sugar until light and fluffy. This should take about 2-3 minutes. Then, add the egg and vanilla extract, and mix until well combined.
- Combine Dry Ingredients: In another bowl, whisk together the all-purpose flour, baking powder, and salt. Gradually add the dry ingredients to the wet ingredients, mixing until just combined to form a dough.
- Divide and Color Dough: Divide the dough into three equal portions. Add a few drops of green food coloring to one portion, purple to the second, and orange to the third. Knead each portion until the color is evenly distributed.
- Shape the Cookies: Take small portions of the dough (about a tablespoon each) and roll them into balls. Place them on the prepared baking sheets, leaving some space between each ball.
- Flatten and Decorate: Gently flatten each ball slightly with your fingers. Press a candy eyeball into the center of each cookie.
- Bake: Bake in the preheated oven for 10-12 minutes, or until the cookies are lightly golden on the edges. Allow them to cool on the baking sheet for 5 minutes before transferring to a wire rack to cool completely.
- Dust with Powdered Sugar: Once cooled, lightly dust the cookies with powdered sugar to give them an extra spooky effect.
Extra Tips: To make your Monster Eyeball Cookies even more fun, try using different sizes of candy eyeballs for a varied look. You can also experiment with different food coloring combinations to create a rainbow of monstrous cookies.
Make sure not to overbake the cookies; they should be soft and chewy for the best texture. If you like, you can add a drop of almond extract along with the vanilla for an extra depth of flavor. Enjoy your baking, and have a monstrously good Halloween!
Spooky Spider Deviled Eggs
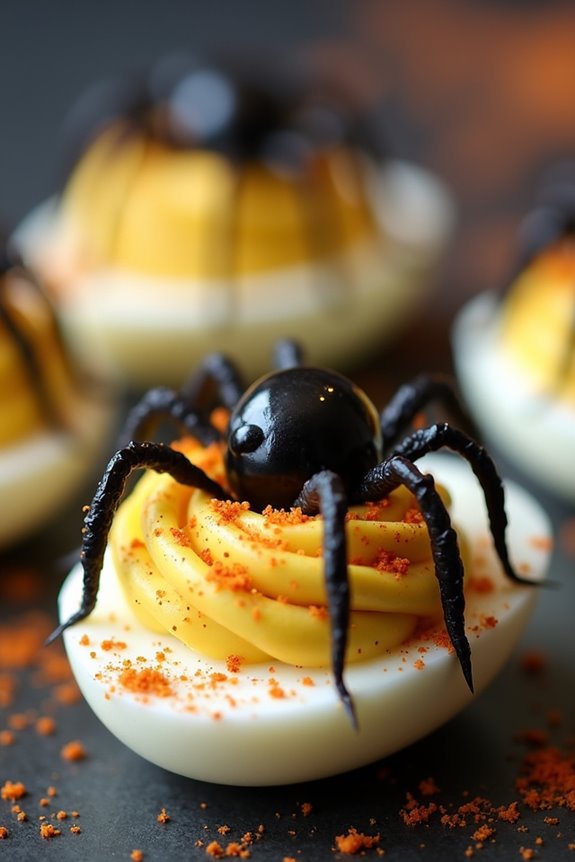
Spooky Spider Deviled Eggs are a delightful and eerie addition to any Halloween party spread. These creepy yet delicious treats are sure to intrigue your guests with their creative design and flavorful taste. The deviled eggs, adorned with black olive spiders, aren’t only visually striking but also packed with the classic creamy and tangy flavors that everyone loves.
Perfect for a Halloween gathering, these deviled eggs add a touch of frightful fun to your festive table. The combination of rich egg yolks, creamy mayonnaise, tangy mustard, and a hint of paprika creates a perfectly balanced filling that’s both smooth and savory. The black olive spiders perched atop each egg add a spooky touch that’s sure to catch the eye of your guests.
With just a little bit of preparation and creativity, you can whip up these Spooky Spider Deviled Eggs to delight both kids and adults at your Halloween celebration.
Ingredients (serving size: 4-6 people):
- 6 large eggs
- 3 tablespoons mayonnaise
- 1 teaspoon Dijon mustard
- 1 teaspoon white vinegar
- Salt to taste
- Black pepper to taste
- Paprika for garnish
- 12-15 black olives (pitted and halved)
Cooking Instructions:
- Boil the Eggs: Place the eggs in a saucepan and cover them with cold water. Bring the water to a boil over medium-high heat. Once the water reaches a rolling boil, remove the saucepan from heat and cover it. Let the eggs sit in the hot water for 10-12 minutes.
- Cool and Peel: After the eggs have cooked, transfer them to a bowl of ice water to cool for about 5 minutes. Once cool, gently peel the shells off the eggs.
- Prepare the Filling: Slice each egg in half lengthwise and scoop out the yolks into a mixing bowl. Mash the yolks with a fork until they’re crumbly and smooth.
- Mix the Filling Ingredients: Add mayonnaise, Dijon mustard, white vinegar, salt, and black pepper to the mashed yolks. Mix until you achieve a smooth, creamy consistency.
- Fill the Egg Whites: Spoon or pipe the yolk mixture back into the hollowed-out egg whites, dividing it evenly among them.
- Create the Olive Spiders: Take the halved black olives and place one half on top of each deviled egg as the spider’s body. Slice the remaining olive halves into thin strips to make the spider’s legs, positioning four legs on each side of the body.
- Garnish and Serve: Lightly sprinkle paprika over the deviled eggs for added flavor and a pop of color. Arrange the Spooky Spider Deviled Eggs on a serving platter and serve chilled.
Extra Tips:
To guarantee your deviled eggs look as creepy as possible, make sure the olive spiders are positioned securely on the yolk filling. If the spiders slide off, you can gently press them into the filling to hold them in place.
Additionally, using a piping bag to fill the egg whites with the yolk mixture will give you a neater and more professional look. If you prefer a milder flavor, you can substitute Dijon mustard with yellow mustard.
Finally, it’s best to prepare these deviled eggs just before serving to keep the yolk filling fresh and vibrant.
Creepy Crawly Cupcakes
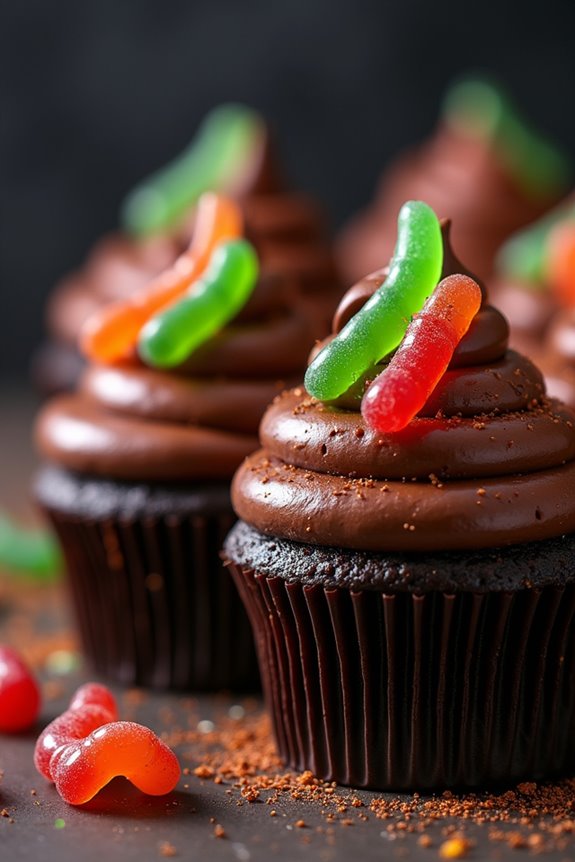
Creepy Crawly Cupcakes are a fun and spooky addition to any Halloween party, sure to thrill your guests with a deliciously eerie surprise. These cupcakes combine rich chocolate flavors with a creepy aesthetic, perfect for the Halloween spirit. The decoration is inspired by creepy crawlers, using gummy worms and other candy insects to create a delightfully frightful presentation.
Not only are these cupcakes visually appealing, but they’re also delectable, ensuring that they’ll be a hit with both kids and adults alike.
Preparing these Creepy Crawly Cupcakes is a straightforward process that allows for creativity and customization. The base of the cupcake is a moist chocolate cake, topped with a smooth chocolate frosting that serves as the perfect backdrop for the creepy decorations. You’ll have the opportunity to release your imagination by decorating with a variety of candy insects and edible decorations to achieve the ultimate creepy effect.
This recipe serves 4-6 people, making it an ideal choice for a small gathering or as part of a larger dessert spread.
Ingredients:
- 1 cup all-purpose flour
- 1/2 cup unsweetened cocoa powder
- 1 teaspoon baking powder
- 1/2 teaspoon baking soda
- 1/4 teaspoon salt
- 1/2 cup unsalted butter, softened
- 1 cup granulated sugar
- 2 large eggs
- 1 teaspoon vanilla extract
- 1/2 cup buttermilk
- 1 cup chocolate frosting
- Assorted gummy worms
- Candy spiders or insects
- Edible glitter or sprinkles (optional)
Cooking Instructions:
- Preheat and Prepare: Preheat your oven to 350°F (175°C) and line a 12-cup muffin tin with cupcake liners.
- Mix Dry Ingredients: In a medium bowl, whisk together the flour, cocoa powder, baking powder, baking soda, and salt until well combined.
- Cream Butter and Sugar: In a large bowl, cream the softened butter and granulated sugar together using an electric mixer until light and fluffy, about 2-3 minutes.
- Add Eggs and Vanilla: Beat in the eggs, one at a time, followed by the vanilla extract, mixing well after each addition.
- Combine Wet and Dry Ingredients: Gradually add the dry ingredients to the butter mixture, alternating with the buttermilk, starting and ending with the dry ingredients. Mix until just combined.
- Fill and Bake: Divide the batter evenly among the prepared cupcake liners, filling each about two-thirds full. Bake in the preheated oven for 18-20 minutes, or until a toothpick inserted into the center comes out clean. Allow the cupcakes to cool completely on a wire rack.
- Frost and Decorate: Once the cupcakes are cool, spread a generous amount of chocolate frosting on each one. Decorate with gummy worms and candy spiders or insects. Add edible glitter or sprinkles for an extra spooky effect if desired.
Extra Tips:
For an even spookier look, consider using food coloring to tint the frosting a ghastly green or eerie purple before decorating. You can also create graveyard scenes using crushed chocolate cookies as “dirt” and adding tombstone cookies for a more macabre touch.
If you’re short on time, store-bought chocolate cupcake mix and frosting can be used to speed up the process without sacrificing flavor. Finally, encourage creativity by allowing party guests to decorate their own cupcakes with an assortment of creepy candies and toppings, making it a fun and interactive experience.
Frankenstein Marshmallow Pops
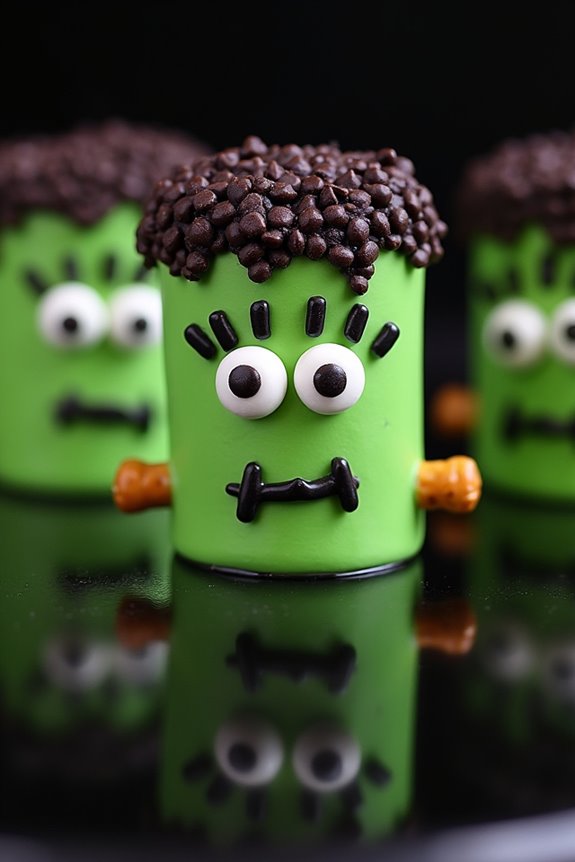
Frankenstein Marshmallow Pops are a delightful and spooky treat perfect for your Halloween party guests. These fun and creative snacks aren’t only easy to make but also a hit with both kids and adults. With their adorable Frankenstein faces and delicious taste, these marshmallow pops will surely be the star of your Halloween spread.
Whether you’re hosting a large party or a small gathering, these pops are an ideal way to add some festive flair to your dessert table. The pops consist of large marshmallows dipped in green candy melts and decorated with various candies to create Frankenstein’s face.
You’ll need a few basic supplies, including lollipop sticks, candy melts, and a selection of edible decorations. This recipe is designed to make 12-15 Frankenstein Marshmallow Pops, serving approximately 4-6 people. With a little creativity and patience, you can whip up these ghoulishly delightful treats in no time.
Ingredients:
- 12-15 large marshmallows
- 12-15 lollipop sticks
- 1 cup green candy melts
- 1 tablespoon coconut or vegetable oil
- Small candy eyes
- Black icing gel
- Pretzel sticks (for bolts)
- Mini chocolate chips or black sprinkles (for hair)
Instructions:
- Prepare the Marshmallows: Begin by inserting a lollipop stick into each marshmallow, making sure it’s secure but doesn’t go all the way through.
- Melt the Candy: In a microwave-safe bowl, combine the green candy melts and a tablespoon of coconut or vegetable oil. Microwave in 30-second intervals, stirring in between, until the candy melts are smooth and fully melted.
- Dip the Marshmallows: Holding the stick, dip each marshmallow into the melted green candy, gently tapping off any excess. Confirm the marshmallow is fully coated.
- Create the Features: Before the candy coating sets, press two small candy eyes onto the marshmallow to make Frankenstein’s eyes. Allow the pops to set by placing them in a cake pop stand or on a parchment-lined baking sheet.
- Add the Details: Once the green coating is firm, use black icing gel to draw a mouth and stitches on each marshmallow. For the hair, dip the top of the marshmallow into mini chocolate chips or sprinkle black sprinkles. Break pretzel sticks in half and insert one on each side of the marshmallow for bolts.
- Set and Serve: Allow the pops to fully set by placing them in the refrigerator for about 10 minutes. Once set, your Frankenstein Marshmallow Pops are ready to serve!
Extra Tips:
For a more vibrant green, you can add a few drops of green food coloring to the candy melts before microwaving. If the candy melt mixture is too thick, adding a bit more coconut or vegetable oil can help achieve a smoother consistency.
Always make sure the candy coating is still wet when adding decorations for the best adherence. If you’re making these pops in advance, store them in an airtight container to maintain freshness. These Frankenstein Marshmallow Pops can also be customized with different expressions or decorations to suit your Halloween theme.
Pumpkin Patch Cheese Ball
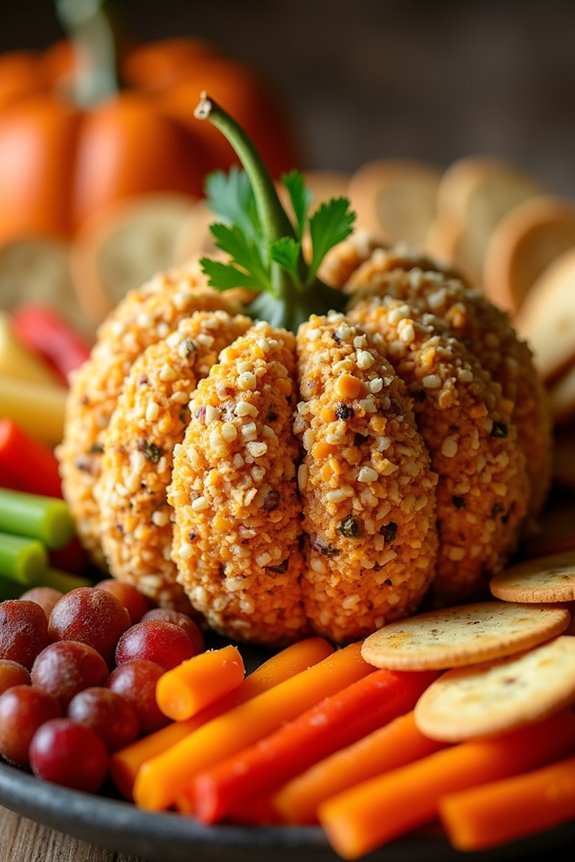
Add a touch of festive fun to your Halloween party with a Pumpkin Patch Cheese Ball. This delightful appetizer isn’t only a crowd-pleaser but also a visual treat that captures the essence of the fall season. Shaped like a pumpkin, this cheese ball is packed with flavor and will certainly be a standout on your snack table.
Whether you’re hosting a spooky gathering or a cozy autumn get-together, this cheese ball is a perfect addition. The combination of creamy cheeses, savory spices, and crunchy nuts makes this dish irresistible. It’s easy to prepare and can be made ahead of time, allowing you to enjoy the festivities without stress.
Serve it with a variety of crackers, pretzels, or fresh vegetables, and watch as your guests delight in this festive and flavorful treat. This recipe serves 4-6 people, making it ideal for a small to medium-sized gathering.
Ingredients:
- 8 oz cream cheese, softened
- 1 cup sharp cheddar cheese, shredded
- 1 teaspoon garlic powder
- 1 teaspoon onion powder
- 1 teaspoon smoked paprika
- 1/4 teaspoon cayenne pepper (optional)
- Salt and pepper to taste
- 1/2 cup finely chopped pecans or walnuts
- 1/4 cup finely chopped fresh parsley
- 1 small bell pepper or celery stalk (for the pumpkin stem)
- Crackers or vegetable sticks for serving
Cooking Instructions:
- Prepare the Cheese Mixture: In a mixing bowl, combine the softened cream cheese and shredded sharp cheddar cheese. Mix well until fully combined and smooth. Add the garlic powder, onion powder, smoked paprika, cayenne pepper (if using), salt, and pepper. Continue to mix until all the spices are evenly incorporated.
- Shape the Cheese Ball: Transfer the cheese mixture onto a piece of plastic wrap. Gather the wrap around the cheese and shape it into a ball. Use your hands to form the cheese mixture into a rough pumpkin shape, making it slightly flat on the bottom.
- Chill the Cheese Ball: Place the wrapped cheese ball in the refrigerator for at least 2 hours, or until it’s firm enough to hold its shape. This step allows the flavors to meld together and makes the cheese ball easier to handle.
- Coat the Cheese Ball: Once chilled, remove the cheese ball from the refrigerator and unwrap it. Roll the cheese ball in the finely chopped pecans or walnuts and chopped parsley until fully coated. This will give the cheese ball a textured, pumpkin-like appearance.
- Add the Stem: Cut a small piece of bell pepper or celery stalk and insert it into the top of the cheese ball to resemble a pumpkin stem.
- Serve: Place the Pumpkin Patch Cheese Ball on a serving platter surrounded by crackers or vegetable sticks. Enjoy!
Extra Tips:
For a more intense flavor, consider making the cheese ball a day in advance to allow the spices to fully develop. If you prefer a milder taste, you can omit the cayenne pepper or adjust the seasoning to your liking.
To make the cheese ball more visually appealing, you can use a toothpick to create lines around the ball, enhancing the pumpkin effect. Always bring the cheese ball to room temperature before serving for the best creamy texture.
Bloodshot Eyeball Punch
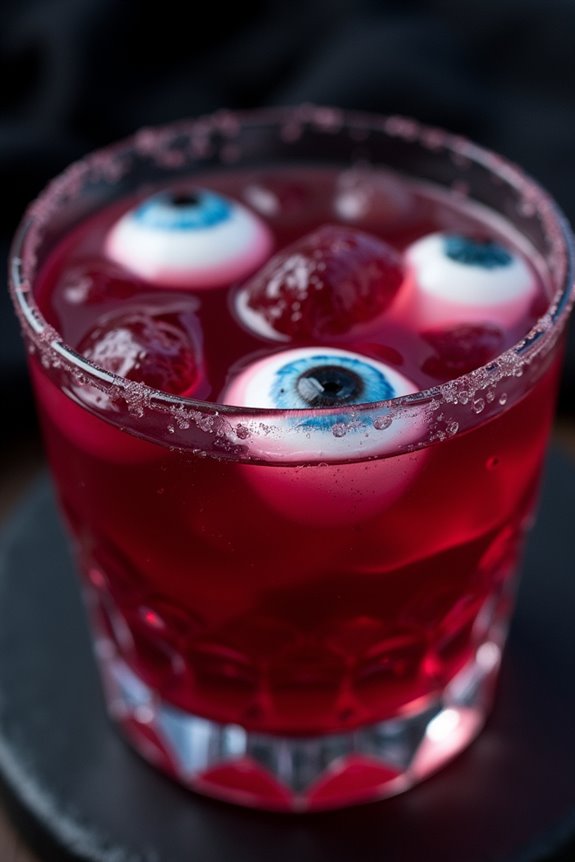
Bloodshot Eyeball Punch is a spooky and visually striking beverage perfect for your Halloween gathering. This eerie punch creates the illusion of floating bloodshot eyeballs, giving your party guests a frightful delight while quenching their thirst. The combination of tangy fruit flavors, vibrant colors, and the chilling effect of the ice will guarantee your Halloween celebration is talked about long after the night is over.
Not only is it visually appealing, but it’s also invigoratingly delicious, making it a hit with both adults and kids. This punch is designed to serve 4-6 people, making it ideal for intimate gatherings or as a centerpiece at larger parties.
The key to this chilling concoction is the use of lychees and blueberries to mimic the look of eyeballs, floating menacingly in a sea of crimson liquid. When paired with the right blend of juices and soda, the Bloodshot Eyeball Punch becomes a tasty and festive treat that’s surprisingly simple to make.
Ingredients (Serving size: 4-6 people)
- 1 can (20 oz) lychees in syrup, drained
- 1 pint fresh blueberries
- 2 cups cranberry juice
- 1 cup pomegranate juice
- 1 cup lemon-lime soda
- 1/2 cup grenadine syrup
- 1/4 cup fresh lime juice
- Ice cubes
Cooking Instructions
- Prepare the Eyeballs: Begin by draining the canned lychees and setting them aside. Insert a single fresh blueberry into the cavity of each lychee. The blueberry should fit snugly, creating the appearance of a pupil in an eyeball. Repeat this process until all lychees are filled.
- Mix the Punch Base: In a large punch bowl, combine the cranberry juice, pomegranate juice, lemon-lime soda, grenadine syrup, and fresh lime juice. Stir the mixture gently until all the ingredients are well combined. This forms the blood-red base of your punch.
- Chill the Punch: Add a generous amount of ice cubes to the punch bowl to keep the drink cold. The icy texture will enhance the chilling effect of the punch.
- Add the Eyeballs: Carefully place the prepared lychee “eyeballs” into the punch bowl. They should float on the surface, giving your punch a terrifyingly realistic appearance.
- Serve: Ladle the punch into individual glasses, ensuring each serving includes at least one “eyeball” for maximum effect. Enjoy the eerie presentation and delicious taste with your guests.
Extra Tips
For an added eerie effect, consider using glow-in-the-dark cups or adding a small amount of tonic water to your punch if you’re using a blacklight, as it will make the drink glow subtly due to the quinine in the tonic water.
If you want to make the punch in advance, prepare the lychee eyeballs and keep them refrigerated in an airtight container until ready to use. This punch can be easily scaled up for larger parties by doubling or tripling the ingredients.
Additionally, if you prefer a non-alcoholic option or wish to cater to younger guests, this drink is perfect as-is, but a splash of vodka can be added for an adult version.
Vampire Bat Wings
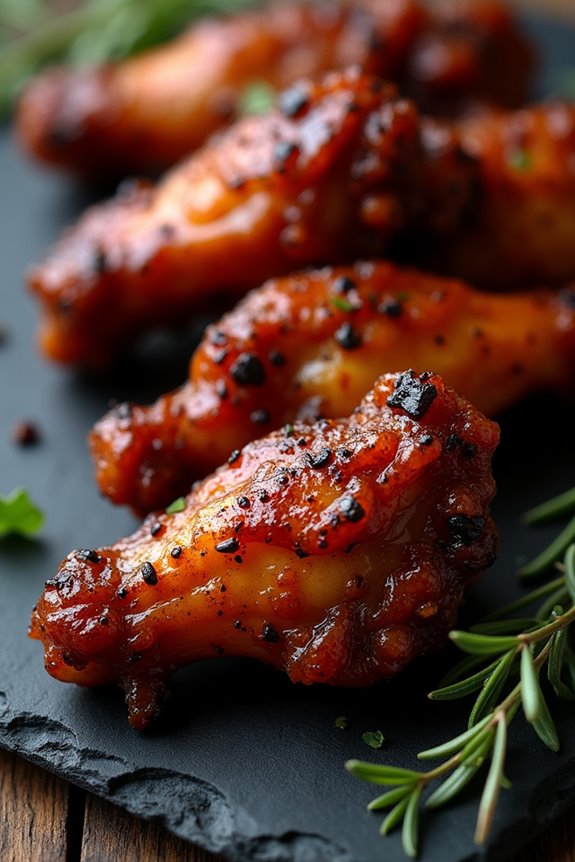
Transform your Halloween party into a ghoulish gathering with these deliciously spooky Vampire Bat Wings. Perfectly seasoned and cooked to perfection, they make for a frightfully delicious snack that will have your guests howling with delight. The rich, dark glaze on these wings gives them a bat-like appearance, making them the perfect addition to your Halloween spread.
Whether you’re hosting a large gathering or an intimate affair, these wings are certain to be a hit!
These Vampire Bat Wings aren’t only visually striking but also packed with flavor. The combination of savory spices and a tangy glaze creates a taste sensation that will leave everyone wanting more. Serve these wings with a side of your favorite dipping sauce and watch them disappear as quickly as a bat in the night.
This recipe serves 4-6 people, making it ideal for a small to medium-sized gathering.
Ingredients:
- 3 pounds of chicken wings
- 2 tablespoons olive oil
- 1 teaspoon salt
- 1 teaspoon black pepper
- 1 teaspoon garlic powder
- 1 teaspoon onion powder
- 1 teaspoon smoked paprika
- 1/2 cup balsamic vinegar
- 1/4 cup soy sauce
- 1/4 cup honey
- 2 tablespoons brown sugar
- 1 tablespoon Dijon mustard
- 1 teaspoon Worcestershire sauce
Cooking Instructions:
- Preheat the Oven: Preheat your oven to 400°F (200°C). Line a baking sheet with aluminum foil and place a wire rack on top. This setup guarantees even cooking and allows the fat to drip away from the wings.
- Prepare the Wings: In a large bowl, toss the chicken wings with olive oil, salt, black pepper, garlic powder, onion powder, and smoked paprika. Confirm each wing is evenly coated with the seasoning.
- Bake the Wings: Arrange the seasoned wings in a single layer on the wire rack. Bake in the preheated oven for 40-45 minutes, turning them halfway through the cooking process to confirm they cook evenly and become crispy.
- Make the Glaze: While the wings are baking, prepare the glaze. In a small saucepan, combine balsamic vinegar, soy sauce, honey, brown sugar, Dijon mustard, and Worcestershire sauce. Bring the mixture to a simmer over medium heat, stirring occasionally. Let it simmer for about 5-7 minutes until it thickens slightly.
- Coat the Wings: Once the wings are done baking, remove them from the oven. Brush the wings generously with the prepared glaze, confirming they’re well coated.
- Finish Baking: Return the glazed wings to the oven and bake for an additional 5-7 minutes. This allows the glaze to caramelize and adhere to the wings, giving them a beautiful, glossy finish.
- Serve: Remove the Vampire Bat Wings from the oven and let them cool slightly before serving. Arrange them on a spooky platter and serve with your choice of dipping sauce.
Extra Tips:
For the crispiest wings, make sure they’re completely dry before seasoning. Pat them with paper towels to remove excess moisture, which helps the skin crisp up in the oven.
If you prefer a spicier kick, add a pinch of cayenne pepper to the seasoning mix. Additionally, you can prepare the glaze a day ahead and store it in the refrigerator, saving you time on the day of your event.
Enjoy your hauntingly delicious Vampire Bat Wings!
Goblin Guacamole
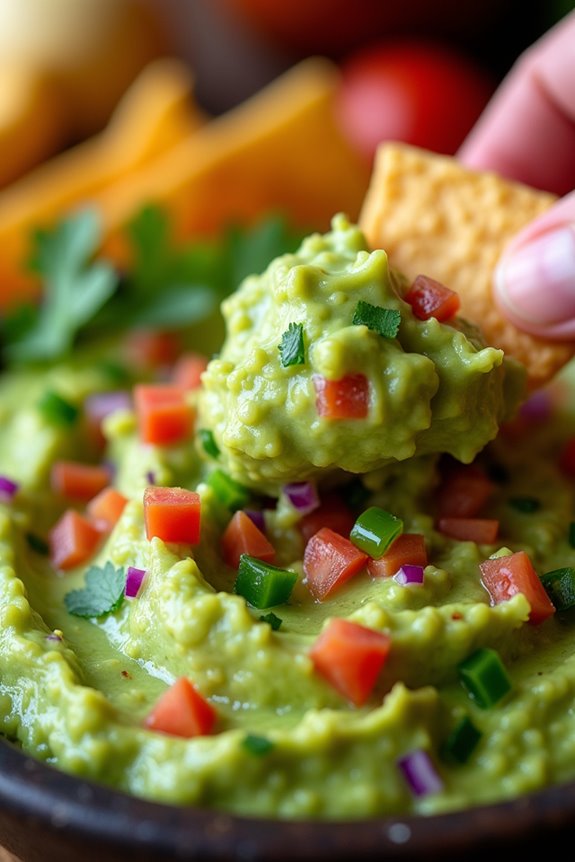
When planning the perfect Halloween party, it’s crucial to have a variety of spooky snacks that delight and surprise your guests. One such crowd-pleaser is Goblin Guacamole, a ghoulish green dip that’s both delicious and visually thematic for the eerie festivities.
Made with ripe avocados and a blend of fresh ingredients, this dish isn’t only quick and easy to prepare but also a healthy option among the other candy-laden treats typically found at Halloween gatherings.
Goblin Guacamole owes its vibrant green color to the creamy avocados, which serve as the base for this flavorful dip. The addition of lime juice, tomatoes, onions, and a touch of heat from jalapeños creates a harmonious balance of flavors that will have your guests coming back for more.
Serve it with a side of crunchy tortilla chips or colorful vegetable sticks to keep the party going strong. This recipe serves 4-6 people, making it perfect for a small gathering or as a part of a larger spread.
Ingredients:
- 4 ripe avocados
- 1 medium lime, juiced
- 1 small red onion, finely chopped
- 2 Roma tomatoes, diced
- 1-2 jalapeños, seeded and minced
- 2 tablespoons fresh cilantro, chopped
- 1 teaspoon salt
- 1/2 teaspoon ground black pepper
- Optional: 1-2 cloves garlic, minced
Cooking Instructions:
- Prepare the Avocados: Cut the avocados in half, remove the pits, and scoop the flesh into a mixing bowl. Use a fork or potato masher to mash the avocados to your desired level of chunkiness.
- Add Lime Juice: Immediately pour the lime juice over the mashed avocados. This not only adds flavor but also helps prevent the avocados from browning.
- Mix in Vegetables: Add the chopped red onion, diced tomatoes, and minced jalapeños to the bowl. These ingredients will add texture and a burst of fresh flavor to the guacamole.
- Season and Flavor: Stir in the chopped cilantro, salt, pepper, and, if desired, minced garlic. Mix everything together until well combined, making certain the seasonings are evenly distributed.
- Chill and Serve: Cover the bowl with plastic wrap, pressing it directly onto the surface of the guacamole to minimize oxidation. Chill in the refrigerator for at least 30 minutes before serving to allow the flavors to meld together.
Extra Tips:
For an extra spooky presentation, consider carving a small pumpkin or bell pepper and serving the Goblin Guacamole inside it.
You can also add a few drops of green food coloring to intensify the color for a more dramatic effect. Adjust the amount of jalapeño according to your spice preference, and don’t hesitate to experiment with additional ingredients like corn or black beans for added texture.
Remember to taste and adjust the seasoning before serving to guarantee your guacamole is perfectly balanced.
Skeleton Bone Breadsticks

Skeleton Bone Breadsticks are a creative and delicious addition to any Halloween-themed party. These spooky snacks aren’t only visually appealing but also delightfully tasty, making them perfect for guests of all ages. Shaped to resemble eerie skeleton bones, these breadsticks will surely set the tone for a fun and festive Halloween gathering.
With a crispy exterior and a soft interior, they’re perfect for dipping into marinara sauce or served alongside other party appetizers.
To make Skeleton Bone Breadsticks, you don’t need to be a professional baker. The recipe is simple to follow and requires only a few basic ingredients. In no time, you’ll have a batch of these bone-chilling breadsticks ready to serve. This recipe yields enough for 4-6 people, ensuring there’s plenty to go around at your Halloween party.
Ingredients for Skeleton Bone Breadsticks (Serving Size: 4-6 people):
- 1 package (13.8 ounces) refrigerated pizza dough
- 2 tablespoons olive oil
- 1 teaspoon garlic powder
- 1 teaspoon dried Italian seasoning
- 3 tablespoons grated Parmesan cheese
- Marinara sauce (for dipping)
Cooking Instructions:
- Preheat and Prepare Dough: Preheat your oven to 375°F (190°C). Unroll the refrigerated pizza dough onto a lightly floured surface and use a rolling pin to gently flatten it into an even rectangle, about 12×8 inches.
- Shape the Bones: Cut the dough into strips approximately 1 inch wide and 6 inches long. To shape each breadstick into a bone, tie a loose knot at each end of the strip, leaving a little dough on either side of the knot to create the bone’s ends.
- Season the Breadsticks: Arrange the shaped breadsticks on a baking sheet lined with parchment paper. Brush each breadstick lightly with olive oil, then sprinkle with garlic powder, Italian seasoning, and Parmesan cheese for added flavor.
- Bake to Perfection: Place the baking sheet in the preheated oven and bake for 12-15 minutes or until the breadsticks are golden brown and crispy on the outside. Keep a close eye on them to prevent over-baking.
- Serve: Once baked, remove the breadsticks from the oven and let them cool for a few minutes. Serve warm with a side of marinara sauce for dipping.
Extra Tips:
For an even spookier presentation, you can use food coloring to tint the dough lightly before shaping it into bones, creating a more ghoulish appearance.
If you prefer a more traditional flavor, feel free to experiment with different seasonings such as rosemary or paprika. You can also prepare the dough ahead of time and refrigerate it until you’re ready to bake, making it a convenient option for hosting.
Haunted House Caramel Apples
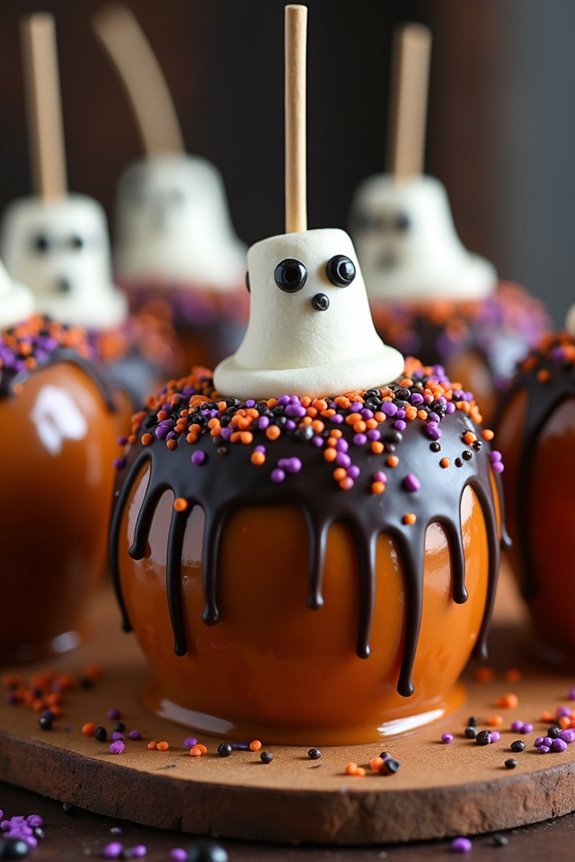
Get ready to add a spooky twist to your Halloween party with these delectable Haunted House Caramel Apples. This recipe is perfect for creating a treat that guests of all ages will enjoy. The sweet, sticky caramel coating paired with the crunch of fresh apples makes for a deliciously eerie delight.
These apples aren’t only tasty but also make for a festive addition to your Halloween spread, with their decorative haunted house embellishments. To make this treat even more special, use a mix of decorating options to give each apple a unique haunted look. From drizzles of white chocolate to mini marshmallow ghosts, the possibilities are endless.
This recipe serves 4-6 people, providing a delightful combination of flavors and fun that’s sure to be a hit at your Halloween gathering.
Ingredients:
- 6 medium apples (Granny Smith or Honeycrisp)
- 1 cup of caramel bits or soft caramels
- 2 tablespoons of water
- 1 cup white chocolate chips
- 1 cup dark chocolate chips
- 12 mini marshmallows
- 6 wooden sticks
- Halloween-themed sprinkles
- Edible eyes
- Black icing gel
Instructions:
- Prepare the Apples: Wash the apples thoroughly to remove any wax or residue. Dry them completely, and then insert a wooden stick into the stem end of each apple.
- Melt the Caramel: In a medium saucepan, combine the caramel bits and water over medium heat. Stir constantly until the caramel is fully melted and smooth. Remove from heat.
- Dip the Apples in Caramel: Holding an apple by the stick, carefully dip it into the melted caramel, turning to coat evenly. Allow excess caramel to drip off before placing the apple on a parchment-lined baking sheet to set. Repeat with the remaining apples.
- Melt the Chocolate: In separate bowls, melt the white and dark chocolate chips either in the microwave (in 30-second intervals, stirring in between) or over a double boiler, until smooth.
- Decorate the Apples: Use a spoon or piping bag to drizzle the melted chocolates over the caramel-coated apples. While the chocolate is still wet, add mini marshmallow ghosts, edible eyes, and Halloween-themed sprinkles to create a haunted house effect.
- Add Final Details: Use black icing gel to add additional spooky details like windows or doors on the marshmallow ghosts. Let the decorated apples set at room temperature until the caramel and chocolate are firm.
- Serve and Enjoy: Once set, arrange the Haunted House Caramel Apples on a platter and serve to your party guests. Enjoy the sweet and spooky flavors!
Extra Tips:
When making Haunted House Caramel Apples, verify that the apples are thoroughly dried after washing, as any moisture can prevent the caramel from sticking properly.
If you find the caramel too thick for dipping, simply add a bit more water to achieve a smoother consistency. Be creative with decorations—use different colors of icing or sprinkles to match your Halloween theme.
Finally, if preparing in advance, store the apples in a cool, dry place to maintain their texture and flavor until serving time.
Zombie Brain Jello

Zombie Brain Jello is a spooky and delightful treat that will surely mesmerize your Halloween party guests. This eerie dessert not only looks fascinating with its brain-like appearance but also delivers a surprisingly sweet and invigorating taste. The combination of jiggly jello and clever presentation will make it a standout item on your festive table.
Perfect for an adult gathering or a family-friendly event, Zombie Brain Jello is a fun and engaging way to bring the Halloween spirit to life.
Crafting Zombie Brain Jello is a straightforward process that requires minimal ingredients and effort. The dish is designed to serve 4-6 people, making it an excellent choice for a small party or gathering. By using a brain-shaped mold, you can create an authentic “zombie brain” effect that will both intrigue and delight your guests.
With a little preparation and creativity, you can whip up this dish to be the highlight of your Halloween spread.
Ingredients for 4-6 servings:
- 2 packets (3 oz each) of berry-flavored jello
- 2 cups boiling water
- 1 cup cold water
- 1 cup evaporated milk
- Green food coloring
- Brain-shaped mold
Cooking Instructions:
- Prepare the Jello Mixture: Begin by dissolving the two packets of berry-flavored jello in 2 cups of boiling water. Stir until the jello powder is completely dissolved, which usually takes about 2 minutes. Confirm there are no granules left undissolved to achieve a smooth consistency.
- Add Cold Ingredients: Once the jello is dissolved, add 1 cup of cold water and 1 cup of evaporated milk to the mixture. Stir well to incorporate all the ingredients. The evaporated milk will give the jello a creamy texture and a slightly opaque appearance, which contributes to the brain-like look of the finished product.
- Color the Jello: Add a few drops of green food coloring to the jello mixture to give it a ghoulish hue. Stir until the color is evenly distributed. Adjust the amount of food coloring to achieve the desired shade of green.
- Mold the Zombie Brain: Carefully pour the jello mixture into the brain-shaped mold. Make sure the mold is placed on a stable and flat surface to prevent spilling. Allow the mixture to cool to room temperature.
- Chill and Set: Transfer the mold to the refrigerator and let it chill for at least 4 hours, or until the jello is fully set. For best results, prepare the jello the night before your event to guarantee it has ample time to firm up.
- Unmold and Serve: Once the jello is set, gently loosen the edges of the jello from the mold using a thin knife. Carefully invert the mold onto a serving platter. If the jello doesn’t release easily, dip the mold briefly in warm water to help loosen it. Serve immediately, slicing into portions as needed.
Extra Tips:
To enhance the spooky effect of your Zombie Brain Jello, consider adding gummy worms or candy eyeballs as garnishes around the serving platter. This will create a more interactive and thematic presentation.
If you want to experiment with flavors, try mixing different jello flavors to create unique color and taste combinations. Additionally, confirm your refrigerator is free of strong odors, as jello can absorb them, potentially affecting its flavor.
Keep the jello covered while setting to maintain its integrity and flavor.
Black Cat Oreo Truffles
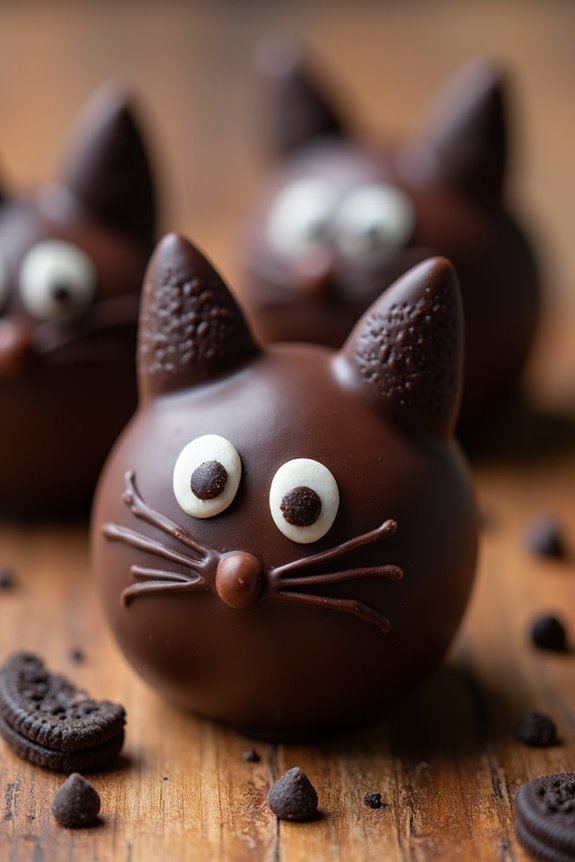
Black Cat Oreo Truffles are a delightful and spooky treat perfect for your Halloween party guests. These bite-sized snacks aren’t only visually appealing but also deliciously rich and chocolaty, making them a hit with both adults and children. The combination of crushed Oreo cookies and cream cheese, coated in a smooth layer of chocolate, creates a decadent dessert that’s sure to impress. With their playful black cat design, these truffles add a touch of whimsy to your festive spread.
These truffles are relatively simple to make, requiring just a few ingredients and some creativity for decoration. The recipe yields about 24-30 truffles, making it ideal for serving 4-6 people. Whether you’re hosting a large gathering or a small get-together, these Black Cat Oreo Truffles are sure to be a conversation starter. Let’s plunge into the ingredients and steps to create these adorable Halloween treats.
Ingredients for 4-6 people:
- 1 package (14 oz) Oreo cookies
- 8 oz cream cheese, softened
- 16 oz semi-sweet chocolate chips or candy melts
- 24-30 mini chocolate chips (for eyes)
- 12-15 chocolate-covered almonds or chocolate candy-coated pieces (for ears)
- Black food coloring pen or icing (optional, for whiskers)
Cooking Instructions:
- Prepare the Oreo Mixture: Begin by placing the Oreo cookies in a food processor and pulse until they’re finely crushed. Transfer the crushed cookies to a large mixing bowl.
- Mix with Cream Cheese: Add the softened cream cheese to the crushed Oreos and mix until well combined. The mixture should be smooth and uniform in texture.
- Shape the Truffles: Using your hands, scoop out small portions of the Oreo mixture and roll them into balls approximately 1 inch in diameter. Place the balls on a baking sheet lined with parchment paper.
- Chill the Balls: Refrigerate the Oreo balls for about 30 minutes to help them firm up. This will make them easier to handle when dipping in chocolate.
- Melt the Chocolate: While the Oreo balls are chilling, melt the semi-sweet chocolate chips or candy melts in a microwave-safe bowl. Heat in 30-second increments, stirring in between, until the chocolate is fully melted and smooth.
- Coat the Truffles: Using a fork or dipping tool, dip each Oreo ball into the melted chocolate, making sure it’s completely coated. Tap off any excess chocolate and return the coated truffle to the parchment-lined sheet.
- Decorate the Cats: Before the chocolate sets, press two mini chocolate chips onto each truffle to create the eyes. Add two chocolate-covered almonds or candy-coated pieces to represent the cat’s ears. If desired, use a black food coloring pen or icing to draw whiskers on each truffle.
- Set the Truffles: Allow the decorated truffles to sit at room temperature until the chocolate hardens completely. For faster setting, you can place them in the refrigerator for about 15 minutes.
Extra Tips:
To guarantee your Black Cat Oreo Truffles look their best, make sure the Oreo mixture is thoroughly combined with the cream cheese, as any lumps can affect the final texture.
When melting the chocolate, be careful not to overheat it, as this can cause it to seize. If you find the chocolate thickening during the dipping process, briefly reheat it in the microwave to maintain a smooth consistency.
Additionally, feel free to get creative with the decorations; you can use different colored candy melts or add additional features like tails or paws using icing.