

The holiday season is the perfect time to enjoy treats that feel indulgent while still being nourishing. From a warm, spiced chai tea loaf to dark chocolate avocado brownies, there are plenty of options that are rich, decadent, and surprisingly wholesome. In this collection, I’ve gathered 13 healthy Christmas baking recipes that strike the right balance. Each one is designed to delight your taste buds without any guilt. Ready to see which sweet delights made the list?
Almond Flour Gingerbread Cookies

Almond Flour Gingerbread Cookies are a delightful treat that combines the festive flavors of gingerbread with the health benefits of almond flour. These cookies are perfect for those who are looking to indulge in holiday sweets without compromising their dietary preferences.
Made with natural, wholesome ingredients, these cookies aren’t only gluten-free but also have a lower glycemic index compared to traditional gingerbread cookies. Their warm spices and subtle sweetness make them a perfect addition to any Christmas dessert table, guaranteeing everyone can enjoy the holiday spirit.
This recipe yields a batch suitable for 4-6 people, making it ideal for a small gathering or family treat. The use of almond flour gives these cookies a tender, melt-in-your-mouth texture, while a blend of spices such as cinnamon, ginger, and cloves adds that unmistakable gingerbread warmth.
Whether enjoyed on their own or paired with a hot cup of cocoa, these cookies are sure to become a festive favorite in your household.
Ingredients:
- 2 cups almond flour
- 1 teaspoon ground ginger
- 1 teaspoon ground cinnamon
- 1/2 teaspoon ground cloves
- 1/2 teaspoon baking soda
- 1/4 teaspoon salt
- 1/4 cup coconut oil, melted
- 1/4 cup maple syrup
- 1 teaspoon vanilla extract
- 1 tablespoon molasses (optional)
- 1 large egg
Instructions:
- Preheat and Prepare: Preheat your oven to 350°F (175°C) and line a baking sheet with parchment paper. This guarantees your cookies bake evenly and don’t stick to the pan.
- Mix Dry Ingredients: In a large bowl, whisk together the almond flour, ground ginger, cinnamon, cloves, baking soda, and salt. This guarantees all the spices are evenly distributed throughout the flour.
- Combine Wet Ingredients: In a separate bowl, whisk together the melted coconut oil, maple syrup, vanilla extract, molasses, and egg until well combined. The molasses gives a deeper flavor to the cookies, but if you prefer a lighter taste, you can omit it.
- Form the Dough: Gradually add the wet ingredients to the dry ingredients, mixing with a spatula or wooden spoon until a dough forms. The dough should be slightly sticky but manageable.
- Shape the Cookies: Using a tablespoon or cookie scoop, drop rounded tablespoons of dough onto the prepared baking sheet, spacing them about 2 inches apart. Use your fingers to gently press down each ball of dough to flatten them slightly.
- Bake: Place the baking sheet in the preheated oven and bake for 10-12 minutes, or until the edges are lightly golden. The cookies will continue to firm up as they cool, so don’t worry if they seem soft when first removed from the oven.
- Cool and Enjoy: Allow the cookies to cool on the baking sheet for 5 minutes before transferring them to a wire rack to cool completely. Serve them with a warm beverage or enjoy them as a standalone treat.
Extra Tips:
When making Almond Flour Gingerbread Cookies, confirm that all ingredients, particularly the coconut oil and egg, are at room temperature. This helps them blend more smoothly into the dough.
If the dough feels too sticky to handle, refrigerate it for about 15-20 minutes to firm up slightly. For an extra festive touch, consider decorating the cooled cookies with a simple glaze made from powdered sugar and a splash of milk or non-dairy alternative.
Enjoy these cookies fresh or store them in an airtight container for up to a week to maintain their freshness and flavor.
Dark Chocolate Avocado Brownies
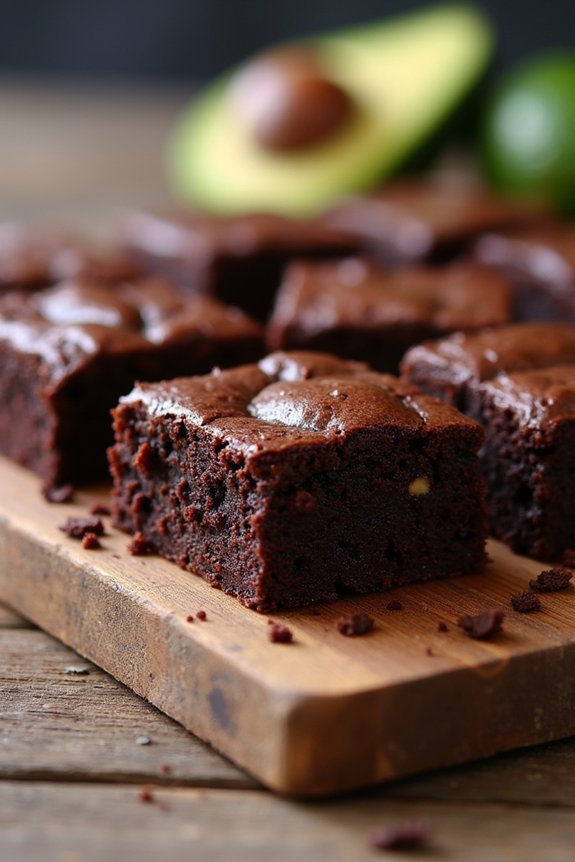
Dark Chocolate Avocado Brownies are a decadent yet healthy treat perfect for the holiday season. This recipe combines the rich flavors of dark chocolate with the creamy texture of avocados, creating a moist and fudgy brownie that’s certain to satisfy any sweet tooth.
Not only are these brownies delicious, but they also incorporate healthy fats and are lower in sugar compared to traditional brownie recipes. Baking these treats is an excellent way to indulge guilt-free during the festivities.
These brownies are ideal for those seeking a healthier dessert option without compromising on taste. The recipe replaces butter with avocado, providing a nourishing alternative that maintains the desired richness of a classic brownie.
Additionally, using dark chocolate adds depth of flavor while offering antioxidants, making these brownies both delicious and nutritious. Whether you’re serving them at a family gathering or enjoying them as a personal indulgence, these Dark Chocolate Avocado Brownies are a must-try for any holiday celebration.
Ingredients (Serves 4-6):
- 2 ripe avocados
- 1 cup dark chocolate chips
- 1/2 cup unsweetened cocoa powder
- 1/2 cup honey or maple syrup
- 1 teaspoon vanilla extract
- 1/2 cup whole wheat flour
- 1/2 teaspoon baking soda
- 1/4 teaspoon salt
- 2 large eggs
Instructions:
- Preheat the Oven: Begin by preheating your oven to 350°F (175°C). This guarantees the oven is at the right temperature once the batter is ready.
- Prepare the Baking Pan: Line an 8×8 inch baking pan with parchment paper or lightly grease it with cooking spray. This will prevent the brownies from sticking and make them easier to remove.
- Melt the Chocolate: In a microwave-safe bowl, melt the dark chocolate chips in 30-second intervals, stirring in between, until smooth and fully melted. Set aside to cool slightly.
- Mash the Avocados: In a large mixing bowl, mash the ripe avocados until smooth and creamy. Guarantee there are no large chunks for a uniform texture.
- Combine Wet Ingredients: Add the melted chocolate, honey or maple syrup, vanilla extract, and eggs to the mashed avocados. Mix well until all ingredients are fully incorporated.
- Mix Dry Ingredients: In a separate bowl, whisk together the cocoa powder, whole wheat flour, baking soda, and salt.
- Combine Wet and Dry Ingredients: Gradually add the dry ingredients to the wet mixture, stirring gently until just combined. Be careful not to overmix to maintain the batter’s lightness.
- Pour into Pan: Transfer the brownie batter into the prepared baking pan, spreading it evenly with a spatula.
- Bake the Brownies: Place the pan in the preheated oven and bake for 25-30 minutes, or until a toothpick inserted into the center comes out mostly clean with a few crumbs.
- Cool and Serve: Allow the brownies to cool in the pan for at least 10 minutes before transferring them to a wire rack. Cut into squares and serve warm or at room temperature.
Extra Tips:
For added texture and flavor, consider folding in a handful of chopped nuts, such as walnuts or pecans, into the batter before baking. If you prefer a sweeter brownie, you can increase the amount of honey or maple syrup slightly.
To guarantee the brownies are perfectly cooked, keep an eye on them towards the end of the baking time, as oven temperatures may vary. These brownies store well in an airtight container for up to three days, making them a convenient make-ahead dessert option.
Whole Wheat Honey Sugar Cookies
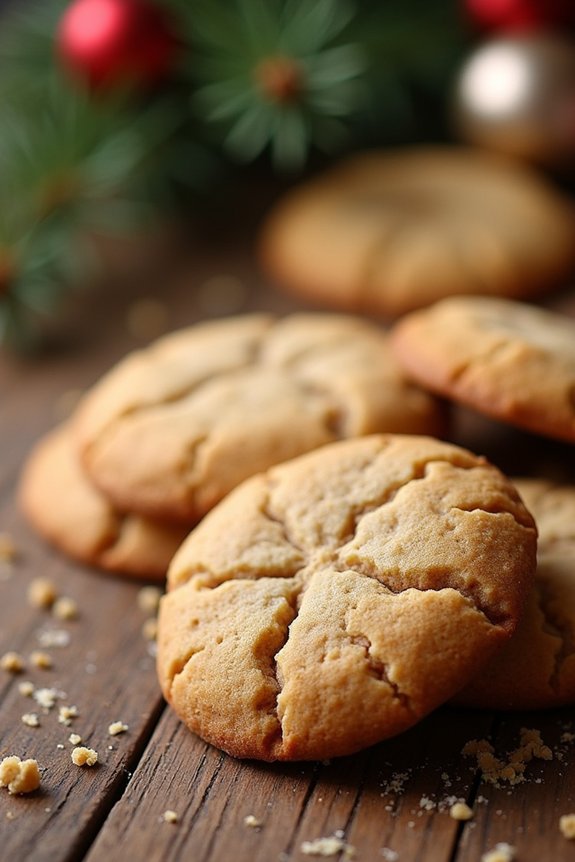
Indulge in a guilt-free holiday treat with these Whole Wheat Honey Sugar Cookies. These cookies offer a healthier twist on a classic favorite, using whole wheat flour and honey as natural sweeteners, perfect for those looking to maintain healthier eating habits during the festive season.
With a soft and chewy texture, these cookies are sure to be a hit at your Christmas gatherings, providing a delightful sweetness that everyone will enjoy. Ideal for serving 4-6 people, this recipe is a great addition to your holiday baking repertoire. Not only are these cookies delicious, but they’re also simple to make, requiring minimal ingredients and time.
So, gather your loved ones, roll up your sleeves, and enjoy some quality time baking these delicious Whole Wheat Honey Sugar Cookies.
Ingredients:
- 2 cups whole wheat flour
- 1/2 teaspoon baking soda
- 1/4 teaspoon salt
- 1/2 cup unsalted butter, softened
- 1/2 cup honey
- 1 teaspoon vanilla extract
- 1 large egg
Instructions:
- Preheat the Oven: Start by preheating your oven to 350°F (175°C). Line a baking sheet with parchment paper or a silicone baking mat to prevent the cookies from sticking.
- Mix Dry Ingredients: In a medium-sized bowl, combine the whole wheat flour, baking soda, and salt. Whisk the ingredients together until they’re well incorporated.
- Cream Butter and Honey: In a large mixing bowl, use an electric mixer to cream the softened butter and honey together until the mixture is light and fluffy. This should take about 2-3 minutes.
- Add Wet Ingredients: Add the vanilla extract and the egg to the butter and honey mixture. Mix on medium speed until the ingredients are fully combined.
- Combine Wet and Dry Mixtures: Gradually add the dry ingredients to the wet mixture, mixing on low speed until a dough forms. Be careful not to overmix, as this can make the cookies tough.
- Shape the Cookies: Scoop tablespoon-sized amounts of dough and roll them into balls. Place them onto the prepared baking sheet, spacing them about 2 inches apart. Gently flatten each ball with the palm of your hand or the bottom of a glass.
- Bake the Cookies: Place the baking sheet in the preheated oven and bake for 8-10 minutes or until the edges of the cookies start to turn golden brown. Avoid overbaking to guarantee the cookies remain chewy.
- Cool the Cookies: Remove the cookies from the oven and allow them to cool on the baking sheet for 5 minutes before transferring them to a wire rack to cool completely.
Extra Tips:
For an extra festive touch, consider adding a sprinkle of cinnamon or nutmeg to the dry ingredients for a warm, spiced flavor.
If you prefer a bit of crunch, you can also stir in a handful of chopped nuts or dried cranberries before scooping the dough. Remember to taste the dough, as honey can vary in sweetness; adjust the amount slightly if necessary.
Enjoy these cookies fresh, or store them in an airtight container to keep them soft and chewy for up to a week.
Vegan Peppermint Patties

Indulging in festive treats doesn’t have to come at the expense of your health or dietary preferences. These Vegan Peppermint Patties are the perfect balance of invigorating mint flavor and smooth dark chocolate, making them a delightful addition to your holiday baking repertoire. Crafted with wholesome ingredients, these peppermint patties allow you to savor the quintessential holiday flavor while adhering to a plant-based lifestyle.
Ideal for serving 4-6 people, these peppermint patties aren’t only vegan but also free from refined sugars. They make for a wonderful make-ahead dessert that will surely impress your family and friends. Whether you’re hosting a holiday gathering or looking for a sweet treat to enjoy yourself, these peppermint patties are sure to satisfy your cravings.
Ingredients (Serving Size: 4-6 people)
- 1 cup unsweetened shredded coconut
- 1/4 cup coconut cream
- 2 tablespoons maple syrup
- 1 teaspoon peppermint extract
- 1 cup dark vegan chocolate chips
- 1 tablespoon coconut oil
Cooking Instructions
- Prepare the Mint Filling: In a food processor, combine the shredded coconut, coconut cream, maple syrup, and peppermint extract. Blend until the mixture is smooth and forms a sticky dough-like consistency. This will serve as the invigorating mint center of your patties.
- Shape the Patties: Using your hands, scoop about one tablespoon of the mint filling and form it into a small, flat disc. Repeat this process until all the filling is used. Place the discs onto a baking sheet lined with parchment paper to prevent sticking.
- Freeze the Patties: Transfer the baking sheet with the mint discs to the freezer. Allow them to chill for about 20-30 minutes or until they become firm. This step is essential to guarantee they hold their shape when coated with chocolate.
- Melt the Chocolate: In a small saucepan, melt the vegan dark chocolate chips and coconut oil over low heat. Stir continuously to guarantee the chocolate doesn’t burn and remains smooth. Once melted, remove from heat and allow it to cool slightly.
- Coat the Patties: Remove the firm mint discs from the freezer. Using a fork, dip each disc into the melted chocolate, ensuring it’s completely covered. Let any excess chocolate drip off before placing it back on the parchment-lined baking sheet.
- Set the Chocolate: Return the chocolate-coated patties to the freezer for another 10-15 minutes, or until the chocolate has hardened completely. This will give your patties a satisfying crunch when bitten into.
Extra Tips
For an added festive touch, consider sprinkling crushed candy canes or a pinch of sea salt over the patties while the chocolate is still wet. This won’t only enhance the visual appeal but also add an extra layer of flavor.
Guarantee the coconut cream you use is well-mixed and free from lumps, as this will affect the texture of the mint filling. If the chocolate begins to thicken during the coating process, gently reheat it over low heat until it returns to a smooth consistency. Enjoy these treats straight from the freezer for the best texture and flavor.
Flourless Almond Butter Chocolate Chip Cookies

Flourless Almond Butter Chocolate Chip Cookies are a delightful and healthy treat perfect for the holiday season. These cookies aren’t only gluten-free but also packed with the nutty flavor of almond butter and the sweetness of chocolate chips.
Whether you’re catering to dietary restrictions or simply seeking a healthier alternative to traditional cookies, this recipe offers a deliciously rich and chewy snack without compromising on taste. Ideal for a serving size of 4-6 people, these cookies are simple to make and require minimal preparation time.
They’re an excellent choice for those who wish to indulge in holiday baking without the guilt. The combination of almond butter and chocolate chips creates a perfect harmony of flavors, making these cookies a festive favorite.
Ingredients:
- 1 cup almond butter
- 1/2 cup brown sugar
- 1 large egg
- 1 teaspoon vanilla extract
- 1/2 teaspoon baking soda
- 1/4 teaspoon salt
- 1/2 cup chocolate chips
Instructions:
- Preheat the Oven: Begin by preheating your oven to 350°F (175°C). This guarantees that the cookies bake evenly and develop a nice golden color.
- Mix the Wet Ingredients: In a large mixing bowl, combine the almond butter, brown sugar, egg, and vanilla extract. Use a wooden spoon or an electric mixer to blend these ingredients until smooth and creamy.
- Add the Dry Ingredients: Sprinkle in the baking soda and salt, and mix well until they’re fully incorporated into the wet mixture. This step is essential for giving the cookies their chewy texture and making sure they rise properly.
- Stir in the Chocolate Chips: Gently fold the chocolate chips into the batter, making sure they’re evenly distributed throughout the dough.
- Shape the Cookies: Using a tablespoon, scoop the dough and roll it into balls. Place the dough balls on a baking sheet lined with parchment paper, leaving some space between each cookie to allow for spreading during baking.
- Bake: Place the baking sheet in the preheated oven and bake for 8-10 minutes, or until the edges of the cookies are lightly browned. The centers may look slightly underbaked, but they’ll firm up as they cool.
- Cool: Remove the cookies from the oven and let them cool on the baking sheet for a few minutes before transferring them to a wire rack to cool completely.
Extra Tips: To enhance the flavor of these cookies, consider adding a pinch of cinnamon or a handful of chopped nuts to the dough.
If you prefer a smoother cookie, make sure your almond butter is well-stirred and creamy before mixing. For a touch of holiday cheer, sprinkle a little sea salt on top of each cookie before baking.
These cookies can be stored in an airtight container at room temperature for up to a week, making them perfect for preparing in advance of your holiday festivities.
Gluten-Free Cranberry Orange Scones
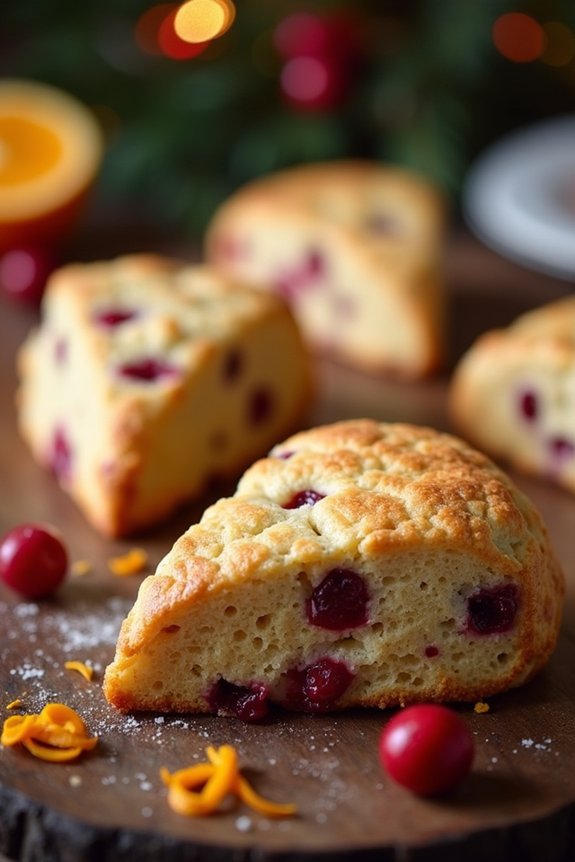
Indulge in the festive flavors of cranberry and orange with these delightful gluten-free scones. Perfect for a Christmas morning treat or a holiday brunch, these scones are bursting with tangy cranberries and zesty orange. Made with gluten-free flour, they’re a great option for those who are gluten intolerant or simply looking to enjoy a lighter baked good without compromising taste or texture.
Whether served with a dollop of whipped cream, a pat of butter, or a drizzle of glaze, these scones are sure to become a holiday favorite. The combination of sweet and tart cranberries with the citrusy brightness of orange creates a wonderfully balanced flavor profile.
These scones are easy to make and are perfect for sharing with family and friends during the holiday season. With their golden crust and soft, tender crumb, they embody the warmth and joy of Christmas baking. Plus, they’re simple enough to whip up on a festive morning, leaving you with plenty of time to savor the holiday cheer.
Ingredients for 4-6 servings:
- 2 cups gluten-free all-purpose flour
- 1/3 cup granulated sugar
- 1 tablespoon baking powder
- 1/2 teaspoon salt
- Zest of 1 large orange
- 1/2 cup unsalted butter, cold and cubed
- 1/2 cup dried cranberries
- 2/3 cup heavy cream
- 1 large egg
- 1 teaspoon vanilla extract
- 2 tablespoons orange juice
Instructions:
- Preheat the Oven: Preheat your oven to 400°F (200°C) and line a baking sheet with parchment paper or a silicone baking mat.
- Mix Dry Ingredients: In a large mixing bowl, combine the gluten-free flour, sugar, baking powder, salt, and orange zest. Stir well to make sure the baking powder is evenly distributed.
- Incorporate Butter: Add the cold, cubed butter to the dry ingredients. Use a pastry cutter or your fingers to work the butter into the flour mixture until it resembles coarse crumbs.
- Add Cranberries: Stir in the dried cranberries, making sure they’re evenly distributed throughout the flour mixture.
- Prepare Wet Ingredients: In a separate bowl, whisk together the heavy cream, egg, vanilla extract, and orange juice until well combined.
- Combine Wet and Dry Ingredients: Pour the wet ingredients into the dry ingredients. Mix gently with a spatula until just combined. Be careful not to overmix the dough to keep the scones tender.
- Form the Dough: Turn the dough out onto a lightly floured surface. Gently knead it a few times to bring it together, then shape it into a disk about 1 inch thick.
- Cut the Scones: Use a sharp knife to cut the dough disk into 8 wedges. Transfer the wedges onto the prepared baking sheet, spacing them slightly apart.
- Bake the Scones: Bake in the preheated oven for 15-20 minutes, or until the scones are golden brown and a toothpick inserted into the center comes out clean.
- Cool and Serve: Allow the scones to cool on the baking sheet for a few minutes before transferring them to a wire rack. Serve warm or at room temperature.
Extra Tips: For an added touch of sweetness, consider drizzling a simple glaze made from powdered sugar and orange juice over the cooled scones. If you’re using fresh cranberries instead of dried, chop them finely and increase the sugar slightly to balance the tartness.
To achieve the best texture, handle the dough as little as possible, and keep your ingredients cold until just before baking. Enjoy these scones with a hot cup of tea or coffee for a cozy holiday experience.
Maple Pecan Snowball Cookies
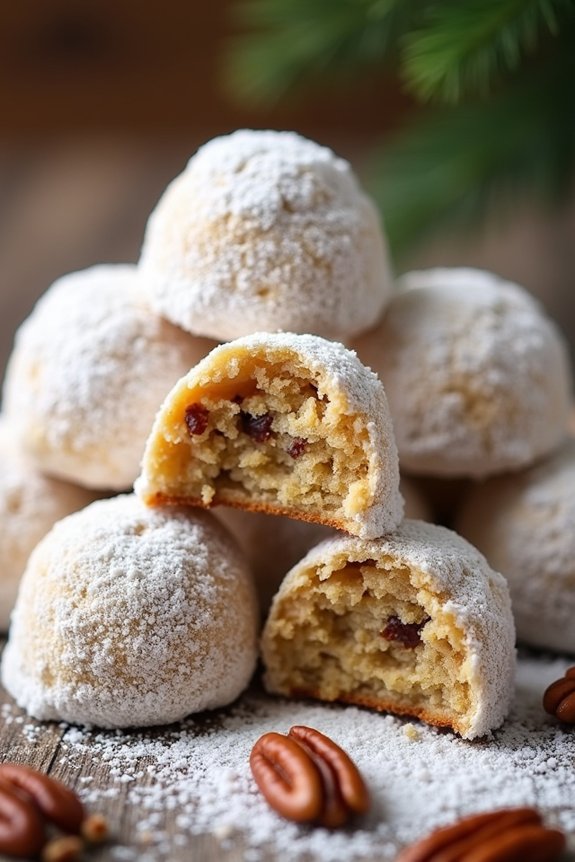
Maple Pecan Snowball Cookies are a delightful holiday treat that combines the warm, nutty flavor of pecans with the rich, natural sweetness of maple syrup.
These cookies, with their delicate, crumbly texture, are perfect for festive gatherings or as a delicious homemade gift. Not only are they a healthier alternative to traditional holiday cookies, but they also bring a touch of elegance to any dessert table.
These cookies are made without refined sugar, relying instead on the natural sweetener of maple syrup to give them their distinctive flavor. The pecans add a wonderful crunch and depth, making each bite a perfect balance of sweetness and nuttiness.
Ideal for serving a group of 4-6 people, these Maple Pecan Snowball Cookies will surely become a favorite in your holiday baking repertoire.
Ingredients (Serving Size: 4-6 people):
- 1 cup pecans
- 1 1/2 cups all-purpose flour
- 1/4 teaspoon salt
- 1/2 cup unsalted butter, softened
- 1/3 cup pure maple syrup
- 1 teaspoon vanilla extract
- 1/2 cup powdered sugar for coating
Instructions:
- Preheat Oven and Prepare Pecans: Preheat your oven to 350°F (175°C). Spread the pecans on a baking sheet and toast them in the oven for about 8-10 minutes, or until they’re lightly browned and fragrant. Allow them to cool completely, then finely chop.
- Mix Dry Ingredients: In a medium-sized bowl, combine the flour and salt. Stir in the cooled, chopped pecans until evenly distributed.
- Cream Butter and Maple Syrup: In a large bowl, beat the softened butter until smooth and creamy. Gradually add the maple syrup and vanilla extract, continuing to beat until the mixture is well-combined and fluffy.
- Combine Mixtures: Slowly add the dry ingredients to the wet ingredients, mixing just until the dough comes together. Be careful not to overmix to guarantee a tender cookie.
- Chill the Dough: Cover the dough with plastic wrap and refrigerate for at least 30 minutes. This makes the dough easier to handle and helps the cookies maintain their shape during baking.
- Shape and Bake: Once the dough is chilled, roll it into 1-inch balls and place them on a parchment-lined baking sheet, leaving about 2 inches between each cookie. Bake in the preheated oven for 12-15 minutes, or until the bottoms are just starting to brown.
- Coat with Sugar: Allow the cookies to cool for about 5 minutes on the baking sheet, then roll them in powdered sugar while they’re still warm. This helps the sugar adhere to the cookies. Once completely cooled, roll them in powdered sugar again for a beautiful, snowy finish.
Extra Tips: For a richer flavor, consider using dark maple syrup, which has a more robust taste compared to the lighter varieties.
If you prefer a finer texture, you can grind the pecans into a coarse meal instead of chopping them. Confirm that the cookies are cool before storing them in an airtight container to maintain their texture.
For a festive touch, try adding a pinch of cinnamon or nutmeg to the dough for a hint of warm spices.
Healthy Oatmeal Raisin Cookies
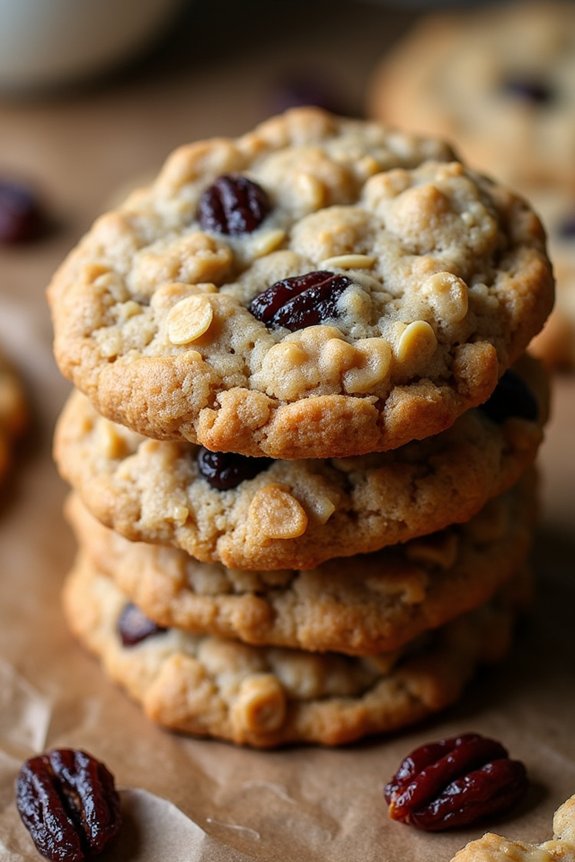
These Healthy Oatmeal Raisin Cookies are a delightful addition to your Christmas baking list. Packed with wholesome ingredients, these cookies offer a guilt-free treat that your entire family can enjoy during the festive season.
The combination of oats and raisins provides a natural sweetness and chewy texture, while whole wheat flour adds a nutritional boost. Whether you’re enjoying them with a warm mug of tea or leaving them out for Santa, these cookies are sure to become a holiday favorite.
Not only are these cookies delicious, but they’re also easy to prepare. With simple ingredients and a straightforward method, you can whip up a batch in no time. They’re perfect for those who want to indulge in holiday treats without compromising on health.
Plus, the recipe is versatile, allowing you to modify it with your favorite additions like nuts or dark chocolate chips.
Ingredients (Serves 4-6):
- 1 cup rolled oats
- 3/4 cup whole wheat flour
- 1/2 teaspoon baking soda
- 1/2 teaspoon ground cinnamon
- 1/4 teaspoon salt
- 1/4 cup coconut oil, melted
- 1/4 cup honey or maple syrup
- 1 large egg
- 1 teaspoon vanilla extract
- 1/2 cup raisins
Instructions:
- Preheat the Oven: Start by preheating your oven to 350°F (175°C). Line a baking sheet with parchment paper or a silicone mat to prevent sticking.
- Mix Dry Ingredients: In a large bowl, combine the rolled oats, whole wheat flour, baking soda, ground cinnamon, and salt. Stir these dry ingredients together until they’re evenly mixed.
- Combine Wet Ingredients: In a separate bowl, whisk together the melted coconut oil, honey (or maple syrup), egg, and vanilla extract. Make sure the mixture is smooth and well combined.
- Mix Everything Together: Pour the wet ingredients into the bowl with the dry ingredients. Stir until just combined, then fold in the raisins. Make sure the raisins are evenly distributed throughout the dough.
- Shape the Cookies: Using a tablespoon or cookie scoop, drop rounded spoonfuls of dough onto the prepared baking sheet, spacing them about 2 inches apart. Gently press each mound to flatten slightly, as these cookies won’t spread much during baking.
- Bake: Place the baking sheet in the preheated oven and bake for 10-12 minutes, or until the edges are golden brown. The centers may look slightly underbaked, but they’ll firm up as they cool.
- Cool: Remove the cookies from the oven and let them cool on the baking sheet for 5 minutes. Then transfer them to a wire rack to cool completely.
Extra Tips: For a more interesting texture, consider adding a handful of chopped nuts such as walnuts or almonds to the dough. If you prefer softer cookies, slightly underbake them, keeping an eye on the edges for a perfect golden color.
You can also substitute cranberries or other dried fruits in place of raisins for a different flavor profile. Store these cookies in an airtight container at room temperature for up to a week, or freeze them for longer storage. Enjoy these cookies as a healthy treat during your Christmas celebrations!
Coconut Flour Raspberry Thumbprint Cookies
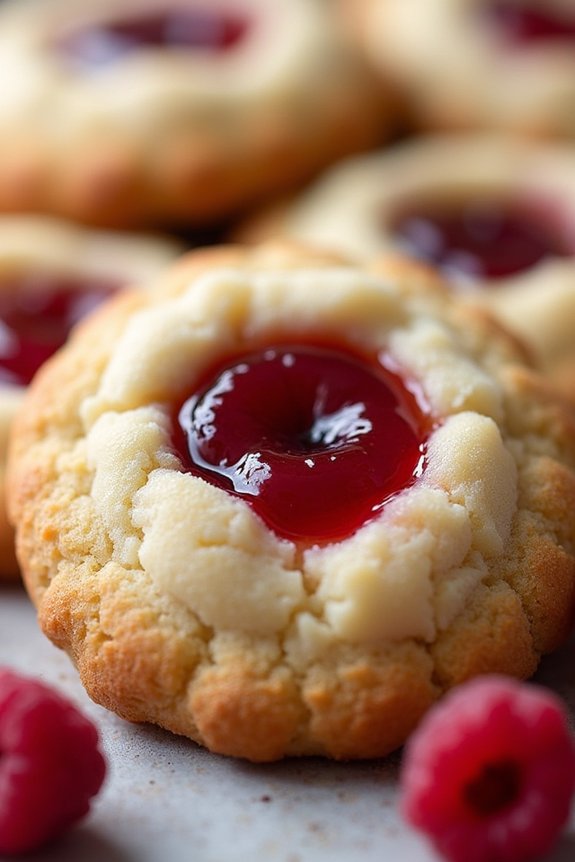
Coconut Flour Raspberry Thumbprint Cookies are a delightful and healthy treat perfect for the holiday season. These cookies are gluten-free and made with coconut flour, which provides a subtle sweetness and a light, fluffy texture. The raspberry jam filling adds a burst of tartness and color, making them not only delicious but visually appealing as well.
They’re easy to prepare and perfect for sharing with family and friends during Christmas gatherings. The recipe is ideal for those looking for a healthier alternative to traditional cookies without compromising on flavor. With a few simple ingredients, you can whip up a batch of these cookies in no time.
They’re also a great option for those with dietary restrictions, as they’re free from refined sugars and grains. Whether you’re an experienced baker or a novice in the kitchen, you’ll find this recipe straightforward and rewarding.
Ingredients (serves 4-6):
- 1 cup coconut flour
- 1/4 cup coconut oil, melted
- 1/4 cup honey or maple syrup
- 1/4 teaspoon salt
- 1/2 teaspoon vanilla extract
- 2 large eggs
- 1/4 cup raspberry jam (preferably sugar-free)
Cooking Instructions:
- Preheat the Oven: Start by preheating your oven to 350°F (175°C). Line a baking sheet with parchment paper to prevent the cookies from sticking.
- Mix the Wet Ingredients: In a large mixing bowl, combine the melted coconut oil, honey or maple syrup, vanilla extract, and eggs. Whisk until the mixture is smooth and well combined.
- Combine with Dry Ingredients: Add the coconut flour and salt to the wet ingredients. Stir until a dough forms. The dough should be slightly sticky but firm enough to hold its shape.
- Shape the Cookies: Using your hands, scoop out small amounts of dough and roll them into 1-inch balls. Place the balls on the prepared baking sheet, leaving space between each.
- Create Thumbprints: Gently press your thumb into the center of each dough ball to create a small indentation. This will hold the raspberry jam.
- Fill with Jam: Spoon a small amount of raspberry jam into each indentation. Be careful not to overfill, as the jam will spread slightly during baking.
- Bake the Cookies: Place the baking sheet in the preheated oven and bake for 12-15 minutes, or until the edges of the cookies are lightly golden.
- Cool and Serve: Allow the cookies to cool on the baking sheet for a few minutes before transferring them to a wire rack to cool completely. Serve once cooled.
Extra Tips:
To achieve the best results, ascertain that the coconut oil is fully melted before mixing with other ingredients to create a smooth dough. If the dough feels too dry, you can add a tablespoon of water to help it come together.
For a different flavor profile, consider using other sugar-free jams such as apricot or blueberry. Store the cookies in an airtight container to keep them fresh for up to a week. These cookies also freeze well; just thaw them at room temperature before serving.
Spiced Chai Tea Loaf
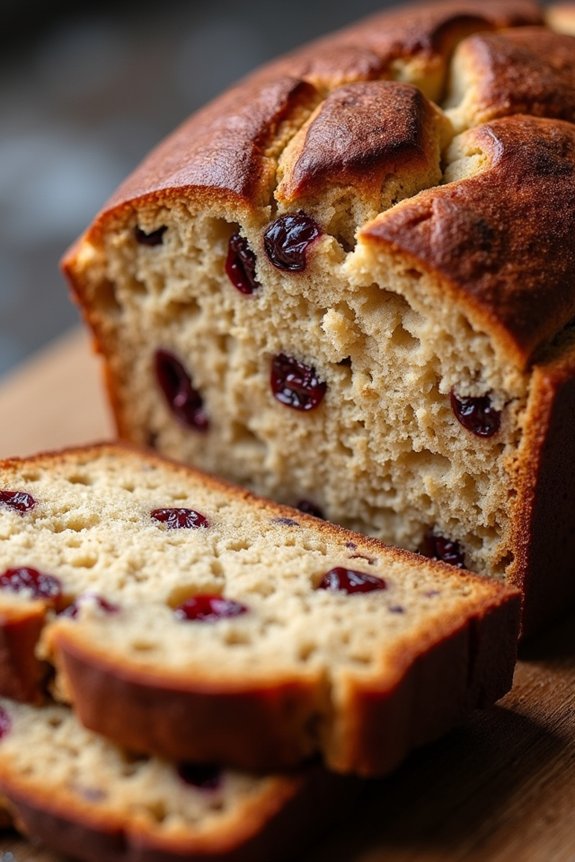
Spiced Chai Tea Loaf is a delightful holiday treat that combines the warm, aromatic flavors of chai spices with the comforting texture of a moist loaf cake. This healthy Christmas baking recipe is perfect for sharing with family and friends during the festive season.
The loaf is infused with a blend of spices like cinnamon, ginger, and cardamom, which not only enhance the flavor but also provide numerous health benefits. It’s a great way to enjoy the holiday flavors without feeling guilty about indulging.
This recipe is designed for a serving size of 4-6 people, making it an ideal addition to your holiday dessert table. The Spiced Chai Tea Loaf is made with wholesome ingredients, guaranteeing you can enjoy a delicious treat while maintaining a balanced diet.
Whether you’re a seasoned baker or a novice in the kitchen, this recipe is straightforward and enjoyable to make.
Ingredients:
- 1 cup brewed chai tea (strong)
- 1/2 cup unsweetened applesauce
- 1/2 cup honey or maple syrup
- 2 large eggs
- 1 teaspoon vanilla extract
- 1 3/4 cups whole wheat flour
- 1 teaspoon baking powder
- 1/2 teaspoon baking soda
- 1/2 teaspoon salt
- 1 teaspoon ground cinnamon
- 1/2 teaspoon ground ginger
- 1/4 teaspoon ground cardamom
- 1/4 teaspoon ground nutmeg
- 1/4 teaspoon ground cloves
- 1/2 cup chopped nuts (optional)
- 1/2 cup raisins or dried cranberries
Instructions:
- Prepare the Tea: Brew a cup of strong chai tea using your preferred method. Let it cool to room temperature while you prepare the rest of the ingredients.
- Preheat the Oven: Preheat your oven to 350°F (175°C). Grease a 9×5-inch loaf pan with a little oil or line it with parchment paper for easy removal.
- Mix Wet Ingredients: In a large mixing bowl, combine the brewed chai tea, unsweetened applesauce, honey (or maple syrup), eggs, and vanilla extract. Whisk together until the mixture is smooth and well combined.
- Combine Dry Ingredients: In another bowl, sift together the whole wheat flour, baking powder, baking soda, salt, and all the spices: cinnamon, ginger, cardamom, nutmeg, and cloves. Stir to guarantee the spices are evenly distributed.
- Combine Wet and Dry Mixtures: Gradually add the dry ingredients to the wet ingredients, stirring gently with a spatula or wooden spoon. Mix until just combined; be careful not to overmix.
- Add Nuts and Dried Fruit: Fold in the chopped nuts and raisins (or dried cranberries) if using. These add texture and a burst of flavor to the loaf.
- Bake the Loaf: Pour the batter into the prepared loaf pan. Smooth the top with a spatula. Bake in the preheated oven for 45-50 minutes, or until a toothpick inserted into the center comes out clean.
- Cool and Serve: Once baked, remove the loaf from the oven and let it cool in the pan for about 10 minutes. Then transfer it to a wire rack to cool completely before slicing and serving.
Extra Tips:
When baking the Spiced Chai Tea Loaf, verify your chai tea is strong enough to impart a robust flavor to the loaf. You can adjust the spices to your taste; if you prefer a spicier loaf, add a bit more ginger or cinnamon.
If you want to make the loaf even healthier, consider substituting half the flour with almond flour for added nutrients and a slightly different texture. Finally, storing the loaf in an airtight container will keep it fresh and moist for several days, making it perfect for enjoying throughout the holiday season.
Low-Sugar Eggnog Muffins
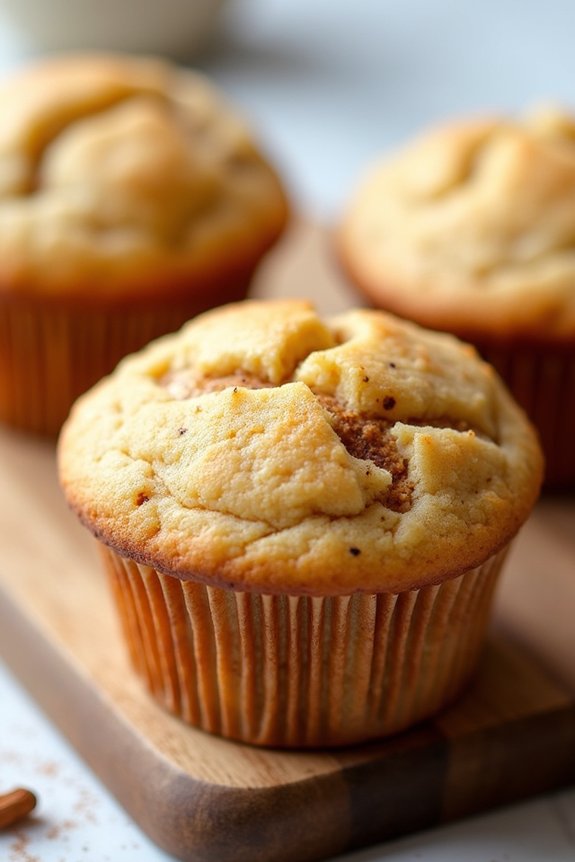
Indulge in the spirit of the holidays with these delightful Low-Sugar Eggnog Muffins. Perfect for those looking to enjoy a festive treat without the guilt, these muffins are a healthier take on a classic favorite. They capture the warm, creamy essence of eggnog with a fraction of the sugar, making them an ideal choice for a seasonal breakfast or a cozy afternoon snack.
With just the right hint of nutmeg and cinnamon, each bite will evoke the comforting flavors of Christmas, allowing you to savor the holiday cheer. These muffins aren’t only delicious but also incredibly easy to make, even for novice bakers. The recipe yields enough for 4-6 people, making it perfect for a small holiday gathering or family breakfast.
By using alternative sweeteners and whole wheat flour, these muffins maintain their moist, rich texture while offering a healthier option. Gather your ingredients, preheat your oven, and get ready to fill your home with the irresistible aroma of freshly baked holiday goodness.
Ingredients for 4-6 people:
- 1 cup whole wheat flour
- 1 cup all-purpose flour
- 1 tablespoon baking powder
- 1/2 teaspoon baking soda
- 1/2 teaspoon salt
- 1 teaspoon ground nutmeg
- 1/2 teaspoon ground cinnamon
- 1/3 cup granulated low-calorie sweetener (e.g., erythritol or stevia)
- 1/4 cup unsalted butter, melted
- 1/2 cup unsweetened applesauce
- 1 teaspoon vanilla extract
- 3/4 cup unsweetened almond milk
- 1/4 cup low-sugar eggnog (or regular eggnog if preferred)
- 2 large eggs
Instructions:
- Preheat the Oven: Begin by preheating your oven to 350°F (175°C). Line a standard 12-cup muffin tin with paper liners or grease with cooking spray for easy muffin removal.
- Mix Dry Ingredients: In a large mixing bowl, combine the whole wheat flour, all-purpose flour, baking powder, baking soda, salt, nutmeg, and cinnamon. Whisk these dry ingredients together until they’re well combined and set aside.
- Prepare Wet Ingredients: In a separate bowl, whisk together the melted butter, unsweetened applesauce, vanilla extract, almond milk, low-sugar eggnog, and eggs. Stir until the mixture is smooth and the eggs are fully integrated.
- Combine Ingredients: Pour the wet ingredients into the bowl with the dry ingredients. Gently fold the mixture using a spatula until just combined. Be careful not to overmix, as this can lead to dense muffins.
- Fill Muffin Tin: Divide the batter evenly among the prepared muffin cups, filling each about two-thirds full to allow room for rising.
- Bake: Place the muffin tin in the preheated oven and bake for 18-22 minutes, or until a toothpick inserted into the center of a muffin comes out clean.
- Cool and Serve: Once baked, remove the muffins from the oven and allow them to cool in the tin for about 5 minutes. Transfer to a wire rack to cool completely before serving.
Extra Tips:
For an added festive touch, consider sprinkling a mixture of cinnamon and sweetener on top of the muffins before baking. This will create a delightful crust and enhance the holiday flavor.
If you prefer a richer eggnog flavor, you can increase the amount of eggnog and decrease the almond milk accordingly. Remember to store any leftover muffins in an airtight container to keep them fresh for up to three days. Enjoy these Low-Sugar Eggnog Muffins with a warm cup of tea or coffee for the perfect holiday treat.
Pumpkin Spice Energy Bites
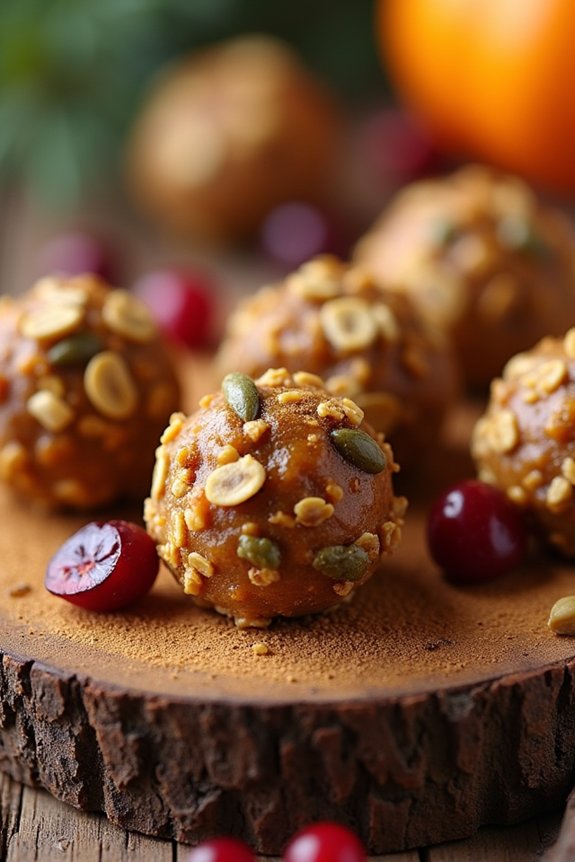
Pumpkin Spice Energy Bites are a delightful and nutritious treat that can be enjoyed during the holiday season or any time you need a quick energy boost. These bites are perfect for those who want to maintain their health goals while indulging in the festive flavors of the season. Made with wholesome ingredients, these energy bites aren’t only easy to prepare but also provide a good source of protein, fiber, and healthy fats.
This recipe is designed to serve 4-6 people, making it ideal for sharing with family and friends or for enjoying throughout the week. The combination of pumpkin puree, oats, and warm spices like cinnamon and nutmeg captures the essence of Christmas, while the addition of nuts and seeds adds a satisfying crunch. Whether you’re looking for a healthy snack option or a quick breakfast on the go, these Pumpkin Spice Energy Bites are bound to please.
Ingredients for 4-6 servings:
- 1 cup rolled oats
- 1/2 cup pumpkin puree
- 1/4 cup almond butter
- 1/4 cup honey or maple syrup
- 1 teaspoon vanilla extract
- 1 teaspoon ground cinnamon
- 1/2 teaspoon ground nutmeg
- 1/4 teaspoon ground ginger
- 1/4 cup chopped walnuts
- 1/4 cup pumpkin seeds
- 1/4 cup dried cranberries
- Pinch of salt
Cooking Instructions:
- Prepare the Base: In a large mixing bowl, combine the rolled oats, pumpkin puree, almond butter, honey (or maple syrup), and vanilla extract. Mix the ingredients thoroughly until they form a smooth, sticky mixture.
- Add Spices: Sprinkle in the ground cinnamon, nutmeg, ginger, and a pinch of salt. Stir well to guarantee the spices are evenly distributed throughout the mixture, enhancing the flavor of the energy bites.
- Incorporate the Mix-ins: Gently fold in the chopped walnuts, pumpkin seeds, and dried cranberries. These ingredients add texture and nutritional value to the energy bites, making them more satisfying.
- Chill the Mixture: Cover the mixing bowl with plastic wrap and refrigerate for about 30 minutes. This will help firm up the mixture, making it easier to shape into bites.
- Form the Bites: Once chilled, remove the mixture from the fridge. Using your hands, roll the mixture into small, bite-sized balls, approximately 1 inch in diameter. You should get about 16-20 energy bites.
- Store and Serve: Place the energy bites in an airtight container and store them in the refrigerator for up to one week. Serve them chilled or at room temperature as a quick snack or energy boost.
Extra Tips:
For added convenience, consider using a cookie scoop to form evenly sized energy bites. If the mixture feels too sticky to handle, lightly wet your hands with water to make rolling easier.
Feel free to customize your Pumpkin Spice Energy Bites by substituting different nuts, seeds, or dried fruits based on your preferences or dietary needs. If you’d like to make a larger batch, simply double the ingredients, and you’ll have plenty to enjoy throughout the holiday season!
Apple Cinnamon Baked Donuts
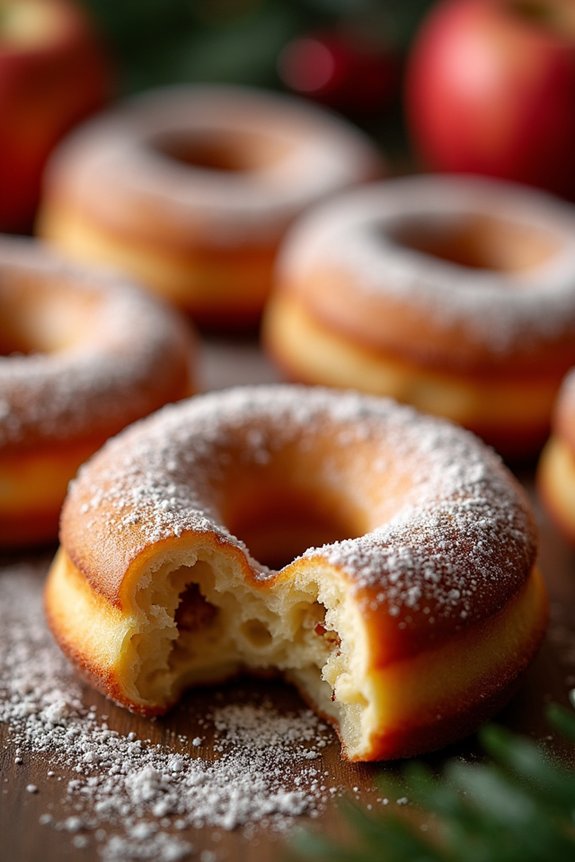
Indulge in a delightful holiday treat with these Apple Cinnamon Baked Donuts, a healthier twist on a classic favorite. Perfectly moist and bursting with the warm flavors of cinnamon and fresh apples, these donuts are a festive addition to any Christmas breakfast or dessert table.
Unlike traditional fried donuts, these are baked, reducing the fat content while still delivering that satisfying donut experience. Serve them warm, topped with a light cinnamon glaze or a dusting of powdered sugar for an extra touch of sweetness.
These donuts aren’t only delicious but also quick and easy to make, making them a perfect option for a busy holiday morning. With a few simple ingredients, you can whip up a batch that serves 4-6 people, guaranteeing everyone gets to enjoy this seasonal delight.
Whether you’re serving them with a cup of hot cocoa or alongside your favorite holiday brunch dishes, these Apple Cinnamon Baked Donuts are sure to be a hit.
Ingredients (Serves 4-6):
- 1 cup all-purpose flour
- 1/3 cup granulated sugar
- 1 teaspoon baking powder
- 1/2 teaspoon baking soda
- 1/2 teaspoon ground cinnamon
- 1/4 teaspoon salt
- 1/4 teaspoon ground nutmeg
- 1/2 cup unsweetened applesauce
- 1/4 cup milk (dairy or non-dairy)
- 1 large egg
- 2 tablespoons unsalted butter, melted
- 1 teaspoon vanilla extract
- 1 small apple, peeled, cored, and finely chopped
Cooking Instructions:
- Preheat the oven: Start by preheating your oven to 350°F (175°C) to ascertain it’s at the right temperature when your donuts are ready to bake.
- Prepare the donut pan: Lightly grease a donut pan with non-stick spray or a bit of butter to prevent the donuts from sticking.
- Mix dry ingredients: In a large mixing bowl, whisk together the flour, granulated sugar, baking powder, baking soda, cinnamon, salt, and nutmeg until well combined.
- Combine wet ingredients: In a separate bowl, mix the applesauce, milk, egg, melted butter, and vanilla extract until smooth.
- Combine mixtures: Gradually add the wet ingredients to the dry ingredients, stirring until just combined. Be careful not to overmix, as this can make the donuts tough.
- Fold in apples: Gently fold the chopped apples into the batter, ensuring they’re evenly distributed.
- Fill the donut pan: Spoon the batter into the prepared donut pan, filling each mold about 3/4 full to allow room for the donuts to rise.
- Bake: Place the pan in the preheated oven and bake for 12-15 minutes, or until a toothpick inserted into a donut comes out clean.
- Cool and serve: Allow the donuts to cool in the pan for about 5 minutes before transferring them to a wire rack. Serve warm or at room temperature with your choice of glaze or powdered sugar.
Extra Tips:
For an extra burst of apple flavor, consider adding a teaspoon of apple pie spice to the batter.
If you want to make the donuts even healthier, you can substitute whole wheat flour for half of the all-purpose flour.
For a dairy-free version, use almond or oat milk and a dairy-free butter substitute.
To make the donuts even more festive, drizzle them with a simple glaze made from powdered sugar and a splash of milk or apple juice.
Store any leftovers in an airtight container; they’ll stay fresh for up to two days.