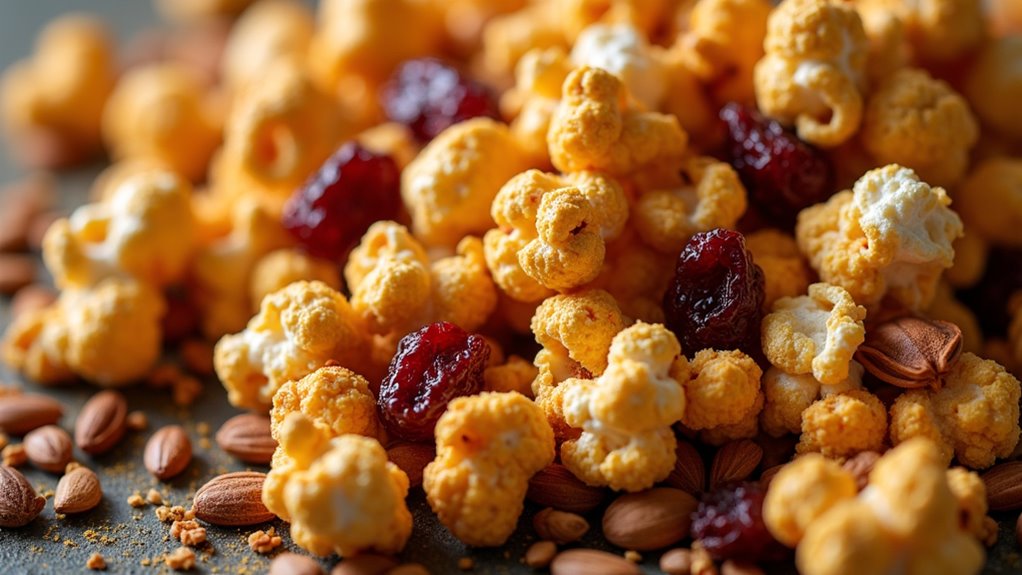
Halloween is just around the corner, and I’ve rounded up 15 healthy snacks that are not only good for you but also incredibly fun to make and eat. Imagine crafting Mummy Apple Slices with your kids or surprising guests with spooky Spider Deviled Eggs. These treats are perfect for all ages, offering a delightful twist to your usual Halloween fare. Curious about how to whip up these festive bites? There’s a lot more to explore in this flavorful journey!
Spooky Spider Deviled Eggs
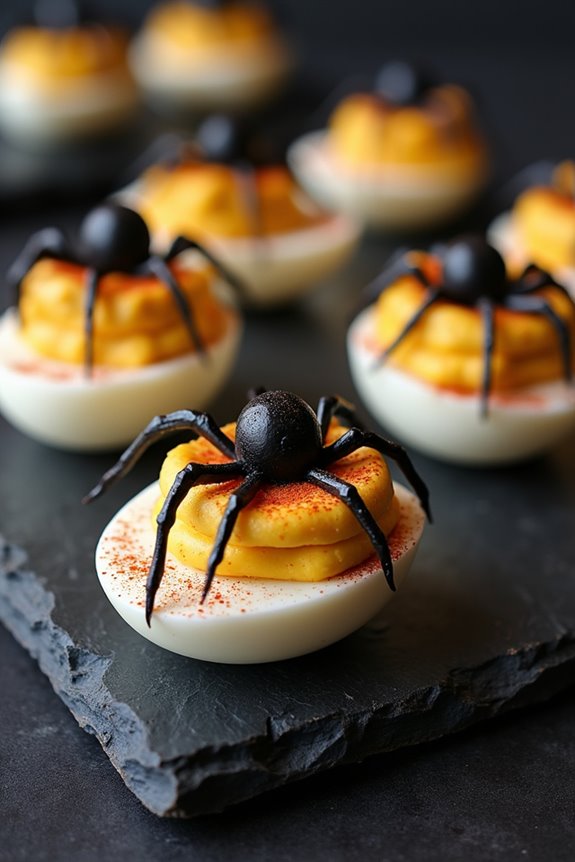
Spooky Spider Deviled Eggs are a fun and festive Halloween treat that combines the classic appeal of deviled eggs with a spooky twist. Perfect for a Halloween party or a themed family dinner, these eggs not only look intriguing but also taste delicious.
The creamy yolk filling is enhanced with a hint of paprika and mustard, while the black olive spiders perched on top add an eerie and appetizing touch. This recipe yields about 12 deviled eggs, serving approximately 4-6 people.
The process involves a few simple steps and a bit of creativity to craft the “spiders.” With minimal ingredients and preparation time, Spooky Spider Deviled Eggs are an easy way to add a spooky flair to your Halloween spread without compromising on flavor.
Ingredients:
- 6 large eggs
- 1/4 cup mayonnaise
- 1 teaspoon yellow mustard
- 1/2 teaspoon white vinegar
- Salt and pepper to taste
- Paprika for garnish
- 12 black olives (preferably pitted)
Cooking Instructions:
- Boil the Eggs: Place the eggs in a medium saucepan and cover them with cold water. Bring the water to a rolling boil over medium-high heat. Once boiling, remove the saucepan from heat, cover it, and let the eggs sit for 10-12 minutes.
- Cool and Peel the Eggs: Transfer the eggs to a bowl of ice water to stop the cooking process. Let them cool for at least 5 minutes. Once cooled, gently peel the shells off the eggs.
- Prepare the Filling: Slice each egg in half lengthwise and carefully remove the yolks. Place the yolks in a mixing bowl and mash them with a fork. Add mayonnaise, mustard, vinegar, salt, and pepper to the yolks, mixing until smooth and creamy.
- Fill the Egg Whites: Using a spoon or a piping bag, fill each egg white half with the yolk mixture. Sprinkle a little paprika on top for added flavor and color.
- Create the Olive Spiders: Cut the black olives in half. Use one half as the spider’s body and slice the other half into thin strips to make legs. Arrange the olive pieces on top of the filled eggs to resemble spiders.
Extra Tips: For an extra touch of flavor, consider adding a dash of hot sauce or a pinch of garlic powder to the yolk mixture.
If you’re preparing these deviled eggs ahead of time, keep the egg whites and yolk filling separate until just before serving to maintain freshness. Additionally, if you find peeling the eggs difficult, try using older eggs, as they tend to peel more easily.
Enjoy these spooky snacks, and watch them disappear from the table as quickly as you can make them!
Witch’s Broomstick Pretzel Sticks

Witch’s Broomstick Pretzel Sticks are a whimsical and healthy Halloween snack that’s perfect for kids and adults alike. This treat combines the crunch of pretzel sticks with the delightful taste of cheese, cleverly fashioned into a broomstick shape that fits perfectly with the spooky theme of the holiday. Not only are these snacks visually appealing, but they’re also easy to make and require minimal ingredients, making them an ideal choice for a Halloween party or a fun family activity.
Crafting these broomstick snacks is a fun, creative process that can be enjoyed by everyone in the family. The combination of salty pretzel sticks and creamy cheese makes for a delicious snack that’s both satisfying and healthy. This recipe is designed to serve 4-6 people, offering enough for everyone to enjoy. With just a few simple steps, you can create these charming treats that are sure to impress your guests and add a touch of magic to your Halloween festivities.
Ingredients (for 4-6 servings):
- 24 pretzel sticks
- 6 mozzarella string cheese sticks
- 24 chives or thin strips of green onion
Instructions:
- Prepare the Cheese: Begin by unwrapping the mozzarella string cheese sticks. Cut each stick into four equal pieces. This will give you a total of 24 pieces, which will serve as the broom bristles.
- Create the Broom Bristles: Take one piece of the cut cheese and, using a sharp knife, carefully slice one end into thin strips, leaving about 1/2 inch uncut at the opposite end. This will create the appearance of broom bristles. Repeat this step for all 24 pieces of cheese.
- Assemble the Broomsticks: Insert one pretzel stick into the uncut end of each cheese piece, ensuring it’s securely in place. Be gentle to avoid breaking the pretzel stick.
- Tie the Broomsticks: Take a chive or a thin strip of green onion and wrap it around the top of the cheese piece where it meets the pretzel stick. Tie it into a small knot to secure the cheese onto the pretzel stick, resembling a broom handle. Repeat this process for each broomstick.
- Serve: Arrange the Witch’s Broomstick Pretzel Sticks on a festive platter and serve them as a delightful Halloween snack.
Extra Tips: For an added twist, you can use different flavors of string cheese, such as cheddar or pepper jack, to add variety and extra taste to your broomsticks. If chives or green onions aren’t available, consider using thin strips of bell pepper as an alternative for tying the broomsticks.
These snacks are best served fresh, so try to assemble them shortly before serving to maintain the crunchiness of the pretzels. Enjoy these treats as a fun, healthy addition to your Halloween celebration!
Mummy Apple Slices
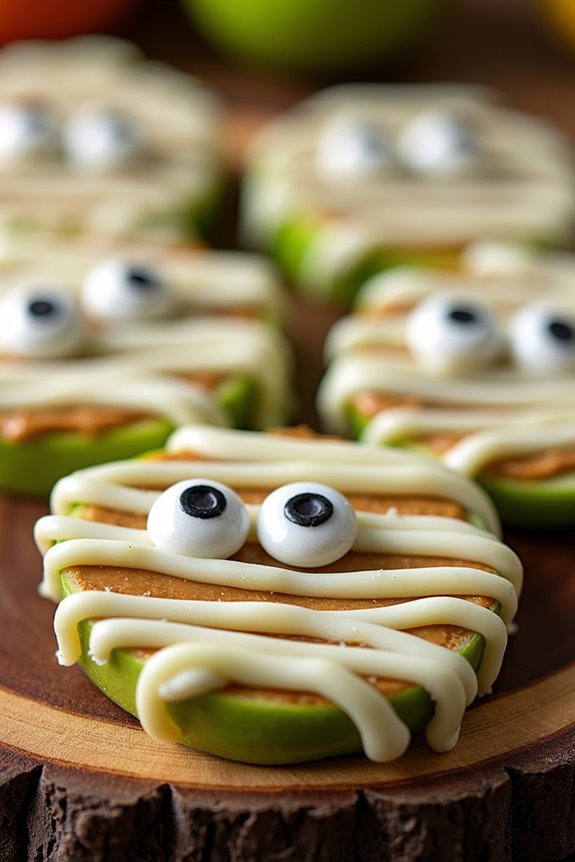
Mummy Apple Slices are a fun and spooky addition to any Halloween snack table. This healthy treat combines the crispness of apples with the sweetness of chocolate and a touch of nuttiness from peanut butter, creating a delightful balance of flavors. Ideal for a Halloween party or a themed night in, these Mummy Apple Slices aren’t only visually appealing but also a nutritious alternative to the typical candy-laden holiday treats.
This recipe is perfect for serving a group of 4-6 people and is both easy and quick to prepare. The slice of fresh apple provides a juicy, invigorating base, while the peanut butter adds a creamy element that pairs wonderfully with the chocolate drizzle. The addition of candy eyes gives these apple slices their adorable, spooky look. This recipe is sure to be a hit with both kids and adults alike who are looking for a healthier Halloween snack option.
Ingredients (serving size: 4-6 people):
- 3 large apples
- 1/2 cup creamy peanut butter
- 1 cup white chocolate chips
- 1 tablespoon coconut oil
- Candy eyes, for decoration
Cooking Instructions:
- Prepare the Apples: Begin by washing the apples thoroughly under cold water. Use a sharp knife to cut each apple into 1/4-inch thick slices. Remove any seeds or core pieces from the slices.
- Apply the Peanut Butter: Spread a thin layer of creamy peanut butter on one side of each apple slice. This will provide a sticky surface for the chocolate drizzle and candy eyes to adhere.
- Melt the Chocolate: In a microwave-safe bowl, combine the white chocolate chips and coconut oil. Microwave in 30-second intervals, stirring in between, until the chocolate is fully melted and smooth. Be careful not to overheat the chocolate.
- Drizzle the Chocolate: Use a spoon or a small piping bag to drizzle the melted chocolate over the peanut butter-coated side of each apple slice. Aim to create a zigzag pattern to mimic the look of mummy bandages.
- Add the Candy Eyes: Before the chocolate sets, place two candy eyes onto each apple slice. Gently press them into the chocolate so they stick securely.
- Set the Chocolate: Allow the chocolate to cool and harden. You can speed up this process by placing the apple slices in the refrigerator for about 10-15 minutes.
- Serve: Once the chocolate has set, arrange the Mummy Apple Slices on a serving platter and enjoy!
Extra Tips:
For the best results, choose firm, tart apples like Granny Smith or Honeycrisp, as they hold their shape well and offer a pleasing contrast to the sweetness of the chocolate and peanut butter.
If you prefer a non-peanut option, almond butter or sunflower seed butter can be used as alternatives. Confirm the melted chocolate isn’t too hot when drizzling, as overheating can cause it to seize and become clumpy.
Finally, to make this treat even more festive, consider using colored candy melts to add a pop of color to your mummies.
Ghostly Banana Pops

Ghostly Banana Pops are a fun and nutritious way to celebrate Halloween with a spooky twist. These delightful treats aren’t only easy to make but also a hit with both kids and adults alike. Made with bananas, yogurt, and a touch of chocolate, they offer a healthier alternative to the usual sugar-laden Halloween candies.
Whether you’re hosting a Halloween party or just looking for a festive snack, Ghostly Banana Pops are sure to be a ghostly delight.
The beauty of Ghostly Banana Pops lies in their simplicity and versatility. You can easily customize them with different toppings or adjust the sweetness to your liking. Plus, they’re a great way to get the little ones involved in the kitchen, making them a perfect family activity.
With just a few ingredients and minimal preparation time, you’ll have a tray of adorable ghostly snacks ready to haunt your Halloween festivities.
Ingredients (Serves 4-6):
- 3 large ripe bananas
- 1 cup of plain or vanilla yogurt
- 1/2 cup of white chocolate chips
- 1/4 cup of mini chocolate chips
- 8-12 popsicle sticks or skewers
- Optional: shredded coconut or crushed nuts for decoration
Instructions:
1. Prepare the Bananas: Start by peeling the bananas and cutting each one in half crosswise. Insert a popsicle stick or skewer into the cut end of each banana half, ensuring it’s securely in place. This will serve as the handle for your banana pops.
2. Freeze the Bananas: Place the banana halves on a baking sheet lined with parchment paper. Transfer the sheet to the freezer and let the bananas freeze for about 1-2 hours until they’re firm.
3. Coat with Yogurt: Once the bananas are frozen, dip each banana half into the yogurt, ensuring it’s evenly coated. You can use a spoon to help spread the yogurt if needed. Return the coated bananas to the parchment-lined baking sheet.
4. Melt the White Chocolate: In a microwave-safe bowl, melt the white chocolate chips in 15-second intervals, stirring in between until smooth. Be careful not to overheat the chocolate as it can burn easily.
5. Decorate the Pops: Using a small spoon or piping bag, drizzle the melted white chocolate over the yogurt-coated bananas. Add two mini chocolate chips to create eyes on each banana pop, giving them their ghostly appearance.
Optionally, sprinkle shredded coconut or crushed nuts over the top for extra texture and flavor.
6. Final Freeze: Place the decorated banana pops back into the freezer for another 30 minutes to allow the yogurt and chocolate to set completely.
Extra Tips:
For an extra touch of whimsy, you can use different colored yogurt or chocolate to create a variety of ghostly characters. If you prefer a sweeter treat, opt for flavored yogurt instead of plain.
Additionally, you can experiment with other toppings like sprinkles or edible glitter to make your Ghostly Banana Pops even more festive. Enjoy these snacks right from the freezer for the best texture and flavor.
Pumpkin Patch Hummus Cups
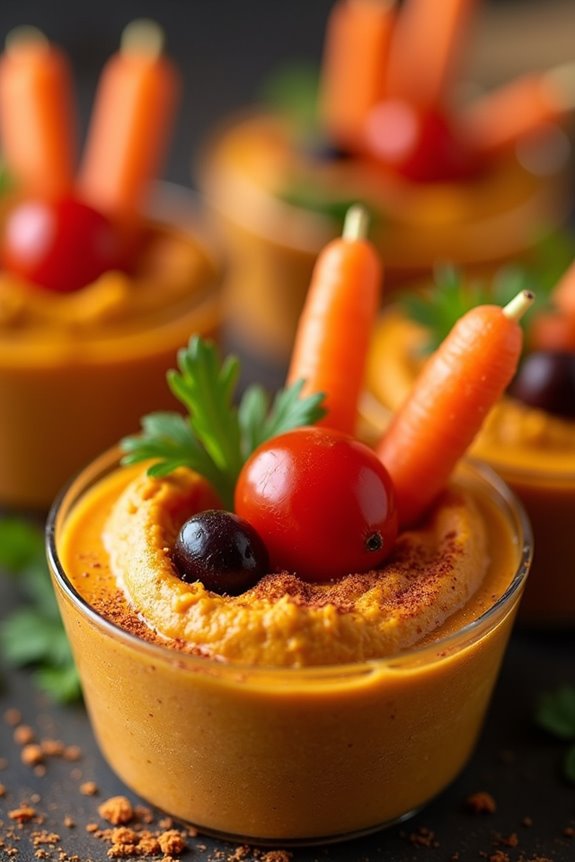
This recipe is designed to serve 4-6 people and combines the creamy texture of hummus with the vibrant colors of seasonal vegetables.
These cups are easy to prepare, and they offer a nutritious snack option that’s rich in protein and vitamins. Whether you’re hosting a Halloween party or just want to enjoy a themed snack, Pumpkin Patch Hummus Cups are a fantastic choice.
Ingredients (Serving Size: 4-6 people):
- 2 cups of plain hummus
- 1 small pumpkin or 1 cup canned pumpkin puree
- 1 teaspoon paprika
- 1/2 teaspoon ground cumin
- Salt and pepper to taste
- 1 cup baby carrots
- 1 cup cherry tomatoes
- 1/2 cup olives (optional)
- Fresh parsley or cilantro for garnish
- 6 small plastic or ceramic cups
Instructions:
1. Prepare the Pumpkin Hummus: If using a small pumpkin, carefully cut it in half, remove the seeds, and roast it in a preheated oven at 375°F (190°C) for about 45 minutes or until tender.
Once cooled, scoop out the flesh and mash it until smooth. If using canned pumpkin puree, skip this step.
2. Mix the Hummus: In a large mixing bowl, combine the plain hummus with the pumpkin puree (whether fresh or canned).
Add in the paprika, ground cumin, salt, and pepper. Stir well until all ingredients are thoroughly mixed, creating a smooth and creamy consistency.
3. Assemble the Cups: Evenly distribute the hummus mixture into each of the small cups.
Smooth the top with a spoon to create a flat surface.
4. Decorate the Pumpkin Patches: Insert baby carrots into the hummus to mimic pumpkin stems.
Place cherry tomatoes around the carrots to represent pumpkins. Add olives for additional decoration, if desired.
5. Garnish: Sprinkle fresh parsley or cilantro over the cups to imitate grass or vines, enhancing the pumpkin patch appearance.
6. Serve and Enjoy: Arrange the cups on a tray and serve immediately, or refrigerate for up to 2 hours before serving.
Extra Tips: For an added twist, consider using flavored hummus such as roasted red pepper or garlic to enhance the taste.
You can also experiment with different vegetables for decoration, such as sliced bell peppers or cucumbers. If you’re making these ahead of time, assemble the cups up to step 3 and add the decorations just before serving to maintain freshness and color.
Monster Mouth Apple Wedges
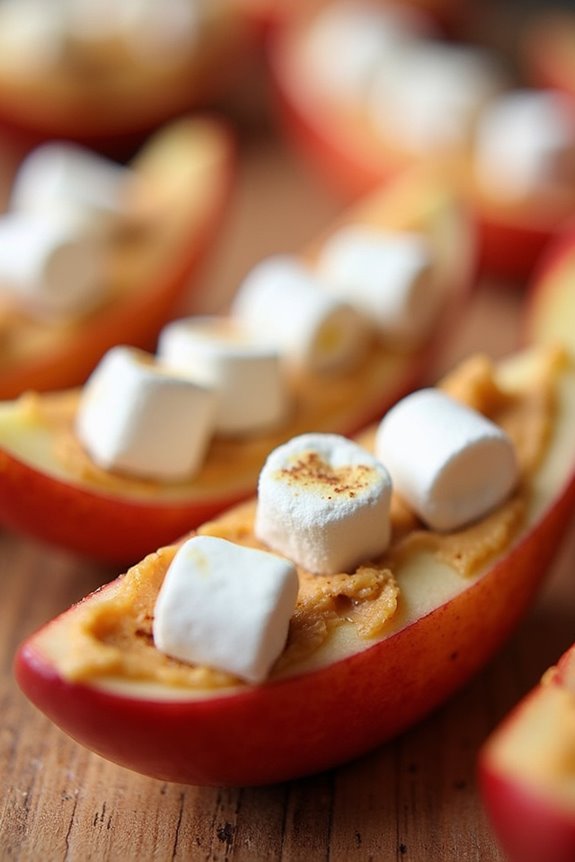
Looking for a fun and healthy treat to serve at your Halloween party? Monster Mouth Apple Wedges are a delightfully spooky snack that kids and adults alike will enjoy.
These playful apple bites aren’t only easy to assemble but also provide a nutritious alternative to sugary Halloween candies. With a combination of crisp apples, creamy peanut butter, and a touch of sweetness from marshmallows, this treat is certain to be a crowd-pleaser.
Creating Monster Mouth Apple Wedges is an engaging activity that can involve the whole family. Use this opportunity to get creative with your designs and let your imagination run wild!
Whether you’re planning a Halloween party or just want to make snack time a little more exciting, these apple wedges are a perfect choice. With just a few simple ingredients, you can whip up this treat in no time, making it ideal for last-minute preparations.
Ingredients (Serves 4-6 people):
- 3 large apples (Granny Smith or Red Delicious recommended)
- 1/2 cup creamy peanut butter
- 1/2 cup mini marshmallows
- 1/4 cup slivered almonds (optional, for extra crunch)
- Lemon juice (to prevent browning)
Cooking Instructions:
- Prepare the Apples: Begin by washing and drying the apples thoroughly. Cut each apple into quarters and remove the core and seeds. Then, slice each quarter into two wedges. You should have 24 apple wedges in total. To prevent the apple slices from browning, lightly brush them with lemon juice.
- Apply Peanut Butter: Spread a generous amount of creamy peanut butter onto one side of each apple wedge. This will act as the “glue” to hold the marshmallows in place.
- Assemble the Monster Mouths: Take two apple wedges and sandwich them together with the peanut butter sides facing each other. Place mini marshmallows along the peanut butter edge of one apple wedge to resemble teeth. You can add a slivered almond in the middle of the marshmallows for a fang effect if desired.
- Secure the Mouths: Gently press the apple wedges together to secure the marshmallows in place. Be careful not to squeeze too hard, as this may cause the peanut butter to ooze out.
- Serve and Enjoy: Arrange the Monster Mouth Apple Wedges on a platter and serve immediately. If you’re preparing in advance, cover them with plastic wrap and store them in the refrigerator to keep the apples fresh.
Extra Tips:
For an allergy-friendly version, consider using sunflower seed butter or almond butter instead of peanut butter.
You can also experiment with different types of apples to find your favorite flavor combination. If you’d like to add an extra touch of whimsy, use edible eyes or food-safe markers to draw little eyes on the apples, turning them into full-faced monsters.
Finally, remember to serve them shortly after preparation to guarantee the apples stay crisp and fresh.
Creepy-Crawly Veggie Tray
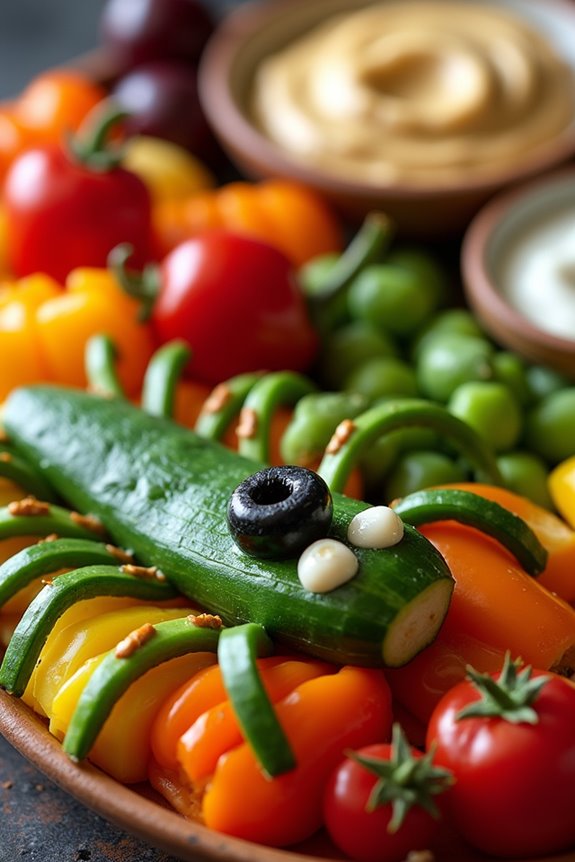
Creating a Creepy-Crawly Veggie Tray is a fun and nutritious way to add a spooky touch to your Halloween celebrations. This dish is perfect for a family gathering or a Halloween party, offering a colorful array of fresh vegetables creatively arranged to resemble eerie critters and creepy crawlies.
It’s an excellent way to promote kids and adults alike to enjoy their veggies while staying in the festive spirit. With a little creativity and a few simple tools, you can transform ordinary vegetables into extraordinary Halloween creatures.
The Creepy-Crawly Veggie Tray isn’t only visually appealing but also packed with nutrients, making it a guilt-free snack option for your Halloween festivities. You can use a variety of vegetables to create a range of textures, colors, and flavors that are sure to delight your guests.
Whether you’re creating carrot spiders or cucumber centipedes, this veggie tray is sure to be a hit. The recipe is versatile, allowing you to adjust the ingredients based on your preferences or what’s available in your fridge. Below, you’ll find a list of ingredients and step-by-step instructions to help you create this fun and healthy Halloween snack for a serving size of 4-6 people.
Ingredients:
- 1 large cucumber
- 1 red bell pepper
- 1 yellow bell pepper
- 1 cup cherry tomatoes
- 2 cups baby carrots
- 1 cup black olives
- 1 cup snap peas
- 1 cup hummus
- 1 cup ranch dressing
- Pretzel sticks
Instructions:
- Prepare the Vegetables:
- Wash all the vegetables thoroughly. Peel the cucumber if desired, then slice it into rounds. Core and slice the red and yellow bell peppers into strips. Halve the cherry tomatoes.
- Create the Creatures:
- Arrange the cucumber rounds in a line to form the body of a centipede. Use pretzel sticks to make legs on each side of the cucumber rounds. Place olives on the ends of the cucumber slices for the eyes using a small amount of hummus to adhere them.
- Assemble the Veggie Spiders:
- Use a cherry tomato for the body of each spider and snap peas for the legs. Cut the snap peas in half lengthwise and arrange them around the tomato to resemble spider legs.
- Construct Bell Pepper Octopuses:
- Use a half of a bell pepper for the body of the octopus. Slice the remaining bell pepper into thin strips and arrange them around the body to mimic tentacles.
- Arrange the Tray:
- Place the hummus and ranch dressing into small serving bowls. Arrange all the vegetable creatures around the dips on a large serving platter, promoting an even distribution of colors and shapes for visual appeal.
Extra Tips:
For added fun, you can use edible eyes from the baking section of your local store to give your veggie creatures a more animated look. If you have kids, involve them in the preparation process; they’ll enjoy creating their own veggie creatures.
Additionally, feel free to experiment with other vegetables such as broccoli florets or celery sticks to diversify the textures and flavors. Keep in mind that freshness is key, so prepare this tray close to serving time to promote the veggies remain crisp and vibrant.
Frankenstein’s Avocado Toast
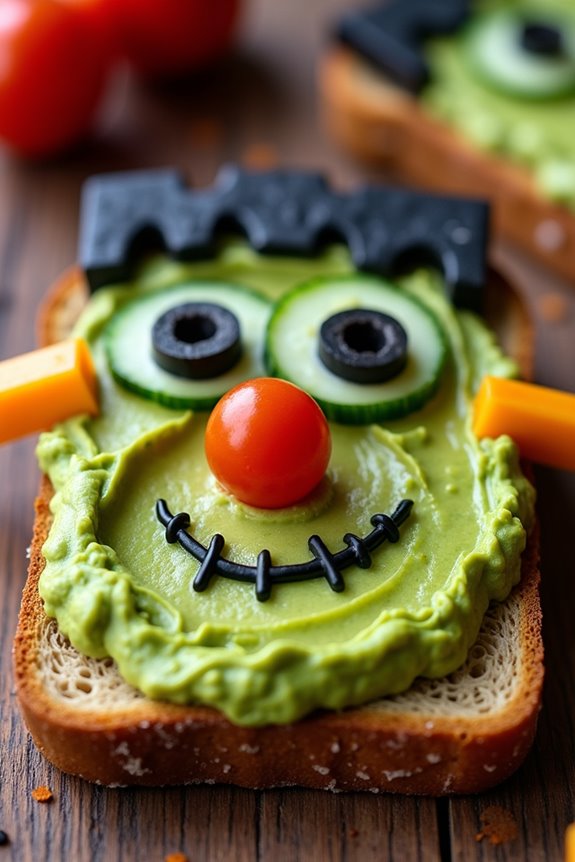
Frankenstein’s Avocado Toast is a delicious and spooky treat that’s perfect for a Halloween gathering. This healthy snack combines the creamy texture of ripe avocados with the wholesome goodness of whole-grain bread, topped with creative decorations that bring the iconic monster to life. Not only is this dish visually appealing, but it also packs a nutritious punch, making it an ideal option for both kids and adults who want to indulge in festive fun without compromising health.
The vibrant green hue of the mashed avocados serves as the perfect base for the Frankenstein theme. This fun and easy recipe is designed to serve 4-6 people, making it suitable for a small party or family gathering. With a few simple ingredients and a touch of creativity, you can transform ordinary avocado toast into a monstrously delightful treat that will leave your guests impressed and satisfied.
Ingredients (Serves 4-6):
- 4 ripe avocados
- 6 slices of whole-grain bread
- 1 lemon (for juice)
- Salt and pepper to taste
- 12 black olives
- 12 cherry tomatoes
- 1 cucumber
- 6 slices of cheese
- 12 small pretzel rods
Instructions:
- Prepare the Avocados: Cut each avocado in half, remove the pit, and scoop the flesh into a mixing bowl. Add the juice of one lemon to the avocados to enhance flavor and prevent browning. Season with salt and pepper to taste. Mash the avocados with a fork until you have a smooth but slightly chunky consistency.
- Toast the Bread: While preparing the avocados, lightly toast the whole-grain bread slices until they’re golden brown and crispy. This will provide a sturdy base for the toppings.
- Assemble the Avocado Toast: Spread a generous layer of the mashed avocado mixture onto each slice of toasted bread, creating a smooth surface. Make sure the avocado layer is thick enough to hold the toppings.
- Create Frankenstein’s Face: Slice the black olives into rings and place them as eyes on the avocado layer. Use slices of cherry tomatoes to form the mouth. Cut thin strips of cucumber to create Frankenstein’s hair and lay them across the top edge of the toast.
- Add the Finishing Touches: Cut the cheese slices into small rectangles to form the bolts and place them on both sides of the toast. Finally, break the pretzel rods in half and insert them into the sides of the toast for an extra playful touch.
Extra Tips:
To guarantee your Frankenstein’s Avocado Toast looks its best, use fresh and ripe avocados for that vibrant green color. If you’re making the toast ahead of time, keep the avocado mixture covered tightly with plastic wrap to prevent it from browning.
Get creative with the toppings to make each Frankenstein face unique—experiment with different vegetables for additional features like ears or scars. This recipe is highly adaptable, so feel free to adjust the ingredients to suit your guests’ preferences and dietary needs.
Eyeball Caprese Skewers
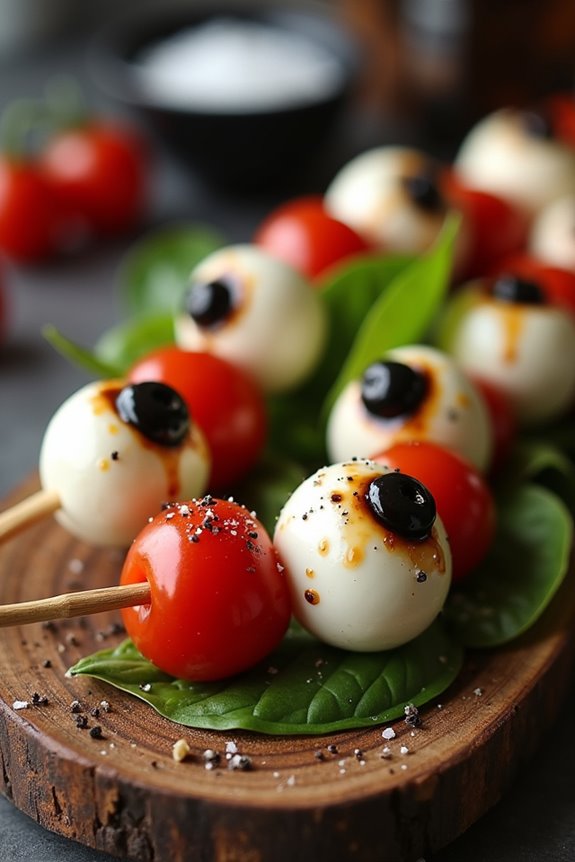
Transform your Halloween party into a spooky yet healthy feast with these Eyeball Caprese Skewers. This dish is a creative twist on the classic Caprese salad, designed to add a touch of eerie elegance to your snack table. Featuring fresh mozzarella balls, juicy cherry tomatoes, and vibrant basil leaves, these skewers aren’t only visually enchanting but also packed with flavor. The “eyeball” effect is achieved with a clever use of black olives, making these skewers both fun and delicious.
This recipe is perfect for serving a group of 4-6 people, making it an ideal appetizer for a small gathering or family celebration. The combination of creamy mozzarella, sweet tomatoes, and aromatic basil is enhanced by a drizzle of balsamic glaze, creating a balanced and invigorating taste. Easy to assemble and delightfully spooky, these Eyeball Caprese Skewers are sure to be a hit at your Halloween festivities.
Ingredients (for 4-6 people):
- 12 fresh mozzarella balls (bocconcini)
- 12 cherry tomatoes
- 6 basil leaves
- 6 black olives, pitted
- 1 tablespoon olive oil
- 1 tablespoon balsamic glaze
- Salt and pepper to taste
- 12 wooden skewers or toothpicks
Instructions:
- Prepare the Ingredients: Begin by washing the cherry tomatoes and basil leaves thoroughly. Pat them dry with a paper towel. Slice the black olives into small rings, which will serve as the pupils for the mozzarella “eyeballs.”
- Assemble the Eyeballs: Take each mozzarella ball and gently press a black olive slice onto the center, making sure it sticks well. This will create the “eyeball” look.
- Construct the Skewers: Start by threading a cherry tomato onto a skewer, followed by a basil leaf, an “eyeball” mozzarella ball, and then another cherry tomato. Repeat this process until all the ingredients are used up, making sure each skewer has a balanced mix of components.
- Season the Skewers: Lay your assembled skewers on a serving platter. Drizzle them with olive oil and balsamic glaze. Sprinkle a pinch of salt and pepper over the top to enhance the flavors.
- Chill Before Serving: For the best taste, refrigerate the skewers for about 30 minutes before serving. This will allow the flavors to meld together and keep the ingredients fresh.
Extra Tips: To enhance the “eyeball” appearance, consider using a toothpick to slightly indent the mozzarella balls before placing the olive slice on top. This will help the olives to stay in place.
If you want a more dramatic effect, try using different colored cherry tomatoes or flavored mozzarella to add variety. For a more robust flavor, you can also marinate the mozzarella balls in olive oil, garlic, and herbs before assembling the skewers.
These skewers are best served chilled, so prepare them a little ahead of your event to make sure they’re cool and invigorating for your guests.
Batty Cheese Bites
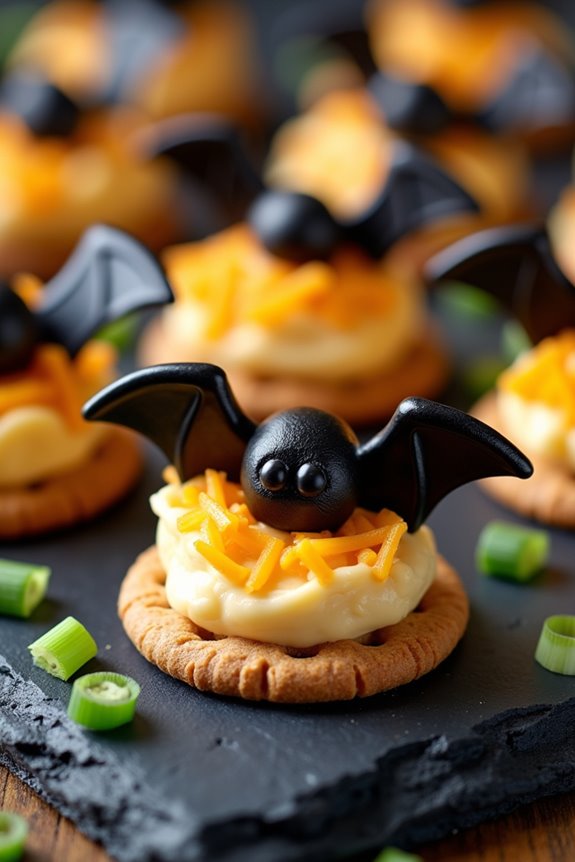
Halloween doesn’t have to be all about candy and sugary treats. With Batty Cheese Bites, you can offer a fun and healthy snack that’s perfect for a spooky celebration. These adorable bat-shaped bites aren’t only delicious but also packed with nutritious ingredients that will please both kids and adults alike.
Made with rich cream cheese, crunchy almonds, and whole wheat crackers, these snacks are both satisfying and festive. The preparation process is simple and doesn’t require any cooking, making it an ideal choice for a quick Halloween party treat. Not only do Batty Cheese Bites serve as a great appetizer, but they also add a touch of creativity to your Halloween spread. Whether you’re hosting a party or simply enjoying a cozy night in, these bites are sure to be a hit.
Ingredients for 4-6 People:
- 8 ounces cream cheese, softened
- 1 cup shredded sharp cheddar cheese
- 1/4 cup finely chopped green onions
- 1/2 teaspoon garlic powder
- 1/4 teaspoon paprika
- 1/4 cup sliced almonds
- 24 whole wheat crackers
- 24 black olives, pitted and halved
Cooking Instructions:
- Mix the Cheese Filling: In a medium-sized bowl, combine the softened cream cheese, shredded cheddar cheese, chopped green onions, garlic powder, and paprika. Mix well until all ingredients are fully incorporated and the mixture is smooth.
- Shape the Cheese Bats: Take a tablespoon of the cheese mixture and shape it into an oval ball. Gently flatten it to resemble the body of a bat. Repeat this process until all the cheese mixture is used up.
- Assemble the Batty Bites: Place each cheese bat on a whole wheat cracker. For the wings, strategically place sliced almonds on either side of the cheese body to mimic bat wings.
- Add the Eyes: For the final touch, place two black olive halves on each cheese bat to create the eyes. Gently press them into the cheese so they stay in place.
- Chill the Bites: Place the assembled Batty Cheese Bites in the refrigerator for at least 30 minutes. This will help them firm up and hold their shape.
Extra Tips:
For a more festive presentation, consider serving these Batty Cheese Bites on a platter decorated with Halloween-themed napkins or surrounded by other healthy snacks like carrot sticks and cucumber slices.
If you want to add a bit more flavor, you can experiment by adding herbs such as dill or chives to the cheese mixture. Also, to make the preparation even quicker, you can prepare the cheese mixture a day in advance and store it in the fridge until you’re ready to assemble the bites.
Bloody Beetroot Hummus Dip
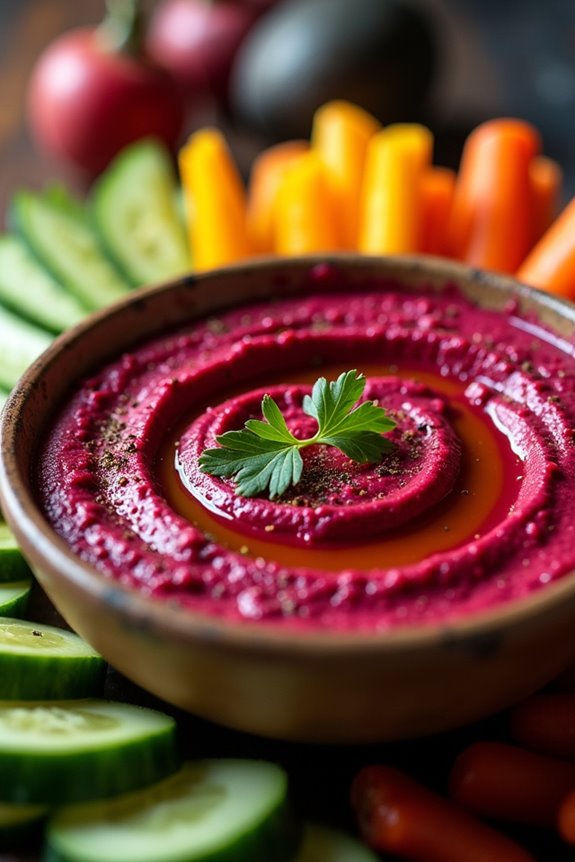
Are you searching for a spooky and healthy treat to serve at your Halloween party? Search no more than Bloody Beetroot Hummus Dip. This vibrant dip combines the earthy flavors of beetroot with the creamy texture of traditional hummus, creating a ghoulishly delicious snack that’s perfect for your Halloween festivities.
The striking red color of the beetroot gives it an eerie appearance, making it an exciting addition to your Halloween spread. Plus, it’s packed with nutrients, making it a guilt-free snack that both kids and adults will love.
Making Bloody Beetroot Hummus Dip isn’t only fun but also incredibly simple. With just a few ingredients and a blender, you can whip up this healthy dip in no time. Serve it with an assortment of fresh veggie sticks, pita bread, or crackers for a snack that’s both creepy and delicious.
This recipe serves 4-6 people, making it perfect for a small gathering or a cozy family get-together. Whether you’re hosting a Halloween party or just want to add a festive touch to your meals, this beetroot hummus is sure to impress.
Ingredients
- 2 medium-sized beetroots, cooked and peeled
- 1 can (15 oz) chickpeas, drained and rinsed
- 3 tablespoons tahini
- 2 tablespoons olive oil
- 3 tablespoons lemon juice
- 2 cloves garlic, minced
- 1 teaspoon ground cumin
- Salt, to taste
- Cracked black pepper, to taste
Cooking Instructions
- Prepare the Beets: Begin by cooking the beetroots. You can either boil them in water until tender, which usually takes about 30-40 minutes, or roast them in the oven at 400°F (200°C) for about 45-50 minutes. Once cooked, let them cool, and then peel the skins off.
- Blend the Ingredients: In a food processor or blender, combine the cooked beetroots, chickpeas, tahini, olive oil, lemon juice, minced garlic, and ground cumin. Blend until the mixture is smooth and creamy.
- Season the Dip: Taste the hummus and add salt and cracked black pepper to your liking. Blend again briefly to confirm the seasoning is well incorporated.
- Chill the Dip: Transfer the beetroot hummus to a serving bowl, cover, and refrigerate for at least 30 minutes. This allows the flavors to meld together and enhances the taste.
- Serve: Once chilled, serve the hummus with your choice of dippers such as fresh vegetable sticks, pita chips, or crackers.
Extra Tips
For an extra smooth hummus, you can remove the skins from the chickpeas before blending. Simply rub the chickpeas between your fingers, and the skins will peel off easily.
You can also adjust the consistency by adding a bit more olive oil or a splash of water if you prefer a thinner dip. For a more intense flavor, try roasting the garlic before adding it to the hummus. This will give the dip a sweet and nutty taste that complements the beetroots beautifully.
Enjoy your Bloody Beetroot Hummus Dip as a vibrant centerpiece at your Halloween table!
Jack-o’-Lantern Orange Bowls
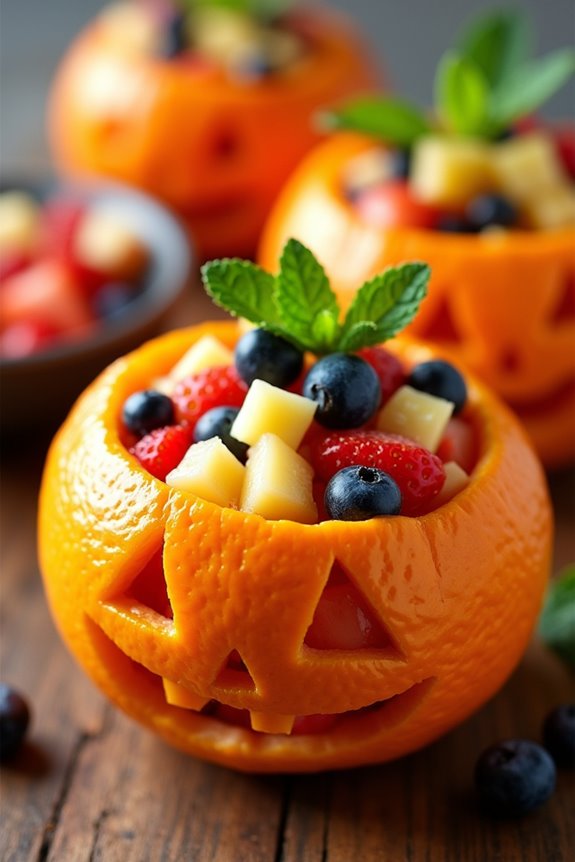
Jack-o’-Lantern Orange Bowls are a delightful and healthy addition to any Halloween celebration. These festive snacks combine the natural sweetness of oranges with a delicious fruit salad, creating an eye-catching treat that’s as fun to make as it’s to eat. Perfect for serving at parties or enjoying with family, these bowls are a great way to incorporate more fruit into your Halloween festivities while keeping things exciting and thematic.
The beauty of Jack-o’-Lantern Orange Bowls lies in their simplicity and versatility. You’ll be carving small oranges just like you’d pumpkins, turning them into adorable mini jack-o’-lanterns. Once carved, the oranges are filled with a revitalizing mixture of assorted fruits, providing a burst of flavor and nutrition in every bite. Whether you’re catering to kids or adults, these bowls are sure to be a hit, offering a creative and healthy alternative to sugary treats.
Ingredients (serving size: 4-6 people):
- 6 small oranges
- 1 cup diced pineapple
- 1 cup diced strawberries
- 1 cup blueberries
- 1 cup diced apple
- 1 tablespoon lemon juice
- 1 tablespoon honey (optional)
- Fresh mint leaves for garnish
Cooking Instructions:
- Prepare the Oranges: Begin by slicing off the tops of the oranges. Use a small knife or spoon to carefully hollow out each orange, removing the pulp without tearing the skin. Reserve the pulp for juice or another use.
- Carve the Faces: With a small, sharp knife, carefully carve jack-o’-lantern faces on one side of each hollowed-out orange. Be creative with the designs, carving triangles for eyes and a zigzag mouth, or any pattern you like.
- Prepare the Fruit Salad: In a medium-sized bowl, combine the diced pineapple, strawberries, blueberries, and apple. Drizzle the mixture with lemon juice and honey, then gently toss to combine.
- Fill the Orange Bowls: Spoon the prepared fruit salad into each carved orange bowl, filling them to the top. Confirm the fruit is evenly distributed among the bowls.
- Garnish and Serve: Top each filled orange with a fresh mint leaf for added color and flavor. Serve immediately or refrigerate until ready to enjoy.
Extra Tips:
When selecting oranges, opt for small, firm ones as they’re easier to carve and will hold their shape better. If you find carving tricky, consider using edible markers to draw the jack-o’-lantern faces instead.
To prevent the fruit salad from becoming too watery, drain excess juice from the fruit before combining it. If preparing in advance, store the filled oranges in the refrigerator and add the mint leaves just before serving to keep them fresh. Enjoy your spooky, healthy creation!
Skeleton Veggie Platter
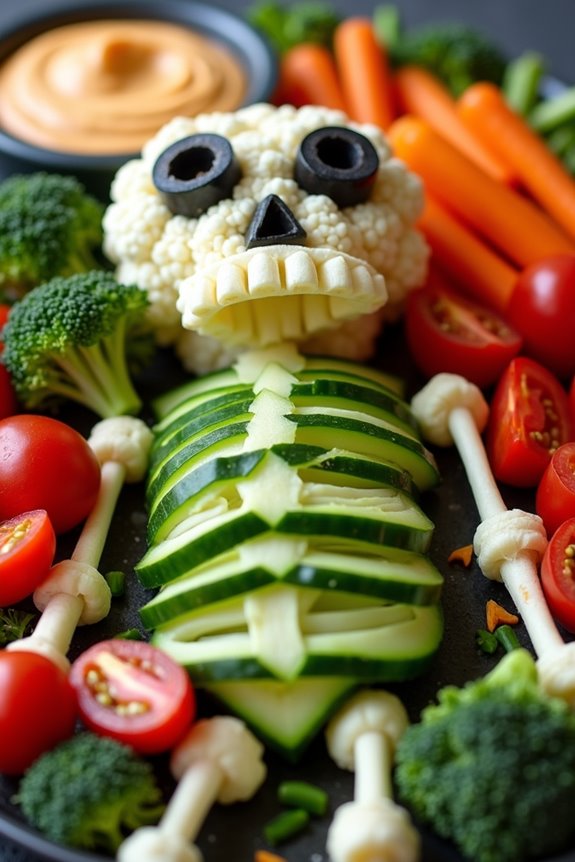
Creating a festive and healthy Halloween treat doesn’t have to be an intimidating task. The Skeleton Veggie Platter is a delightful way to combine fun and nutrition, making it a perfect addition to your spooky celebrations. This dish transforms an array of colorful vegetables into a playful skeleton figure, making it an engaging centerpiece that encourages everyone to snack on fresh, crunchy veggies.
Not only is it visually appealing, but it also provides a range of nutrients to satisfy both kids and adults. The Skeleton Veggie Platter is designed to serve 4-6 people, making it an excellent option for small gatherings or family dinners. It allows for creativity, as you can select vegetables based on preference and availability.
This recipe offers a variety of textures and flavors, ensuring that there’s something for everyone to enjoy. Coupled with a tasty dip, this platter is bound to be a hit at your Halloween party, providing a guilt-free alternative to sugary treats.
Ingredients (serving size: 4-6 people):
- 1 head of cauliflower
- 1 bunch of broccoli
- 1 red bell pepper
- 1 yellow bell pepper
- 1 cucumber
- 1 cup cherry tomatoes
- 1 large carrot
- 1/2 cup black olives
- 1 cup hummus or ranch dressing (for dipping)
Instructions:
- Prepare the Vegetables:
- Wash all the vegetables thoroughly under running water. Pat them dry with a clean towel.
- Cut the cauliflower into small florets and do the same with the broccoli. These will form the head and body of the skeleton.
- Slice the red and yellow bell peppers into thin strips. These will be used for the ribs and arms.
- Slice the cucumber into rounds to create the spine.
- Halve the cherry tomatoes. These can be used to accentuate the skeleton’s features or fill in the spaces.
- Peel the large carrot and cut it into long sticks for the legs.
- Assemble the Skeleton:
- On a large platter or tray, start by placing the cauliflower florets at the top to form the skull.
- Below the skull, arrange the cucumber slices in a straight line to form the spine.
- Use the broccoli florets to create the torso around the spine.
- Arrange the bell pepper strips on either side of the torso to represent the ribs and arms.
- Position the carrot sticks at the bottom to form the legs.
- Add the cherry tomatoes as accents on the body or around the platter for added color.
- Add the Details:
- Use the black olives to create eyes and a nose on the cauliflower skull.
- Place a small bowl of hummus or ranch dressing at the bottom or side of the platter for easy dipping.
Extra Tips:
When assembling your Skeleton Veggie Platter, feel free to get creative with the design. You can use additional vegetables like radishes or snap peas to add more color and variety.
If you have kids helping, let them participate in the decoration process to make it more engaging. To keep the veggies fresh and crisp, prepare and refrigerate the platter a few hours before serving.
This dish isn’t only fun and healthy but also adaptable to any dietary preferences by swapping out the dip or veggies used.
Vampire Grape Bites
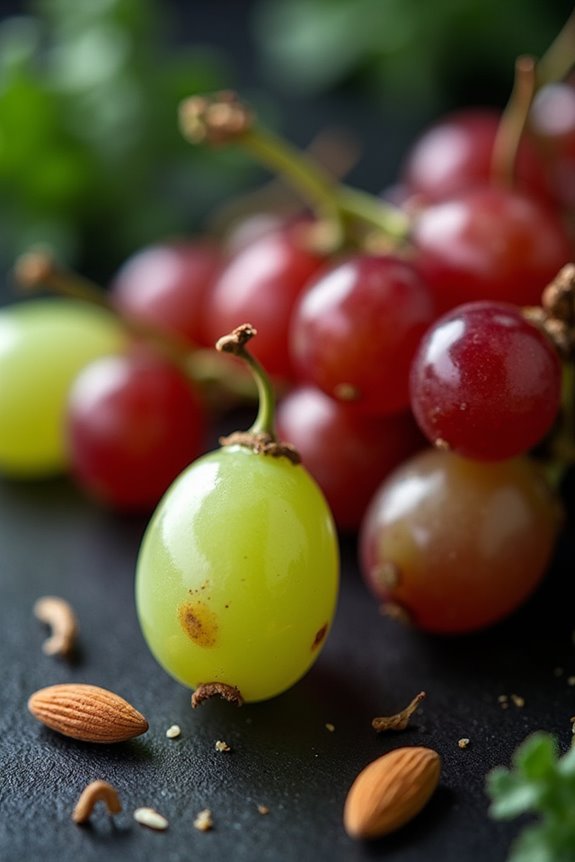
Vampire Grape Bites are a fun, spooky, and healthy treat that’s perfect for Halloween. These bite-sized snacks are easy to make and can add a touch of the eerie to your Halloween table spread. Not only are they visually appealing, but they also pack a sweet and juicy punch that’s both invigorating and satisfying.
Ideal for parties or a festive family snack, Vampire Grape Bites are sure to be a hit with kids and adults alike. These grape bites are skewered with a sharp almond slice to resemble a vampire’s fang, making them a creative and thematic choice for the holiday. They aren’t only a healthier alternative to traditional Halloween candy but also quick and simple to prepare.
You can assemble these tasty treats in advance, making them a convenient option for busy hosts. Whether you’re serving them at a party or enjoying them as a nutritious snack, these Vampire Grape Bites are sure to delight!
Ingredients (Serving size: 4-6 people):
- 2 cups seedless red grapes
- 1 cup seedless green grapes
- 1/2 cup slivered almonds
- 1 tablespoon lemon juice
- 1 tablespoon honey
- 1/2 teaspoon vanilla extract
- Toothpicks or small skewers
Instructions:
- Prepare the Grapes: Wash the red and green grapes thoroughly under running water. Pat them dry with a clean paper towel. This guarantees they’re clean and ready to be skewered.
- Mix the Coating: In a small bowl, combine the lemon juice, honey, and vanilla extract. Stir until well mixed. This mixture will serve as a light coating to give the grapes a subtle sweet and tangy flavor.
- Coat the Grapes: Place the red and green grapes into a larger mixing bowl. Drizzle the lemon-honey mixture over the grapes and gently toss them to make sure they’re evenly coated. This step enhances the flavor and gives the grapes a glossy finish.
- Assemble the Vampire Bites: Take a toothpick or small skewer and begin by piercing one red grape, followed by one green grape. Repeat this process for each skewer. Once you have skewered a pair of grapes, insert a slivered almond into each grape to mimic vampire fangs. Align them so they protrude slightly for the best visual effect.
- Serve: Arrange the Vampire Grape Bites on a serving platter. For added effect, you can place them over a bed of lettuce or kale leaves to resemble a spooky Halloween scene.
Extra Tips:
For an even more festive appearance, consider using black grapes alongside the red and green grapes for a variety of colors. If you want to prepare these ahead of time, assemble them and store them in an airtight container in the refrigerator for up to a day. This will keep them fresh and juicy.
Additionally, if you have younger children, you can substitute slivered almonds with small pieces of candy corn for a nut-free option. This recipe is highly adaptable, so feel free to get creative with your presentation and ingredients to match your Halloween theme.
Harvest Pumpkin Popcorn Mix
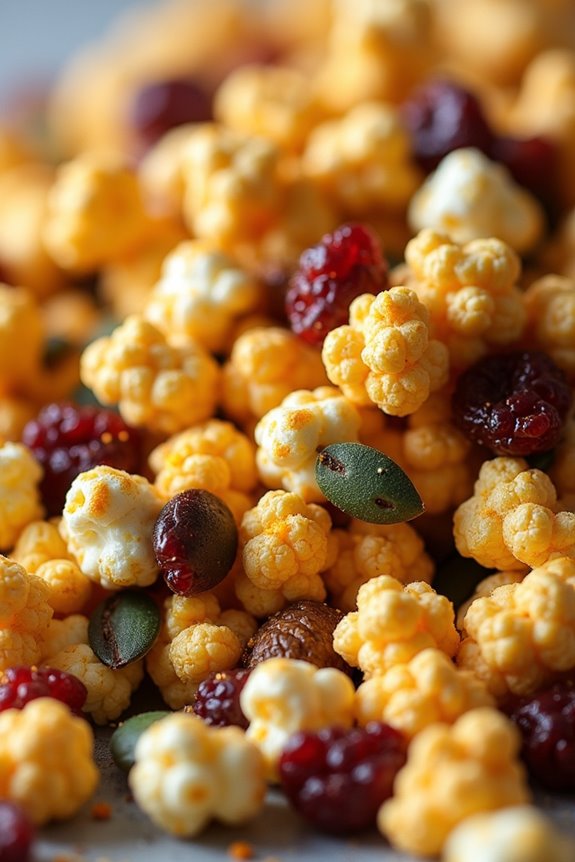
Celebrate Halloween with a delightful and healthy snack that combines the flavors of autumn into a crunchy treat. Harvest Pumpkin Popcorn Mix is a perfect blend of sweet, salty, and spicy elements that will make your taste buds dance with joy.
This snack isn’t only easy to prepare but also a fantastic option for both kids and adults who are looking for a guilt-free indulgence during the festive season.
This recipe yields enough to serve 4-6 people, making it ideal for a small gathering or family movie night. The combination of popcorn, pumpkin seeds, dried cranberries, and a touch of pumpkin spice offers a seasonal twist that’s both satisfying and nutritious. Enjoy the rich flavors and the vibrant colors of this mix, which can be customized to suit your personal taste preferences.
Ingredients:
- 8 cups of popped popcorn
- 1 cup of roasted pumpkin seeds
- 1 cup of dried cranberries
- 1/2 cup of chopped nuts (almonds or pecans work well)
- 1/4 cup of honey or maple syrup
- 2 tablespoons of melted coconut oil or olive oil
- 1 teaspoon of pumpkin spice mix
- 1/2 teaspoon of sea salt
Instructions:
- Pop the Popcorn: Start by popping the popcorn using your preferred method. You can use an air popper, stovetop, or microwave. Once popped, place the popcorn in a large mixing bowl, ensuring to remove any unpopped kernels.
- Prepare the Flavor Mixture: In a small saucepan, combine the honey or maple syrup, melted coconut oil, pumpkin spice mix, and sea salt. Heat gently over low heat, stirring continuously until all ingredients are well combined. This mixture will act as the glue and flavor enhancer for your popcorn mix.
- Mix the Ingredients: Pour the warm flavor mixture over the bowl of popcorn. Use a large spoon or spatula to toss and coat the popcorn evenly. Add the roasted pumpkin seeds, dried cranberries, and chopped nuts to the bowl, and continue tossing until everything is well distributed and coated with the flavor mixture.
- Bake for Crispiness (Optional): Preheat your oven to 300°F (150°C). Spread the popcorn mixture onto a baking sheet lined with parchment paper. Bake in the preheated oven for about 15 minutes, stirring halfway through, until the mix is golden and crispy. This step is optional but adds extra crunch to the mix.
- Cool and Serve: Remove from the oven and allow the mix to cool completely on the baking sheet. Once cooled, transfer the Harvest Pumpkin Popcorn Mix to a serving bowl and enjoy!
Extra Tips:
For added flavor and nutrition, consider adding a sprinkle of cinnamon or nutmeg to the flavor mixture. If you prefer a sweeter mix, increase the amount of honey or maple syrup.
Store any leftovers in an airtight container at room temperature for up to a week. You can also customize this recipe by adding your favorite dried fruits or seeds, such as sunflower seeds or raisins, to the mix. Adjust the spice level by adding a pinch of cayenne pepper for a hint of heat.

