

Gather around for some heartwarming hot chocolate dessert recipes that are perfect for cozy evenings. These 13 recipes offer a comforting mix of rich chocolate goodness with a touch of creativity. From the gooey center of a classic lava cake to the creamy richness of bread pudding, there’s a treat here for every chocolate enthusiast. Let’s explore these delightful desserts and find your next favorite indulgence.
Classic Hot Chocolate Lava Cake
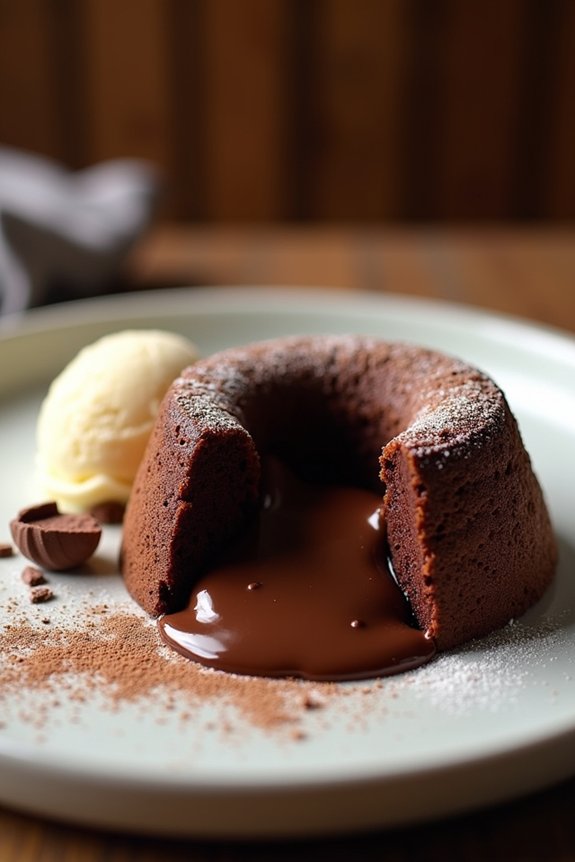
Classic Hot Chocolate Lava Cake is a decadent dessert that combines the richness of chocolate with a molten, gooey center that flows like lava when you cut into it. This dessert is perfect for special occasions or any time you want to impress your guests with a restaurant-quality treat made at home. The key to a successful lava cake is using high-quality chocolate and baking it just long enough to set the outer edges while keeping the center delightfully soft and molten.
The beauty of this dessert lies in its simplicity and the contrast of textures it offers. The outer layer is slightly crisp and cake-like, while the center remains silky and liquid, creating a delightful surprise with every bite. Whether enjoyed on its own or paired with a scoop of vanilla ice cream, Classic Hot Chocolate Lava Cake is sure to satisfy any chocolate lover’s cravings. This recipe serves 4-6 people, making it ideal for a cozy gathering or a romantic dinner for two with leftovers.
Ingredients:
- 1 cup (170g) high-quality dark chocolate, chopped
- 1/2 cup (115g) unsalted butter
- 2 large eggs
- 2 large egg yolks
- 1/4 cup (50g) granulated sugar
- 1/4 teaspoon salt
- 2 tablespoons all-purpose flour
- 1 teaspoon vanilla extract
- Butter and cocoa powder for ramekins
Cooking Instructions:
- Preheat the Oven: Start by preheating your oven to 425°F (220°C). This high temperature is essential for setting the outer layer quickly while keeping the center gooey.
- Prepare Ramekins: Butter the insides of four or six ramekins (depending on size) and dust them with cocoa powder. This will help the cakes release easily after baking.
- Melt Chocolate and Butter: In a medium-sized microwave-safe bowl, combine the chopped chocolate and butter. Microwave in 30-second intervals, stirring after each, until both are melted and smooth. Allow it to cool slightly.
- Mix Eggs and Sugar: In a separate bowl, whisk together the eggs, egg yolks, sugar, and salt until the mixture is pale and slightly thickened.
- Combine Mixtures: Gently fold the melted chocolate mixture into the egg mixture, followed by the flour and vanilla extract. Stir until just combined.
- Fill Ramekins: Divide the batter evenly among the prepared ramekins, filling each about three-quarters full.
- Bake: Place the ramekins on a baking sheet and bake in the preheated oven for about 12-14 minutes. The edges should be firm while the center remains soft.
- Cool and Serve: Let the cakes cool for 1 minute, then run a knife around the edges to loosen. Carefully invert each cake onto a serving plate. Serve immediately, ideally with a dollop of whipped cream or a scoop of vanilla ice cream.
Extra Tips:
Timing is essential for achieving the perfect lava cake. For the best results, keep a close eye on the baking time, as ovens can vary. If the cakes are left in the oven too long, the center will set and lose its molten quality.
Feel free to experiment with different types of chocolate or add a pinch of cinnamon or a splash of coffee liqueur to the batter for a unique twist. Always use high-quality chocolate, as it greatly impacts the flavor and texture of the final dessert.
Spiced Hot Chocolate Brownies
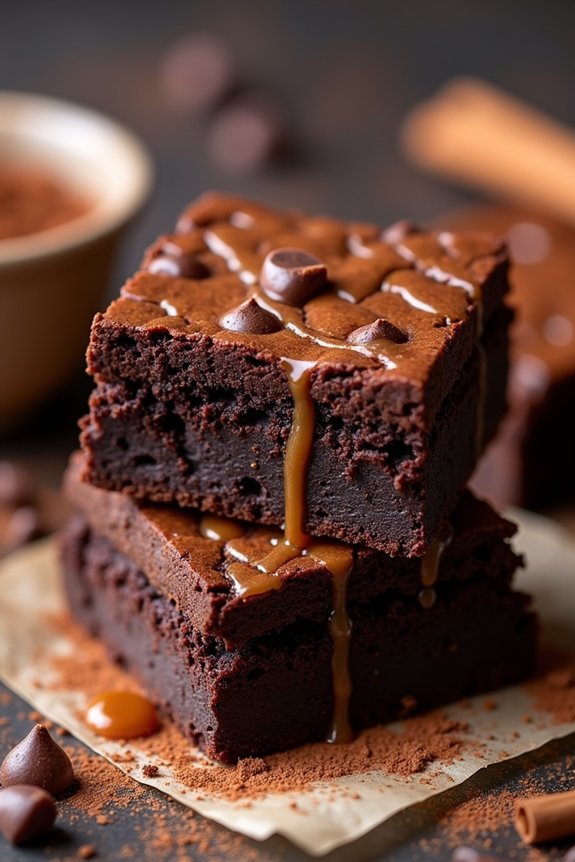
Indulge in the rich, decadent flavors of Spiced Hot Chocolate Brownies, a perfect dessert to warm you up on chilly evenings. This unique twist on traditional brownies incorporates the comforting essence of spiced hot chocolate, combining cocoa, cinnamon, and a hint of cayenne for a delightful surprise of heat. The result is a batch of fudgy, aromatic brownies that are sure to impress your family and friends with their complex flavor profile.
These brownies aren’t only delicious but also easy to make, making them an ideal treat for any occasion. The balance of sweet chocolate and the gentle spice creates a harmonious flavor that will have everyone reaching for seconds. Whether enjoyed fresh out of the oven or with a scoop of ice cream, these Spiced Hot Chocolate Brownies are bound to become your new go-to dessert.
Ingredients (Serves 4-6):
- 1 cup unsalted butter
- 1 1/4 cups granulated sugar
- 3/4 cup packed light brown sugar
- 1 cup unsweetened cocoa powder
- 1 teaspoon ground cinnamon
- 1/4 teaspoon cayenne pepper
- 1/2 teaspoon salt
- 4 large eggs
- 1 teaspoon vanilla extract
- 1 cup all-purpose flour
- 1/2 teaspoon baking powder
- 1 cup semi-sweet chocolate chips
Instructions:
- Preheat and Prepare: Preheat your oven to 350°F (175°C). Line a 9×9-inch baking pan with parchment paper, leaving an overhang on the sides to lift the brownies out easily once baked.
- Melt Butter and Mix Sugars: In a medium saucepan over low heat, melt the butter. Once melted, remove from heat and stir in the granulated sugar and brown sugar until well combined.
- Add Cocoa and Spices: Stir in the cocoa powder, cinnamon, cayenne pepper, and salt. Mix until the mixture is smooth and well combined.
- Incorporate Eggs and Vanilla: Add the eggs one at a time, stirring well after each addition. Then, stir in the vanilla extract until the mixture is glossy and smooth.
- Mix in Flour and Baking Powder: Sift the flour and baking powder into the saucepan. Gently fold the dry ingredients into the wet ingredients until just combined. Be careful not to overmix.
- Add Chocolate Chips: Fold in the chocolate chips, ensuring they’re evenly distributed throughout the batter.
- Bake: Pour the batter into the prepared baking pan, spreading it evenly. Bake in the preheated oven for 25-30 minutes or until a toothpick inserted in the center comes out with a few moist crumbs attached.
- Cool and Serve: Allow the brownies to cool in the pan for at least 15 minutes. Use the parchment paper overhang to lift the brownies out of the pan, then cut into squares and serve.
Extra Tips:
For an extra spicy kick, you can increase the cayenne pepper to 1/2 teaspoon, but be cautious as it can overpower the other flavors. If you prefer a less intense chocolate flavor, consider using milk chocolate chips instead of semi-sweet.
To make cutting easier, chill the brownies in the refrigerator for about an hour after cooling. For an extra indulgent touch, drizzle warm caramel sauce over the brownies before serving. Enjoy them with a scoop of vanilla ice cream or a dollop of whipped cream to balance the spice with a creamy texture.
Hot Chocolate Bread Pudding
Indulge in the ultimate comfort food with this rich and decadent Hot Chocolate Bread Pudding. This dessert combines the creamy, smooth flavors of hot chocolate with the warm, satisfying texture of bread pudding. Perfect for cold winter nights, this dessert will bring a sense of warmth and nostalgia to your table.
Whether you’re serving it up for a special occasion or simply enjoying a cozy night in, this dish is bound to become a family favorite. The mixture of chocolate, cream, and bread creates a luscious dessert that’s irresistible. The bread soaks up the hot chocolate mixture, resulting in a soft, custard-like interior with a slightly crisp top.
The combination of dark chocolate and cocoa powder guarantees that each bite is layered with deep chocolate flavor, while the addition of vanilla and cinnamon adds a touch of sweetness and spice.
Ingredients (Serves 4-6):
- 6 cups of cubed day-old bread (preferably brioche or challah)
- 2 cups of whole milk
- 1 cup of heavy cream
- 3/4 cup of granulated sugar
- 1/4 cup of unsweetened cocoa powder
- 6 ounces of dark chocolate, chopped
- 4 large eggs
- 1 teaspoon of vanilla extract
- 1/2 teaspoon of ground cinnamon
- 1/4 teaspoon of salt
- 1/2 cup of semisweet chocolate chips
- Optional: Whipped cream or vanilla ice cream for serving
Cooking Instructions:
- Prepare the Oven and Baking Dish: Preheat your oven to 350°F (175°C). Grease a 9×13-inch baking dish with butter or non-stick cooking spray to facilitate easy removal of the pudding once it’s baked.
- Mix the Chocolate Base: In a medium saucepan over medium heat, combine the whole milk, heavy cream, granulated sugar, and cocoa powder. Stir continuously until the sugar and cocoa powder are completely dissolved and the mixture is steaming, but not boiling.
- Melt the Chocolate: Remove the saucepan from heat and add the chopped dark chocolate. Stir until the chocolate is fully melted and the mixture is smooth.
- Prepare the Custard: In a large bowl, whisk together the eggs, vanilla extract, cinnamon, and salt. Gradually whisk in the warm chocolate mixture until everything is well combined.
- Combine Bread and Chocolate Mixture: Place the cubed bread in the prepared baking dish. Pour the chocolate mixture over the bread cubes, making sure all pieces are evenly soaked. Gently press down on the bread to help it absorb the liquid.
- Add Chocolate Chips: Sprinkle the semisweet chocolate chips evenly over the top of the bread pudding mixture.
- Bake the Pudding: Cover the dish with aluminum foil and bake for 30 minutes. Remove the foil and continue baking for an additional 15-20 minutes, or until the top is set and slightly crispy.
- Cool and Serve: Allow the pudding to cool for at least 10 minutes before serving. Pair it with a dollop of whipped cream or a scoop of vanilla ice cream for an extra treat.
Extra Tips:
For the best results, use day-old bread as it absorbs the chocolate mixture better without becoming too mushy. If you’re short on time, you can cut the bread into cubes and lightly toast them in the oven before using.
Additionally, feel free to add a splash of liqueur, like Baileys or Kahlua, to the chocolate mixture for an adult twist on this classic dessert. Adjust the sweetness to your liking by altering the amount of sugar, and don’t hesitate to experiment with different types of chocolate or add-ins like nuts or dried fruit for variety.
Hot Chocolate Cheesecake Bars
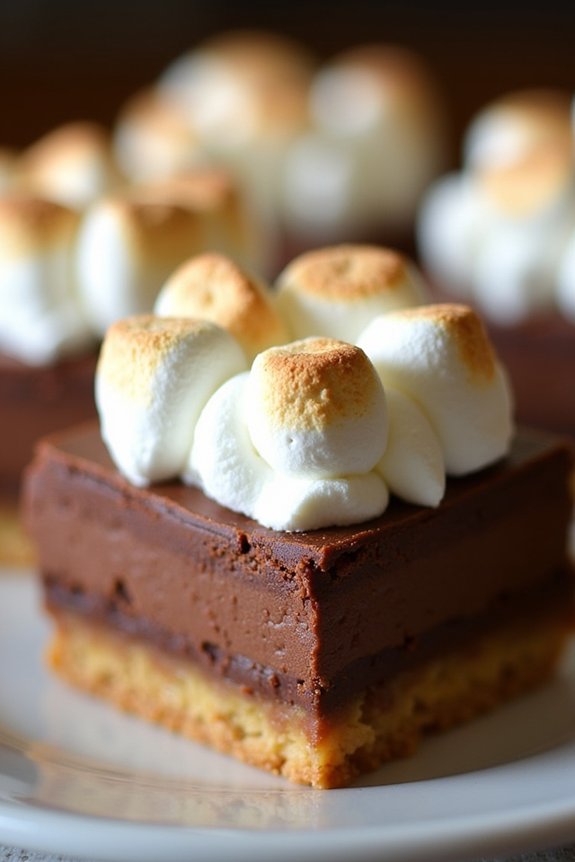
Hot Chocolate Cheesecake Bars are a delightful fusion of two beloved treats: the rich, creamy texture of cheesecake and the comforting warmth of hot chocolate. These bars are perfect for chilly days when you’re craving something sweet and indulgent. With a buttery graham cracker crust, a luscious chocolate cheesecake layer, and a topping of whipped cream and mini marshmallows, these bars are bound to become a favorite dessert for family gatherings and holiday parties.
The beauty of Hot Chocolate Cheesecake Bars lies in their versatility and ease of preparation. They can be made ahead of time, making them ideal for entertaining, and their portable nature means they can be enjoyed at picnics, potlucks, or simply as a treat after dinner.
The combination of flavors and textures—a crunchy base, smooth filling, and fluffy topping—creates a delightful experience that will have everyone reaching for seconds.
Ingredients (Serves 4-6):
- 1 1/2 cups graham cracker crumbs
- 1/4 cup unsalted butter, melted
- 2 tablespoons granulated sugar
- 16 oz cream cheese, softened
- 1/2 cup granulated sugar
- 2 large eggs
- 1 teaspoon vanilla extract
- 1/2 cup semi-sweet chocolate chips, melted
- 1/4 cup hot chocolate mix
- 1 cup heavy cream
- 1 tablespoon powdered sugar
- 1/2 cup mini marshmallows
Cooking Instructions:
- Preheat and Prepare: Preheat your oven to 325°F (163°C). Line an 8×8 inch baking pan with parchment paper, leaving an overhang on the sides to easily lift the bars out later.
- Make the Crust: In a medium bowl, combine graham cracker crumbs, melted butter, and 2 tablespoons of granulated sugar. Mix until the crumbs are evenly coated with butter. Press the mixture firmly into the bottom of the prepared pan to form an even layer. Bake for 8-10 minutes, then set aside to cool.
- Prepare the Cheesecake Filling: In a large mixing bowl, beat the softened cream cheese and 1/2 cup sugar until smooth and creamy. Add the eggs one at a time, mixing well after each addition. Stir in the vanilla extract.
- Incorporate the Chocolate: Melt the semi-sweet chocolate chips in a microwave-safe bowl, stirring every 20 seconds until smooth. Add the melted chocolate and hot chocolate mix to the cream cheese mixture, and beat until fully combined.
- Assemble and Bake: Pour the chocolate cheesecake mixture over the cooled graham cracker crust. Spread it evenly with a spatula. Bake in the preheated oven for 30-35 minutes, or until the center is set. Allow to cool completely in the pan.
- Whip the Cream: In a separate bowl, whip the heavy cream and powdered sugar until soft peaks form. Spread the whipped cream over the cooled cheesecake layer.
- Final Touches: Sprinkle mini marshmallows over the whipped cream. For an extra touch, you can lightly toast the marshmallows using a kitchen torch.
- Chill and Serve: Refrigerate the bars for at least 2 hours or until fully set. Once chilled, lift the bars out of the pan using the parchment paper overhang and cut into squares. Serve chilled and enjoy!
Extra Tips:
For the best results, verify that all your ingredients are at room temperature before you start, especially the cream cheese, which will help it blend smoothly with the other ingredients.
If you don’t have a kitchen torch and still want to toast the marshmallows, place the pan under a broiler for a few seconds, watching closely to prevent burning.
Additionally, to achieve clean cuts when slicing the bars, use a sharp knife and wipe it clean between each cut.
You can also customize this recipe by adding a drizzle of chocolate sauce or a sprinkle of cocoa powder over the whipped cream for an enhanced chocolate experience.
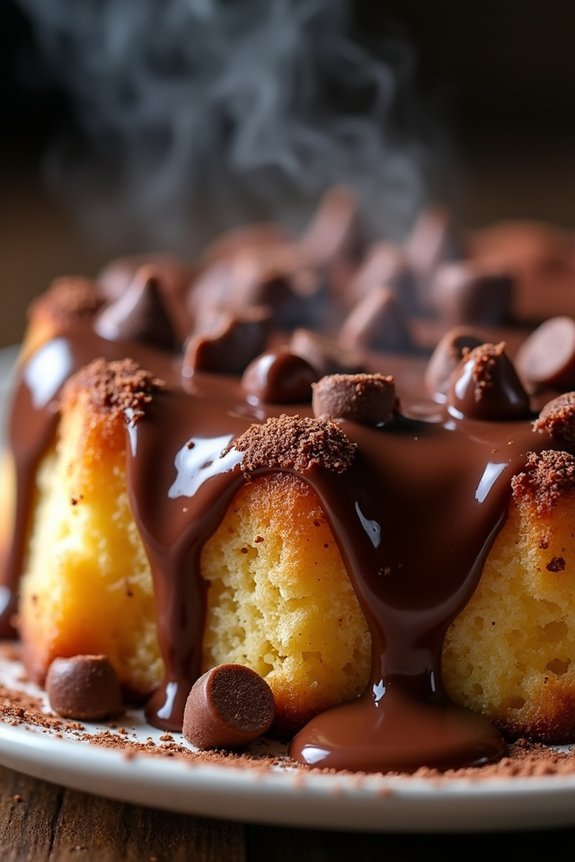
Gooey Hot Chocolate Mug Cake
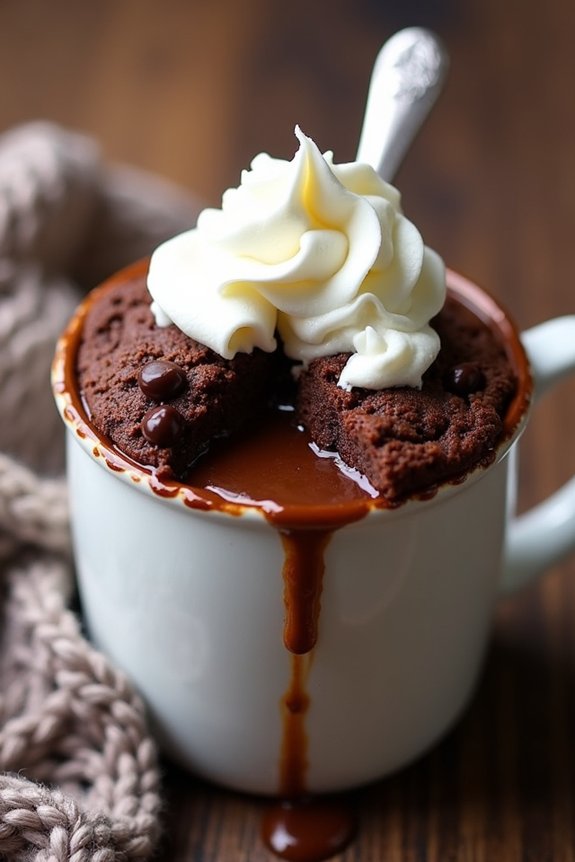
Gooey Hot Chocolate Mug Cake is the perfect dessert for those chilly evenings when you’re craving something warm and indulgent. This delightful treat is a cross between a rich chocolate cake and a comforting cup of hot cocoa, offering the best of both worlds.
It’s incredibly easy to make, requiring only a few minutes of preparation and cooking time. The result is a soft, moist cake with a molten chocolate center that oozes out when you dig in with your spoon. It’s the ultimate comfort food that’s both satisfying and delightful.
This recipe is perfect for serving 4-6 people, making it an ideal choice for family gatherings or a cozy night in with friends. The beauty of this Gooey Hot Chocolate Mug Cake is its simplicity and versatility. You can prepare it in individual mugs, allowing each person to have their own personal cake, or make it in a larger dish for sharing.
Either way, this dessert is sure to impress with its gooey center and rich chocolate flavor. Pair it with a dollop of whipped cream or a scoop of vanilla ice cream for an extra special treat.
Ingredients for 4-6 servings:
- 1 cup all-purpose flour
- 1 cup granulated sugar
- 1/2 cup unsweetened cocoa powder
- 1 teaspoon baking powder
- 1/2 teaspoon salt
- 1/2 cup milk
- 1/3 cup vegetable oil
- 1 teaspoon vanilla extract
- 1/2 cup hot water
- 1/2 cup semi-sweet chocolate chips
- Optional toppings: whipped cream, marshmallows, or vanilla ice cream
Cooking Instructions:
1. Prepare the Dry Ingredients:
In a medium-sized mixing bowl, combine the all-purpose flour, granulated sugar, cocoa powder, baking powder, and salt. Mix well until all the dry ingredients are thoroughly combined.
2. Mix the Wet Ingredients:
In a separate bowl, whisk together the milk, vegetable oil, and vanilla extract. Once mixed, pour the wet ingredients into the bowl with the dry ingredients. Stir until you achieve a smooth batter with no lumps.
3. Prepare the Mugs:
Divide the batter evenly among 4-6 microwave-safe mugs or ramekins, filling each about halfway. This will allow room for the cake to rise as it cooks.
4. Add the Gooey Center:
Sprinkle a few chocolate chips into the center of each mug, pressing them slightly into the batter. This will create the gooey, molten center as the cake cooks.
5. Add Hot Water:
Carefully pour a little bit of hot water over the top of each mug, about 1-2 tablespoons per mug. Don’t stir. This step is essential for creating the gooey texture.
6. Microwave the Cakes:
Place the mugs in the microwave and cook each one individually for about 1-2 minutes on high. The cake should rise to the top and be set around the edges but still slightly gooey in the center.
7. Serve and Enjoy:
Carefully remove the mugs from the microwave (they will be hot) and let them cool for a minute or two. Top with whipped cream, marshmallows, or a scoop of vanilla ice cream if desired.
Extra Tips:
For the best results, make sure not to overcook the cakes, as this can result in a dry texture. The cooking time may vary depending on your microwave’s power, so keep an eye on the cakes as they cook.
If you’re making this dessert for a larger party, you can prepare the batter in advance and store it in the fridge until you’re ready to cook. Just remember to let it come to room temperature before microwaving.
Finally, feel free to experiment with additional mix-ins like nuts or caramel chips to personalize your Gooey Hot Chocolate Mug Cake!
Hot Chocolate Ice Cream Sandwiches
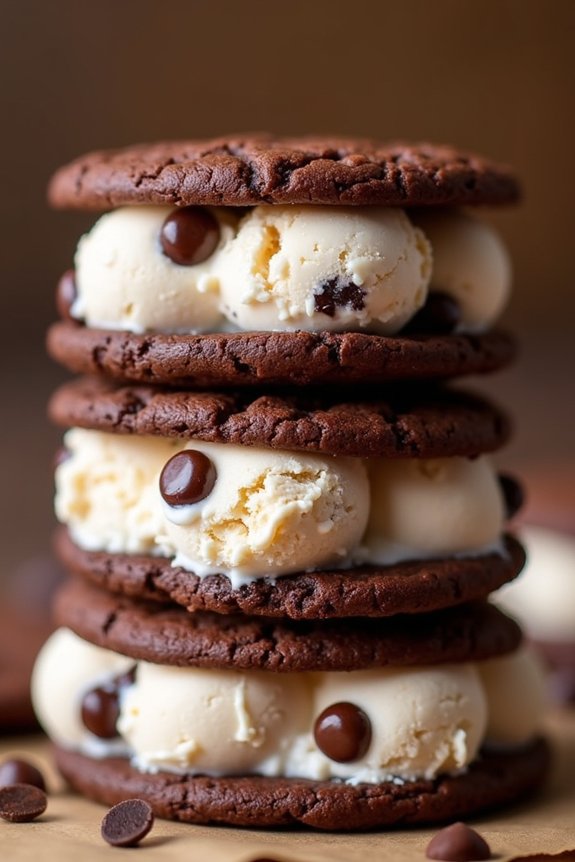
Indulge in a delightful twist on a classic treat with Hot Chocolate Ice Cream Sandwiches. Perfect for any time of the year, these sandwiches combine the comforting warmth of hot chocolate with the invigorating chill of ice cream. This dessert is ideal for both chocolate lovers and ice cream enthusiasts, offering a rich, creamy experience that tantalizes the taste buds.
The contrast between the warm, chewy cookies and the cold, smooth ice cream creates a satisfying sensory delight, making it a perfect treat for gatherings or simply as a luxurious personal indulgence.
These Hot Chocolate Ice Cream Sandwiches are simple to prepare yet impressive to serve. The recipe yields enough for 4-6 people, making it a fantastic choice for small parties or family desserts. By using a combination of homemade hot chocolate cookies and your favorite ice cream, you can customize the flavors to match your preferences.
Whether you enjoy the classic vanilla or a more adventurous flavor, these sandwiches can be tailored to suit any palate.
Ingredients (serves 4-6):
- 1 cup unsalted butter, softened
- 1 cup granulated sugar
- 1 cup brown sugar, packed
- 2 large eggs
- 2 teaspoons vanilla extract
- 2 1/4 cups all-purpose flour
- 1/2 cup unsweetened cocoa powder
- 1 teaspoon baking soda
- 1/2 teaspoon salt
- 1 cup semi-sweet chocolate chips
- 1 quart of your favorite ice cream
Cooking Instructions:
- Prepare the Dough: In a large mixing bowl, cream together the softened butter, granulated sugar, and brown sugar until light and fluffy. Add the eggs one at a time, beating well after each addition. Stir in the vanilla extract.
- Mix Dry Ingredients: In another bowl, whisk together the all-purpose flour, unsweetened cocoa powder, baking soda, and salt. Gradually add this dry mixture to the wet ingredients, mixing until just combined. Fold in the chocolate chips.
- Bake the Cookies: Preheat your oven to 350°F (175°C). Line a baking sheet with parchment paper. Scoop tablespoon-sized amounts of dough onto the prepared baking sheet, spacing them about 2 inches apart. Bake for 10-12 minutes or until the cookies are set and slightly firm to the touch. Allow them to cool completely on a wire rack.
- Assemble the Sandwiches: Once the cookies are completely cooled, take a scoop of your chosen ice cream and place it between two cookies. Gently press them together to form a sandwich. Repeat until all cookies are used.
- Freeze the Sandwiches: Place the assembled sandwiches on a baking sheet and freeze for at least 1 hour to allow the ice cream to firm up and the sandwiches to hold together properly.
Extra Tips:
For an extra chocolatey experience, consider rolling the edges of the ice cream sandwiches in mini chocolate chips or crushed chocolate candies before freezing.
If you’re making these ahead of time, wrap each sandwich individually in plastic wrap to prevent freezer burn and maintain freshness.
Additionally, feel free to experiment with different ice cream flavors or add-ins like nuts or marshmallows in the cookie dough for a personalized touch. Enjoy these sandwiches straight from the freezer for the best texture and flavor contrast.
Hot Chocolate Mousse
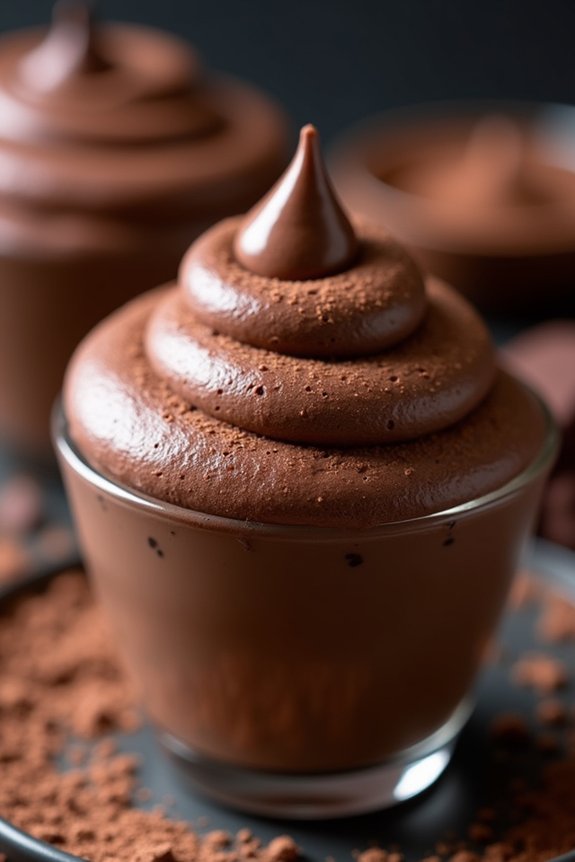
Hot Chocolate Mousse is a decadent and creamy dessert that combines the rich flavors of chocolate with the light, airy texture of mousse. It’s a perfect treat for chocolate lovers and serves as an ideal dessert for any special occasion or to simply indulge in something sweet and luxurious.
This dessert captures the essence of a classic hot chocolate drink but transforms it into a delightful, chilled dessert that melts in your mouth.
Creating Hot Chocolate Mousse is both an art and a science, requiring precision in measurement and timing to achieve the perfect consistency. The key is to gently fold whipped cream into a rich chocolate mixture, allowing it to set into a velvety mousse that’s both light and satisfying.
This recipe serves 4-6 people, making it a great choice for a family gathering or a dinner party with friends.
Ingredients:
- 200g dark chocolate, chopped
- 3 large eggs, separated
- 50g granulated sugar
- 1 teaspoon vanilla extract
- 300ml heavy cream
- Pinch of salt
- Optional toppings: whipped cream, chocolate shavings, or cocoa powder
Instructions:
- Melt the Chocolate: Begin by placing the chopped dark chocolate in a heatproof bowl set over a pot of simmering water. Stir occasionally until the chocolate is completely melted and smooth. Remove from heat and let it cool slightly.
- Prepare the Egg Mixture: In a separate bowl, whisk the egg yolks with the granulated sugar and vanilla extract until the mixture is pale and slightly thickened.
- Combine Chocolate and Egg Mixture: Gradually add the melted chocolate to the egg yolk mixture, stirring continuously to guarantee the chocolate is fully incorporated without cooking the eggs.
- Whip the Egg Whites: In a clean bowl, beat the egg whites with a pinch of salt until soft peaks form. Gently fold the egg whites into the chocolate mixture in batches to maintain the lightness of the mousse.
- Whip the Cream: In another bowl, whip the heavy cream until soft peaks form. Carefully fold the whipped cream into the chocolate mixture until fully combined and no streaks remain.
- Chill the Mousse: Divide the mousse evenly among serving glasses or bowls. Cover and refrigerate for at least 4 hours, or until set.
- Serve and Garnish: Before serving, top with optional garnishes like whipped cream, chocolate shavings, or a dusting of cocoa powder for an extra touch of elegance.
Extra Tips:
For the best results, verify all your mixing bowls and utensils are clean and dry, especially when whipping egg whites. Any trace of grease or moisture can prevent the whites from reaching the desired volume.
Additionally, when folding ingredients together, use a gentle hand to maintain the airiness of the mousse. If you want to experiment with flavors, consider adding a hint of espresso powder or a splash of your favorite liqueur to the chocolate mixture for a unique twist.
Decadent Hot Chocolate Truffles
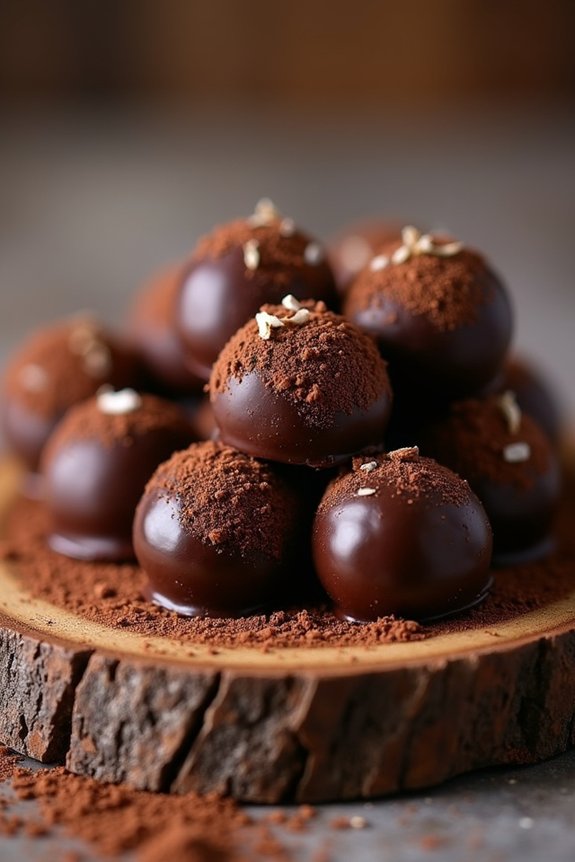
Decadent Hot Chocolate Truffles are the perfect indulgence for chocolate lovers, bringing a rich and creamy experience to your taste buds. These truffles are a delightful addition to any dessert platter and can be enjoyed as a treat during the colder months or whenever you crave a luxurious chocolate indulgence.
The essence of these truffles lies in their smooth, melt-in-your-mouth texture, combined with the deep flavors of premium cocoa. Perfect for entertaining guests or as a sweet personal treat, these truffles are sure to impress with their elegant simplicity and rich taste.
Creating these decadent truffles involves a few simple steps, allowing you to enjoy the process as much as the finished product. You begin by crafting a luscious chocolate ganache, which forms the base of your truffles. After chilling, the ganache is rolled into small balls and coated with a dusting of cocoa powder or other coatings of your choice, such as crushed nuts or coconut.
This recipe produces enough truffles to serve 4-6 people, making it a wonderful treat to share with family and friends or to keep as a delightful nibble for yourself.
Ingredients (Serves 4-6):
- 1 cup heavy cream
- 8 ounces high-quality dark chocolate, finely chopped
- 1 teaspoon vanilla extract
- 1 tablespoon unsalted butter
- 1/4 cup unsweetened cocoa powder (for coating)
- Optional: crushed nuts, shredded coconut, or sprinkles for additional coatings
Cooking Instructions:
- Prepare the Ganache: In a small saucepan, heat the heavy cream over medium heat until it just begins to simmer. Avoid boiling the cream to prevent curdling.
- Melt the Chocolate: Place the chopped dark chocolate in a heatproof bowl. Pour the hot cream over the chocolate and let it sit for about 2 minutes to soften the chocolate.
- Mix Ingredients: Gently stir the chocolate and cream together until smooth and fully combined. Add the vanilla extract and butter, stirring until the butter has melted and the mixture is glossy.
- Chill the Mixture: Cover the bowl with plastic wrap and refrigerate the ganache for about 2 hours, or until firm enough to scoop and shape.
- Form the Truffles: Using a small spoon or a melon baller, scoop out small portions of the chilled ganache and roll them into balls between your palms. Work quickly to prevent the ganache from melting.
- Coat the Truffles: Roll each truffle in unsweetened cocoa powder or your desired coating, ensuring an even layer covers the surface. Place the truffles on a baking sheet lined with parchment paper.
- Chill Again: Refrigerate the coated truffles for at least 30 minutes to set before serving.
Extra Tips:
When making Decadent Hot Chocolate Truffles, it’s important to use high-quality chocolate for the best flavor and texture. If you prefer, you can experiment with different flavors by adding a few drops of flavored extracts (such as mint or orange) to the ganache.
If the ganache mixture becomes too soft while rolling, place it back in the refrigerator for a few minutes to firm up. Truffles can be stored in an airtight container in the refrigerator for up to two weeks, making them a convenient make-ahead dessert option.
Hot Chocolate Fudge
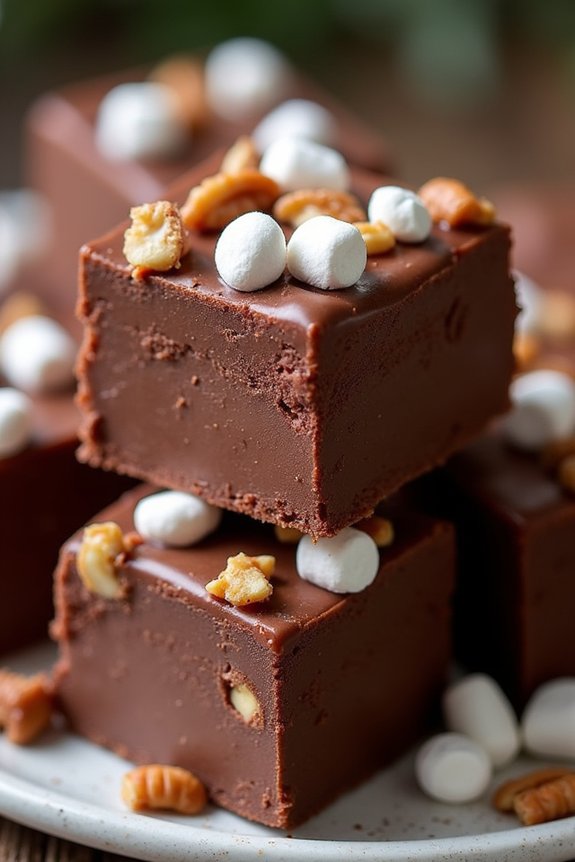
Indulge in the rich and velvety decadence of Hot Chocolate Fudge, a dessert that combines the comforting flavors of hot chocolate with the chewy, satisfying texture of fudge. This sweet treat is perfect for cozy evenings or as a delightful end to a festive dinner.
With its smooth chocolatey base and the subtle hint of vanilla, it’s bound to be a hit with both kids and adults alike. The fudge is wonderfully easy to prepare, making it an ideal recipe for those who may not have a lot of time to spend in the kitchen but still want to impress their family and friends with a homemade dessert.
This Hot Chocolate Fudge recipe is designed to serve 4-6 people, making it a great option for small gatherings or family dinners. The simplicity of the ingredients means that even novice bakers can achieve professional results with minimal effort. All you need is a little patience and a few basic kitchen tools to create this luscious treat.
Once set, the fudge can be cut into squares and served as is, or you can get creative by adding toppings such as marshmallows, nuts, or a drizzle of caramel for an extra touch of indulgence.
Ingredients (serves 4-6):
- 2 cups semisweet chocolate chips
- 1 can (14 ounces) sweetened condensed milk
- 1/4 cup unsalted butter
- 1/2 teaspoon vanilla extract
- 1/4 teaspoon salt
- 1 cup mini marshmallows (optional, for topping)
- 1/4 cup chopped nuts (optional, for topping)
Cooking Instructions:
- Prepare the Pan: Line an 8×8 inch baking pan with parchment paper, leaving some overhang on the sides. This will make it easier to lift the fudge out once it’s set.
- Melt the Ingredients: In a medium saucepan, combine the semisweet chocolate chips, sweetened condensed milk, and unsalted butter. Place the saucepan over low heat.
- Stir Constantly: Gently stir the mixture continuously until the chocolate chips and butter are completely melted and the mixture is smooth and well combined. Be careful not to let the mixture boil or burn.
- Add Flavoring: Once the mixture is smooth, remove the saucepan from the heat. Stir in the vanilla extract and salt until they’re fully incorporated.
- Pour and Spread: Pour the fudge mixture into the prepared baking pan. Use a spatula to spread it evenly into the corners of the pan.
- Add Toppings: If desired, sprinkle mini marshmallows and/or chopped nuts evenly over the top of the fudge, pressing them lightly into the surface.
- Chill the Fudge: Place the baking pan in the refrigerator and allow the fudge to chill for at least 2 hours, or until it’s firm and set.
- Cut and Serve: Once the fudge is set, use the parchment paper overhang to lift it out of the pan. Cut the fudge into squares and serve.
Extra Tips:
For the perfect Hot Chocolate Fudge, verify that your saucepan is over low heat to prevent the chocolate from seizing. Stirring constantly is key to achieving a smooth consistency.
If you prefer a softer fudge, you can adjust the ratio of chocolate to condensed milk slightly. Additionally, feel free to customize your fudge with different toppings or mix-ins, such as crushed peppermint candies for a festive touch or a sprinkle of sea salt for a savory contrast.
Hot Chocolate Cupcakes With Marshmallow Frosting
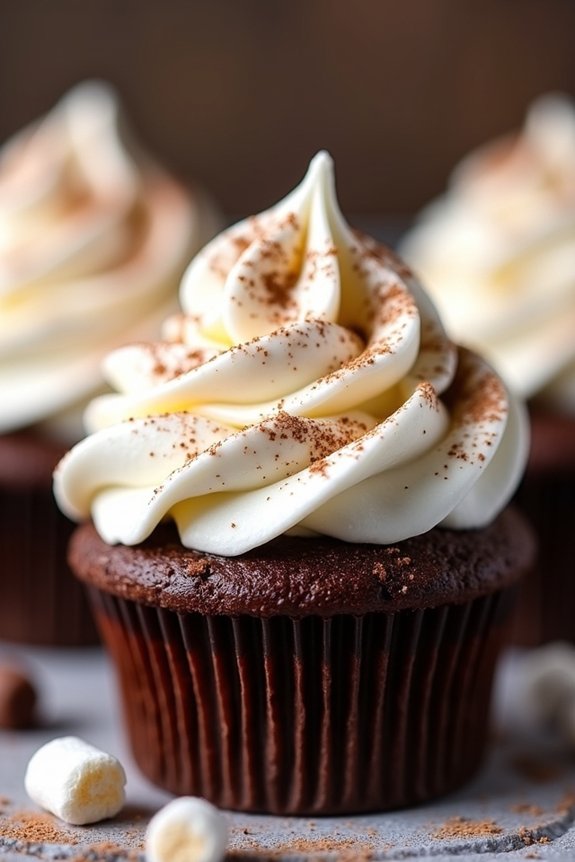
Indulge in the rich, decadent flavors of Hot Chocolate Cupcakes With Marshmallow Frosting, a delightful twist on a classic favorite that combines the comforting warmth of hot chocolate with the fluffy sweetness of marshmallow.
These cupcakes are perfect for any occasion, whether you’re hosting a winter gathering, celebrating a birthday, or simply treating yourself to a cozy dessert. The moist chocolate cupcakes are infused with a deep cocoa flavor and topped with a dreamy marshmallow frosting that adds a light, airy sweetness to every bite.
These cupcakes are easy to prepare, making them an ideal treat for both novice and experienced bakers. With a blend of simple ingredients, you’ll be able to whip up a batch that will have your family and friends coming back for more. The recipe yields approximately 12 cupcakes, serving 4-6 people, making it a perfect choice for small gatherings or family dessert time.
Ingredients:
- 1 cup all-purpose flour
- 1 cup granulated sugar
- 1/2 cup unsweetened cocoa powder
- 1 teaspoon baking powder
- 1/2 teaspoon baking soda
- 1/4 teaspoon salt
- 1/2 cup milk
- 1/4 cup vegetable oil
- 1 large egg
- 1 teaspoon vanilla extract
- 1/2 cup boiling water
- 1 cup mini marshmallows
- 1/2 cup unsalted butter, room temperature
- 1 1/2 cups powdered sugar
- 1/2 teaspoon vanilla extract
- 1-2 tablespoons milk
Instructions:
- Preheat and Prepare: Preheat your oven to 350°F (175°C). Line a 12-cup muffin tin with paper cupcake liners.
- Mix Dry Ingredients: In a large bowl, whisk together the flour, sugar, cocoa powder, baking powder, baking soda, and salt until well combined.
- Combine Wet Ingredients: In a separate bowl, mix the milk, vegetable oil, egg, and vanilla extract until smooth.
- Create Batter: Gradually add the wet ingredients to the dry ingredients, mixing until fully incorporated. Carefully stir in the boiling water until the batter is smooth and thin.
- Fill and Bake: Divide the batter evenly among the cupcake liners, filling each about two-thirds full. Bake in the preheated oven for 18-20 minutes, or until a toothpick inserted into the center of a cupcake comes out clean.
- Cool: Once baked, remove from the oven and allow the cupcakes to cool in the pan for a few minutes before transferring them to a wire rack to cool completely.
- Make Marshmallow Frosting: In a medium bowl, beat the butter until creamy. Gradually add the powdered sugar, beating until smooth. Mix in the vanilla extract. Add the milk, one tablespoon at a time, until the frosting reaches a smooth, spreadable consistency. Fold in the mini marshmallows.
- Frost Cupcakes: Once the cupcakes are completely cool, generously spread or pipe the marshmallow frosting on top of each cupcake.
Extra Tips:
For an extra special touch, consider garnishing the frosted cupcakes with chocolate shavings or a dusting of cocoa powder.
If you want an even richer chocolate flavor, try adding a teaspoon of instant coffee granules to the batter.
To make sure your marshmallow frosting remains fluffy, avoid overmixing.
And remember, patience is key: make sure the cupcakes are completely cool before frosting to prevent the frosting from melting.
Enjoy these delightful treats with a steaming cup of hot chocolate for the ultimate indulgence!
Hot Chocolate Pancakes
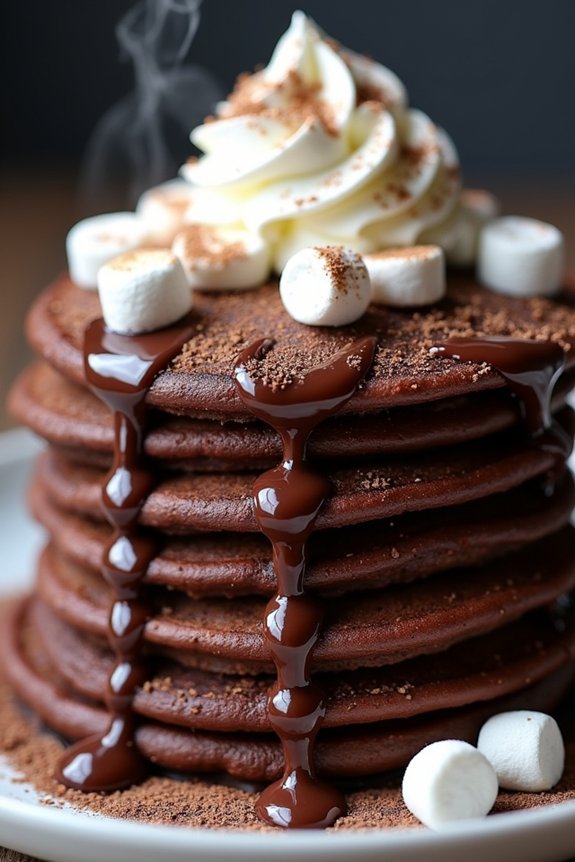
Indulge in the comforting flavors of hot chocolate with these decadent Hot Chocolate Pancakes. Perfect for a cozy breakfast or a sweet dessert, these pancakes capture the rich essence of your favorite winter drink. Imagine fluffy pancakes infused with cocoa and topped with a luscious chocolate sauce, marshmallows, and whipped cream. It’s like having a mug of hot chocolate turned into a stack of pancakes, offering warmth and sweetness in every bite.
These Hot Chocolate Pancakes are ideal for serving a small group of 4-6 people, making them a delightful treat for family brunch or a special weekend breakfast. The batter is enhanced with cocoa powder and chocolate chips, guaranteeing each pancake is filled with gooey chocolate goodness. Finished with toppings reminiscent of a classic hot cocoa, these pancakes are sure to bring smiles to everyone at the table.
Ingredients (Serving Size: 4-6 People):
- 1 ½ cups all-purpose flour
- ¼ cup unsweetened cocoa powder
- 2 tablespoons granulated sugar
- 1 tablespoon baking powder
- ½ teaspoon salt
- 1 ¾ cups milk
- 2 large eggs
- 1 teaspoon vanilla extract
- ¼ cup melted butter
- ½ cup chocolate chips
- ½ cup mini marshmallows (for topping)
- Chocolate syrup (for drizzling)
- Whipped cream (for topping)
Cooking Instructions:
- Mix Dry Ingredients: In a large mixing bowl, whisk together the flour, cocoa powder, sugar, baking powder, and salt until well combined. This guarantees that the cocoa flavor is evenly distributed in your pancakes.
- Combine Wet Ingredients: In another bowl, whisk the milk, eggs, vanilla extract, and melted butter. Confirm that the eggs are fully incorporated and the mixture is smooth.
- Create the Batter: Gradually pour the wet mixture into the dry ingredients, stirring gently with a spatula or wooden spoon. Mix until just combined; it’s okay if the batter is a little lumpy. Overmixing can lead to tough pancakes.
- Add Chocolate Chips: Fold the chocolate chips into the batter, distributing them evenly without overworking the mixture.
- Preheat the Griddle: Heat a non-stick griddle or a large skillet over medium heat. Lightly grease it with butter or cooking spray.
- Cook the Pancakes: Pour ¼ cup of batter onto the griddle for each pancake. Cook until bubbles form on the surface and the edges look set, about 2-3 minutes. Flip and cook the other side until golden brown, approximately another 2 minutes.
- Keep Warm: Transfer cooked pancakes to a warm oven (around 200°F) while you finish cooking the rest.
- Serve and Garnish: Stack the pancakes on plates, drizzle generously with chocolate syrup, top with mini marshmallows, and add a dollop of whipped cream.
Extra Tips:
For extra fluffy pancakes, let the batter rest for about 5-10 minutes before cooking. This allows the baking powder to activate, resulting in a lighter texture.
If you prefer a more intense chocolate flavor, you can increase the cocoa powder by an additional tablespoon. Feel free to get creative with toppings by adding crushed peppermint candies or a sprinkle of cinnamon for a festive touch.
Enjoy these pancakes hot for the best experience, as the melted chocolate chips provide a delightful gooey texture.
Hot Chocolate Éclairs
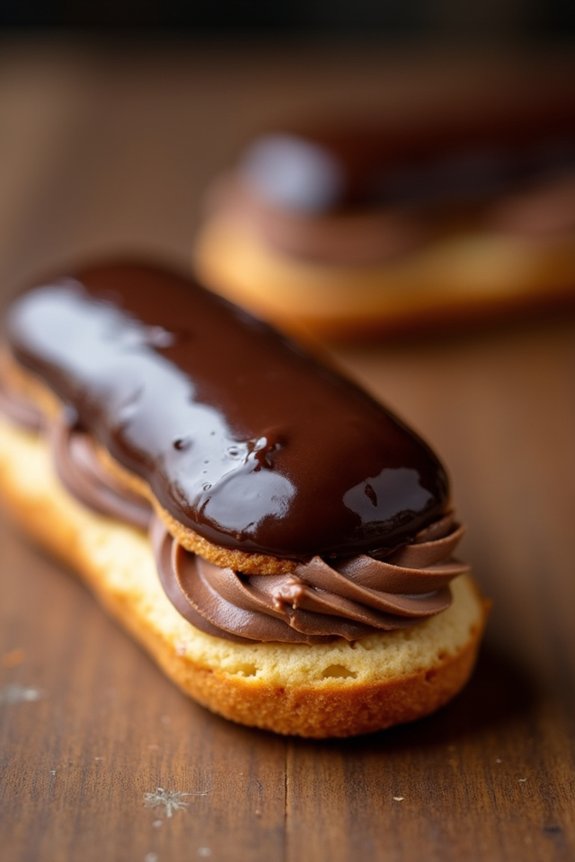
Hot Chocolate Éclairs are a decadent twist on the classic French pastry, perfect for a cozy dessert or a sophisticated treat. These éclairs are filled with a rich hot chocolate pastry cream, encased in a delicate choux pastry, and topped with a glossy chocolate glaze. The combination of the creamy filling and the smooth glaze makes for an indulgent dessert that’s certain to impress your family and guests.
Whether you’re a seasoned baker or a beginner, this recipe will guide you through creating these delightful pastries step by step.
Éclairs are traditionally filled with a vanilla pastry cream, but this version swaps it out for a luscious hot chocolate cream, enhancing the flavor profile with a deep cocoa richness. This dish is perfect for serving 4-6 people, making it ideal for small gatherings or a special family dessert.
With a bit of patience and attention to detail, you’ll be able to create these stunning éclairs that look as good as they taste.
Ingredients (Serves 4-6)
For the Choux Pastry:
- 1/2 cup water
- 1/2 cup milk
- 1/2 cup unsalted butter
- 1 tablespoon sugar
- 1/4 teaspoon salt
- 1 cup all-purpose flour
- 4 large eggs
For the Hot Chocolate Pastry Cream:
- 2 cups whole milk
- 3 tablespoons unsweetened cocoa powder
- 1/4 cup sugar
- 3 tablespoons cornstarch
- 4 large egg yolks
- 2 teaspoons vanilla extract
- 2 tablespoons unsalted butter
For the Chocolate Glaze:
- 1/2 cup heavy cream
- 4 ounces semi-sweet chocolate, chopped
- 1 tablespoon unsalted butter
Cooking Instructions
Make the Choux Pastry:
- Prepare the Dough: In a medium saucepan, combine water, milk, butter, sugar, and salt. Bring to a boil over medium heat. Once boiling, remove from heat and add the flour all at once. Stir vigorously until the mixture forms a ball and pulls away from the sides of the pan.
- Cook the Dough: Return the saucepan to the heat and cook for another 1-2 minutes, stirring constantly to dry out the mixture slightly.
- Beat in the Eggs: Transfer the dough to a mixing bowl. Add the eggs one at a time, beating well after each addition until the dough is smooth and glossy.
- Pipe the Éclairs: Preheat the oven to 400°F (200°C). Line a baking sheet with parchment paper. Transfer the dough to a piping bag fitted with a large round tip. Pipe 4-inch long éclairs onto the baking sheet, leaving space between each.
- Bake the Éclairs: Bake for 15 minutes, then reduce the temperature to 350°F (175°C) and bake for an additional 20-25 minutes until golden brown. Let them cool completely on a wire rack.
Make the Hot Chocolate Pastry Cream:
- Heat the Milk: In a saucepan, whisk together milk, cocoa powder, and half of the sugar. Bring to a simmer over medium heat.
- Mix the Egg Yolks: In a separate bowl, whisk together the remaining sugar, cornstarch, and egg yolks until smooth.
- Combine and Cook: Gradually pour the hot milk into the egg mixture, whisking constantly. Return the mixture to the saucepan and cook over medium heat, stirring constantly until thickened.
- Finish the Cream: Remove from heat, stir in vanilla extract and butter until smooth. Let it cool completely.
Make the Chocolate Glaze:
1. Melt the Chocolate: In a small saucepan, heat heavy cream until it simmers. Remove from heat and add chopped chocolate and butter. Stir until smooth and glossy.
Assemble the Éclairs:
- Fill the Éclairs: Once the éclairs and pastry cream are cooled, cut the éclairs in half lengthwise. Pipe the hot chocolate pastry cream onto the bottom half of each éclair.
- Top with Glaze: Dip the top halves of the éclairs into the chocolate glaze and place them back on top of the filled halves. Allow the glaze to set before serving.
Extra Tips
For the best results, verify all ingredients are at the correct temperature before starting, especially for the choux pastry and pastry cream.
It’s important to bake the éclairs until they’re fully dry to prevent them from collapsing as they cool. If you don’t have a piping bag, you can use a plastic bag with the corner snipped off.
When making the glaze, be careful not to overheat the chocolate to prevent it from seizing. Enjoy these Hot Chocolate Éclairs fresh for the best texture and flavor!
Hot Chocolate Fondue
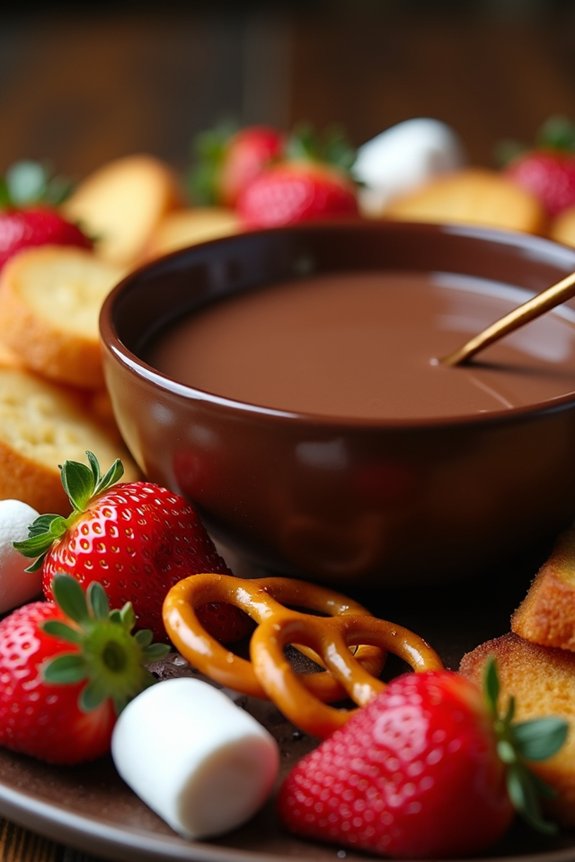
Hot chocolate fondue is a delightful twist on the traditional fondue experience, perfect for cozy gatherings or a sweet treat for the family. This luscious dessert features a rich, velvety blend of chocolate and cream, offering a warm dip ideal for an assortment of dippables like fruits, marshmallows, and cookies. Its creamy texture and indulgent flavor are sure to be a hit with guests of all ages.
Creating the perfect hot chocolate fondue is both simple and rewarding. The key is choosing high-quality chocolate and balancing it with the right amount of cream for a smooth consistency. This recipe serves 4-6 people, making it an excellent choice for intimate get-togethers or family dessert nights. With just a few steps, you’ll have a delightful dessert that brings warmth and joy to your table.
Ingredients (Serves 4-6):
- 1 cup heavy cream
- 1 cup whole milk
- 12 oz semi-sweet chocolate chips (or finely chopped chocolate)
- 2 tablespoons granulated sugar
- 1 teaspoon vanilla extract
- A pinch of salt
Cooking Instructions:
- Prepare the Base: In a medium saucepan, combine the heavy cream and whole milk. Heat the mixture over medium heat, stirring occasionally to prevent it from scorching, until it starts to steam but not boil.
- Add Chocolate: Reduce the heat to low and add the semi-sweet chocolate chips to the saucepan. Stir continuously until the chocolate has melted completely and the mixture is smooth and glossy.
- Sweeten the Fondue: Stir in the granulated sugar, vanilla extract, and a pinch of salt. Continue to stir until the sugar has dissolved and is fully incorporated into the fondue.
- Transfer to Fondue Pot: Pour the hot chocolate fondue into a fondue pot or a heatproof serving bowl. If using a fondue pot, light the burner to keep the chocolate warm and melted throughout the serving.
- Serve with Dippables: Arrange assorted dippables such as strawberries, bananas, marshmallows, pretzels, or pieces of pound cake around the fondue pot for dipping.
Extra Tips:
For a richer flavor, consider using a mixture of dark and milk chocolate instead of just semi-sweet chocolate. If the fondue becomes too thick as it cools, gently reheat it or add a bit more milk to achieve the desired consistency.
Remember to keep the heat source low to prevent the chocolate from burning or separating. Customize your fondue by adding a splash of liqueur like Bailey’s or Grand Marnier for an adult twist. Enjoy your hot chocolate fondue with various dipping options to cater to different tastes and preferences.