

The holiday season is the perfect time to indulge in some baking magic. I’ve curated a delightful list of 13 Christmas cookie recipes that are sure to impress. From the timeless charm of classic sugar cookies to the unique flavors of pistachio and cranberry biscotti, each recipe offers something special. The aroma of gingerbread men baking in the kitchen is enough to warm the heart. These cookies are bound to add joy and maybe even a touch of nostalgia to your festive celebrations.
Classic Sugar Cookies
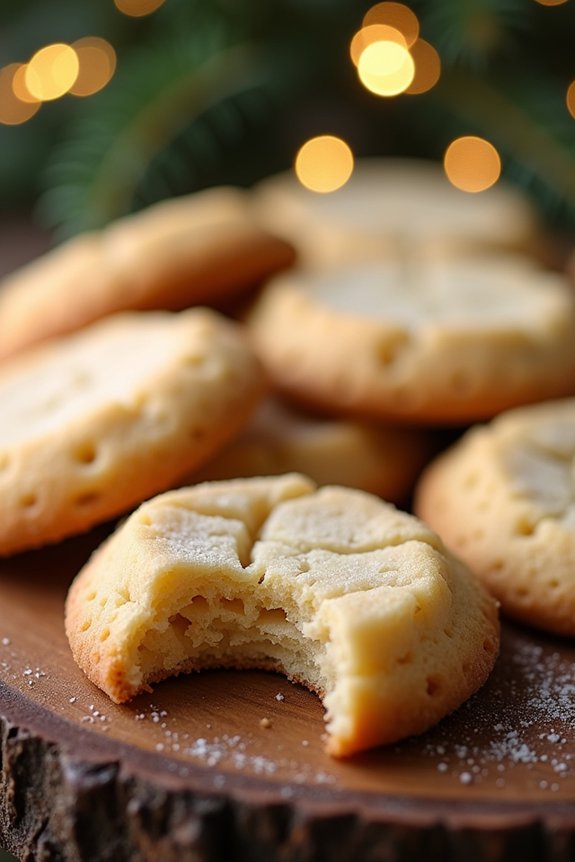
Classic Sugar Cookies are a timeless treat that are perfect for the holiday season. These cookies aren’t only deliciously sweet but also provide a great canvas for creativity when it comes to decorating. Whether you’re planning to enjoy them with a warm cup of cocoa or gift them to friends and family, classic sugar cookies are always a hit at Christmas time.
The combination of a crisp exterior with a soft, chewy center makes these cookies irresistible. Plus, the delightful aroma of vanilla and butter filling your kitchen as they bake is certain to put you in the holiday spirit.
This recipe is simple to follow and requires only a handful of ingredients that you likely already have in your pantry. The dough can be made ahead of time, allowing for flexibility during the busy holiday season. Once baked, these cookies can be decorated with royal icing, sprinkles, or left plain for a more traditional look.
With a serving size for 4-6 people, this recipe yields enough cookies for sharing, but is easily doubled or tripled if you’re hosting a larger gathering. Whether you’re an experienced baker or a novice in the kitchen, these classic sugar cookies are bound to impress.
Ingredients for Classic Sugar Cookies (Serves 4-6):
- 2 3/4 cups all-purpose flour
- 1 teaspoon baking soda
- 1/2 teaspoon baking powder
- 1 cup unsalted butter, softened
- 1 1/2 cups white sugar
- 1 egg
- 1 teaspoon vanilla extract
- 1/2 teaspoon almond extract
- 3 to 4 tablespoons buttermilk
Cooking Instructions:
- Preheat the Oven: Start by preheating your oven to 375°F (190°C). This guarantees that the oven is at the right temperature when your cookies are ready to bake.
- Mix Dry Ingredients: In a medium-sized bowl, whisk together the all-purpose flour, baking soda, and baking powder. This helps to evenly distribute the leavening agents throughout the flour.
- Cream Butter and Sugar: In a large bowl, cream together the softened butter and sugar until the mixture is light and fluffy. This should take about 2-3 minutes using an electric mixer on medium speed.
- Add Egg and Extracts: Beat in the egg, vanilla extract, and almond extract until the mixture is well combined. These ingredients add flavor and moisture to your cookies.
- Combine Wet and Dry Ingredients: Gradually add the dry ingredients to the creamed mixture, mixing well after each addition. Add the buttermilk a tablespoon at a time until the dough comes together and is smooth.
- Roll Out the Dough: On a lightly floured surface, roll out the dough to about 1/4 inch thickness. Use cookie cutters to cut out shapes and place them on an ungreased baking sheet about 1 inch apart.
- Bake the Cookies: Bake in the preheated oven for 8 to 10 minutes, or until the edges are golden brown. Be careful not to overbake, as this can result in a hard cookie.
- Cool and Decorate: Allow the cookies to cool on the baking sheet for a few minutes before transferring them to a wire rack to cool completely. Once cool, decorate as desired.
Extra Tips:
To guarantee your sugar cookies maintain their shape while baking, consider chilling the dough in the refrigerator for at least an hour before rolling it out. This will help prevent the dough from spreading too much in the oven.
If you’re planning to decorate with royal icing, make sure the cookies are completely cool to avoid melting the icing. For a festive touch, consider adding food coloring to the dough or icing to match the holiday theme.
And remember, these cookies make great gifts when packaged in a decorative tin or cellophane bag tied with a ribbon. Happy baking!
Chocolate Peppermint Bark Cookies
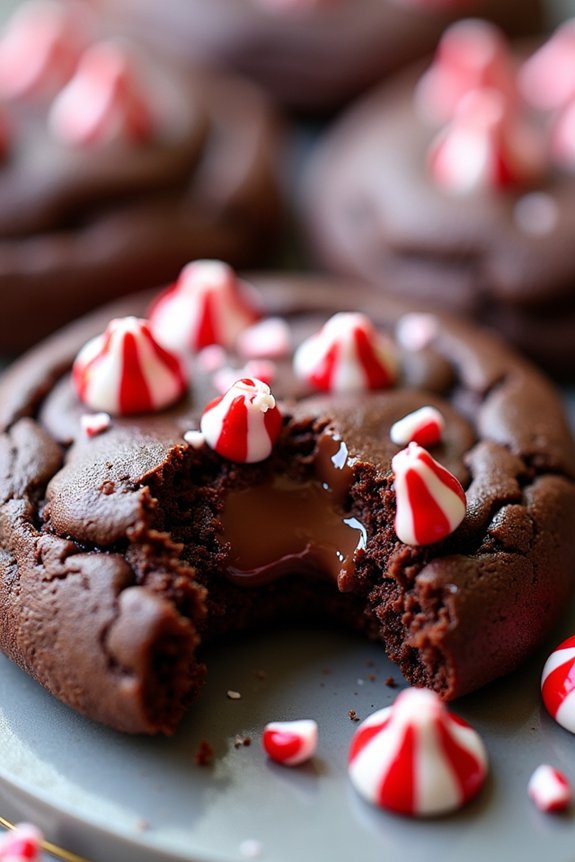
Chocolate Peppermint Bark Cookies are a festive treat perfect for adding a bit of holiday cheer to your dessert table. These cookies combine the rich flavors of chocolate with the revitalizing hint of peppermint, creating a delightful balance that captures the essence of the season.
The crunchy texture of the peppermint bark complements the chewy chocolate cookie base, making them irresistible for anyone with a sweet tooth. They’re great for holiday parties, gift exchanges, or simply enjoying by the fireplace with a cup of hot cocoa.
The recipe is straightforward, making it perfect for both novice and experienced bakers. With a few simple ingredients and easy-to-follow steps, you can whip up a batch of these delicious cookies in no time. This recipe yields approximately 24 cookies, making it ideal for serving 4-6 people.
Whether you’re baking them for a festive gathering or to enjoy at home, these Chocolate Peppermint Bark Cookies are sure to become a holiday favorite.
Ingredients:
- 1 cup all-purpose flour
- 1/2 cup unsweetened cocoa powder
- 1/2 teaspoon baking soda
- 1/4 teaspoon salt
- 1/2 cup unsalted butter, softened
- 1/2 cup granulated sugar
- 1/2 cup packed light brown sugar
- 1 large egg
- 1 teaspoon vanilla extract
- 1 cup semi-sweet chocolate chips
- 1/2 cup peppermint bark, chopped
- 1/4 cup crushed peppermint candies
Instructions:
- Preheat and Prepare: Preheat your oven to 350°F (175°C). Line two baking sheets with parchment paper or silicone baking mats to prevent sticking and guarantee even baking.
- Mix Dry Ingredients: In a medium bowl, whisk together the flour, cocoa powder, baking soda, and salt until evenly combined. This helps to guarantee that all the dry ingredients are evenly distributed in the batter.
- Cream Butter and Sugars: In a large mixing bowl, beat the softened butter, granulated sugar, and brown sugar together on medium speed until creamy and smooth, about 2 minutes. This step helps to incorporate air into the mixture, creating light and fluffy cookies.
- Add Wet Ingredients: Add the egg and vanilla extract to the butter mixture and beat until well combined. Scrape down the sides of the bowl as needed to guarantee everything is mixed thoroughly.
- Combine Mixtures: Gradually add the dry ingredients to the wet ingredients, mixing on low speed until just combined. Be careful not to overmix, as this can result in tough cookies.
- Fold in Chocolate and Peppermint: Gently fold in the chocolate chips, chopped peppermint bark, and crushed peppermint candies using a spatula or wooden spoon. Guarantee that the mix-ins are evenly distributed throughout the dough.
- Form Cookies: Using a tablespoon or cookie scoop, drop rounded balls of dough onto the prepared baking sheets, spacing them about 2 inches apart to allow room for spreading.
- Bake: Bake the cookies in the preheated oven for 10-12 minutes, or until the edges are set and the tops are just starting to crack. The centers may appear slightly underbaked, but they’ll firm up as they cool.
- Cool: Remove the cookies from the oven and let them cool on the baking sheets for 5 minutes before transferring them to a wire rack to cool completely.
Extra Tips:
When making Chocolate Peppermint Bark Cookies, consider chilling the dough for about 30 minutes before baking. This can help prevent the cookies from spreading too much and will enhance the flavor as the ingredients meld together.
If you prefer a more intense peppermint flavor, you can add a few drops of peppermint extract to the dough. Additionally, guarantee that the butter is at room temperature for easier blending with the sugars.
Enjoy these cookies fresh out of the oven or store them in an airtight container for up to a week.
Gingerbread Men With Royal Icing

Gingerbread Men With Royal Icing are a classic holiday treat that brings warmth and cheer to any festive gathering. These delightful cookies aren’t only fun to make, but they also fill your home with the comforting aroma of spices like ginger, cinnamon, and nutmeg. The addition of royal icing allows for creativity, letting you decorate each cookie with intricate designs or simple patterns. Perfect for a family baking session, this recipe yields enough cookies to share with everyone, making it an ideal choice for holiday parties or gift-giving.
Gingerbread Men are known for their distinctive flavor and slightly chewy texture, which pairs beautifully with the sweet, crisp royal icing. The key to achieving the perfect cookie is in the balance of spices and the careful rolling and cutting of the dough. Once baked, these cookies hold their shape well, making them perfect for decorating. The royal icing, made with powdered sugar and egg whites or meringue powder, hardens upon drying, creating a lovely contrast to the soft cookies. This recipe serves 4-6 people, making enough to enjoy with friends and family.
Ingredients for Gingerbread Men:
- 3 cups all-purpose flour
- 3/4 cup dark brown sugar, packed
- 3/4 teaspoon baking soda
- 1 tablespoon ground ginger
- 1 tablespoon ground cinnamon
- 1/2 teaspoon ground cloves
- 1/2 teaspoon salt
- 12 tablespoons unsalted butter, softened
- 3/4 cup molasses
- 2 tablespoons milk
Ingredients for Royal Icing:
- 2 large egg whites or 3 tablespoons meringue powder
- 3 cups powdered sugar
- 1 teaspoon vanilla extract
- Food coloring (optional)
Cooking Instructions:
- Prepare the Dough: In a large bowl, combine the flour, brown sugar, baking soda, ginger, cinnamon, cloves, and salt. Add the softened butter, molasses, and milk, and mix until a dough forms. Divide the dough in half, flatten into disks, wrap in plastic, and refrigerate for at least 1 hour.
- Preheat the Oven: Preheat your oven to 350°F (175°C) and line two baking sheets with parchment paper.
- Roll Out the Dough: On a lightly floured surface, roll out one disk of dough to about 1/4 inch thickness. Use a gingerbread man cookie cutter to cut out shapes and place them on the prepared baking sheets, leaving space between each cookie.
- Bake the Cookies: Bake in the preheated oven for 8-10 minutes until the edges are firm but the centers are still slightly soft. Remove from the oven and let cool on the sheets for 5 minutes before transferring to a wire rack to cool completely.
- Make the Royal Icing: In a medium bowl, beat the egg whites or meringue powder with powdered sugar and vanilla extract until the mixture is smooth and thick. If using, add food coloring to achieve desired colors.
- Decorate the Cookies: Once the cookies are completely cool, use a piping bag or a ziplock bag with a small corner snipped off to pipe the royal icing onto the cookies. Let the icing harden before serving or storing.
Extra Tips:
When preparing the dough, be sure not to overmix, as this can lead to tougher cookies. If your dough feels sticky after chilling, dust it lightly with flour before rolling it out. To make decorating easier, use a toothpick to help guide the icing for finer details. If you want your royal icing to harden faster, place the decorated cookies in a cool, dry area.
Thumbprint Jam Cookies
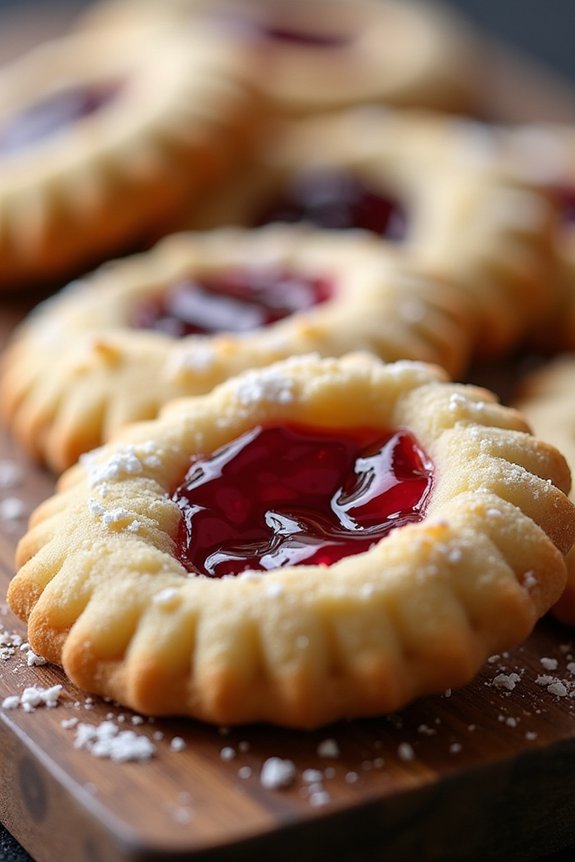
Thumbprint Jam Cookies are a delightful holiday treat that combines the buttery goodness of a classic shortbread cookie with the sweet tang of your favorite jam.
These cookies aren’t only visually appealing with their jewel-like centers but also incredibly satisfying to bite into, making them a perfect addition to your Christmas cookie tray. Whether you’re hosting a holiday party or gifting them to friends and family, these cookies are sure to impress with their simple yet elegant presentation.
The best part about Thumbprint Jam Cookies is their versatility. You can customize them with any jam or preserve of your choice, from raspberry and apricot to strawberry and blackberry.
The subtle hint of vanilla extract and the light dusting of powdered sugar enhance the flavor profile, making these cookies a holiday favorite. With this easy-to-follow recipe, you’ll be able to whip up a batch of these delicious cookies in no time, serving 4-6 people.
Ingredients (Serves 4-6)
- 1 cup unsalted butter, softened
- 1/2 cup granulated sugar
- 2 large egg yolks
- 1 teaspoon vanilla extract
- 2 cups all-purpose flour
- 1/4 teaspoon salt
- 1/2 cup of your favorite jam or preserve
- Powdered sugar for dusting (optional)
Cooking Instructions
- Preheat the Oven: Start by preheating your oven to 350°F (175°C). Line two baking sheets with parchment paper to guarantee the cookies don’t stick.
- Cream the Butter and Sugar: In a large mixing bowl, cream together the softened butter and granulated sugar until the mixture is light and fluffy. This should take about 2-3 minutes using an electric mixer.
- Add Egg Yolks and Vanilla: Add the egg yolks one at a time, beating well after each addition. Mix in the vanilla extract until fully incorporated.
- Combine Dry Ingredients: In a separate bowl, whisk together the all-purpose flour and salt. Gradually add this to the wet mixture, beating at low speed until a dough forms.
- Shape the Cookies: Roll the dough into 1-inch balls and place them on the prepared baking sheets, spacing them about 2 inches apart.
- Create Thumbprints: Use your thumb or the back of a teaspoon to gently press an indentation into the center of each cookie ball, being careful not to press too hard.
- Fill with Jam: Using a small spoon, fill each indentation with about 1/2 teaspoon of your chosen jam or preserve.
- Bake the Cookies: Place the baking sheets in the preheated oven and bake for 12-15 minutes or until the edges are lightly golden.
- Cool and Serve: Remove the cookies from the oven and let them cool on the baking sheets for 5 minutes before transferring them to a wire rack to cool completely. Dust with powdered sugar before serving if desired.
Extra Tips
When making Thumbprint Jam Cookies, it’s important to use room temperature butter for easy creaming with sugar, which results in a smooth cookie dough.
Be sure to chill the dough for about 30 minutes if it feels too soft to handle, as this will help the cookies maintain their shape during baking. For best results, try using a variety of jams to create an assortment of flavors and colors.
Finally, verify the cookies are completely cooled before dusting with powdered sugar to prevent it from melting into the jam. Enjoy your festive baking!
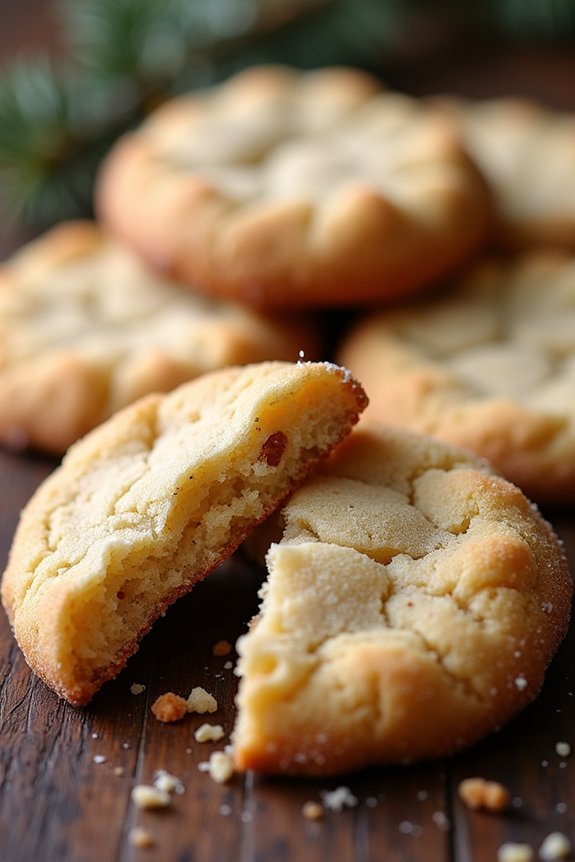
Snickerdoodle Snowflakes
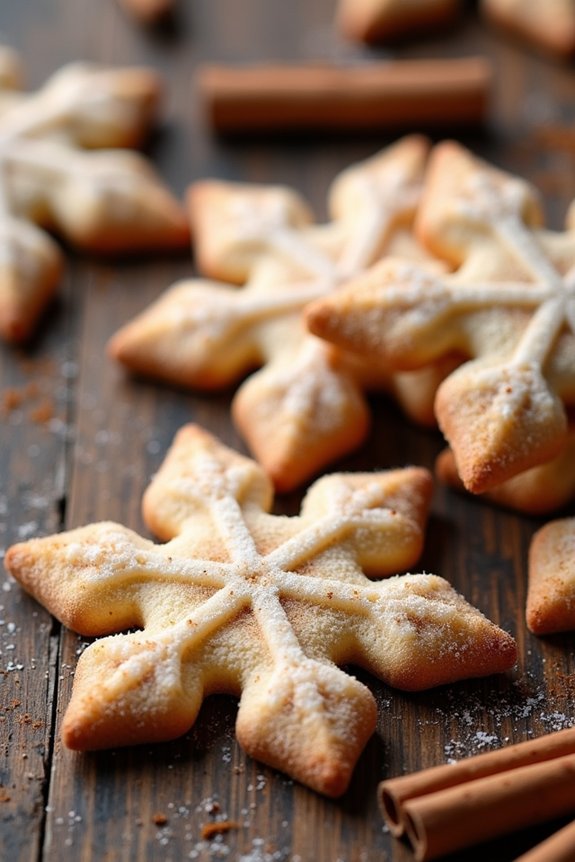
Snickerdoodle Snowflakes are a delightful twist on the classic snickerdoodle cookie, perfect for adding a touch of holiday magic to your dessert table. These cookies aren’t only delicious with their cinnamon-sugar coating but also visually appealing, resembling delicate snowflakes. Ideal for holiday gatherings or a cozy night in, these cookies will surely be a hit with both kids and adults alike.
The key to these Snickerdoodle Snowflakes is achieving the perfect balance of a soft, chewy center and a slightly crispy edge. The cookies are rolled in a generous amount of cinnamon sugar before baking, giving them that quintessential snickerdoodle flavor. With the right ingredients and a little bit of patience, you’ll have a batch of beautiful and delicious cookies ready to enjoy. This recipe serves 4-6 people, making it perfect for a small gathering or family treat.
Ingredients:
- 1 cup unsalted butter, softened
- 1 1/2 cups granulated sugar
- 2 large eggs
- 2 teaspoons vanilla extract
- 2 3/4 cups all-purpose flour
- 2 teaspoons cream of tartar
- 1 teaspoon baking soda
- 1/4 teaspoon salt
- 2 tablespoons ground cinnamon
- Additional 1/4 cup granulated sugar (for coating)
Cooking Instructions:
- Preheat the Oven: Start by preheating your oven to 375°F (190°C). Line two baking sheets with parchment paper to prevent the cookies from sticking.
- Mix Wet Ingredients: In a large mixing bowl, cream together the softened butter and 1 1/2 cups of granulated sugar until light and fluffy. This should take about 3-4 minutes. Add the eggs one at a time, beating well after each addition. Stir in the vanilla extract.
- Combine Dry Ingredients: In a separate bowl, whisk together the all-purpose flour, cream of tartar, baking soda, and salt. Gradually add the dry ingredients to the wet ingredients, mixing until just combined. Be careful not to overmix, as this can make the cookies tough.
- Prepare Cinnamon Sugar Coating: In a small bowl, mix the remaining 1/4 cup of granulated sugar with the 2 tablespoons of ground cinnamon.
- Shape the Cookies: Using a tablespoon or small cookie scoop, portion the dough into balls. Roll each ball in the cinnamon sugar mixture until fully coated.
- Create Snowflake Shapes: To form the snowflake shape, gently flatten each ball on the baking sheet. Use a small, sharp knife or a snowflake cookie cutter to create snowflake patterns on the surface of each cookie.
- Bake the Cookies: Place the cookies on the prepared baking sheet, leaving enough space between them to allow for spreading. Bake for 8-10 minutes, or until the edges are slightly golden. Remove from the oven and allow to cool on the baking sheet for 5 minutes before transferring to a wire rack to cool completely.
Extra Tips:
For the best results, make certain your butter is at room temperature before starting. This helps achieve a smooth and creamy texture when creaming with sugar.
If you’re feeling creative, you can add a bit of nutmeg or ground ginger to the cinnamon-sugar coating for an extra layer of flavor. Additionally, make sure to chill the dough for about 30 minutes if you find it too sticky to handle; this will make it easier to shape into snowflakes.
Finally, if you don’t have a snowflake cutter, you can use a knife to score patterns on the cookie surface for a homemade touch.
Red Velvet Crinkle Cookies
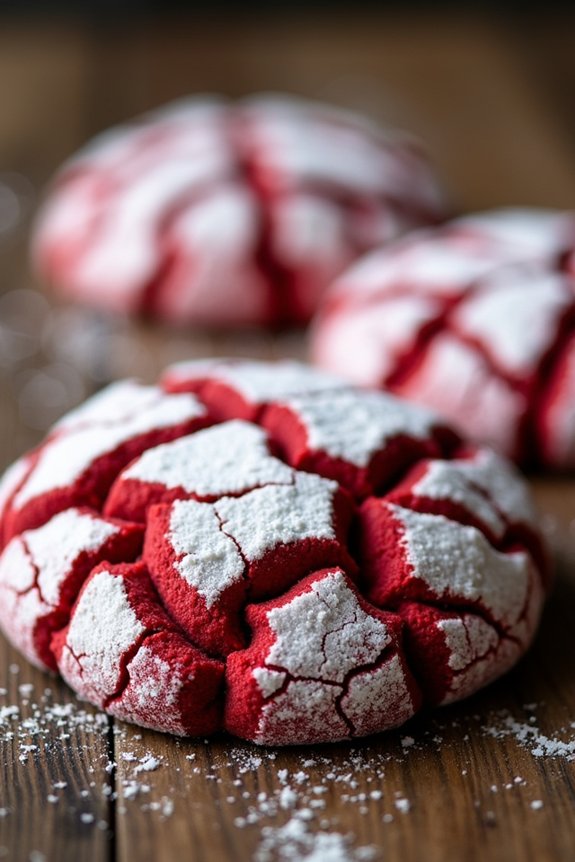
Red Velvet Crinkle Cookies are the perfect festive treat to add to your holiday baking list. These cookies capture the vibrant red hue and subtle cocoa flavor of classic red velvet cake, all while offering a delightful contrast between a soft, chewy center and a slightly crisp exterior. The crinkled powdered sugar coating not only enhances their visual appeal but also adds a touch of sweetness that makes each bite irresistible. Perfect for sharing at Christmas gatherings or as a sweet gift, these cookies will surely become a holiday favorite.
This recipe for Red Velvet Crinkle Cookies is designed to serve 4-6 people, making it ideal for a small gathering or a cozy family dessert. The process involves creating a dough infused with red food coloring and cocoa powder, which is then chilled to guarantee the cookies bake with their iconic crinkle texture. Once baked, these cookies are a beautiful addition to any holiday dessert spread, offering both aesthetic and delicious appeal.
Ingredients
- 1 1/2 cups all-purpose flour
- 1/4 cup unsweetened cocoa powder
- 1 teaspoon baking powder
- 1/4 teaspoon salt
- 1/2 cup unsalted butter, softened
- 1 cup granulated sugar
- 2 large eggs
- 1 teaspoon vanilla extract
- 1 tablespoon red food coloring
- 1/2 cup powdered sugar
Instructions
- Prepare the Dry Ingredients: In a medium-sized bowl, whisk together the flour, cocoa powder, baking powder, and salt. This will guarantee that the dry ingredients are evenly distributed in the dough.
- Cream the Butter and Sugar: In a large mixing bowl, use an electric mixer to cream the softened butter and granulated sugar together until light and fluffy. This should take about 2-3 minutes.
- Add Eggs and Flavoring: Beat in the eggs one at a time, mixing well after each addition. Then, add the vanilla extract and red food coloring, and mix until fully incorporated and the dough is uniformly red.
- Combine Wet and Dry Ingredients: Gradually add the dry ingredients to the wet mixture, mixing on low speed until just combined. Be careful not to overmix, as this can make the cookies tough.
- Chill the Dough: Cover the mixing bowl with plastic wrap and refrigerate the dough for at least 1 hour. This chilling step is essential for achieving the perfect crinkle effect during baking.
- Preheat the Oven: Once the dough is chilled, preheat your oven to 350°F (175°C). Line a baking sheet with parchment paper.
- Form the Cookies: Scoop tablespoons of dough and roll them into balls. Then, roll each ball in powdered sugar until fully coated, which will create the crinkle effect as the cookies bake.
- Bake the Cookies: Place the dough balls on the prepared baking sheet, spacing them about 2 inches apart. Bake for 10-12 minutes, or until the cookies are set around the edges but still soft in the center.
- Cool and Serve: Allow the cookies to cool on the baking sheet for 5 minutes before transferring them to a wire rack to cool completely. Serve and enjoy!
Extra Tips
For the best results, confirm that your butter is at room temperature before beginning, as this will help it cream more effectively with the sugar. If you prefer a deeper red hue, you can adjust the amount of red food coloring to your liking.
Additionally, if you find the dough too sticky to handle, chilling it for a bit longer can help make it easier to roll into balls. Finally, keep an eye on the cookies while they bake; they should be soft in the center when removed from the oven, as they’ll continue to firm up as they cool.
Enjoy these delightful Red Velvet Crinkle Cookies as part of your festive celebrations!
Almond Biscotti With Cranberries
Almond Biscotti With Cranberries is a delightful treat that combines the nutty flavor of almonds with the sweet and tart taste of cranberries. Perfect for the holiday season, these biscotti are twice-baked, resulting in a crunchy texture that pairs perfectly with a cup of coffee or tea.
This recipe isn’t only delicious but also makes for a wonderful homemade gift that will be cherished by friends and family alike. With its festive ingredients, this biscotti is sure to become a staple in your holiday baking repertoire.
This recipe is designed to serve 4-6 people, making it ideal for a small gathering or as a thoughtful gift. The combination of almonds and cranberries provides a festive flair, while the twice-baked method guarantees that the biscotti has the perfect crispness.
Whether you’re a seasoned baker or a novice in the kitchen, this recipe is straightforward and satisfying to make. Gather your ingredients and follow the steps below to create a batch of Almond Biscotti With Cranberries that will surely impress your loved ones.
Ingredients (serving size: 4-6 people):
- 2 cups all-purpose flour
- 1 teaspoon baking powder
- 1/4 teaspoon salt
- 3/4 cup granulated sugar
- 1/2 cup unsalted butter, softened
- 2 large eggs
- 1 teaspoon vanilla extract
- 1 cup whole almonds, coarsely chopped
- 1/2 cup dried cranberries
Instructions:
- Preheat and Prepare: Preheat your oven to 350°F (175°C). Line a baking sheet with parchment paper or a silicone baking mat to prevent sticking.
- Mix Dry Ingredients: In a medium-sized bowl, whisk together the flour, baking powder, and salt. This guarantees that the baking powder and salt are evenly distributed throughout the flour.
- Cream Butter and Sugar: In a large mixing bowl, cream together the softened butter and granulated sugar using an electric mixer on medium speed until the mixture is light and fluffy, about 2-3 minutes.
- Add Eggs and Vanilla: Add the eggs one at a time to the butter and sugar mixture, beating well after each addition. Stir in the vanilla extract until fully incorporated.
- Combine Wet and Dry Ingredients: Gradually add the dry ingredients to the wet mixture, mixing on low speed until just combined. Be careful not to overmix.
- Fold in Almonds and Cranberries: Gently fold in the chopped almonds and dried cranberries using a spatula or wooden spoon, making sure they’re evenly distributed throughout the dough.
- Shape the Dough: Divide the dough in half and shape each half into a log approximately 12 inches long and 2 inches wide. Place the logs on the prepared baking sheet, spacing them about 3 inches apart.
- First Bake: Bake the logs in the preheated oven for 25-30 minutes, or until they’re golden brown and firm to the touch. Remove from the oven and let them cool on the baking sheet for 10 minutes.
- Slice and Second Bake: Reduce the oven temperature to 325°F (160°C). Using a serrated knife, cut the logs diagonally into 1/2-inch thick slices. Lay the slices cut side down on the baking sheet.
- Final Bake: Return the slices to the oven and bake for an additional 10-12 minutes on each side, or until they’re dry and crisp. Cool completely on a wire rack before serving or storing.
Extra Tips: When making Almond Biscotti With Cranberries, confirm that the almonds are coarsely chopped for added texture. If the dough is sticky when shaping the logs, lightly dust your hands with flour to make handling easier.
For a more pronounced almond flavor, consider toasting the almonds lightly before adding them to the dough. Remember, these biscotti can be stored in an airtight container for up to two weeks, making them a convenient treat to have on hand during the holiday season.
White Chocolate Macadamia Nut Cookies
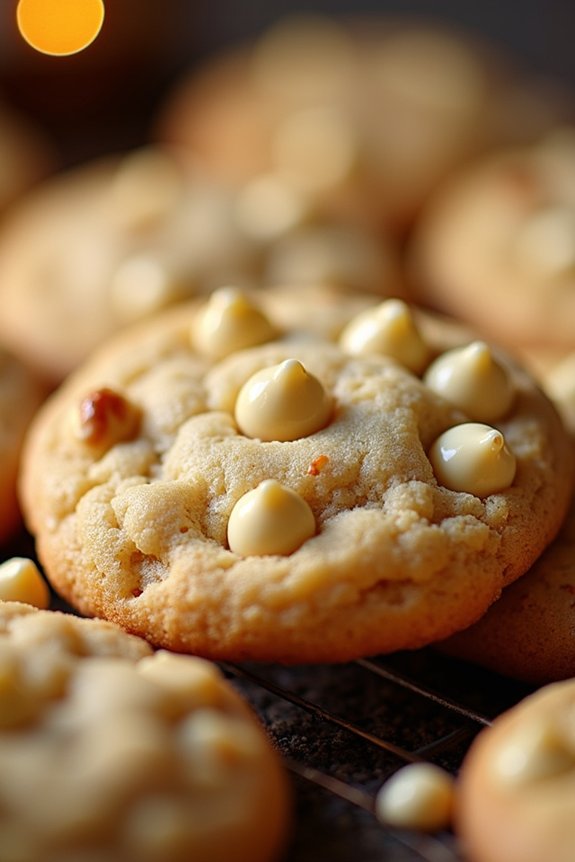
White Chocolate Macadamia Nut Cookies are a delightful treat that combines the rich, creamy flavor of white chocolate with the buttery crunch of macadamia nuts. These cookies are perfect for holiday gatherings or as a cozy treat on a winter’s day. The combination of sweet and savory elements makes them a favorite among cookie enthusiasts, and their beautiful golden-brown appearance adds a festive touch to any cookie platter.
Whether you’re an experienced baker or a novice in the kitchen, this recipe is straightforward and guaranteed to impress. The key to success lies in using high-quality ingredients and paying attention to the texture of the dough. This recipe yields a serving size appropriate for 4-6 people, making it ideal for sharing with family and friends.
Ingredients (for 4-6 people):
- 1 cup (2 sticks) unsalted butter, softened
- 1 cup granulated sugar
- 1 cup packed light brown sugar
- 2 large eggs
- 1 teaspoon vanilla extract
- 2 ½ cups all-purpose flour
- 1 teaspoon baking soda
- ½ teaspoon salt
- 1 cup white chocolate chips
- 1 cup macadamia nuts, coarsely chopped
Instructions:
- Preheat the Oven: Start by preheating your oven to 350°F (175°C). Line two baking sheets with parchment paper or silicone baking mats to prevent the cookies from sticking.
- Cream the Butter and Sugars: In a large mixing bowl, cream together the softened butter, granulated sugar, and light brown sugar using an electric mixer on medium speed until the mixture is light and fluffy, about 2-3 minutes.
- Add Eggs and Vanilla: Beat in the eggs one at a time, making sure each egg is fully incorporated before adding the next. Mix in the vanilla extract until well combined.
- Combine Dry Ingredients: In a separate bowl, whisk together the all-purpose flour, baking soda, and salt. Gradually add the dry ingredients to the wet ingredients, mixing on low speed until just combined. Be careful not to overmix.
- Fold in Chocolate and Nuts: Using a spatula, gently fold in the white chocolate chips and chopped macadamia nuts until evenly distributed throughout the dough.
- Shape the Cookies: Scoop heaping tablespoons of dough onto the prepared baking sheets, spacing them about 2 inches apart to allow for spreading.
- Bake the Cookies: Bake in the preheated oven for 10-12 minutes, or until the edges are golden brown and the centers are set. Rotate the baking sheets halfway through to guarantee even baking.
- Cool the Cookies: Remove the cookies from the oven and allow them to cool on the baking sheets for about 5 minutes before transferring them to a wire rack to cool completely.
Extra Tips:
For the best results, use high-quality white chocolate chips and fresh macadamia nuts. If possible, toast the macadamia nuts lightly in a dry skillet over medium heat for a few minutes before adding them to the dough; this enhances their flavor and adds an extra layer of depth to the cookies.
Additionally, make sure the butter is at room temperature before starting, as this helps achieve the perfect texture. If you prefer chewier cookies, slightly underbake them and let them finish cooking on the baking sheets after removal from the oven.
Enjoy your festive White Chocolate Macadamia Nut Cookies with a warm cup of cocoa or your favorite holiday beverage!
Eggnog-Spiced Sugar Cookies
Eggnog-Spiced Sugar Cookies are the perfect festive treat to bring the essence of holiday cheer right into your kitchen. These cookies blend the comforting flavors of traditional sugar cookies with the rich, creamy notes of eggnog, making them a delightful addition to your holiday cookie platter.
Whether you’re enjoying them by a cozy fireplace or gifting them to friends and family, these cookies are bound to be a hit this Christmas season. The subtle warmth of nutmeg and cinnamon paired with a hint of vanilla extract elevates these cookies to a new level of holiday indulgence.
The light crunch from the sugar coating on the outside makes a perfect contrast to the soft, chewy center. Ideal for serving 4-6 people, this recipe is great for small gatherings or to enjoy as a sweet treat throughout the week.
Ingredients:
- 2 ¾ cups all-purpose flour
- 1 teaspoon baking soda
- ½ teaspoon baking powder
- 1 teaspoon ground nutmeg
- ½ teaspoon ground cinnamon
- 1 cup unsalted butter, softened
- 1 ½ cups granulated sugar
- 1 large egg
- 1 teaspoon vanilla extract
- ½ cup eggnog
- Additional granulated sugar for rolling
Instructions:
- Preheat the Oven: Start by preheating your oven to 350°F (175°C). This guarantees that your cookies bake evenly and achieve a consistent texture.
- Mix Dry Ingredients: In a medium bowl, whisk together the flour, baking soda, baking powder, nutmeg, and cinnamon. This will be your dry ingredient mixture. Set aside.
- Cream Butter and Sugar: In a large mixing bowl, use an electric mixer to cream together the softened butter and granulated sugar until light and fluffy. This should take about 2-3 minutes.
- Add Egg and Flavorings: Beat in the large egg, vanilla extract, and eggnog. Mix well until everything is fully incorporated and smooth.
- Combine Mixtures: Gradually add the dry ingredient mixture to the wet ingredients, mixing on low speed until just combined. Don’t overmix, as this can make the cookies tough.
- Shape the Cookies: Using a tablespoon or cookie scoop, scoop the dough into balls. Roll each ball in granulated sugar to coat the outside, then place them on an ungreased baking sheet, leaving about 2 inches of space between each cookie.
- Bake: Bake in the preheated oven for 10-12 minutes, or until the edges are lightly golden. The centers should be soft and slightly underbaked, as they’ll continue to set as they cool.
- Cool: Allow the cookies to cool on the baking sheet for about 5 minutes before transferring them to a wire rack to cool completely.
Extra Tips:
For an extra touch of holiday flair, you can drizzle the cookies with a simple glaze made from powdered sugar and a small amount of eggnog, or sprinkle them with festive colored sugar before baking.
If you prefer a stronger eggnog flavor, you can increase the amount of nutmeg slightly, but be cautious as it can easily overpower other flavors. These cookies also freeze well, so you can make them in advance and simply thaw them at room temperature when you’re ready to enjoy.
Spiced Molasses Cookies
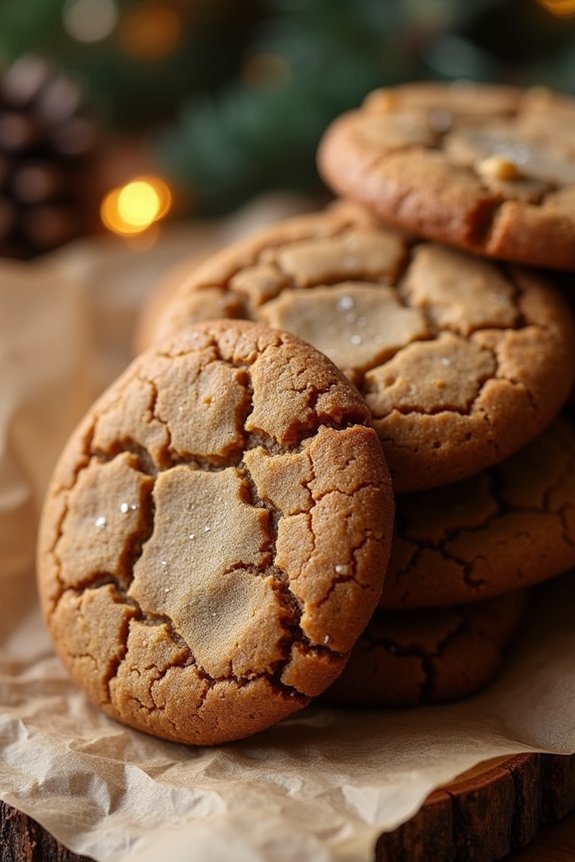
Spiced Molasses Cookies are a delightful holiday treat, perfect for bringing warmth and cheer to your Christmas festivities. These cookies combine the rich, deep flavors of molasses with a blend of aromatic spices, creating a cookie that’s both chewy and full of depth. The spices, including ginger, cinnamon, and cloves, lend a festive aroma that fills your home with the spirit of the season.
Whether you’re planning to gift these cookies or serve them at a holiday gathering, they’re sure to be a hit with friends and family alike. The combination of ingredients in Spiced Molasses Cookies gives them a unique texture and taste, making them a standout choice among Christmas cookie recipes.
The molasses provides a robust sweetness and a chewy texture, while the blend of spices adds a warm, inviting flavor profile. This recipe yields approximately 24-30 cookies, perfect for serving 4-6 people, depending on how many cookies each person enjoys. These cookies aren’t only delicious but also relatively easy to prepare, guaranteeing that even novice bakers can achieve impressive results.
Ingredients for Spiced Molasses Cookies (Serving Size: 4-6 people):
- 2 cups all-purpose flour
- 1 teaspoon baking soda
- 1/4 teaspoon salt
- 1 teaspoon ground cinnamon
- 1 teaspoon ground ginger
- 1/2 teaspoon ground cloves
- 1/2 cup unsalted butter, softened
- 1/2 cup granulated sugar
- 1/4 cup brown sugar, packed
- 1 large egg
- 1/3 cup molasses
- 1 teaspoon vanilla extract
- Extra granulated sugar for rolling
Cooking Instructions:
- Preheat the Oven: Start by preheating your oven to 350°F (175°C). Line two baking sheets with parchment paper or silicone baking mats and set aside.
- Mix Dry Ingredients: In a medium-sized bowl, whisk together the all-purpose flour, baking soda, salt, ground cinnamon, ground ginger, and ground cloves. This will guarantee that the spices are evenly distributed throughout the flour.
- Cream Butter and Sugars: In a large mixing bowl, use an electric mixer to cream together the softened butter, granulated sugar, and brown sugar until light and fluffy. This should take about 2-3 minutes.
- Add Wet Ingredients: Beat in the egg, followed by the molasses and vanilla extract. Mix until the ingredients are well combined and the mixture is smooth.
- Combine Wet and Dry Ingredients: Gradually add the dry ingredient mixture to the wet ingredients, mixing on low speed until just combined. Be careful not to overmix, as this can toughen the cookies.
- Shape the Cookies: Scoop tablespoons of dough and roll them into balls. Roll each ball in granulated sugar to coat, then place them on the prepared baking sheets about 2 inches apart.
- Bake the Cookies: Bake in the preheated oven for 8-10 minutes, or until the edges are set but the centers are still soft. The cookies will continue to firm up as they cool.
- Cool and Store: Allow the cookies to cool on the baking sheets for about 5 minutes before transferring them to a wire rack to cool completely. Store the cooled cookies in an airtight container to maintain their chewiness.
Extra Tips:
For the best results, verify that your butter is softened to room temperature, as this will help in achieving the right texture when creaming with the sugars. If you prefer a slightly crispier cookie, extend the baking time by an additional 1-2 minutes, but be careful not to overbake as this can lead to a more brittle cookie.
Additionally, chilling the dough for about 30 minutes before rolling can help prevent the cookies from spreading too much during baking. Enjoy your Spiced Molasses Cookies with a glass of milk or a cup of tea for a truly comforting holiday treat!
Raspberry Linzer Cookies
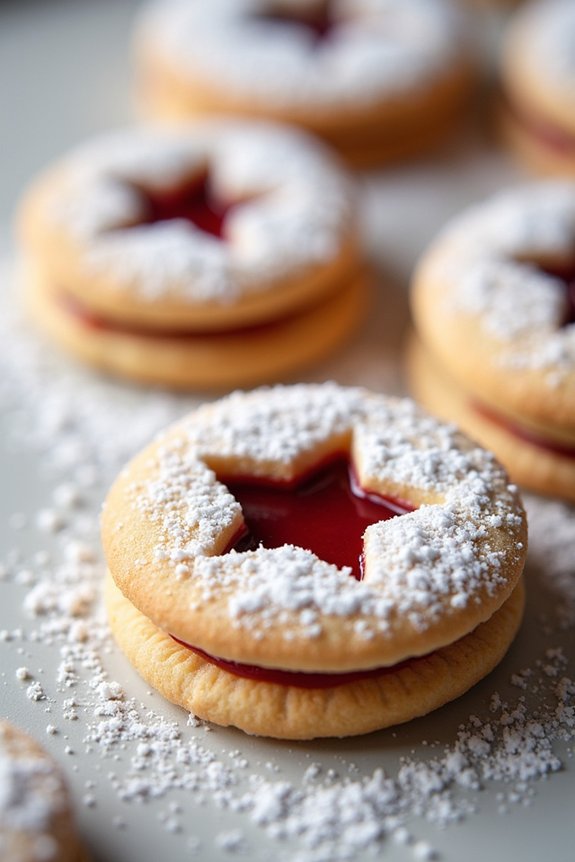
Raspberry Linzer Cookies are a delightful treat perfect for the holiday season. These traditional Austrian cookies are composed of buttery, nutty shortbread dough sandwiched together with a tart raspberry jam filling, creating a beautiful and delicious dessert. With their festive appearance, they make an elegant addition to any Christmas cookie platter.
The distinct cut-out shapes on the top layer of the cookies reveal the vibrant red jam, resembling small, edible stained-glass windows.
Linzer cookies require a bit of time and patience, but the end result is certainly worth the effort. They combine the flavors of almonds, butter, and raspberry in a way that’s both sophisticated and comforting. The cookies are tender and slightly crumbly, while the jam adds a fruity contrast that enhances the overall taste.
This recipe serves 4-6 people, making it ideal for small gatherings or as a thoughtful homemade gift.
Ingredients:
- 1 cup unsalted butter, softened
- 1/2 cup granulated sugar
- 1 teaspoon vanilla extract
- 1 large egg yolk
- 2 cups all-purpose flour
- 1 cup almond flour
- 1/4 teaspoon salt
- 3/4 cup raspberry jam
- Powdered sugar, for dusting
Instructions:
- Prepare the Dough: In a large mixing bowl, cream together the softened butter and granulated sugar using an electric mixer until light and fluffy. Add in the vanilla extract and egg yolk, mixing until fully incorporated.
- Mix Dry Ingredients: In a separate bowl, whisk together the all-purpose flour, almond flour, and salt. Gradually add the dry ingredients to the butter mixture, mixing on low speed until a dough forms. Divide the dough into two equal portions, shape them into discs, wrap them in plastic wrap, and refrigerate for at least 1 hour.
- Roll Out the Dough: Preheat your oven to 350°F (175°C). On a lightly floured surface, roll out one disc of dough to about 1/8-inch thickness. Use a round cookie cutter to cut out cookies. For half of the cookies, use a smaller, decorative cutter to cut out the center of each. Repeat with the second disc of dough.
- Bake the Cookies: Line a baking sheet with parchment paper and place the cookies about 1 inch apart. Bake for 10-12 minutes or until the edges are lightly golden. Allow them to cool completely on a wire rack.
- Assemble the Cookies: Spread about 1 teaspoon of raspberry jam on the flat side of the whole cookies. Dust the tops of the cut-out cookies with powdered sugar. Place the cut-out cookies on top of the jam-covered cookies, pressing gently to sandwich them together.
- Serve and Enjoy: Allow the cookies to set for a few minutes before serving. The raspberry jam will hold the two cookie layers together, creating a delightful and festive treat.
Extra Tips: When making Raspberry Linzer Cookies, make sure your dough is well-chilled before rolling it out; this will make it easier to handle and prevent it from sticking to your rolling pin.
If the dough becomes too soft while working, simply return it to the refrigerator for a few minutes. You can also experiment with different flavors by substituting the raspberry jam with other fruit preserves, like apricot or strawberry, for a unique twist.
Dusting the top cookies with powdered sugar before assembling makes for a neater presentation.
Chocolate-Dipped Shortbread
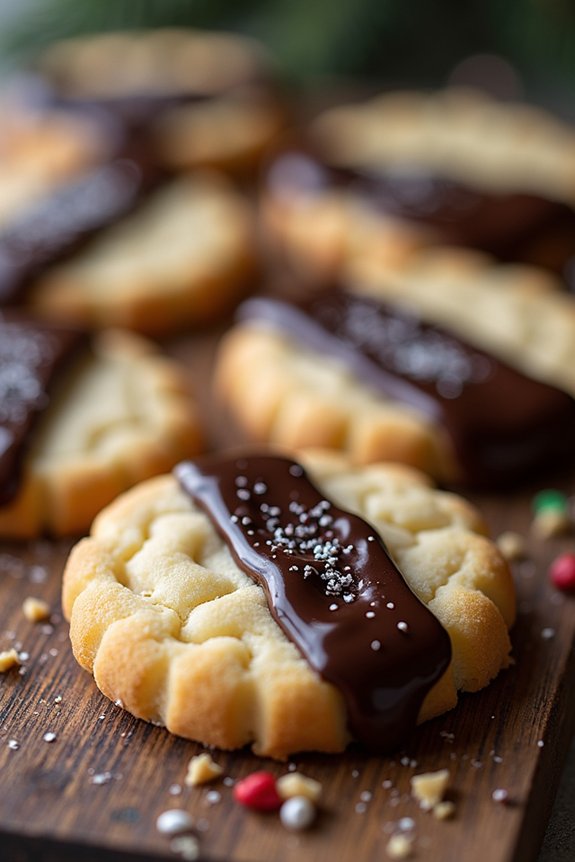
Indulge in the delightful combination of rich, buttery shortbread and decadent chocolate with this Chocolate-Dipped Shortbread recipe. Perfect for the holiday season, these cookies aren’t only a treat to the senses but also a joy to make. The buttery flavor of the shortbread pairs perfectly with the smooth, rich chocolate, creating a holiday cookie that’s both simple to make and delicious to eat.
Whether you’re baking for family gatherings, gifting to friends, or simply treating yourself, these cookies are sure to impress. Shortbread is a classic holiday cookie that’s known for its simplicity and melt-in-your-mouth texture. By dipping these cookies in chocolate, you add an extra layer of indulgence that elevates the traditional shortbread to a festive favorite.
This recipe makes enough for a serving size of 4-6 people, making it perfect for sharing during the holiday season. Follow this straightforward recipe to create your own batch of Chocolate-Dipped Shortbread cookies.
Ingredients:
- 1 cup unsalted butter, softened
- 3/4 cup powdered sugar
- 1 teaspoon vanilla extract
- 2 cups all-purpose flour
- 1/4 teaspoon salt
- 1 cup semi-sweet or dark chocolate chips
- 1 tablespoon vegetable oil (optional)
- Sprinkles or crushed nuts for decoration (optional)
Instructions:
- Prepare the Dough: In a large mixing bowl, cream together the softened butter and powdered sugar until light and fluffy. Add in the vanilla extract and mix until combined.
- Incorporate Dry Ingredients: Gradually add the all-purpose flour and salt to the butter mixture. Mix until a dough forms. If the dough is too crumbly, add a teaspoon of water until it binds together.
- Chill the Dough: Gather the dough into a ball, wrap it in plastic wrap, and refrigerate for at least 30 minutes. This helps the dough firm up and makes it easier to roll out.
- Preheat the Oven: Preheat your oven to 350°F (175°C) and line a baking sheet with parchment paper.
- Roll Out and Cut the Dough: On a lightly floured surface, roll out the dough to about 1/4-inch thickness. Use a cookie cutter of your choice to cut out shapes and place them on the prepared baking sheet.
- Bake the Cookies: Bake the shortbread cookies in the preheated oven for 10-12 minutes or until the edges are lightly golden. Allow them to cool on the baking sheet for 5 minutes, then transfer them to a wire rack to cool completely.
- Melt the Chocolate: In a microwave-safe bowl, combine the chocolate chips and vegetable oil (if using). Microwave in 30-second intervals, stirring after each, until the chocolate is smooth and melted.
- Dip the Cookies: Once the cookies have cooled, dip each one halfway into the melted chocolate. Let the excess chocolate drip off and place the dipped cookies back onto the parchment paper.
- Decorate: Before the chocolate sets, sprinkle the cookies with sprinkles or crushed nuts if desired. Allow the chocolate to set completely before serving.
Extra Tips:
For best results, make certain your butter is properly softened at room temperature before starting the recipe, as this will help to achieve a smooth, creamy dough. If you find the dough too sticky when rolling it out, lightly flour your rolling pin and surface to prevent sticking.
For a festive touch, experiment with different shapes and decorations, such as edible glitter or finely chopped dried fruit. When melting chocolate, take care not to overheat it, as this can cause it to seize. If you prefer a thicker chocolate coating, dip the cookies twice, allowing the first layer to set before applying the second.
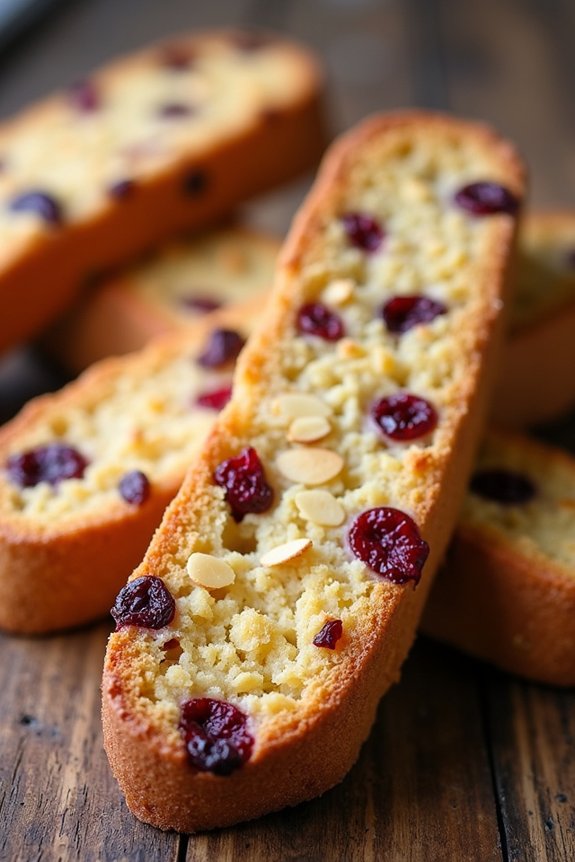
Pistachio and Cranberry Biscotti
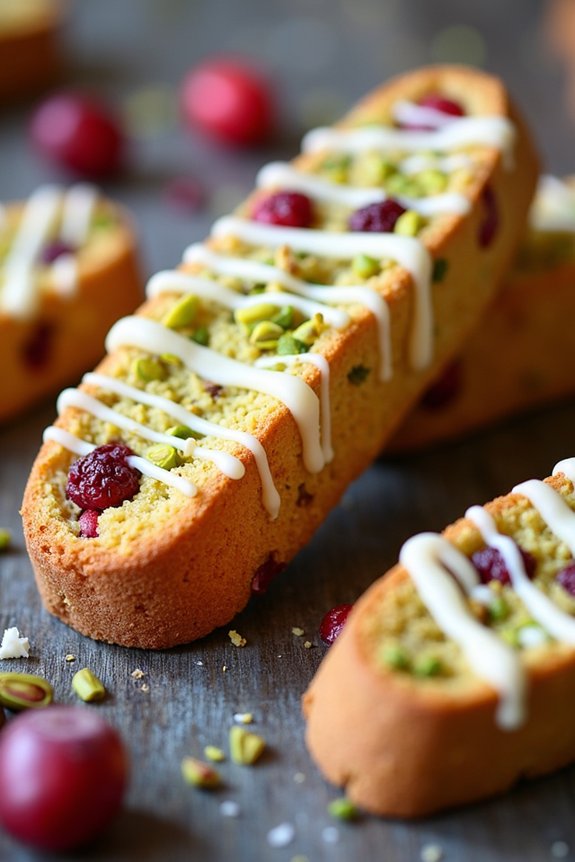
Pistachio and Cranberry Biscotti is a delightful twist on traditional Italian biscotti, blending the nutty flavor of pistachios with the sweet-tart burst of dried cranberries. This twice-baked cookie is perfect for pairing with a hot cup of coffee or tea during the holiday season.
The vibrant green and red colors of the pistachios and cranberries not only make these biscotti festive but also incredibly appealing. Whether you’re hosting a Christmas gathering or looking for a homemade gift idea, these biscotti will be a standout treat.
The process of making biscotti is wonderfully straightforward, involving an initial bake to form a log, which is then sliced and baked again to achieve that signature crisp texture. The combination of flavors and the contrasting textures between the crunchy nuts and chewy fruit make every bite a delight.
Plus, these biscotti can be stored for several weeks, making them a convenient make-ahead option for busy holiday schedules.
Ingredients (Serving Size: 4-6 people)
- 2 cups all-purpose flour
- 1 cup granulated sugar
- 1 teaspoon baking powder
- 1/4 teaspoon salt
- 3 large eggs
- 1 teaspoon vanilla extract
- 1/2 teaspoon almond extract
- 1 cup shelled pistachios
- 3/4 cup dried cranberries
- Zest of 1 orange
Cooking Instructions
- Preheat and Prepare the Oven: Preheat your oven to 350°F (175°C). Line a baking sheet with parchment paper or a silicone baking mat to prevent sticking.
- Mix Dry Ingredients: In a large mixing bowl, whisk together the flour, sugar, baking powder, and salt. This guarantees that the baking powder is evenly distributed throughout the flour.
- Combine Wet Ingredients: In another bowl, beat the eggs, vanilla extract, and almond extract until well combined. Add the orange zest and mix it into the wet ingredients.
- Form the Dough: Gradually add the wet ingredients to the dry ingredients, stirring until just combined. Fold in the pistachios and cranberries, verifying they’re evenly distributed throughout the dough.
- Shape the Biscotti Log: Transfer the dough onto a lightly floured surface. Divide it in half and shape each half into a log about 10 inches long and 2 inches wide. Place the logs onto the prepared baking sheet.
- First Bake: Bake the logs in the preheated oven for 25-30 minutes, or until they’re firm to the touch and lightly golden. Remove from the oven and let them cool for about 10 minutes.
- Slice the Biscotti: Reduce the oven temperature to 325°F (160°C). Using a sharp serrated knife, slice the logs diagonally into 1/2-inch thick slices.
- Second Bake: Arrange the slices cut side down on the baking sheet. Bake for an additional 10-12 minutes on each side, or until they’re crisp and golden.
- Cool and Store: Allow the biscotti to cool completely on a wire rack. Once cooled, store them in an airtight container.
Extra Tips
For a truly festive touch, consider drizzling the cooled biscotti with white chocolate. Simply melt some white chocolate chips and use a spoon or piping bag to create thin lines across the biscotti.
Additionally, if you prefer softer biscotti, reduce the second bake time slightly. Always use a sharp serrated knife for cutting to verify clean slices without crumbling. Enjoy your Pistachio and Cranberry Biscotti with a hot beverage for a perfect holiday treat!