

As Christmas approaches, I can’t help but get excited about all the sweet treats that make the season special. Picture a table with a classic Yule Log Cake, gingerbread trifles, and peppermint chocolate bark. Each dessert is a little piece of holiday magic, ready to delight your taste buds. Your guests will light up as they enjoy these festive creations. Ready to make your holiday gatherings unforgettable?
Classic Yule Log Cake
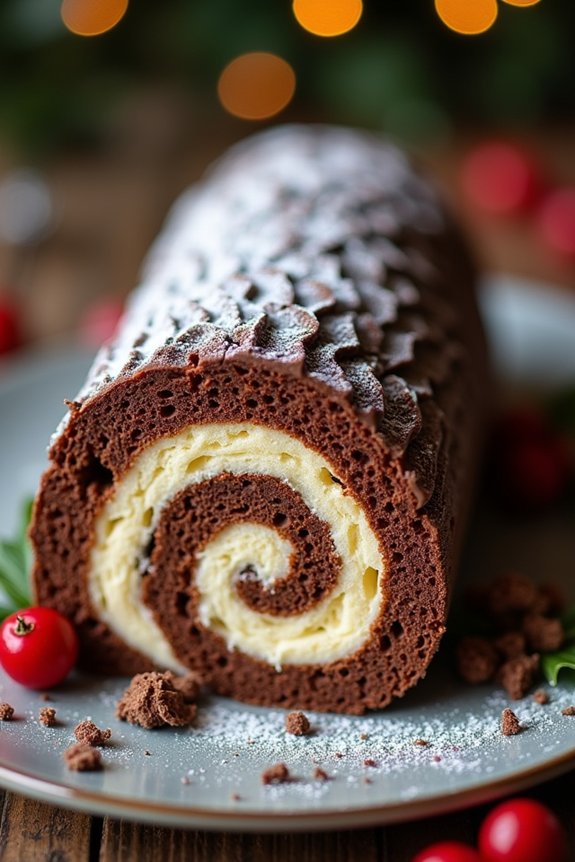
The Classic Yule Log Cake, also known as Bûche de Noël, is a traditional French Christmas dessert that resembles a miniature log. It’s a delightful combination of a light and airy sponge cake filled with creamy frosting and rolled into a log shape, then decorated to mimic the appearance of a wooden log.
This festive dessert isn’t only visually appealing but also delicious, making it a perfect centerpiece for your holiday table. With its rich flavors and charming presentation, the Yule Log Cake is certain to impress your family and friends during the holiday season.
This recipe serves 4-6 people, making it ideal for a cozy Christmas gathering. The process involves preparing a delicate chocolate sponge cake, a luscious buttercream filling, and a ganache or icing to create the bark-like exterior. Whether you’re seasoned in baking or trying your hand at a Yule Log for the first time, this recipe will guide you step-by-step to create a stunning and scrumptious dessert that embodies the spirit of Christmas.
Ingredients:
- 4 large eggs
- 1/2 cup granulated sugar
- 1 teaspoon vanilla extract
- 1/2 cup all-purpose flour
- 1/4 cup unsweetened cocoa powder
- 1/2 teaspoon baking powder
- 1/4 teaspoon salt
- 1 cup heavy cream
- 2 tablespoons confectioners’ sugar
- 1 teaspoon vanilla extract (for filling)
- 1 cup unsalted butter, softened
- 1 1/2 cups confectioners’ sugar (for frosting)
- 1/3 cup unsweetened cocoa powder (for frosting)
- 1 teaspoon vanilla extract (for frosting)
- 2 tablespoons milk
- Optional: powdered sugar, chocolate shavings, or berries for decoration
Instructions:
- Preheat and Prepare: Preheat your oven to 350°F (175°C). Line a 10×15-inch jelly roll pan with parchment paper, leaving a bit of overhang for easy removal later.
- Make the Sponge Cake: In a large bowl, beat the eggs and granulated sugar together using an electric mixer on high speed until the mixture becomes thick and pale, about 5 minutes. Add the vanilla extract and mix well.
- Combine Dry Ingredients: In a separate bowl, sift together the flour, cocoa powder, baking powder, and salt. Gradually fold the dry ingredients into the egg mixture using a spatula, being careful not to deflate the batter.
- Bake the Cake: Pour the batter into the prepared pan and spread it evenly. Bake in the preheated oven for 10-12 minutes, or until the cake springs back when lightly touched.
- Roll the Cake: Once baked, remove the cake from the oven and immediately roll it up with the parchment paper, starting from the short edge. Allow it to cool completely in this rolled position.
- Prepare the Filling: In a mixing bowl, whip the heavy cream, confectioners’ sugar, and vanilla extract together until stiff peaks form.
- Unroll and Fill: Carefully unroll the cooled cake and spread the whipped cream filling evenly over the surface. Re-roll the cake without the parchment paper and place it seam-side down on a serving platter.
- Make the Frosting: Beat together the softened butter, confectioners’ sugar, cocoa powder, vanilla extract, and milk until smooth and creamy. Adjust the consistency with more milk if needed.
- Frost the Cake: Spread the frosting over the rolled cake, using a fork or spatula to create a bark-like texture. Decorate with optional powdered sugar, chocolate shavings, or berries.
- Chill and Serve: Refrigerate the Yule Log for at least an hour before serving to allow the flavors to meld and the frosting to set. Slice and enjoy!
Extra Tips:
When making the Classic Yule Log Cake, verify that the sponge cake isn’t overbaked; it should be pliable for rolling. Rolling the cake while it’s still warm helps prevent cracks.
For a more authentic log appearance, you can shape one end of the roll slightly tapered. Decorating with powdered sugar can mimic snow, adding to the festive look. If you want a richer flavor, consider adding a splash of coffee or rum to the frosting. Enjoy your delightful creation with a warm cup of holiday cheer!
Gingerbread Trifle Delight
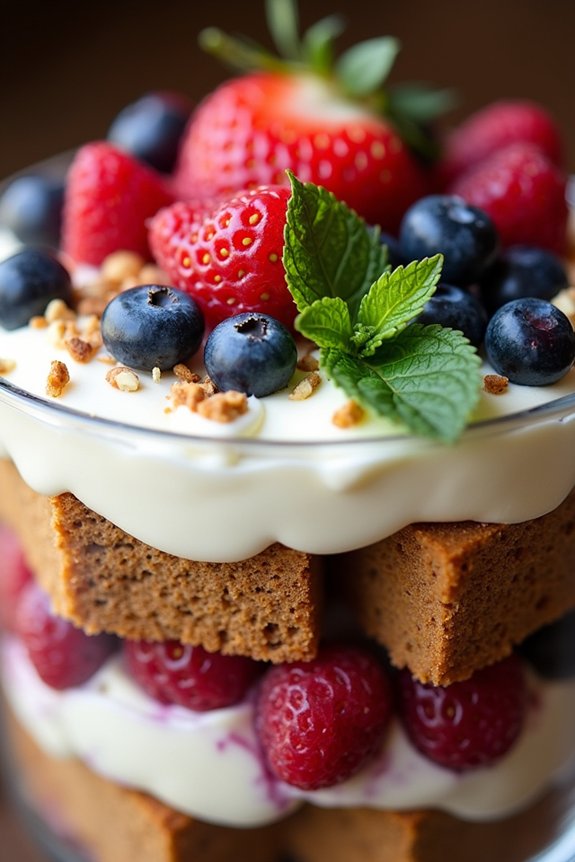
The holidays are the perfect time to indulge in sweet treats, and what better way to celebrate than with a delightful Gingerbread Trifle Delight? This dessert combines the warm, spiced flavors of gingerbread with layers of creamy, rich custard and a hint of tangy fruit, creating a festive and indulgent treat that’s perfect for any holiday gathering.
The trifle isn’t only visually stunning with its layers of contrasting textures and colors, but it also captures the essence of the season with every bite. Whether you’re hosting a holiday party or simply spending a cozy evening at home, this trifle is bound to bring joy and satisfy your sweet tooth.
Gingerbread Trifle Delight is a versatile dessert that allows you to showcase your creativity. While the classic elements of gingerbread, custard, and fruit remain, you can easily customize the trifle by adding different fruits, nuts, or even a splash of rum for an adult twist.
Preparing this dessert ahead of time also allows the flavors to meld together beautifully, making it an excellent choice for those who like to plan their holiday meals in advance. Perfect for serving 4-6 people, this recipe will become a cherished addition to your holiday traditions.
Ingredients:
- 1 loaf of gingerbread cake (store-bought or homemade)
- 2 cups vanilla custard
- 1 cup heavy whipping cream
- 2 tablespoons confectioners’ sugar
- 1 teaspoon vanilla extract
- 1 cup mixed berries (such as raspberries, strawberries, and blueberries)
- 1/4 cup crystallized ginger, chopped
- 1/4 cup toasted pecans, chopped
- Mint leaves for garnish (optional)
Cooking Instructions:
- Prepare the Gingerbread: Begin by cutting the gingerbread loaf into 1-inch cubes. This will form the base and layers of your trifle. Set aside.
- Make the Whipped Cream: In a mixing bowl, combine the heavy whipping cream, confectioners’ sugar, and vanilla extract. Use an electric mixer to whip the mixture until soft peaks form. Be careful not to over-whip, as the cream can turn into butter.
- Assemble the Trifle: In a trifle dish or a large glass bowl, start by placing a layer of gingerbread cubes at the bottom. Then, spoon over a layer of vanilla custard, making sure it covers the gingerbread.
- Add Fruits and Nuts: Scatter a layer of mixed berries over the custard. Sprinkle some chopped crystallized ginger and toasted pecans for added texture and flavor.
- Repeat Layers: Repeat the layering process with remaining gingerbread cubes, custard, berries, ginger, and pecans until you reach the top of the trifle dish.
- Top with Whipped Cream: Finish with a generous layer of whipped cream on top. Use a spatula to spread it evenly, creating a smooth surface.
- Garnish and Chill: Garnish the top of the trifle with additional mixed berries, a few mint leaves, and a final sprinkle of chopped pecans if desired. Cover the trifle with plastic wrap and refrigerate for at least 2 hours, or overnight, to allow the flavors to develop.
Extra Tips:
When making the Gingerbread Trifle Delight, feel free to experiment with the ingredients. You can substitute the berries with other fruits like pomegranate seeds or diced kiwi for a vibrant twist.
For a more decadent version, drizzle some caramel or chocolate sauce between layers. Make sure the gingerbread isn’t too dry, as it needs to absorb some moisture from the custard and fruit for the best texture.
Finally, letting the trifle sit in the fridge overnight enhances the flavors, making it an even more satisfying treat for your holiday celebrations.
Peppermint Chocolate Bark
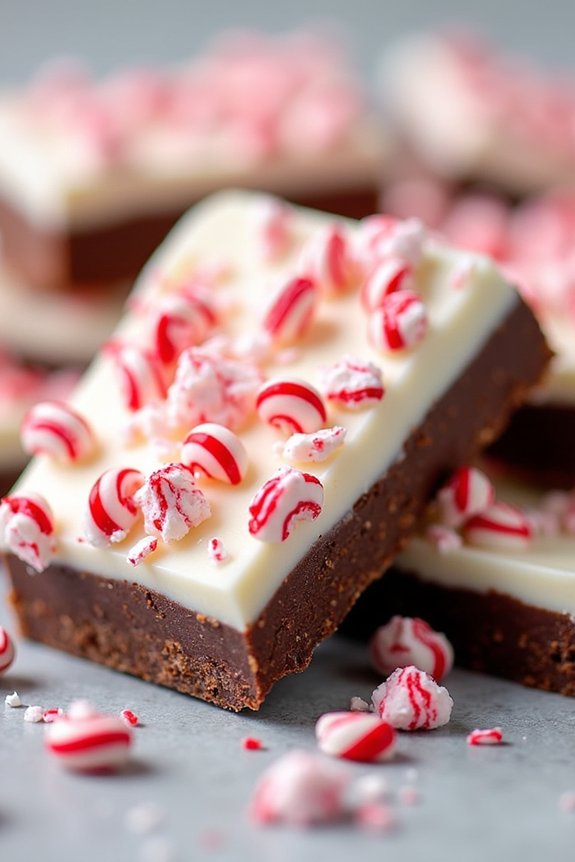
Peppermint Chocolate Bark is a delightful and festive treat that’s perfect for the holiday season. This delicious dessert combines the rich, smooth flavors of dark and white chocolate with the invigorating crunch of peppermint. Not only is it visually appealing with its contrasting colors and textures, but it’s also incredibly easy to make, making it an ideal choice for a quick homemade gift or a sweet addition to your Christmas dessert table.
The beauty of Peppermint Chocolate Bark lies in its simplicity and versatility. You can prepare it in under an hour, and it requires just a handful of ingredients that are readily available. The combination of chocolate and peppermint creates a classic holiday flavor that’s sure to be a hit with both kids and adults alike.
Whether you’re making it for a festive party or simply to enjoy with a warm cup of cocoa by the fire, this bark will surely bring a touch of holiday cheer to your celebrations.
Ingredients for 4-6 servings:
- 12 ounces of dark chocolate chips
- 12 ounces of white chocolate chips
- 1 teaspoon of peppermint extract
- 1/2 cup of crushed candy canes or peppermint candies
Instructions:
1. Prepare the Baking Sheet:
Line a baking sheet with parchment paper. This will prevent the chocolate from sticking and will make it easier to remove the bark once it’s set.
2. Melt the Dark Chocolate:
In a microwave-safe bowl, melt the dark chocolate chips in the microwave. Heat them in 30-second increments, stirring in between each interval until completely melted and smooth.
3. Add Peppermint Extract:
Stir in the peppermint extract into the melted dark chocolate. This will infuse the chocolate with a delightful minty flavor.
4. Spread the Dark Chocolate:
Pour the melted dark chocolate onto the prepared baking sheet and spread it evenly using a spatula, aiming for about 1/4 inch thickness.
5. Melt the White Chocolate:
In a separate microwave-safe bowl, melt the white chocolate chips using the same method as the dark chocolate.
6. Layer the White Chocolate:
Once the white chocolate is melted and smooth, pour it over the dark chocolate layer, spreading it evenly.
7. Add Crushed Peppermint:
Sprinkle the crushed candy canes or peppermint candies evenly over the top of the white chocolate layer. Press them gently into the chocolate so that they adhere.
8. Chill the Bark:
Place the baking sheet in the refrigerator for about 30 minutes or until the chocolate is completely set and hardened.
9. Break into Pieces:
Once the chocolate is firm, remove the baking sheet from the fridge and break the bark into pieces of your desired size.
Extra Tips:
When making Peppermint Chocolate Bark, make sure that your work area is clean and dry, as any moisture can cause the chocolate to seize. Additionally, be patient when melting the chocolate; overheating can also lead to seizing or burning.
Feel free to experiment with different types of chocolate, such as milk chocolate or semisweet, to suit your taste. If you prefer a less intense peppermint flavor, reduce the amount of extract slightly. Finally, store the bark in an airtight container at room temperature or in the fridge to maintain its freshness and crunch.
Spiced Eggnog Cheesecake
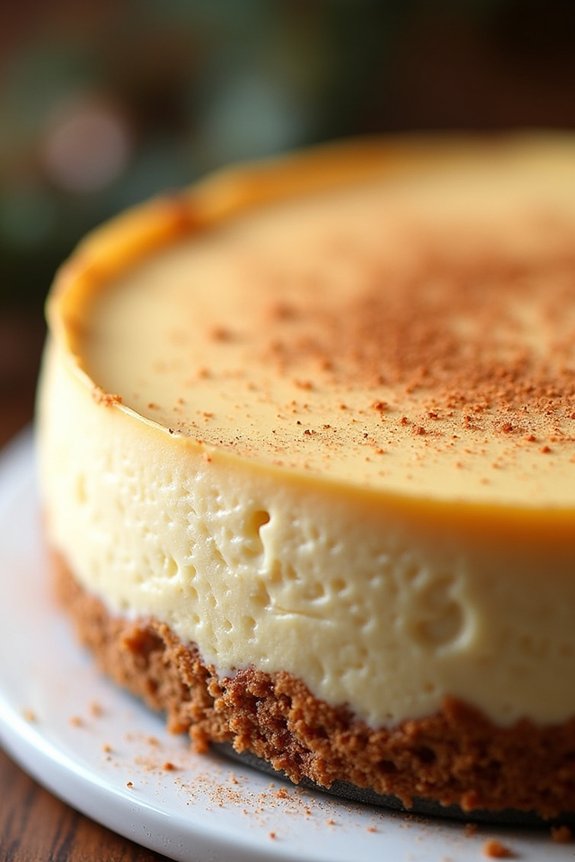
Indulge in the festive spirit with a rich and creamy Spiced Eggnog Cheesecake, perfectly capturing the essence of the holiday season. This delightful dessert combines the smooth, velvety texture of traditional cheesecake with the warm, inviting flavors of eggnog and a hint of spice. Ideal for a cozy family gathering or a holiday party, this cheesecake is bound to impress your guests with its unique twist on a classic favorite.
The key to this dessert is balancing the creamy, spiced filling with a buttery crust and a light topping, creating a harmonious blend of flavors and textures. With a preparation time of about 30 minutes and a baking time of just over an hour, this Spiced Eggnog Cheesecake is a manageable yet impressive addition to your holiday dessert table. Below is the recipe, designed to serve 4-6 people.
Ingredients:
- 1 1/2 cups graham cracker crumbs
- 1/4 cup granulated sugar
- 1/2 cup unsalted butter, melted
- 3 (8 oz) packages cream cheese, softened
- 1 cup granulated sugar
- 3 tablespoons all-purpose flour
- 3/4 cup eggnog
- 2 teaspoons vanilla extract
- 1/2 teaspoon ground cinnamon
- 1/2 teaspoon ground nutmeg
- 4 large eggs
Instructions:
- Preheat and Prepare: Preheat your oven to 325°F (160°C). Grease a 9-inch springform pan and set aside.
- Make the Crust: In a medium bowl, combine the graham cracker crumbs, 1/4 cup of sugar, and melted butter. Mix well until the crumbs are moistened. Press this mixture firmly into the bottom of the prepared springform pan to form an even crust.
- Prepare the Filling: In a large mixing bowl, beat the softened cream cheese until smooth and creamy. Gradually add 1 cup of sugar and flour, continuing to mix until well combined.
- Add Eggnog and Spices: Pour in the eggnog, vanilla extract, cinnamon, and nutmeg. Mix until all ingredients are fully incorporated and the mixture is smooth.
- Incorporate the Eggs: Add the eggs one at a time, beating well after each addition. This guarantees the filling is light and fluffy.
- Assemble and Bake: Pour the cheesecake filling over the prepared crust in the springform pan. Smooth the top with a spatula. Place the pan on a baking sheet to catch any drips and bake for 60-70 minutes, or until the center is set and the edges are slightly golden.
- Cool and Chill: Remove the cheesecake from the oven and let it cool to room temperature. Once cooled, refrigerate for at least 4 hours, or overnight, to allow it to set properly.
- Serve: Before serving, you can sprinkle additional cinnamon and nutmeg on top for extra flavor. Carefully remove the cheesecake from the springform pan, slice, and enjoy.
Extra Tips:
To guarantee the best texture, make sure the cream cheese is thoroughly softened before mixing. This prevents lumps in the batter. Additionally, avoid overbaking; the center should still have a slight jiggle when you turn off the oven. Allowing the cheesecake to cool gradually in the oven with the door slightly ajar can help prevent cracks on the surface. For a decorative touch, consider topping the cheesecake with whipped cream or a sprinkle of crushed graham crackers.
Red Velvet Snowball Cookies
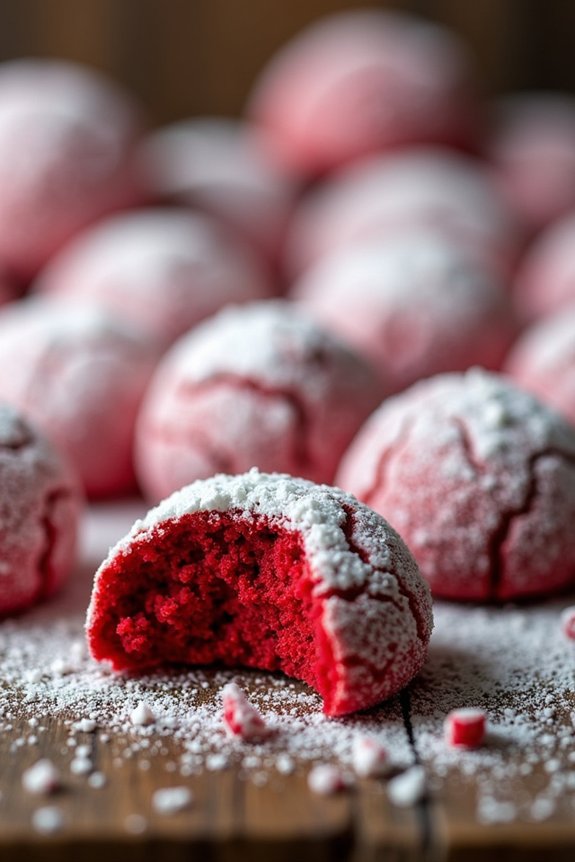
Red Velvet Snowball Cookies are a delightful treat that combines the rich, velvety flavor of red velvet cake with the classic taste of a snowball cookie. These cookies are perfect for the holiday season, offering a festive look with their vibrant red color and a dusting of powdered sugar that resembles freshly fallen snow. Their tender crumb and sweet, buttery flavor make them a standout addition to any Christmas dessert table.
To make this holiday favorite, you’ll need to start by gathering all the necessary ingredients. The process involves creating a dough that’s both simple and forgiving, allowing for a fun and easy baking experience. Once baked, the cookies are rolled in powdered sugar for that signature snowball effect. Whether you’re serving them at a family gathering or giving them as a thoughtful homemade gift, these Red Velvet Snowball Cookies are sure to impress.
Ingredients (Serves 4-6):
- 1 cup unsalted butter, softened
- 1/2 cup granulated sugar
- 1 teaspoon vanilla extract
- 1 tablespoon red food coloring
- 2 cups all-purpose flour
- 1/4 cup cocoa powder
- 1/4 teaspoon salt
- 1 cup chopped pecans (optional)
- 1 cup powdered sugar, for rolling
Cooking Instructions:
- Preheat and Prepare: Preheat your oven to 350°F (175°C). Line a baking sheet with parchment paper or a silicone baking mat and set aside.
- Cream Butter and Sugar: In a large mixing bowl, cream together the softened butter and granulated sugar until light and fluffy. This should take about 2-3 minutes with an electric mixer.
- Add Vanilla and Food Coloring: Mix in the vanilla extract and red food coloring until fully incorporated. The mixture should have a uniform red color.
- Combine Dry Ingredients: In a separate bowl, whisk together the flour, cocoa powder, and salt. Gradually add the dry ingredients to the butter mixture, mixing until just combined.
- Add Pecans (Optional): If using, fold in the chopped pecans until evenly distributed throughout the dough.
- Shape the Cookies: Using a tablespoon or a small cookie scoop, shape the dough into 1-inch balls and place them on the prepared baking sheet about 1 inch apart.
- Bake: Bake in the preheated oven for 12-15 minutes, or until the cookies are set but not browned.
- Cool and Roll in Sugar: Allow the cookies to cool on the baking sheet for 5 minutes, then roll them in powdered sugar while they’re still warm. Transfer to a wire rack to cool completely. Once cooled, roll them in powdered sugar a second time for a thicker coating.
Extra Tips:
For the best results, confirm the butter is properly softened before you start; this aids in creating a smooth, well-mixed dough. If you prefer a more intense red color, feel free to adjust the amount of food coloring to your preference.
When rolling the cookies in powdered sugar, do so gently to avoid breaking the delicate cookies. These cookies can be stored in an airtight container for up to a week, making them a perfect make-ahead option for your holiday festivities.
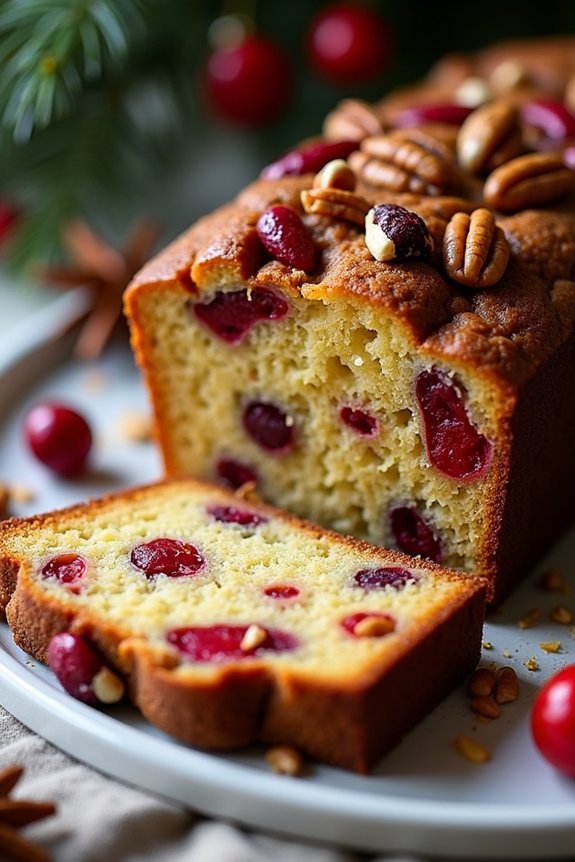
Cranberry Orange Bundt Cake
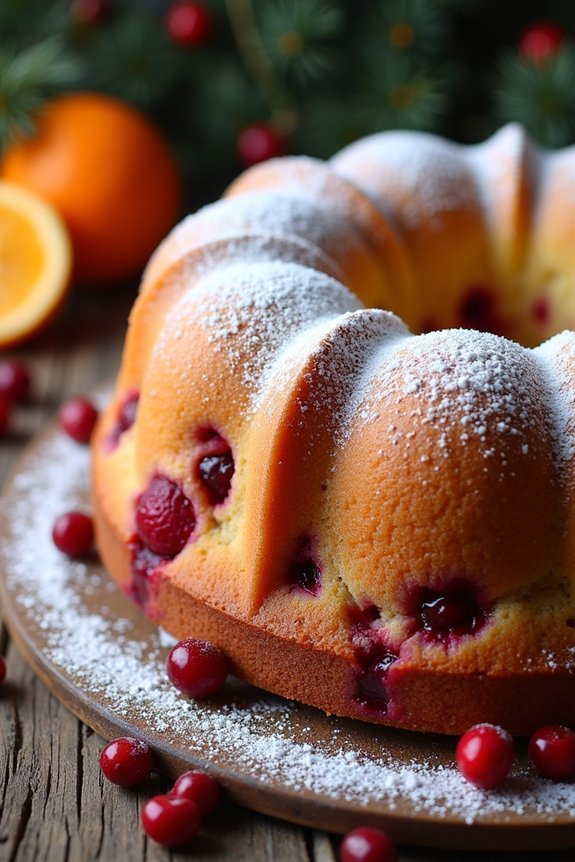
Cranberry Orange Bundt Cake is a delightful dessert that perfectly combines the tartness of cranberries with the bright, zesty flavor of oranges. This festive cake isn’t only a visual treat with its vibrant colors but also a burst of flavors that symbolize the joy of Christmas.
Whether you’re hosting a holiday gathering or simply want to enjoy a sweet treat with family, this cake is bound to impress with its moist texture and fragrant aroma.
Bundt cakes are known for their characteristic ring shape, and the Cranberry Orange Bundt Cake is no exception. The cake is baked in a bundt pan, which gives it a beautiful presentation without the need for elaborate decoration.
The cranberries add a pop of color and a touch of tartness, while the orange zest infuses the cake with a fresh, citrusy scent. This recipe serves 4-6 people, making it an ideal choice for small gatherings or an intimate family dessert.
Ingredients:
- 1 1/2 cups all-purpose flour
- 1 teaspoon baking powder
- 1/2 teaspoon baking soda
- 1/4 teaspoon salt
- 1/2 cup unsalted butter, softened
- 1 cup granulated sugar
- 2 large eggs
- 1 teaspoon vanilla extract
- 1/2 cup sour cream
- 1 tablespoon orange zest
- 1/4 cup fresh orange juice
- 1 cup fresh or frozen cranberries
- 1/4 cup powdered sugar (for dusting)
Cooking Instructions:
- Preheat the Oven: Start by preheating your oven to 350°F (175°C). Grease a bundt pan with butter or non-stick spray, then lightly flour it to guarantee the cake releases easily after baking.
- Mix Dry Ingredients: In a medium-sized bowl, whisk together the all-purpose flour, baking powder, baking soda, and salt. This guarantees that the leavening agents are evenly distributed throughout the flour.
- Cream Butter and Sugar: In a large mixing bowl, beat the softened butter and granulated sugar together using an electric mixer on medium speed until the mixture is light and fluffy, about 2-3 minutes.
- Add Eggs and Vanilla: Add the eggs one at a time, beating well after each addition. Then mix in the vanilla extract to incorporate the flavors.
- Combine Wet Ingredients: Stir in the sour cream, orange zest, and orange juice until well blended. The sour cream adds moisture and richness to the cake, while the orange components enhance the citrus flavor.
- Combine Dry and Wet Mixtures: Gradually add the dry ingredients to the wet mixture, beating on low speed until just combined. Be careful not to overmix, as this can lead to a dense cake.
- Fold in Cranberries: Gently fold in the cranberries using a spatula, ensuring they’re evenly distributed throughout the batter.
- Pour and Bake: Pour the batter into the prepared bundt pan, smoothing the top with a spatula. Bake in the preheated oven for 40-45 minutes, or until a toothpick inserted into the center of the cake comes out clean.
- Cool and Decorate: Allow the cake to cool in the pan for about 10 minutes before inverting it onto a wire rack to cool completely. Once cooled, dust the cake with powdered sugar using a fine-mesh sieve for a snowy effect.
Extra Tips:
To enhance the flavor of the Cranberry Orange Bundt Cake, consider adding a glaze made from powdered sugar and orange juice drizzled over the top for extra sweetness and shine.
If using frozen cranberries, don’t thaw them before adding to the batter to prevent the fruit from bleeding and coloring the cake. Additionally, confirm all ingredients are at room temperature before starting to guarantee a smooth and even batter.
This cake can be stored in an airtight container for up to three days, making it convenient to prepare ahead of time for holiday celebrations.
White Chocolate Raspberry Tart
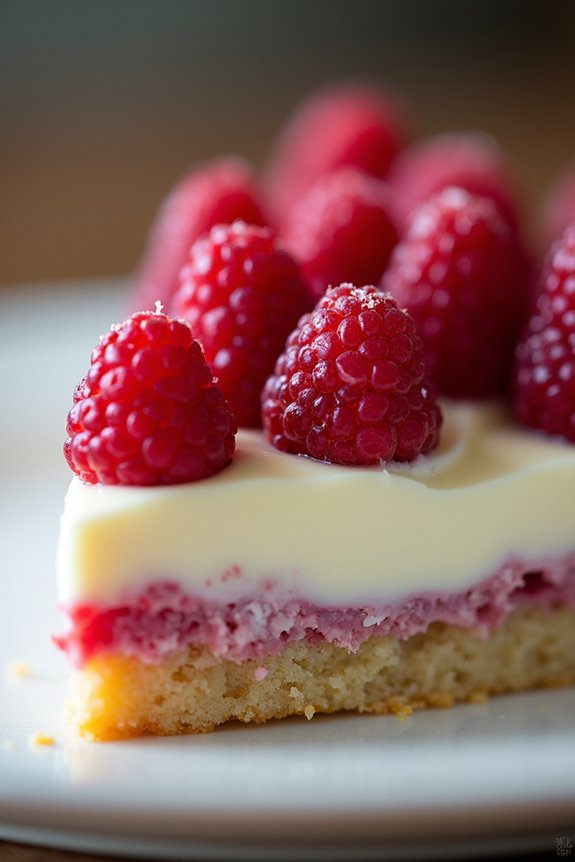
White Chocolate Raspberry Tart is a delightful dessert that combines the creamy richness of white chocolate with the tart sweetness of fresh raspberries. This elegant treat is perfect for the holiday season, offering a burst of flavor and a visually stunning presentation.
The crisp pastry crust provides a satisfying contrast to the velvety white chocolate ganache and the juicy raspberries, making each bite a harmonious blend of textures and tastes. Ideal for serving 4-6 people, this tart isn’t only a feast for the taste buds but also a treat for the eyes, with its vibrant red berries adorning the creamy white base.
Whether you’re hosting a festive gathering or looking to impress your loved ones with a homemade dessert, this White Chocolate Raspberry Tart is sure to be a hit. The recipe is straightforward, and with a little patience, you can create a masterpiece that will have everyone asking for seconds.
Ingredients:
- 1 1/4 cups all-purpose flour
- 1/4 cup powdered sugar
- 1/2 cup unsalted butter, chilled and cubed
- 1/4 teaspoon salt
- 1 egg yolk
- 1 tablespoon cold water
- 8 ounces white chocolate, chopped
- 1/2 cup heavy cream
- 1 teaspoon vanilla extract
- 2 cups fresh raspberries
- 2 tablespoons raspberry preserves, warmed
Instructions:
- Prepare the Pastry Crust:
- In a food processor, combine the all-purpose flour, powdered sugar, and salt. Add the chilled cubed butter and pulse until the mixture resembles coarse crumbs.
- In a small bowl, whisk together the egg yolk and cold water. Add this to the flour mixture and pulse until the dough just comes together.
- Turn the dough out onto a lightly floured surface and gently knead it into a ball. Wrap the dough in plastic wrap and refrigerate for at least 30 minutes.
- Bake the Crust:
- Preheat the oven to 350°F (175°C). Roll out the chilled dough on a floured surface to fit a 9-inch tart pan. Press the dough into the pan and trim the edges.
- Prick the bottom of the crust with a fork and line it with parchment paper. Fill with pie weights or dried beans. Bake for 15 minutes, then remove the weights and parchment paper. Bake for an additional 10 minutes, or until golden. Allow the crust to cool completely.
- Make the White Chocolate Ganache:
- In a small saucepan over medium heat, heat the heavy cream until it just begins to simmer. Remove from heat and add the chopped white chocolate. Let sit for 2 minutes, then stir until smooth and fully melted.
- Stir in the vanilla extract and allow the ganache to cool slightly before pouring it into the cooled tart crust. Refrigerate the tart until the ganache is set, about 1 hour.
- Assemble the Tart:
- Arrange the fresh raspberries on top of the set white chocolate ganache in a decorative pattern.
- Gently brush the raspberries with the warmed raspberry preserves to give them a glossy finish. Refrigerate the tart for another 30 minutes before serving.
Extra Tips:
When making the pastry crust, make sure that the butter remains cold throughout the process to achieve a flaky texture. If you don’t have a food processor, you can use a pastry cutter or your fingers to incorporate the butter into the flour.
When melting the white chocolate, be careful not to overheat the cream, as this can cause the chocolate to seize. If the ganache seems too thin, allow it to cool for a bit longer until it thickens. For an extra touch, consider garnishing the tart with mint leaves or dusting it lightly with powdered sugar before serving.
Salted Caramel Pecan Pie
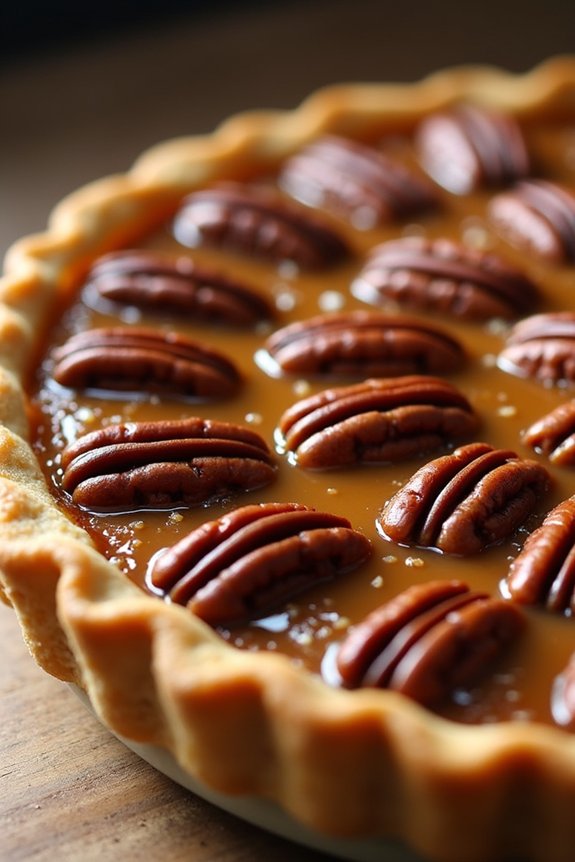
Salted Caramel Pecan Pie is a decadent and festive dessert that beautifully combines the rich flavors of caramel and toasted pecans, all encased in a perfectly flaky crust. This pie is a wonderful addition to any Christmas dinner table, offering a delightful balance of sweet and salty that’s sure to impress your guests.
The luscious caramel filling, infused with a touch of salt, enhances the natural sweetness of the pecans, making each bite a luxurious experience. This recipe serves 4-6 people, making it ideal for a small gathering or family dinner.
The preparation involves creating a homemade caramel sauce, which is then mixed with crunchy pecans and baked to perfection in a buttery crust. This Salted Caramel Pecan Pie isn’t only delicious but also relatively easy to prepare, guaranteeing that you’ll have more time to enjoy the festivities with your loved ones.
Ingredients:
- 1 pre-made pie crust (or homemade if preferred)
- 1 cup granulated sugar
- 1/4 cup water
- 1/2 cup heavy cream
- 1/4 cup unsalted butter
- 1/2 teaspoon vanilla extract
- 1/2 teaspoon salt
- 2 cups pecan halves
- 3 large eggs
- 1/2 cup light corn syrup
Cooking Instructions:
- Prepare the Pie Crust: If using a homemade crust, roll it out and fit it into a 9-inch pie pan. Trim and crimp the edges, then place it in the refrigerator to chill while you prepare the filling.
- Make the Caramel Sauce: In a medium saucepan, combine the granulated sugar and water. Cook over medium heat, stirring constantly, until the sugar dissolves. Increase the heat to medium-high and bring the mixture to a boil without stirring. Continue cooking until the mixture turns a deep amber color, about 8-10 minutes.
- Add Cream and Butter: Carefully add the heavy cream and butter to the caramel. The mixture will bubble up, so stir cautiously until the caramel is smooth. Remove the pan from the heat and stir in the vanilla extract and salt. Allow the caramel to cool slightly.
- Toast the Pecans: Preheat your oven to 350°F (175°C). Spread the pecan halves on a baking sheet and toast them in the oven for about 5-7 minutes, or until they’re fragrant. Allow them to cool.
- Prepare the Filling: In a large bowl, whisk together the eggs and light corn syrup. Gradually add the cooled caramel sauce, whisking constantly. Stir in the toasted pecans until they’re fully coated with the caramel mixture.
- Assemble the Pie: Pour the pecan-caramel mixture into the prepared pie crust. Use a spoon to arrange the pecans into an even layer.
- Bake: Place the pie on a baking sheet to catch any drips, and bake in the preheated oven for 45-50 minutes, or until the filling is set and the crust is golden brown. If the crust is browning too quickly, cover the edges with foil.
- Cool and Serve: Allow the pie to cool completely before serving. This will guarantee that the filling sets properly and makes slicing easier.
Extra Tips:
When making the caramel, it’s important to keep a close eye on the sugar as it changes color rapidly from amber to burnt. Use a heavy-bottomed saucepan to guarantee even heat distribution and avoid stirring once the sugar starts to boil.
If you prefer a more pronounced salty flavor, you can sprinkle a pinch of flaky sea salt on top of the pie just before serving. Finally, for an added touch of indulgence, serve your Salted Caramel Pecan Pie with a dollop of whipped cream or a scoop of vanilla ice cream.
Holiday Fruitcake Reimagined
The traditional holiday fruitcake often gets a bad rap, but when reimagined with a modern twist, it can become a delightful and cherished part of your festive celebrations. This Reimagined Holiday Fruitcake recipe combines the classic elements of fruit and nuts with a touch of spice and a hint of citrus, resulting in a moist and flavorful cake that’s anything but ordinary.
Whether you’re a fruitcake aficionado or a skeptic, this recipe promises to win you over with its vibrant flavors and rich texture. Designed to serve 4-6 people, this fruitcake is perfect for those intimate holiday gatherings or as a gift for a loved one.
The cake, bursting with dried fruits soaked in a mixture of rum and orange juice, is paired with crunchy nuts and a blend of warm spices to guarantee every bite is a taste of holiday cheer. Follow this recipe to create a festive dessert that will have your guests asking for seconds.
Ingredients (Serves 4-6):
- 1 cup mixed dried fruits (such as raisins, currants, and chopped dried apricots)
- 1/4 cup dark rum
- 1/4 cup freshly squeezed orange juice
- 1 cup all-purpose flour
- 1/2 teaspoon baking powder
- 1/4 teaspoon baking soda
- 1/2 teaspoon cinnamon
- 1/4 teaspoon nutmeg
- 1/4 teaspoon allspice
- 1/4 teaspoon salt
- 1/2 cup unsalted butter, softened
- 1/2 cup brown sugar
- 2 large eggs
- 1 teaspoon vanilla extract
- 1/2 cup chopped nuts (such as walnuts or pecans)
- Zest of 1 orange
Instructions:
- Pre-soak the Fruits: In a small bowl, combine the mixed dried fruits with the dark rum and orange juice. Cover and let soak for at least 2 hours, or overnight if possible. This helps the fruits absorb the flavors and become plump.
- Prepare the Dry Ingredients: Preheat your oven to 325°F (160°C). In a medium bowl, whisk together the all-purpose flour, baking powder, baking soda, cinnamon, nutmeg, allspice, and salt. Set aside.
- Cream Butter and Sugar: In a large mixing bowl, beat the softened butter and brown sugar together until light and fluffy. This should take about 3-4 minutes. Add the eggs one at a time, beating well after each addition. Stir in the vanilla extract.
- Combine Ingredients: Gradually add the dry ingredient mixture to the creamed butter and sugar, mixing just until combined. Be careful not to overmix. Gently fold in the soaked fruits (including any remaining liquid), chopped nuts, and orange zest.
- Bake the Cake: Pour the batter into a greased and lined loaf pan or a round cake tin. Smooth the top with a spatula. Bake in the preheated oven for 60-70 minutes, or until a skewer inserted into the center comes out clean.
- Cool and Serve: Allow the cake to cool in the pan for about 15 minutes before transferring it to a wire rack to cool completely. Once cooled, slice and serve, or wrap in aluminum foil for gifting.
Extra Tips:
To guarantee your fruitcake stays moist, consider brushing it with a bit of extra rum or orange juice while it cools. This not only enhances the flavor but also adds moisture.
For a more festive presentation, you can decorate the top of the cake with whole nuts or candied fruits before baking. If you prefer a non-alcoholic version, simply replace the rum with additional orange juice.
Make sure to start this cake a day ahead to allow the fruits to soak properly, as this is key to achieving the best texture and flavor.
Mulled Wine Poached Pears

Mulled Wine Poached Pears are an elegant and festive dessert perfect for the holiday season. This dish features tender pears gently poached in a fragrant mixture of red wine, spices, and citrus, creating a delightful harmony of flavors. The rich, spiced wine syrup seeps into the pears, infusing them with warmth and sweetness.
Served warm or chilled, these poached pears make a stunning centerpiece for any Christmas feast, and are certain to impress your family and friends with their sophisticated taste and simplicity.
While Mulled Wine Poached Pears may sound elaborate, they’re surprisingly easy to prepare. The key is to select firm pears that hold their shape during cooking, and to allow them to soak up the mulled wine’s flavors. This recipe serves 4-6 people, making it ideal for intimate gatherings or smaller holiday dinners.
Pair the poached pears with a dollop of whipped cream, a scoop of vanilla ice cream, or a drizzle of chocolate sauce for an indulgent treat that captures the essence of the season.
Ingredients:
- 4-6 firm pears, peeled and cored
- 750 ml bottle of red wine
- 1 cup granulated sugar
- 1 cinnamon stick
- 4 whole cloves
- 1 star anise
- 1 vanilla bean, split and seeds scraped
- Zest of 1 orange
- 2 tablespoons orange juice
Instructions:
- Prepare the Pears: Start by peeling the pears, leaving the stems intact for a decorative touch. Slice a thin layer off the bottom of each pear so they can stand upright.
- Create the Mulled Wine Base: In a large saucepan, combine the red wine, sugar, cinnamon stick, cloves, star anise, vanilla bean and seeds, orange zest, and orange juice. Stir the mixture over medium heat until the sugar dissolves completely.
- Poach the Pears: Gently place the pears in the saucepan, assuring they’re submerged in the wine mixture. If necessary, add a little water to cover the pears. Bring the liquid to a gentle simmer, then reduce the heat to low. Cover the saucepan partially and let the pears poach for about 20-25 minutes, or until they’re tender when pierced with a fork.
- Cool and Infuse: Once poached, carefully remove the pears from the saucepan and set them aside. Increase the heat and bring the wine mixture to a boil, reducing it by half to create a thicker syrup. Remove the saucepan from heat and allow the pears to cool in the reduced syrup for at least 1 hour, or overnight in the refrigerator for a more intense flavor.
- Serve: To serve, place each pear on a plate and drizzle with the mulled wine syrup. Add a garnish of your choice such as whipped cream, ice cream, or a sprinkle of chopped nuts for added texture.
Extra Tips: When choosing pears, opt for varieties like Bosc or Anjou as they hold their shape well during poaching. If you prefer a non-alcoholic version, substitute the red wine with pomegranate or cranberry juice.
To guarantee the pears are evenly poached, occasionally rotate them gently in the poaching liquid. For an extra aromatic touch, consider adding a few slices of fresh ginger to the poaching liquid. Enjoy this dish warm or allow the flavors to develop further by chilling it in the fridge before serving.
Chocolate Peppermint Mousse
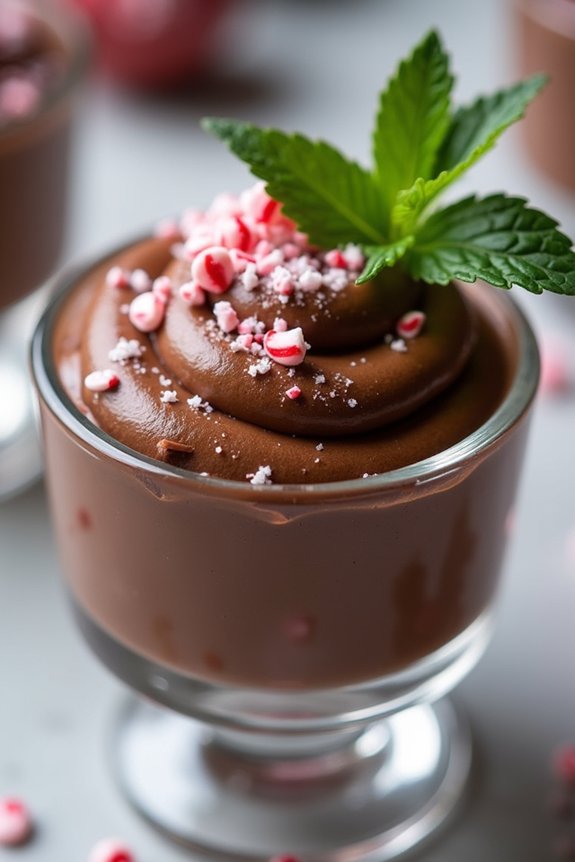
Indulge in the rich and festive flavors of Chocolate Peppermint Mousse, a perfect dessert to grace your Christmas table. This delightful treat combines the deep, luscious taste of chocolate with the invigorating zing of peppermint, creating a harmonious dessert that will leave your guests asking for seconds.
The smooth, airy texture of the mousse is achieved by carefully folding whipped cream into a chocolate mixture, resulting in a light yet decadent dessert. Ideal for serving 4-6 people, this Chocolate Peppermint Mousse isn’t just a feast for the taste buds but also a visual delight, especially when garnished with a sprinkle of crushed peppermint candies or a sprig of fresh mint.
Whether you’re hosting a grand holiday dinner or enjoying a quiet evening with family, this dessert is sure to bring joy and satisfaction to your Christmas celebrations.
Ingredients (Serves 4-6):
- 6 ounces bittersweet chocolate, chopped
- 3 tablespoons unsalted butter
- 3 large eggs, separated
- 1/4 cup granulated sugar
- 1/2 teaspoon peppermint extract
- 1 cup heavy cream
- 1/4 cup powdered sugar
- Pinch of salt
- Crushed peppermint candies, for garnish (optional)
- Fresh mint leaves, for garnish (optional)
Instructions:
- Melt the Chocolate: Begin by melting the chopped bittersweet chocolate and unsalted butter in a heatproof bowl set over a pot of simmering water. Stir continuously until the mixture is smooth and fully melted. Remove from heat and let it cool slightly.
- Prepare the Egg Mixture: In a separate bowl, whisk the egg yolks with granulated sugar until the mixture is pale and creamy. Stir in the peppermint extract. Gradually add the melted chocolate mixture to the egg yolk mixture, stirring constantly to combine.
- Beat the Egg Whites: In a clean bowl, whisk the egg whites with a pinch of salt until soft peaks form. Gently fold the egg whites into the chocolate mixture in two batches, being careful not to deflate the airiness.
- Whip the Cream: In another bowl, whip the heavy cream with powdered sugar until soft peaks form. Gently fold the whipped cream into the chocolate mixture until fully incorporated.
- Chill the Mousse: Divide the mousse evenly among individual serving cups or glasses. Cover and refrigerate for at least 2 hours or until set.
- Serve: Before serving, garnish the mousse with crushed peppermint candies and fresh mint leaves for a festive touch.
Extra Tips:
For the best results, confirm that all your mixing bowls are clean and dry, especially when whipping egg whites. Any trace of oil or moisture can prevent the whites from achieving the desired fluffiness.
Also, using high-quality chocolate is key to achieving a rich, robust flavor in your mousse. Remember to serve the mousse chilled for ideal texture and taste. If you want to add an extra festive touch, consider layering the mousse with whipped cream in the serving glasses for a beautiful presentation.
Almond Biscotti With Amaretto Glaze
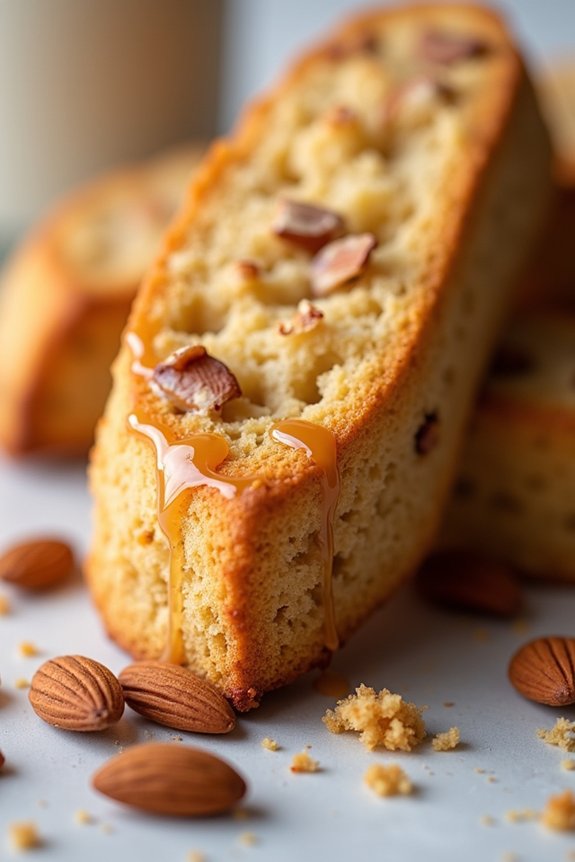
Almond Biscotti With Amaretto Glaze is a delightful treat that brings a touch of elegance to your Christmas dessert table. These twice-baked Italian cookies are known for their delightful crunch and subtle sweetness, enhanced by the rich flavor of almonds. The addition of Amaretto glaze not only complements the almond taste but also adds a festive flair to this classic treat.
Perfect for serving alongside coffee or tea, Almond Biscotti With Amaretto Glaze is bound to become a holiday favorite for your family and friends. This recipe yields enough biscotti to serve 4-6 people, making it a perfect option for a small gathering or as a thoughtful homemade gift. The use of real almonds and almond extract guarantees a deep, authentic flavor, while the Amaretto glaze provides a beautiful finish.
Whether you’re a seasoned baker or trying biscotti for the first time, this recipe is straightforward and rewarding, resulting in a delicious, crispy cookie that pairs perfectly with your holiday beverages.
Ingredients:
- 2 cups all-purpose flour
- 1 teaspoon baking powder
- 1/4 teaspoon salt
- 1/2 cup unsalted butter, softened
- 3/4 cup granulated sugar
- 2 large eggs
- 1 teaspoon vanilla extract
- 1 teaspoon almond extract
- 1 cup whole almonds, toasted and coarsely chopped
- 1 cup powdered sugar
- 2 tablespoons Amaretto liqueur
- 1-2 tablespoons milk
Instructions:
- Preheat and Prepare: Preheat your oven to 350°F (175°C). Line a baking sheet with parchment paper to prevent sticking.
- Mix Dry Ingredients: In a medium bowl, whisk together the flour, baking powder, and salt. Set aside.
- Cream Butter and Sugar: In a large mixing bowl, beat the softened butter and granulated sugar until light and fluffy, about 2-3 minutes. This will incorporate air into the mixture, assuring a tender texture.
- Add Eggs and Extracts: Add the eggs one at a time, beating well after each addition. Mix in the vanilla and almond extracts until well combined.
- Combine and Add Almonds: Gradually add the dry ingredients to the wet ingredients, mixing until just combined. Stir in the toasted almonds until evenly distributed.
- Shape the Dough: Divide the dough in half and shape each portion into a log about 12 inches long and 2 inches wide. Place the logs on the prepared baking sheet, spacing them a few inches apart.
- First Bake: Bake in the preheated oven for 25-30 minutes, or until the logs are golden brown and firm to the touch. Remove from the oven and let cool for about 10 minutes.
- Slice and Second Bake: Using a serrated knife, cut the logs diagonally into 3/4-inch slices. Arrange the slices cut side down on the baking sheet. Return to the oven and bake for an additional 10-15 minutes, or until the biscotti are crisp and golden. Cool completely on a wire rack.
- Prepare the Amaretto Glaze: In a small bowl, whisk together the powdered sugar, Amaretto liqueur, and enough milk to achieve a smooth, drizzle-able consistency.
- Glaze the Biscotti: Once the biscotti are completely cool, drizzle the Amaretto glaze over the top. Allow the glaze to set before serving.
Extra Tips:
For the best results, toast the almonds before adding them to the dough to enhance their flavor. If you like a softer biscotti, reduce the second baking time slightly.
You can store these biscotti in an airtight container at room temperature for up to two weeks, making them a convenient make-ahead option for holiday entertaining. If you prefer a non-alcoholic version, you can substitute the Amaretto with almond extract mixed with water for the glaze.
Festive Sugar Cookie Platter

Celebrate the holiday season with a delightful Festive Sugar Cookie Platter that’s as fun to make as it’s to eat. These cookies are perfect for decorating with family and friends, making your kitchen the hub of creativity and joy. Whether you prefer classic shapes like stars and trees or want to experiment with unique designs, sugar cookies offer a versatile canvas. The rich buttery flavor combined with the sweet icing makes these cookies a perennial favorite during the festive season.
Creating a sugar cookie platter involves making the cookies themselves and preparing a variety of colorful icings and decorations. The beauty of this dessert lies in its simplicity and the opportunity for personalization. This recipe will guide you through making enough cookies and icing to serve 4-6 people, guaranteeing everyone has a chance to express their artistic flair. Whether you’re hosting a Christmas party or looking for a fun family activity, this sugar cookie platter is the perfect festive treat.
Ingredients (serving size: 4-6 people):
- 2 ¾ cups all-purpose flour
- 1 teaspoon baking powder
- ½ teaspoon salt
- 1 cup unsalted butter, softened
- 1 ½ cups granulated sugar
- 1 large egg
- 2 teaspoons vanilla extract
- ½ teaspoon almond extract
- Assorted food coloring
- Sprinkles, edible glitter, and other decorations
- 2 cups powdered sugar
- 2-4 tablespoons milk
- 1 teaspoon vanilla extract (for icing)
Instructions:
- Prepare the Dough: In a mixing bowl, whisk together the flour, baking powder, and salt. In a separate large bowl, beat the softened butter and granulated sugar using an electric mixer on medium speed until the mixture is light and fluffy, about 3 minutes. Add the egg, 2 teaspoons of vanilla extract, and almond extract, beating until combined.
- Combine Ingredients: Gradually add the dry flour mixture to the wet ingredients, mixing on low speed until a dough forms. Divide the dough in half, flatten into discs, wrap in plastic wrap, and refrigerate for at least 1 hour or until firm.
- Roll and Cut: Preheat your oven to 350°F (175°C). On a lightly floured surface, roll out one dough disc to about ¼ inch thickness. Use cookie cutters to cut out shapes and transfer them to a parchment-lined baking sheet, leaving some space between each cookie.
- Bake the Cookies: Bake the cookies in the preheated oven for 8-10 minutes or until the edges are just beginning to turn golden. Allow the cookies to cool on the baking sheet for a few minutes before transferring them to a wire rack to cool completely.
- Prepare the Icing: In a small bowl, mix the powdered sugar with 2 tablespoons of milk and the remaining 1 teaspoon of vanilla extract. Add more milk gradually until the desired icing consistency is reached. Divide the icing into separate bowls and tint each with a few drops of food coloring.
- Decorate the Cookies: Once the cookies are completely cooled, use a spoon or piping bag to apply the colored icing. Decorate with sprinkles, edible glitter, and other decorations as desired. Allow the icing to set before serving or packaging.
Extra Tips:
For the best results, verify your butter is at room temperature before starting the recipe, as this will help achieve a smooth dough. If the dough becomes too sticky while rolling, refrigerate it for a few more minutes.
Use gel food coloring for vibrant icing colors, and let each icing layer dry slightly before adding additional decorations to prevent smudging. Enjoy the process and get creative with your designs – there are no wrong ways to decorate your sugar cookie platter!
Sticky Toffee Pudding
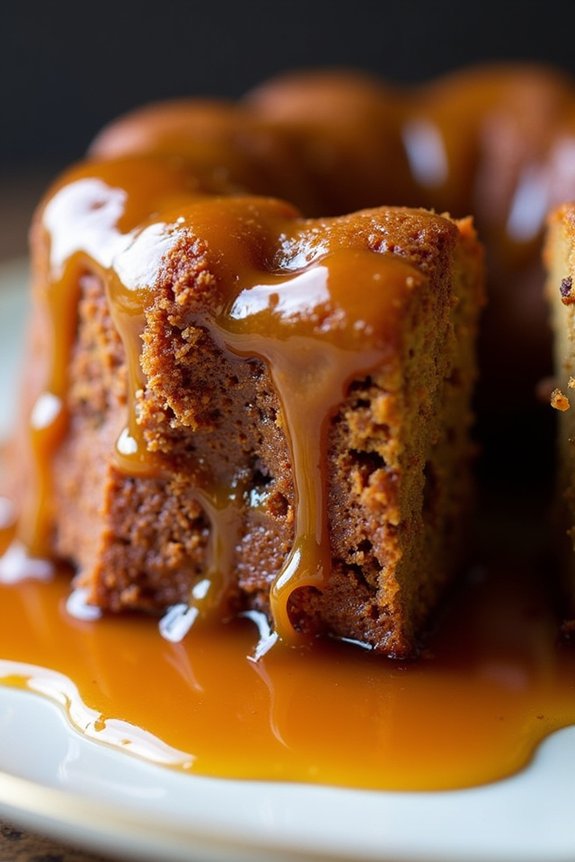
Sticky Toffee Pudding is a classic British dessert that combines the rich flavors of dates and brown sugar to create a moist, indulgent cake topped with a luscious toffee sauce. This dessert is especially popular during the holiday season and is perfect for those who enjoy a sweet treat with a hint of warmth and spice.
The pudding is often served warm, allowing the toffee sauce to soak into the cake, making it irresistibly gooey and delicious.
The origins of Sticky Toffee Pudding are somewhat debated, but it has firmly established itself as a beloved staple in British cuisine. Its rich and satisfying taste makes it an excellent choice for a Christmas dessert, providing a comforting end to any festive meal.
This recipe serves 4-6 people, making it ideal for family gatherings or intimate holiday dinners.
Ingredients (serving size: 4-6 people):
- 200g pitted dates
- 250ml boiling water
- 1 teaspoon baking soda
- 85g unsalted butter, softened
- 175g light brown sugar
- 2 large eggs
- 1 teaspoon vanilla extract
- 175g self-raising flour
- 1 teaspoon baking powder
- 100ml milk
For the Toffee Sauce:
- 200g light brown sugar
- 100g butter
- 250ml double cream
- 1 teaspoon vanilla extract
Cooking Instructions:
- Prepare the Date Mixture: Preheat your oven to 180°C (350°F). Chop the pitted dates into small pieces and place them in a bowl. Pour the boiling water over the dates and add the baking soda. Let it sit for about 10 minutes to soften the dates, then mash them gently with a fork or a potato masher.
- Make the Pudding Batter: In a large mixing bowl, cream together the softened butter and light brown sugar until light and fluffy. Add the eggs one at a time, beating well after each addition. Stir in the vanilla extract.
- Combine Dry Ingredients: In another bowl, sift together the self-raising flour and baking powder. Gradually add the dry mixture to the creamed butter and sugar, alternating with the milk, and mix until well combined. Fold in the softened date mixture until fully incorporated.
- Bake the Pudding: Grease a baking dish or pudding mold. Pour the batter into the prepared dish and smooth the top with a spatula. Bake in the preheated oven for about 35-40 minutes, or until a skewer inserted into the center comes out clean.
- Prepare the Toffee Sauce: While the pudding is baking, make the toffee sauce by combining the light brown sugar, butter, and double cream in a saucepan. Cook over low heat, stirring continuously until the sugar has dissolved and the sauce is smooth. Stir in the vanilla extract and remove from heat.
- Serve the Pudding: Once the pudding is done, remove it from the oven and let it cool slightly in the dish. To serve, cut the pudding into portions and pour the warm toffee sauce generously over each piece. Serve immediately, with extra sauce on the side if desired.
Extra Tips:
For an even richer flavor, try adding a pinch of ground cinnamon or nutmeg to the pudding batter. If you want a more intense toffee flavor, allow the sauce to simmer gently for a few more minutes to thicken further.
Sticky Toffee Pudding is best enjoyed warm, so if you’re not serving immediately, reheat the pudding and sauce gently before serving. For an added touch, serve with a scoop of vanilla ice cream or a dollop of whipped cream.
Spiced Apple Cider Donuts
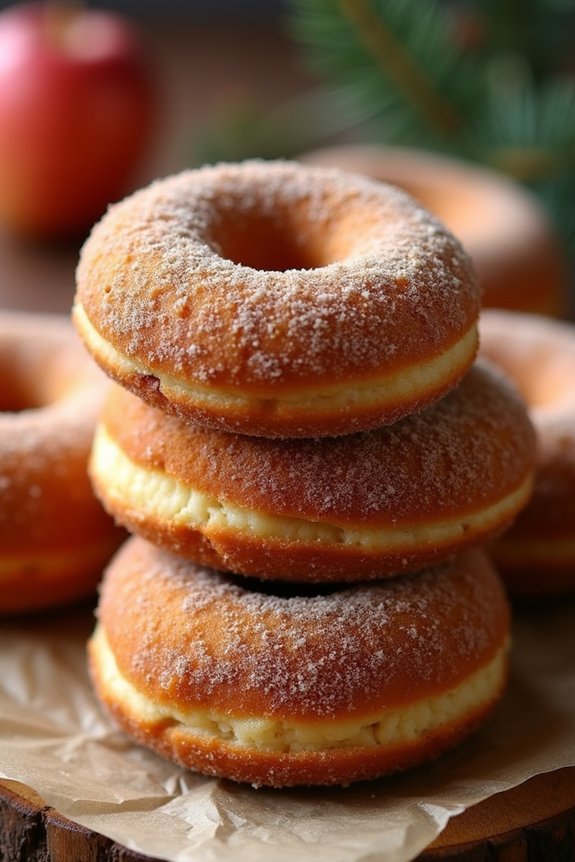
Spiced Apple Cider Donuts are a delightful treat that perfectly encapsulate the warm, comforting flavors of the holiday season. Infused with the aromatic essence of apple cider and a blend of spices, these donuts are a must-try dessert for any Christmas gathering. The donuts are light, fluffy, and have a subtle tang from the apple cider, making them an irresistible treat that pairs perfectly with a hot cup of cocoa or a glass of milk.
As you take a bite, the soft, cakey texture and the sweet, spiced sugar coating will transport you to a cozy winter wonderland.
These donuts aren’t only delicious but also surprisingly easy to make. With a few simple ingredients and some basic kitchen tools, you’ll have these festive treats ready to serve in no time. Whether you’re an experienced baker or a novice in the kitchen, this recipe is straightforward and rewarding, making it a perfect choice for a fun holiday baking activity.
Gather your family around, and enjoy making these scrumptious Spiced Apple Cider Donuts together, creating cherished memories along with a delectable dessert.
Ingredients for 4-6 servings:
- 1 cup apple cider
- 2 cups all-purpose flour
- 1 teaspoon baking powder
- 1/2 teaspoon baking soda
- 1/2 teaspoon cinnamon
- 1/4 teaspoon nutmeg
- 1/4 teaspoon salt
- 1/2 cup granulated sugar
- 3 tablespoons unsalted butter, melted
- 1 large egg
- 1/2 cup buttermilk
- 1 teaspoon vanilla extract
- Vegetable oil (for frying)
- 1/2 cup sugar (for coating)
- 1 teaspoon cinnamon (for coating)
Instructions:
- Reduce the Apple Cider: Begin by pouring the apple cider into a small saucepan and bringing it to a boil over medium heat. Reduce the heat and let it simmer until it reduces to 1/3 cup, about 10-15 minutes. This intensifies the apple flavor. Allow it to cool.
- Prepare the Dry Ingredients: In a medium bowl, whisk together the flour, baking powder, baking soda, cinnamon, nutmeg, and salt. Set aside.
- Mix the Wet Ingredients: In a large mixing bowl, whisk together the granulated sugar, melted butter, egg, buttermilk, vanilla extract, and the cooled reduced apple cider until well combined.
- Combine Wet and Dry Ingredients: Gradually add the dry ingredients to the wet ingredients, mixing gently until just combined. Be careful not to overmix the batter.
- Shape the Donuts: Transfer the dough to a lightly floured surface and gently roll it out to about 1/2-inch thickness. Use a donut cutter to cut out donut shapes. Gather the scraps, re-roll, and cut more donuts until all the dough is used.
- Heat the Oil: In a heavy-bottomed pot, heat about 2 inches of vegetable oil to 350°F (175°C). Use a thermometer to verify the oil maintains the correct temperature.
- Fry the Donuts: Carefully place a few donuts into the hot oil, frying them in batches. Fry each side for about 1-2 minutes, or until golden brown. Use a slotted spoon to transfer the donuts to a paper towel-lined plate to drain excess oil.
- Coat the Donuts: In a shallow bowl, mix together the sugar and cinnamon for coating. While the donuts are still warm, roll them in the cinnamon-sugar mixture until fully coated.
Extra Tips:
For the best results, make sure the apple cider is reduced properly to concentrate the flavor. You can also experiment with adding a pinch of cloves or allspice to the sugar coating for a more complex spice profile.
If you don’t have a donut cutter, you can use a round biscuit cutter and a smaller one for the center hole, or simply make donut holes instead. These donuts are best enjoyed fresh, but they can be stored in an airtight container for up to two days. To reheat, place them in a warm oven for a few minutes to regain their fresh-baked taste.