

When it comes to family dinners, finding meals that satisfy both kids and adults is key. I’ve rounded up 12 go-to dishes that are sure to please everyone around the table. From classic spaghetti and meatballs to fun create-your-own pizza nights, these meals combine comfort and flavor with ease. With options for picky eaters and busy nights, there’s something for every craving. Curious to know what makes these dinners a hit?
Classic Spaghetti and Meatballs
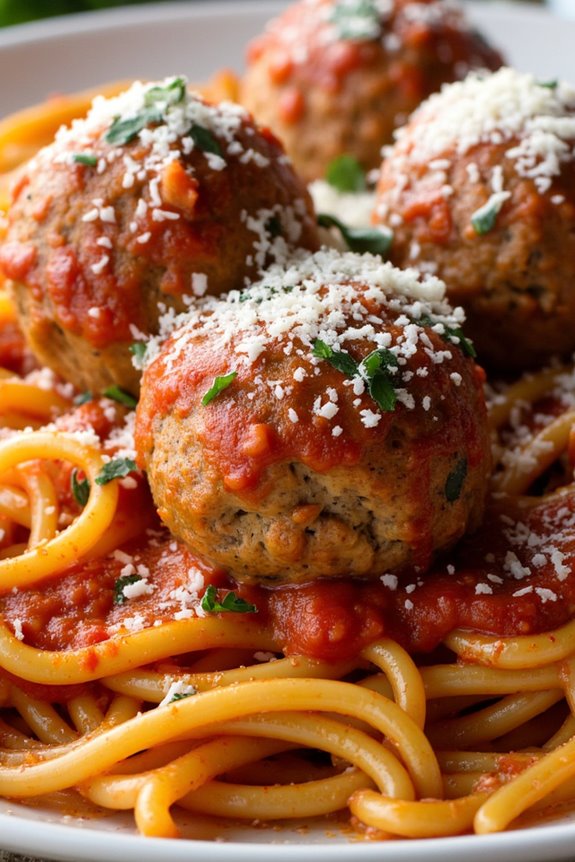
There’s nothing quite like the comfort of a classic plate of spaghetti and meatballs to bring smiles to the dinner table. This dish isn’t only beloved by kids, but it’s also a hit with adults, making it a perfect family meal. The combination of savory meatballs, rich tomato sauce, and perfectly cooked spaghetti creates a symphony of flavors and textures that’s hard to resist.
Whether you’re cooking for a family dinner or a special occasion, this recipe will surely become a household favorite.
Crafting the perfect spaghetti and meatballs involves a few vital steps to guarantee that every element of the dish is cooked to perfection. From forming the most tender meatballs to simmering a delicious homemade tomato sauce, each component is essential to the overall success of the dish.
This recipe will guide you through the process to create a meal that’s both satisfying and kid-approved, designed to serve 4-6 people.
Ingredients:
- 1 pound ground beef
- 1/2 cup breadcrumbs
- 1/4 cup grated Parmesan cheese
- 1/4 cup chopped fresh parsley
- 1 large egg
- 2 cloves garlic, minced
- Salt and pepper to taste
- 1 tablespoon olive oil
- 1 medium onion, chopped
- 1 can (28 ounces) crushed tomatoes
- 1 teaspoon dried basil
- 1 teaspoon dried oregano
- 1/2 teaspoon sugar
- 12 ounces spaghetti
- Grated Parmesan cheese for serving
- Fresh basil leaves for garnish (optional)
Cooking Instructions:
- Prepare the Meatballs: In a large bowl, combine the ground beef, breadcrumbs, Parmesan cheese, parsley, egg, garlic, salt, and pepper. Mix until just combined, being careful not to overwork the meat. Form the mixture into 1 1/2-inch meatballs and place them on a plate.
- Cook the Meatballs: Heat the olive oil in a large skillet over medium heat. Add the meatballs, cooking them in batches if necessary to avoid overcrowding the pan. Cook until browned on all sides, about 8-10 minutes total. Remove the meatballs from the skillet and set them aside.
- Make the Sauce: In the same skillet, add the chopped onion and sauté until translucent, about 5 minutes. Stir in the crushed tomatoes, dried basil, dried oregano, and sugar. Allow the sauce to simmer, uncovered, for about 15 minutes to thicken and develop flavor.
- Simmer the Meatballs in Sauce: Return the meatballs to the skillet, nestling them into the sauce. Cover and let them simmer on low heat for an additional 15-20 minutes, or until the meatballs are cooked through.
- Cook the Spaghetti: While the meatballs are simmering, bring a large pot of salted water to a boil. Add the spaghetti and cook according to the package instructions until al dente. Drain the pasta and set aside.
- Combine and Serve: Toss the cooked spaghetti with the sauce and meatballs in the skillet, guaranteeing the pasta is well coated. Serve hot, topped with additional grated Parmesan cheese and fresh basil leaves if desired.
Extra Tips:
When forming the meatballs, try to keep them uniform in size to guarantee even cooking. If you notice the mixture is too sticky, wet your hands slightly with water to help shape the meatballs.
For a richer flavor, you can substitute ground beef with a mix of beef and pork. If you have time, let the meatballs and sauce sit for a few minutes before serving to allow the flavors to meld together.
This dish can be prepared ahead of time; simply reheat over low heat before serving.
Savory Mac and Cheese With Hidden Veggies
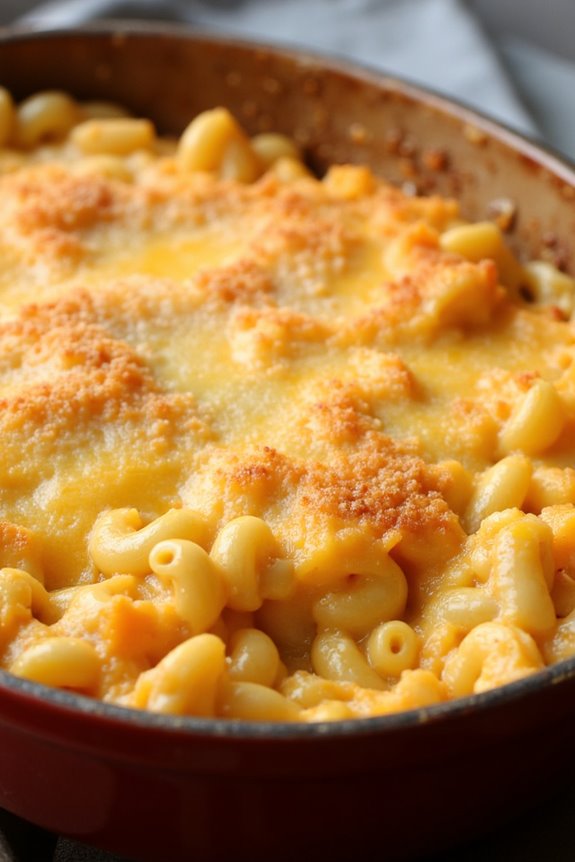
Mac and cheese is a classic comfort food that kids love, but it’s often lacking in nutritional value. This version of savory mac and cheese sneaks in some vegetables, making it both delicious and nutritious. By incorporating veggies into the cheese sauce, you guarantee that your little ones are getting the vitamins and minerals they need, all while enjoying a creamy, cheesy meal. This dish is perfect for a family dinner, providing a serving size that accommodates 4-6 people.
The trick to creating a kid-approved recipe is to blend the vegetables well so they complement the cheese without being noticeable. This recipe uses a combination of butternut squash and cauliflower, which add a subtle sweetness and creaminess to the dish. These veggies are cooked and pureed before being mixed into the cheese sauce, ensuring a smooth texture that melds perfectly with the pasta. The result is a dish that maintains the classic flavor of mac and cheese, with the added benefit of hidden nutrition.
Ingredients (serving size: 4-6 people):
- 12 ounces elbow macaroni
- 1 cup butternut squash, peeled and diced
- 1 cup cauliflower florets
- 2 cups milk
- 2 cups shredded cheddar cheese
- 1 tablespoon butter
- 1 tablespoon all-purpose flour
- 1 teaspoon garlic powder
- 1 teaspoon onion powder
- Salt and pepper to taste
- 1/2 cup grated Parmesan cheese
Cooking Instructions:
- Cook the Pasta: Begin by cooking the elbow macaroni according to package instructions. Once cooked, drain and set aside.
- Prepare the Vegetables: In a medium saucepan, combine the butternut squash and cauliflower with enough water to cover them. Bring to a boil, then reduce the heat and let them simmer until they’re tender, about 10-15 minutes.
- Puree the Vegetables: Drain the cooked vegetables and let them cool slightly. Use a blender or food processor to puree the vegetables until smooth. Set aside.
- Make the Cheese Sauce: In a large saucepan, melt the butter over medium heat. Whisk in the flour and cook for about 1 minute until it becomes a light golden color. Slowly add the milk, whisking continuously to avoid lumps. Cook the mixture until it thickens, about 5 minutes.
- Combine Ingredients: Stir in the pureed vegetables, cheddar cheese, garlic powder, onion powder, salt, and pepper into the thickened milk mixture. Continue to stir until the cheese is fully melted and the sauce is smooth.
- Mix with Pasta: Add the cooked macaroni to the cheese sauce, stirring well to coat the pasta evenly. Transfer the macaroni and cheese to a baking dish.
- Top and Bake: Sprinkle the grated Parmesan cheese over the top. Bake in a preheated oven at 350°F (175°C) for about 15 minutes, or until the top is golden and bubbly.
Extra Tips:
For a creamier sauce, consider using whole milk or even adding a splash of cream. If your children are particularly sensitive to textures, guarantee that the vegetable puree is as smooth as possible by blending it thoroughly.
You can also experiment with different cheeses to find the combination your family loves best. If you desire a bit of crunch, add some breadcrumbs on top before baking. This dish can be prepared in advance and stored in the refrigerator, making it a convenient option for busy weeknights.
Creamy Chicken Alfredo for Busy Nights
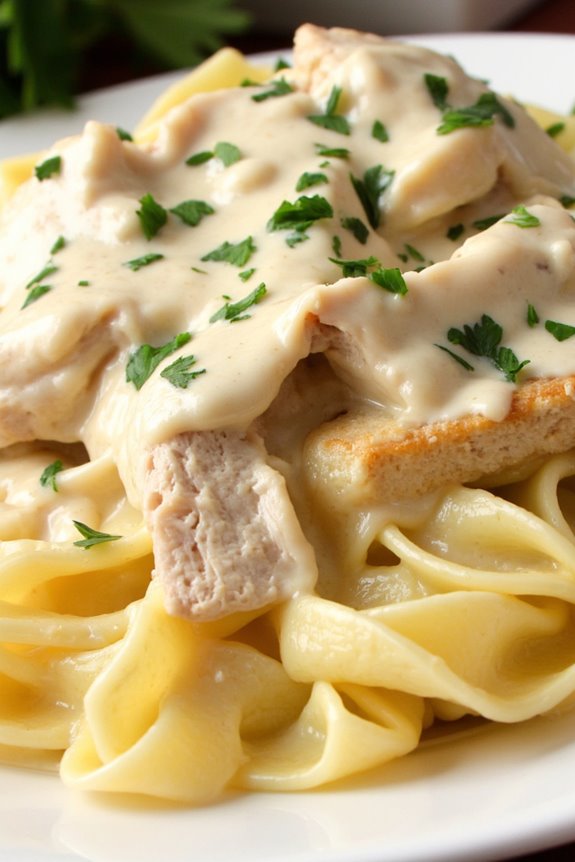
Creamy Chicken Alfredo for Busy Nights is the perfect dish for families who need a quick yet satisfying meal after a long day. This classic Italian-inspired pasta dish combines tender pieces of chicken with a rich and creamy Alfredo sauce, making it a hit with both kids and adults.
The beauty of this recipe lies in its simplicity and quick preparation time, making it ideal for those hectic weeknights when you want to serve something delicious without spending hours in the kitchen. The dish isn’t only a treat for the taste buds but also provides a comforting warmth that makes everyone feel right at home.
With just a few ingredients and minimal effort, you can whip up a restaurant-quality meal that will have everyone asking for seconds. The creamy texture of the sauce perfectly coats the pasta and chicken, creating a harmonious blend of flavors that’s truly irresistible.
Ingredients (Serves 4-6):
- 1 pound boneless, skinless chicken breasts
- Salt and pepper to taste
- 2 tablespoons olive oil
- 1 pound fettuccine pasta
- 1 cup heavy cream
- 1 cup grated Parmesan cheese
- 1/2 cup unsalted butter
- 2 cloves garlic, minced
- 1 cup milk
- 2 tablespoons chopped fresh parsley
Cooking Instructions:
- Prepare the Chicken: Start by seasoning the chicken breasts with salt and pepper. Heat the olive oil in a large skillet over medium-high heat. Add the chicken breasts and cook for about 6-7 minutes on each side, or until fully cooked and golden brown. Remove from the skillet and set aside to rest before slicing into thin strips.
- Cook the Pasta: In a large pot, bring salted water to a boil. Add the fettuccine pasta and cook according to package instructions until al dente. Drain the pasta and return it to the pot.
- Make the Alfredo Sauce: In the same skillet used for the chicken, melt the butter over medium heat. Add the minced garlic and sauté for about 1 minute until fragrant. Pour in the heavy cream and milk, stirring constantly. Gradually add the grated Parmesan cheese, stirring until the cheese has melted and the sauce is smooth and creamy.
- Combine Pasta and Sauce: Add the cooked pasta and sliced chicken to the skillet with the Alfredo sauce. Gently toss until the pasta and chicken are evenly coated with the sauce.
- Serve: Transfer the Creamy Chicken Alfredo to a serving dish. Garnish with freshly chopped parsley for added color and flavor. Serve immediately while hot.
Extra Tips:
For the best results, use freshly grated Parmesan cheese instead of pre-packaged shredded cheese, as it melts more smoothly into the sauce. Confirm the heat isn’t too high when making the Alfredo sauce to prevent it from separating.
If the sauce becomes too thick, you can add a splash of pasta water to reach your desired consistency. For an extra flavor boost, consider adding a pinch of nutmeg to the sauce. Enjoy your Creamy Chicken Alfredo with a side of garlic bread and a simple green salad for a complete meal.
Create Your Own Pizza Night

Create Your Own Pizza Night is a fun and interactive way to get the whole family involved in making dinner. Not only is it a great opportunity to teach kids about cooking, but it also allows everyone to express their creativity by choosing their favorite toppings.
Whether you prefer a classic Margherita, a meaty feast, or a veggie-loaded pie, this recipe provides a versatile base for any pizza lover. Gather around the kitchen, roll up your sleeves, and prepare for a night of delicious homemade pizza that everyone will enjoy.
This recipe is designed for a serving size of 4-6 people, guaranteeing everyone gets their fill of cheesy, saucy goodness. By using store-bought or homemade pizza dough, you can save time and focus on the fun part – adding the toppings! Encourage kids to try different combinations and maybe even create a signature family pizza.
So grab your aprons and get ready for a delightful pizza-making adventure.
Ingredients:
- 2 pounds of pizza dough (store-bought or homemade)
- 2 cups of pizza sauce
- 3 cups of shredded mozzarella cheese
- 1 cup of pepperoni slices
- 1 cup of sliced mushrooms
- 1 cup of diced bell peppers
- 1 cup of sliced black olives
- 1 cup of cooked and crumbled sausage
- 1 cup of pineapple chunks
- 1 tablespoon of olive oil
- 1 teaspoon of dried oregano
- 1 teaspoon of garlic powder
- Flour for dusting
Cooking Instructions:
- Preheat the Oven: Begin by preheating your oven to 475°F (245°C). If you have a pizza stone, place it in the oven while it heats up. This will help to achieve a crispy crust.
- Prepare the Dough: Dust your work surface with flour and divide the pizza dough into 4-6 equal parts, depending on your preferred pizza size. Roll each piece into a ball and let them rest for about 10 minutes to relax the gluten, making them easier to shape.
- Shape the Dough: Using a rolling pin or your hands, flatten each dough ball into a round shape, approximately 10-12 inches in diameter. If the dough resists stretching, let it rest for a few minutes before trying again.
- Add the Sauce: Spread a thin layer of pizza sauce over each dough base, leaving a small border around the edges for the crust. Use the back of a spoon or a small ladle to distribute the sauce evenly.
- Top the Pizza: Let each family member choose their favorite toppings. Start with a generous layer of mozzarella cheese, then add pepperoni, mushrooms, bell peppers, olives, sausage, and pineapple as desired. Sprinkle a pinch of oregano and garlic powder over the top for extra flavor.
- Bake the Pizza: Transfer each pizza onto a baking sheet or directly onto the preheated pizza stone. Bake in the oven for 10-12 minutes, or until the crust is golden brown and the cheese is bubbly and melted.
- Serve and Enjoy: Once the pizzas are done, remove them from the oven and let them cool for a couple of minutes before slicing. Serve hot and enjoy your homemade creations!
Extra Tips:
For the best results, confirm your oven is fully preheated before baking the pizzas, as this affects the crust’s crispiness. If you’re using a pizza stone, it mimics the effect of a professional pizza oven, yielding a better texture.
Encourage kids to experiment with different toppings, perhaps even introducing new ones like fresh basil or artichoke hearts. If you have any leftover toppings, they can be used for salads or sandwiches the next day.
Finally, don’t worry about getting the perfect round shape; rustic pizzas have their charm!
Kid-Approved Cheesy Quesadillas
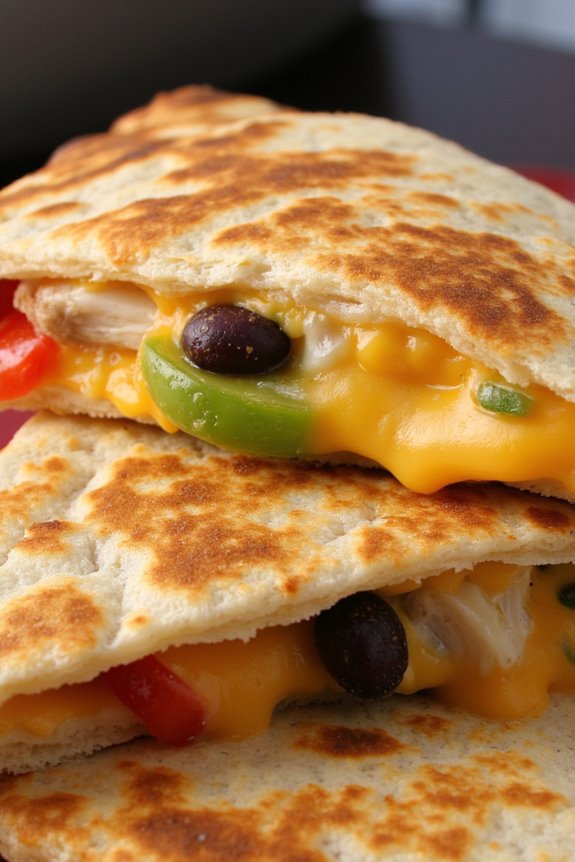
Kid-Approved Cheesy Quesadillas are a delightful and easy-to-make meal that both kids and adults will love. Perfect for a quick lunch or a fun dinner, these quesadillas are packed with gooey cheese and can be customized with a variety of fillings to suit any picky eater’s taste.
With the satisfying crunch of a golden-brown tortilla and the creamy texture of melted cheese, this dish is guaranteed to become a staple in your meal rotation.
Quesadillas aren’t only delicious but also versatile. You can add in other ingredients like chicken, beans, or vegetables to make them a complete meal. They’re a great way to sneak in some extra nutrition without sacrificing taste.
This recipe is designed to serve 4-6 people, making it perfect for family dinners or small gatherings. Follow the simple steps below to create your own Kid-Approved Cheesy Quesadillas.
Ingredients (Serving size: 4-6)
- 8 large flour tortillas
- 3 cups shredded cheddar cheese
- 1 cup shredded Monterey Jack cheese
- 1 cup cooked chicken, shredded (optional)
- 1/2 cup black beans, drained and rinsed (optional)
- 1/2 cup corn kernels (optional)
- 1/4 cup finely chopped bell peppers (optional)
- 1/4 cup chopped green onions (optional)
- Butter or cooking spray
- Salsa, sour cream, or guacamole for serving
Cooking Instructions
- Prepare Ingredients: Begin by gathering all your ingredients and preparing any optional additions. Shred the cheeses and, if desired, shred cooked chicken, rinse the beans, and chop the vegetables.
- Heat the Pan: Place a large non-stick skillet over medium heat. Add a small amount of butter or use cooking spray to lightly coat the pan to prevent sticking.
- Assemble Quesadillas: Lay out one tortilla and sprinkle a generous amount of cheddar and Monterey Jack cheese over half of it. Add optional ingredients like chicken, beans, corn, bell peppers, and green onions on top of the cheese. Fold the tortilla in half to cover the filling.
- Cook the Quesadillas: Carefully place the folded tortilla in the heated skillet. Cook for about 2-3 minutes on each side, or until the tortilla is golden brown and the cheese has melted. Use a spatula to press down gently on the quesadilla to guarantee even cooking.
- Repeat: Remove the cooked quesadilla from the skillet and repeat the process with the remaining tortillas and fillings.
- Serve: Once all quesadillas are cooked, cut them into wedges and serve warm with salsa, sour cream, or guacamole.
Extra Tips
For best results, make sure the cheese is evenly distributed and not piled too high, as this will allow the quesadillas to cook evenly and the cheese to melt properly.
If you’re adding meat or beans, make sure they’re pre-cooked and at room temperature before assembling the quesadillas to guarantee quick and even cooking.
Feel free to experiment with different cheese blends or additional fillings to suit your family’s preferences. Enjoy your Kid-Approved Cheesy Quesadillas!
Tasty Veggie-Filled Tacos

When it comes to kid-approved dinners, nothing beats the fun and flavor of tacos. These tasty veggie-filled tacos aren’t only delicious but also a clever way to sneak in some nutritious vegetables into your child’s diet. Filled with a vibrant mix of sautéed vegetables and seasoned to perfection, these tacos are sure to be a family favorite.
Whether you’re catering to vegetarians or simply looking for a lighter meal option, these veggie tacos are packed with flavor and texture that will satisfy both kids and adults alike. The key to making these tacos appealing to children is to guarantee the vegetables are cooked to a tender perfection and seasoned just right.
This recipe uses a colorful assortment of vegetables such as bell peppers, zucchini, and corn, which not only add a burst of color to the plate but also a variety of nutrients. With a sprinkle of cheese and a dollop of sour cream, these tacos provide a delightful combination of creamy, crunchy, and savory flavors that kids will love. Serve them on soft flour or corn tortillas for a meal that’s as quick to prepare as it’s satisfying.
Ingredients (Serves 4-6):
- 1 tablespoon olive oil
- 1 red bell pepper, sliced
- 1 yellow bell pepper, sliced
- 1 zucchini, diced
- 1 cup corn kernels (fresh or frozen)
- 1 teaspoon ground cumin
- 1 teaspoon chili powder
- Salt and pepper to taste
- 8-10 small flour or corn tortillas
- 1 cup shredded cheddar cheese
- 1 cup sour cream
- 1 cup salsa
- 1 avocado, sliced
- Fresh cilantro, chopped (optional)
Cooking Instructions:
- Prepare the Vegetables: Begin by washing all the vegetables thoroughly. Slice the red and yellow bell peppers into thin strips, and dice the zucchini into small cubes. If using fresh corn, slice the kernels off the cob.
- Sauté the Vegetables: Heat the olive oil in a large skillet over medium heat. Add the sliced bell peppers, diced zucchini, and corn kernels to the skillet. Sauté the vegetables for about 5-7 minutes or until they’re tender and slightly caramelized.
- Season the Vegetables: Once the vegetables are cooked, sprinkle in the ground cumin, chili powder, salt, and pepper. Stir well to guarantee the vegetables are evenly coated with the spices. Cook for an additional 2 minutes to allow the flavors to meld together.
- Warm the Tortillas: While the vegetables are cooking, warm the tortillas. You can do this by placing them in a dry skillet over medium heat for about 30 seconds on each side, or by wrapping them in a damp paper towel and microwaving for 20-30 seconds.
- Assemble the Tacos: To assemble, lay the warm tortillas flat and spoon a generous amount of the veggie mixture onto each tortilla. Top with shredded cheddar cheese, a dollop of sour cream, a spoonful of salsa, and a few slices of avocado. Garnish with fresh cilantro if desired.
- Serve and Enjoy: Serve the tacos immediately while warm. Allow everyone to add extra toppings as they like.
Extra Tips:
To make these tacos even more kid-friendly, involve your little ones in the preparation process. Let them help wash the vegetables or choose their favorite toppings.
You can also add a squeeze of lime juice for a zesty kick or some black beans for added protein. If your kids are sensitive to spice, adjust the amount of chili powder to their liking or omit it entirely.
Finally, these tacos pair wonderfully with a side of refried beans or a simple green salad for a complete meal.
Crispy Chicken Tenders Every Kid Loves

Crispy Chicken Tenders are a classic favorite among kids, and it’s not hard to see why. With their golden-brown exterior, juicy interior, and a hint of seasoning, these tenders are both delicious and fun to eat. Perfect for a family dinner or a weekend treat, these tenders are bound to become a staple in your household.
They’re easy to prepare and can be paired with a variety of dips and sides, making them a versatile option for any meal. The secret to achieving the perfect crispiness lies in the breading process and the quality of ingredients used. By using a blend of breadcrumbs and seasoning, you can guarantee each bite is packed with flavor.
Additionally, baking the tenders instead of frying them keeps the dish on the healthier side without sacrificing taste or texture. Here’s how you can make these mouth-watering tenders for a serving size of 4-6 people.
Ingredients:
- 1 ½ pounds boneless, skinless chicken breasts
- 1 cup all-purpose flour
- 1 teaspoon salt
- ½ teaspoon black pepper
- 1 teaspoon garlic powder
- 1 teaspoon onion powder
- 2 large eggs
- 2 tablespoons milk
- 1 ½ cups breadcrumbs
- ½ cup grated Parmesan cheese
- 1 teaspoon paprika
- Cooking spray or oil for greasing
Instructions:
- Preheat the Oven: Set your oven to 400°F (200°C) and line a baking sheet with parchment paper or lightly grease it with cooking spray to prevent sticking.
- Prepare the Chicken: Cut the chicken breasts into strips, approximately 1 inch wide. Try to keep them uniform in size to guarantee even cooking.
- Set Up Breading Stations: In a shallow dish, combine the flour, salt, pepper, garlic powder, and onion powder. In a separate bowl, whisk together the eggs and milk. Finally, in a third bowl, mix the breadcrumbs, Parmesan cheese, and paprika.
- Bread the Chicken: Dredge each chicken strip in the flour mixture, shaking off any excess. Then, dip it into the egg mixture, allowing the excess to drip off, before coating it in the breadcrumb mixture. Press the breadcrumbs onto the chicken to guarantee they adhere well.
- Arrange on Baking Sheet: Place the breaded chicken strips on the prepared baking sheet, leaving space between each piece to allow for even cooking.
- Bake the Tenders: Bake in the preheated oven for 20-25 minutes, flipping halfway through. The tenders should be golden brown and reach an internal temperature of 165°F (74°C).
- Serve: Once cooked, remove from the oven and let them cool slightly. Serve with your favorite dipping sauces like ketchup, honey mustard, or ranch.
Extra Tips:
For an added flavor twist, you can incorporate herbs like dried oregano or thyme into the breadcrumb mixture. If you prefer a spicier kick, add a pinch of cayenne pepper.
To keep the tenders extra crispy, avoid overcrowding the baking sheet, as this can lead to steaming rather than baking. For those with dietary restrictions, gluten-free flour and breadcrumbs can be used as alternatives.
Enjoy your crispy chicken tenders with a side of fresh veggies or a simple salad for a complete meal.
Burger Sliders With a Fun Twist

Burger sliders are a delightful way to enjoy the classic flavors of a burger in a smaller, kid-friendly size. Perfect for a family dinner or casual gathering, these sliders aren’t only easy to prepare but also allow for creativity in the kitchen. This version adds a twist by incorporating a surprise ingredient: pineapple rings! The sweetness of the pineapple complements the savory flavors of the beef and cheese, making each bite a flavorful adventure that even the pickiest eaters will love.
These fun and delicious burger sliders are designed to serve 4-6 people, making them an ideal option for a family meal or a small party. They’re easy to assemble, and you can involve the kids in the preparation process, turning dinner into a fun family activity. By using fresh ingredients and a few creative toppings, you can transform ordinary sliders into a memorable meal that everyone will enjoy.
Ingredients:
- 1 1/2 pounds ground beef
- Salt and pepper to taste
- 6 slider buns
- 6 pineapple rings
- 6 slices of cheddar cheese
- 1/4 cup barbecue sauce
- 1/2 cup mayonnaise
- 1 tablespoon honey
- Lettuce leaves
- Sliced tomatoes
- Butter for toasting buns
Instructions:
- Prepare the Patties: Begin by preheating your grill or stovetop skillet over medium-high heat. In a mixing bowl, combine the ground beef with salt and pepper. Mix until just combined, being careful not to overwork the meat. Divide the beef into 6 equal portions and form into small, round patties that will fit your slider buns.
- Cook the Patties: Place the beef patties on the preheated grill or skillet. Cook each side for about 3-4 minutes, or until the internal temperature reaches 160°F (71°C), indicating they’re fully cooked. During the last minute of cooking, place a slice of cheddar cheese on each patty and cover with a lid to melt the cheese.
- Toast the Buns: While the patties are cooking, butter the insides of the slider buns lightly. Place them on the grill or in a separate pan, cut side down, and toast until golden brown.
- Prepare Pineapple Rings: Grill the pineapple rings for about 2 minutes on each side until they’re caramelized and have grill marks.
- Make the Sauce: In a small bowl, mix together the mayonnaise, barbecue sauce, and honey until smooth. This sauce will add a sweet and tangy flavor to your sliders.
- Assemble the Sliders: Start by spreading a spoonful of the prepared sauce on the bottom half of each toasted bun. Place a lettuce leaf and a slice of tomato on top. Next, add the cheesy beef patty, followed by a grilled pineapple ring. Top with the other half of the bun.
- Serve and Enjoy: Arrange the sliders on a platter and serve warm. These sliders are best enjoyed fresh off the grill.
Extra Tips:
For an even more adventurous twist, consider adding crispy bacon or jalapeño slices for a bit of crunch and heat. If you want to make the sliders more health-conscious, you can substitute the ground beef with turkey or chicken.
Additionally, if you don’t have access to a grill, a stovetop skillet works just as well for cooking the patties and toasting the buns. Remember, the key to a great slider is balancing the flavors, so feel free to adjust the ingredients according to your family’s preferences.
Flavorful and Simple Sloppy Joes

Sloppy Joes are a classic comfort food that kids absolutely love. This dish isn’t only quick to prepare but also packed with flavor, making it an excellent choice for a family dinner. The combination of seasoned ground beef and a tangy, slightly sweet sauce served on a soft hamburger bun creates a meal that’s satisfying and delicious.
Whether you’re cooking for a busy weeknight or a casual weekend gathering, these Sloppy Joes are sure to please both kids and adults alike.
This recipe for Flavorful and Simple Sloppy Joes is designed to serve 4-6 people. It’s perfect for families looking for a meal that can be made in under 30 minutes with ingredients you likely already have in your pantry. The secret to this dish lies in the perfect balance of spices and condiments, resulting in a sauce that’s both savory and sweet.
The use of fresh vegetables not only adds extra nutrition but also enhances the overall flavor profile, creating a meal that’s as wholesome as it’s delicious.
Ingredients (Serves 4-6):
- 1 1/2 pounds ground beef
- 1 tablespoon olive oil
- 1 medium onion, finely chopped
- 1 green bell pepper, finely chopped
- 2 cloves garlic, minced
- 1 cup ketchup
- 2 tablespoons tomato paste
- 1 tablespoon Worcestershire sauce
- 1 tablespoon brown sugar
- 1 teaspoon mustard powder
- Salt and pepper to taste
- 6 hamburger buns
Cooking Instructions:
- Prepare the Ingredients: Begin by gathering all the ingredients. Finely chop the onion and bell pepper and mince the garlic. Having everything prepped ahead of time will make the cooking process smoother.
- Cook the Beef: In a large skillet, heat the olive oil over medium-high heat. Add the ground beef, breaking it up with a wooden spoon. Cook until the beef is browned and no longer pink, about 5-7 minutes. Drain any excess fat from the skillet.
- Sauté the Vegetables: Reduce the heat to medium and add the chopped onion, bell pepper, and minced garlic to the skillet. Cook for about 4-5 minutes, or until the vegetables are softened and fragrant.
- Make the Sauce: Stir in the ketchup, tomato paste, Worcestershire sauce, brown sugar, and mustard powder. Mix well to combine all the ingredients, ensuring the beef and vegetables are evenly coated.
- Simmer: Reduce the heat to low and let the mixture simmer for about 10 minutes, stirring occasionally. This allows the flavors to meld together and the sauce to thicken.
- Season and Serve: Taste the Sloppy Joe mixture and add salt and pepper to your liking. Serve the mixture hot on hamburger buns. For an extra touch, you can toast the buns lightly before adding the filling.
Extra Tips:
For added flavor, consider adding a splash of vinegar or a dash of hot sauce to the mixture if your family enjoys a bit of tang or spice. If you prefer a leaner option, you can substitute ground turkey or chicken for the beef.
Additionally, you can sneak in extra vegetables, such as grated carrots or zucchini, for a boost of nutrition without altering the taste considerably. Finally, Sloppy Joes can be made ahead of time and stored in the refrigerator for up to three days, making them an excellent option for meal prep. Just reheat the mixture on the stove before serving.
Healthy Veggie Stir Fry for Picky Eaters
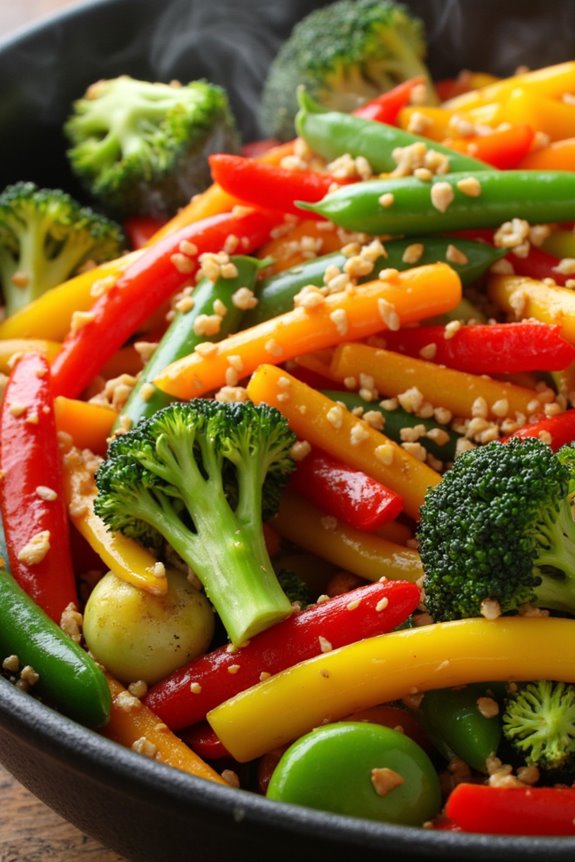
Finding meals that both nourish and delight picky eaters can be quite the challenge, but this Healthy Veggie Stir Fry is a winner in every sense. Packed with vibrant vegetables and a flavorful sauce, this dish isn’t only visually appealing but also nutritious and satisfying. The combination of colorful veggies guarantees that even the pickiest of eaters won’t be able to resist digging in.
The beauty of this recipe is its adaptability; feel free to swap or add any vegetables your family prefers, ensuring everyone at the table enjoys their meal. This stir fry is perfect for busy weeknights as it comes together quickly and requires minimal preparation. By using fresh, seasonal produce, you can guarantee maximum flavor and nutrition.
The recipe aims to strike a balance between taste and health, making it an ideal choice for parents looking to introduce more vegetables into their children’s diets. Here’s how you can make this delightful dish for a serving size of 4-6 people.
Ingredients:
- 2 tablespoons vegetable oil
- 1 onion, sliced
- 2 cloves garlic, minced
- 1 red bell pepper, sliced
- 1 yellow bell pepper, sliced
- 1 cup broccoli florets
- 1 cup snap peas
- 1 cup carrots, julienned
- 2 tablespoons soy sauce
- 1 tablespoon oyster sauce
- 1 teaspoon sesame oil
- 1 tablespoon cornstarch mixed with 2 tablespoons water
- Salt and pepper to taste
- Cooked rice or noodles, for serving
- Optional: sesame seeds and sliced green onions for garnish
Cooking Instructions:
- Prepare the Vegetables: Begin by washing and slicing all the vegetables as instructed. This will guarantee that all ingredients are ready to be cooked quickly when the time comes.
- Heat the Oil: In a large wok or skillet, heat the vegetable oil over medium-high heat. The oil should be hot enough that it shimmers but not so hot that it smokes.
- Sauté Onions and Garlic: Add the sliced onion and minced garlic to the pan. Sauté for about 2 minutes until the onions are translucent and the garlic is fragrant.
- Cook the Vegetables: Add the sliced bell peppers, broccoli florets, snap peas, and carrots to the pan. Stir-fry the vegetables for about 5-7 minutes until they’re tender-crisp. Make sure to keep the vegetables moving to guarantee even cooking.
- Add the Sauces: Reduce the heat to medium and stir in the soy sauce, oyster sauce, and sesame oil. Mix well so that the vegetables are evenly coated.
- Thicken the Sauce: Add the cornstarch mixture to the pan and stir continuously until the sauce thickens and coats the vegetables, about 2 minutes.
- Season and Serve: Taste and adjust seasoning with salt and pepper as needed. Serve the stir fry over cooked rice or noodles and garnish with sesame seeds and sliced green onions if desired.
Extra Tips: When making this stir fry, it’s important to keep the vegetables moving in the pan to prevent them from burning and to guarantee even cooking. If you prefer a spicier kick, consider adding a pinch of red pepper flakes or a dash of sriracha sauce.
Additionally, to save time on busy evenings, you can prep the vegetables ahead of time and store them in the fridge until you’re ready to cook. Finally, remember that the key to a great stir fry is cooking over high heat quickly, which helps maintain the vibrant color and crispness of the vegetables.
Crunchy Fish Sticks Made Easy
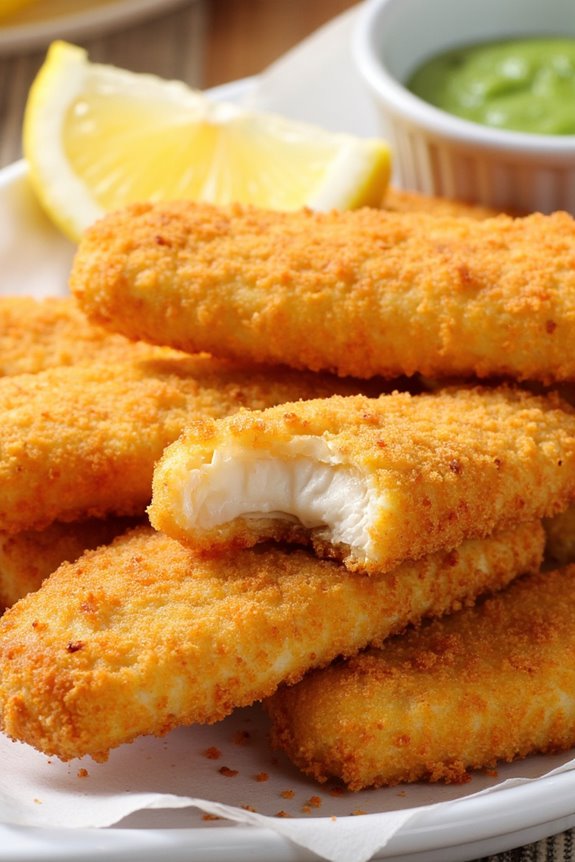
Crunchy Fish Sticks are a classic favorite among kids and a delightful homemade alternative to store-bought options. This recipe is designed to be simple, quick, and fun to make, guaranteeing that your family gets a nutritious meal packed with flavor and texture. By using fresh ingredients and a few smart techniques, you can create fish sticks that are crispy on the outside and tender on the inside, making them the perfect dinner option for your little ones.
The key to great fish sticks is selecting the right type of fish and guaranteeing that each piece is evenly coated with a crispy breading. The recipe below is tailored for a serving size of 4-6 people, making it ideal for family dinners or gatherings. With just a few steps, you’ll have a batch of mouthwatering fish sticks that your kids will love.
Ingredients (Serves 4-6):
- 1 ½ pounds of white fish fillets (such as cod or haddock)
- 1 cup all-purpose flour
- 2 large eggs
- 2 tablespoons milk
- 1 ½ cups panko breadcrumbs
- 1 teaspoon garlic powder
- 1 teaspoon onion powder
- ½ teaspoon paprika
- Salt and pepper to taste
- 3 tablespoons vegetable oil
- Lemon wedges, for serving (optional)
Cooking Instructions:
- Prepare the Fish: Rinse the fish fillets under cold water and pat them dry with paper towels. Cut the fillets into strips approximately 1 inch wide and 4 inches long.
- Set Up the Breading Station: In one shallow dish, place the flour and season with a pinch of salt and pepper. In a second shallow dish, beat the eggs together with the milk. In a third shallow dish, combine the panko breadcrumbs, garlic powder, onion powder, paprika, and a pinch of salt and pepper.
- Coat the Fish: Dredge each fish strip in the flour, shaking off any excess. Dip the strip into the egg mixture, allowing any excess to drip off. Finally, press the strip into the breadcrumb mixture, guaranteeing it’s fully coated. Repeat with all the fish strips.
- Preheat the Pan: Heat the vegetable oil in a large non-stick skillet over medium heat. The oil should be hot but not smoking.
- Cook the Fish Sticks: Working in batches, add the breaded fish strips to the skillet, leaving space between each piece. Cook for 3-4 minutes on each side, or until the breadcrumbs are golden brown and the fish is cooked through and flakes easily with a fork. Use additional oil as needed for subsequent batches.
- Serve: Transfer the cooked fish sticks to a paper towel-lined plate to drain any excess oil. Serve warm with optional lemon wedges and your choice of dipping sauce.
Extra Tips:
For an even crunchier texture, consider using a mixture of panko and regular breadcrumbs, or add a small amount of grated Parmesan cheese to the breadcrumb mixture.
If you prefer baking over frying, you can arrange the breaded fish strips on a greased baking sheet and bake them in a preheated oven at 400°F (200°C) for about 12-15 minutes, turning halfway through. This method reduces oil usage and still delivers great results.
Always guarantee the fish is cooked to an internal temperature of 145°F (63°C) for safety.
Enjoy Breakfast-for-Dinner Pancakes

Breakfast-for-Dinner Pancakes is a delightful dish that brings the comfort and warmth of morning meals to your evening dining table. This kid-approved meal isn’t just delicious but also incredibly fun to make, allowing the whole family to get involved. The fluffy and tender pancakes can be served with a variety of toppings, such as fresh fruits, maple syrup, or even a dollop of whipped cream, making it a versatile option that caters to everyone’s palate.
Perfect for a casual dinner, this recipe serves 4-6 people, guaranteeing there’s plenty to go around. The batter is easy to whip up, requiring just a few staple ingredients you likely already have in your pantry. In just a few simple steps, you’ll have a stack of golden pancakes ready to be devoured. Whether you’re looking to shake up your dinner routine or simply satisfy a craving, Breakfast-for-Dinner Pancakes is a surefire way to bring joy to the table.
Ingredients:
- 2 cups all-purpose flour
- 2 tablespoons sugar
- 2 teaspoons baking powder
- 1/2 teaspoon baking soda
- 1/2 teaspoon salt
- 2 cups buttermilk
- 2 large eggs
- 1/4 cup unsalted butter, melted
- 1 teaspoon vanilla extract
- Butter or oil for cooking
- Optional toppings: maple syrup, fresh fruits, whipped cream
Instructions:
- Prepare the Batter: In a large mixing bowl, combine the dry ingredients: flour, sugar, baking powder, baking soda, and salt. Whisk them together until well blended.
- Mix Wet Ingredients: In another bowl, whisk together the buttermilk, eggs, melted butter, and vanilla extract until smooth and uniform.
- Combine Wet and Dry Ingredients: Gradually pour the wet ingredients into the dry ingredients, gently mixing with a spatula or wooden spoon until just combined. Be careful not to over-mix; a few lumps in the batter are okay.
- Preheat Griddle or Pan: Heat a non-stick griddle or frying pan over medium heat. Once hot, lightly grease it with butter or oil.
- Cook the Pancakes: Pour about 1/4 cup of batter onto the griddle for each pancake. Cook until bubbles form on the surface and the edges look set, about 2-3 minutes. Flip the pancakes and cook for another 1-2 minutes until golden brown on both sides.
- Serve: Remove the pancakes from the griddle and keep them warm. Repeat the process with the remaining batter. Serve the pancakes warm with your choice of toppings.
Extra Tips:
To make sure your pancakes are light and fluffy, avoid over-mixing the batter, as this can result in dense pancakes. Letting the batter rest for a few minutes before cooking can also help achieve a better texture.
If you don’t have buttermilk on hand, you can make a substitute by adding 2 tablespoons of lemon juice or vinegar to 2 cups of regular milk and letting it sit for 5 minutes.
Experiment with mix-ins like chocolate chips or blueberries to add an extra layer of flavor that kids will love.