

The secret to a stress-free holiday season lies in make-ahead Christmas desserts. Picture your fridge stocked with a classic tiramisu, a chocolate yule log ready to serve, and pecan pie bars that are simply irresistible. With these treats prepped in advance, you can savor the festivities without the last-minute scramble. Wondering how to make this holiday magic happen? Let’s explore these delicious, time-saving treats together.
Classic Tiramisu

Tiramisu, a classic Italian dessert, is a delightful combination of coffee-soaked ladyfingers layered with a rich mascarpone cream. This no-bake dessert is perfect for making ahead of time, allowing the flavors to meld together beautifully. Its creamy texture paired with a hint of coffee and cocoa makes it an irresistible treat for any Christmas gathering.
With its elegant presentation and delectable taste, classic tiramisu is sure to impress your guests and become a holiday favorite. This recipe serves 4-6 people and requires a bit of patience as it needs to chill for several hours or overnight. The key to a perfect tiramisu is using high-quality ingredients, especially the mascarpone and espresso.
By preparing this dessert a day in advance, you’ll have more time to enjoy the festivities without the stress of last-minute preparations. Let’s plunge into creating this make-ahead Christmas dessert that will leave a lasting impression.
Ingredients:
- 3 large eggs, separated
- 1 cup granulated sugar
- 1 cup mascarpone cheese
- 1 cup heavy cream
- 1 cup brewed espresso or strong coffee, cooled
- 1/4 cup coffee liqueur (optional)
- 24 ladyfingers (savoiardi)
- Unsweetened cocoa powder, for dusting
- Dark chocolate shavings, for garnish (optional)
Instructions:
- Prepare the Egg Mixture: In a mixing bowl, whisk the egg yolks and half of the sugar (1/2 cup) until the mixture is pale and creamy. This should take about 3-5 minutes. Add the mascarpone cheese to the egg yolk mixture and gently fold until smooth. Be careful not to overmix.
- Whip the Cream: In a separate bowl, whip the heavy cream until soft peaks form. Gently fold the whipped cream into the mascarpone mixture until well incorporated.
- Beat the Egg Whites: In another clean bowl, beat the egg whites until frothy. Gradually add the remaining sugar (1/2 cup) and continue to beat until stiff peaks form. Carefully fold the egg whites into the mascarpone mixture, making sure you maintain the light and airy texture.
- Prepare the Coffee Mixture: In a shallow dish, combine the brewed espresso (or strong coffee) with the coffee liqueur if using. Stir to mix.
- Assemble the Tiramisu: Quickly dip each ladyfinger into the coffee mixture, making sure they’re soaked but not soggy. Layer half of the soaked ladyfingers in the bottom of a 9×9-inch dish. Spread half of the mascarpone mixture over the ladyfingers. Repeat with another layer of soaked ladyfingers and the remaining mascarpone mixture.
- Chill the Tiramisu: Cover the dish with plastic wrap and refrigerate for at least 4 hours, preferably overnight, to allow the flavors to develop and the dessert to set.
- Serve: Just before serving, dust the top of the tiramisu with unsweetened cocoa powder. Garnish with dark chocolate shavings if desired. Cut into squares and serve chilled.
Extra Tips:
For the best results, confirm that your eggs are fresh and at room temperature, which will help achieve the right texture for both the egg yolk mixture and the whipped egg whites. If you’re concerned about using raw eggs, look for pasteurized eggs at your grocery store.
To make serving easier, use a sharp knife dipped in hot water to cut clean slices. Tiramisu can be stored in the refrigerator for up to 3 days, making it a perfect dessert to prepare ahead of time. Enjoy the delightful flavors of this classic dessert with your loved ones this holiday season!
Chocolate Yule Log
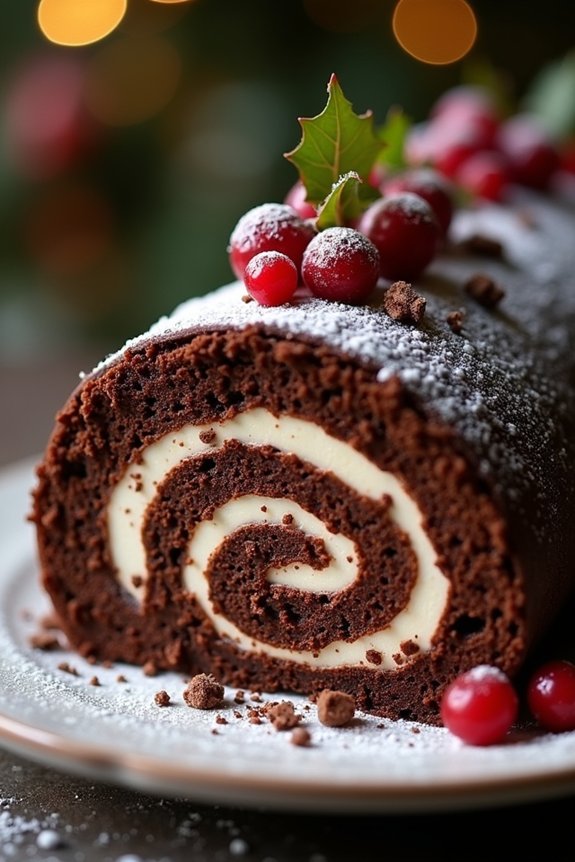
The Chocolate Yule Log, or Bûche de Noël, is a classic Christmas dessert that brings a touch of elegance and tradition to your holiday table. Its rich chocolate sponge and creamy filling rolled into a log shape, often decorated to resemble a tree branch, captures the festive spirit while delighting the taste buds.
Ideal for making ahead, this dessert allows you to focus on other holiday preparations while guaranteeing a beautiful and delicious treat is ready to serve. Perfect for a serving size of 4-6 people, the Chocolate Yule Log is a wonderful addition to any Christmas gathering.
The process involves creating a light and airy chocolate sponge cake, a luscious filling, and an optional chocolate ganache for added decadence. With a bit of patience and creativity, you can craft a dessert that not only looks spectacular but also captures the warmth and joy of the holiday season.
Ingredients:
- For the Sponge Cake:
- 4 large eggs, separated
- 100g (1/2 cup) granulated sugar
- 1 teaspoon vanilla extract
- 65g (1/2 cup) all-purpose flour
- 30g (1/4 cup) unsweetened cocoa powder
- 1/4 teaspoon salt
- For the Filling:
- 240ml (1 cup) heavy cream
- 2 tablespoons powdered sugar
- 1 teaspoon vanilla extract
- Optional Ganache Topping:
- 120ml (1/2 cup) heavy cream
- 120g (4 oz) semi-sweet chocolate, chopped
- Decorations (optional):
- Powdered sugar for dusting
- Chocolate shavings or curls
- Fresh berries or holly leaves
Instructions:
- Preheat and Prepare: Preheat your oven to 180°C (350°F). Line a 10×15-inch jelly roll pan with parchment paper, ensuring it covers all sides.
- Make the Batter: In a large bowl, beat the egg yolks, 50g (1/4 cup) of sugar, and vanilla extract until pale and thick. In another bowl, sift together the flour, cocoa, and salt. Gently fold these dry ingredients into the yolk mixture until combined.
- Whip Egg Whites: In a separate clean bowl, whip the egg whites until soft peaks form. Gradually add the remaining 50g (1/4 cup) sugar and continue to beat until stiff peaks form.
- Combine Mixtures: Gently fold the whipped egg whites into the chocolate mixture in three additions, ensuring the batter remains light and airy.
- Bake the Sponge: Pour the batter into the prepared pan and spread evenly. Tap the pan lightly to remove air bubbles. Bake for 10-12 minutes, or until the cake springs back when touched.
- Roll the Cake: While the cake is still warm, carefully roll it up in the parchment paper, starting from one of the short sides. Allow it to cool completely on a wire rack in its rolled form.
- Prepare the Filling: Whip the heavy cream, powdered sugar, and vanilla extract together until stiff peaks form. Unroll the cooled cake and evenly spread the cream filling over it.
- Reroll the Cake: Gently reroll the cake without the parchment paper. Place it seam-side down on a serving platter.
- Make the Ganache (optional): Heat the heavy cream until just simmering, then pour it over the chopped chocolate. Let it sit for a minute before stirring until smooth. Cool slightly before spreading over the cake.
- Decorate: Dust with powdered sugar and decorate with chocolate shavings, berries, or holly leaves as desired.
Extra Tips:
When making the Chocolate Yule Log, patience is key. Confirm the sponge cake is rolled while it’s warm to prevent cracking. If it does crack slightly, the filling and ganache can help cover imperfections.
For the best results, prepare this dessert a day in advance to let the flavors meld and the cake settle. Additionally, get creative with decorations to match your holiday theme, and remember that practice makes perfect with rolling techniques. Enjoy the process and the delicious result!
Pecan Pie Bars
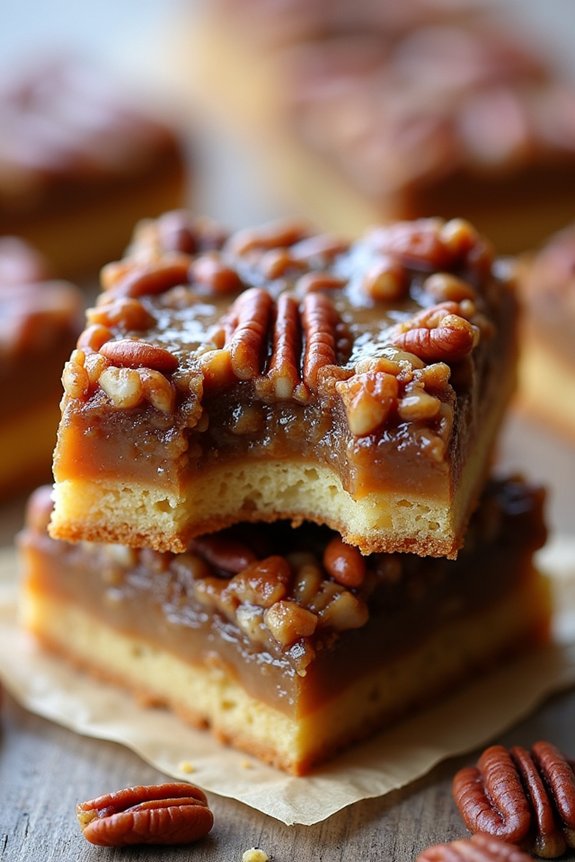
Pecan Pie Bars are an irresistibly sweet and nutty dessert that encapsulate all the flavors of a traditional pecan pie in a convenient, bite-sized form. Perfect for holiday gatherings, these make-ahead bars offer a delightful combination of a buttery shortbread crust topped with a gooey, caramel-like pecan filling.
Not only are they delicious, but they also hold up well when made in advance, making them a fantastic choice for a stress-free Christmas dessert menu. This recipe serves 4-6 people, guaranteeing that everyone gets to enjoy a piece of the holiday magic.
With a rich, decadent taste and a texture that melts in your mouth, Pecan Pie Bars are sure to impress your guests and become a family favorite. Whether you’re looking to simplify your holiday baking or simply want a crowd-pleaser that can be prepared ahead of time, these bars are your answer.
Ingredients:
- 1 cup all-purpose flour
- 1/4 cup granulated sugar
- 1/2 cup unsalted butter, softened
- 3/4 cup packed brown sugar
- 1/2 cup light corn syrup
- 2 large eggs
- 1 tablespoon vanilla extract
- 1 1/2 cups chopped pecans
- 1/4 teaspoon salt
Instructions:
1. Preheat and Prepare the Pan:
Preheat your oven to 350°F (175°C). Line an 8×8-inch baking pan with parchment paper or aluminum foil, leaving an overhang on the sides to easily lift the bars out later. This will prevent the bars from sticking and guarantee an easy cleanup.
2. Make the Crust:
In a medium bowl, mix together the flour and granulated sugar. Cut in the softened butter using a pastry cutter or your hands until the mixture resembles coarse crumbs. Press this mixture firmly into the bottom of the prepared baking pan to form the crust. Bake for 15 minutes or until lightly golden.
3. Prepare the Pecan Filling:
While the crust is baking, whisk together the brown sugar, corn syrup, eggs, vanilla extract, and salt in another bowl until smooth and well combined. Stir in the chopped pecans, guaranteeing they’re evenly coated with the filling mixture.
4. Assemble and Bake:
Pour the pecan filling over the hot crust, spreading it evenly with a spatula. Return the pan to the oven and bake for an additional 25-30 minutes, or until the filling is set and slightly firm to the touch. The center shouldn’t jiggle when the pan is gently shaken.
5. Cool and Slice:
Allow the bars to cool completely in the pan on a wire rack. Once cooled, use the parchment or foil overhang to lift the bars out of the pan. Transfer to a cutting board and slice into squares or rectangles.
Extra Tips:
To guarantee the best texture, make sure the bars cool completely before slicing, as this allows the filling to set properly. If you’re making these ahead of time, store them in an airtight container at room temperature for up to 3 days, or refrigerate for longer storage.
You can also freeze them by wrapping tightly in plastic wrap and storing in a freezer-safe bag for up to 2 months. Just thaw them at room temperature before serving. Enjoy these delicious bars with a dollop of whipped cream or a scoop of vanilla ice cream for an extra indulgent treat.
Cranberry Cheesecake
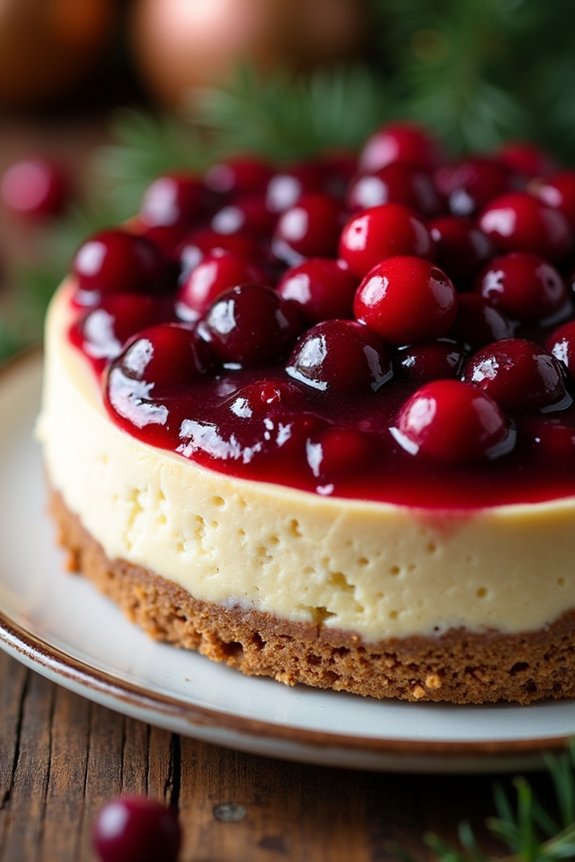
Indulge in the festive spirit with this delectable Cranberry Cheesecake, a delightful addition to your make-ahead Christmas desserts. This creamy, tangy dessert combines the richness of cheesecake with the tartness of cranberries, making it a perfect treat for the holiday season.
Preparing this dessert in advance means you can enjoy the festivities without the last-minute rush. Its vibrant red color and luscious texture make it not only a feast for the taste buds but also a stunning centerpiece for your Christmas table.
The beauty of this Cranberry Cheesecake lies in its simplicity and ease of preparation. With a buttery graham cracker crust, a smooth cream cheese filling, and a topping of homemade cranberry sauce, this dessert is sure to impress your family and guests. Plus, it serves 4-6 people, making it ideal for small to medium gatherings.
Let’s explore the ingredients and steps to create this irresistible holiday dessert.
Ingredients (Serves 4-6):
- 1 1/2 cups graham cracker crumbs
- 1/4 cup unsalted butter, melted
- 3 (8 oz) packages cream cheese, softened
- 1 cup granulated sugar
- 3 large eggs
- 1 teaspoon vanilla extract
- 1 cup fresh or frozen cranberries
- 1/2 cup water
- 1/2 cup granulated sugar (for cranberry sauce)
- 1 tablespoon cornstarch
- 1 tablespoon water (for cornstarch slurry)
Cooking Instructions:
1. Prepare the Crust: Preheat your oven to 325°F (160°C). In a medium bowl, mix the graham cracker crumbs and melted butter until well combined. Press the mixture firmly into the bottom of a 9-inch springform pan to form the crust. Bake for 10 minutes, then remove from the oven and let it cool.
2. Make the Cheesecake Filling: In a large mixing bowl, beat the softened cream cheese and 1 cup of granulated sugar using an electric mixer on medium speed until smooth and creamy. Add the eggs one at a time, beating well after each addition. Stir in the vanilla extract until fully incorporated.
3. Assemble the Cheesecake: Pour the cream cheese mixture over the cooled crust in the springform pan, spreading it evenly with a spatula. Smooth the top for an even surface.
4. Bake the Cheesecake: Place the cheesecake in the preheated oven and bake for 50-60 minutes, or until the center is set and the edges are slightly golden. Turn off the oven and leave the cheesecake inside with the door slightly ajar for an additional 30 minutes to cool gradually.
5. Prepare the Cranberry Sauce: While the cheesecake cools, make the cranberry sauce. In a saucepan, combine the cranberries, 1/2 cup of granulated sugar, and 1/2 cup of water. Bring to a boil, then reduce the heat and simmer for about 10 minutes until the cranberries burst and the sauce thickens.
Mix the cornstarch with 1 tablespoon of water to create a slurry and stir it into the cranberry sauce. Cook for another 2 minutes until the sauce thickens further. Allow it to cool.
6. Top the Cheesecake: Once the cheesecake is completely cooled, remove it from the springform pan. Spread the cooled cranberry sauce evenly over the top. Refrigerate for at least 4 hours, or overnight, to allow the flavors to meld and the cheesecake to set completely.
Extra Tips:
For the best results, make sure that all your ingredients, especially the cream cheese, are at room temperature before starting the recipe. This will help you achieve a smooth, lump-free cheesecake filling.
When baking the cheesecake, avoid opening the oven door frequently to prevent cracks. If you prefer a less tart cranberry topping, add a little extra sugar to the sauce to suit your taste.
This cheesecake can be made up to two days in advance, making it a perfect make-ahead dessert for busy holiday schedules. Enjoy your Cranberry Cheesecake with a dusting of powdered sugar for an extra festive touch!
Gingerbread Trifle
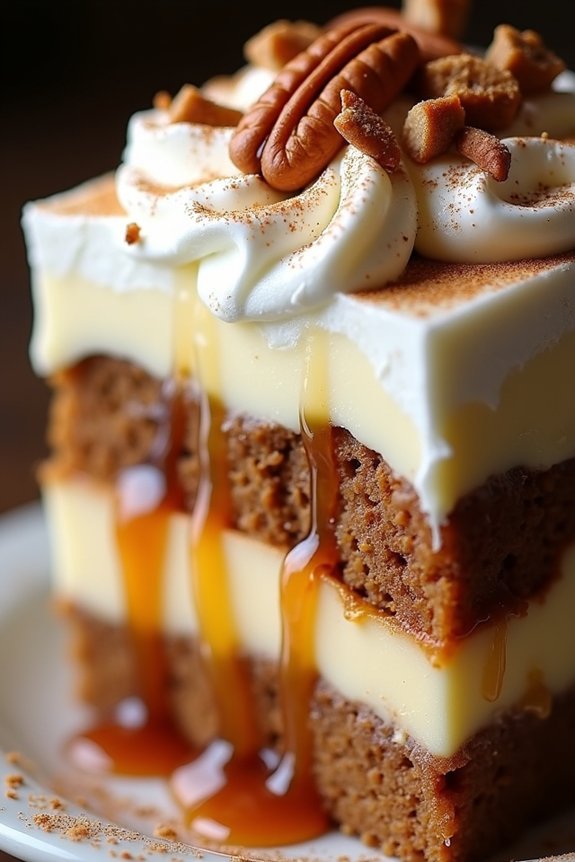
The Gingerbread Trifle is a delightful make-ahead Christmas dessert that perfectly captures the warmth and spice of the holiday season. This layered treat combines the rich flavors of gingerbread cake with creamy custard and a hint of festive spirit from whipped cream and caramel sauce.
It’s a visually stunning dessert that’s as delicious as it’s beautiful, making it a centerpiece-worthy addition to any holiday gathering. Serve it in a large trifle dish or individual glasses for a more elegant presentation.
This recipe for Gingerbread Trifle is designed to serve 4-6 people, offering a generous portion of this luscious dessert. The make-ahead nature of the trifle allows the flavors to meld together beautifully, enhancing the overall taste. Perfect for hosting friends or family during the festive season, this trifle is sure to impress even the most discerning dessert lovers.
Ingredients:
- 1 gingerbread cake, baked and cooled (store-bought or homemade)
- 2 cups vanilla custard
- 1 cup heavy whipping cream
- 2 tablespoons powdered sugar
- 1 teaspoon vanilla extract
- 1/4 cup caramel sauce
- 1/4 cup chopped pecans
- 1 teaspoon ground cinnamon
- 1/4 teaspoon ground nutmeg
Cooking Instructions:
- Prepare the Gingerbread Cake: If you’re using a store-bought gingerbread cake, skip to the next step. If homemade, bake your gingerbread cake according to your favorite recipe and allow it to cool completely. Once cooled, cut the cake into 1-inch cubes.
- Make the Whipped Cream: In a large mixing bowl, combine the heavy whipping cream, powdered sugar, and vanilla extract. Using an electric mixer, whip the cream on medium-high speed until soft peaks form. Set aside in the refrigerator until ready to use.
- Layer the Trifle: In a trifle dish or individual glasses, begin layering the dessert. Start with a layer of gingerbread cake cubes at the bottom. Next, add a layer of vanilla custard, spreading it evenly over the cake. Drizzle a small amount of caramel sauce over the custard.
- Repeat Layers: Continue layering with more gingerbread cake cubes, custard, and caramel sauce until you reach the top of the dish, finishing with a layer of whipped cream.
- Garnish: Sprinkle the top with chopped pecans, ground cinnamon, and a pinch of ground nutmeg for extra flavor and a festive look.
- Chill: Cover the trifle with plastic wrap and refrigerate for at least 2 hours, or overnight if making ahead, to allow the flavors to meld together.
Extra Tips:
To add an extra touch of holiday flavor, consider incorporating a splash of dark rum or brandy into the custard or whipped cream. The alcohol will enhance the warmth of the gingerbread spices.
Additionally, if desired, you can substitute the caramel sauce with a spiced apple or cranberry sauce for a different flavor profile. Remember to balance the layers evenly to warrant every serving has a perfect mix of cake, custard, and cream.
Peppermint Bark
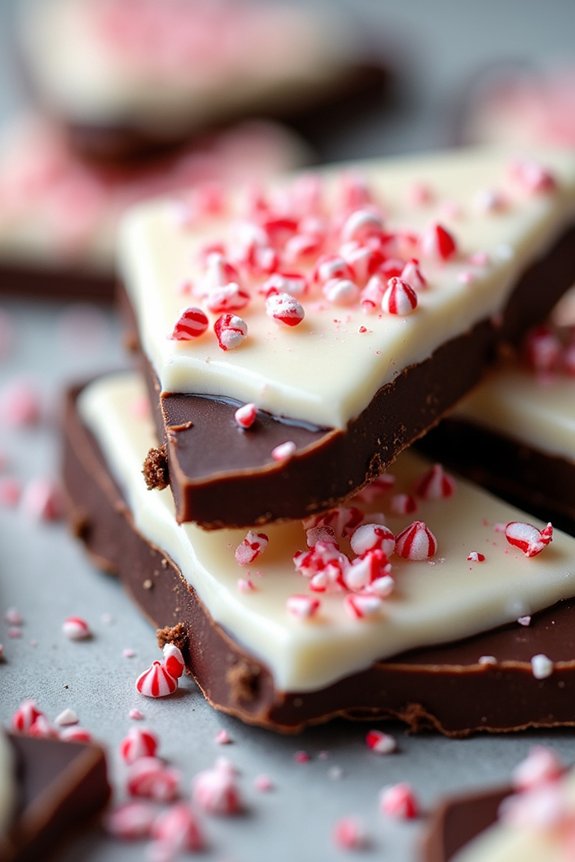
Peppermint Bark is a classic holiday treat that combines the rich flavors of chocolate with the invigorating zing of peppermint. It’s a delightful dessert that appeals to both kids and adults, making it perfect for holiday gatherings. Best of all, this make-ahead treat is incredibly simple to prepare, allowing you to focus on other aspects of your holiday planning.
With just a few ingredients and minimal effort, you can create a festive dessert that captures the spirit of Christmas. This recipe yields enough Peppermint Bark to serve 4-6 people, making it an ideal choice for small gatherings or as a sweet addition to a larger dessert spread. The layers of dark and white chocolate, topped with crushed peppermint candies, create a beautiful and tasty holiday presentation.
Store it in an airtight container, and you’ll have a ready-to-serve dessert whenever you need it during the busy holiday season.
Ingredients:
- 8 ounces of dark chocolate (semisweet or bittersweet)
- 8 ounces of white chocolate
- 1 teaspoon of peppermint extract
- 1/2 cup crushed peppermint candies or candy canes
Instructions:
1. Prepare the Baking Sheet:
Line a baking sheet with parchment paper or a silicone baking mat. This will prevent the chocolate from sticking and make it easier to remove the bark once it has set.
2. Melt the Dark Chocolate:
Break the dark chocolate into small pieces and place them in a microwave-safe bowl. Microwave the chocolate in 30-second intervals, stirring in between, until the chocolate is completely melted and smooth. You can also melt the chocolate using a double boiler if preferred.
3. Spread the Dark Chocolate:
Pour the melted dark chocolate onto the prepared baking sheet. Use a spatula to spread it into an even layer, about 1/4 inch thick. Place the baking sheet in the refrigerator to allow the chocolate to set while you prepare the next layer.
4. Melt the White Chocolate:
Repeat the melting process with the white chocolate, using the same microwave or double boiler method. Once melted, stir in the peppermint extract until well combined.
5. Spread the White Chocolate:
Remove the baking sheet with the set dark chocolate from the refrigerator. Pour the melted white chocolate over the set dark chocolate, spreading it evenly to cover the dark chocolate completely.
6. Add the Peppermint Topping:
Immediately sprinkle the crushed peppermint candies over the white chocolate layer. Press them gently into the chocolate with the back of a spoon to make certain they adhere as the chocolate cools.
7. Set the Bark:
Return the baking sheet to the refrigerator for about 30 minutes, or until the chocolate is fully set and hard.
8. Break and Serve:
Once set, remove the bark from the refrigerator. Break it into pieces of varying sizes using your hands or a sharp knife. Serve immediately or store in an airtight container until ready to enjoy.
Extra Tips:
For an even more festive look, consider using colored peppermint candies or adding a sprinkle of edible glitter on top of the bark. If you prefer a thicker bark, you can double the chocolate quantities for each layer.
When melting chocolate, make sure that no water comes into contact with it, as this can cause the chocolate to seize. Finally, feel free to experiment with different types of chocolate or flavor extracts, such as almond or vanilla, for a unique twist on the traditional peppermint bark.
Eggnog Bread Pudding
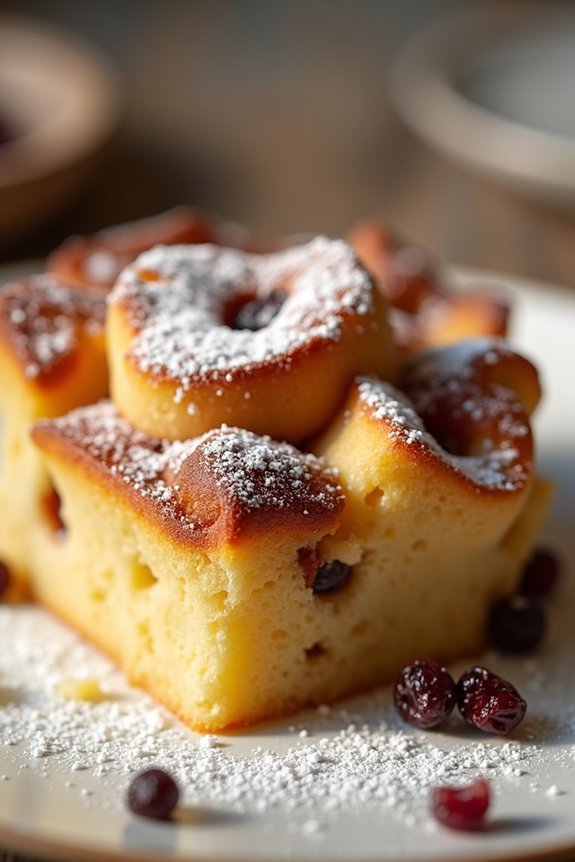
Eggnog Bread Pudding is a delightful make-ahead Christmas dessert that combines the rich, creamy flavors of eggnog with the comforting texture of bread pudding. This dish is perfect for those festive gatherings where you want to impress your guests but also enjoy the celebration without spending too much time in the kitchen.
The aroma of nutmeg and vanilla will fill your home, creating a warm and inviting atmosphere. This recipe is designed for a serving size of 4-6 people, making it ideal for a small family get-together or a cozy holiday dinner with friends. The preparation can be done the night before, allowing the flavors to meld together beautifully.
When you’re ready to serve, just pop it in the oven, and you’ll have a deliciously decadent dessert that will surely become a holiday favorite.
Ingredients:
- 1 loaf of day-old French bread, cubed
- 2 cups eggnog
- 1 cup whole milk
- 4 large eggs
- 3/4 cup granulated sugar
- 1 teaspoon vanilla extract
- 1/2 teaspoon ground nutmeg
- 1/4 teaspoon ground cinnamon
- 1/4 cup unsalted butter, melted
- Optional: 1/2 cup raisins or dried cranberries
Cooking Instructions:
- Prepare the Bread: Begin by cutting the loaf of day-old French bread into cubes. Place the cubed bread in a large mixing bowl. Stale bread works best as it absorbs the custard mixture more effectively.
- Mix the Custard: In a separate bowl, whisk together the eggnog, whole milk, eggs, granulated sugar, vanilla extract, ground nutmeg, and ground cinnamon until well combined and smooth.
- Combine Bread and Custard: Pour the custard mixture over the cubed bread, making certain all pieces are thoroughly coated. Gently toss the bread cubes to promote even soaking. Add raisins or dried cranberries if desired.
- Transfer to Baking Dish: Grease a 9×13-inch baking dish with melted butter. Pour the bread and custard mixture into the prepared dish, spreading it evenly. Drizzle the remaining melted butter over the top.
- Chill and Preheat: Cover the baking dish with plastic wrap and refrigerate for at least 2 hours, or overnight. This allows the bread to fully absorb the custard. When ready to bake, preheat your oven to 350°F (175°C).
- Bake the Pudding: Remove the plastic wrap and bake in the preheated oven for 45-50 minutes, or until the pudding is set and the top is golden brown.
- Cool and Serve: Allow the bread pudding to cool for about 10 minutes before serving. This will help it set and make serving easier.
Extra Tips:
For added texture and flavor, consider topping the baked pudding with a sprinkle of powdered sugar or a dollop of whipped cream before serving.
If you want to make it more indulgent, serve with a scoop of vanilla ice cream or a drizzle of caramel sauce. To keep the pudding moist, cover it loosely with foil if it starts to brown too quickly while baking.
Spiced Apple Crisp
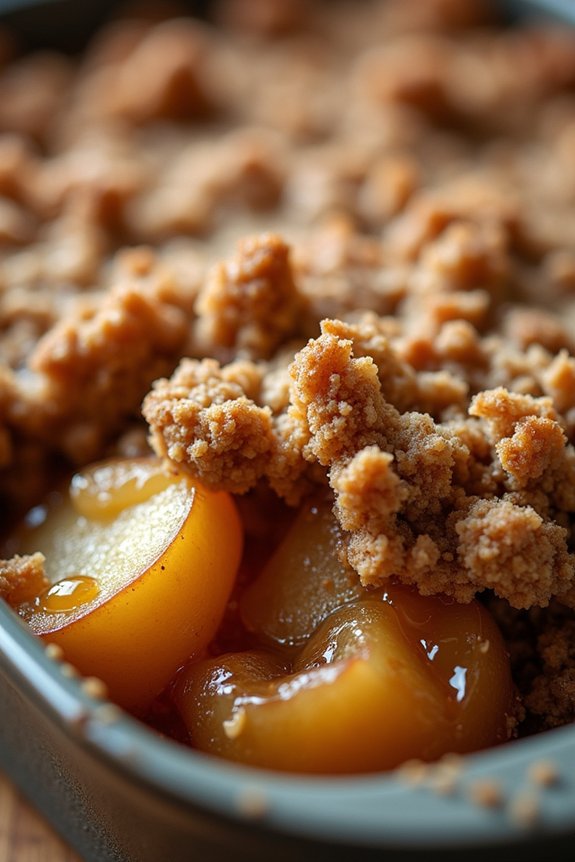
Spiced Apple Crisp is a delightful make-ahead dessert perfect for Christmas gatherings. The warm aroma of cinnamon and nutmeg combined with tender, sweet apples and a crispy, buttery topping is sure to make everyone feel cozy and festive. This dessert isn’t only delicious but also incredibly convenient for holiday planning, as it can be prepared in advance, allowing you more time to enjoy with your loved ones.
This recipe serves 4-6 people and is designed to be assembled ahead of time and baked just before serving. The spiced apple filling, paired with the crisp topping, creates a harmonious balance of flavors and textures that are sure to impress. Whether enjoyed on its own or with a scoop of vanilla ice cream, this Spiced Apple Crisp will become a holiday favorite.
Ingredients:
- 6 cups peeled and sliced apples (such as Granny Smith or Honeycrisp)
- 1 tablespoon lemon juice
- 1/2 cup granulated sugar
- 1 teaspoon ground cinnamon
- 1/4 teaspoon ground nutmeg
- 1/4 teaspoon ground allspice
- 1 cup all-purpose flour
- 1 cup rolled oats
- 1 cup packed brown sugar
- 1/2 cup unsalted butter, cubed and chilled
- 1/4 teaspoon salt
- Optional: vanilla ice cream or whipped cream for serving
Instructions:
- Prepare the Apples: Preheat your oven to 350°F (175°C). In a large mixing bowl, combine the peeled and sliced apples with lemon juice, granulated sugar, cinnamon, nutmeg, and allspice. Toss the apples until they’re well coated with the spice mixture. This step guarantees that the apples maintain their shape and absorb the spices evenly.
- Transfer to Baking Dish: Pour the apple mixture into a 9×13 inch baking dish. Spread it out evenly to guarantee consistent cooking. This will help the apples cook uniformly and allow the flavors to meld together beautifully.
- Make the Crisp Topping: In a separate bowl, combine the flour, oats, brown sugar, and salt. Add the chilled, cubed butter. Using a pastry cutter or your fingertips, blend the butter into the dry ingredients until the mixture resembles coarse crumbs. The key here is to make certain that the butter is well incorporated to form a crumbly topping.
- Assemble the Crisp: Sprinkle the crumbly topping evenly over the apple mixture in the baking dish. Make sure the entire surface is covered to achieve a uniform crisp texture when baked.
- Bake the Crisp: Place the assembled dish in the preheated oven and bake for 35-40 minutes, or until the topping is golden brown and the apple filling is bubbling around the edges. Cooking times may vary slightly based on your oven, so keep an eye on it towards the end.
- Cool Slightly and Serve: Once baked, remove the dish from the oven and let it cool for about 10 minutes before serving. This allows the juices to settle and makes serving easier.
Extra Tips:
For an extra burst of flavor, consider adding a handful of chopped nuts, such as pecans or walnuts, to the crisp topping.
If you’re preparing this dish ahead of time, you can assemble the apple mixture and topping separately, then store them in airtight containers in the refrigerator for up to 24 hours. Combine them just before baking to make sure the topping stays crisp.
Additionally, try serving the Spiced Apple Crisp with a scoop of vanilla ice cream or a dollop of whipped cream for a delightful contrast of hot and cold.
Mocha Mousse Cups
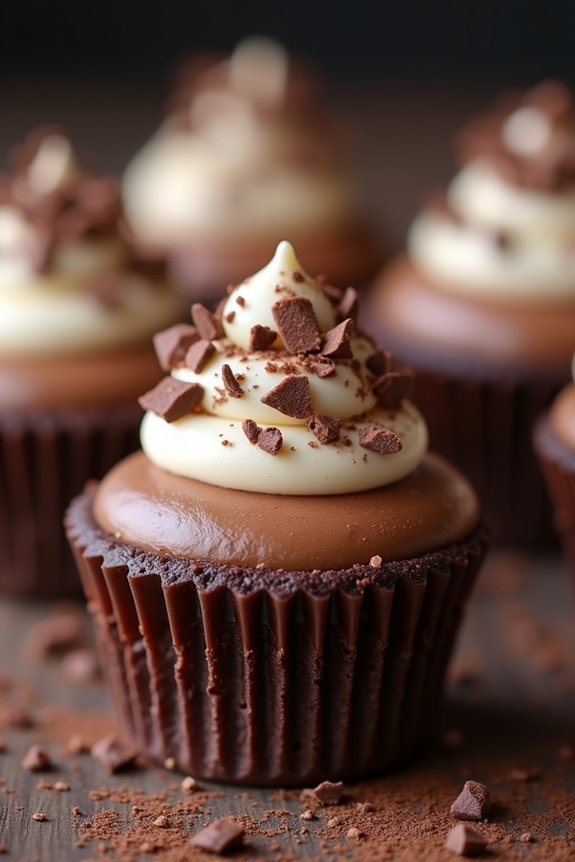
Indulge in the rich and decadent flavors of Mocha Mousse Cups this holiday season. This delightful dessert combines the bold taste of coffee with the creamy texture of chocolate mousse, making it a perfect treat for chocolate and coffee lovers alike.
The best part is, these mocha mousse cups can be made ahead of time, allowing you to focus on other holiday preparations without compromising a sweet finish to your festive meal. Whether you’re hosting a Christmas dinner or attending a potluck, these elegant and simple-to-prepare desserts are sure to impress your guests.
The smooth and airy mousse is beautifully complemented by a crunchy chocolate biscuit base, offering a satisfying contrast in textures with every spoonful. The recipe is designed for a serving size of 4-6 people, guaranteeing that everyone at your gathering gets to enjoy this delicious treat.
With a few simple ingredients and some easy-to-follow steps, you’ll have a dessert that looks as good as it tastes, and can be stored in the refrigerator until it’s time to serve.
Ingredients:
- 1 cup of heavy cream
- 1/2 cup of semi-sweet chocolate chips
- 2 tablespoons of strong brewed coffee, cooled
- 2 tablespoons of granulated sugar
- 1 teaspoon of pure vanilla extract
- 1/4 cup of chocolate biscuit crumbs
- Whipped cream and chocolate shavings for garnish (optional)
Instructions:
- Prepare the Chocolate Base: Begin by evenly distributing the chocolate biscuit crumbs into the bottom of 4-6 small serving cups or ramekins. Press the crumbs down gently to create a firm base. Set aside.
- Melt the Chocolate: In a heatproof bowl, combine the semi-sweet chocolate chips and strong brewed coffee. Place the bowl over a pot of simmering water (double boiler method) and stir until the chocolate is completely melted and smooth. Remove from heat and let it cool slightly.
- Whip the Cream: In a separate bowl, use an electric mixer to whip the heavy cream, granulated sugar, and vanilla extract together until soft peaks form. Be careful not to overwhip, as you want a light and airy texture.
- Combine Ingredients: Gently fold the melted chocolate mixture into the whipped cream using a spatula. Make sure to incorporate the chocolate thoroughly without deflating the cream.
- Assemble the Mousse Cups: Spoon the chocolate mousse evenly over the prepared biscuit bases in each serving cup. Smooth the tops with the back of a spoon or a small spatula.
- Chill the Mousse: Cover the mousse cups with plastic wrap and refrigerate for at least 2 hours, or until set. The mousse can be made up to two days in advance and kept chilled until serving.
- Garnish and Serve: Just before serving, garnish each cup with a dollop of whipped cream and chocolate shavings, if desired. Serve chilled and enjoy!
Extra Tips:
To guarantee that your mocha mousse has a perfect texture, make sure that both the chocolate mixture and the whipped cream are at similar temperatures before combining them. This will help maintain the mousse’s smooth and airy consistency.
For a more intense coffee flavor, consider using espresso instead of regular brewed coffee. If you’re short on time, you can also use store-bought chocolate biscuit crumbs or graham cracker crumbs as a quick alternative for the base.
Red Velvet Cake Roll
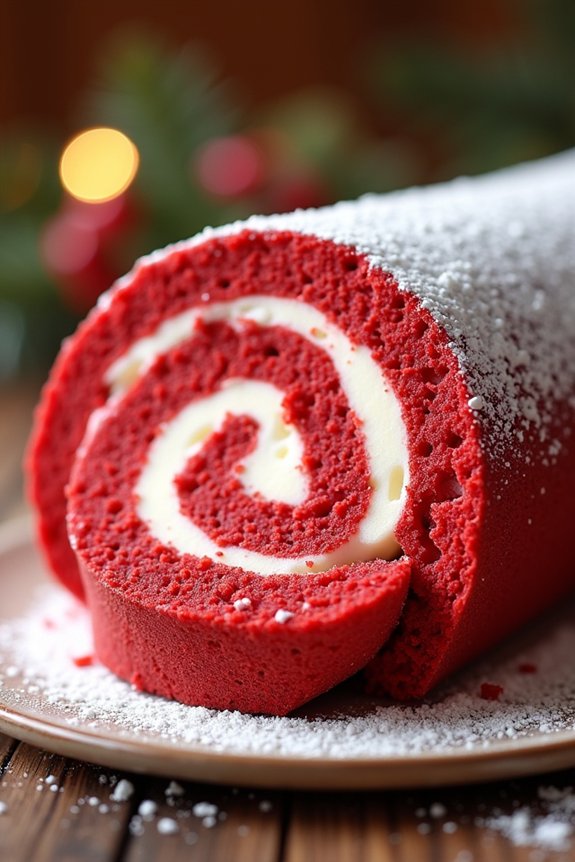
Impress your holiday guests with a stunning Red Velvet Cake Roll, a delightful twist on the classic red velvet cake. This festive dessert combines the rich, chocolatey flavors of red velvet with a creamy, tangy cream cheese filling, all elegantly rolled into a beautiful spiral.
Not only is it visually appealing, but this cake roll is also perfect for making ahead of time, allowing you to enjoy a stress-free Christmas celebration.
This Red Velvet Cake Roll serves 4-6 people, making it an ideal centerpiece for your dessert table. Preparing it in advance guarantees that the flavors meld beautifully, and the cake stays moist and tender. Plus, the convenience of having a pre-made dessert means you can focus on enjoying the company of your loved ones during the holiday festivities.
Ingredients:
- 3 large eggs
- 3/4 cup granulated sugar
- 2 tablespoons vegetable oil
- 1 teaspoon vanilla extract
- 2 tablespoons buttermilk
- 1 cup all-purpose flour
- 2 tablespoons unsweetened cocoa powder
- 1 teaspoon baking powder
- 1/4 teaspoon salt
- 1 tablespoon red food coloring
- Powdered sugar, for dusting
- 8 ounces cream cheese, softened
- 1 cup powdered sugar
- 6 tablespoons unsalted butter, softened
- 1 teaspoon vanilla extract
Cooking Instructions:
- Preheat the Oven and Prepare the Pan: Preheat your oven to 350°F (175°C). Line a 15×10-inch jelly roll pan with parchment paper, guaranteeing it extends over the sides for easy removal later. Lightly grease the parchment paper with non-stick spray.
- Make the Cake Batter: In a large mixing bowl, beat the eggs on high speed for about 5 minutes until thick and lemon-colored. Gradually add the granulated sugar, mixing until well combined. Lower the mixer speed and blend in the vegetable oil, vanilla extract, and buttermilk.
- Combine Dry Ingredients: In a separate bowl, whisk together the all-purpose flour, cocoa powder, baking powder, and salt. Gradually fold the dry ingredients into the wet mixture until just combined. Add the red food coloring, mixing until the batter is evenly colored.
- Bake the Cake: Spread the batter evenly onto the prepared jelly roll pan. Bake for 12-15 minutes or until the cake springs back when touched lightly in the center. Don’t overbake, as this can make the cake difficult to roll.
- Roll the Cake: While the cake is baking, dust a clean kitchen towel with powdered sugar. Once the cake is done, immediately invert it onto the prepared towel. Carefully peel off the parchment paper. Starting at one short end, roll up the cake and towel together. Let it cool completely on a wire rack.
- Prepare the Filling: In a medium bowl, beat the softened cream cheese, powdered sugar, butter, and vanilla extract until smooth and creamy.
- Assemble the Cake Roll: Once the cake is completely cool, gently unroll it. Spread the cream cheese filling evenly over the cake, leaving a small border around the edges. Carefully re-roll the cake without the towel.
- Chill: Wrap the cake roll in plastic wrap and refrigerate for at least 2 hours, or overnight, to allow the flavors to meld and for the cake to set.
Extra Tips:
To achieve the perfect roll without cracking, make sure to roll the cake while it’s still warm and pliable. Using a good amount of powdered sugar on the towel prevents the cake from sticking.
When spreading the filling, guarantee it’s smooth and free of lumps for an even layer. Finally, when cutting the cake roll into slices, use a sharp serrated knife and clean the blade between cuts to maintain tidy, beautiful slices.
Enjoy this delightful make-ahead dessert that’s sure to be a hit at your Christmas gathering!
Almond Biscotti
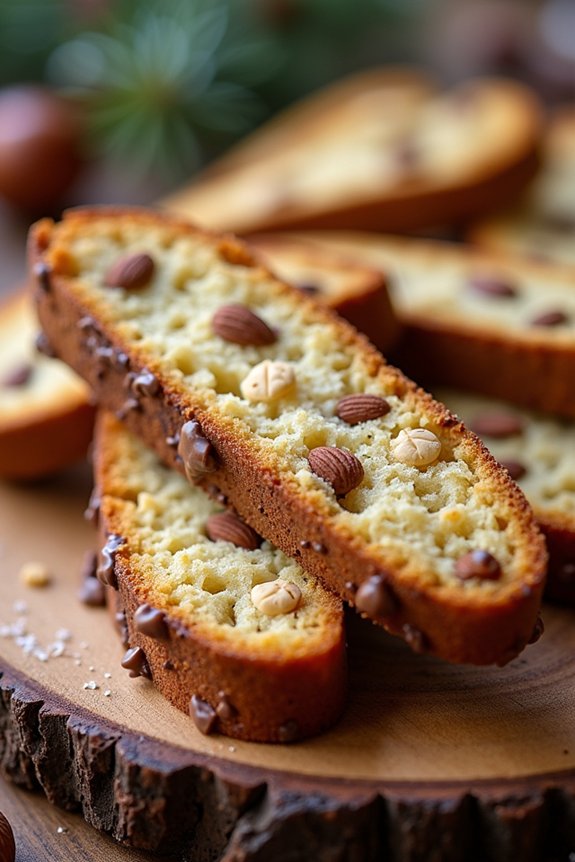
Almond Biscotti is a classic Italian treat that’s perfect for the holiday season. These twice-baked cookies are crunchy and flavorful, with a delightful almond essence that pairs beautifully with coffee or tea. Making them ahead of time is a great idea because they store well and even improve in flavor after a day or two. This recipe provides a serving size of 4-6 people, making it ideal for family gatherings or for gifting to friends and neighbors.
The process of making Almond Biscotti involves creating a simple dough that’s first shaped into logs, baked, and then sliced and baked again to achieve that signature crisp texture. The almond flavor is enhanced with the use of both almond extract and chopped almonds, creating a rich and nutty taste. Not only are these biscotti delicious, but they also add a festive touch to any holiday dessert table.
Ingredients:
- 2 cups all-purpose flour
- 1 cup granulated sugar
- 1 teaspoon baking powder
- 1/4 teaspoon salt
- 3 large eggs
- 1 teaspoon vanilla extract
- 1 teaspoon almond extract
- 1 cup whole almonds, toasted and coarsely chopped
- Optional: 1 tablespoon grated lemon zest
Cooking Instructions:
- Preheat the Oven: Begin by preheating your oven to 350°F (175°C). Line a baking sheet with parchment paper for easy cleanup and to prevent sticking.
- Prepare the Dry Ingredients: In a medium bowl, whisk together the flour, baking powder, and salt. Set aside.
- Mix Wet Ingredients: In a large bowl, beat the eggs and sugar until light and fluffy. This should take about 2-3 minutes. Then, mix in the vanilla extract, almond extract, and lemon zest (if using).
- Combine Ingredients: Gradually add the dry ingredients to the wet mixture, stirring until combined. The dough will be quite sticky. Fold in the chopped almonds ensuring they’re evenly distributed.
- Shape the Dough: With floured hands, divide the dough in half and shape each half into a log about 12 inches long and 3 inches wide. Place each log onto the prepared baking sheet, leaving some space between them.
- First Bake: Bake in the preheated oven for 25-30 minutes or until the logs are golden brown and firm to the touch. Remove from the oven and allow them to cool on the baking sheet for about 10 minutes.
- Slice and Second Bake: Reduce the oven temperature to 325°F (160°C). Using a serrated knife, carefully slice each log diagonally into 1/2-inch thick slices. Place the slices cut-side down on the baking sheet and return to the oven.
- Final Bake: Bake for 10-12 minutes, then flip the slices and bake for another 10-12 minutes, or until golden and crisp. Remove the biscotti from the oven and let them cool completely on a wire rack.
Extra Tips:
Toasting the almonds before adding them to the dough enhances their flavor, giving the biscotti a deeper nutty taste.
Make sure to allow the biscotti to cool completely before storing them in an airtight container to maintain their crisp texture.
If you prefer a softer biscotti, you can reduce the second bake time slightly.
For a festive touch, you can drizzle melted chocolate over the cooled biscotti or dip one end in chocolate for an elegant presentation.
Lemon Curd Tart
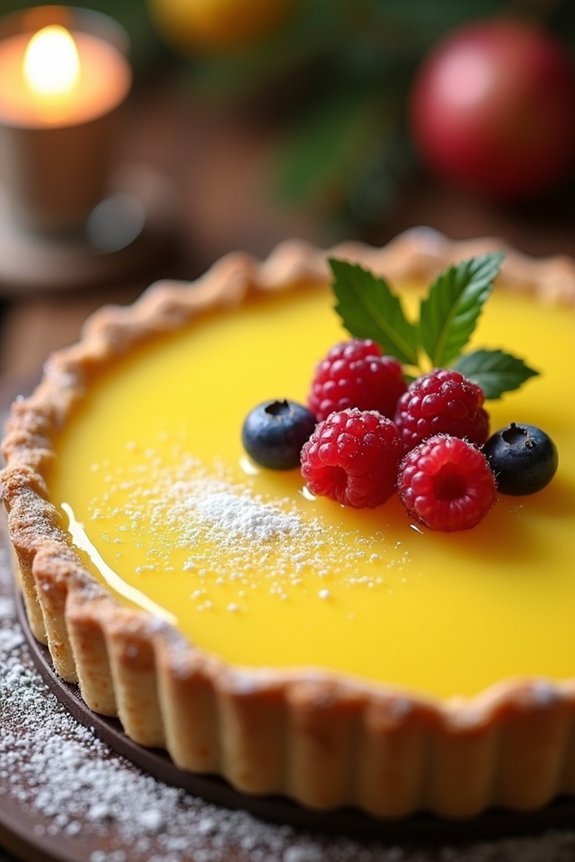
The Lemon Curd Tart is a delightful dessert that perfectly balances tartness with a touch of sweetness, making it an ideal treat for the festive season. Its bright, zesty flavor can lift any holiday table, providing a revitalizing palate cleanser after a hearty Christmas meal.
This make-ahead dessert can be prepared a day or two in advance, allowing you to focus on other holiday preparations while ensuring you have a stunning dessert ready to impress your guests.
The tart consists of a buttery, flaky crust filled with a smooth and tangy lemon curd. The crust is baked to golden perfection, while the curd is made with fresh lemon juice and zest, eggs, sugar, and butter, creating a luscious filling that sets beautifully in the fridge.
Garnished with a sprinkle of powdered sugar or adorned with fresh berries, this tart not only tastes divine but also looks stunning on the dessert table.
Ingredients (serves 4-6):
- 1 ½ cups all-purpose flour
- ½ cup powdered sugar
- ½ teaspoon salt
- ½ cup unsalted butter, chilled and diced
- 1 large egg yolk
- 3 tablespoons ice water
- ¾ cup freshly squeezed lemon juice (about 4 lemons)
- Zest of 2 lemons
- ¾ cup granulated sugar
- 3 large eggs
- ½ cup unsalted butter, diced
Cooking Instructions:
- Prepare the Tart Crust:
- In a food processor, combine the flour, powdered sugar, and salt. Add the chilled, diced butter and pulse until the mixture resembles coarse crumbs.
- Add the egg yolk and ice water, pulsing until the dough begins to come together.
- Turn the dough out onto a lightly floured surface, shape it into a disk, wrap in plastic, and refrigerate for at least 30 minutes.
- Bake the Tart Shell:
- Preheat your oven to 375°F (190°C).
- Roll out the chilled dough on a lightly floured surface to fit a 9-inch tart pan with a removable bottom. Press the dough into the pan and trim the excess.
- Line the dough with parchment paper and fill with pie weights or dried beans. Bake for 15 minutes, then remove the weights and parchment paper. Continue baking for 10 more minutes until the crust is golden. Let it cool completely.
- Make the Lemon Curd:
- In a medium saucepan, whisk together the lemon juice, lemon zest, sugar, and eggs until well combined.
- Cook the mixture over medium heat, stirring constantly with a wooden spoon, until it thickens and coats the back of the spoon, about 8-10 minutes. Don’t let it boil.
- Remove from heat and stir in the butter pieces until melted and smooth.
- Assemble the Tart:
- Pour the lemon curd into the cooled tart shell, spreading it evenly.
- Refrigerate the tart for at least 2 hours or until the curd is set.
- Serve:
- Before serving, dust with powdered sugar and optionally garnish with fresh berries for an added touch of color and flavor.
Extra Tips:
For an even smoother lemon curd, strain the mixture through a fine mesh sieve before pouring it into the tart shell to remove any bits of cooked egg or zest.
If you’re short on time, you can prepare the tart shell dough and lemon curd separately up to two days in advance, storing the dough wrapped in plastic in the fridge and the curd covered in an airtight container.
When ready to serve, simply assemble and chill the tart. This flexibility makes the Lemon Curd Tart a versatile and stress-free addition to your holiday dessert repertoire.
Raspberry Linzer Cookies

Raspberry Linzer Cookies are a delightful treat that brings a touch of elegance to your holiday dessert table. These traditional Austrian cookies feature a tender, buttery almond dough sandwiched with a sweet and slightly tart raspberry jam. The cookies are characterized by their distinctive cut-out shapes that reveal the vibrant raspberry filling, making them as visually appealing as they’re delicious.
Perfect for making ahead, these cookies can be stored for several days, allowing you to focus on enjoying the festivities with family and friends.
The preparation of Raspberry Linzer Cookies involves making a dough enriched with ground almonds, which adds a nutty depth to the flavor profile. The dough is rolled out and shaped into rounds, with half of the cookies having a smaller cut-out in the center to create the signature Linzer look.
Once baked and cooled, the cookies are filled with raspberry jam and dusted with powdered sugar, resulting in a beautiful and tasty holiday treat. This recipe serves 4-6 people, making it perfect for small gatherings or as part of a larger dessert spread.
Ingredients:
- 1 cup unsalted butter, softened
- 1/2 cup granulated sugar
- 1 teaspoon vanilla extract
- 2 cups all-purpose flour
- 1 cup ground almonds
- 1/4 teaspoon salt
- 1/2 cup raspberry jam
- Powdered sugar, for dusting
Instructions:
- Prepare the Dough: In a large mixing bowl, beat the softened butter and granulated sugar together until light and fluffy. Add the vanilla extract and mix until well combined.
- Mix Dry Ingredients: In a separate bowl, whisk together the all-purpose flour, ground almonds, and salt. Gradually add the dry ingredients to the butter mixture, mixing until a dough forms.
- Chill the Dough: Divide the dough into two equal portions, flatten each into a disc, wrap them in plastic wrap, and refrigerate for at least 1 hour or until firm.
- Roll Out the Dough: Preheat the oven to 350°F (175°C). On a lightly floured surface, roll out one dough disc to about 1/8-inch thickness. Use a round cookie cutter to cut out cookies. Place them on a baking sheet lined with parchment paper.
- Cut Out Centers: Roll out the second dough disc and cut out the same number of cookies as the first disc. Use a smaller cookie cutter to cut out the centers of these cookies, creating rings.
- Bake the Cookies: Bake all cookies in the preheated oven for 10-12 minutes or until the edges are lightly golden. Allow them to cool on the baking sheet for 5 minutes before transferring to a wire rack to cool completely.
- Assemble the Cookies: Spread a small amount of raspberry jam on the full cookie rounds. Place the cut-out cookies on top, pressing gently to sandwich them together.
- Dust with Sugar: Once all cookies are assembled, dust the tops generously with powdered sugar for an elegant finish.
Extra Tips:
When making Raspberry Linzer Cookies, verify that the dough is well-chilled before rolling to prevent sticking and make it easier to cut. If the dough becomes too soft while working, return it to the refrigerator briefly.
For a more flavorful jam filling, consider using seedless raspberry jam or homemade preserves. When storing the cookies, place them in an airtight container and separate layers with parchment paper to maintain their delicate texture.
Enjoy these cookies with a warm cup of tea or coffee for a truly festive experience.
Caramel Walnut Tart
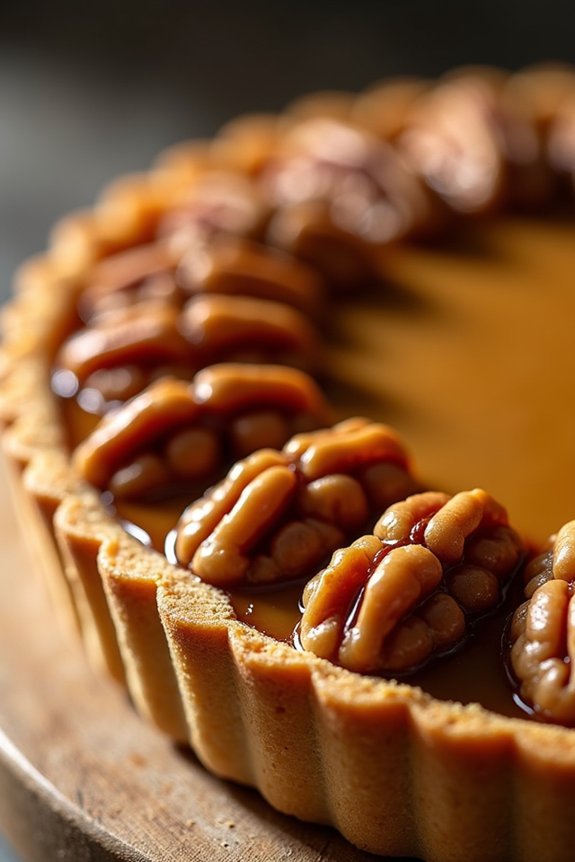
The Caramel Walnut Tart is a delightful dessert that perfectly complements the festive atmosphere of Christmas gatherings. This indulgent pastry combines a buttery, flaky crust with a rich and creamy caramel filling, topped with a generous layer of crunchy walnuts. Its sweet and nutty flavor profile is sure to be a hit with your family and friends, making it an excellent choice for a make-ahead dessert that lets you enjoy the festivities without constant kitchen duties.
Preparing this tart ahead of your Christmas celebration not only enhances the flavors as they meld together, but it also allows you to focus on other aspects of your holiday preparations. The tart can be made a day in advance and stored until it’s time to serve. With easy-to-follow instructions, even novice bakers can achieve a professional-looking and scrumptious dessert that embodies the warmth and joy of the holiday season.
Ingredients for 4-6 servings:
- 1 1/2 cups all-purpose flour
- 1/2 cup unsalted butter, chilled and cubed
- 1/4 cup granulated sugar
- 1/4 teaspoon salt
- 1/4 cup cold water
- 1 cup granulated sugar (for caramel)
- 1/4 cup water (for caramel)
- 1/2 cup heavy cream
- 1/4 cup unsalted butter
- 1 teaspoon vanilla extract
- 2 cups walnut halves
- 1/4 teaspoon salt (for caramel)
Instructions:
- Prepare the Crust:
- In a large mixing bowl, combine the flour, sugar, and salt. Add the chilled, cubed butter and use a pastry cutter or your fingers to blend the butter into the flour until the mixture resembles coarse crumbs.
- Gradually add cold water, one tablespoon at a time, mixing until the dough begins to come together. Don’t overmix; the dough should still have small lumps of butter.
- Form the dough into a disk, wrap it in plastic wrap, and refrigerate for at least 30 minutes to firm up.
- Make the Caramel:
- In a medium saucepan over medium heat, combine the sugar and water. Stir until the sugar is dissolved, then increase the heat and let it boil without stirring until it turns a deep amber color.
- Remove from heat and carefully whisk in the heavy cream. The mixture will bubble vigorously, so take caution. Stir in the butter, vanilla extract, and salt until smooth. Set aside to cool slightly.
- Assemble the Tart:
- Preheat your oven to 350°F (175°C). Roll out the chilled dough on a lightly floured surface to fit a 9-inch tart pan. Press the dough into the pan and trim any excess.
- Pour the caramel mixture over the prepared crust, spreading it evenly. Arrange the walnut halves over the caramel in a single layer.
- Bake the tart in the preheated oven for 25-30 minutes or until the crust is golden brown and the caramel is bubbling slightly around the edges.
- Remove the tart from the oven and let it cool completely in the pan on a wire rack before removing and serving.
Extra Tips:
- To prevent the crust from shrinking during baking, make sure it’s well-chilled before rolling it out and pressing it into the tart pan. Also, avoid stretching the dough as you fit it into the pan.
- If you prefer a more intense nutty flavor, lightly toast the walnuts in the oven for about 5-7 minutes at 350°F (175°C) before adding them to the tart.
- For a more decorative finish, consider adding a sprinkle of flaky sea salt over the top of the caramel and walnuts before serving, which will enhance the flavors and add visual appeal.