

Have you ever needed a festive dessert at the last minute? We’ve all been there, and that’s why these 14 speedy Christmas desserts are a lifesaver. Ready in 30 minutes or less, they’re perfect for any impromptu holiday gathering. From peppermint bark to no-bake cheesecake bites, there’s a little something for everyone. Let’s explore these deliciously quick recipes together!
Peppermint Bark
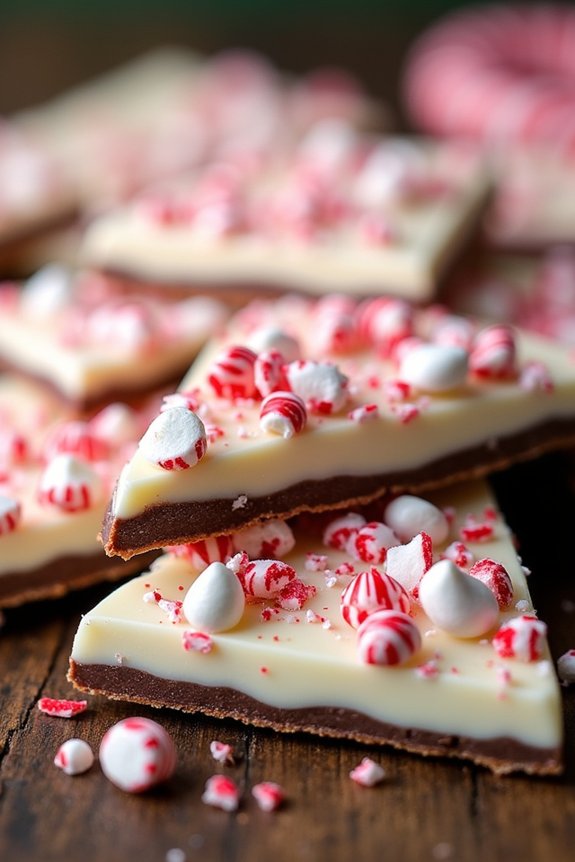
Peppermint Bark is a classic holiday treat that combines the invigorating flavor of peppermint with the rich, creamy taste of chocolate. This simple yet decadent dessert is perfect for sharing at Christmas gatherings or gifting to friends and family. The contrasting layers of white and dark chocolate, sprinkled with crushed peppermint candies, create a visually appealing and flavorful treat that embodies the spirit of the season.
Whether you’re an experienced baker or a novice in the kitchen, peppermint bark is an easy and delightful recipe to try during the holidays. The beauty of peppermint bark lies in its simplicity and versatility. It requires minimal ingredients and can be prepared in just a few steps, making it an ideal choice for those busy holiday days when every minute counts.
Furthermore, it stores well, so you can make it ahead of time and keep it on hand for any unexpected guests. This recipe, designed to serve 4-6 people, will guarantee you have enough to share, while still being easy to scale up if needed. With its festive appearance and irresistible taste, peppermint bark is sure to become a favorite in your holiday dessert repertoire.
Ingredients for 4-6 Servings:
- 12 ounces of high-quality dark chocolate, chopped
- 12 ounces of high-quality white chocolate, chopped
- 1 teaspoon of peppermint extract
- 1 cup of crushed peppermint candies or candy canes
Cooking Instructions:
- Prepare the Baking Sheet: Line a baking sheet with parchment paper or a silicone baking mat. This will prevent the bark from sticking and make it easier to remove once set.
- Melt the Dark Chocolate: In a microwave-safe bowl, melt the dark chocolate in 30-second intervals, stirring between each, until smooth and fully melted. Alternatively, use a double boiler for more controlled melting.
- Spread the Dark Chocolate: Pour the melted dark chocolate onto the prepared baking sheet. Use a spatula to spread it into an even layer, approximately 1/4 inch thick. Refrigerate the tray for about 20 minutes, or until the chocolate is firm.
- Melt the White Chocolate: While the dark chocolate is setting, melt the white chocolate in the same manner as the dark chocolate. Once melted, stir in the peppermint extract until well combined.
- Layer the White Chocolate: Carefully pour the melted white chocolate over the hardened dark chocolate layer. Gently spread it to cover the dark chocolate completely.
- Add the Peppermint Candies: Immediately sprinkle the crushed peppermint candies over the top of the white chocolate layer. Press them lightly to make sure they stick.
- Set the Bark: Allow the peppermint bark to cool at room temperature or refrigerate it until fully set. This may take about 1-2 hours.
- Break into Pieces: Once set, break the peppermint bark into pieces of your desired size. Store in an airtight container at room temperature or in the refrigerator for up to two weeks.
Extra Tips:
When making peppermint bark, it’s important to use high-quality chocolate for the best flavor and texture. If you prefer a bit more texture, consider adding chopped nuts or a sprinkle of sea salt for an extra layer of flavor.
Be cautious when melting the chocolate, as overheating can cause it to seize. Using a thermometer to confirm the chocolate doesn’t exceed 115°F (46°C) can help achieve a smooth, glossy finish. Finally, feel free to get creative with the toppings—dried cranberries or festive sprinkles can add a unique twist to this classic holiday treat.
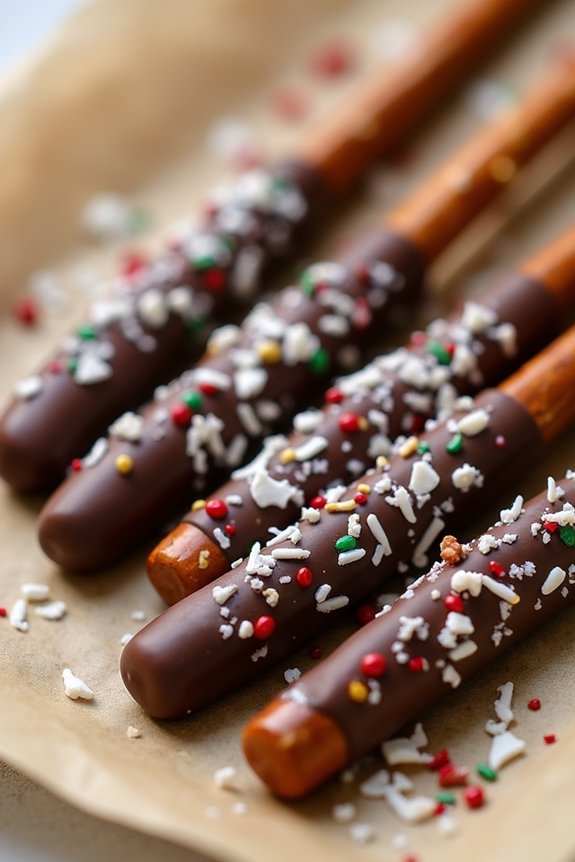
Chocolate Dipped Pretzels
These treats aren’t only delicious but also fun and easy to make, making them a perfect activity for family and friends during the holiday season.
With just a few ingredients and minimal preparation time, chocolate dipped pretzels can be made in advance and stored, allowing you more time to enjoy the festivities. The following recipe will provide enough chocolate-dipped pretzels to serve 4-6 people.
Ingredients (serving size: 4-6 people):
- 24 large pretzel rods
- 12 ounces semi-sweet chocolate chips
- 12 ounces white chocolate chips
- 1 tablespoon vegetable oil
- Assorted holiday-themed sprinkles
- Crushed nuts (optional)
- Shredded coconut (optional)
Instructions:
1. Prepare Your Workspace: Line two baking sheets with parchment paper or silicone baking mats. This will prevent the pretzels from sticking and make cleanup easier.
2. Melt the Chocolate: In two separate microwave-safe bowls, combine the semi-sweet chocolate chips and white chocolate chips with 1/2 tablespoon of vegetable oil in each bowl.
Microwave each bowl in 30-second intervals, stirring in between, until the chocolate is completely melted and smooth.
3. Dip the Pretzels: Hold a pretzel rod by one end and dip it into the melted chocolate, covering about three-quarters of the pretzel.
Allow the excess chocolate to drip off before placing the pretzel on the prepared baking sheet. Repeat with the remaining pretzels, alternating between semi-sweet and white chocolate.
4. Add Toppings****: While the chocolate is still wet, sprinkle your choice of toppings, such as holiday sprinkles, crushed nuts, or shredded coconut, over the chocolate-coated portion of each pretzel.
Be creative with your designs!
5. Set the Pretzels: Let the pretzels sit at room temperature or place them in the refrigerator for about 30 minutes to allow the chocolate to set completely.
6. Store the Pretzels: Once set, store the chocolate-dipped pretzels in an airtight container at room temperature or in the refrigerator until ready to serve.
Extra Tips****:
To guarantee your chocolate melts smoothly and without clumping, make sure all utensils and bowls are completely dry before you begin.
Any moisture can cause the chocolate to seize. If you prefer a more intense chocolate flavor, you can substitute the semi-sweet chocolate with dark chocolate.
Additionally, if you want to add a personal touch, use colored melting wafers to match your Christmas color scheme.
For a more uniform look, you can use a piping bag to drizzle the alternate chocolate over the dipped pretzels for a professional finish.
Enjoy your festive creation!
No-Bake Cheesecake Bites

No-Bake Cheesecake Bites are the perfect festive treat to add to your Christmas dessert spread. These bite-sized delights aren’t only easy to make but also require no baking, making them an ideal choice when you need to whip up a quick holiday dessert.
With a creamy and rich cheesecake filling, a buttery graham cracker crust, and a touch of festive decoration on top, these bites are sure to impress your guests with both their taste and presentation.
The beauty of this recipe lies in its simplicity and versatility. You can customize the flavors to suit your holiday theme or personal preferences by adding different toppings or mix-ins.
Whether you’re serving them at a holiday party or just enjoying them with family, these No-Bake Cheesecake Bites offer a delightful melt-in-your-mouth experience that everyone will love. Here’s how to make a batch that serves 4-6 people:
Ingredients:
- 1 cup graham cracker crumbs
- 3 tablespoons unsalted butter, melted
- 8 oz cream cheese, softened
- 1/4 cup granulated sugar
- 1 teaspoon vanilla extract
- 1/2 cup heavy cream
- Assorted toppings (e.g., crushed candy canes, chocolate shavings, or fruit preserves)
Instructions:
- Prepare the Crust: In a medium bowl, combine the graham cracker crumbs and melted butter. Mix until the crumbs are evenly coated and the mixture resembles wet sand. Press the mixture firmly into the bottom of a lined mini muffin tin or silicone mold, creating a solid base for each bite. Place in the refrigerator to set while you prepare the filling.
- Make the Cheesecake Filling: In a large mixing bowl, beat the softened cream cheese with an electric mixer until smooth and creamy. Add the granulated sugar and vanilla extract, and continue beating until well combined. In a separate bowl, whip the heavy cream until stiff peaks form, then gently fold it into the cream cheese mixture until fully incorporated.
- Assemble the Bites: Remove the crusts from the refrigerator. Using a piping bag or a spoon, fill each crust with the cheesecake filling, smoothing the tops as needed. Be generous to guarantee each bite is filled to the brim.
- Chill the Bites: Return the filled molds to the refrigerator and allow the cheesecake bites to set for at least 2 hours, or until firm. This chilling time is essential to confirm the bites hold their shape when removed from the molds.
- Decorate and Serve: Once set, gently remove the cheesecake bites from the molds. Top each bite with your choice of festive toppings, such as a sprinkle of crushed candy canes, a pinch of chocolate shavings, or a dollop of fruit preserves. Arrange on a serving platter and enjoy!
Extra Tips:
For best results, make sure your cream cheese is fully softened before mixing to prevent lumps in your filling. If you’re short on time, you can speed up the chilling process by placing the bites in the freezer for a shorter period.
When decorating, consider offering a variety of toppings in small bowls, allowing guests to customize their own cheesecake bites. This not only adds a personal touch but also caters to diverse taste preferences.
Enjoy these No-Bake Cheesecake Bites as a delightful, hassle-free addition to your holiday dessert repertoire!
Gingerbread Mug Cake
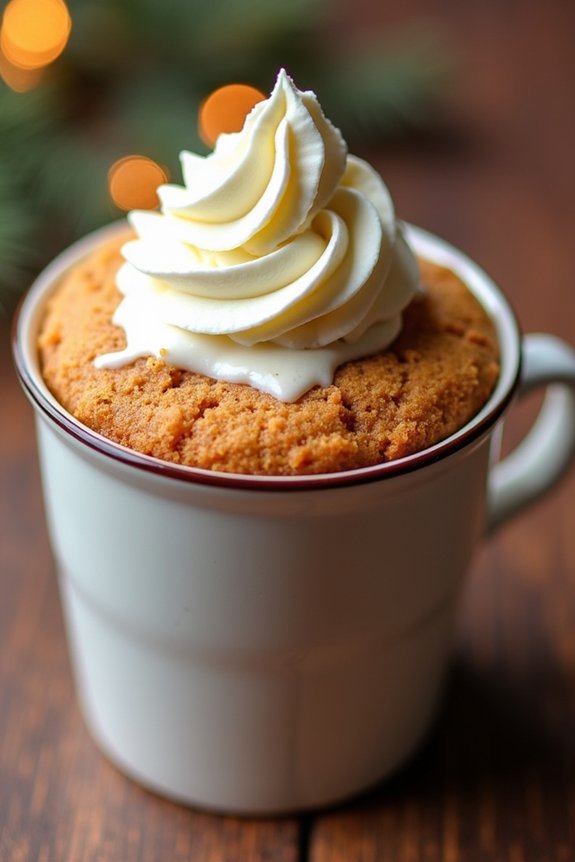
Gingerbread Mug Cake is the perfect holiday dessert for when you want to enjoy the classic flavors of gingerbread without the hassle of baking an entire batch. This delightful, spiced cake can be whipped up in a matter of minutes, offering a warm and comforting treat ideal for chilly winter nights. The mug cake captures the essence of traditional gingerbread with its rich blend of spices like ginger, cinnamon, and cloves, and is topped with a dollop of whipped cream or a scoop of vanilla ice cream to complete the holiday indulgence.
Making a Gingerbread Mug Cake isn’t only quick but also requires minimal ingredients, many of which you may already have in your pantry. It’s a perfect dessert for a cozy night in or for when unexpected guests show up during the festive season. This recipe makes enough to serve 4-6 people, making sure everyone gets to enjoy their own personal mug of gingerbread goodness.
Ingredients (for 4-6 servings):
- 1 cup all-purpose flour
- 1 teaspoon baking powder
- 1/2 teaspoon ground ginger
- 1/2 teaspoon ground cinnamon
- 1/4 teaspoon ground cloves
- 1/4 teaspoon salt
- 1/2 cup brown sugar
- 1/4 cup unsalted butter, melted
- 1/4 cup molasses
- 1/2 cup milk
- 2 large eggs
- 1 teaspoon vanilla extract
- Optional: whipped cream or vanilla ice cream for topping
Cooking Instructions:
- Prepare the Dry Ingredients: In a large mixing bowl, whisk together the all-purpose flour, baking powder, ground ginger, ground cinnamon, ground cloves, and salt until well combined.
- Mix the Wet Ingredients: In a separate bowl, combine the brown sugar, melted butter, molasses, milk, eggs, and vanilla extract. Whisk these ingredients together until you have a smooth and uniform mixture.
- Combine the Mixtures: Gradually add the wet mixture to the dry ingredients, stirring continuously until a smooth batter forms. Make sure there are no lumps and the batter is well incorporated.
- Divide the Batter: Evenly divide the batter into 4-6 microwave-safe mugs, filling each one about halfway to allow room for rising during cooking.
- Cook the Mug Cakes: Microwave each mug individually on high for about 1 to 1.5 minutes. Keep a close eye to prevent overflow. The cake should rise and set, with a slightly springy texture when touched.
- Serve: Allow the cakes to cool slightly before topping them with whipped cream or a scoop of vanilla ice cream, if desired. Serve immediately for the best experience.
Extra Tips:
When making Gingerbread Mug Cake, verify your mugs are truly microwave-safe to avoid any accidents. If your microwave is particularly powerful, reduce the cooking time to prevent the cakes from becoming dry.
Feel free to adjust the spices to your taste, adding more or less depending on how intense you want the gingerbread flavor. For an extra festive touch, sprinkle some powdered sugar or cinnamon on top of the whipped cream before serving. Enjoy your festive treat!
Cranberry Pistachio Fudge

Cranberry Pistachio Fudge is a delightful holiday treat that combines the tartness of cranberries with the rich creaminess of white chocolate and the nutty crunch of pistachios. This festive fudge is perfect for adding a splash of color to your Christmas dessert spread, and its unique flavor profile is sure to captivate your family and friends.
With just a few ingredients and some simple steps, you can whip up this decadent dessert in no time. This recipe yields enough Cranberry Pistachio Fudge to serve 4-6 people, making it ideal for small gatherings or as a part of a larger selection of holiday treats.
The vibrant red cranberries and green pistachios not only provide a visual feast but also balance the sweetness of the fudge with their unique flavors. Whether you’re looking for a sweet gift or a tasty treat to enjoy yourself, this fudge is a must-try during the Christmas season.
Ingredients (serving size: 4-6 people):
- 2 cups white chocolate chips
- 1 can (14 ounces) sweetened condensed milk
- 1 teaspoon vanilla extract
- 1/2 cup dried cranberries
- 1/2 cup shelled pistachios, roughly chopped
- A pinch of salt
Cooking Instructions:
- Prepare the Pan: Line an 8×8 inch square baking pan with parchment paper, leaving some overhang on the sides to make it easier to lift the fudge out once it’s set. Lightly grease the parchment paper with non-stick spray or butter.
- Melt the Chocolate: In a medium saucepan, combine the white chocolate chips and sweetened condensed milk. Place the saucepan over low heat and stir continuously until the chocolate chips are completely melted and the mixture is smooth. Be careful not to overheat or burn the chocolate.
- Add Flavorings: Remove the saucepan from the heat and quickly stir in the vanilla extract and a pinch of salt. Mix until well combined.
- Incorporate the Mix-ins: Gently fold in the dried cranberries and chopped pistachios into the melted chocolate mixture. Make certain that they’re evenly distributed throughout the fudge.
- Pour and Set: Pour the mixture into the prepared baking pan, spreading it evenly with a spatula. Tap the pan gently on the counter to remove any air bubbles and level the surface.
- Chill the Fudge: Place the pan in the refrigerator and allow the fudge to chill for at least 2 hours, or until it’s firm to the touch.
- Cut and Serve: Once the fudge is set, lift it out of the pan using the parchment paper overhang. Place it on a cutting board and cut it into small squares or rectangles. Serve immediately or store in an airtight container.
Extra Tips:
To enhance the flavor of your Cranberry Pistachio Fudge, consider toasting the pistachios lightly before adding them to the mixture. This will bring out their natural oils and enhance their nuttiness.
Also, if you prefer a slightly softer fudge, reduce the chilling time to 1.5 hours. For a more personalized touch, you can experiment by adding other ingredients such as orange zest or a sprinkle of sea salt on top before chilling.
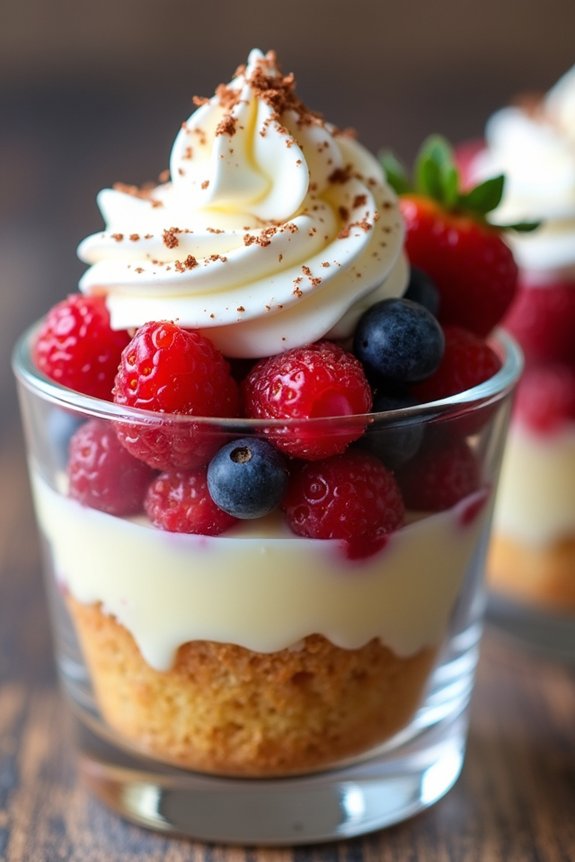
Mini Trifle Cups
If you’re searching for a dessert that combines the festive spirit of Christmas with a touch of elegance, seek no further than Mini Trifle Cups. These delightful treats aren’t only visually appealing but also pack a punch with layers of rich flavors and textures. Perfect for holiday gatherings, these mini trifles allow each guest to enjoy their own serving of a classic dessert, without the hassle of serving from a large dish.
The best part is that they’re customizable, allowing you to incorporate your favorite fruits, creams, and other delectable ingredients to suit your taste.
The key to creating the perfect Mini Trifle Cups lies in the balance of flavors and the presentation of each layer. These cups typically include a moist sponge cake, a layer of luscious custard or cream, and a variety of fruits, often topped with whipped cream and a sprinkle of grated chocolate or nuts. By using clear glass cups, you can showcase the beautiful, colorful layers that truly make this dessert a showstopper on any Christmas dessert table.
Now, let’s gather the ingredients for a serving size of 4-6 people.
Ingredients:
- 1 pound cake or sponge cake, cut into small cubes
- 2 cups fresh mixed berries (such as strawberries, raspberries, and blueberries)
- 1 cup prepared custard or vanilla pudding
- 1 cup heavy whipping cream
- 2 tablespoons powdered sugar
- 1 teaspoon vanilla extract
- 2 tablespoons sherry or fruit juice (optional)
- Grated chocolate or nuts for garnish
Cooking Instructions:
- Prepare the Whipped Cream: In a mixing bowl, pour the heavy whipping cream and add the powdered sugar and vanilla extract. Using an electric mixer, whip the cream on medium-high speed until soft peaks form. Be careful not to over-whip, as you want a smooth and creamy texture.
- Assemble the Cake Layer: Start by placing a few cubes of the pound cake or sponge cake at the bottom of each glass cup. If you choose to use sherry or fruit juice, lightly drizzle it over the cake cubes to moisten them and add extra flavor.
- Add the Custard Layer: Spoon a layer of prepared custard or vanilla pudding over the cake cubes, making sure to have an even distribution to cover the cake entirely. The custard adds a creamy element that complements the cake’s texture.
- Layer the Berries: Evenly distribute the fresh mixed berries over the custard layer. The berries add a burst of color and a revitalizing taste, balancing the sweetness of the cake and custard.
- Top with Whipped Cream: Generously dollop the prepared whipped cream over the berries, creating a light and airy top layer for the trifle.
- Garnish: Finish off by sprinkling grated chocolate or chopped nuts over the whipped cream. This adds a touch of elegance and a hint of crunch to the dessert.
- Chill and Serve: Refrigerate the Mini Trifle Cups for at least an hour before serving to allow the flavors to meld together. Serve chilled and enjoy!
Extra Tips:
When making Mini Trifle Cups, consider using seasonal fruits for the freshest and most flavorful results. You can also experiment with different types of cake, such as chocolate or lemon, to vary the flavor profile of the dessert.
If you’re aiming for a non-alcoholic version, simply replace the sherry with fruit juice or leave it out altogether. Additionally, it’s important not to overfill the cups to guarantee each layer is visible and distinct, contributing to the visual appeal of the dessert.
Enjoy the flexibility and creativity that Mini Trifle Cups offer, and have fun creating a festive treat that everyone will love!
Sugar Cookie Bars
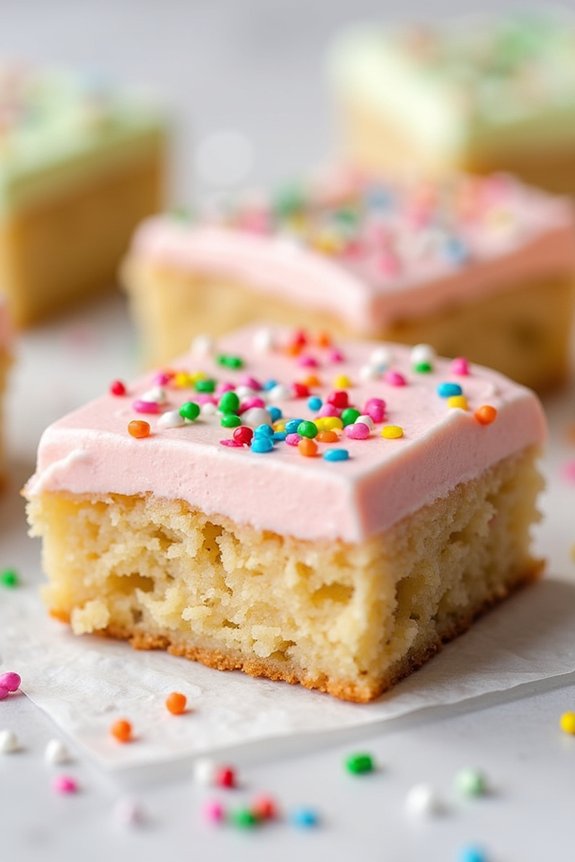
Sugar Cookie Bars are a delightful and festive dessert option that captures the essence of Christmas in every bite. These bars offer the classic taste of traditional sugar cookies but with the added convenience of baking them in bar form, making them perfect for serving a crowd.
With a soft, chewy texture and a sweet, buttery flavor, they’re sure to become a holiday favorite. The best part is that they can be decorated with an array of colorful frostings and sprinkles, allowing you to customize them to fit your festive theme.
Perfect for gatherings or as a delightful treat to share with family and friends, these Sugar Cookie Bars are both easy to make and delicious. In this recipe, we’ll guide you through the steps to create a batch that serves 4-6 people, ensuring everyone can indulge in this holiday delight.
Whether you’re a seasoned baker or just starting out, you’ll find this recipe straightforward and rewarding, adding a touch of joy to your Christmas dessert table.
Ingredients (serving size: 4-6 people):
- 1 cup unsalted butter, softened
- 1 cup granulated sugar
- 1 large egg
- 1 teaspoon vanilla extract
- 2 1/4 cups all-purpose flour
- 1/2 teaspoon baking powder
- 1/2 teaspoon salt
- 1 cup powdered sugar
- 2 tablespoons milk
- Food coloring (optional)
- Sprinkles (optional)
Cooking Instructions:
- Preheat the Oven: Start by preheating your oven to 350°F (175°C). Line a 9×13-inch baking pan with parchment paper, allowing some overhang for easy removal later.
- Make the Dough: In a large bowl, cream together the softened butter and granulated sugar until light and fluffy. This should take about 2-3 minutes using an electric mixer. Add the egg and vanilla extract, mixing until well combined.
- Combine Dry Ingredients: In a separate bowl, whisk together the flour, baking powder, and salt. Gradually add this to the wet mixture, mixing on low speed until just combined. Be careful not to overmix, as this can make the bars tough.
- Press and Bake: Transfer the dough into the prepared baking pan. Use your hands or a spatula to press the dough evenly across the bottom of the pan. Bake in the preheated oven for 18-20 minutes, or until the edges are lightly golden. Allow to cool completely in the pan on a wire rack.
- Prepare the Frosting: In a small bowl, whisk together the powdered sugar and milk until smooth. If desired, add a few drops of food coloring to achieve your preferred hue for the frosting.
- Frost and Decorate: Once the cookie base has cooled, spread the frosting evenly over the top. Decorate with sprinkles as desired. Allow the frosting to set slightly before cutting into bars.
- Cut and Serve: Use the parchment paper overhang to lift the bars from the pan. Cut into squares or rectangles, and serve.
Extra Tips:
For an extra touch of holiday spirit, consider using different colors of food coloring in the frosting to create a marbled effect. You can also use festive-shaped cookie cutters to cut the bars into holiday-themed shapes.
If you prefer a more pronounced vanilla flavor, try adding a teaspoon of almond extract to the dough. These bars can be stored in an airtight container at room temperature for up to a week, making them an excellent make-ahead option for your holiday celebrations.
Hot Chocolate Cookies
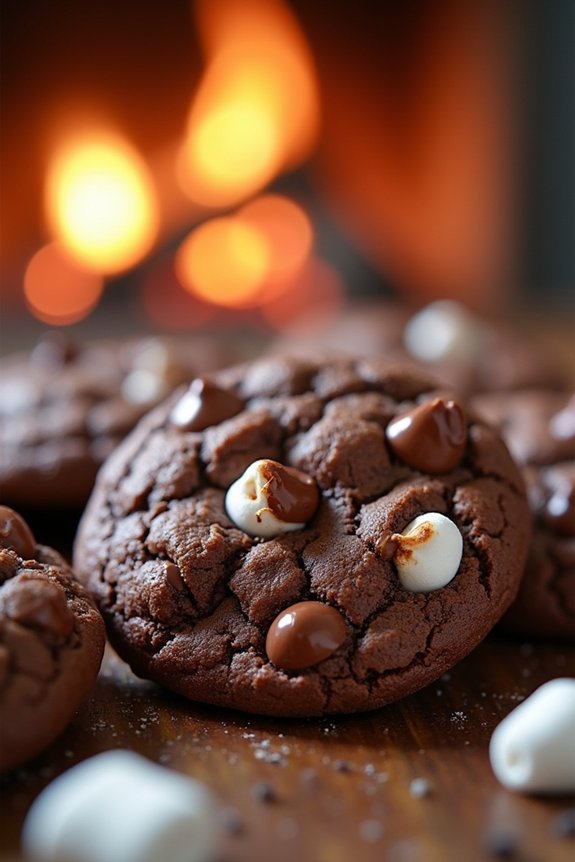
The holiday season is the perfect time to indulge in sweet treats, and Hot Chocolate Cookies make for a delightful festive dessert. These cookies capture the essence of a warm cup of hot chocolate in every bite, providing a comforting, chocolatey experience that’s sure to please both young and old alike.
With their chewy centers, crispy edges, and a hint of marshmallow, these cookies are destined to be a holiday favorite. Perfect for sharing with family or serving at a Christmas party, Hot Chocolate Cookies are an indulgent way to celebrate the joy of the season.
Not only are these cookies delicious, but they also bring a sense of nostalgia, reminding us of cozy winter nights spent by the fire with a steaming mug of cocoa. The combination of rich cocoa powder, sweet chocolate chips, and gooey marshmallow bits creates a symphony of flavors that mimic the classic winter beverage.
Whether you’re an experienced baker or a novice in the kitchen, this recipe is simple to follow and will result in a batch of irresistible cookies that are sure to disappear quickly.
Ingredients for 4-6 servings:
- 1 cup unsalted butter, softened
- 1 cup granulated sugar
- 1 cup brown sugar, packed
- 2 large eggs
- 2 teaspoons vanilla extract
- 2 ¾ cups all-purpose flour
- ⅔ cup unsweetened cocoa powder
- 1 teaspoon baking soda
- ½ teaspoon salt
- 2 cups semi-sweet chocolate chips
- 1 cup mini marshmallows
- ½ cup milk or white chocolate chips (optional)
Cooking Instructions:
- Preheat the Oven: Start by preheating your oven to 350°F (175°C). This will guarantee that your cookies bake evenly and to perfection.
- Prepare the Dough: In a large mixing bowl, cream together the softened butter, granulated sugar, and brown sugar until the mixture is light and fluffy. This should take about 2-3 minutes using an electric mixer on medium speed.
- Add Wet Ingredients: Beat in the eggs one at a time, making sure each egg is fully incorporated before adding the next. Mix in the vanilla extract for added flavor.
- Mix Dry Ingredients: In a separate bowl, whisk together the flour, cocoa powder, baking soda, and salt. Gradually add this dry mixture to the wet ingredients, mixing until just combined. Be careful not to overmix, as this can result in tough cookies.
- Fold in Mix-ins: Gently fold in the semi-sweet chocolate chips, mini marshmallows, and optional milk or white chocolate chips. Make sure these are evenly distributed throughout the dough.
- Shape the Cookies: Using a tablespoon or cookie scoop, drop rounded tablespoons of dough onto a baking sheet lined with parchment paper. Leave about 2 inches of space between each cookie to allow for spreading.
- Bake: Place the baking sheet in the preheated oven and bake for 10-12 minutes. The cookies should be set around the edges but still soft in the center. The marshmallows should be melted and gooey.
- Cool and Serve: Remove the cookies from the oven and allow them to cool on the baking sheet for a couple of minutes before transferring them to a wire rack to cool completely. Enjoy them warm or at room temperature.
Extra Tips:
When making Hot Chocolate Cookies, it’s important to verify your butter is properly softened but not melted, as this will affect the texture of your cookies.
If you prefer a more chocolatey experience, you can increase the amount of chocolate chips or even use dark chocolate chips for a richer flavor. Keep an eye on the cookies while they bake; they can quickly go from perfectly baked to overdone.
Finally, if you want to create an even more festive presentation, consider adding a sprinkle of crushed peppermint candies on top before baking for a minty twist.
Christmas Tree Brownie Bites
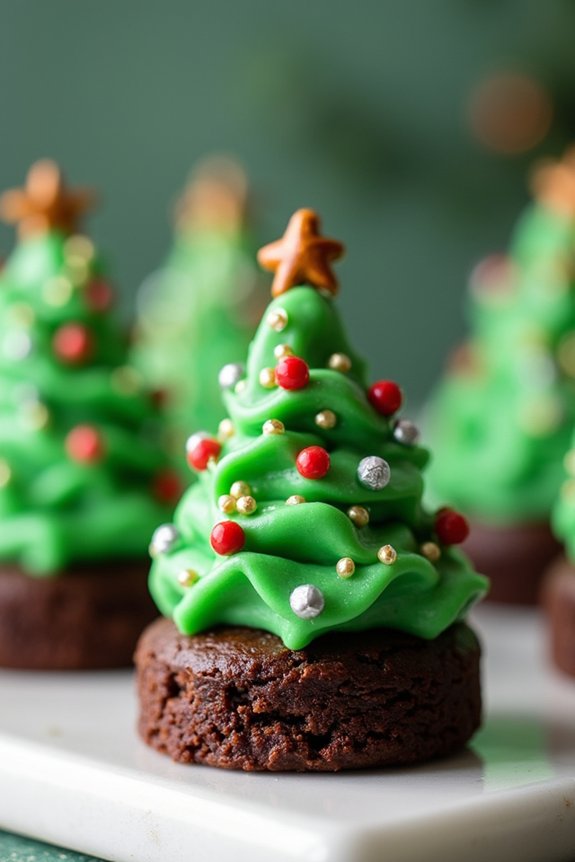
Christmas Tree Brownie Bites are a delightful and festive treat that will add a touch of whimsy to your holiday dessert platter. These bite-sized brownies aren’t only delicious but also visually enchanting, shaped like tiny Christmas trees and adorned with a variety of colorful decorations. Perfect for a family gathering or a holiday party, these brownie bites are sure to be a hit with both kids and adults alike.
The process of making Christmas Tree Brownie Bites is both fun and straightforward, making it a great activity to enjoy with loved ones during the holiday season. The recipe combines the rich, chocolatey flavor of classic brownies with a playful presentation, using simple decorations to transform each bite into a mini Christmas tree. Whether you’re an experienced baker or a beginner, these treats are easy to put together and are guaranteed to bring joy and smiles to everyone who tries them.
Ingredients (Serves 4-6):
- 1/2 cup unsalted butter
- 1 cup granulated sugar
- 2 large eggs
- 1 teaspoon vanilla extract
- 1/3 cup unsweetened cocoa powder
- 1/2 cup all-purpose flour
- 1/4 teaspoon salt
- 1/4 teaspoon baking powder
- Green food coloring
- 1 cup powdered sugar
- 2 tablespoons milk
- 1/2 teaspoon vanilla extract
- Sprinkles and edible decorations
- 8-10 pretzel sticks
Cooking Instructions:
- Preheat and Prepare: Preheat your oven to 350°F (175°C). Grease a 9×9 inch baking pan or line it with parchment paper to prevent sticking.
- Make Brownie Batter: In a medium saucepan, melt the butter over low heat. Once melted, remove from heat and stir in the granulated sugar, eggs, and vanilla extract until well combined.
- Combine Dry Ingredients: In a separate bowl, whisk together the cocoa powder, flour, salt, and baking powder. Gradually stir this dry mixture into the butter mixture until just blended.
- Bake the Brownies: Pour the brownie batter into the prepared baking pan and spread it evenly. Bake in the preheated oven for 20-25 minutes or until a toothpick inserted into the center comes out clean. Allow the brownies to cool in the pan before proceeding.
- Cut and Shape: Once cooled, remove the brownies from the pan and cut them into triangles to resemble Christmas trees. You can make a template from cardboard to help guide your cuts if desired.
- Prepare Icing: In a small bowl, mix powdered sugar, milk, vanilla extract, and a few drops of green food coloring until smooth. The icing should be thick enough to hold shape but spreadable.
- Decorate Trees: Using a spoon or piping bag, drizzle the green icing over the brownie triangles to create the look of a Christmas tree. Decorate with sprinkles and edible decorations as desired.
- Add Trunks: Insert a pretzel stick into the base of each brownie triangle to serve as the tree trunk.
Extra Tips:
For an extra festive touch, consider using a variety of sprinkles to mimic ornaments, and a small star-shaped candy at the top of each tree. If you want more vibrant green icing, add a few more drops of food coloring until you reach your desired hue.
Confirm that the brownies are completely cooled before cutting and decorating to prevent the icing from melting. If you have leftover icing, it can be stored in an airtight container in the refrigerator for up to a week.
Eggnog Panna Cotta
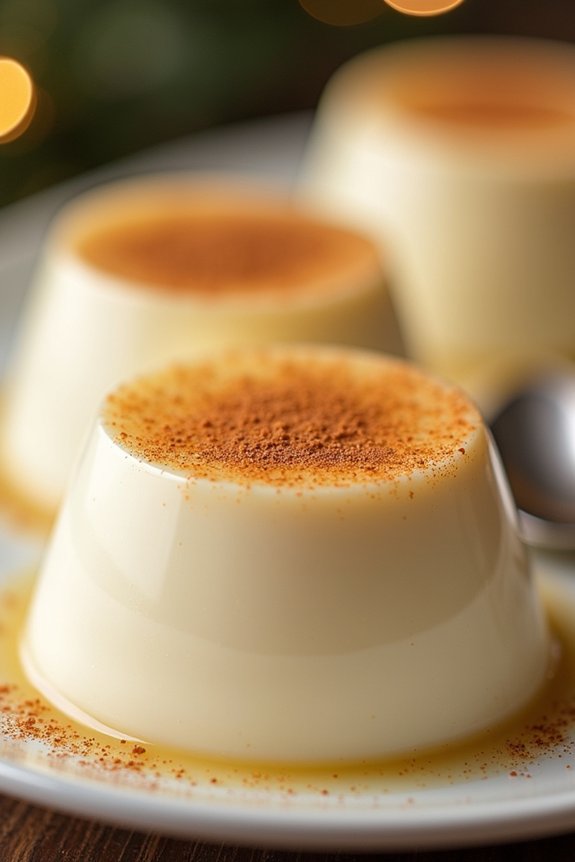
Eggnog Panna Cotta is a delightful and creamy dessert that combines the festive flavors of eggnog with the rich texture of panna cotta. This luscious treat is perfect for holiday gatherings, as it offers a sophisticated twist on traditional holiday desserts.
The silky smooth texture paired with the warm spices of eggnog makes it a hit among both children and adults, creating a memorable end to any Christmas meal.
This dessert is surprisingly simple to prepare, requiring only a few key ingredients and minimal cooking time. Eggnog Panna Cotta can be made in advance, allowing you to focus on other aspects of your holiday feast.
Its elegant presentation and festive flavors are sure to impress your guests, making it an ideal choice for any Christmas celebration.
Ingredients for 4-6 servings:
- 2 cups of eggnog
- 1 cup of heavy cream
- 1/4 cup of granulated sugar
- 2 teaspoons of unflavored gelatin
- 1/4 cup of cold water
- 1/2 teaspoon of vanilla extract
- Ground nutmeg for garnish
Cooking Instructions:
- Bloom the Gelatin: Start by sprinkling the unflavored gelatin over 1/4 cup of cold water in a small bowl. Let it sit for about 5 minutes, allowing the gelatin to soften and bloom.
- Heat the Mixture: In a medium saucepan, combine the eggnog, heavy cream, and granulated sugar. Heat the mixture over medium heat, stirring occasionally, until the sugar is completely dissolved. Don’t let it come to a boil.
- Incorporate the Gelatin: Once the eggnog mixture is heated and the sugar is dissolved, remove the saucepan from the heat. Add the bloomed gelatin and stir until the gelatin is fully dissolved and incorporated into the mixture.
- Add Flavoring: Stir in the vanilla extract to enhance the flavors. Confirm the mixture is smooth and well combined.
- Pour into Molds: Carefully pour the mixture into individual serving molds or ramekins, leaving a bit of space at the top for expansion as it sets.
- Chill: Cover the molds with plastic wrap and refrigerate for at least 4 hours, or until the panna cotta is set and firm.
- Serve: To serve, gently run a knife along the edges of the molds to loosen the panna cotta. Invert each mold onto a plate and give it a slight shake to release the dessert. Garnish with a sprinkle of ground nutmeg before serving.
Extra Tips:
When preparing Eggnog Panna Cotta, it’s important to verify that the gelatin is completely dissolved to avoid any lumps in the final product.
If you’re using store-bought eggnog, consider adjusting the amount of sugar based on its sweetness. For a more personalized touch, you can infuse the cream with additional spices such as cinnamon or cloves before combining it with the eggnog.
Remember to allow enough time for the panna cotta to set in the refrigerator, as rushing this process may result in a less than perfect texture.
Spiced Apple Tartlets
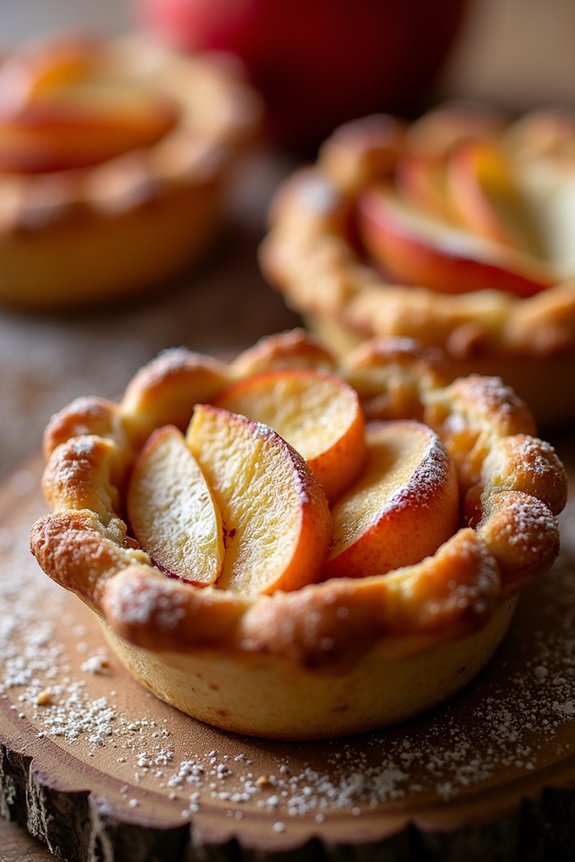
Indulge in the festive flavors of the season with our Spiced Apple Tartlets, a quintessential Christmas dessert that’s bound to please family and friends.
These delightful tartlets are a harmonious blend of flaky pastry, sweet-tart apples, and a warm medley of spices that evoke the cozy essence of the holidays. Perfectly portioned, they’re an elegant addition to any holiday dessert table and a delightful way to conclude a festive meal.
Our recipe for Spiced Apple Tartlets serves 4-6 people and is surprisingly easy to prepare. The key to these tartlets is the delicate balance of spices that complement the natural sweetness of the apples, creating a dessert that’s both comforting and sophisticated.
With this recipe, you can bring a touch of homemade warmth to your holiday celebrations, creating memories that will linger long after the last crumb is gone.
Ingredients (Serves 4-6):
- 2 sheets of puff pastry
- 4 medium-sized apples (such as Granny Smith or Honeycrisp)
- 1/2 cup granulated sugar
- 1 teaspoon ground cinnamon
- 1/4 teaspoon ground nutmeg
- 1/4 teaspoon ground allspice
- 1 tablespoon lemon juice
- 1 tablespoon all-purpose flour
- 1 egg (for egg wash)
- 2 tablespoons unsalted butter
- Powdered sugar for dusting (optional)
Cooking Instructions:
- Prepare the Puff Pastry: Preheat your oven to 400°F (200°C). On a lightly floured surface, roll out the puff pastry sheets to smooth them out. Using a round cookie cutter or a glass, cut out circles from the pastry sheets, each about 4 inches in diameter. Place these pastry circles on a baking sheet lined with parchment paper.
- Prepare the Apple Filling: Peel, core, and thinly slice the apples. In a mixing bowl, combine the sliced apples with granulated sugar, cinnamon, nutmeg, allspice, lemon juice, and flour. Toss until the apple slices are evenly coated with the spice mixture.
- Assemble the Tartlets: Arrange the spiced apple mixture in the center of each puff pastry circle, leaving a small border around the edges. Dot the top of the apples with small pieces of unsalted butter.
- Apply Egg Wash: Beat the egg in a small bowl. Using a pastry brush, apply the egg wash around the edges of the pastry circles. This will help achieve a golden-brown crust when baked.
- Bake the Tartlets: Place the baking sheet in the preheated oven and bake for about 18-22 minutes, or until the pastry is golden brown and puffed, and the apples are tender.
- Cool and Serve: Once baked, remove the tartlets from the oven and allow them to cool slightly on a wire rack. Dust with powdered sugar before serving if desired.
Extra Tips:
For a more pronounced spice flavor, consider adding a pinch of ground cloves or ginger to the apple mixture.
If you prefer a slightly sweeter tartlet, drizzle some honey or caramel sauce over the apples before baking.
To guarantee the apples cook evenly, slice them uniformly and not too thick. You can also prepare the apple filling a day in advance to save time on the day of baking.
Adjust the sugar to your taste, especially if using sweeter apple varieties. Enjoy these tartlets warm with a scoop of vanilla ice cream or a dollop of whipped cream for an extra special treat.
White Chocolate Raspberry Mousse
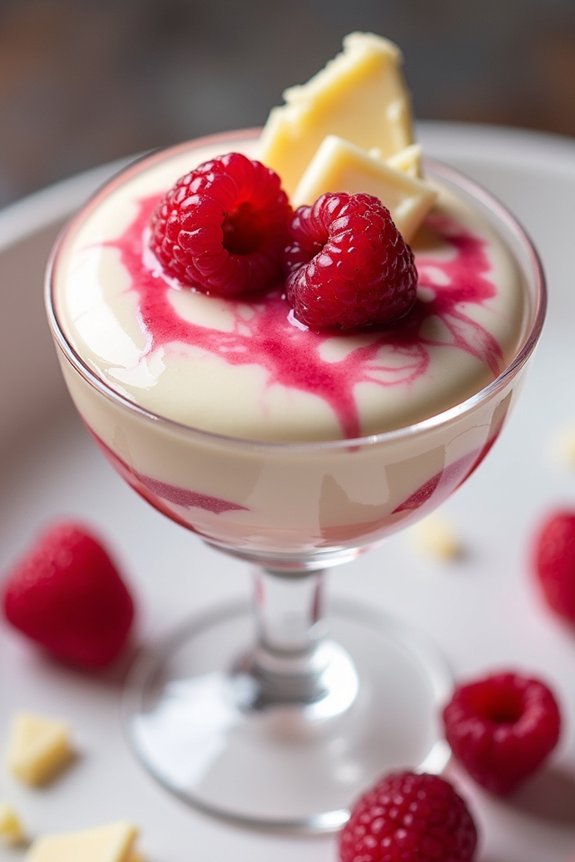
Indulge in the luscious and elegant flavors of White Chocolate Raspberry Mousse this Christmas season. This dessert combines the creamy richness of white chocolate with the tartness of fresh raspberries, creating a delightful treat that will impress your guests.
Whether you’re hosting a festive dinner or simply want to add a touch of sophistication to your holiday gatherings, this mousse is bound to be a crowd-pleaser. Its light and airy texture makes it the perfect conclusion to a hearty Christmas meal, leaving everyone satisfied and craving for more.
The contrast of flavors and textures in the White Chocolate Raspberry Mousse is what makes it truly special. The smooth and velvety white chocolate mousse is perfectly complemented by the bright, fruity burst of raspberries.
This recipe is designed for a serving size of 4-6 people, making it ideal for intimate family gatherings or small parties. By following the steps outlined below, you’ll be able to create a dessert that not only tastes amazing but also looks stunning when served in elegant glassware or ramekins.
Ingredients (serves 4-6):
- 1 cup white chocolate chips
- 2 cups heavy cream, divided
- 1 teaspoon vanilla extract
- 1 cup fresh raspberries
- 2 tablespoons sugar
- 1 tablespoon water
- 1 tablespoon raspberry liqueur (optional)
- Fresh raspberries and white chocolate shavings for garnish (optional)
Instructions:
- Prepare the Raspberry Sauce: In a small saucepan over medium heat, combine 1 cup of fresh raspberries, 2 tablespoons of sugar, and 1 tablespoon of water. Cook the mixture while stirring occasionally until the raspberries break down and the sauce thickens, about 5-7 minutes. If desired, stir in 1 tablespoon of raspberry liqueur. Remove from heat and strain the sauce through a fine-mesh sieve to remove seeds. Allow it to cool.
- Melt the White Chocolate: In a heatproof bowl set over a pot of simmering water (double boiler), melt 1 cup of white chocolate chips, stirring until smooth. Once melted, remove from heat and set aside to cool slightly.
- Whip the Cream: In a large mixing bowl, whip 1 1/2 cups of heavy cream until soft peaks form. Gently fold in the vanilla extract to incorporate.
- Make the Mousse: Gently fold the melted white chocolate into the whipped cream until fully combined, taking care not to deflate the mixture. The texture should be light and airy.
- Assemble the Mousse: Divide the white chocolate mousse evenly into serving glasses or ramekins. Top each serving with a spoonful of raspberry sauce, swirling slightly to create a marbled effect.
- Chill and Serve: Refrigerate the assembled mousse for at least 2 hours to allow it to firm up. Before serving, garnish with fresh raspberries and white chocolate shavings if desired.
Extra Tips:
For the best results, verify that your mixing bowl and beaters are chilled before whipping the cream, as this helps achieve the perfect airy texture.
When folding the white chocolate into the whipped cream, use a gentle hand to maintain the mousse’s lightness. If you prefer a sweeter mousse, you can adjust the sugar level in the raspberry sauce to your taste.
Finally, when garnishing, feel free to get creative with edible gold leaf or mint leaves for an extra festive touch.
Almond Snowball Cookies
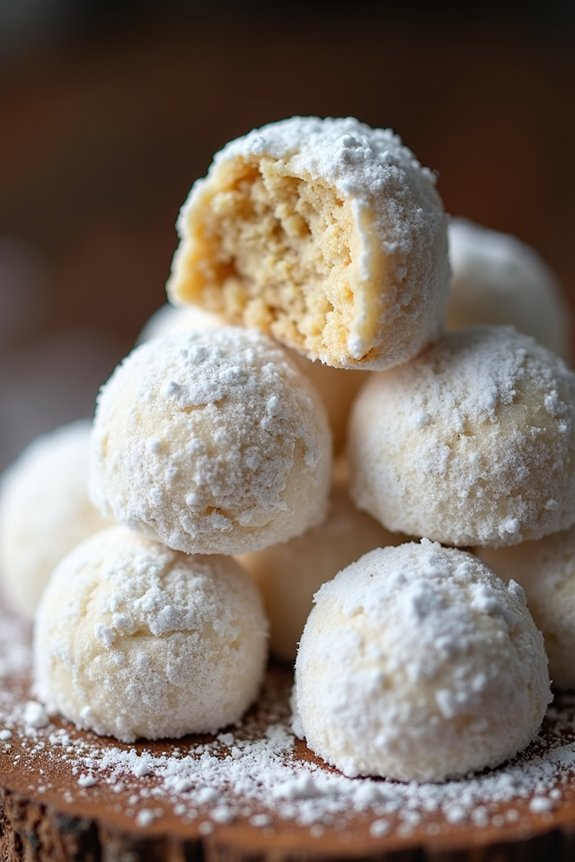
Almond Snowball Cookies are a delightful treat that perfectly encapsulate the festive spirit of Christmas. These buttery, nutty cookies are rolled in powdered sugar, giving them a snowball-like appearance, which makes them a charming addition to any holiday dessert table. Their rich almond flavor and crumbly texture make them melt in your mouth, leaving a sweet, nutty aftertaste that’s simply irresistible.
Whether you’re baking them for a cozy family gathering or as a thoughtful edible gift, Almond Snowball Cookies are certain to be a hit with anyone who tries them.
Baking these cookies is a simple and enjoyable process that doesn’t require any complicated techniques or equipment. With just a handful of ingredients, you can whip up a batch of these delicious cookies in no time. They’re also quite forgiving, making them an excellent choice for both novice and experienced bakers.
As you bake, your kitchen will be filled with the warm, inviting aroma of toasted almonds and vanilla, setting the perfect mood for the holiday season. Now, let’s gather the ingredients and get started on making these delectable Almond Snowball Cookies.
Ingredients for Almond Snowball Cookies (serving size: 4-6 people):
- 1 cup (2 sticks) unsalted butter, softened
- 1/2 cup powdered sugar
- 1 teaspoon vanilla extract
- 2 cups all-purpose flour
- 1 cup finely chopped almonds
- 1/4 teaspoon salt
- Additional powdered sugar for coating
Cooking Instructions:
- Preheat the Oven: Begin by preheating your oven to 350°F (175°C). This guarantees that it’s at the right temperature when you’re ready to bake the cookies.
- Mix the Butter and Sugar: In a large mixing bowl, combine the softened butter and 1/2 cup of powdered sugar. Use an electric mixer to beat them together until the mixture is light and fluffy. This should take about 2-3 minutes.
- Add Vanilla and Dry Ingredients: Add the vanilla extract, flour, chopped almonds, and salt to the creamed butter and sugar. Mix everything together until a dough forms. The dough should be soft but not sticky.
- Shape the Cookies: Scoop out small portions of the dough (about 1 tablespoon each) and roll them into balls. Place the balls onto an ungreased baking sheet, spacing them about 1 inch apart.
- Bake the Cookies: Place the baking sheet in the preheated oven and bake for 15-18 minutes, or until the cookies are set and very lightly browned on the bottom. Be careful not to overbake, as they should remain pale in color.
- Coat with Powdered Sugar: Remove the cookies from the oven and allow them to cool slightly on the baking sheet for about 5 minutes. While they’re still warm, roll them in additional powdered sugar to coat completely. Place them on a wire rack to cool completely.
- Final Coating: Once the cookies have cooled, roll them in powdered sugar one more time to guarantee a generous coating that resembles snow.
Extra Tips:
For the best flavor, use freshly toasted almonds; simply spread them on a baking sheet and toast in a 350°F (175°C) oven for about 5-7 minutes, or until they start to turn golden and fragrant. Be mindful not to over-toast as they can quickly turn bitter.
If you prefer a finer texture, you can pulse the almonds in a food processor before adding them to the dough. To store the cookies, keep them in an airtight container at room temperature for up to a week.
If you want to prepare them in advance, you can freeze the unbaked dough balls and bake them straight from the freezer, adding a few extra minutes to the baking time. Enjoy your Almond Snowball Cookies with a warm cup of tea or coffee for the perfect holiday treat!
Quick Tiramisu Cups
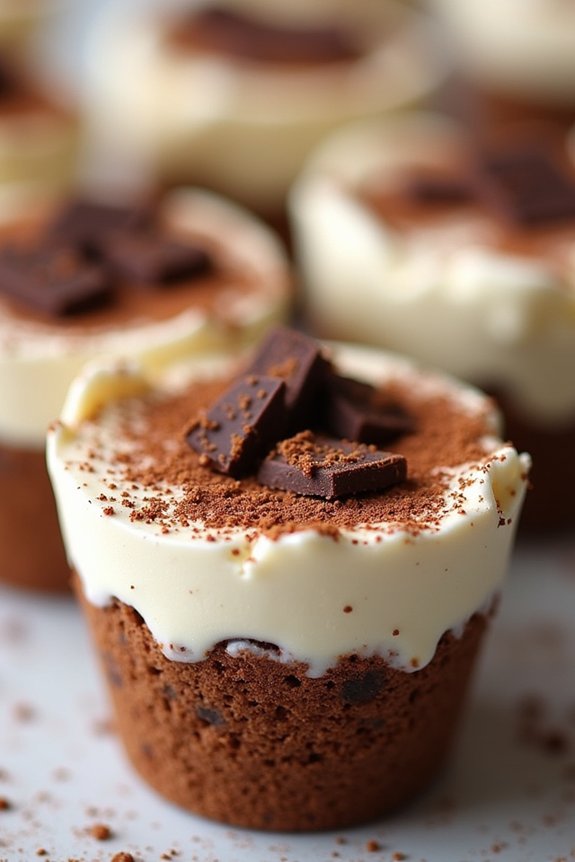
Quick Tiramisu Cups are the perfect festive treat for your Christmas celebrations. This delightful dessert is a simplified version of the classic Italian Tiramisu, served in individual cups for easy portioning and an elegant presentation.
With layers of coffee-soaked ladyfingers, creamy mascarpone filling, and a dusting of cocoa powder, these cups offer rich flavors and a creamy texture that will impress your guests. The best part is that this dessert can be prepared in advance, allowing you to enjoy more time with your loved ones on Christmas day.
Ideal for serving 4-6 people, these Quick Tiramisu Cups require minimal effort and only a handful of ingredients. They’re perfect for those who want to enjoy a luxurious dessert without spending hours in the kitchen.
The balance of coffee, cocoa, and creamy mascarpone is a crowd-pleaser, ensuring these cups will be a hit at your holiday gatherings. Whether you’re a seasoned baker or a novice in the kitchen, this recipe is straightforward and yields delicious results.
Ingredients (serving size: 4-6 people):
- 1 cup strong brewed coffee, cooled
- 3 tablespoons coffee liqueur (optional)
- 1 pack ladyfinger biscuits (about 20-24 pieces)
- 1 cup mascarpone cheese
- 1 cup heavy cream
- 1/4 cup granulated sugar
- 1 teaspoon vanilla extract
- Unsweetened cocoa powder, for dusting
- Dark chocolate shavings, for garnish (optional)
Instructions:
- Prepare the Coffee Mixture: In a shallow dish, combine the cooled brewed coffee and coffee liqueur (if using). This mixture will be used to soak the ladyfingers and infuse them with a rich coffee flavor.
- Whip the Cream: In a mixing bowl, combine the heavy cream, sugar, and vanilla extract. Use an electric mixer to whip the cream until soft peaks form. Be careful not to overmix, as you want the cream to be light and fluffy.
- Create the Mascarpone Mixture: Gently fold the mascarpone cheese into the whipped cream mixture. Use a spatula to combine the ingredients, ensuring a smooth and creamy consistency without deflating the whipped cream.
- Assemble the Tiramisu Cups: Quickly dip each ladyfinger into the coffee mixture, ensuring they’re soaked but not overly saturated. Place a layer of soaked ladyfingers at the bottom of each serving cup.
- Layer the Dessert: Spoon a layer of the mascarpone mixture over the ladyfingers in each cup. Repeat the process by adding another layer of soaked ladyfingers followed by another layer of the mascarpone mixture. Fill the cups to the top, finishing with a mascarpone layer.
- Chill and Serve: Cover the cups with plastic wrap and refrigerate for at least 2 hours, allowing the flavors to meld and the dessert to set. Just before serving, dust the top of each cup with cocoa powder and garnish with dark chocolate shavings, if desired.
Extra Tips: For the best flavor, prepare the Quick Tiramisu Cups a day ahead and let them chill overnight in the refrigerator. This allows the flavors to develop fully and results in a more cohesive texture.
If you prefer a non-alcoholic version, simply omit the coffee liqueur. Additionally, you can experiment with different garnishes such as crushed nuts or berries to add a personal touch to your dessert. Enjoy this delightful treat as a sweet finale to your Christmas feast!