

Get ready to explore a delightful collection of no-bake Christmas dessert recipes that are both quick and stunning. Think Peppermint Bark Cheesecake or Eggnog Panna Cotta, all without turning on the oven. These treats are lifesavers for last-minute holiday gatherings or when you’re pressed for time but still want to wow your guests. Let’s uncover these festive gems that will make your celebrations shine.
Peppermint Bark Cheesecake
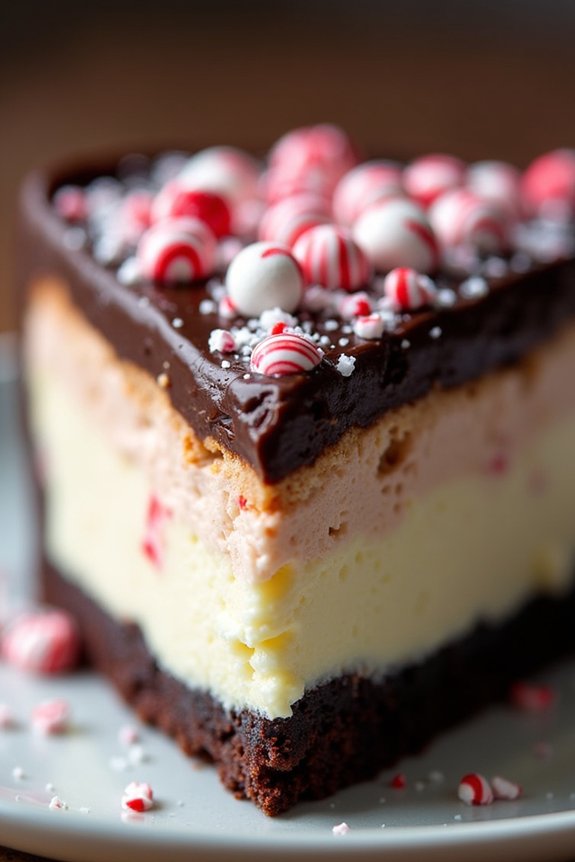
For a festive and indulgent treat this holiday season, try making a delightful Peppermint Bark Cheesecake. This no-bake dessert combines the rich, creamy texture of cheesecake with the invigorating, minty flavor of peppermint bark, making it a perfect addition to your Christmas dessert table.
The layers of this cheesecake aren’t only visually stunning but also packed with flavors that will surely impress your family and friends. This cheesecake consists of a chocolate cookie crust, a creamy peppermint-flavored cheesecake layer, and a decadent topping of homemade peppermint bark.
The best part? It requires no baking, making it an easy and stress-free dessert option during the busy holiday season. Serve this delicious dessert to a group of 4-6 people and watch it disappear in no time!
Ingredients (Serving size: 4-6 people):
- 1 1/2 cups chocolate cookie crumbs
- 1/4 cup unsalted butter, melted
- 16 oz cream cheese, softened
- 1 cup powdered sugar
- 1 teaspoon vanilla extract
- 1/2 teaspoon peppermint extract
- 1 cup heavy whipping cream
- 4 oz white chocolate, melted
- 1/2 cup crushed peppermint candies
- 4 oz dark chocolate, melted
- Extra crushed peppermint candies for garnish (optional)
Instructions:
1. Prepare the Crust: In a medium bowl, mix the chocolate cookie crumbs with the melted butter until well combined. Press this mixture evenly into the bottom of a 9-inch springform pan to form the crust.
Place the pan in the refrigerator to chill while you prepare the filling.
2. Make the Cheesecake Filling: In a large mixing bowl, beat the softened cream cheese until smooth and creamy. Gradually add the powdered sugar, continuing to beat until fully incorporated.
Mix in the vanilla extract and peppermint extract until combined.
3. Whip the Cream: In a separate bowl, whip the heavy whipping cream until stiff peaks form. Gently fold the whipped cream into the cream cheese mixture using a spatula.
Be careful not to deflate the whipped cream too much.
4. Add White Chocolate and Peppermint: Gently fold the melted white chocolate and crushed peppermint candies into the cream cheese mixture until evenly distributed.
5. Assemble the Cheesecake: Pour the cheesecake filling over the chilled crust in the springform pan. Smooth the top with a spatula.
Refrigerate the cheesecake for at least 4 hours, or until it’s set and firm.
6. Prepare the Peppermint Bark Topping: Once the cheesecake is set, melt the dark chocolate and spread it over the top of the cheesecake.
Immediately sprinkle extra crushed peppermint candies over the melted chocolate. Return the cheesecake to the refrigerator for about 30 minutes to let the topping set.
7. Serve and Enjoy****: Carefully remove the cheesecake from the springform pan and place it on a serving platter.
Slice and serve the cheesecake chilled, garnished with additional crushed peppermint candies if desired.
Extra Tips:
When making the crust, make certain that the cookie crumbs are finely crushed to help the crust hold together better.
To melt the chocolate, use a double boiler or microwave, stirring often to prevent burning. If the cheesecake seems too soft when removing it from the pan, place it back in the refrigerator for additional time.
When folding in whipped cream, a gentle hand is essential to maintain the light and airy texture of the cheesecake filling.
Eggnog Panna Cotta
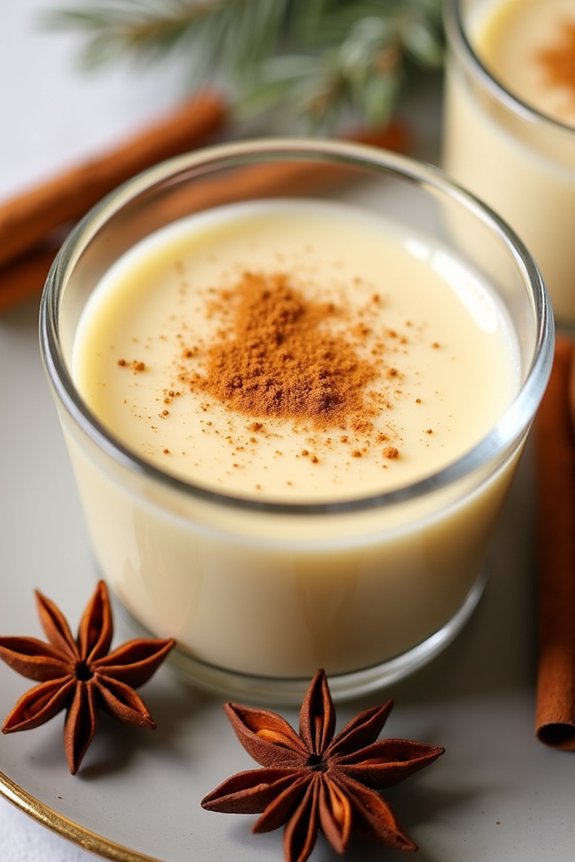
Eggnog Panna Cotta is a delightful and festive no-bake dessert that combines the rich, creamy flavors of traditional Italian panna cotta with the holiday spirit of eggnog. This elegant dessert is perfect for holiday gatherings and can be prepared in advance, leaving you more time to enjoy the festivities with family and friends.
The smooth, velvety texture of the panna cotta complemented by the warm spices of nutmeg and cinnamon make it an irresistible treat that will impress your guests.
This recipe is designed to serve 4-6 people and is incredibly easy to make, even for those who aren’t experienced in the kitchen. By using store-bought eggnog, you can save time while still achieving that authentic holiday flavor. The panna cotta sets beautifully in the refrigerator, allowing you to prepare it a day ahead.
When you’re ready to serve, simply garnish with a sprinkle of nutmeg or cinnamon to enhance its festive appeal.
Ingredients (serves 4-6):
- 2 cups of store-bought eggnog
- 1 cup of heavy cream
- 1 packet (about 2 1/4 teaspoons) of unflavored gelatin
- 1/4 cup of granulated sugar
- 1 teaspoon of vanilla extract
- Ground nutmeg, for garnish
- Ground cinnamon, for garnish
Instructions:
- Prepare the Gelatin: In a small bowl, sprinkle the gelatin over 1/4 cup of the cold eggnog. Let it sit for about 5 minutes, allowing the gelatin to soften and bloom.
- Heat the Mixture: In a saucepan over medium heat, combine the remaining eggnog, heavy cream, and sugar. Stir the mixture occasionally until the sugar is completely dissolved and the mixture is heated through but not boiling.
- Incorporate the Gelatin: Remove the saucepan from the heat. Add the bloomed gelatin to the warm eggnog mixture, stirring constantly until the gelatin is fully dissolved. Stir in the vanilla extract for added flavor.
- Pour into Molds: Carefully pour the mixture into serving glasses or ramekins. Allow them to cool slightly at room temperature before covering them with plastic wrap.
- Chill to Set: Transfer the covered panna cotta to the refrigerator and let them chill for at least 4 hours or until firmly set. For best results, let them set overnight.
- Garnish and Serve: Before serving, sprinkle each panna cotta with a pinch of ground nutmeg and cinnamon. Serve chilled and enjoy!
Extra Tips:
To guarantee smooth panna cotta, make sure the gelatin is completely dissolved before pouring it into the molds; undissolved gelatin can lead to a grainy texture.
If you want to add a touch of elegance, consider inverting the panna cotta onto a plate before serving. Simply run a small knife around the edge of the mold and dip the bottom briefly in warm water to help release it.
This dessert pairs beautifully with gingerbread cookies or a light biscotti for a delightful holiday treat.
Gingerbread Truffles

Gingerbread truffles are a delightful no-bake treat that perfectly captures the spice and warmth of the holiday season. These bite-sized wonders are perfect for Christmas gatherings or as gifts for friends and family. Made with the classic flavors of gingerbread cookies, these truffles are both rich and satisfying, yet surprisingly simple to prepare. Their soft, creamy center is enveloped in a smooth chocolate coating that adds an extra layer of indulgence.
This recipe takes the hassle out of holiday baking by eliminating the need for an oven. Instead, you’ll be combining ingredients and refrigerating them to achieve the perfect texture for rolling into delectable truffles. With just a few simple steps, you’ll have a festive dessert that everyone will love. This recipe yields approximately 24 truffles, making it ideal for serving 4-6 people.
Ingredients:
- 2 cups gingerbread cookies, crushed
- 4 oz cream cheese, softened
- 1 cup powdered sugar
- 1 tsp ground ginger
- 1 tsp cinnamon
- 1/2 tsp nutmeg
- 1/2 tsp allspice
- 1 cup white chocolate chips
- 1 tbsp vegetable oil
Instructions:
- Prepare the Cookie Base: Begin by crushing the gingerbread cookies into fine crumbs using a food processor or by placing them in a sealed plastic bag and crushing them with a rolling pin. Make sure there are no large chunks remaining.
- Mix the Filling: In a large mixing bowl, combine the crushed gingerbread cookies, softened cream cheese, powdered sugar, ground ginger, cinnamon, nutmeg, and allspice. Mix thoroughly until the ingredients are well combined and the mixture is smooth and holds together when pressed.
- Chill the Mixture: Cover the bowl with plastic wrap and place it in the refrigerator for about 30 minutes. This will make the mixture easier to handle and roll into balls.
- Form the Truffles: Once chilled, remove the mixture from the refrigerator. Use a small spoon or cookie scoop to portion out the mixture and roll it into 1-inch balls with your hands. Place the formed balls onto a baking sheet lined with parchment paper.
- Prepare the Coating: In a microwave-safe bowl, combine the white chocolate chips and vegetable oil. Microwave in 30-second intervals, stirring in between, until the chocolate is fully melted and smooth.
- Coat the Truffles: Using a fork, dip each truffle into the melted chocolate, allowing any excess to drip off before placing it back onto the parchment-lined baking sheet. Repeat until all truffles are coated.
- Set the Truffles: Allow the chocolate-coated truffles to set by refrigerating them for at least 15 minutes or until the chocolate has hardened.
Extra Tips:
For an added touch, consider decorating the truffles with festive sprinkles or a drizzle of contrasting chocolate before the coating sets. If you prefer a darker chocolate flavor, substitute the white chocolate chips with milk or dark chocolate.
The key to achieving the best texture for these truffles is ensuring the gingerbread mixture is thoroughly chilled before rolling and coating. This will help maintain their shape and make them easier to work with. Enjoy these delightful treats throughout the holiday season!
White Chocolate Cranberry Fudge
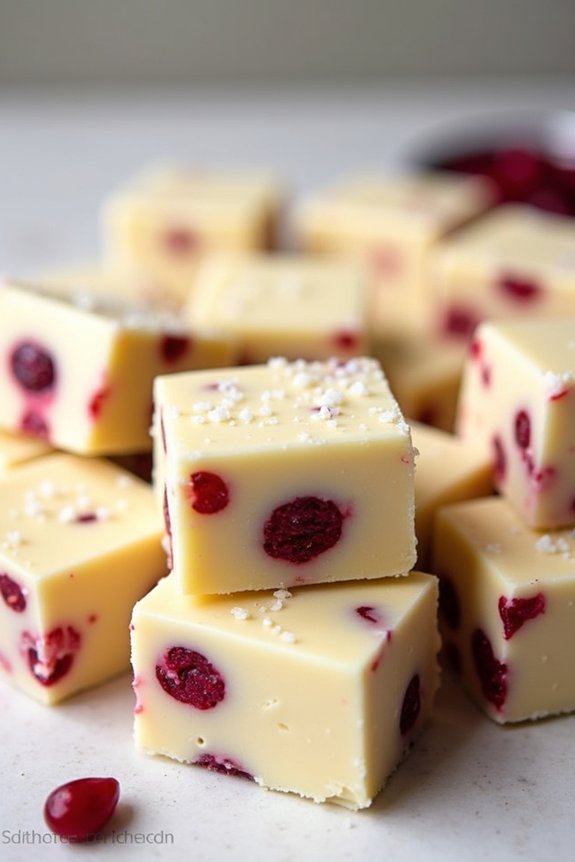
White Chocolate Cranberry Fudge is a festive and delightful no-bake dessert that perfectly complements the holiday season with its creamy texture and vibrant flavors. This treat combines the sweetness of white chocolate with the tartness of dried cranberries, offering a delicious bite-sized indulgence that’s both easy to make and sure to impress your holiday guests.
Whether you’re hosting a Christmas gathering or simply want to enjoy a sweet treat with your family, this fudge is a wonderful addition to any holiday dessert table.
One of the best things about White Chocolate Cranberry Fudge is that it requires minimal effort and no oven time, making it a perfect last-minute dessert option. The recipe involves melting white chocolate and condensed milk together, which creates a luscious base that’s then blended with dried cranberries and a hint of vanilla extract.
Once you pour the mixture into a pan and let it set, you’ll have a delightful batch of fudge ready to share. The combination of flavors and textures makes this fudge a favorite among kids and adults alike, and it’s a great way to add a touch of elegance to your holiday celebrations.
Ingredients (Serves 4-6 people):
- 2 cups white chocolate chips
- 1 can (14 ounces) sweetened condensed milk
- 1 teaspoon vanilla extract
- 1 cup dried cranberries
- A pinch of salt
Instructions:
- Prepare the Pan: Line an 8×8 inch baking pan with parchment paper, leaving some excess paper hanging over the sides for easy removal later.
- Melt the Chocolate: In a medium saucepan over low heat, combine the white chocolate chips and sweetened condensed milk. Stir continuously with a spatula until the chocolate is completely melted and the mixture is smooth. Be careful not to overheat the chocolate to prevent it from burning.
- Add Flavorings: Remove the saucepan from heat and quickly stir in the vanilla extract and a pinch of salt until fully incorporated.
- Incorporate Cranberries: Gently fold in the dried cranberries, making sure they’re evenly distributed throughout the chocolate mixture.
- Set the Fudge: Pour the mixture into the prepared baking pan, spreading it out evenly with the spatula. Tap the pan gently on the counter to remove any air bubbles.
- Chill: Place the pan in the refrigerator for at least 2 hours, or until the fudge is firm and set.
- Cut and Serve: Once set, use the parchment paper to lift the fudge out of the pan. Cut into squares and serve as desired.
Extra Tips:
For a more festive appearance, consider sprinkling some extra dried cranberries or even a handful of chopped nuts on top of the fudge before chilling.
You can also experiment by adding a dash of orange zest for an additional layer of flavor that complements the cranberries beautifully. If you find the fudge difficult to cut, let it sit at room temperature for a few minutes to soften slightly before slicing.
Store any leftovers in an airtight container in the refrigerator for up to two weeks, ensuring you have a delicious treat ready whenever a sweet craving strikes.
No-Bake Chocolate Yule Log
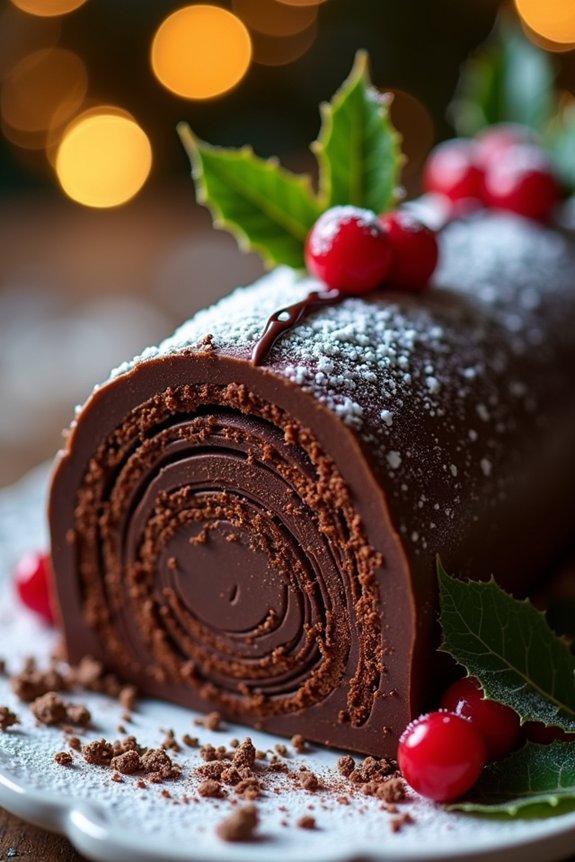
No-Bake Chocolate Yule Log is a delightful and festive dessert that captures the essence of Christmas without the need for an oven. Perfect for those who are short on time or want to avoid the hassle of baking, this dessert brings together the rich flavors of chocolate and cream in a stunning presentation. The traditional Yule log, or “Bûche de Noël,” is reimagined here in a hassle-free version that retains all the charm and indulgence of the classic.
Whether you’re entertaining guests or simply enjoying a cozy night in, this no-bake treat is sure to impress with its elegant appearance and delectable taste.
The key to this no-bake Yule Log is its simplicity and the use of readily available ingredients. By using store-bought chocolate biscuits or wafers as the base, the dessert maintains a firm structure without the need for baking. The creamy filling, which is a luscious blend of chocolate and cream, is spread onto the biscuits, which are then rolled up to form the log shape.
Finished with a smooth chocolate ganache and decorative elements like powdered sugar and edible decorations, this dessert is as visually appealing as it’s scrumptious. Follow these easy steps to create a No-Bake Chocolate Yule Log that serves 4-6 people.
Ingredients:
- 200g chocolate biscuits or wafers
- 1 cup heavy cream
- 1/4 cup powdered sugar
- 1 teaspoon vanilla extract
- 300g dark chocolate, chopped
- 1/2 cup heavy cream (for ganache)
- 2 tablespoons powdered sugar (for decoration)
- Edible decorations (e.g., chocolate shavings, berries, holly leaves)
Instructions:
1. Prepare the Filling: In a mixing bowl, whip 1 cup of heavy cream with 1/4 cup of powdered sugar and 1 teaspoon of vanilla extract until stiff peaks form. This will be your filling for the log.
2. Assemble the Log: Lay out a large piece of plastic wrap on a flat surface. Spread a thin layer of the whipped cream mixture onto each chocolate biscuit, then stack them horizontally to form a log shape on the plastic wrap. Once all biscuits are stacked, carefully roll the entire log with the plastic wrap, ensuring it’s tight and secure.
Place in the refrigerator for at least 2 hours or until firm.
3. Make the Ganache: In a heatproof bowl, add the chopped dark chocolate. In a small saucepan, bring 1/2 cup of heavy cream to a simmer, then pour it over the chocolate. Let it sit for a minute, then stir until smooth and glossy. Allow it to cool slightly.
4. Coat the Log: Remove the chocolate log from the refrigerator and unwrap it. Carefully place it on a serving platter. Pour the chocolate ganache over the log, spreading it evenly to coat the surface.
5. Decorate: Once the ganache has set slightly, dust the log with powdered sugar to resemble snow. Add edible decorations like chocolate shavings, berries, or holly leaves to enhance the festive look.
6. Chill and Serve: Allow the log to chill in the refrigerator for at least 1 hour to set completely before serving. Slice and serve to enjoy.
Extra Tips:
To enhance the flavor of your No-Bake Chocolate Yule Log, consider adding a splash of coffee or a liqueur like Baileys to the whipped cream filling for an adult twist.
Be sure to use high-quality chocolate for the ganache to achieve a rich and smooth finish. If you’re preparing this dessert in advance, it can be stored in the refrigerator for up to two days.
When ready to serve, let the log sit at room temperature for a few minutes to soften slightly, making it easier to slice. Enjoy your festive creation with a hot cup of cocoa or a glass of chilled eggnog for the ultimate holiday treat!
Cranberry Orange Parfaits
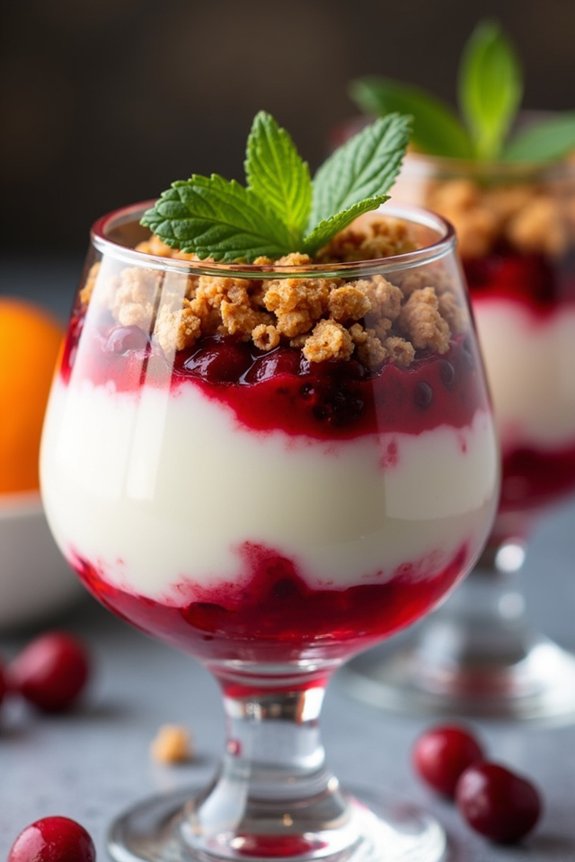
This dessert is layered with a creamy, tangy base of whipped cream cheese and yogurt, enhanced by a homemade cranberry-orange compote. Topped with crunchy granola or crushed gingerbread cookies, these parfaits offer a lovely contrast of textures. The best part? They require no baking at all.
With a little preparation, you can create these beautiful and delicious parfaits that capture the essence of the holiday season.
Ingredients for Cranberry Orange Parfaits (serving size: 4-6 people):
- 1 cup fresh or frozen cranberries
- 1/2 cup orange juice
- Zest of 1 orange
- 1/3 cup sugar
- 1 cup cream cheese, softened
- 1 cup Greek yogurt
- 1/4 cup honey or maple syrup
- 1 teaspoon vanilla extract
- 1 cup granola or crushed gingerbread cookies
- Fresh mint leaves for garnish (optional)
Instructions:
- Prepare the Cranberry-Orange Compote: In a small saucepan, combine the cranberries, orange juice, orange zest, and sugar. Cook over medium heat, stirring occasionally, until the cranberries begin to pop and the sauce thickens, about 10-15 minutes. Remove from heat and let it cool completely.
- Make the Cream Base: In a medium bowl, mix together the softened cream cheese, Greek yogurt, honey or maple syrup, and vanilla extract until smooth and creamy. Adjust sweetness to taste if necessary.
- Assemble the Parfaits: In serving glasses or bowls, start by adding a layer of the cream cheese mixture. Follow with a spoonful of the cranberry-orange compote. Repeat the layers until the glasses are almost full, ending with the compote on top.
- Add Crunch and Garnish: Sprinkle a generous amount of granola or crushed gingerbread cookies over the top layer. If desired, garnish with fresh mint leaves for an extra festive touch.
- Chill and Serve: Refrigerate the parfaits for at least 1 hour before serving to allow the flavors to meld together. Serve chilled and enjoy your festive dessert!
Extra Tips:
For a smoother texture, make sure the cream cheese is fully softened before mixing with the yogurt. You can prepare the cranberry-orange compote a day in advance to save time on the day of serving.
If you prefer individual portions, use smaller glasses or jars for a cute, personalized presentation. Feel free to experiment with different toppings such as chopped nuts or coconut flakes for added flavor and texture.
Chocolate Peanut Butter Snowballs
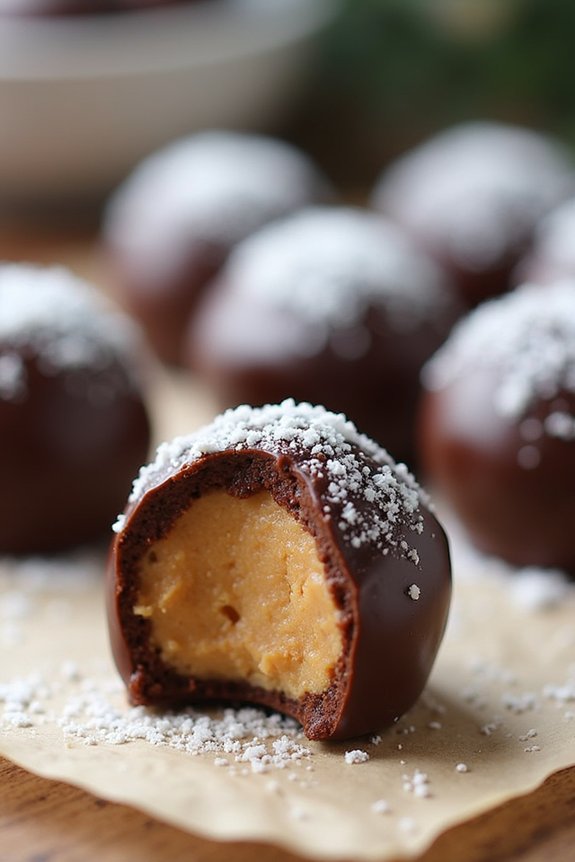
Chocolate Peanut Butter Snowballs are a delightful no-bake treat that combines the timeless flavors of chocolate and peanut butter into a festive holiday dessert. These bite-sized confections aren’t only delicious but also incredibly easy to make, requiring no oven time, making them perfect for holiday gatherings or a quick treat.
With a smooth peanut butter center enveloped in a rich chocolate coating and dusted with powdered sugar, these snowballs are certain to be a hit with family and friends. This recipe yields enough for 4-6 people, making it ideal for small gatherings or as part of a larger dessert spread.
The ingredients are simple and likely already in your pantry, which means you can whip up a batch of these delectable snowballs in no time. Whether you’re an experienced baker or a novice in the kitchen, you’ll find this recipe straightforward and rewarding.
Ingredients (Serves 4-6):
- 1 cup creamy peanut butter
- 1/4 cup unsalted butter, softened
- 1 cup powdered sugar, plus more for dusting
- 1 cup graham cracker crumbs
- 1 cup semi-sweet chocolate chips
- 1 tablespoon coconut oil
Cooking Instructions:
- Mix the Peanut Butter Base: In a large mixing bowl, combine the creamy peanut butter and softened butter. Use a hand mixer or a stand mixer to blend the ingredients until smooth and creamy.
- Incorporate Dry Ingredients: Gradually add the powdered sugar and graham cracker crumbs to the peanut butter mixture. Continue mixing until all ingredients are well combined and form a dough-like consistency.
- Shape the Snowballs: Using your hands or a small cookie scoop, portion out the mixture and roll it into small balls, approximately 1 inch in diameter. Place the balls onto a baking sheet lined with parchment paper. Once all the balls are formed, refrigerate them for about 30 minutes to firm up.
- Prepare the Chocolate Coating: In a microwave-safe bowl, combine the semi-sweet chocolate chips and coconut oil. Microwave in 30-second intervals, stirring between each interval, until the chocolate is completely melted and smooth.
- Coat the Snowballs: Remove the peanut butter balls from the refrigerator. Using a fork or a dipping tool, dip each ball into the melted chocolate, making sure it’s fully coated. Allow any excess chocolate to drip off before placing the coated balls back onto the parchment-lined baking sheet.
- Chill and Finish: Once all the balls are coated, place them back in the refrigerator for another 15-20 minutes, or until the chocolate has set. Before serving, dust the snowballs with additional powdered sugar for a festive touch.
Extra Tips:
To achieve the best consistency for the peanut butter mixture, verify that both the peanut butter and butter are at room temperature before mixing. If the dough feels too sticky, you can add a little more graham cracker crumbs or powdered sugar to reach the desired texture.
For a fun variation, consider adding a pinch of sea salt on top of the chocolate coating before it sets, which will enhance the flavors and add a delightful crunch. These snowballs can be made ahead and stored in the refrigerator for up to a week, making them a convenient option for holiday entertaining.
Festive Berry Tiramisu
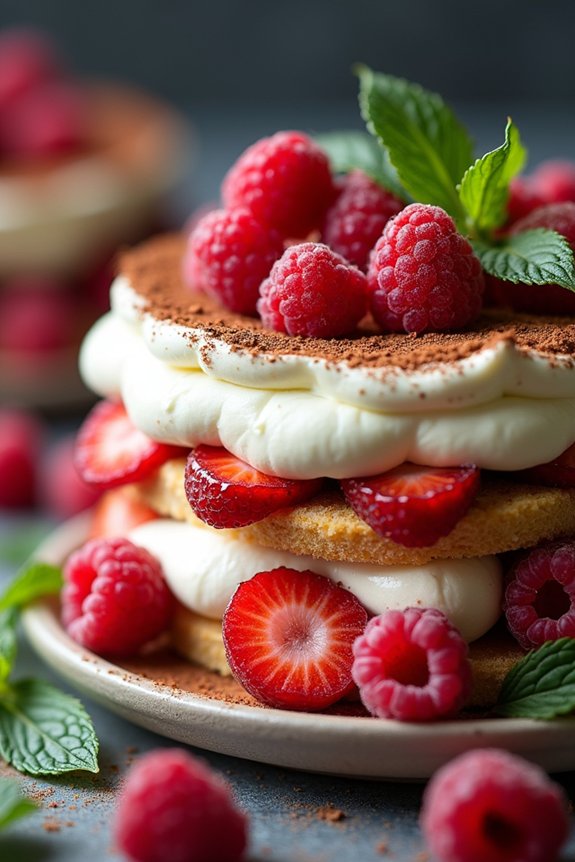
Indulge in a delightful twist on the classic Italian dessert with this Festive Berry Tiramisu. Perfect for the holiday season, this no-bake treat combines layers of luscious mascarpone cream, coffee-soaked ladyfingers, and a vibrant mix of fresh berries. This dessert not only tastes divine but also looks stunning, making it a showstopper at any Christmas gathering.
The combination of sweet berries and rich cream provides a rejuvenating contrast to traditional heavy holiday desserts, guaranteeing a memorable end to your festive feast.
Ready in under 30 minutes, this Festive Berry Tiramisu is ideal for those who want to maximize their time spent with loved ones rather than in the kitchen. This recipe serves 4-6 people, making it perfect for intimate gatherings or as an impressive addition to a larger spread.
With its layers of color and flavor, this dessert is sure to become a new holiday tradition for your family and friends.
Ingredients:
- 1 cup of strong brewed coffee, cooled
- 2 tablespoons of sugar
- 1 teaspoon of vanilla extract
- 1 cup of mascarpone cheese
- 1 cup of heavy cream
- 1/4 cup of powdered sugar
- 1 pint of fresh strawberries, hulled and sliced
- 1 pint of fresh raspberries
- 1 package of ladyfinger cookies
- Cocoa powder, for dusting
- Fresh mint leaves, for garnish
Instructions:
- Prepare Coffee Mixture: In a shallow bowl, combine the cooled coffee with 2 tablespoons of sugar and the vanilla extract. Stir until the sugar dissolves completely. This mixture will be used to soak the ladyfinger cookies.
- Make Mascarpone Cream: In a medium-sized bowl, beat the mascarpone cheese until smooth. In a separate bowl, whip the heavy cream with the powdered sugar until soft peaks form. Gently fold the whipped cream into the mascarpone cheese until well combined, creating a light and fluffy filling.
- Layer the Tiramisu: Quickly dip each ladyfinger into the coffee mixture, making sure they’re soaked but not soggy. Lay a single layer of soaked ladyfingers in the bottom of a 9×9 inch dish or a similar-sized serving dish. Spread half of the mascarpone cream over the ladyfingers, smoothing it evenly with a spatula.
- Add Berries: Arrange half of the sliced strawberries and raspberries over the mascarpone layer. Repeat the process with another layer of coffee-dipped ladyfingers, the remaining mascarpone cream, and the rest of the berries.
- Finish and Chill: Dust the top layer of berries with cocoa powder using a fine sieve. Cover the dish with plastic wrap and refrigerate for at least 2 hours, allowing the flavors to meld together. For best results, chill overnight.
- Garnish and Serve: Before serving, garnish with fresh mint leaves for a festive touch. Slice the tiramisu with a sharp knife and serve chilled.
Extra Tips:
For a more intense berry flavor, consider tossing the berries with a tablespoon of sugar and letting them macerate for 10 minutes before layering. This will draw out their natural juices, enhancing the overall taste of the dessert.
If you prefer a non-alcoholic version, make sure that the coffee is fully cooled before dipping the ladyfingers to prevent them from becoming too soft. Finally, feel free to experiment with different berry combinations or additional toppings such as shaved chocolate for a personalized touch.
Coconut Rum Balls
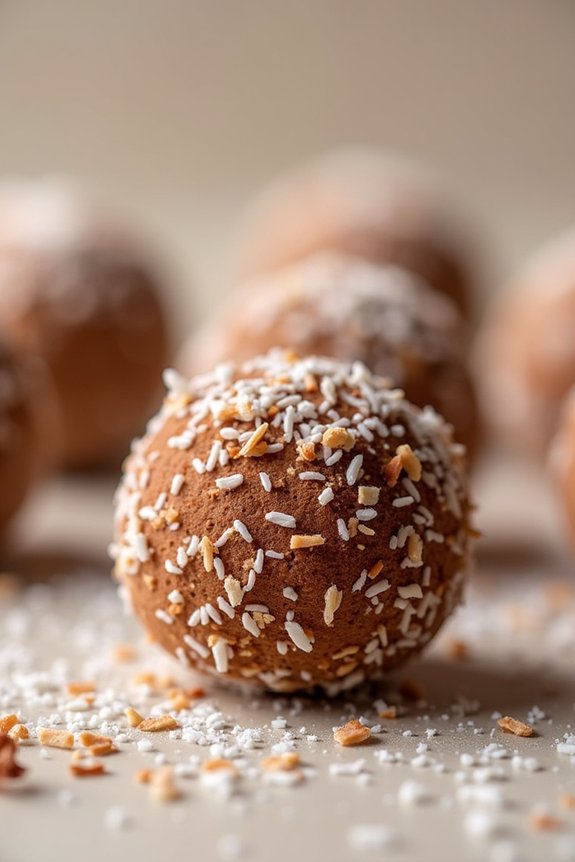
Coconut Rum Balls are a delightful no-bake treat that adds a tropical twist to your Christmas dessert table. These bite-sized confections combine the rich flavor of rum with the sweetness of coconut, making them an irresistible holiday treat. Perfect for those who prefer not to use the oven, these rum balls are incredibly easy to make and require minimal time and effort.
The combination of crushed cookies, cocoa, and coconut creates a satisfying texture that’s both chewy and crunchy, while the rum adds a warm, festive note. This recipe is designed to serve 4-6 people, making it an ideal choice for small gatherings or as part of a larger dessert spread.
The key to achieving the perfect coconut rum balls lies in using high-quality ingredients and allowing enough time for the flavors to meld together. Whether you’re an experienced cook or a beginner, this recipe will guide you through creating a delicious and impressive dessert that everyone will love.
Ingredients:
- 1 cup crushed vanilla wafers
- 1 cup shredded coconut
- 1/2 cup powdered sugar
- 1/4 cup cocoa powder
- 1/4 cup dark rum
- 2 tablespoons light corn syrup
- 1/2 teaspoon vanilla extract
- Additional shredded coconut for rolling
Instructions:
- Prepare the Dry Mixture: Start by placing the crushed vanilla wafers, shredded coconut, powdered sugar, and cocoa powder in a large mixing bowl. Stir the ingredients together until they’re well combined and evenly distributed.
- Add the Wet Ingredients: In another small bowl, combine the dark rum, light corn syrup, and vanilla extract. Stir them together until they’re well mixed.
- Combine Mixtures: Pour the wet ingredients into the bowl with the dry mixture. Use a spatula or your hands to mix everything thoroughly until a sticky dough forms. Make sure all the dry ingredients are moistened and the mixture holds together when pressed.
- Form the Balls: Using your hands, scoop out small portions of the mixture and roll them into balls about 1 inch in diameter. If the mixture is too sticky, dampen your hands slightly with water to make rolling easier.
- Coat with Coconut: Place the additional shredded coconut on a plate. Roll each rum ball in the coconut to coat them evenly. This not only adds flavor but also helps to prevent sticking.
- Chill the Rum Balls: Place the coated rum balls on a baking sheet lined with parchment paper. Once all the balls are formed, refrigerate them for at least 1 hour to allow them to firm up and for the flavors to meld together.
Extra Tips: For the best flavor, make these coconut rum balls a day in advance; this allows the flavors to develop fully, resulting in a richer taste. If you prefer a non-alcoholic version, you can substitute the rum with rum extract and a bit of water.
You can also customize your rum balls by adding chopped nuts or dried fruits to the mixture for added texture and flavor. Store the finished rum balls in an airtight container in the refrigerator for up to a week to keep them fresh.
Spiced Apple Cider Jellies
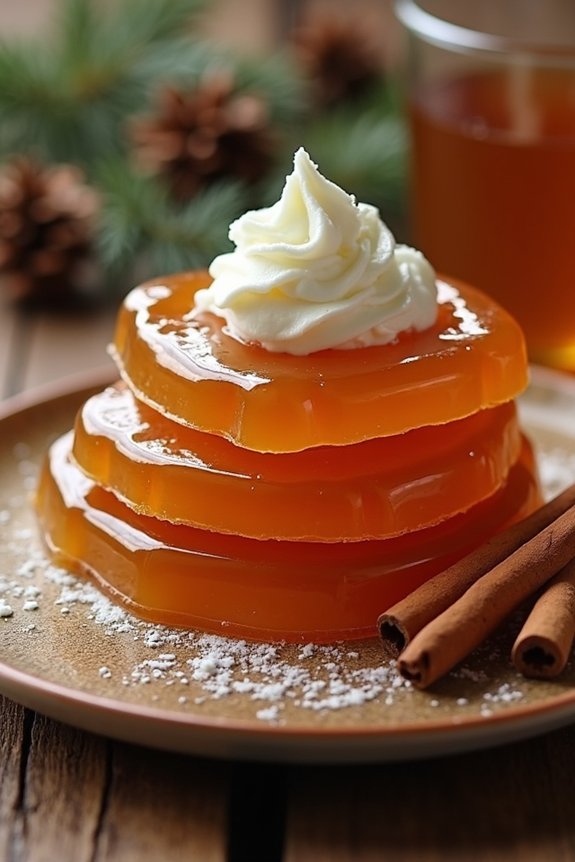
Spiced Apple Cider Jellies are a delightful no-bake dessert that combines the warmth of spiced apple cider with the invigorating texture of jellies. Perfect for a festive holiday table, these jellies are sure to impress your guests with their rich flavors and elegant presentation. They capture the essence of Christmas with the use of classic spices and are an excellent alternative for those who love the taste of apple cider but prefer a lighter dessert option.
These jellies are incredibly simple to make, requiring minimal ingredients and effort, yet they deliver a sophisticated dessert that looks as good as it tastes. They can be made ahead of time, allowing you to focus on other holiday preparations. Whether you’re hosting a Christmas dinner or attending a potluck, these Spiced Apple Cider Jellies will be a crowd-pleaser, offering a sweet, spiced treat that embodies the spirit of the season.
Ingredients (for 4-6 servings):
- 2 cups apple cider
- 1/2 cup granulated sugar
- 1/4 teaspoon ground cinnamon
- 1/8 teaspoon ground nutmeg
- 1/8 teaspoon ground cloves
- 2 tablespoons unflavored gelatin powder
- 1/4 cup cold water
- 1 tablespoon lemon juice
- Optional: whipped cream and cinnamon sticks for garnish
Instructions:
- Prepare the Gelatin Mixture: In a small bowl, sprinkle the unflavored gelatin over 1/4 cup of cold water. Let it sit for about 5 minutes until the gelatin softens and blooms.
- Heat the Cider and Spices: In a medium saucepan, combine the apple cider, granulated sugar, ground cinnamon, ground nutmeg, and ground cloves. Heat the mixture over medium heat, stirring occasionally, until the sugar dissolves and the mixture is hot but not boiling.
- Dissolve the Gelatin: Once the cider mixture is hot, remove the saucepan from the heat. Add the bloomed gelatin to the hot cider and stir until the gelatin is completely dissolved.
- Add Lemon Juice: Stir in the lemon juice to the mixture to add a touch of brightness that balances the sweetness and spices.
- Pour into Molds: Pour the mixture into silicone molds or a square baking dish if you want to cut the jellies into shapes later. Let the mixture cool to room temperature before moving it to the refrigerator.
- Chill: Refrigerate the jellies for at least 4 hours, or until they’re fully set and firm to the touch.
- Serve: Once set, carefully remove the jellies from the molds or cut them into squares if using a baking dish. Garnish with whipped cream and a cinnamon stick if desired, and serve chilled.
Extra Tips: For the best results, use fresh, high-quality apple cider, as it will greatly impact the flavor of your jellies. If you prefer a sweeter jelly, you can adjust the sugar to taste. Additionally, verify that the gelatin is fully dissolved to avoid any lumps in the final product.
If you don’t have silicone molds, a lightly greased baking dish will work just as well, and you can use cookie cutters to create festive shapes. Finally, these jellies can be made up to two days in advance, making them a convenient dessert option for busy holiday schedules.
Mocha Oreo Mousse Cups
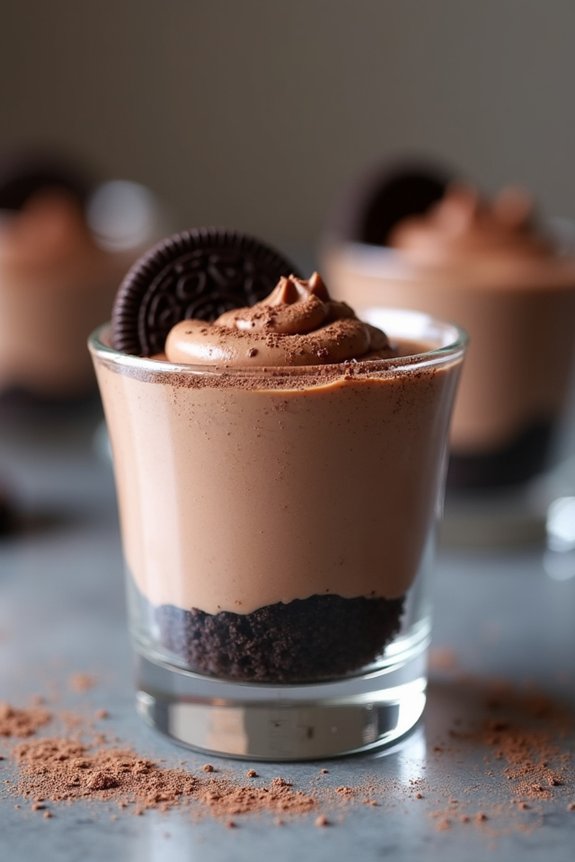
Mocha Oreo Mousse Cups are the perfect no-bake dessert to delight your family and friends this holiday season. This decadent treat combines the rich flavors of mocha and chocolate with the creamy texture of mousse, all nestled in a crunchy Oreo cookie crust.
Not only are these mousse cups delicious, but they also look stunning when served in individual glasses or cups, making them a show-stopping addition to your Christmas dessert table.
The beauty of this recipe lies in its simplicity and ease, requiring no oven time and minimal kitchen equipment. With just a few key ingredients, you can create a dessert that will impress your guests and leave them asking for seconds.
The combination of coffee and chocolate is a classic that never disappoints, and when paired with the beloved Oreo cookie, it creates a harmonious blend of flavors that’s both comforting and indulgent. This recipe serves 4-6 people, making it perfect for an intimate holiday gathering.
Ingredients:
- 24 Oreo cookies
- 4 tablespoons unsalted butter, melted
- 1 cup heavy whipping cream
- 1/2 cup powdered sugar
- 2 tablespoons instant espresso powder
- 8 ounces cream cheese, softened
- 1 teaspoon vanilla extract
- 1 cup semisweet chocolate chips, melted
Instructions:
- Prepare the Oreo Crust:
- Begin by processing the Oreo cookies in a food processor until they form fine crumbs. Add the melted butter to the crumbs and pulse until well combined.
- Divide the mixture evenly into individual serving cups or glasses, pressing it down with the back of a spoon to form a firm crust layer.
- Make the Mocha Mousse:
- In a large mixing bowl, whip the heavy cream with the powdered sugar and instant espresso powder until soft peaks form. Set aside.
- In another bowl, beat the softened cream cheese until smooth. Gradually add the melted chocolate and vanilla extract to the cream cheese, mixing until well combined.
- Gently fold the whipped cream mixture into the chocolate-cream cheese mixture, guaranteeing it’s well incorporated without deflating the whipped cream.
- Assemble the Cups:
- Spoon or pipe the mocha mousse over the Oreo crusts in each cup, filling them evenly.
- Refrigerate the mousse cups for at least 2 hours, or until the mousse is set and firm.
- Serve:
- Before serving, optionally garnish the mousse cups with shaved chocolate, cocoa powder, or a dollop of whipped cream for extra flair.
Extra Tips:
For best results, verify that your cream cheese is fully softened before mixing to prevent lumps in the mousse.
If you prefer a stronger coffee flavor, you can increase the amount of instant espresso powder to your liking.
These Mocha Oreo Mousse Cups can be made a day in advance, which allows you to focus on other preparations on the day of your gathering.
Additionally, feel free to experiment with different types of cookies or chocolate for the crust and mousse to put your own twist on this festive dessert.
Candy Cane Chocolate Bark
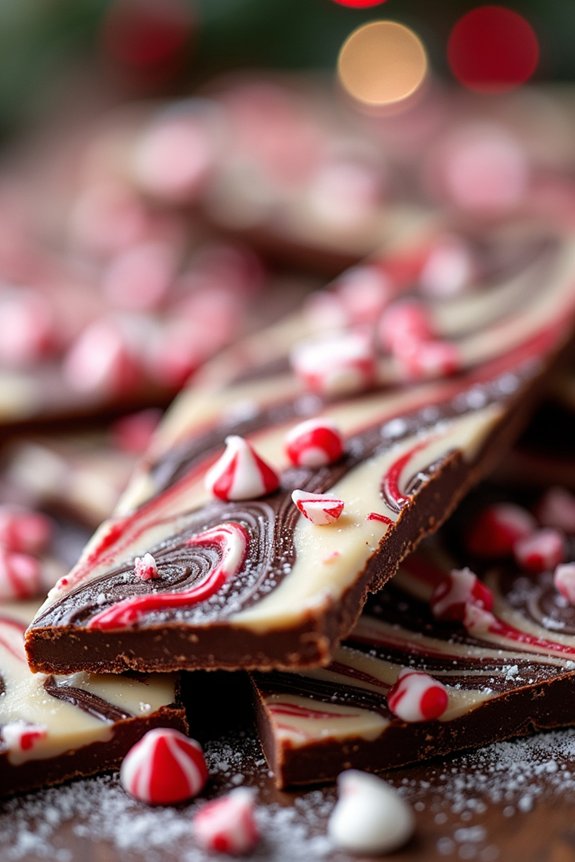
Candy Cane Chocolate Bark is a delightful and festive treat that’s perfect for the holiday season. This no-bake dessert isn’t only easy to make but also a fun activity to do with family and friends. The combination of rich chocolate and invigorating peppermint from the candy canes creates a sweet and uplifting treat that everyone will love.
The bark can be made in advance and stored, making it a convenient option for holiday parties or as a homemade gift. This recipe yields enough Candy Cane Chocolate Bark to serve 4-6 people, making it ideal for a small gathering or as part of a larger dessert spread.
The vibrant red and white of the candy canes against the dark chocolate make for an eye-catching presentation, bringing a touch of holiday cheer to any dessert table. Plus, you can customize the toppings to your liking, adding nuts, dried fruits, or other favorite candies to the mix.
Ingredients:
- 12 ounces of semisweet chocolate chips
- 12 ounces of white chocolate chips
- 1 teaspoon of peppermint extract
- 1 cup of crushed candy canes (about 8 candy canes)
- Optional: 1/4 cup of chopped nuts, dried fruit, or sprinkles
Cooking Instructions:
- Prepare the Candy Canes: Start by unwrapping the candy canes and placing them in a zip-top bag. Use a rolling pin or a meat mallet to gently crush them into small pieces. Set aside.
- Melt the Semisweet Chocolate: In a microwave-safe bowl, place the semisweet chocolate chips. Microwave in 30-second intervals, stirring between each, until completely melted and smooth. Be careful not to overheat the chocolate.
- Spread the Chocolate: Line a baking sheet with parchment paper. Pour the melted semisweet chocolate onto the paper and spread it evenly using a spatula, creating a thin layer. Allow it to set slightly for about 5 minutes.
- Melt the White Chocolate: In another microwave-safe bowl, melt the white chocolate chips using the same method as the semisweet chocolate. Once melted, stir in the peppermint extract.
- Layer and Swirl: Pour the melted white chocolate over the semisweet chocolate layer. Use a toothpick or a skewer to gently swirl the two chocolates together, creating a marbled effect.
- Add Toppings: Immediately sprinkle the crushed candy canes over the swirled chocolate. If using, also add any nuts, dried fruit, or sprinkles at this stage.
- Set the Bark: Allow the chocolate bark to cool and harden completely. You can speed up this process by placing the baking sheet in the refrigerator for about 30 minutes.
- Break and Serve: Once the bark is set, remove it from the parchment paper and break it into pieces. Serve immediately or store in an airtight container at room temperature until ready to enjoy.
Extra Tips:
When melting chocolate, make sure no water comes into contact with it, as this can cause the chocolate to seize and become unusable.
Also, verify that the chocolate is melted slowly and evenly to prevent burning. If you prefer a stronger peppermint flavor, you can increase the amount of peppermint extract slightly, but be cautious as too much can overpower the chocolate.
For an even more festive touch, consider adding edible glitter or colored sugar to the toppings.