

There’s something so comforting about a warm bowl of soup that reminds us of simpler times. The aroma of spices and love simmering on the stove always takes me back to my grandmother’s kitchen. Those classic soups from the 1950s have a nostalgia that’s truly special. Think hearty chicken noodle or creamy tomato soup. Ready to explore some timeless recipes?
Classic Chicken Noodle Soup

Reminiscent of cozy family dinners and heartwarming gatherings, Classic Chicken Noodle Soup from the 1950s remains a cherished staple in many households. This beloved soup offers a delightful combination of tender chicken, hearty vegetables, and comforting noodles, all simmered together in a flavorful broth. Its soothing qualities make it the perfect remedy for a chilly evening or a comforting meal for someone feeling under the weather.
The magic of this recipe lies in its simplicity and the quality of ingredients used. Fresh vegetables and herbs elevate the soup, while the homemade broth gives it a depth of flavor that canned versions simply can’t match. This recipe serves 4-6 people, making it ideal for a family meal or for sharing with friends.
Ingredients:
- 1 whole chicken (about 3-4 pounds), cut into pieces
- 2 tablespoons olive oil
- 1 large onion, chopped
- 3 cloves garlic, minced
- 3 carrots, sliced
- 3 celery stalks, sliced
- 8 cups chicken broth
- 2 bay leaves
- Salt and pepper to taste
- 1 teaspoon dried thyme
- 1/2 teaspoon dried rosemary
- 1/4 teaspoon dried sage
- 2 cups egg noodles
- 1/4 cup chopped fresh parsley
Cooking Instructions:
- Prepare the Chicken: Begin by rinsing the chicken pieces under cold water and patting them dry with paper towels. Heat the olive oil in a large stockpot over medium heat, then add the chicken pieces. Brown the chicken on all sides, which should take about 5-7 minutes. Remove the chicken from the pot and set aside.
- Sauté the Vegetables: In the same pot, add the chopped onion, garlic, carrots, and celery. Sauté for about 5 minutes, or until the onions become translucent and the vegetables begin to soften.
- Simmer the Soup: Return the chicken to the pot with the sautéed vegetables. Add the chicken broth, bay leaves, salt, pepper, thyme, rosemary, and sage. Bring the mixture to a boil, then reduce the heat to low. Cover the pot and let it simmer for about 45 minutes, or until the chicken is fully cooked and tender.
- Cook the Noodles: Remove the chicken pieces from the pot and set them aside to cool slightly. Add the egg noodles to the pot and increase the heat to medium. Cook the noodles for about 8-10 minutes, or until they’re tender.
- Shred the Chicken: While the noodles are cooking, remove the skin and bones from the chicken pieces. Shred the chicken meat using two forks, then return the shredded chicken to the pot.
- Final Touches: Stir the shredded chicken into the soup and let it simmer for another 5 minutes. Remove the bay leaves and adjust the seasoning if necessary. Stir in the fresh parsley before serving.
Extra Tips:
For the richest flavor, consider making your own chicken broth using the same chicken pieces, simmering them with vegetables and herbs for a few hours before starting the soup. This not only enhances the soup’s taste but also allows you to control the sodium content.
Additionally, for a slightly thicker consistency, you can mash some of the cooked vegetables before serving. Remember, the quality of your ingredients will greatly affect the final outcome, so opt for fresh and organic when possible.
Creamy Tomato Soup

Creamy Tomato Soup is a classic comfort food that evokes memories of cozy family dinners around the table in the 1950s. This nostalgic recipe combines the rich, tangy flavors of ripe tomatoes with a luscious, velvety creaminess that makes it irresistible.
The aroma of this soup simmering on the stove is sure to transport you back in time, as you prepare a warming meal that’s perfect for a chilly evening or a simple midday treat.
This version of Creamy Tomato Soup is both simple and satisfying, highlighting the natural sweetness of tomatoes while adding a delightful smoothness with cream. Whether you’re serving it as a starter for a larger meal or alongside a crispy grilled cheese sandwich, this soup is sure to be a hit with both kids and adults alike.
Gather your ingredients, roll up your sleeves, and get ready to bring a taste of the 1950s to your kitchen!
Ingredients (serves 4-6):
- 2 tablespoons unsalted butter
- 1 medium onion, finely chopped
- 2 cloves garlic, minced
- 2 (28-ounce) cans of whole peeled tomatoes
- 1 cup chicken or vegetable broth
- 1 tablespoon sugar
- 1 teaspoon salt
- 1/2 teaspoon freshly ground black pepper
- 1/2 cup heavy cream
- Fresh basil leaves for garnish (optional)
Cooking Instructions:
- Prepare the Base: In a large pot, melt the butter over medium heat. Add the chopped onion and sauté until the onion is soft and translucent, about 5 minutes. Stir in the minced garlic and cook for an additional 1-2 minutes, until fragrant.
- Add Tomatoes and Broth: Pour in the canned tomatoes with their juices, breaking them up with a spoon. Add the chicken or vegetable broth, sugar, salt, and black pepper. Stir well to combine all the ingredients.
- Simmer the Soup: Bring the mixture to a gentle boil, then reduce the heat to low. Cover the pot and let the soup simmer for 20-25 minutes, allowing the flavors to meld together.
- Blend the Soup: Use an immersion blender to puree the soup until smooth. Alternatively, you can carefully transfer the soup in batches to a blender and puree until smooth. Return the soup to the pot if using a blender.
- Add the Cream: Stir in the heavy cream and heat the soup over low heat for another 5 minutes, stirring occasionally, until the soup is heated through and creamy.
- Serve and Garnish: Ladle the soup into bowls and garnish with fresh basil leaves if desired. Serve hot, and enjoy the creamy, nostalgic flavors.
Extra Tips: For a richer flavor, consider roasting fresh tomatoes in the oven with olive oil and a pinch of salt before adding them to the soup. If you prefer a thicker consistency, reduce the amount of broth slightly.
Adjust the seasoning to your taste, and feel free to experiment with herbs like thyme or oregano for added depth. To make this dish vegetarian, simply use vegetable broth instead of chicken broth.
Hearty Beef and Vegetable Stew

Transport yourself back to the comforting kitchens of the 1950s with a classic Hearty Beef and Vegetable Stew, a staple for those chilly nights when only a warm, nourishing meal will do. This dish combines tender chunks of beef with a medley of vegetables, simmered slowly to perfection in a rich broth. It’s the ideal meal for families, offering a satisfying blend of flavors and textures that are sure to evoke memories of simpler times.
Whether you’re gathering around the table for a weeknight dinner or serving it as a centerpiece for a Sunday meal, this stew is bound to become a favorite.
The 1950s were all about wholesome, nourishing meals, and this stew exemplifies that philosophy. The beef is seared to lock in juices, while the slow cooking process guarantees the meat becomes melt-in-your-mouth tender.
Vegetables like carrots, potatoes, and peas add color and nutrition, making this a balanced meal that pleases both the palate and the eye. The addition of herbs and seasoning deepens the flavor profile, making each spoonful a delightful experience.
Let’s explore the ingredients and steps to create this hearty masterpiece for 4-6 people.
Ingredients:
- 2 pounds beef chuck, cut into 1-inch cubes
- 2 tablespoons vegetable oil
- 1 large onion, diced
- 3 cloves garlic, minced
- 4 cups beef broth
- 2 tablespoons tomato paste
- 1 teaspoon Worcestershire sauce
- 4 large carrots, peeled and sliced
- 3 large potatoes, peeled and diced
- 1 cup frozen peas
- 1 teaspoon dried thyme
- 1 bay leaf
- Salt and pepper to taste
- 2 tablespoons all-purpose flour
- 2 tablespoons water
- Fresh parsley, chopped (optional, for garnish)
Cooking Instructions:
- Prepare the Beef: Begin by patting the beef cubes dry with paper towels. Season them generously with salt and pepper. This helps create a nice crust when searing.
- Sear the Beef: In a large Dutch oven or heavy pot, heat the vegetable oil over medium-high heat. Add the beef cubes in batches, avoiding overcrowding the pot. Sear the beef until browned on all sides, about 5-7 minutes. Remove the beef and set aside.
- Sauté the Aromatics: In the same pot, add the diced onion and minced garlic. Sauté for 3-4 minutes until the onion becomes translucent and fragrant.
- Deglaze and Simmer: Stir in the tomato paste, cooking for another minute. Add the beef back to the pot, followed by the beef broth, Worcestershire sauce, dried thyme, and bay leaf. Bring the mixture to a boil, then reduce the heat to low. Cover and let it simmer for about 1 hour.
- Add the Vegetables: After an hour, add the carrots and potatoes to the pot. Continue simmering for another 30-40 minutes, or until the vegetables are tender and the beef is fork-tender.
- Thicken the Stew: In a small bowl, mix the flour and water to create a smooth slurry. Stir this mixture into the stew to thicken it. Add the frozen peas and cook for an additional 5 minutes.
- Final Seasoning: Taste the stew and adjust the seasoning with salt and pepper as needed. Remove the bay leaf before serving.
- Serve: Ladle the stew into bowls. Garnish with fresh parsley, if desired, and serve hot.
Extra Tips: To enhance the flavor, consider making the stew a day ahead. Allowing it to rest overnight in the refrigerator will deepen the flavors, making it even more delicious.
When reheating, you may need to add a bit more broth or water to reach your desired consistency. Additionally, feel free to experiment with other root vegetables or herbs you have on hand, such as parsnips or rosemary, to tailor the stew to your taste preferences.
Split Pea Soup With Ham
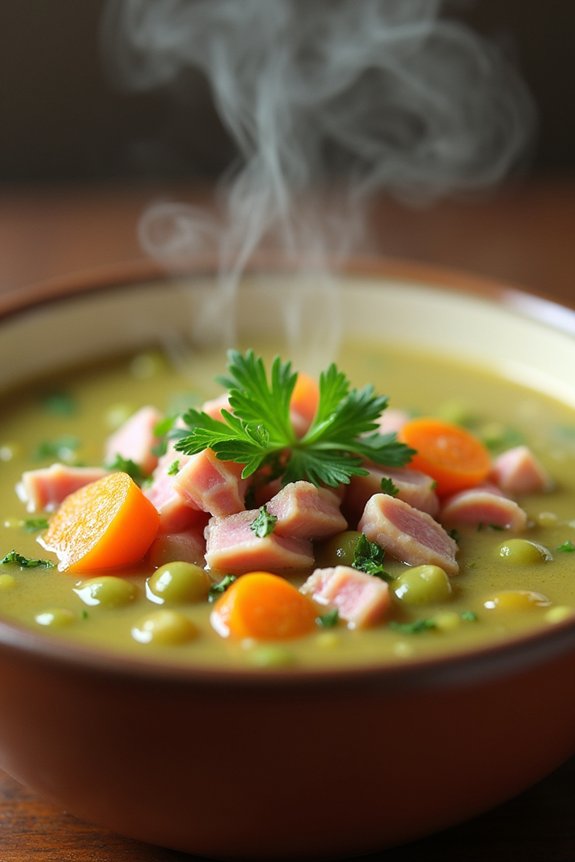
Split Pea Soup With Ham is a classic comfort dish that brings back memories of cozy family dinners and leisurely weekend lunches. This hearty soup is a staple in many households and is known for its rich flavor and satisfying texture. The combination of split peas and ham provides a savory base, while the addition of vegetables and seasonings elevates the dish to a fulfilling meal. This recipe will guide you through creating a traditional Split Pea Soup With Ham that serves 4-6 people.
The 1950s was a time when home-cooked meals were at the heart of family gatherings, and soup was often the star. Split Pea Soup With Ham is a perfect example of a dish that embodies the simplicity and wholesomeness of that era. Whether you’re looking to recreate a nostalgic family recipe or simply want to try something new, this soup is sure to warm your heart and your stomach.
Ingredients (Serves 4-6):
- 1 pound dried green split peas
- 1 meaty ham bone or 2 cups diced cooked ham
- 1 large onion, chopped
- 2 carrots, sliced
- 2 celery stalks, chopped
- 3 cloves garlic, minced
- 8 cups water or chicken broth
- 1 bay leaf
- Salt and pepper to taste
- Fresh parsley, chopped (for garnish)
Cooking Instructions:
- Prepare the Ingredients: Begin by rinsing the split peas in cold water to remove any debris. Drain them well before setting aside. Chop the onion, carrots, and celery, and mince the garlic for the soup base.
- Combine Ingredients: In a large pot or Dutch oven, combine the rinsed split peas, ham bone or diced ham, chopped onion, carrots, celery, and minced garlic. Pour in the water or chicken broth to cover the ingredients.
- Add Seasonings: Add the bay leaf to the pot. Season with salt and pepper to taste, keeping in mind that the ham will add some saltiness to the soup.
- Bring to a Boil: Place the pot over medium-high heat and bring the soup to a boil. Once it reaches a boil, reduce the heat to low and cover the pot with a lid.
- Simmer the Soup: Allow the soup to simmer for about 1.5 to 2 hours, stirring occasionally. The peas should become tender and start to break down, thickening the soup. If the soup becomes too thick, add more water or broth to reach the desired consistency.
- Remove the Ham Bone: If you used a ham bone, carefully remove it from the pot once the soup has thickened. Shred any remaining meat from the bone and return it to the pot.
- Final Adjustments: Taste the soup and adjust the seasoning with additional salt and pepper if needed. Remove the bay leaf before serving.
- Garnish and Serve: Ladle the soup into bowls and garnish with freshly chopped parsley. Serve hot with crusty bread for a complete meal.
Extra Tips:
For an extra layer of flavor, consider adding a smoked ham hock instead of a regular ham bone. This will impart a smoky richness to the soup.
If you prefer a smoother texture, use an immersion blender to purée the soup to your liking.
Store any leftover soup in an airtight container in the refrigerator for up to three days. The flavors will continue to develop, making it even more delicious the next day.
Old-Fashioned Potato Soup

Old-Fashioned Potato Soup is a heartwarming classic that takes us back to the comforting kitchens of the 1950s. This soup is the epitome of simplicity and warmth, combining the earthy flavors of potatoes with the rich, creamy texture that so many of us remember from childhood meals. It’s a dish that evokes memories of family gatherings, where the aroma of simmering soup filled the house and brought everyone to the table.
Whether served as a starter or the main course, this soup is certain to warm your heart and soul. The beauty of Old-Fashioned Potato Soup lies in its straightforward preparation and the use of readily available ingredients. The potatoes are the star of the show, providing that hearty base, while the addition of aromatic vegetables, cream, and a hint of seasoning elevates the dish to a comforting masterpiece.
This recipe, serving 4-6 people, is perfect for a cozy family dinner or a casual get-together with friends. As you recreate this nostalgic dish, you’ll be reminded of the simple joys of home-cooked meals and the power of food to bring people together.
Ingredients:
- 6 medium potatoes, peeled and diced
- 1 large onion, chopped
- 3 stalks celery, chopped
- 4 cups chicken or vegetable stock
- 1 cup milk
- 1 cup heavy cream
- 3 tablespoons butter
- Salt and pepper to taste
- Optional: chopped fresh parsley for garnish
Cooking Instructions:
- Prepare the Vegetables: Begin by peeling and dicing the potatoes into small, uniform pieces. Chop the onion and celery as well. This guarantees even cooking and a consistent texture throughout the soup.
- Sauté the Vegetables: In a large pot, melt the butter over medium heat. Add the chopped onion and celery, sautéing until the onion becomes translucent and the celery is tender, about 5-7 minutes.
- Cook the Potatoes: Add the diced potatoes to the pot and pour in the chicken or vegetable stock. Bring the mixture to a boil, then reduce the heat to a simmer. Cover the pot and let it cook for about 20 minutes, or until the potatoes are fork-tender.
- Blend the Soup: Once the potatoes are cooked, use an immersion blender to puree the soup until smooth. If you prefer a chunkier texture, blend only part of the soup.
- Add Dairy and Seasonings: Stir in the milk and heavy cream, mixing well to combine. Season with salt and pepper to taste. Allow the soup to heat through but avoid bringing it back to a boil.
- Serve: Ladle the soup into bowls and, if desired, garnish with a sprinkle of chopped fresh parsley for a pop of color and freshness.
Extra Tips:
When preparing Old-Fashioned Potato Soup, it’s important to choose starchy potatoes like Russet or Yukon Gold, as they break down well and thicken the soup naturally. For an extra depth of flavor, consider adding a bay leaf while simmering the potatoes and removing it before blending.
Additionally, if you prefer a slightly thicker soup, you can mash some of the potatoes against the pot’s side before blending. This dish is highly adaptable, so feel free to adjust the creaminess by altering the amount of cream or milk to suit your taste. Enjoy this nostalgic soup with a side of crusty bread for the ultimate comforting meal.
Cream of Mushroom Soup

Cream of Mushroom Soup is a classic dish that harkens back to the comfort and simplicity of the 1950s. Known for its creamy texture and rich, earthy flavor, this soup was a staple in many households during the mid-20th century. Often served as a starter, it also found its way into numerous casserole recipes, becoming a versatile favorite that brought warmth to the dinner table. This particular recipe captures the essence of the era, using simple ingredients to create a delicious and satisfying soup that can be enjoyed by both the young and old alike.
The beauty of Cream of Mushroom Soup lies in its straightforward preparation and reliance on fresh ingredients that were readily available in the 1950s. Mushrooms, onions, and garlic create a robust foundation, while butter and cream provide the lusciousness that makes this soup so beloved. With just a few steps and some patience, you can recreate this nostalgic dish that transports you back to a time when meals were made from scratch and shared with family and friends.
Ingredients for 4-6 servings:
- 1 pound fresh mushrooms, sliced
- 1 medium onion, finely chopped
- 2 cloves garlic, minced
- 4 tablespoons butter
- 4 tablespoons all-purpose flour
- 4 cups chicken or vegetable broth
- 1 cup heavy cream
- Salt and pepper to taste
- Fresh parsley, chopped (optional, for garnish)
Cooking Instructions:
- Prepare the Vegetables: Begin by cleaning and slicing the mushrooms into thin pieces. Chop the onion finely and mince the garlic cloves. This guarantees that all ingredients are ready to be added as you cook, streamlining the process.
- Sauté the Vegetables: In a large pot, melt the butter over medium heat. Add the chopped onions and garlic, sautéing them until they’re soft and fragrant, about 5 minutes. Add the sliced mushrooms to the pot and cook for another 5-7 minutes until they’re tender and have released their juices.
- Create a Roux: Sprinkle the flour over the mushroom mixture and stir continuously for about 2 minutes. This step is essential as it helps thicken the soup. Make sure the flour is fully incorporated and doesn’t stick to the bottom of the pot.
- Add the Broth: Gradually pour in the chicken or vegetable broth while stirring to prevent lumps from forming. Bring the mixture to a gentle boil, then reduce the heat and let it simmer for about 10 minutes. This allows the flavors to meld together beautifully.
- Blend the Soup: Using an immersion blender, blend the soup until smooth. If you prefer a chunkier texture, blend less or remove a portion of the mushrooms before blending and add them back in afterward.
- Incorporate the Cream: Stir in the heavy cream and let the soup simmer for an additional 5 minutes. This adds richness and a velvety texture to the dish. Season with salt and pepper to taste.
- Serve: Ladle the soup into bowls, and if desired, garnish with freshly chopped parsley for an added touch of color and flavor. Serve hot alongside crusty bread for a complete meal.
Extra Tips:
When making Cream of Mushroom Soup, choosing a variety of mushrooms like cremini or shiitake can elevate the flavor profile, adding depth and complexity. If you prefer a thicker soup, simply increase the amount of flour in the roux. For a lighter version, substitute half of the heavy cream with milk.
This soup can also be stored in the refrigerator for up to three days, making it a convenient option for meal planning. Finally, remember that like most soups, the flavors tend to deepen over time, so consider making it a day ahead for an even more delicious experience.
Navy Bean Soup
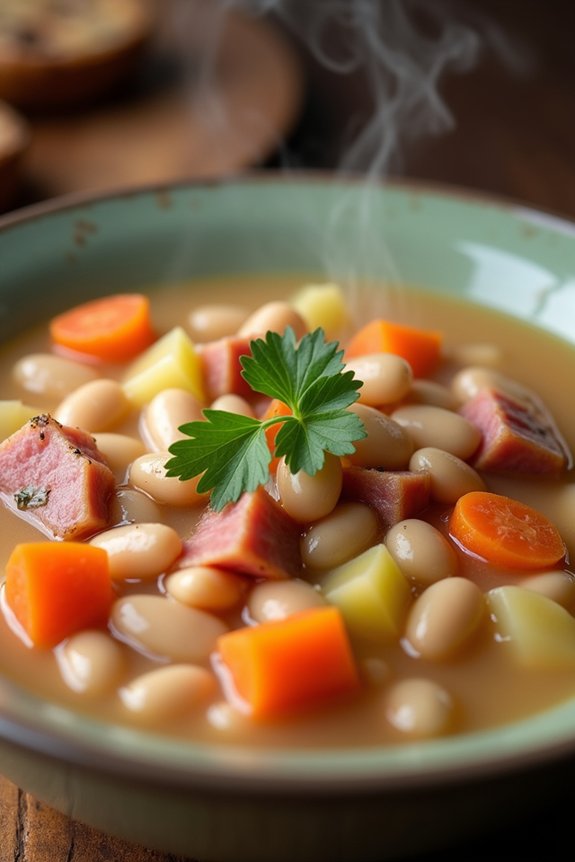
The 1950s were a time when home-cooked meals brought families together around the dinner table, and soups were a staple in many households. Navy Bean Soup, with its hearty texture and rich flavors, embodies the comforting and satisfying meals of this era. This classic soup isn’t only budget-friendly but also packed with protein, making it a perfect dish to warm you up on a cold day.
The simplicity of the ingredients reflects the resourcefulness of cooks from the past who made the most of what they had. This Navy Bean Soup recipe is designed to serve 4-6 people, making it ideal for a family meal or for enjoying leftovers the next day. The creamy beans pair perfectly with smoky ham, aromatic vegetables, and the subtle hint of herbs, creating a flavorful dish that’s both filling and nourishing.
Whether you’re looking to relive the culinary charm of the 1950s or simply want to enjoy a wholesome bowl of soup, this recipe is sure to please.
Ingredients (Serves 4-6):
- 1 pound dried navy beans
- 1 tablespoon olive oil
- 1 large onion, chopped
- 2 carrots, diced
- 2 celery stalks, diced
- 2 cloves garlic, minced
- 1 bay leaf
- 1 teaspoon dried thyme
- 8 cups chicken broth
- 2 cups diced cooked ham
- Salt and pepper to taste
- 2 tablespoons chopped fresh parsley (optional, for garnish)
Cooking Instructions:
- Prepare the Beans:
- Place the dried navy beans in a large bowl and cover them with water. Let them soak overnight, or for at least 8 hours. Drain and rinse the beans thoroughly before using them in the soup.
- Sauté the Vegetables:
- In a large pot or Dutch oven, heat the olive oil over medium heat. Add the chopped onion, diced carrots, and diced celery. Sauté for about 5 minutes, or until the vegetables are tender and the onion is translucent. Stir in the minced garlic and cook for an additional minute.
- Combine Ingredients:
- Add the soaked and drained navy beans to the pot, followed by the bay leaf, dried thyme, and chicken broth. Stir everything together to combine.
- Cook the Soup:
- Bring the mixture to a boil, then reduce the heat to low. Cover the pot and let the soup simmer for about 1.5 to 2 hours, or until the beans are tender. Stir occasionally and check if more broth or water is needed to keep the beans submerged.
- Add the Ham:
- Once the beans are tender, stir in the diced cooked ham. Allow the soup to continue simmering for an additional 15-20 minutes, so the flavors meld together. Season with salt and pepper to taste.
- Finish and Serve:
- Remove the bay leaf from the pot. If desired, use a potato masher to mash some of the beans in the pot for a thicker consistency. Serve the soup hot, garnished with chopped fresh parsley.
Extra Tips:
For an even richer flavor, consider adding a ham bone or ham hock to the soup while it simmers. This will infuse the broth with a deep, smoky taste.
If you prefer a vegetarian version, you can omit the ham and use vegetable broth instead of chicken broth. Additionally, if you’re short on time, you can use canned navy beans, but be sure to adjust the cooking time accordingly. A slow cooker can also be used to make this dish; simply combine all the ingredients and cook on low for 8-10 hours.
Enjoy the satisfying warmth of this nostalgic soup with a side of crusty bread.
Chicken and Dumplings Soup

Chicken and Dumplings Soup is a classic comfort food that has been warming hearts and tummies for decades. Originating in the American South, this dish became a staple in 1950s kitchens due to its hearty ingredients and nourishing qualities. The combination of tender chicken, rich broth, and fluffy dumplings makes it a perfect meal for any occasion, especially during colder months.
Its nostalgic appeal and simple preparation guarantee it remains a beloved family dish through the generations.
This recipe for Chicken and Dumplings Soup serves 4-6 people, making it an ideal choice for family dinners or small gatherings. The homemade dumplings add a touch of charm and texture, transforming a basic chicken soup into a satisfying meal. The following list of ingredients and step-by-step instructions will guide you in recreating this timeless dish in your own kitchen, providing a taste of nostalgia and comfort with every spoonful.
Ingredients:
- 1 whole chicken (about 3-4 pounds), cut into pieces
- 2 tablespoons vegetable oil
- 1 large onion, chopped
- 3 carrots, sliced
- 3 celery stalks, sliced
- 4 cups chicken broth
- 2 cups water
- 1 teaspoon salt
- 1/2 teaspoon black pepper
- 1 bay leaf
- 2 cups all-purpose flour
- 1 tablespoon baking powder
- 1 teaspoon salt
- 1/2 cup whole milk
- 1/2 cup unsalted butter, melted
- 2 tablespoons fresh parsley, chopped
Cooking Instructions:
- Prepare the Chicken: In a large pot or Dutch oven, heat the vegetable oil over medium-high heat. Add the chicken pieces and brown them on all sides. This should take about 5-7 minutes. Once browned, remove the chicken from the pot and set aside.
- Sauté the Vegetables: In the same pot, add the chopped onion, sliced carrots, and celery. Sauté until the onions are translucent and the vegetables are slightly tender, about 5 minutes.
- Simmer the Soup: Return the chicken to the pot. Add the chicken broth, water, salt, pepper, and bay leaf. Bring the mixture to a boil, then reduce the heat to low and cover. Let it simmer for about 45 minutes, or until the chicken is cooked through and tender.
- Make the Dumplings: In a mixing bowl, whisk together the flour, baking powder, and salt. Stir in the milk and melted butter until a dough forms. Don’t overmix.
- Cook the Dumplings: Remove the cooked chicken from the pot and set aside to cool slightly. Drop spoonfuls of the dumpling dough into the simmering soup. Cover and let the dumplings cook for about 15-20 minutes, or until they’re puffed and cooked through.
- Shred the Chicken: While the dumplings cook, shred the chicken meat, discarding the skin and bones. Return the shredded chicken to the pot.
- Finish the Soup: Stir the soup gently to combine. Taste and adjust seasoning if necessary. Sprinkle with fresh parsley before serving.
Extra Tips:
For an extra rich flavor, you can use homemade chicken broth if you have the time.
When making the dumplings, be careful not to overmix the dough, as this can make them tough instead of light and fluffy.
If you prefer a thicker soup, you can add a slurry of cornstarch and water towards the end of cooking to reach your desired consistency.
Finally, remember to adjust the seasoning to your taste—sometimes a little extra salt or pepper can bring all the flavors together perfectly.
Vegetable Beef Barley Soup
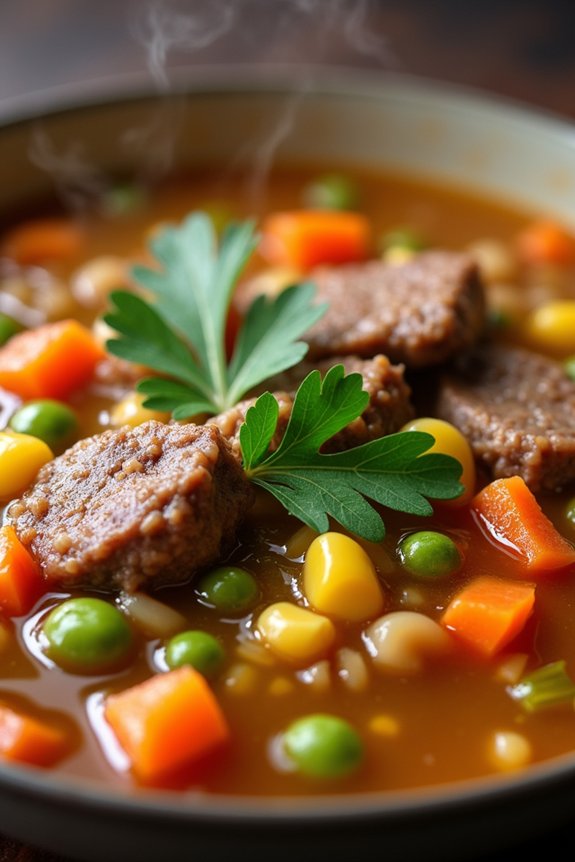
Vegetable Beef Barley Soup is a hearty and comforting dish that harks back to the 1950s, when wholesome, homemade meals were the cornerstone of family dining. This soup combines the robust flavors of beef with the earthiness of barley and a medley of vegetables, creating a timeless classic that warms the soul. Perfect for a chilly evening or a nostalgic dinner party, this soup will transport you back to simpler times with its delicious, home-cooked taste.
The beauty of Vegetable Beef Barley Soup lies in its simplicity and the way the ingredients come together to create a rich and satisfying meal. It’s a great way to incorporate a variety of vegetables into your diet while enjoying the tender chunks of beef and the nutty texture of barley. Whether you’re making it as a main course or as a starter, this recipe is sure to be a hit with family and friends.
Ingredients (Serves 4-6):
- 1 pound beef stew meat, cut into 1-inch cubes
- 1 tablespoon vegetable oil
- 1 large onion, chopped
- 2 cloves garlic, minced
- 3 carrots, sliced
- 3 stalks celery, sliced
- 1 cup frozen peas
- 1 cup frozen corn
- 1 can (14.5 ounces) diced tomatoes, undrained
- 8 cups beef broth
- 3/4 cup pearl barley
- 1 teaspoon dried thyme
- 1 teaspoon salt
- 1/2 teaspoon black pepper
- 2 bay leaves
- 2 tablespoons chopped fresh parsley (optional for garnish)
Cooking Instructions:
- Brown the Beef: In a large pot or Dutch oven, heat the vegetable oil over medium-high heat. Add the beef stew meat and cook until browned on all sides. This should take about 5-7 minutes. Remove the beef from the pot and set aside.
- Sauté the Vegetables: In the same pot, add the chopped onion and minced garlic. Sauté for 3-4 minutes until the onion is translucent and the garlic is fragrant.
- Add Remaining Vegetables: Stir in the sliced carrots, sliced celery, frozen peas, and frozen corn. Cook for an additional 5 minutes, stirring occasionally.
- Combine Ingredients: Return the browned beef to the pot. Add the diced tomatoes, beef broth, pearl barley, dried thyme, salt, black pepper, and bay leaves. Stir to combine all ingredients.
- Simmer the Soup: Bring the mixture to a boil, then reduce the heat to low. Cover the pot and let the soup simmer for about 1 to 1.5 hours, or until the beef is tender and the barley is cooked through.
- Final Touches: Remove the bay leaves from the soup. Taste and adjust seasoning if necessary. If desired, sprinkle with fresh parsley before serving.
Extra Tips:
For the best results, choose a cut of beef that has a good amount of marbling, such as chuck roast, which will become tender and flavorful during the long simmering process.
If you prefer a thicker soup, you can increase the amount of barley or let the soup simmer uncovered for a few additional minutes to allow it to reduce.
For a bit of spice, consider adding a pinch of red pepper flakes or a splash of Worcestershire sauce.
This soup also freezes well, making it a convenient option for meal prep or easy dinners on busy nights.
Clam Chowder

The 1950s were a time when comfort foods reigned supreme, and nothing says comfort quite like a hearty bowl of clam chowder. This classic dish, with its creamy base, tender clams, and savory vegetables, brings a touch of nostalgia to every spoonful.
Whether served at a cozy family gathering or a casual dinner party, this clam chowder recipe will transport you back to a simpler time when flavor and warmth were the ultimate goals of every meal.
Clam chowder has its roots in New England, where it became a staple due to the region’s abundance of fresh seafood. This version of the dish is rich and creamy, with a perfect balance of flavors that highlight the briny sweetness of clams. The addition of potatoes and onions adds texture and depth, while a touch of bacon adds a smoky undertone that enhances the overall taste.
Enjoy this delightful chowder as a main dish or as a starter to a larger meal.
Ingredients for 4-6 servings:
- 2 dozen fresh clams or 2 cups canned clams
- 2 cups clam juice or fish stock
- 4 slices of bacon
- 1 medium onion, diced
- 2 medium potatoes, peeled and diced
- 2 cups whole milk
- 1 cup heavy cream
- 2 tablespoons all-purpose flour
- 2 tablespoons butter
- Salt and pepper to taste
- Fresh parsley, chopped (for garnish)
Cooking Instructions:
- Prepare the Clams:
- If using fresh clams, clean them thoroughly under cold water to remove any grit. Steam them in a pot with 1 cup of water until they open, about 5-7 minutes. Remove the clams from their shells and chop them coarsely. Reserve the clam liquid after straining it through a fine sieve.
- Cook the Bacon:
- In a large pot, cook the bacon over medium heat until crispy. Remove the bacon and set aside on a paper towel to drain. Once cool, crumble the bacon into small pieces.
- Sauté the Vegetables:
- In the same pot with the bacon drippings, add the diced onion and sauté until it becomes translucent. Add the diced potatoes and cook for an additional 5 minutes, stirring occasionally.
- Make the Base:
- Melt the butter in the pot with the vegetables. Sprinkle in the flour, stirring constantly to create a roux. Cook for about 2 minutes, ensuring it doesn’t brown.
- Add Liquids:
- Gradually whisk in the clam juice (or fish stock) and the reserved clam liquid if you used fresh clams. Bring the mixture to a boil, then reduce to a simmer and cook until the potatoes are tender, about 15 minutes.
- Finish the Chowder:
- Stir in the milk and heavy cream, followed by the chopped clams and half of the crumbled bacon. Season with salt and pepper to taste. Allow the chowder to heat through without boiling.
- Serve:
- Ladle the clam chowder into bowls, garnishing each serving with the remaining crumbled bacon and a sprinkle of fresh parsley.
Extra Tips:
For the best results, use high-quality whole milk and heavy cream to achieve a silky and rich texture. If you prefer a thicker chowder, you can add more flour when making the roux or reduce the chowder further by simmering it longer.
Always taste and adjust the seasoning as the saltiness can vary depending on the type of clams used. For a touch of extra flavor, consider adding a splash of dry white wine or a pinch of thyme to the chowder.
Serve with crusty bread or oyster crackers for an authentic 1950s experience.
Minestrone Soup
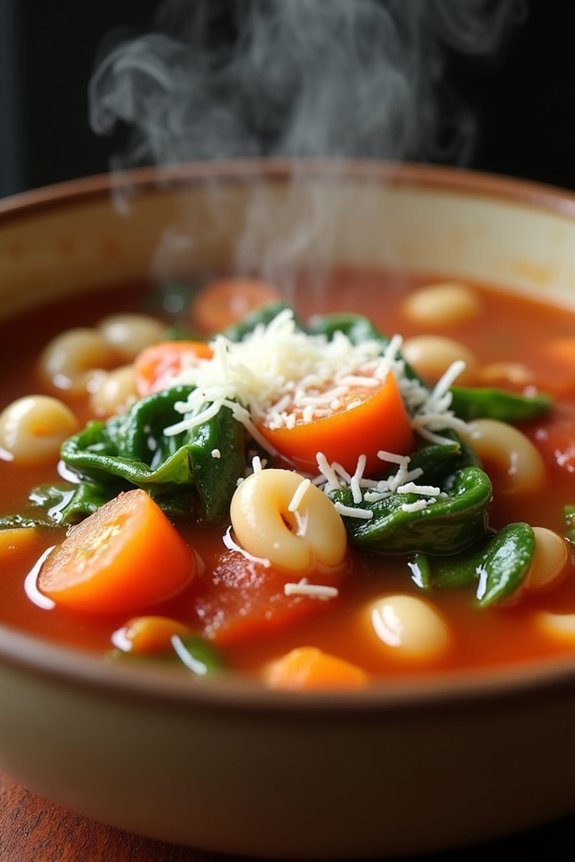
Minestrone soup, a comforting staple from the 1950s, is a hearty dish filled with vegetables, beans, and pasta, simmered in a savory broth. It’s a versatile soup that brings warmth and nostalgia with each spoonful. This classic recipe is perfect for family dinners, offering a taste of the past with its wholesome and simple ingredients. The balance of flavors and textures in this dish makes it not only filling but also deliciously satisfying.
Originally an Italian peasant dish, minestrone became a popular soup in American households during the 1950s, reflecting a post-war era of embracing international flavors while maintaining a sense of simplicity. This recipe will guide you through creating a traditional minestrone soup that serves 4-6 people, ensuring that everyone at your table can enjoy a bowl of this timeless classic.
Ingredients:
- 2 tablespoons olive oil
- 1 medium onion, chopped
- 2 cloves garlic, minced
- 2 carrots, diced
- 2 celery stalks, diced
- 1 medium zucchini, diced
- 1 cup green beans, chopped
- 1 can (14.5 oz) diced tomatoes, with juice
- 6 cups vegetable broth
- 1 can (15 oz) cannellini beans, drained and rinsed
- 1 teaspoon dried oregano
- 1 teaspoon dried basil
- Salt and pepper to taste
- 1 cup small pasta (such as ditalini or elbow macaroni)
- 2 cups fresh spinach, roughly chopped
- Grated Parmesan cheese, for serving (optional)
Instructions:
- Prepare the Vegetables: Start by heating the olive oil in a large pot over medium heat. Add the chopped onions and garlic, sautéing them until they become translucent and fragrant, about 3-4 minutes.
- Add the Vegetables: Incorporate the carrots, celery, zucchini, and green beans into the pot. Stir well and cook for another 5-7 minutes until the vegetables start to soften.
- Simmer the Soup: Pour in the diced tomatoes with their juice and the vegetable broth. Stir in the cannellini beans, oregano, basil, salt, and pepper. Bring the mixture to a boil, then reduce the heat to low and let it simmer for 20-25 minutes, allowing the flavors to meld together.
- Cook the Pasta: While the soup is simmering, cook the pasta separately according to the package instructions. Once cooked, drain and set aside.
- Combine and Serve: Add the cooked pasta and fresh spinach to the pot, stirring until the spinach wilts. Adjust seasoning with salt and pepper as needed. Serve the soup hot, garnished with grated Parmesan cheese if desired.
Extra Tips:
For an even deeper flavor, consider adding a Parmesan rind to the soup as it simmers, removing it before serving. This will infuse the broth with a rich, cheesy taste.
If you prefer a thicker soup, mash some of the beans before adding them to the pot. Minestrone is highly adaptable, so feel free to use whatever vegetables are in season or what you have on hand.
This soup also tastes even better the next day, so consider making it ahead for a quick and delicious meal.
Corn Chowder

Corn chowder is a hearty and comforting soup that brings a taste of nostalgia straight from the kitchens of the 1950s. This creamy and savory dish was a staple during the post-war era, offering families a delicious way to enjoy the simple yet flavorful ingredients that were readily available at the time. The rich combination of corn, potatoes, and bacon creates a satisfying and warm meal that evokes fond memories of family dinners and cozy evenings.
The charm of corn chowder lies in its simplicity, making it a perfect choice for those who wish to recreate a classic 1950s recipe. With just a few ingredients and minimal effort, you can bring this timeless dish to your table, offering a taste of history with each spoonful. Ideal for serving 4-6 people, this corn chowder recipe is a delightful way to enjoy a piece of culinary heritage.
Ingredients (Serving Size: 4-6 people):
- 4 slices of bacon
- 1 medium onion, chopped
- 2 cups potatoes, peeled and diced
- 3 cups fresh or frozen corn kernels
- 4 cups chicken or vegetable broth
- 1 cup whole milk
- 1/2 cup heavy cream
- 1 teaspoon salt
- 1/2 teaspoon black pepper
- 1 tablespoon butter
- 2 tablespoons all-purpose flour
- Fresh parsley for garnish (optional)
Cooking Instructions:
- Prep the Bacon: In a large pot, cook the bacon over medium heat until crisp. Remove the bacon and set it aside on a paper towel to drain. Once cooled, crumble it into small pieces.
- Sauté the Onion: In the same pot, using the bacon drippings, add the chopped onion. Sauté over medium heat until the onion is translucent and fragrant, which should take about 5 minutes.
- Cook the Potatoes: Add the diced potatoes to the pot and sauté for another 5 minutes, stirring occasionally to avoid sticking.
- Add Corn and Broth: Stir in the corn kernels, then pour in the chicken or vegetable broth. Bring the mixture to a boil, then reduce the heat to low and let it simmer for about 15-20 minutes, or until the potatoes are tender.
- Prepare the Cream Base: In a separate saucepan, melt the butter over medium heat. Stir in the flour and cook for about 1 minute to form a roux. Gradually whisk in the milk, continuing to stir until the mixture thickens.
- Combine and Season: Slowly stir the milk mixture into the pot with the corn and potatoes. Add the heavy cream, salt, and black pepper. Let the chowder simmer for an additional 5 minutes, allowing the flavors to meld.
- Serve: Ladle the chowder into bowls and top each serving with crumbled bacon. Garnish with fresh parsley if desired.
Extra Tips: For an added depth of flavor, consider roasting the corn kernels in the oven for a few minutes before adding them to the chowder. This will bring out a sweet, caramelized taste that complements the creamy texture of the soup.
Additionally, if you prefer a thicker chowder, simply mash some of the potatoes with a fork or potato masher before adding the cream base. This will naturally thicken the soup without the need for additional flour.
Enjoy your nostalgic journey back to the 1950s with this delightful corn chowder!