

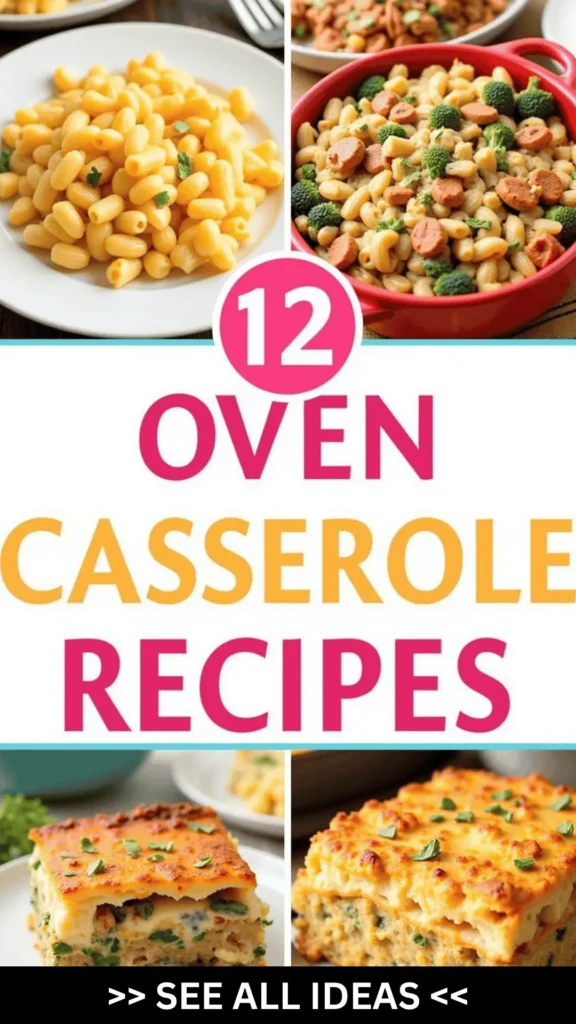
There’s something truly magical about the warmth of a bubbling casserole fresh from the oven.
The aroma of melted cheese and fragrant herbs fills the kitchen, wrapping you in a cozy embrace.
From the comforting classic of beef and potato shepherd’s pie to the vibrant Mediterranean lamb and feta bake, each dish tells a unique story.
These recipes are designed to satisfy every craving, making mealtime a delightful experience for your family.
Let’s discover which of these scrumptious casseroles will become your new go-to favorite!
Cheesy Chicken and Broccoli Casserole
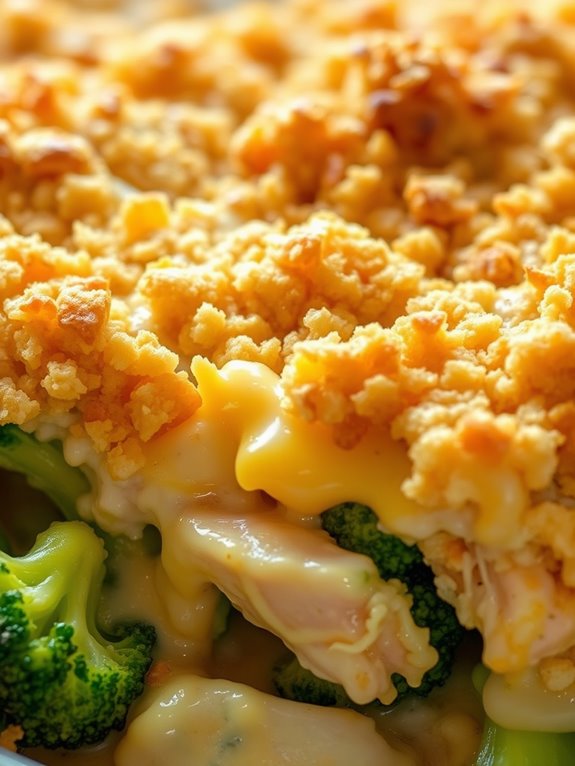
Cheesy Chicken and Broccoli Casserole is a comforting and delicious dish perfect for family dinners or gatherings. This casserole combines tender chicken, crisp broccoli, and a creamy cheese sauce, all topped with a golden breadcrumb crust.
It’s an easy-to-make dish that satisfies everyone’s cravings for both protein and veggies, while the cheesy goodness makes it a hit for kids and adults alike.
This recipe serves 4-6 people, making it ideal for a family meal or dinner with friends. The flavors meld beautifully as the chicken and broccoli absorb the creamy cheese sauce during baking. Plus, it’s a great way to use up leftover chicken or rotisserie chicken, saving you time in the kitchen while still delivering a homemade meal that feels indulgent and hearty.
Ingredients:
- 2 cups cooked chicken, shredded or diced
- 4 cups broccoli florets
- 1 can (10.5 oz) condensed cream of chicken soup
- 1 cup sour cream
- 1 teaspoon garlic powder
- 1 teaspoon onion powder
- 1/2 teaspoon salt
- 1/2 teaspoon black pepper
- 2 cups shredded cheddar cheese
- 1 cup milk
- 1 cup breadcrumbs
- 2 tablespoons melted butter
Cooking Instructions:
- Preheat the Oven: Set your oven to 375°F (190°C) to prepare for baking the casserole.
- Cook the Broccoli: In a large pot of boiling water, blanch the broccoli florets for about 3-4 minutes until they’re bright green and slightly tender. Drain and set aside.
- Mix the Sauce: In a large mixing bowl, combine the condensed cream of chicken soup, sour cream, milk, garlic powder, onion powder, salt, and black pepper. Stir until the mixture is smooth and well-blended.
- Assemble the Casserole: In a large baking dish, layer the cooked chicken and broccoli. Pour the creamy sauce over the top, ensuring it covers all the ingredients. Sprinkle the shredded cheddar cheese evenly over the casserole.
- Prepare Breadcrumb Topping: In a small bowl, mix the breadcrumbs with the melted butter until they’re evenly coated. Sprinkle this mixture over the cheese layer.
- Bake: Place the baking dish in the preheated oven and bake for 25-30 minutes, or until the cheese is bubbly and the breadcrumbs are golden brown.
- Serve: Remove from the oven and let it cool for a few minutes before serving. Enjoy your cheesy chicken and broccoli casserole while it’s warm.
Extra Tips: For added flavor, consider adding a pinch of nutmeg to the sauce for a subtle depth of flavor. You can also switch up the cheese type to your preference; mozzarella or a Mexican blend can provide a different cheesy experience.
If you’re looking for a healthier option, use low-fat cheese and sour cream, and consider adding other vegetables like cauliflower or peas to the mix. Finally, if you prefer a crunchier top, broil the casserole for the last 2-3 minutes of baking.
Mediterranean Lamb and Feta Bake
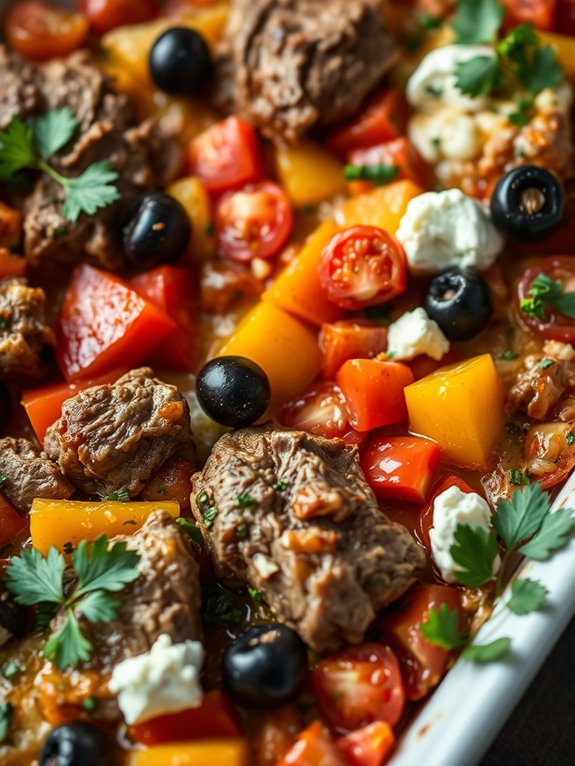
Mediterranean Lamb and Feta Bake is a savory and aromatic casserole that brings the flavors of the Mediterranean to your table. This dish combines succulent pieces of lamb with the tangy, creamy essence of feta cheese, all set against a backdrop of fresh vegetables and herbs. It’s a perfect meal for gatherings or family dinners, offering a delightful blend of textures and tastes that are bound to please any palate.
The lamb is marinated in a mixture of herbs and spices, enhancing its natural flavors, before being baked to tender perfection. Paired with colorful bell peppers, juicy tomatoes, and a sprinkle of olives, this casserole not only looks vibrant but also packs a punch of nutrients. The feta cheese adds a creamy, salty contrast that melts into the layers, creating a rich and satisfying dish. This Mediterranean Lamb and Feta Bake serves 4-6 people, making it an ideal choice for a cozy dinner or an elegant main course at a celebration.
Ingredients (serves 4-6):
- 1.5 pounds of lamb shoulder, cut into 1-inch cubes
- 2 tablespoons olive oil
- 1 large onion, chopped
- 3 cloves of garlic, minced
- 1 red bell pepper, chopped
- 1 yellow bell pepper, chopped
- 14-ounce can of chopped tomatoes
- 1 tablespoon tomato paste
- 1 teaspoon dried oregano
- 1 teaspoon dried thyme
- Salt and pepper to taste
- 1 cup pitted Kalamata olives
- 8 ounces feta cheese, crumbled
- 1/4 cup fresh parsley, chopped
- Juice of 1 lemon
Cooking Instructions:
- Preheat the Oven: Start by preheating your oven to 350°F (175°C) to make certain it’s ready for baking once the preparation is complete.
- Prepare the Lamb: In a large bowl, combine the lamb cubes with olive oil, oregano, thyme, salt, and pepper. Mix well to coat the lamb evenly with the spices. Let it marinate while you prep the vegetables.
- Sauté the Vegetables: Heat a large oven-safe skillet or Dutch oven over medium heat. Add the chopped onion and garlic, sautéing until the onion becomes translucent.
- Add Peppers and Tomatoes: Stir in the red and yellow bell peppers, cooking until they start to soften. Add the chopped tomatoes and tomato paste, stirring to combine.
- Combine with Lamb: Add the marinated lamb to the skillet, mixing it thoroughly with the vegetables. Cook for about 5 minutes until the lamb begins to brown.
- Bake the Casserole: Transfer the skillet to the preheated oven. Bake uncovered for approximately 45 minutes, allowing the flavors to meld and the lamb to become tender.
- Add Olives and Feta: After baking, remove the skillet and scatter the pitted olives over the top. Crumble the feta cheese evenly across the dish. Return to the oven and bake for an additional 10-15 minutes until the cheese slightly melts and becomes bubbly.
- Garnish and Serve: Once baked, remove from the oven and let it cool for a few minutes. Sprinkle with fresh parsley and squeeze lemon juice over the top before serving.
Extra Tips:
For the best flavor, consider marinating the lamb overnight in the refrigerator. This allows the spices to permeate the meat fully. If you prefer a bit of heat, add a pinch of red pepper flakes to the marinade.
Serve this casserole with a side of crusty bread or a light green salad to balance the rich flavors. If you have leftovers, this dish reheats beautifully, and the flavors are often even better the next day.
Classic Beef and Potato Shepherd’s Pie
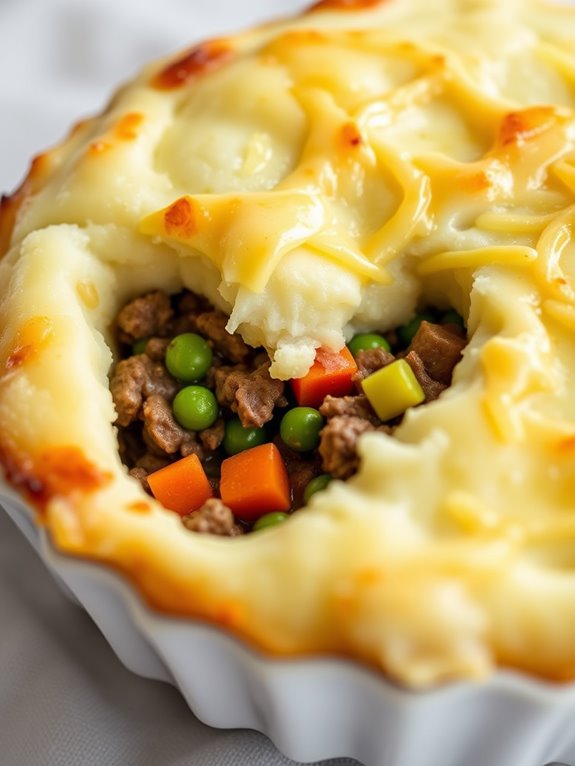
Classic Beef and Potato Shepherd’s Pie is a hearty and comforting dish that brings together savory beef filling and creamy mashed potatoes, baked to perfection. This dish is perfect for family dinners or gatherings, offering a delicious blend of flavors and textures that are sure to satisfy everyone at the table. The rich beef filling, combined with tender vegetables and topped with a layer of smooth mashed potatoes, creates a warm and inviting meal that’s both nourishing and delightful.
Originating from the United Kingdom, Shepherd’s Pie has become a beloved classic worldwide, often adapted to suit local tastes and ingredients. This version stays true to its roots, using minced beef as the main protein source, complemented by a medley of vegetables and a savory gravy. The topping of buttery mashed potatoes is lightly browned in the oven, adding an irresistible golden crust. It’s a perfect dish for colder days, providing both comfort and nourishment.
Ingredients (Serves 4-6):
- 1 tablespoon olive oil
- 1 large onion, finely chopped
- 2 cloves garlic, minced
- 1 pound ground beef
- 1 cup beef broth
- 2 tablespoons tomato paste
- 1 tablespoon Worcestershire sauce
- 1 teaspoon fresh thyme leaves, chopped
- 1 cup frozen peas and carrots mix
- Salt and pepper to taste
- 2 pounds potatoes, peeled and quartered
- 4 tablespoons butter
- 1/2 cup milk
- 1/2 cup cheddar cheese, grated
Cooking Instructions:
- Prepare the Potatoes: Place the quartered potatoes in a large pot of salted water. Bring the water to a boil, then reduce the heat and let them simmer until the potatoes are fork-tender, about 15-20 minutes.
- Prepare the Beef Filling: While the potatoes are cooking, heat the olive oil in a large skillet over medium heat. Add the chopped onion and minced garlic, sautéing until the onion is translucent, about 5 minutes.
- Cook the Beef: Add the ground beef to the skillet. Cook until the beef is browned and no longer pink, breaking it up with a spoon as it cooks.
- Make the Gravy: Stir in the beef broth, tomato paste, Worcestershire sauce, and thyme. Bring the mixture to a simmer and let it cook for about 10 minutes, allowing the flavors to meld and the sauce to thicken.
- Add Vegetables: Stir in the frozen peas and carrots, and cook for another 2-3 minutes. Season the mixture with salt and pepper to taste.
- Prepare the Mashed Potatoes: Drain the cooked potatoes and return them to the pot. Add the butter and milk, mashing until smooth and creamy. Season with salt and pepper. Stir in half of the grated cheddar cheese.
- Assemble the Pie: Preheat your oven to 400°F (200°C). Spread the beef mixture evenly in a baking dish. Spoon the mashed potatoes over the top, spreading them out evenly. Sprinkle the remaining cheddar cheese over the mashed potatoes.
- Bake: Place the dish in the preheated oven and bake for 20-25 minutes, or until the cheese is melted and the top is lightly browned.
- Serve: Allow the pie to cool slightly before serving. Enjoy your Classic Beef and Potato Shepherd’s Pie with a side salad or crusty bread.
Extra Tips: For a richer flavor, you can add a splash of red wine to the beef filling along with the broth. If you prefer a crunchier top, consider adding breadcrumbs to the cheese topping before baking. For a smoother mashed potato topping, use a potato ricer or food mill. Adjust seasoning to your taste, and remember that the pie can be made a day ahead and baked just before serving for added convenience.
Creamy Tuna Noodle Casserole
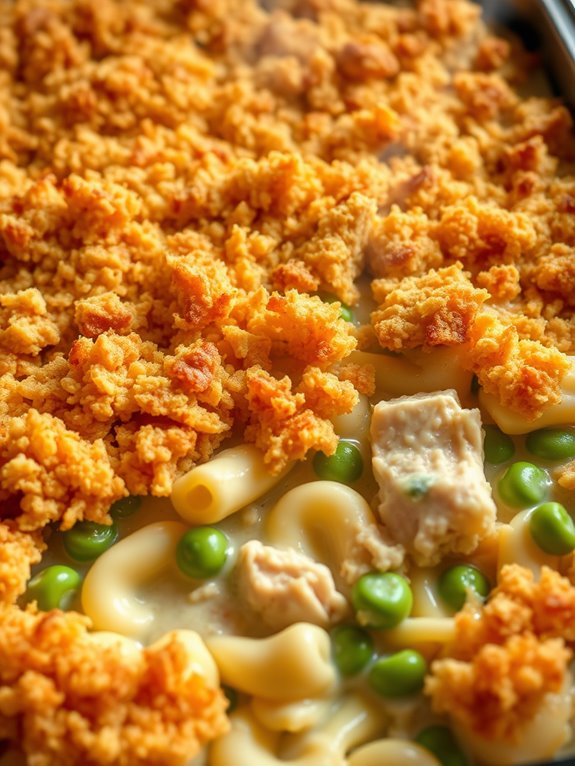
Creamy Tuna Noodle Casserole is a comforting, classic dish that combines tender noodles with a rich, creamy sauce, succulent chunks of tuna, and a crispy topping. This delightful meal is perfect for a cozy family dinner or can be prepared ahead of time for a busy weeknight.
The combination of flavors and textures makes this casserole a crowd-pleaser, and it’s a fantastic way to incorporate more seafood into your diet.
This version of Creamy Tuna Noodle Casserole is designed to serve 4-6 people, making it ideal for either a small family gathering or ensuring there are leftovers for the next day. The creamy sauce is enhanced with a blend of spices and a hint of cheese, while the topping adds a satisfying crunch.
The dish is easy to prepare, requiring minimal prep work and only a few simple steps to bring everything together.
Ingredients:
- 12 oz egg noodles
- 2 cans (10 oz each) of tuna, drained
- 1 can (10.5 oz) of condensed cream of mushroom soup
- 1 cup milk
- 1 cup frozen peas
- 1 cup shredded cheddar cheese
- 1/2 cup chopped onion
- 1/2 cup chopped celery
- 1/4 cup mayonnaise
- 1 tablespoon butter
- 1 teaspoon garlic powder
- 1/2 teaspoon salt
- 1/4 teaspoon black pepper
- 1 cup breadcrumbs
- 2 tablespoons melted butter
Cooking Instructions:
- Preheat and Prepare: Preheat your oven to 350°F (175°C). Grease a 9×13-inch baking dish with butter or non-stick cooking spray.
- Cook the Noodles: In a large pot of boiling salted water, cook the egg noodles according to package instructions until al dente. Drain and set aside.
- Sauté Vegetables: In a skillet over medium heat, melt 1 tablespoon of butter. Add the chopped onion and celery, sautéing until they’re tender, about 5 minutes.
- Mix the Sauce: In a large mixing bowl, combine the cream of mushroom soup, milk, mayonnaise, garlic powder, salt, and black pepper. Stir in the sautéed onion and celery, and then add the drained tuna, frozen peas, and shredded cheddar cheese. Mix until thoroughly combined.
- Combine with Noodles: Gently fold the cooked noodles into the tuna mixture until everything is evenly coated.
- Assemble the Casserole: Transfer the noodle mixture into the prepared baking dish, spreading it out evenly.
- Prepare the Topping: In a small bowl, mix the breadcrumbs with 2 tablespoons of melted butter. Spread this mixture evenly over the top of the casserole.
- Bake: Place the casserole in the preheated oven and bake for 25-30 minutes, or until the top is golden brown and the casserole is bubbly.
- Serve: Let the casserole cool for a few minutes before serving, allowing the flavors to meld together.
Extra Tips:
To add more flavor, consider incorporating a teaspoon of Worcestershire sauce or a dash of hot sauce into the sauce mixture.
For a healthier version, you can substitute whole wheat noodles, use low-fat cheese, and opt for reduced-fat mayonnaise. If you prefer a crunchy topping, crushed potato chips or fried onions can be used in place of breadcrumbs.
Don’t forget to taste the sauce before combining it with the noodles to adjust the seasoning to your preference. Enjoy your Creamy Tuna Noodle Casserole with a simple side salad or some crusty bread for a complete meal.
Spinach and Ricotta Stuffed Shells
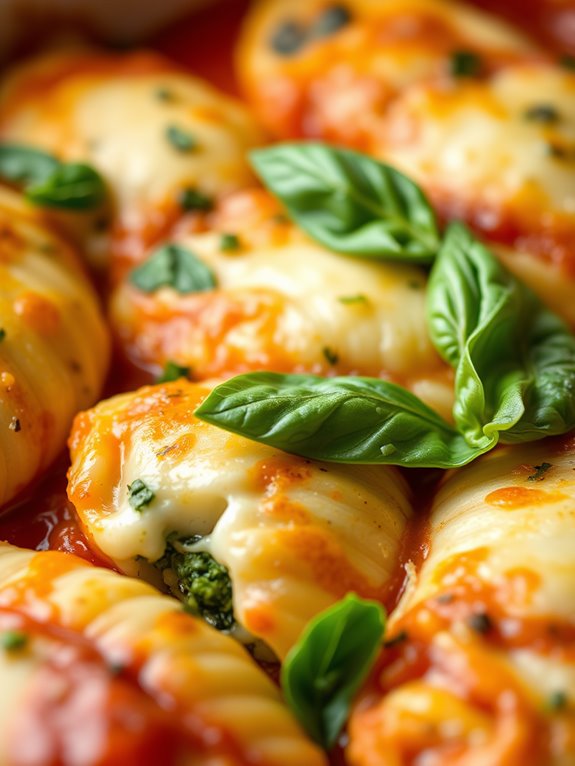
Spinach and Ricotta Stuffed Shells is a delightful Italian-inspired casserole dish that combines the rich, creamy flavors of ricotta cheese with the earthy taste of spinach, all encased within tender pasta shells. This comfort food is perfect for a family dinner or a gathering with friends, where you want to impress with minimal effort. The dish is both hearty and elegant, offering a satisfying meal that’s sure to please vegetarians and meat-lovers alike.
With the added benefit of being able to prepare parts of it in advance, Spinach and Ricotta Stuffed Shells is a convenient and delicious addition to your recipe repertoire. The beauty of this dish lies in its simplicity and the fresh ingredients that elevate the flavors. The combination of ricotta, mozzarella, and Parmesan cheeses provides a creamy, cheesy filling that pairs perfectly with the slightly bitter spinach.
The tomato sauce base adds a layer of acidity and sweetness, balancing the richness of the cheese. As you bake the casserole, the flavors meld together, and the cheese melts to perfection, creating a mouthwatering dish that’s both nutritious and indulgent. Whether served as a main course or a side, Spinach and Ricotta Stuffed Shells is sure to become a favorite in your household.
Ingredients (serving size: 4-6 people):
- 20-24 jumbo pasta shells
- 1 tablespoon olive oil
- 2 cups fresh spinach, chopped
- 2 cups ricotta cheese
- 1 cup shredded mozzarella cheese
- 1/2 cup grated Parmesan cheese
- 1 large egg
- 2 cups marinara sauce
- 1 teaspoon salt
- 1/2 teaspoon black pepper
- 1 teaspoon Italian seasoning
- Fresh basil leaves for garnish (optional)
Cooking Instructions:
- Preheat the Oven: Set your oven to 375°F (190°C) to guarantee it’s at the right temperature when you’re ready to bake the stuffed shells.
- Cook the Pasta Shells: Bring a large pot of salted water to a boil. Add the jumbo pasta shells and cook until al dente, about 9-10 minutes. Drain and set aside to cool slightly.
- Prepare the Spinach Filling: In a large skillet, heat the olive oil over medium heat. Add the chopped spinach and sauté until wilted, about 2-3 minutes. Remove from heat and let cool.
- Mix the Cheese Filling: In a large bowl, combine the ricotta cheese, 1/2 cup of mozzarella cheese, 1/4 cup of Parmesan cheese, the cooked spinach, egg, salt, black pepper, and Italian seasoning. Mix until well combined.
- Stuff the Shells: Carefully fill each cooked pasta shell with the spinach and cheese mixture. You can use a small spoon or a piping bag for precision and ease.
- Assemble the Casserole: Spread 1 cup of marinara sauce evenly over the bottom of a baking dish. Arrange the stuffed shells in a single layer on top of the sauce. Pour the remaining marinara sauce over the shells, then sprinkle with the remaining mozzarella and Parmesan cheese.
- Bake the Dish: Cover the baking dish with aluminum foil and bake in the preheated oven for 25 minutes. Remove the foil and bake for an additional 10 minutes, or until the cheese is bubbly and golden brown.
- Garnish and Serve: Let the casserole cool for a few minutes before serving. Garnish with fresh basil leaves if desired.
Extra Tips:
To save time, you can prepare the filling a day ahead and refrigerate it until you’re ready to stuff the shells. If using frozen spinach, make sure to thaw and thoroughly drain it before adding to the cheese mixture to avoid excess moisture.
Feel free to add other ingredients, such as sautéed mushrooms or cooked sausage, to customize the dish to your liking. When reheating leftovers, cover the dish with foil to maintain moisture and prevent the cheese from drying out.
Southwest Black Bean and Quinoa Bake

Southwest Black Bean and Quinoa Bake is a delicious and nutritious casserole that combines the vibrant flavors of the Southwest with wholesome ingredients. This dish is perfect for a family dinner or a gathering with friends, offering a hearty and satisfying meal that’s both vegetarian and gluten-free. The combination of protein-rich black beans and quinoa, along with the zest of tomatoes, corn, and spices, makes this bake not only flavorful but also incredibly filling.
It’s an ideal option for those looking to enjoy a healthy, comforting meal that doesn’t compromise on taste. This Southwest Black Bean and Quinoa Bake is easy to prepare and can be customized to suit your taste preferences. Whether you choose to make it spicier or add some cheese on top, there’s plenty of room to make this casserole your own.
It’s a one-dish meal that can be prepared ahead of time and stored in the refrigerator until you’re ready to bake it. Follow this recipe to create a delicious and wholesome casserole that will have everyone coming back for seconds.
Ingredients (serving size: 4-6 people):
- 1 cup quinoa, rinsed
- 2 cups vegetable broth
- 1 can (15 oz) black beans, drained and rinsed
- 1 can (15 oz) diced tomatoes
- 1 cup corn kernels (fresh, frozen, or canned)
- 1 red bell pepper, diced
- 1 small onion, diced
- 2 cloves garlic, minced
- 1 tablespoon olive oil
- 1 teaspoon chili powder
- 1 teaspoon cumin
- 1/2 teaspoon smoked paprika
- Salt and pepper to taste
- 1 cup shredded cheddar cheese (optional)
- Fresh cilantro, chopped (for garnish)
- Lime wedges (for serving)
Cooking Instructions:
- Preheat the Oven: Begin by preheating your oven to 375°F (190°C).
- Cook the Quinoa: In a medium saucepan, combine the rinsed quinoa and vegetable broth. Bring to a boil over medium-high heat, then reduce the heat to low, cover, and let it simmer for about 15 minutes or until the quinoa has absorbed all the liquid and is tender. Fluff it with a fork.
- Sauté Vegetables: While the quinoa is cooking, heat the olive oil in a large skillet over medium heat. Add the diced onion, red bell pepper, and minced garlic. Sauté until the vegetables are soft and the onion is translucent, about 5 minutes.
- Combine Ingredients: In a large mixing bowl, combine the cooked quinoa, sautéed vegetables, black beans, diced tomatoes, corn, chili powder, cumin, smoked paprika, salt, and pepper. Stir until all ingredients are well combined.
- Assemble the Casserole: Transfer the mixture into a greased 9×13-inch baking dish. Spread it evenly.
- Add Cheese (Optional): If you choose to use cheese, sprinkle the shredded cheddar evenly over the top of the casserole.
- Bake: Place the baking dish in the preheated oven and bake for 25-30 minutes, or until the cheese is bubbly and lightly golden (if using).
- Garnish and Serve: Remove from the oven, let it cool for a few minutes, then garnish with freshly chopped cilantro. Serve with lime wedges on the side.
Extra Tips: For a spicier version, consider adding chopped jalapeños or a dash of hot sauce to the mixture before baking. If you prefer a vegan dish, simply omit the cheese or use a plant-based alternative.
This bake can also be prepared in advance; just assemble the dish, cover, and refrigerate until ready to bake. Leftovers can be stored in an airtight container in the refrigerator for up to three days, making it a great option for meal prep.
Mushroom and Wild Rice Casserole
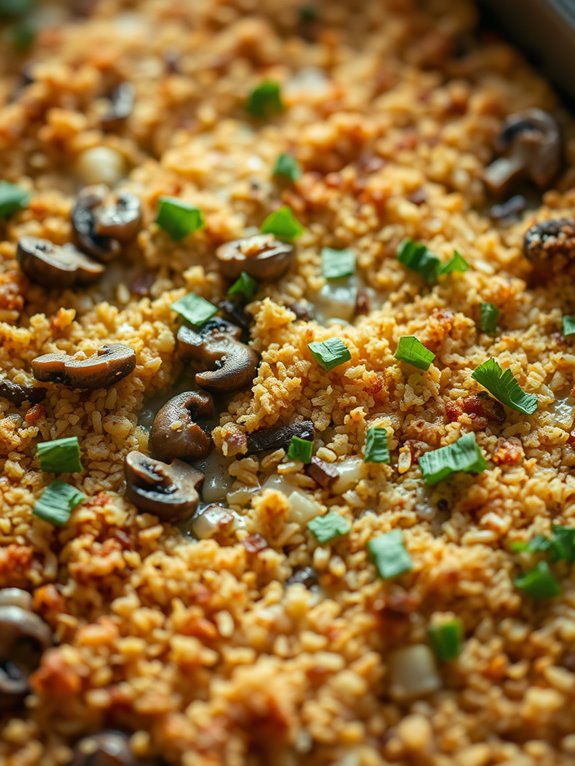
Mushroom and Wild Rice Casserole is a hearty and flavorful dish perfect for cozy family dinners or potlucks. The combination of earthy mushrooms and nutty wild rice creates a delicious base, while a creamy sauce ties everything together. This dish isn’t only comforting but also nutritious, making it a great option for a balanced meal.
Whether you’re catering to vegetarians or simply looking for a meatless option, this casserole will surely satisfy everyone’s taste buds.
The recipe is designed to serve 4-6 people, making it ideal for a family gathering or a week’s worth of meal prep. With a mix of fresh ingredients and pantry staples, this casserole is easy to prepare and can be made in advance, freeing up your time for other activities. The following ingredients and step-by-step instructions will guide you in creating this delightful dish.
Ingredients:
- 1 cup wild rice
- 2 cups vegetable broth
- 2 tablespoons olive oil
- 1 onion, chopped
- 3 cloves garlic, minced
- 16 ounces mushrooms, sliced
- 1 teaspoon thyme
- 1 teaspoon rosemary
- ½ cup heavy cream
- 1 cup grated Parmesan cheese
- Salt and pepper to taste
- ½ cup breadcrumbs
- ¼ cup chopped parsley
Cooking Instructions:
- Prepare the Wild Rice: Rinse the wild rice under cold water. In a medium saucepan, combine the wild rice and vegetable broth. Bring to a boil, then reduce the heat to low, cover, and simmer for about 40-45 minutes, or until the rice is tender and the liquid is absorbed. Fluff with a fork and set aside.
- Sauté the Vegetables: In a large skillet, heat the olive oil over medium heat. Add the chopped onion and sauté for 3-4 minutes until it becomes translucent. Stir in the minced garlic and cook for another minute.
- Cook the Mushrooms: Add the sliced mushrooms to the skillet and cook for 5-7 minutes, or until they’re browned and have released their moisture. Stir in the thyme and rosemary, and season with salt and pepper to taste.
- Combine Ingredients: Preheat your oven to 350°F (175°C). In a large mixing bowl, combine the cooked wild rice, mushroom mixture, heavy cream, and half of the grated Parmesan cheese. Mix until well combined.
- Transfer to Baking Dish: Grease a 9×13-inch baking dish and spread the rice and mushroom mixture evenly in the dish. Sprinkle the remaining Parmesan cheese on top.
- Add Breadcrumbs: In a small bowl, mix the breadcrumbs with a tablespoon of olive oil to moisten them slightly. Sprinkle the breadcrumbs evenly over the casserole.
- Bake the Casserole: Place the baking dish in the preheated oven and bake for 25-30 minutes, or until the top is golden brown and the casserole is heated through.
- Garnish and Serve: Remove the casserole from the oven and let it cool for a few minutes. Garnish with chopped parsley before serving.
Extra Tips:
For a richer flavor, consider adding a splash of white wine to the mushroom mixture during sautéing. If you’re looking to make this dish vegan, substitute the heavy cream and Parmesan cheese with coconut milk and nutritional yeast, respectively.
Additionally, you can add some cooked chicken or turkey if you prefer a non-vegetarian version. Leftovers can be stored in the refrigerator for up to three days and are best reheated in the oven to retain their texture.
Zucchini and Tomato Gratin
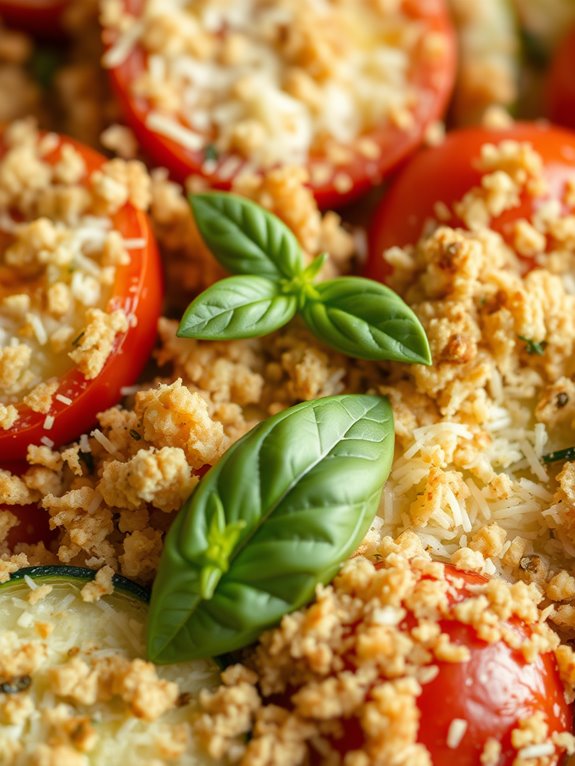
Zucchini and Tomato Gratin is a delightful and healthy dish that showcases the best of late summer produce. This comforting casserole layers tender slices of zucchini and juicy tomatoes with a crunchy breadcrumb topping, all baked to golden perfection.
It’s a versatile dish that can be served as a main course alongside a fresh salad or as a hearty side dish to complement meat, poultry, or fish. The flavors of zucchini and tomato are enhanced with a touch of garlic, fresh herbs, and a sprinkle of cheese, making it a crowd-pleaser for any gathering.
This recipe is perfect for a serving size of 4-6 people, making it ideal for family dinners or small parties. The preparation is simple and requires minimal ingredients, allowing the natural flavors of the vegetables to shine through.
With its vibrant colors and rich aroma, Zucchini and Tomato Gratin is sure to become a favorite in your culinary repertoire. Whether you’re looking to use up an abundance of garden-fresh zucchini or simply crave a wholesome dish, this gratin is a must-try.
Ingredients:
- 2 medium zucchinis, thinly sliced
- 4 large tomatoes, thinly sliced
- 2 tablespoons olive oil
- 2 cloves garlic, minced
- 1 teaspoon dried oregano
- 1 teaspoon dried basil
- Salt and pepper to taste
- 1 cup grated Parmesan cheese
- 1 cup breadcrumbs
- 2 tablespoons butter, melted
- Fresh basil leaves for garnish (optional)
Cooking Instructions:
- Preheat the Oven: Begin by preheating your oven to 375°F (190°C). This guarantees that the gratin will cook evenly and develop a nice crust.
- Prepare the Vegetables: Wash the zucchinis and tomatoes thoroughly. Slice them both thinly, about 1/4 inch thick, to guarantee they cook evenly. Set aside.
- Season the Vegetables: In a large bowl, combine the zucchini and tomato slices. Drizzle with olive oil, add minced garlic, dried oregano, dried basil, salt, and pepper. Toss everything together until the vegetables are evenly coated with the oil and seasonings.
- Assemble the Gratin: In a baking dish, arrange the zucchini and tomato slices in alternating layers, slightly overlapping each slice. Continue layering until all the vegetables are used up.
- Add Cheese and Breadcrumbs: Sprinkle the grated Parmesan cheese evenly over the top of the vegetable layers. Then, in a small bowl, mix the breadcrumbs with melted butter and sprinkle this mixture over the cheese.
- Bake: Place the baking dish in the preheated oven and bake for 30-35 minutes, or until the top is golden brown and the vegetables are tender.
- Serve: Remove the gratin from the oven and let it cool for a few minutes. Garnish with fresh basil leaves if desired. Serve warm and enjoy!
Extra Tips:
For a more robust flavor, consider adding a layer of sautéed onions or mushrooms between the zucchini and tomato layers. If you prefer a cheesier gratin, you can add a layer of mozzarella or Gruyère cheese along with the Parmesan.
To make this dish gluten-free, substitute the breadcrumbs with gluten-free breadcrumbs or crushed nuts. Remember to use ripe, firm tomatoes and fresh, firm zucchinis for the best texture and flavor. Adjust the seasoning to your taste, and don’t hesitate to experiment with different herbs and spices to make this dish your own.
Italian Sausage and Pepperoni Pizza Casserole
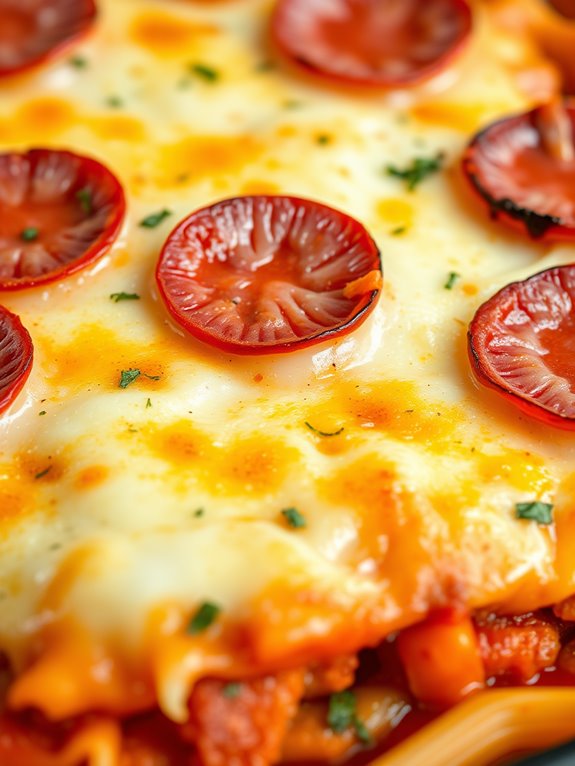
Italian Sausage and Pepperoni Pizza Casserole is a hearty and flavorful dish that combines the savory tastes of Italian sausage and pepperoni with the comforting texture of a casserole. This dish is perfect for pizza lovers who also enjoy the warmth of a homemade casserole.
It’s a great option for family dinners or casual gatherings, offering a delicious and satisfying meal that can be prepared with ease. This casserole brings together the classic flavors of a pizza in a form that’s easy to serve and enjoy.
The Italian sausage adds a rich, meaty texture, while the pepperoni provides a spicy kick. Layered with pasta and cheese, this dish is baked to perfection, creating a golden, bubbly top. It’s a wonderful way to enjoy the flavors of a pepperoni pizza in a new and exciting way.
Ingredients (Serves 4-6):
- 1 pound Italian sausage, casings removed
- 1 cup sliced pepperoni
- 8 ounces uncooked pasta (penne or rotini)
- 2 cups marinara sauce
- 2 cups shredded mozzarella cheese
- 1 cup grated Parmesan cheese
- 1 cup sliced mushrooms (optional)
- 1 green bell pepper, chopped
- 1 small onion, chopped
- 2 cloves garlic, minced
- 1 tablespoon olive oil
- 1 teaspoon Italian seasoning
- Salt and pepper to taste
Instructions:
- Preheat and Prepare: Preheat your oven to 350°F (175°C). Cook the pasta according to the package instructions until al dente, then drain and set aside.
- Cook the Sausage: In a large skillet over medium heat, add the olive oil. Once hot, add the Italian sausage, breaking it into small pieces with a spatula. Cook until browned and cooked through, about 5-7 minutes. Remove from the skillet and set aside.
- Sauté Vegetables: In the same skillet, add the chopped onion, green bell pepper, and mushrooms (if using). Sauté for about 5 minutes or until the vegetables are soft. Add the minced garlic and cook for an additional minute.
- Combine Ingredients: In a large bowl, combine the cooked pasta, sausage, sautéed vegetables, marinara sauce, half of the mozzarella cheese, and Italian seasoning. Mix until well combined.
- Assemble the Casserole: In a 9×13 inch baking dish, spread the pasta mixture evenly. Top with the remaining mozzarella cheese and the pepperoni slices. Sprinkle the Parmesan cheese evenly over the top.
- Bake the Casserole: Place the casserole in the preheated oven and bake for 25-30 minutes, or until the cheese is melted and bubbly, and the edges are slightly browned.
- Serve: Remove from the oven and let it rest for about 5 minutes before serving. This will help the casserole set and make it easier to serve.
Extra Tips:
For added flavor, consider sprinkling some red pepper flakes on top before serving for a bit of heat. If you’re a fan of extra toppings, feel free to add olives, jalapeños, or even a sprinkle of oregano or basil for a more authentic pizza taste.
If you prefer a crispier top, you can broil the casserole for the last 2-3 minutes of baking, keeping a close eye to prevent burning. Remember to taste the sauce before assembling to adjust the seasoning if necessary.
Baked Macaroni and Cheese With Bacon
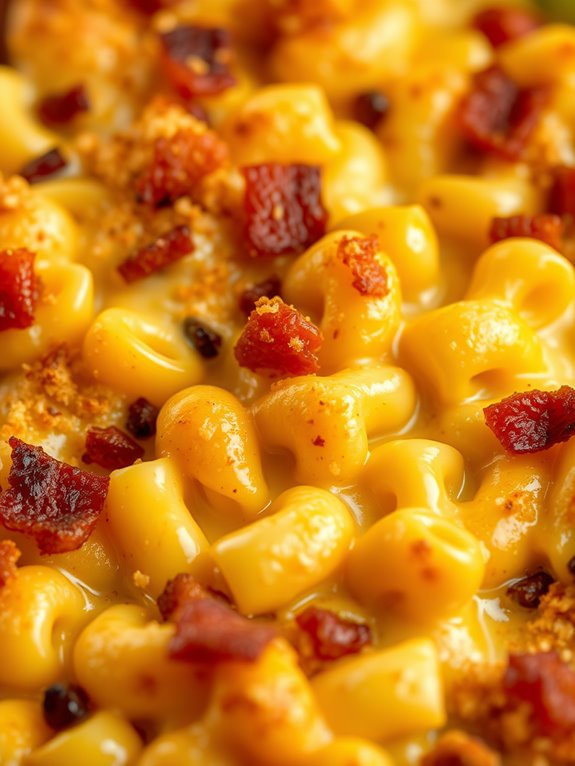
Baked Macaroni and Cheese With Bacon is a delectable twist on the classic comfort food, perfect for a hearty family meal. This dish combines creamy, cheesy macaroni with the savory crunch of crispy bacon, resulting in a rich and satisfying casserole that’s sure to please everyone at the table.
Ideal for both weeknight dinners and special occasions, this baked version elevates traditional mac and cheese by adding layers of flavor and texture that make each bite a delight. The golden, bubbly crust on top of the dish is achieved by baking it in the oven, allowing the cheese to melt perfectly while the bacon infuses its smoky flavor throughout the casserole.
This recipe serves 4-6 people, making it an excellent choice for a small gathering or a cozy family dinner. Follow the recipe below to create a dish that will leave your guests asking for seconds.
Ingredients:
- 12 ounces elbow macaroni
- 8 ounces sharp cheddar cheese, shredded
- 4 ounces mozzarella cheese, shredded
- 4 slices of bacon, cooked and crumbled
- 2 cups milk
- 3 tablespoons unsalted butter
- 3 tablespoons all-purpose flour
- 1 teaspoon salt
- 1/2 teaspoon black pepper
- 1/2 teaspoon garlic powder
- 1/2 teaspoon onion powder
- 1/4 cup breadcrumbs (optional for topping)
Cooking Instructions:
- Preheat and Cook Pasta: Preheat your oven to 350°F (175°C). Cook the elbow macaroni in a large pot of boiling salted water until al dente, following the package instructions. Drain and set aside.
- Prepare Bacon: While the pasta is cooking, fry the bacon slices in a skillet over medium heat until crispy. Remove from the skillet and let them cool on a paper towel-lined plate. Once cooled, crumble the bacon into small pieces.
- Make Cheese Sauce: In a medium saucepan, melt the butter over medium heat. Stir in the flour, salt, black pepper, garlic powder, and onion powder to form a roux. Gradually whisk in the milk, ensuring no lumps form. Continue to cook, stirring constantly, until the mixture thickens and begins to bubble.
- Add Cheese: Remove the saucepan from heat and stir in the shredded cheddar and mozzarella cheeses until they’re fully melted and the sauce is smooth.
- Combine Ingredients: In a large mixing bowl, combine the cooked macaroni, cheese sauce, and crumbled bacon. Mix well until the macaroni is uniformly coated in the cheese sauce.
- Assemble and Bake: Transfer the macaroni mixture into a greased 9×13-inch baking dish. If using, sprinkle the breadcrumbs evenly over the top for an added crunchy texture. Bake in the preheated oven for 20-25 minutes, or until the top is golden and bubbly.
- Serve: Remove from the oven and let it cool for a few minutes before serving. Spoon the Baked Macaroni and Cheese With Bacon onto plates and enjoy!
Extra Tips:
For an even richer flavor, consider adding a teaspoon of Dijon mustard to the cheese sauce. This will enhance the cheese’s tanginess and add depth to the dish.
If you prefer a spicy kick, a pinch of cayenne pepper can be added to the sauce. Additionally, experimenting with different cheese combinations, such as Gruyère or smoked gouda, can provide a unique twist to the classic recipe.
Make sure to keep an eye on the baking time to avoid overbaking, as this can dry out the macaroni. Enjoy your deliciously cheesy creation!
BBQ Pulled Pork Cornbread Casserole
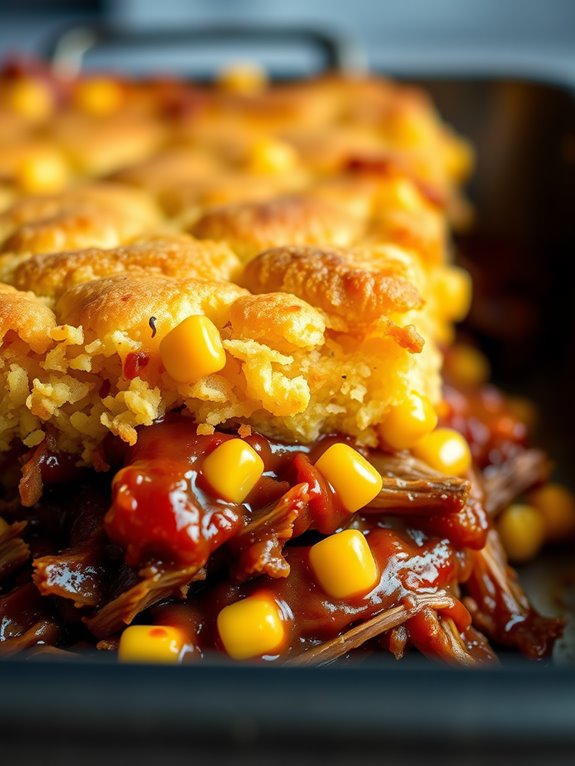
BBQ Pulled Pork Cornbread Casserole is a comforting and hearty dish that combines the smoky flavors of pulled pork with the sweet, crumbly texture of cornbread. This casserole is perfect for gatherings or family dinners, offering a delightful mix of tastes and textures that please both the meat lovers and cornbread fans alike.
With layers of succulent BBQ pulled pork and a golden cornbread topping, this dish isn’t only delicious but also visually appealing, making it a centerpiece for any meal.
This recipe is designed to serve 4-6 people, making it ideal for small get-togethers or a satisfying family meal. The preparation involves making a batch of pulled pork, which can be done ahead of time or using store-bought to save time. The cornbread mixture is simple yet perfectly complements the savory pork. As it bakes, the flavors meld together, creating a warm and inviting dish that’s sure to become a favorite in your recipe collection.
Ingredients (Serves 4-6):
- 2 pounds pulled pork
- 1 cup BBQ sauce
- 1 box (8.5 oz) cornbread mix
- 1/3 cup milk
- 1 egg
- 1 cup shredded cheddar cheese
- 1/2 cup corn kernels (optional)
- 1 tablespoon butter, melted
- 1/4 teaspoon garlic powder
- Salt and pepper to taste
Instructions:
- Preheat and Prepare: Preheat your oven to 375°F (190°C). Grease a 9×13 inch baking dish with butter or non-stick spray to prevent sticking.
- Prepare Pulled Pork: In a medium bowl, mix the pulled pork with BBQ sauce until well combined. If the pork is cold, warm it slightly in a microwave or on the stove to make it easier to mix.
- Layer the Pulled Pork: Spread the BBQ pulled pork evenly across the bottom of the prepared baking dish. Verify it’s distributed evenly to form a solid base layer.
- Mix Cornbread Topping: In another bowl, prepare the cornbread mix according to the package instructions, typically by mixing the cornbread mix with milk and an egg. Stir until just combined, being careful not to overmix.
- Add Corn and Cheese: Fold in the corn kernels and half of the shredded cheese into the cornbread mixture. This will add extra flavor and texture to your casserole.
- Layer Cornbread: Carefully spread the cornbread mixture over the pulled pork layer in the baking dish, making sure to cover it completely.
- Top with Cheese: Sprinkle the remaining shredded cheese on top of the cornbread layer for a cheesy crust.
- Bake: Place the dish in the preheated oven and bake for 25-30 minutes, or until the cornbread is golden brown and a toothpick inserted in the center comes out clean.
- Rest and Serve: Allow the casserole to cool for about 5 minutes before serving. This resting time helps the layers set and makes it easier to cut and serve.
Extra Tips:
For a spicier kick, consider adding a few chopped jalapeños to the cornbread mixture. If you prefer a sweeter taste, add a tablespoon of honey or sugar to the cornbread mix.
Leftovers can be stored in the refrigerator for up to 3 days and can be reheated in the oven or microwave. For added convenience, use pre-cooked pulled pork available at many grocery stores.
Eggplant Parmesan Casserole

Eggplant Parmesan Casserole is a delightful twist on the classic Italian dish, combining layers of tender eggplant, rich marinara sauce, and gooey melted cheese, all baked to perfection in a single dish. This casserole isn’t only a delicious comfort food but also a fantastic way to incorporate more vegetables into your meals.
Perfect for both weeknight dinners and special occasions, this casserole is sure to become a family favorite. The dish is hearty enough to serve as a main course and pairs beautifully with a fresh green salad or some crusty bread.
It’s a versatile recipe that can be easily adapted to suit different dietary needs, such as using gluten-free breadcrumbs or a dairy-free cheese alternative. This Eggplant Parmesan Casserole serves 4-6 people, making it an ideal choice for family gatherings or meal prepping for the week.
Ingredients for 4-6 people:
- 2 large eggplants, sliced into 1/4 inch rounds
- 2 cups marinara sauce
- 1 1/2 cups shredded mozzarella cheese
- 1/2 cup grated Parmesan cheese
- 1 cup all-purpose flour
- 3 large eggs
- 2 cups breadcrumbs
- 1/4 cup olive oil
- Salt and pepper to taste
- Fresh basil leaves for garnish (optional)
Cooking Instructions:
- Prepare the Eggplant: Start by preheating your oven to 375°F (190°C). Sprinkle salt over the eggplant slices and let them sit for about 20 minutes to draw out excess moisture. Afterward, rinse the slices and pat them dry with paper towels.
- Set Up the Breading Station: In three separate shallow dishes, place flour, beaten eggs, and breadcrumbs. Dredge each eggplant slice in flour, then dip it into the eggs, and finally coat it in breadcrumbs, confirming each slice is evenly coated.
- Fry the Eggplant: Heat olive oil in a large skillet over medium heat. Fry the eggplant slices in batches for about 3-4 minutes on each side until they’re golden brown. Transfer them to a plate lined with paper towels to drain excess oil.
- Assemble the Casserole: In a 9×13 inch baking dish, spread a layer of marinara sauce on the bottom. Add a layer of fried eggplant slices, followed by more marinara sauce, a sprinkle of mozzarella, and a bit of Parmesan cheese. Repeat the layers until all ingredients are used, finishing with a generous topping of mozzarella and Parmesan.
- Bake the Casserole: Cover the dish with aluminum foil and bake in the preheated oven for 25 minutes. Remove the foil and bake for an additional 15 minutes, or until the cheese is bubbly and golden brown.
- Serve: Allow the casserole to cool for a few minutes before serving. Garnish with fresh basil leaves, if desired.
Extra Tips:
To guarantee your Eggplant Parmesan Casserole isn’t too watery, take the time to salt the eggplant slices to draw out excess moisture. For a crispier topping, consider adding a layer of breadcrumbs mixed with a little olive oil on top before baking.
If you prefer a spicier dish, add a pinch of red pepper flakes to the marinara sauce. This dish can also be prepared ahead of time and stored in the refrigerator; simply reheat in the oven before serving.