

When it comes to holiday treats, there’s something about the cool, invigorating taste of peppermint that just screams Christmas. I remember my first attempt at making peppermint brownies. The rich chocolate combined with the minty zest was a hit at our family gathering. Whether it’s a batch of homemade peppermint fudge or a luxurious peppermint cheesecake, these desserts are sure to elevate your festivities. Get ready to treat yourself and your loved ones to something special this holiday season.
Peppermint Bark
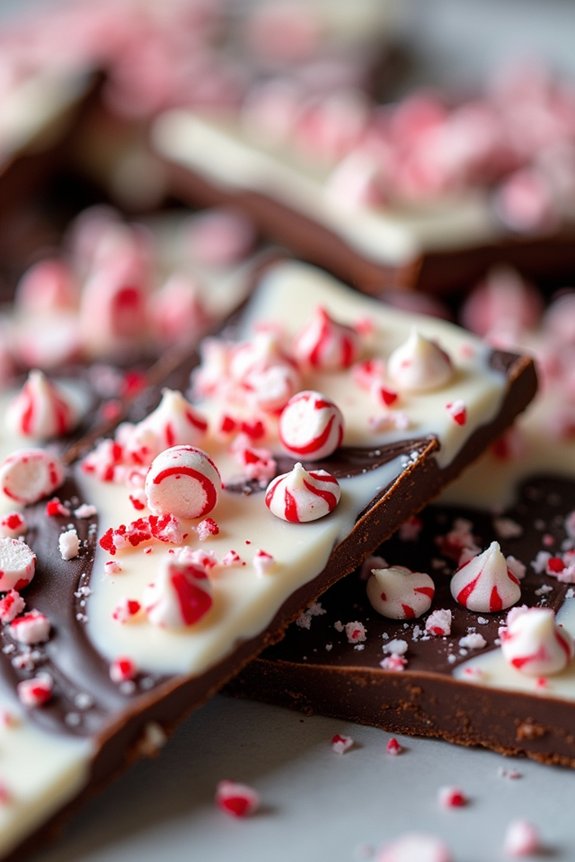
Peppermint Bark is a festive and delicious treat that combines the rich flavors of chocolate with the fresh, cool taste of peppermint. It’s a classic holiday dessert that’s simple to make and perfect for gift-giving or sharing at holiday parties. The combination of dark and white chocolate creates a beautiful marbled effect, while the crushed peppermint on top adds a delightful crunch and burst of flavor.
This no-bake recipe is ideal for those who want to create a homemade Christmas dessert without spending hours in the kitchen. Making peppermint bark isn’t only fun but also a great way to involve family and friends in holiday preparations. With just a few ingredients, you can whip up a batch of this delightful dessert that serves 4-6 people.
Whether you’re a seasoned home baker or a novice in the kitchen, this recipe is straightforward and forgiving, making it a stress-free addition to your holiday menu.
Ingredients (serving size: 4-6 people):
- 12 oz of high-quality dark chocolate, chopped
- 12 oz of high-quality white chocolate, chopped
- 1 teaspoon of peppermint extract
- 1 cup of crushed peppermint candies or candy canes
Cooking Instructions:
- Prepare the Baking Sheet: Line a baking sheet with parchment paper, making sure it covers the entire surface. This will prevent the chocolate from sticking and make it easy to remove the bark once it’s set.
- Melt the Dark Chocolate: In a microwave-safe bowl, melt the dark chocolate in 30-second intervals, stirring after each interval until completely smooth. Alternatively, melt the chocolate over a double boiler on the stove. Once melted, stir in 1/2 teaspoon of peppermint extract.
- Spread the Dark Chocolate: Pour the melted dark chocolate onto the prepared baking sheet and spread it into an even layer, approximately 1/4-inch thick, using a spatula. Place the baking sheet in the refrigerator for about 20 minutes to allow the chocolate to set slightly.
- Melt the White Chocolate: While the dark chocolate is setting, melt the white chocolate using the same method as the dark chocolate. Stir in the remaining 1/2 teaspoon of peppermint extract once the chocolate is smooth.
- Spread the White Chocolate: Remove the baking sheet from the refrigerator and pour the melted white chocolate over the dark chocolate layer. Spread it evenly with a spatula, creating a marbled effect if desired.
- Add Crushed Peppermint: Immediately sprinkle the crushed peppermint candies over the white chocolate layer, pressing down gently to guarantee they adhere to the chocolate.
- Chill the Bark: Return the baking sheet to the refrigerator and allow the bark to chill for at least 1 hour, or until completely set.
- Break Into Pieces: Once set, remove the bark from the refrigerator and break it into pieces of your desired size. Store in an airtight container at room temperature or in the refrigerator.
Extra Tips:
For a professional-looking peppermint bark, make certain that both layers of chocolate are spread evenly. If you prefer a thicker bark, adjust the thickness by using a smaller baking sheet.
To achieve a marbled effect, use a toothpick or a skewer to swirl the dark and white chocolates together before adding the peppermint topping. When crushing peppermint candies, use a rolling pin or a food processor for a consistent texture.
Finally, make sure your work area is cool, as warm temperatures can cause the chocolate to melt or separate.
Peppermint Cheesecake
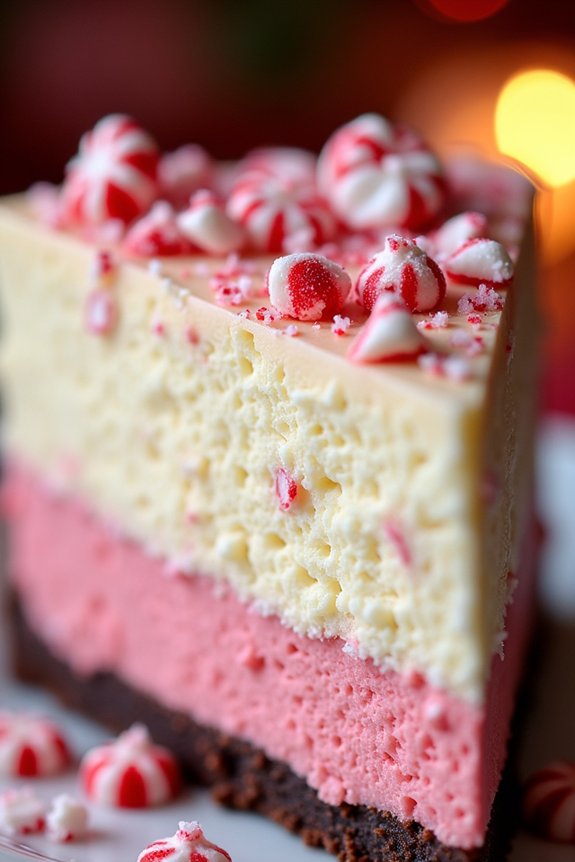
Peppermint Cheesecake is the perfect festive dessert to add a revitalizing twist to your holiday table. With its creamy texture and delightful peppermint flavor, this cheesecake is sure to impress your guests and become a holiday favorite. The combination of a crisp chocolate crust and a smooth peppermint-infused filling offers a sensational balance of flavors that will delight your taste buds.
Whether you’re hosting a large Christmas gathering or enjoying a cozy family dinner, this dessert is sure to bring cheer to your celebration. This recipe is designed to serve 4-6 people, making it ideal for smaller gatherings or as a delightful addition to a larger dessert spread. The preparation involves a few simple steps that any home baker can master with ease.
By following the detailed instructions, you’ll be able to create a beautiful and delicious Peppermint Cheesecake that looks as good as it tastes. So, gather your ingredients, preheat your oven, and get ready to bake a dessert that will surely become a holiday tradition.
Ingredients:
- 1 ½ cups chocolate cookie crumbs
- ¼ cup unsalted butter, melted
- 16 oz cream cheese, softened
- 1 cup granulated sugar
- 3 large eggs
- 1 teaspoon vanilla extract
- 1 teaspoon peppermint extract
- ½ cup sour cream
- ½ cup heavy cream
- Red food coloring (optional)
- Crushed peppermint candies, for garnish
Cooking Instructions:
- Prepare the Crust: Begin by preheating your oven to 325°F (160°C). In a medium bowl, mix the chocolate cookie crumbs with the melted butter until well combined. Press the mixture firmly into the bottom of a 9-inch springform pan to form the crust. Bake the crust for 10 minutes, then remove it from the oven and allow it to cool.
- Make the Cheesecake Filling: In a large mixing bowl, beat the softened cream cheese and granulated sugar together until smooth and creamy. Add the eggs one at a time, mixing well after each addition. Stir in the vanilla and peppermint extracts, followed by the sour cream and heavy cream. If you desire a festive look, add a few drops of red food coloring to achieve a peppermint pink hue.
- Assemble the Cheesecake: Pour the cheesecake filling over the cooled crust in the springform pan. Smooth the top with a spatula to guarantee an even surface. Place the pan on a baking sheet to catch any drips.
- Bake the Cheesecake: Bake in the preheated oven for 50-60 minutes, or until the edges are set but the center still jiggles slightly. Once baked, turn off the oven and leave the cheesecake inside with the door ajar for about an hour to cool gradually. This helps prevent cracking.
- Chill and Serve: After removing the cheesecake from the oven, let it cool completely at room temperature. Cover the cheesecake with plastic wrap and refrigerate for at least 4 hours, or overnight, to set fully. Before serving, garnish with crushed peppermint candies for an extra festive touch.
Extra Tips:
For best results, verify all your ingredients are at room temperature before you start mixing, as this helps in achieving a smoother batter. If you find the cheesecake top cracking, try placing a shallow pan of water in the oven while baking to create a moist environment.
Additionally, you can substitute the chocolate crust with a graham cracker crust if desired, but the chocolate adds a lovely contrast to the peppermint flavor. Enjoy your Peppermint Cheesecake with a cup of hot cocoa or coffee for a perfect holiday treat!
Peppermint Hot Chocolate

As the winter chill sets in and the holiday season approaches, there’s nothing quite as comforting as a warm mug of hot chocolate. This year, elevate your holiday dessert game with Peppermint Hot Chocolate. This festive beverage combines the rich, creamy taste of traditional hot chocolate with the revitalizing, invigorating flavor of peppermint.
It’s the perfect drink to enjoy by the fireplace, surrounded by family and friends, while snowflakes gently fall outside.
This Peppermint Hot Chocolate recipe is designed to serve 4-6 people, making it ideal for small gatherings or cozy nights in with loved ones. Whether you’re hosting a holiday party or simply want to indulge in a delightful treat, this recipe will bring joy and warmth to your celebrations.
The addition of peppermint not only adds a seasonal touch but also enhances the overall flavor profile, creating a harmonious blend of sweetness and minty freshness.
Ingredients (Serves 4-6):
- 4 cups whole milk
- 1 cup heavy cream
- 1/2 cup granulated sugar
- 1 cup semi-sweet chocolate chips
- 1/4 cup unsweetened cocoa powder
- 1 teaspoon vanilla extract
- 1/2 teaspoon peppermint extract
- Whipped cream, for topping
- Crushed candy canes or peppermint candies, for garnish
- Mini marshmallows (optional)
Instructions:
1. Prepare the Base: In a medium saucepan, combine the whole milk, heavy cream, and granulated sugar. Place the saucepan over medium heat and whisk continuously to dissolve the sugar.
Heat the mixture until it begins to steam, but confirm it doesn’t boil.
2. Add the Chocolate: Once the milk mixture is steaming, reduce the heat to low. Add the semi-sweet chocolate chips and unsweetened cocoa powder to the saucepan.
Stir continuously with a whisk or a wooden spoon until the chocolate is completely melted and the mixture is smooth and creamy.
3. Enhance the Flavor: Stir in the vanilla extract and peppermint extract, confirming they’re evenly distributed throughout the hot chocolate.
Taste the mixture and adjust the peppermint extract to your preference if needed.
4. Serve: Pour the hot chocolate into mugs, leaving some space at the top for toppings. Top each serving with a generous dollop of whipped cream.
Sprinkle crushed candy canes or peppermint candies over the whipped cream for a festive touch. Add mini marshmallows if desired.
5. Enjoy: Serve the Peppermint Hot Chocolate immediately while it’s still warm.
Watch as your guests delight in the rich, minty flavors that make this holiday beverage so special.
Extra Tips:
To guarantee the best results, use high-quality chocolate chips and cocoa powder, as these will greatly impact the flavor and texture of your Peppermint Hot Chocolate.
If you prefer a thicker consistency, try adding an extra tablespoon of cocoa powder or use a higher percentage of dark chocolate. For a dairy-free option, substitute the milk and cream with almond or coconut milk.
Finally, adjust the peppermint extract according to your taste; a little goes a long way, so start with a small amount and add more if needed. Enjoy this delightful holiday treat with your loved ones!
Peppermint Brownies
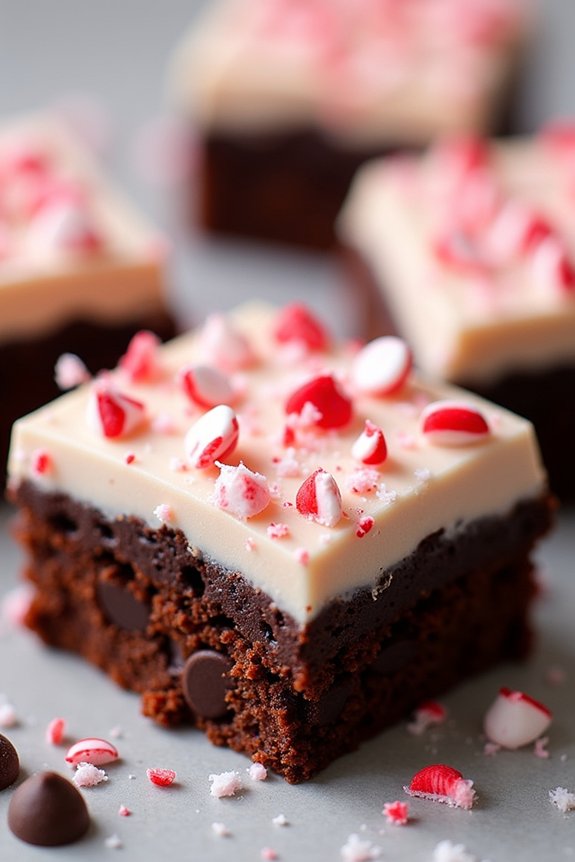
Peppermint Christmas Brownies are a festive twist on the classic dessert that combines the rich, fudgy texture of traditional brownies with the reviving flavor of peppermint. These brownies are perfect for the holiday season, adding a touch of minty magic to your dessert table.
Whether you’re hosting a Christmas party or simply looking for a cozy treat to enjoy by the fireplace, these delightful brownies are sure to impress both children and adults alike.
The combination of chocolate and peppermint creates a harmonious balance that’s both indulgent and invigorating. The brownies are topped with a layer of peppermint frosting and sprinkled with crushed candy canes for added crunch and visual appeal.
Serve these brownies with a scoop of vanilla ice cream or a warm cup of hot chocolate for the ultimate holiday dessert experience.
Ingredients (Serves 4-6 people):
- 1 cup unsalted butter
- 2 cups granulated sugar
- 4 large eggs
- 1 cup all-purpose flour
- 1 cup unsweetened cocoa powder
- 1/2 teaspoon salt
- 1 teaspoon vanilla extract
- 1 teaspoon peppermint extract
- 1 cup semi-sweet chocolate chips
- 1/2 cup crushed candy canes
- 1/2 cup heavy cream
- 1/2 cup powdered sugar
- 2 tablespoons unsalted butter (softened)
Instructions:
- Preheat and Prepare: Preheat your oven to 350°F (175°C). Line a 9×13-inch baking pan with parchment paper, leaving some overhang on the sides for easy removal.
- Melt Butter and Mix: In a medium saucepan, melt 1 cup of unsalted butter over low heat. Once melted, remove from heat and stir in 2 cups of granulated sugar until well combined. Allow the mixture to cool slightly.
- Add Eggs and Flavorings: Whisk in 4 large eggs, one at a time, into the butter-sugar mixture. Add 1 teaspoon of vanilla extract and 1 teaspoon of peppermint extract, stirring until combined.
- Combine Dry Ingredients: In a separate bowl, sift together 1 cup of all-purpose flour, 1 cup of unsweetened cocoa powder, and 1/2 teaspoon of salt. Gradually add the dry ingredients to the wet mixture, stirring until just combined.
- Add Chocolate Chips: Gently fold in 1 cup of semi-sweet chocolate chips.
- Bake: Pour the batter into the prepared baking pan, spreading it evenly. Bake in the preheated oven for 25-30 minutes or until a toothpick inserted in the center comes out with a few moist crumbs.
- Prepare Frosting: While the brownies are baking, prepare the frosting. In a mixing bowl, beat 1/2 cup of heavy cream and 2 tablespoons of softened unsalted butter together until smooth. Gradually add 1/2 cup of powdered sugar, beating until the mixture is light and fluffy.
- Frost and Decorate: Once the brownies are baked and slightly cooled, spread the peppermint frosting evenly over the top. Sprinkle 1/2 cup of crushed candy canes over the frosted brownies.
- Cool and Serve: Allow the brownies to cool completely in the pan before lifting them out using the parchment overhang. Cut into squares and serve.
Extra Tips:
When making Peppermint Christmas Brownies, confirm the butter-sugar mixture is sufficiently cooled before adding the eggs to prevent them from cooking.
For a more intense peppermint flavor, you can increase the peppermint extract by an additional 1/2 teaspoon. If you prefer a smoother texture for the frosting, sift the powdered sugar before adding it to the cream and butter mixture.
For a festive touch, consider using different colored candy canes or peppermint candies for decoration.
Peppermint Fudge
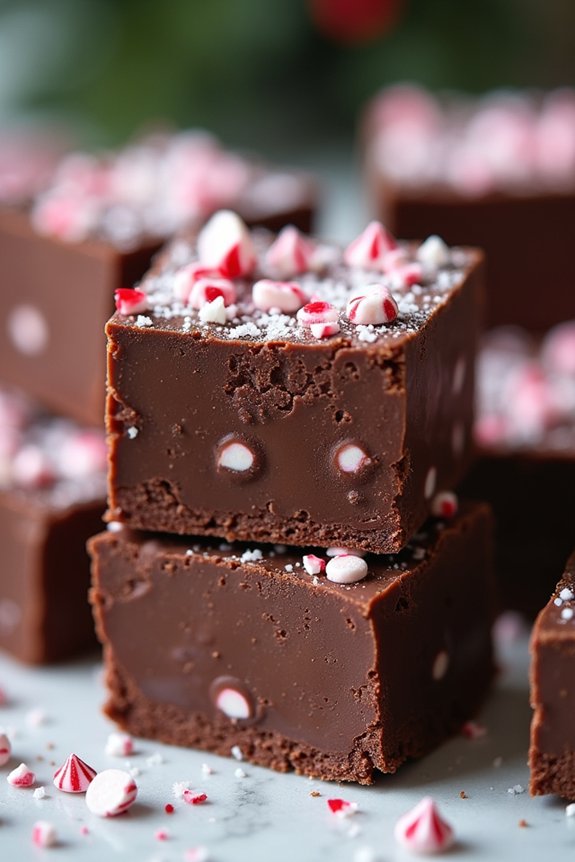
Indulge in the festive flavors of the holiday season with this delightful Peppermint Fudge recipe. This rich and creamy treat is infused with the invigorating taste of peppermint, making it a perfect addition to your Christmas dessert spread. The combination of smooth chocolate and minty freshness creates a harmonious balance that will leave your taste buds dancing with joy.
Whether you’re hosting a holiday party or simply enjoying a cozy evening at home, this Peppermint Fudge is sure to bring a bit of holiday magic into your kitchen.
Making Peppermint Fudge is surprisingly simple, requiring only a few key ingredients and minimal effort. This recipe is designed to serve 4-6 people, making it an ideal choice for a small gathering or a family treat. The key to achieving the perfect fudge consistency lies in careful attention to timing and temperature, ensuring that the chocolate melts smoothly and the peppermint flavor is evenly distributed.
With a little patience and precision, you’ll be rewarded with a batch of fudge that boasts a creamy texture and a delightful peppermint kick.
Ingredients (Serves 4-6):
- 2 cups semisweet chocolate chips
- 1 can (14 ounces) sweetened condensed milk
- 2 tablespoons unsalted butter
- 1/2 teaspoon peppermint extract
- 1/4 teaspoon salt
- 1/2 cup crushed peppermint candies or candy canes
- Optional: extra crushed peppermint candies for garnish
Instructions:
- Prepare the Pan: Line an 8×8-inch baking dish with parchment paper, ensuring that the paper hangs over the edges for easy removal later. This will prevent the fudge from sticking to the pan and make it easier to cut.
- Melt the Chocolate: In a medium saucepan, combine the semisweet chocolate chips, sweetened condensed milk, and unsalted butter. Place the saucepan over medium-low heat, stirring constantly until the chocolate is completely melted and the mixture is smooth. Be careful not to overheat the mixture, as this can cause the chocolate to seize.
- Add Flavor: Once the chocolate mixture is smooth, remove the saucepan from the heat. Stir in the peppermint extract and salt until well combined. The peppermint extract will give the fudge its signature festive flavor.
- Mix in the Peppermint Candies: Gently fold in the crushed peppermint candies or candy canes, ensuring they’re evenly distributed throughout the mixture. This will add both flavor and a slight crunch to the fudge.
- Transfer to the Pan: Pour the fudge mixture into the prepared baking dish, spreading it evenly with a spatula. If desired, sprinkle extra crushed peppermint candies on top for added decoration and flavor.
- Chill: Refrigerate the fudge for at least 2 hours, or until it’s firm and set. This will allow the fudge to solidify properly, making it easier to cut into squares.
- Cut and Serve: Once the fudge is fully set, use the overhanging parchment paper to lift it out of the baking dish. Cut the fudge into small squares and serve. Enjoy the rich chocolatey treat with a hint of peppermint invigoratingness.
Extra Tips:
When making fudge, it’s essential to maintain a low and steady heat to prevent the chocolate from burning or seizing. Stir consistently to encourage even melting and incorporate the ingredients smoothly.
If you prefer a stronger peppermint flavor, you can adjust the quantity of peppermint extract to suit your taste. For a fun and festive touch, consider drizzling white chocolate over the top of the fudge before chilling, or use cookie cutters to shape the fudge into holiday-themed designs.
Store any leftovers in an airtight container in the refrigerator to keep the fudge fresh and delicious.
Peppermint Ice Cream

Peppermint Ice Cream is a delightful treat that captures the essence of the holiday season in every spoonful. This creamy dessert combines the invigorating taste of peppermint with the smooth texture of homemade ice cream, making it a perfect finish to any festive meal.
Whether you’re enjoying it solo or serving it as a complement to other Christmas desserts, Peppermint Ice Cream is sure to bring joy to your holiday celebrations.
The recipe is designed to serve 4-6 people, making it an ideal choice for small gatherings or family dinners. With simple ingredients and easy-to-follow steps, you can create this delicious dessert right at home. Let’s explore the ingredients and instructions for making Peppermint Ice Cream.
Ingredients:
- 2 cups heavy cream
- 1 cup whole milk
- 3/4 cup granulated sugar
- 1 teaspoon pure vanilla extract
- 1 teaspoon peppermint extract
- 4 large egg yolks
- 1/2 cup crushed peppermint candies or candy canes
- A few drops of red food coloring (optional)
Cooking Instructions:
- Prepare the Base: In a medium saucepan, combine the heavy cream, whole milk, and sugar. Cook over medium heat, stirring occasionally, until the sugar is fully dissolved, and the mixture is warm. Don’t let it boil.
- Whisk the Eggs: In a separate bowl, whisk the egg yolks until pale and slightly thickened. Slowly add about 1 cup of the warm cream mixture to the egg yolks, whisking constantly to temper the eggs. This prevents the eggs from curdling when added to the hot mixture.
- Combine and Heat: Pour the tempered egg mixture back into the saucepan with the remaining cream mixture. Cook over medium-low heat, stirring constantly with a wooden spoon, until the mixture thickens slightly and coats the back of the spoon. This should take about 5-7 minutes. Avoid letting it boil.
- Flavor the Ice Cream: Remove the saucepan from heat. Stir in the vanilla extract, peppermint extract, and a few drops of red food coloring if desired, to give the ice cream a festive pink hue.
- Cool the Mixture: Transfer the mixture to a bowl and let it cool to room temperature. Cover and refrigerate for at least 3 hours, or until thoroughly chilled.
- Churn the Ice Cream: Once chilled, pour the mixture into an ice cream maker and churn according to the manufacturer’s instructions. During the final few minutes of churning, add the crushed peppermint candies to incorporate evenly.
- Freeze Until Firm: Transfer the churned ice cream to an airtight container and freeze for at least 2 hours, or until firm enough to scoop.
Extra Tips:
For a richer flavor, consider using a combination of half-and-half instead of whole milk. If you prefer a stronger peppermint taste, you can increase the peppermint extract slightly, but be cautious as it can become overpowering quickly.
To avoid large chunks of candy in your ice cream, crush the peppermint candies finely before adding them. Finally, for those without an ice cream maker, you can pour the mixture into a shallow dish and freeze it, stirring every 30 minutes to break up ice crystals until set.
Enjoy your homemade Peppermint Ice Cream with a drizzle of chocolate sauce or alongside your favorite Christmas pie.
Peppermint Cupcakes
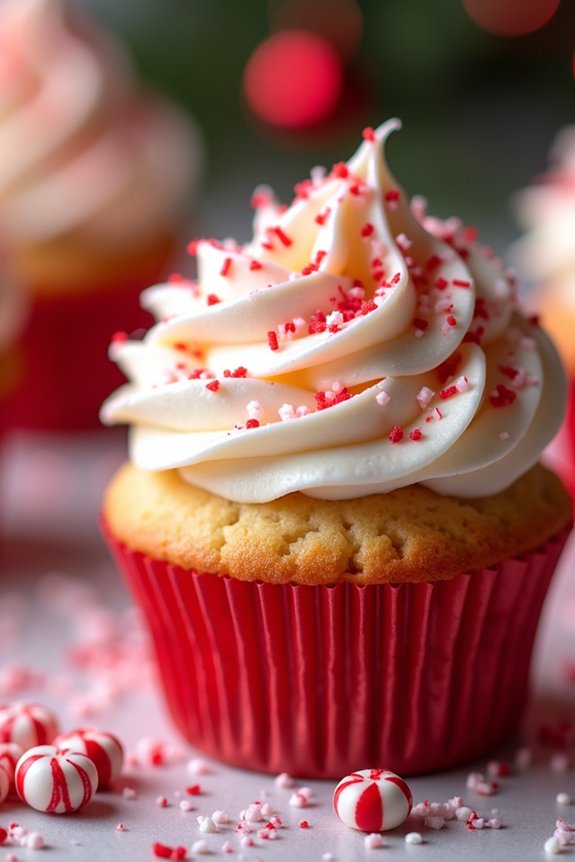
Peppermint cupcakes are a festive treat that encapsulate the essence of the holiday season with their revitalizing minty flavor and soft, fluffy texture. Perfect for Christmas parties or family gatherings, these cupcakes are a delightful addition to any dessert table. The combination of peppermint-infused cake and a creamy, peppermint buttercream frosting creates a harmonious blend of flavors that will leave your guests wanting more.
This recipe yields 12 peppermint cupcakes, making it perfect for a small to medium-sized gathering of 4-6 people. The cupcakes are easy to make, and the recipe includes straightforward steps that even novice bakers can follow. With a few basic ingredients and a little bit of holiday spirit, you can create these delicious treats in no time.
Ingredients:
- 1 1/2 cups all-purpose flour
- 1 cup granulated sugar
- 1/2 cup unsalted butter, softened
- 2 large eggs
- 1/2 cup whole milk
- 1 teaspoon vanilla extract
- 1 teaspoon peppermint extract
- 1 1/2 teaspoons baking powder
- 1/4 teaspoon salt
- Red food coloring (optional)
- Crushed peppermint candies (for garnish)
For the Peppermint Buttercream Frosting:
- 1 cup unsalted butter, softened
- 3 cups powdered sugar
- 2 tablespoons whole milk
- 1 teaspoon peppermint extract
- Red food coloring (optional)
- Crushed peppermint candies (for garnish)
Instructions:
- Preheat the Oven: Begin by preheating your oven to 350°F (175°C). Line a 12-cup muffin tin with cupcake liners.
- Mix the Dry Ingredients: In a medium bowl, sift together the flour, baking powder, and salt. Set this mixture aside.
- Cream Butter and Sugar: In a large mixing bowl, beat the softened butter and granulated sugar together using an electric mixer until the mixture is light and fluffy, about 2-3 minutes.
- Add Eggs and Extracts: Add the eggs one at a time, beating well after each addition. Mix in the vanilla and peppermint extracts until fully incorporated.
- Combine Dry and Wet Ingredients: Gradually add the dry ingredients to the wet mixture, alternating with the milk. Begin and end with the dry ingredients. If desired, add a few drops of red food coloring to the batter and gently swirl for a festive touch.
- Fill the Cupcake Liners: Divide the batter evenly among the cupcake liners, filling each about two-thirds full.
- Bake the Cupcakes: Bake in the preheated oven for 18-20 minutes, or until a toothpick inserted into the center of a cupcake comes out clean. Allow the cupcakes to cool in the tin for 5 minutes before transferring them to a wire rack to cool completely.
- Prepare the Frosting: While the cupcakes are cooling, prepare the frosting. In a large bowl, beat the softened butter until creamy. Gradually add the powdered sugar, mixing well after each addition. Add the milk and peppermint extract, and continue to beat until the frosting is smooth and fluffy. Add a few drops of red food coloring if desired.
- Frost the Cupcakes: Once the cupcakes have cooled completely, pipe or spread the peppermint buttercream frosting on top of each cupcake. Sprinkle with crushed peppermint candies for extra flavor and decoration.
Extra Tips:
To guarantee your peppermint cupcakes have the perfect texture, make sure all your ingredients are at room temperature before you begin. This helps the ingredients combine more smoothly and results in a more even bake.
Additionally, if you find the frosting too thick, you can add a little more milk, a teaspoon at a time, until you reach your desired consistency. For a more vibrant appearance, consider swirling the red food coloring lightly into the batter or frosting rather than fully mixing it in.
This will create a beautiful marbled effect that adds to the festive presentation. Enjoy your peppermint cupcakes with a warm cup of cocoa for the ultimate holiday experience!
Peppermint Sugar Cookies
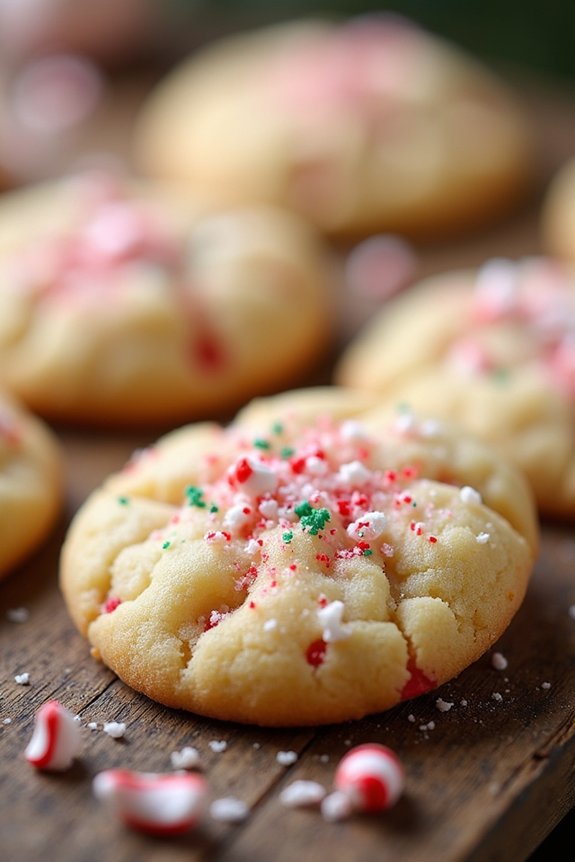
Peppermint Sugar Cookies are a delightful treat that brings a revitalizing twist to traditional sugar cookies, making them perfect for the holiday season. The bright and invigorating flavor of peppermint combined with the soft, buttery texture of these cookies creates a festive dessert that’s sure to impress your family and friends.
Whether you’re hosting a Christmas party or looking for a homemade gift, these cookies are a wonderful choice for any peppermint lover. The subtle hint of peppermint extract and the crunch of crushed peppermint candies make these cookies both visually appealing and deliciously satisfying.
They’re easy to make, allowing even novice bakers to create a batch of these goodies with minimal fuss. With this recipe, you can make 24-30 cookies, which is perfect for serving 4-6 people or for sharing with a group.
Ingredients:
- 2 ¾ cups all-purpose flour
- 1 teaspoon baking soda
- ½ teaspoon baking powder
- 1 cup unsalted butter, softened
- 1 ½ cups granulated sugar
- 1 egg
- 1 teaspoon vanilla extract
- ½ teaspoon peppermint extract
- ½ cup crushed peppermint candies or candy canes
- Optional: Red and green colored sugar for decoration
Instructions:
- Preheat the Oven: Begin by preheating your oven to 350°F (175°C). Line two baking sheets with parchment paper or silicone baking mats to guarantee the cookies don’t stick.
- Mix Dry Ingredients: In a medium bowl, whisk together the flour, baking soda, and baking powder. This guarantees that the baking agents are evenly distributed throughout the flour.
- Cream Butter and Sugar: In a separate large bowl, cream the softened butter and sugar together using an electric mixer on medium speed until the mixture is light and fluffy, about 2-3 minutes. This step is vital for achieving the right texture of the cookies.
- Add Egg and Extracts: Beat in the egg, vanilla extract, and peppermint extract until well combined. The extracts will infuse the dough with flavor.
- Combine Wet and Dry Ingredients: Gradually add the dry ingredients to the wet ingredients, mixing on low speed until just combined. Be careful not to over-mix, as this can make the cookies tough.
- Fold in Crushed Candies: Gently fold in the crushed peppermint candies with a spatula, making sure they’re evenly distributed throughout the dough.
- Shape the Cookies: Using a tablespoon, scoop out dough and roll into balls. If desired, roll the balls in colored sugar for a festive touch. Place the balls on the prepared baking sheets, spacing them about 2 inches apart.
- Bake: Bake in the preheated oven for 8-10 minutes, or until the edges are lightly golden. The centers should still be soft, as they’ll continue to firm up as they cool.
- Cool: Allow the cookies to cool on the baking sheet for 5 minutes before transferring them to a wire rack to cool completely.
Extra Tips:
For the best results, make sure your butter is softened but not melted, as this will help achieve the ideal cookie texture. It’s also important to crush the peppermint candies finely so they blend well into the dough without creating large chunks.
If you prefer a more intense peppermint flavor, you can increase the peppermint extract slightly, but be cautious as it can quickly become overpowering. Finally, storing the cookies in an airtight container at room temperature will keep them fresh and chewy for several days, making them perfect for holiday planning and gift-giving.
Peppermint Chocolate Mousse
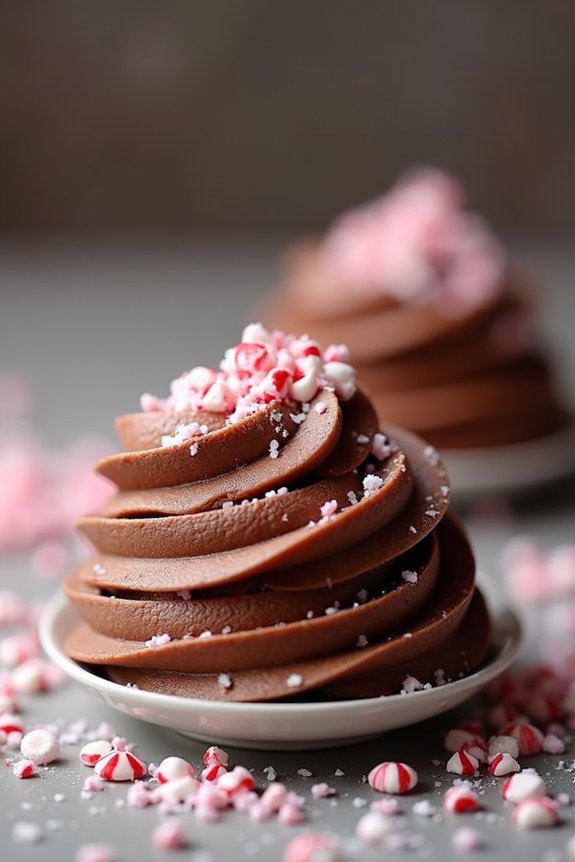
Peppermint Chocolate Mousse is a delightful dessert that perfectly captures the essence of the holiday season. This smooth and airy mousse combines the rich flavors of chocolate with the invigorating and festive burst of peppermint, making it an ideal treat for Christmas gatherings.
It’s an elegant dessert that’s sure to impress your guests with both its taste and its presentation. Whether you’re hosting a large dinner or an intimate family gathering, this Peppermint Chocolate Mousse will add a touch of sweet sophistication to your Christmas menu.
The process of making Peppermint Chocolate Mousse is relatively straightforward, requiring some basic ingredients and a bit of patience. The end result is a creamy, fluffy mousse with a subtle hint of mint that complements the deep, rich flavor of chocolate.
The recipe serves 4-6 people, making it a perfect dessert option for a small group. With its festive flavors and luxurious texture, this mousse is sure to become a holiday favorite.
Ingredients for Peppermint Chocolate Mousse (serves 4-6):
- 1 cup of heavy cream
- 1 cup of semi-sweet chocolate chips
- 2 tablespoons of unsalted butter
- 1/4 cup of granulated sugar
- 3 large eggs, separated
- 1 teaspoon of peppermint extract
- 1/4 teaspoon of salt
- Crushed peppermint candies or candy canes for garnish
Cooking Instructions:
- Melt the Chocolate: In a heatproof bowl set over a pot of simmering water, melt the chocolate chips and butter together. Stir until smooth and fully combined. Remove from heat and let it cool slightly.
- Prepare the Egg Mixture: In a separate bowl, whisk the egg yolks with the sugar until the mixture is pale and creamy. Gradually add the melted chocolate mixture to the egg yolks, stirring continuously to combine. Mix in the peppermint extract.
- Beat the Egg Whites: In a clean bowl, using an electric mixer, beat the egg whites with the salt until stiff peaks form. This will take about 3-4 minutes.
- Fold Egg Whites into Chocolate Mixture: Gently fold the beaten egg whites into the chocolate mixture, being careful not to deflate the airiness of the egg whites. Mix until no streaks remain.
- Whip the Cream: In another bowl, whip the heavy cream until soft peaks form. Carefully fold the whipped cream into the chocolate mixture, making sure for a light and fluffy texture.
- Chill the Mousse: Spoon the mousse into serving glasses or bowls. Cover with plastic wrap and refrigerate for at least 4 hours, or until set.
- Garnish and Serve: Before serving, top each mousse with a sprinkle of crushed peppermint candies or candy canes for a festive touch. Enjoy your Peppermint Chocolate Mousse chilled.
Extra Tips:
For the best results, verify all your mixing bowls and utensils are completely dry before beating the egg whites, as any moisture can prevent them from reaching stiff peaks.
When folding ingredients together, use a gentle, sweeping motion to maintain the mousse’s airy texture. If you prefer a stronger peppermint flavor, you can adjust the amount of peppermint extract to taste.
Finally, you can prepare the mousse a day in advance, which allows the flavors to develop further, making it even more delicious when served.
Peppermint Truffles
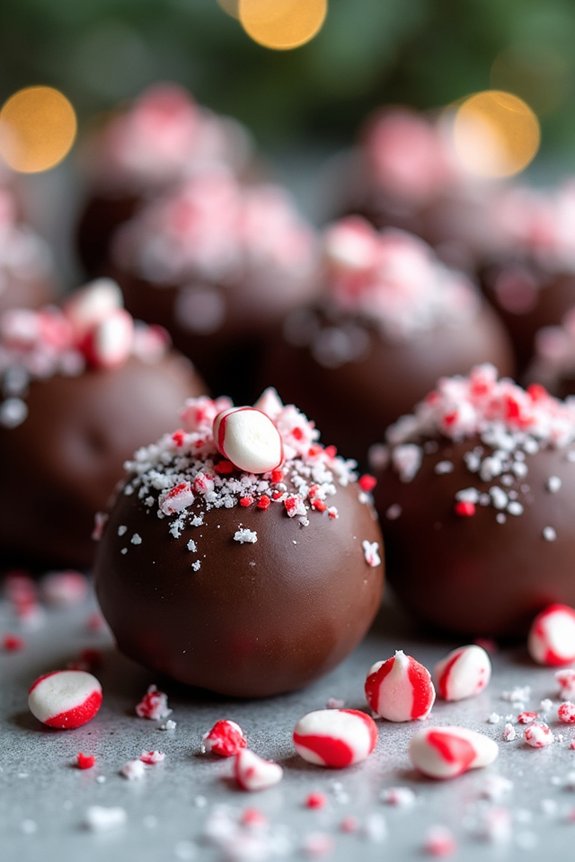
Indulge in the festive spirit with these delightful Peppermint Truffles. This dessert is a perfect blend of rich chocolate and invigorating peppermint, making it an ideal treat for holiday gatherings or a cozy night in. The smooth, creamy texture of the truffles combined with the cool, minty flavor creates a delightful contrast that melts in your mouth.
Whether you’re a seasoned baker or a novice in the kitchen, this recipe is simple to follow and sure to impress your guests. These Peppermint Truffles aren’t just delicious but also an excellent homemade gift option. Pack them in a decorative box or jar, and you have a thoughtful, handmade gift that showcases the joy and warmth of the holiday season.
The recipe makes enough to serve 4-6 people, guaranteeing there’s plenty to share with friends and family. Let’s explore the ingredients and steps needed to create this delectable Christmas dessert.
Ingredients (serving size: 4-6 people):
- 1 cup semi-sweet chocolate chips
- 1/2 cup heavy cream
- 1/4 teaspoon peppermint extract
- 1/2 cup crushed peppermint candies
- 1/4 cup unsweetened cocoa powder
- 1 tablespoon unsalted butter
- A pinch of salt
Cooking Instructions:
- Prepare the Chocolate Mixture: Begin by placing the semi-sweet chocolate chips in a heatproof bowl. In a small saucepan, heat the heavy cream over medium heat until it just begins to simmer. Be careful not to let it boil. Pour the hot cream over the chocolate chips and let it sit for about 2-3 minutes.
- Mix and Add Flavoring: After the chocolate has softened, add the unsalted butter, peppermint extract, and a pinch of salt. Stir the mixture gently until the chocolate is completely melted and the mixture is smooth. If needed, use a whisk to confirm a silky texture.
- Chill the Mixture: Cover the bowl with plastic wrap and refrigerate the mixture for about 1-2 hours, or until it’s firm enough to hold its shape when scooped.
- Form the Truffles: Once the mixture is firm, use a small cookie scoop or a teaspoon to portion out small amounts of the chocolate mixture. With clean hands, roll each portion into a ball.
- Coat the Truffles: Place the crushed peppermint candies on a shallow plate. Roll each truffle in the crushed candies to coat the outside. For an extra layer of flavor, you can first roll the truffles in unsweetened cocoa powder before coating them with peppermint candies.
- Serve and Enjoy: Arrange the truffles on a serving plate or in a decorative box if gifting. They can be served immediately or stored in an airtight container in the refrigerator for up to a week.
Extra Tips: For a smoother texture, verify that your chocolate is of good quality, as it greatly affects the final taste of the truffles. If you prefer a stronger peppermint flavor, feel free to adjust the amount of peppermint extract to your taste.
When rolling the truffles, work quickly to prevent the chocolate from melting in your hands. Using slightly damp hands can help prevent sticking. Enjoy these truffles with a hot cup of cocoa for a truly festive treat!
Peppermint Macarons
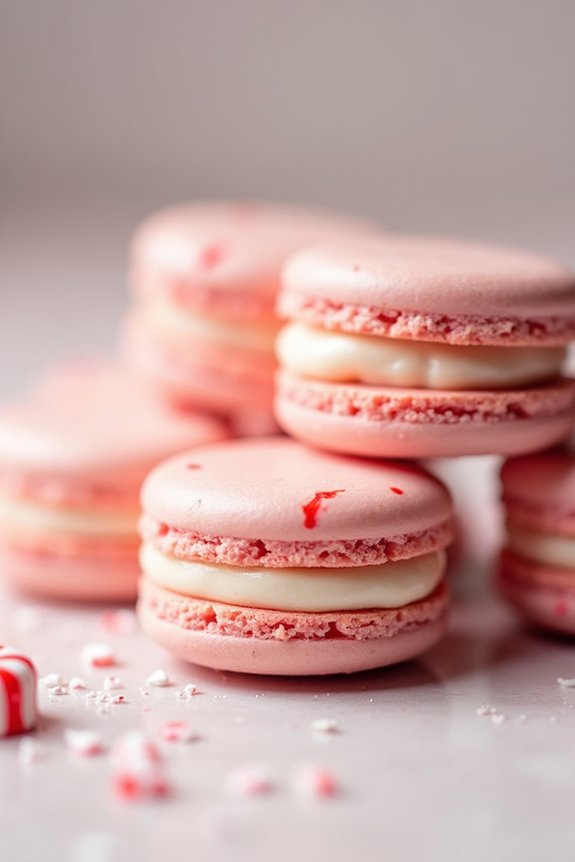
Indulge in the festive spirit with these delightful Peppermint Macarons. These delicate French confections are infused with a revitalizing peppermint flavor, making them the perfect treat for Christmas gatherings. The smooth, crisp shells are paired with a luscious peppermint buttercream filling, offering a balance of sweetness and minty freshness that will captivate your taste buds. Not only are these macarons irresistibly delicious, but their charming appearance also makes them a stunning addition to any holiday dessert table.
Creating macarons requires attention to detail and a bit of patience, but the end result is certainly worth the effort. The process involves whipping up a meringue, folding it into almond flour and sugar, and carefully piping the mixture into perfectly rounded shells. With a bit of practice, you’ll master the art of macaron making and impress your family and friends with this festive peppermint version. This recipe yields enough macarons to serve 4-6 people, making it ideal for intimate holiday gatherings or as a thoughtful homemade gift.
Ingredients:
- 1 cup almond flour
- 1 3/4 cups powdered sugar
- 3 large egg whites, at room temperature
- 1/4 cup granulated sugar
- 1/2 teaspoon peppermint extract
- Red gel food coloring (optional)
- 1/2 cup unsalted butter, softened
- 1 cup powdered sugar (for filling)
- 1/2 teaspoon peppermint extract (for filling)
- 1-2 tablespoons heavy cream
Cooking Instructions:
- Prep and Mix Dry Ingredients:
- Sift the almond flour and 1 3/4 cups of powdered sugar together into a large mixing bowl. This guarantees a smooth, lump-free mixture for your macaron shells.
- Make the Meringue:
- In a separate bowl, beat the egg whites on medium speed until foamy. Gradually add the granulated sugar and continue beating until stiff peaks form. Add the peppermint extract and a few drops of red gel food coloring if desired, and gently mix until just combined.
- Combine Meringue and Dry Mixture:
- Gently fold the meringue into the almond flour mixture using a rubber spatula. Continue folding until the batter flows like lava and you can make a figure-eight with the batter without it breaking.
- Pipe the Macarons:
- Transfer the batter to a piping bag fitted with a round tip. Pipe small circles onto a baking sheet lined with parchment paper or a silicone mat. Tap the baking sheet firmly on the counter to remove any air bubbles.
- Rest the Macarons:
- Allow the piped macarons to sit at room temperature for 30-60 minutes, or until a skin forms on the surface. This step is essential for developing the macarons’ iconic smooth tops and feet.
- Bake the Shells:
- Preheat your oven to 300°F (150°C). Bake the macarons for 15-18 minutes, or until they can be easily lifted off the baking sheet without sticking. Allow them to cool completely on the baking sheet.
- Prepare the Filling:
- In a mixing bowl, beat the softened butter until creamy. Gradually add 1 cup of powdered sugar, then the peppermint extract and heavy cream. Beat until the buttercream is smooth and fluffy.
- Assemble the Macarons:
- Pair up the macaron shells by size. Pipe a small amount of peppermint buttercream onto the flat side of one shell and gently sandwich it with another shell. Repeat until all macarons are assembled.
Extra Tips:
Achieving the perfect macaron requires practice and precision. It’s important to measure your ingredients accurately, preferably using a kitchen scale. Guarantee your mixing bowls and utensils are completely dry, as even a small amount of moisture can affect the meringue.
If you’re new to making macarons, consider starting with a small batch to familiarize yourself with the process. Finally, macarons often taste even better after resting in the refrigerator for a day or two, allowing the flavors to meld beautifully.
Peppermint Chocolate Tart

Indulge in the festive flavors of the holiday season with a Peppermint Chocolate Tart, a delightful dessert that combines rich, velvety chocolate with the invigorating zing of peppermint. This decadent tart is perfect for Christmas gatherings, offering a beautiful balance of sweetness and minty freshness.
Whether you’re hosting a holiday party or simply enjoying a cozy evening with loved ones, this tart is sure to impress with its elegant presentation and irresistible taste.
The crust of this tart is made from a simple mixture of crushed chocolate cookies and butter, creating a crunchy base that complements the smooth chocolate filling. The filling itself is a luscious combination of high-quality dark chocolate, heavy cream, and a hint of peppermint extract, resulting in a silky, melt-in-your-mouth experience.
Topped with crushed candy canes or peppermint candies, this dessert not only tantalizes the taste buds but also adds a festive touch to your holiday table.
Ingredients for a serving size of 4-6 people:
- 1 ½ cups chocolate cookie crumbs
- ½ cup unsalted butter, melted
- 1 ½ cups heavy cream
- 12 oz dark chocolate, chopped
- 1 tsp peppermint extract
- ¼ cup granulated sugar
- Pinch of salt
- ½ cup crushed candy canes or peppermint candies
Instructions:
1. Prepare the crust: Preheat your oven to 350°F (175°C). In a medium bowl, combine the chocolate cookie crumbs and melted butter. Mix until the crumbs are evenly coated with butter.
Press the mixture firmly into the bottom and up the sides of a 9-inch tart pan with a removable bottom. Use the back of a spoon or a flat-bottomed glass to guarantee the crust is evenly distributed and compact. Bake for 10 minutes, then remove from the oven and let cool completely.
2. Make the chocolate filling: In a small saucepan, heat the heavy cream over medium heat until it just begins to simmer. Remove from heat and add the chopped dark chocolate, stirring until the chocolate is completely melted and smooth.
Stir in the peppermint extract, granulated sugar, and a pinch of salt, mixing well to combine.
3. Assemble the tart: Pour the chocolate filling into the cooled crust, using a spatula to spread it evenly. Tap the tart pan gently on the counter to eliminate any air bubbles.
Sprinkle the crushed candy canes or peppermint candies over the top of the filling.
4. Chill the tart: Place the tart in the refrigerator for at least 2 hours, or until the filling is set and firm. For best results, chill overnight to allow the flavors to meld fully.
5. Serve: Once set, remove the tart from the refrigerator. Carefully remove the tart from the pan and transfer it to a serving plate.
Use a sharp knife to cut slices, wiping the knife clean between cuts for neat slices.
Tips:
For a more intense peppermint flavor, you can increase the amount of peppermint extract slightly, but be cautious as it can quickly become overpowering.
When crushing the candy canes or peppermint candies, use a sealed plastic bag and a rolling pin or mallet to prevent mess. If you prefer a less sweet tart, consider using bittersweet chocolate instead of dark chocolate.
Additionally, this tart can be made a day in advance, making it a great option for stress-free holiday entertaining.
Peppermint Meringue Cookies
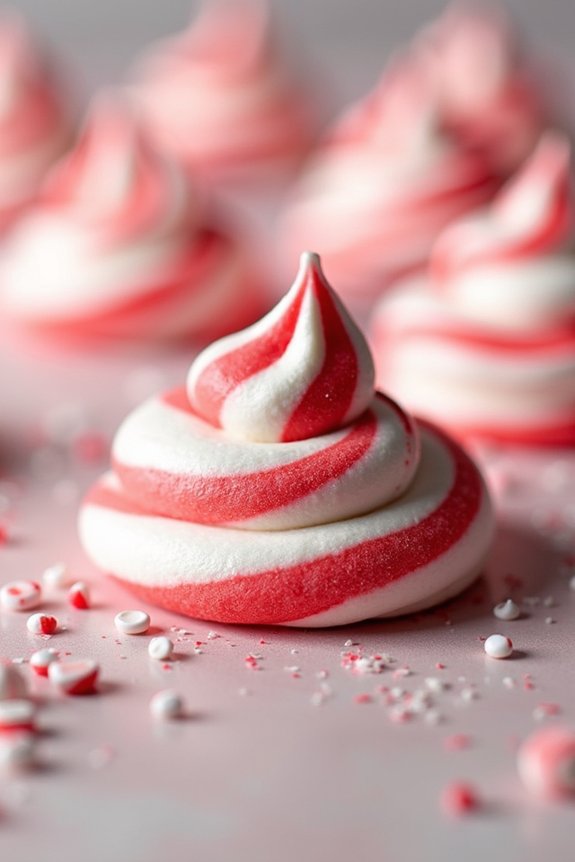
Peppermint Meringue Cookies are a delightful treat that perfectly capture the essence of the holiday season. With their crisp outer shell and soft, chewy interior, these festive cookies are infused with the invigorating taste of peppermint. They’re light, airy, and a perfect addition to any holiday dessert table.
Whether you’re hosting a Christmas party or looking for a festive homemade gift, these cookies are sure to impress.
These cookies aren’t only delicious but also visually appealing, thanks to the swirling red and white colors reminiscent of candy canes. The secret to achieving this effect lies in the careful folding of peppermint extract and red food coloring into the meringue.
These Peppermint Meringue Cookies are a wonderful way to add a touch of holiday cheer to your dessert repertoire, and they’re easy to make with just a few ingredients.
Ingredients (Serving Size: 4-6 people)
- 4 large egg whites
- 1 cup granulated sugar
- 1/2 teaspoon cream of tartar
- 1/4 teaspoon peppermint extract
- Red gel food coloring
Instructions
- Preheat and Prepare: Preheat your oven to 225°F (110°C). Line two baking sheets with parchment paper to prevent the meringues from sticking.
- Beat the Egg Whites: In a clean, dry bowl, beat the egg whites with an electric mixer on medium speed until they start to become frothy. Add the cream of tartar and continue to beat until soft peaks form.
- Add Sugar Gradually: Gradually add the granulated sugar, one tablespoon at a time, while continuing to beat on medium-high speed. Confirm each spoonful of sugar is completely dissolved before adding the next. This process should take about 5-7 minutes.
- Incorporate Peppermint Extract: Once the mixture is thick and glossy with stiff peaks, gently fold in the peppermint extract using a spatula. Be careful not to deflate the meringue.
- Add Gel Food Coloring: For the candy cane effect, add a few drops of red gel food coloring to the meringue. Use a toothpick to lightly swirl the color through the mixture, creating a marbled effect. Don’t over-mix.
- Pipe the Meringues: Transfer the meringue mixture into a piping bag fitted with a star tip. Pipe small mounds onto the prepared baking sheets, leaving about an inch between each cookie.
- Bake: Bake in the preheated oven for 1 hour. After baking, turn off the oven and let the meringues cool inside for another hour to confirm they dry out completely.
- Store: Once cooled, remove the meringues from the baking sheet. Store them in an airtight container to maintain their crispness until ready to serve.
Extra Tips
To confirm the perfect meringue, make sure your mixing bowl and beaters are completely clean and free of any grease, as even a small amount can prevent the egg whites from whipping properly.
Also, avoid making these cookies on a humid day, as moisture in the air can affect the texture. If you want to add an extra touch, consider dipping the bottoms of the cooled meringues in melted chocolate and letting them set before serving.