

Mornings can feel like a whirlwind, can’t they?
That’s why I’ve fallen in love with the simplicity of quick breakfast casseroles.
Whether you’re savoring a savory sausage and egg bake or treating yourself to a sweet cinnamon roll surprise, these dishes make mornings easier.
Plus, many can be prepped the night before, so they’re perfect for busy days.
Ready to discover cheesy hash brown goodness or a berry oatmeal treat? Let’s get started!
Savory Sausage and Egg Casserole

Savory Sausage and Egg Casserole is a delightful breakfast dish that combines the rich flavors of sausage, eggs, and cheese in a comforting and hearty casserole. Perfect for a family breakfast or brunch, this dish is both satisfying and easy to prepare.
The combination of savory sausage and creamy eggs, enhanced by the addition of cheese and optional vegetables, makes this casserole a crowd-pleaser that can be made ahead of time and baked fresh in the morning.
This recipe is designed to serve 4-6 people, making it ideal for a small gathering or a family meal. The casserole is versatile and can be customized with your favorite add-ins like mushrooms, spinach, or bell peppers to suit your taste preferences.
With simple ingredients and straightforward steps, you can have this delicious breakfast casserole ready in no time, leaving you free to enjoy your morning with less hassle.
Ingredients (serving size: 4-6 people):
- 1 pound ground breakfast sausage
- 6 large eggs
- 2 cups shredded cheddar cheese
- 2 cups milk
- 4 cups cubed bread (day-old or slightly stale)
- 1 teaspoon salt
- 1/2 teaspoon black pepper
- 1/2 teaspoon garlic powder
- 1/2 teaspoon onion powder
- 1/4 cup chopped green onions (optional)
- Butter or cooking spray for greasing the baking dish
Cooking Instructions:
- Preheat the Oven: Preheat your oven to 350°F (175°C). Grease a 9×13-inch baking dish with butter or cooking spray to prevent sticking.
- Cook the Sausage: In a large skillet, cook the ground breakfast sausage over medium heat until fully browned. Break it apart with a spoon as it cooks to guarantee it crumbles nicely. Once cooked, drain the excess fat and set aside.
- Prepare the Egg Mixture: In a large mixing bowl, whisk together the eggs, milk, salt, black pepper, garlic powder, and onion powder until well combined.
- Assemble the Casserole: Spread the cubed bread evenly in the prepared baking dish. Sprinkle the cooked sausage over the bread, followed by the shredded cheddar cheese. Pour the egg mixture evenly over the top. If using, sprinkle the chopped green onions over the casserole.
- Bake: Place the casserole in the preheated oven and bake for 40-45 minutes, or until the eggs are fully set and the top is golden brown. A knife inserted into the center should come out clean.
- Cool and Serve: Allow the casserole to cool for about 5 minutes before serving. This rest time helps the casserole set and makes it easier to cut into portions.
Extra Tips:
When preparing the Savory Sausage and Egg Casserole, consider using day-old bread as it absorbs the egg mixture better, resulting in a more cohesive casserole.
Feel free to experiment with different cheeses, such as mozzarella or pepper jack, for added flavor complexity. For a healthier twist, use turkey sausage and add a variety of vegetables like bell peppers or spinach.
If you want to prepare this dish in advance, assemble the casserole the night before and store it in the refrigerator, then bake it fresh in the morning for a convenient and delicious breakfast.
Delicious Cheesy Hash Brown Breakfast Bake

Delicious Cheesy Hash Brown Breakfast Bake is the perfect comfort food to start your morning right. This savory, cheesy dish is packed with flavors that everyone will love, making it an ideal choice for family breakfasts or brunch gatherings. The combination of crispy hash browns, melted cheese, and savory sausage or bacon creates a mouthwatering medley that satisfies the palate while providing a hearty meal to fuel your day.
This breakfast bake isn’t only delicious but also incredibly convenient. It can be prepared ahead of time, making it a go-to recipe for busy mornings or when you have guests over. The golden, bubbly cheese topping adds a delightful texture contrast to the creamy interior, and you can customize the dish with your choice of additional vegetables or seasonings to suit your taste. With a serving size that caters to 4-6 people, it’s perfect for sharing with loved ones.
Ingredients (serving size: 4-6 people):
- 1 pound frozen hash browns
- 1 pound breakfast sausage or bacon, cooked and crumbled
- 6 large eggs
- 2 cups shredded cheddar cheese
- 1 cup milk
- 1/2 cup chopped onion
- 1/2 cup chopped bell pepper
- 1 teaspoon salt
- 1/2 teaspoon black pepper
- 1/2 teaspoon garlic powder
Cooking Instructions:
- Preheat the Oven: Start by preheating your oven to 375°F (190°C) to guarantee it reaches the right temperature by the time your dish is assembled.
- Prepare the Baking Dish: Lightly grease a 9×13-inch baking dish with cooking spray or butter to prevent sticking and guarantee easy cleanup.
- Layer the Hash Browns: Spread the frozen hash browns evenly in the bottom of the prepared baking dish. This forms the base layer of your casserole.
- Add the Protein: Sprinkle the cooked and crumbled sausage or bacon over the hash browns, distributing it evenly to guarantee every bite has some protein.
- Mix the Egg Mixture: In a large bowl, whisk together the eggs, milk, salt, pepper, and garlic powder until the mixture is well blended.
- Add Vegetables: Stir in the chopped onion and bell pepper into the egg mixture, guaranteeing they’re evenly distributed for added flavor and texture.
- Assemble the Casserole: Pour the egg mixture over the hash browns and sausage in the baking dish. Use a spatula to gently press down and guarantee the liquid covers all the layers.
- Top with Cheese: Sprinkle the shredded cheddar cheese evenly over the top of the casserole. The cheese will melt and form a delicious, golden crust during baking.
- Bake: Place the dish in the preheated oven and bake for 40-45 minutes, or until the eggs are set and the top is golden brown. You can check doneness by inserting a knife into the center; it should come out clean.
- Cool and Serve: Allow the casserole to cool for a few minutes before slicing. Serve warm and enjoy!
Extra Tips:
For an extra burst of flavor, consider adding a dash of hot sauce or a sprinkle of paprika to the egg mixture. You can also mix in other vegetables like mushrooms or spinach for added nutrition. This dish can be prepared the night before; simply cover and refrigerate, then bake in the morning. If you find the top browning too quickly, loosely cover with foil midway through baking. Enjoy experimenting with different cheeses like Monterey Jack or pepper jack for a different taste profile.
Indulgent Classic French Toast Casserole
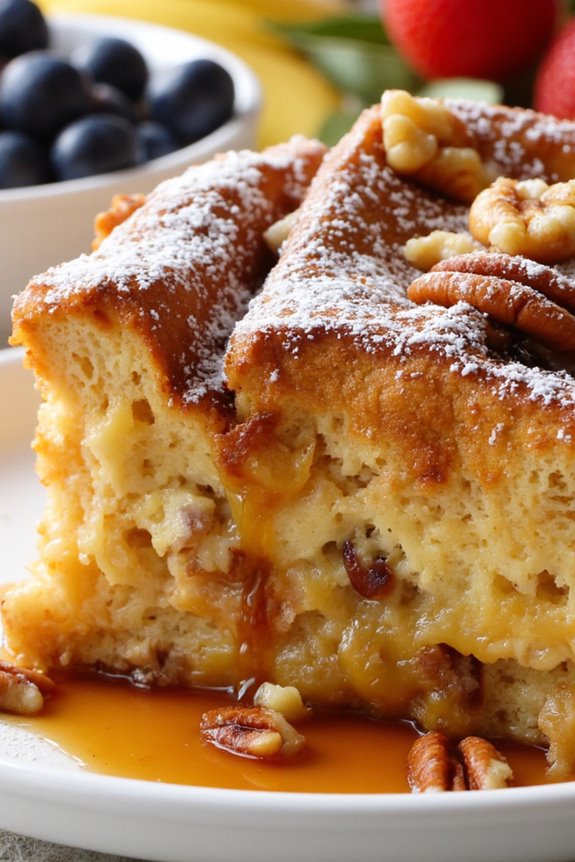
Indulgent Classic French Toast Casserole is a delightful twist on the traditional French toast that offers a rich and satisfying start to your day. This dish combines the comforting flavors of cinnamon and vanilla with the soft, custard-like texture of baked bread. It’s perfect for a cozy family breakfast or a special brunch occasion.
With its golden, crispy top and soft, creamy center, this casserole is sure to please everyone at the table. The best part is you can prepare it the night before, allowing the bread to soak up all the flavors and making your morning stress-free.
This recipe is designed to serve 4-6 people, making it an excellent choice for a small gathering or family meal. Using simple, readily available ingredients, this French toast casserole is both easy to prepare and utterly indulgent. The combination of sweet and savory elements guarantees that each bite is a delightful experience, perfect for pairing with fresh fruits, maple syrup, or a dusting of powdered sugar.
Let’s explore the ingredients and steps needed to create this scrumptious breakfast dish.
Ingredients (Serves 4-6):
- 1 loaf of brioche or challah bread (about 12 slices)
- 6 large eggs
- 2 cups whole milk
- 1/2 cup heavy cream
- 1/2 cup granulated sugar
- 1/4 cup packed brown sugar
- 1 tablespoon vanilla extract
- 1 teaspoon ground cinnamon
- 1/4 teaspoon ground nutmeg
- 1/4 teaspoon salt
- 1/2 cup chopped pecans or walnuts (optional)
- 1/4 cup unsalted butter, melted
- Maple syrup and powdered sugar for serving
Cooking Instructions:
- Prepare the Bread: Start by slicing the brioche or challah bread into thick slices, about 1 inch each. Arrange them in a greased 9×13 inch baking dish, overlapping them slightly to fit.
- Make the Custard Mixture: In a large mixing bowl, whisk together the eggs, whole milk, heavy cream, granulated sugar, brown sugar, vanilla extract, cinnamon, nutmeg, and salt until well combined.
- Soak the Bread: Pour the custard mixture evenly over the bread slices in the baking dish, making sure all the bread is well soaked. If using, sprinkle the chopped pecans or walnuts on top. Cover the dish with plastic wrap or aluminum foil and refrigerate for at least 3 hours, or preferably overnight, to allow the bread to absorb the custard.
- Preheat the Oven: When ready to bake, preheat your oven to 350°F (175°C). Remove the casserole from the refrigerator and let it sit at room temperature while the oven heats.
- Bake the Casserole: Drizzle the melted butter over the top of the casserole. Cover the dish with aluminum foil and bake for 30 minutes. Remove the foil and bake for an additional 20-25 minutes, or until the top is golden brown and the custard is set.
- Serve: Allow the casserole to cool for a few minutes before serving. Cut into squares and serve with maple syrup and a dusting of powdered sugar if desired.
Extra Tips:
For the best results, opt for slightly stale bread, which will absorb the custard better. If you only have fresh bread, you can dry the slices in a low oven for about 10 minutes before using.
Feel free to customize this dish by adding your favorite fruits like blueberries or sliced bananas before baking. For a more decadent version, add a swirl of cream cheese or chocolate chips to the custard mixture.
Hearty Veggie and Cheese Strata

Hearty Veggie and Cheese Strata is a delicious and satisfying breakfast casserole that’s perfect for feeding a crowd or enjoying with your family over a leisurely weekend breakfast. This dish combines layers of crusty bread, fresh vegetables, and a variety of cheeses, all soaked in a rich, savory egg custard. The result is a comforting, flavorful meal that’s both filling and nutritious.
Whether you’re hosting a brunch or simply want to prepare a hearty breakfast in advance, this strata is bound to be a hit. This recipe is versatile, allowing you to customize the vegetables and cheeses to suit your taste preferences or whatever you have on hand. Feel free to experiment with different combinations of veggies such as spinach, mushrooms, or bell peppers, and cheeses like cheddar, mozzarella, or feta.
The strata can be prepared the night before and baked fresh in the morning, making it an ideal choice for busy mornings. Gather your ingredients and let’s get started on this delicious breakfast dish.
Ingredients for 4-6 servings:
- 1 loaf of crusty bread (about 1 pound), cut into 1-inch cubes
- 1 cup shredded cheddar cheese
- 1 cup shredded mozzarella cheese
- 1 cup cherry tomatoes, halved
- 1 cup fresh spinach, roughly chopped
- 1/2 cup bell peppers, diced
- 1/2 cup mushrooms, sliced
- 8 large eggs
- 2 cups milk
- 1 teaspoon salt
- 1/2 teaspoon black pepper
- 1/2 teaspoon garlic powder
- 1/2 teaspoon onion powder
- 2 tablespoons olive oil
- 2 tablespoons fresh parsley, chopped
Cooking Instructions:
1. Prepare the Bread and Vegetables: Preheat your oven to 350°F (175°C). Spread the bread cubes on a baking sheet and toast for about 10 minutes, until lightly golden.
Meanwhile, heat olive oil in a skillet over medium heat. Sauté the bell peppers and mushrooms for about 5 minutes until softened. Add the spinach and cook for another 2 minutes until wilted. Remove from heat and set aside.
2. Assemble the Strata: In a large mixing bowl, whisk together the eggs, milk, salt, pepper, garlic powder, and onion powder until well combined.
In a greased 9×13-inch baking dish, layer half of the toasted bread cubes, half of the sautéed vegetables, half of the cherry tomatoes, and half of the cheddar and mozzarella cheeses. Repeat the layers with the remaining ingredients.
3. Add the Egg Mixture****: Pour the egg mixture evenly over the layered bread, vegetables, and cheese in the baking dish. Gently press down on the mixture with a spatula to guarantee the bread is fully soaked in the egg mixture.
4. Bake the Strata: Cover the baking dish with aluminum foil and bake in the preheated oven for 30 minutes. Remove the foil and bake for an additional 15-20 minutes, or until the top is golden brown and the custard is set in the center. A knife inserted into the center should come out clean.
5. Garnish and Serve: Once baked, remove the strata from the oven and let it rest for a few minutes. Sprinkle with fresh parsley before serving. Enjoy your hearty veggie and cheese strata warm.
Extra Tips:
For best results, use a day-old loaf of bread as it will better absorb the egg mixture without becoming too soggy. You can also prepare the strata the night before by assembling it and allowing it to rest in the refrigerator overnight, which helps the flavors meld together.
If you prefer a spicier version, consider adding a pinch of red pepper flakes or a few dashes of hot sauce to the egg mixture. This dish pairs wonderfully with a side of fresh fruit or a simple green salad.
Ham and Swiss Croissant Casserole

Ham and Swiss Croissant Casserole is a delightful breakfast dish that combines the flaky goodness of croissants with the savory flavors of ham and Swiss cheese. It’s perfect for family brunches or weekend gatherings, offering a warm and satisfying start to the day.
The combination of buttery croissants, salty ham, and creamy Swiss cheese creates a harmonious blend that will please any crowd. This casserole isn’t only simple to prepare but also allows you to make it ahead of time, so you can relax and enjoy your morning without any rush.
This recipe is designed to serve 4-6 people and is sure to be a hit at your breakfast table. The casserole is layered with pieces of croissants, ham, and cheese, then topped with a rich custard mix that binds everything together as it bakes to golden perfection.
Whether you’re serving it for a special occasion or just want to treat your family to a hearty breakfast, this Ham and Swiss Croissant Casserole won’t disappoint.
Ingredients:
- 4 large croissants, roughly torn into pieces
- 1 ½ cups diced cooked ham
- 1 ½ cups shredded Swiss cheese
- 6 large eggs
- 1 cup whole milk
- 1 cup heavy cream
- 1 tablespoon Dijon mustard
- 1 teaspoon salt
- ½ teaspoon black pepper
- ½ teaspoon garlic powder
- ½ teaspoon onion powder
- 2 tablespoons chopped fresh chives (optional)
Instructions:
- Prepare the Oven and Dish: Preheat your oven to 350°F (175°C). Grease a 9×13-inch baking dish with butter or nonstick spray to guarantee the casserole doesn’t stick.
- Layer the Ingredients: Spread the torn croissant pieces evenly in the baking dish. Sprinkle the diced ham and shredded Swiss cheese over the croissants, making sure they’re evenly distributed.
- Make the Custard Mixture: In a large mixing bowl, whisk together the eggs, milk, heavy cream, Dijon mustard, salt, black pepper, garlic powder, and onion powder until well combined.
- Assemble the Casserole: Pour the custard mixture evenly over the layered croissants, ham, and cheese in the baking dish. Gently press down with a spatula to guarantee the bread absorbs the liquid.
- Optional Chilling: Cover the dish with foil and refrigerate for at least 30 minutes to allow the custard to soak into the croissants. This step can be skipped if you’re short on time, but it helps enhance flavors.
- Bake the Casserole: Remove the foil and bake in the preheated oven for 35-40 minutes, or until the casserole is puffed and golden brown on top. A knife inserted into the center should come out clean.
- Garnish and Serve: Let the casserole cool for about 5 minutes before cutting. Garnish with chopped chives, if desired, and serve warm.
Extra Tips:
For added flavor, consider adding a pinch of nutmeg to the custard mixture. If Swiss cheese isn’t your favorite, Gruyère or cheddar can be used as alternatives.
This casserole is ideal for preparing the night before; simply assemble and refrigerate overnight, then bake in the morning. To guarantee even cooking, allow the chilled casserole to sit at room temperature for about 15 minutes before baking.
This dish can be customized by adding vegetables like spinach or mushrooms for an extra nutritional boost.
Banana Bread Pudding Delight
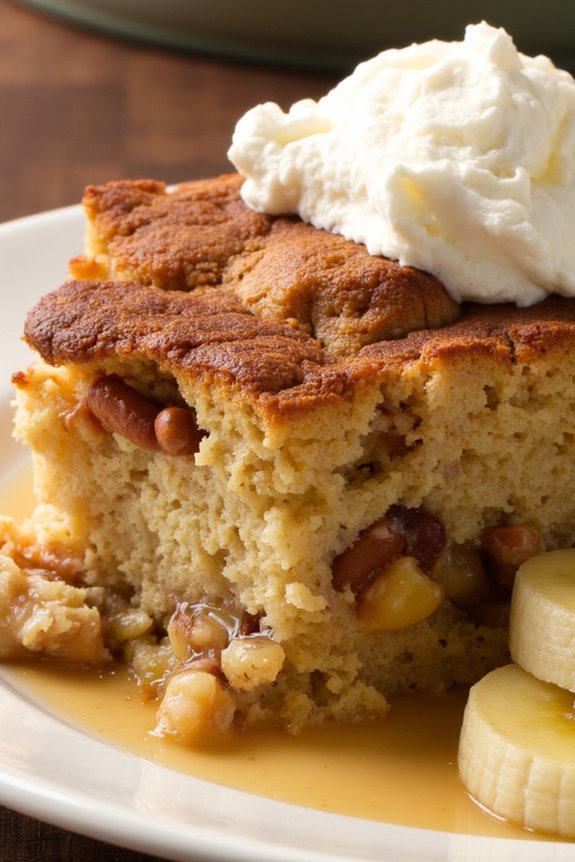
Banana Bread Pudding Delight is a scrumptious breakfast casserole dish that combines the classic flavors of banana bread with the creamy texture of bread pudding. This delightful dish is perfect for a leisurely weekend breakfast or a special brunch gathering. The combination of ripe bananas, warm spices, and a rich custard creates a comforting and indulgent dish that will please both young and old alike.
Whether you serve it warm from the oven or enjoy it chilled, this Banana Bread Pudding Delight is bound to become a family favorite.
This recipe takes advantage of overripe bananas, turning them into a flavorful base that soaks into cubes of bread, creating a moist and tender texture. The addition of cinnamon and vanilla enhances the natural sweetness of the bananas, while a sprinkle of nuts adds a delightful crunch.
With a serving size of 4-6 people, this dish is perfect for a small gathering or family breakfast. Prepare it the night before and bake it in the morning for a hassle-free and delicious start to your day.
Ingredients for 4-6 servings:
- 4 cups of cubed stale bread (such as French bread or brioche)
- 3 ripe bananas, mashed
- 4 large eggs
- 2 cups of whole milk
- 1/2 cup of granulated sugar
- 1 teaspoon of vanilla extract
- 1 teaspoon of ground cinnamon
- 1/4 teaspoon of salt
- 1/2 cup of chopped nuts (such as walnuts or pecans)
- 2 tablespoons of melted butter
Cooking Instructions:
- Preheat the Oven: Start by preheating your oven to 350°F (175°C). This guarantees that the oven is hot and ready by the time your dish is assembled and ready to bake.
- Prepare the Bread: Cube the stale bread into approximately 1-inch pieces and place them in a large mixing bowl. If your bread is fresh, you can dry it out by toasting it lightly in the oven.
- Mix Wet Ingredients: In a separate bowl, whisk together the mashed bananas, eggs, milk, sugar, vanilla extract, cinnamon, and salt until well combined. This mixture will serve as the custard base for the pudding.
- Combine Bread and Custard: Pour the wet mixture over the cubed bread, making sure that all pieces are evenly coated. Gently fold in the chopped nuts, being careful not to break up the bread too much.
- Let it Soak: Allow the bread to soak in the custard for at least 15-20 minutes. This step is vital as it allows the bread to absorb the flavors and moisture, resulting in a more cohesive pudding.
- Prepare the Baking Dish: Grease a 9×13-inch baking dish with the melted butter. This will help prevent sticking and add extra flavor to the pudding.
- Transfer to Baking Dish: Pour the soaked bread mixture into the prepared baking dish, spreading it out evenly. Press down gently to guarantee a compact layer.
- Bake: Place the baking dish in the preheated oven and bake for 45-50 minutes, or until the top is golden brown and the custard is set. A knife inserted into the center should come out clean.
- Cool Slightly and Serve: Allow the pudding to cool for about 10 minutes before serving. This rest period helps the flavors meld together and makes it easier to cut into portions.
Extra Tips:
For an extra indulgent touch, drizzle some maple syrup or caramel sauce over the top before serving. If you prefer a more pronounced banana flavor, consider adding a teaspoon of banana extract to the custard mixture.
To make the dish ahead of time, assemble it the night before and refrigerate overnight. In the morning, simply pop it in the oven and bake as directed. Additionally, feel free to customize the nuts or add raisins or chocolate chips for a unique twist on this classic recipe.
Spinach and Feta Breakfast Casserole

Spinach and Feta Breakfast Casserole is a delicious and nutritious dish perfect for a hearty breakfast or brunch. This casserole combines the savory flavors of spinach and feta cheese with eggs, creating a creamy and flavorful meal that will delight your taste buds. It’s an excellent option for those who love starting their day with a protein-rich breakfast.
Plus, this dish can be made ahead of time, making it convenient for busy mornings. The combination of fresh spinach and tangy feta cheese creates a wonderful contrast of flavors that’s both satisfying and wholesome. The eggs provide a fluffy texture that binds the ingredients together, while the addition of herbs and spices enhances the overall taste.
This breakfast casserole isn’t only easy to make but also a great way to incorporate more greens into your diet. Perfect for serving a small family or a group of friends, this recipe will surely become a favorite in your breakfast repertoire.
Ingredients (serving size: 4-6 people):
- 1 tablespoon olive oil
- 1 small onion, chopped
- 2 cloves garlic, minced
- 6 cups fresh spinach leaves
- 8 large eggs
- 1 cup milk
- 1 teaspoon salt
- 1/2 teaspoon black pepper
- 1/4 teaspoon nutmeg
- 1 cup crumbled feta cheese
- 1/2 cup grated Parmesan cheese
- 1/2 cup cherry tomatoes, halved
- 1/4 cup fresh dill, chopped
- 1 cup bread cubes (preferably day-old)
Cooking Instructions:
- Preheat and Prepare: Preheat your oven to 375°F (190°C). Lightly grease a 9×13 inch baking dish with olive oil or non-stick cooking spray.
- Sauté Vegetables: In a large skillet, heat olive oil over medium heat. Add the chopped onion and sauté until it becomes translucent, about 3-4 minutes. Add the minced garlic and cook for another 1 minute until fragrant.
- Wilt the Spinach: Add the fresh spinach leaves to the skillet and cook until wilted, about 2-3 minutes. Remove from heat and set aside.
- Mix Eggs and Dairy: In a large mixing bowl, whisk together the eggs, milk, salt, black pepper, and nutmeg until well combined.
- Assemble the Casserole: In the prepared baking dish, spread the sautéed spinach mixture evenly. Sprinkle the crumbled feta cheese, grated Parmesan cheese, halved cherry tomatoes, and chopped dill over the spinach. Distribute the bread cubes evenly on top.
- Pour Egg Mixture: Pour the egg mixture over the ingredients in the baking dish, ensuring that the bread cubes are soaked and everything is evenly covered.
- Bake: Place the baking dish in the preheated oven and bake for 30-35 minutes, or until the eggs are set and the top is golden brown.
- Cool and Serve: Once baked, remove the casserole from the oven and let it cool for a few minutes before serving. Slice and serve warm.
Extra Tips:
For best results, use day-old bread, as it will absorb the egg mixture better and provide a firmer texture in the casserole. Feel free to customize this recipe by adding other ingredients like mushrooms, bell peppers, or cooked bacon for additional flavor.
If you prefer a more pronounced cheese flavor, consider using a sharper cheese like cheddar in combination with feta. This casserole can also be made ahead of time—assemble it the night before and refrigerate, then simply bake in the morning. Enjoy this versatile dish with a side of fresh fruit or a light salad for a complete meal.
Sweet Cinnamon Roll Casserole

Sweet Cinnamon Roll Casserole is a delightful breakfast dish that combines the comforting flavors of traditional cinnamon rolls with the convenience of a casserole. This dish is perfect for a weekend brunch or a special holiday breakfast with family and friends. The sweet, gooey texture paired with the warm aroma of cinnamon makes it a crowd-pleaser, loved by both adults and children alike.
Easy to prepare, this casserole allows you to spend more time enjoying your meal and less time in the kitchen. The beauty of the Sweet Cinnamon Roll Casserole lies in its simplicity. You don’t need to make dough from scratch, as refrigerated cinnamon rolls form the base of this recipe. Combined with a creamy egg mixture and topped with a drizzle of icing, this dish is both indulgent and satisfying. It serves 4-6 people, making it ideal for a small gathering or a family breakfast.
Let’s explore the ingredients and steps needed to create this delectable dish.
Ingredients for 4-6 Servings:
- 2 cans (12.4 oz each) refrigerated cinnamon rolls with icing
- 4 large eggs
- 1/2 cup heavy cream
- 2 teaspoons ground cinnamon
- 1 teaspoon vanilla extract
- 1/4 cup maple syrup
- 1/2 cup chopped pecans (optional)
Cooking Instructions:
- Preheat the Oven: Start by preheating your oven to 375°F (190°C) to guarantee it’s hot and ready to bake the casserole.
- Prepare the Baking Dish: Lightly grease a 9×13-inch baking dish with cooking spray or butter to prevent the casserole from sticking.
- Cut the Cinnamon Rolls: Open the cans of refrigerated cinnamon rolls and set aside the icing. Cut each cinnamon roll into quarters and spread them evenly in the prepared baking dish.
- Mix the Egg Mixture: In a medium bowl, whisk together the eggs, heavy cream, ground cinnamon, vanilla extract, and maple syrup until well combined.
- Pour Over Cinnamon Rolls: Pour the egg mixture evenly over the cut-up cinnamon rolls in the baking dish, guaranteeing all pieces are coated. Sprinkle chopped pecans on top if using.
- Bake the Casserole: Place the baking dish in the preheated oven and bake for 25-30 minutes or until the cinnamon rolls are golden brown and the egg mixture is set.
- Add the Icing: Once baked, remove the casserole from the oven and let it cool for a few minutes. Drizzle the reserved icing from the cinnamon roll packages evenly over the top of the casserole.
- Serve and Enjoy: Slice the casserole into portions and serve warm. Enjoy the sweet, comforting flavors of your homemade cinnamon roll casserole.
Extra Tips:
For an extra touch of flavor, consider adding some raisins or dried cranberries to the casserole before baking. If you prefer a more decadent dish, you can substitute the heavy cream with half-and-half or whole milk.
The casserole can be prepared the night before and stored in the refrigerator; simply bake it fresh in the morning for a hassle-free breakfast. Remember, the key to a perfect Sweet Cinnamon Roll Casserole is allowing the egg mixture to soak into the cinnamon rolls, guaranteeing a rich and creamy texture.
Southwestern Chorizo Breakfast Bake

The Southwestern Chorizo Breakfast Bake is a delightful and hearty dish that brings together the bold flavors of the Southwest into a comforting casserole. Perfect for a weekend brunch or a special occasion breakfast, this dish combines spicy chorizo, fluffy eggs, and a medley of vegetables and spices to create a savory treat that will satisfy any appetite.
The addition of cheese and crispy tortilla chips adds a delightful texture and richness, making each bite a delicious experience. This breakfast bake isn’t only flavorful but also versatile, allowing you to easily adjust the ingredients to suit your taste or dietary needs.
Whether you’re preparing it for a family gathering or a simple breakfast at home, the Southwestern Chorizo Breakfast Bake is sure to impress. Serve it with a side of fresh fruit or a dollop of sour cream to balance the spice and add a rejuvenating touch to the meal.
Ingredients (Serves 4-6):
- 1 pound chorizo sausage
- 1 tablespoon olive oil
- 1 small onion, diced
- 1 red bell pepper, diced
- 1 green bell pepper, diced
- 2 cloves garlic, minced
- 8 large eggs
- 1/2 cup milk
- 1 teaspoon ground cumin
- 1 teaspoon smoked paprika
- 1/2 teaspoon salt
- 1/4 teaspoon black pepper
- 2 cups shredded cheddar cheese
- 2 cups crushed tortilla chips
- 1/4 cup chopped fresh cilantro
- Optional toppings: sliced avocado, salsa, sour cream
Cooking Instructions:
- Preheat Oven: Preheat your oven to 375°F (190°C). This guarantees that it reaches the right temperature by the time you’re ready to bake the casserole.
- Cook Chorizo: In a large skillet over medium heat, cook the chorizo until browned, about 5-7 minutes. Use a wooden spoon to break it apart as it cooks. Once done, remove the chorizo from the skillet and set it aside on a paper towel-lined plate to drain excess grease.
- Sauté Vegetables: In the same skillet, add olive oil, and sauté the diced onion, red bell pepper, and green bell pepper until softened, about 4-5 minutes. Add the minced garlic and cook for an additional minute.
- Prepare Egg Mixture: In a large bowl, whisk together the eggs, milk, ground cumin, smoked paprika, salt, and black pepper until well combined.
- Combine Ingredients: Grease a 9×13-inch baking dish. Layer the cooked chorizo, sautéed vegetables, and crushed tortilla chips in the dish. Pour the egg mixture over the layered ingredients, ensuring it spreads evenly.
- Add Cheese: Sprinkle the shredded cheddar cheese on top of the egg mixture, making sure it covers the entire surface of the casserole.
- Bake: Place the baking dish in the preheated oven and bake for 25-30 minutes, or until the eggs are set and the cheese is bubbly and golden brown.
- Garnish and Serve: Once baked, remove the casserole from the oven and let it cool slightly. Sprinkle with chopped fresh cilantro before serving. Add optional toppings such as sliced avocado, salsa, or sour cream for added flavor.
Extra Tips:
For a spicier kick, consider adding chopped jalapeños or a dash of hot sauce to the egg mixture. You can also substitute the chorizo with a vegetarian sausage for a meat-free option.
If you prefer a creamier texture, replace half of the milk with heavy cream. This dish can be prepared the night before and baked in the morning, making it an excellent choice for a stress-free breakfast.
Adjust the level of cheese and spices to suit your personal preference, and feel free to experiment with additional vegetables like zucchini or mushrooms to enhance the nutritional value.
Fluffy Blueberry Pancake Casserole

Fluffy Blueberry Pancake Casserole is a delightful twist on traditional pancakes, offering a deliciously layered breakfast option perfect for weekend brunches or special occasions. This casserole combines the light and airy texture of pancakes with the sweet, juicy burst of blueberries, all baked to perfection in one easy dish. The result is a warm, comforting meal that can be served directly from the oven, making it ideal for feeding a family or a small gathering.
Preparing Fluffy Blueberry Pancake Casserole requires minimal effort and uses simple ingredients you likely already have in your pantry. The magic of this dish lies in the combination of the pancake batter with fresh or frozen blueberries, which add a pop of flavor and color.
Once baked, the casserole can be served as is or topped with maple syrup, whipped cream, or additional fresh fruits to create a breakfast that’s both satisfying and visually appealing.
Ingredients (for 4-6 servings):
- 2 cups all-purpose flour
- 2 tablespoons granulated sugar
- 1 tablespoon baking powder
- 1/2 teaspoon salt
- 2 large eggs
- 1 1/2 cups milk
- 1 teaspoon vanilla extract
- 4 tablespoons unsalted butter, melted
- 1 1/2 cups fresh or frozen blueberries
- Cooking spray or additional butter for greasing the baking dish
Cooking Instructions:
- Preheat the Oven: Start by preheating your oven to 350°F (175°C). This will guarantee the casserole bakes evenly once it’s prepared.
- Mix the Dry Ingredients: In a large mixing bowl, combine the flour, sugar, baking powder, and salt. Stir well to make sure all the ingredients are evenly distributed.
- Prepare the Wet Ingredients: In a separate bowl, whisk together the eggs, milk, and vanilla extract until the mixture is smooth. Gradually pour in the melted butter while continuing to whisk.
- Combine Wet and Dry Ingredients: Slowly add the wet ingredients to the dry ingredients, stirring gently until just combined. Be careful not to overmix, as this can cause the casserole to become dense rather than fluffy.
- Fold in Blueberries: Gently fold in the blueberries, making sure they’re evenly distributed throughout the batter. If using frozen blueberries, don’t thaw them before adding to the mixture.
- Prepare the Baking Dish: Lightly grease a 9×13-inch baking dish with cooking spray or butter to prevent sticking.
- Pour and Spread the Batter: Pour the pancake batter into the prepared baking dish and spread it out evenly using a spatula.
- Bake the Casserole: Place the dish in the preheated oven and bake for 25-30 minutes, or until the top is golden brown and a toothpick inserted into the center comes out clean.
- Cool and Serve: Allow the casserole to cool slightly before cutting into squares and serving. Top with your favorite pancake toppings if desired.
Extra Tips:
For an extra burst of flavor, consider adding a teaspoon of lemon zest to the batter, which pairs beautifully with blueberries. If you prefer a sweeter casserole, increase the sugar by an additional tablespoon.
Additionally, if you’re using frozen blueberries, toss them in a tablespoon of flour before folding them into the batter to prevent them from sinking to the bottom of the dish. This casserole can be prepared the night before and stored in the refrigerator, then baked fresh in the morning, making it a convenient option for busy mornings.
Berry Oatmeal Breakfast Casserole
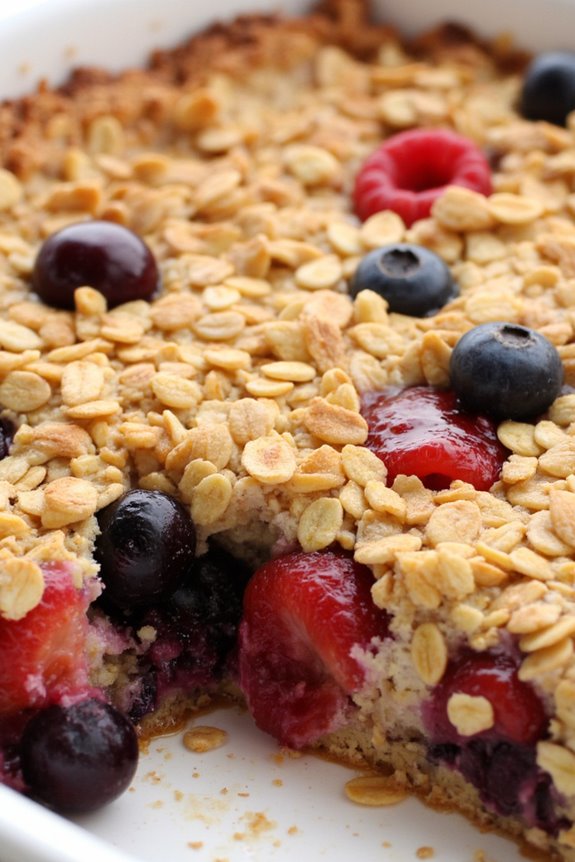
Berry Oatmeal Breakfast Casserole is a delightful and nutritious way to kickstart your morning. This hearty dish combines the comforting flavors of oats with the natural sweetness of fresh berries, making it a perfect breakfast option for those who enjoy a wholesome start to their day.
The casserole is both filling and easy to prepare, offering a blend of flavors that are certain to please everyone at the breakfast table. This Berry Oatmeal Breakfast Casserole is ideal for feeding a family or a small group of 4-6 people.
The preparation involves assembling oats, berries, and a few other simple ingredients, baking them to perfection for a warm and satisfying meal. Not only is it delicious, but it also packs a nutritional punch with the inclusion of fiber-rich oats and antioxidant-loaded berries.
Ingredients (Serves 4-6):
- 2 cups rolled oats
- 1 teaspoon baking powder
- 1/2 teaspoon salt
- 1 teaspoon ground cinnamon
- 2 cups milk (dairy or non-dairy)
- 1/4 cup honey or maple syrup
- 2 large eggs
- 1 teaspoon vanilla extract
- 2 cups mixed berries (such as blueberries, raspberries, and strawberries)
- 1/2 cup chopped nuts (such as walnuts or almonds)
- 1 tablespoon butter or coconut oil, for greasing
Cooking Instructions:
- Preheat the Oven: Start by preheating your oven to 375°F (190°C). This guarantees that the casserole bakes evenly once it’s assembled.
- Prepare the Baking Dish: Grease a 9×13-inch baking dish with butter or coconut oil to prevent sticking. This will make serving and clean-up much easier.
- Mix Dry Ingredients: In a large bowl, combine the rolled oats, baking powder, salt, and ground cinnamon. Stir well to confirm the baking powder and cinnamon are evenly distributed throughout the oats.
- Combine Wet Ingredients: In another bowl, whisk together the milk, honey or maple syrup, eggs, and vanilla extract. Make sure everything is thoroughly mixed for a smooth consistency.
- Assemble the Casserole: Pour the dry oat mixture into the prepared baking dish. Evenly distribute the mixed berries and chopped nuts over the oats. Gently pour the wet mixture over the top, ensuring all the oats are submerged.
- Bake the Casserole: Place the assembled dish in the preheated oven and bake for 35-40 minutes, or until the top is golden brown and the oats have absorbed the liquid.
- Cool and Serve: Remove the casserole from the oven and let it cool for a few minutes before serving. This allows the oats to set slightly, making it easier to slice and serve.
Extra Tips:
For an even more flavor-packed dish, consider adding a pinch of nutmeg or cardamom to the oat mixture. If you prefer a sweeter casserole, you can increase the amount of honey or maple syrup.
This dish is also versatile—feel free to use whatever berries or nuts you have on hand. For a dairy-free version, use almond milk or any other plant-based milk alternative.
Leftovers can be stored in the refrigerator for up to three days and reheated in the oven or microwave for a quick and easy breakfast option.