

As the holiday season approaches, baking red velvet Christmas cookies becomes an exciting tradition. These cookies are not only delicious but also a feast for the eyes, adding a touch of elegance to any gathering. From crinkle cookies to linzer variations, there’s a unique twist in each recipe. The thought of pairing them with hot cocoa on a cozy winter evening makes my heart warm. Ready to explore these delightful recipes?
Classic Red Velvet Crinkle Cookies
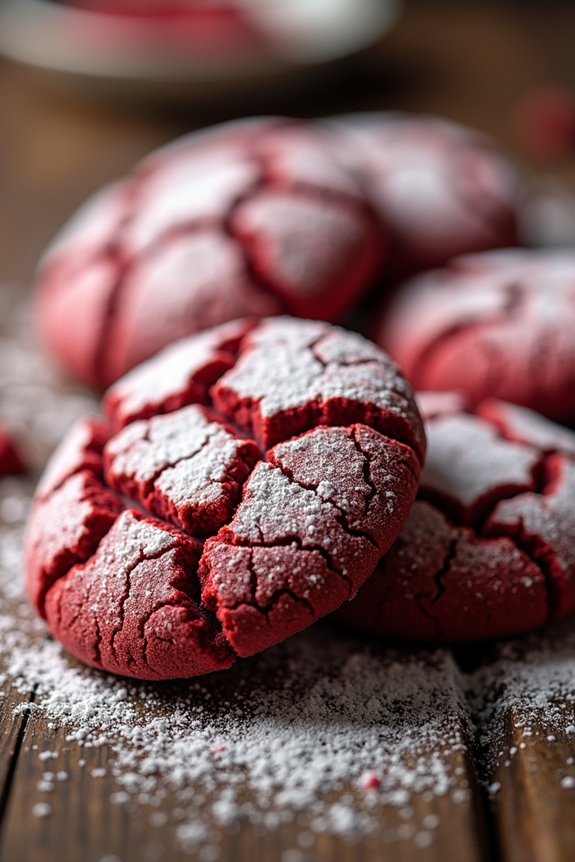
Red velvet crinkle cookies are a delightful fusion of the classic red velvet cake and the irresistible charm of crinkle cookies. These cookies offer a soft, chewy center with a slightly crisp exterior, making them perfect for holiday gatherings or festive celebrations. Their deep red hue, contrasted by the white powdered sugar coating, makes them visually striking and a treat for both the eyes and the taste buds.
Perfect for sharing, this recipe yields enough to serve 4-6 people, guaranteeing everyone gets a taste of these delectable cookies. The cocoa-infused dough, paired with a hint of vanilla, creates a rich and flavorful base that’s both comforting and indulgent. Whether you’re an experienced baker or a novice, these cookies are straightforward to prepare and promise to impress.
Ingredients for 4-6 servings:
- 1 1/4 cups all-purpose flour
- 1/4 cup unsweetened cocoa powder
- 1 teaspoon baking powder
- 1/4 teaspoon salt
- 1/2 cup unsalted butter, softened
- 3/4 cup granulated sugar
- 1 large egg
- 1 teaspoon vanilla extract
- 1 tablespoon red food coloring
- 1/2 cup powdered sugar
Cooking Instructions:
- Preheat the Oven: Start by preheating your oven to 350°F (175°C). Line two baking sheets with parchment paper to prepare them for baking.
- Mix Dry Ingredients: In a medium-sized bowl, whisk together the all-purpose flour, cocoa powder, baking powder, and salt. This guarantees that all the dry ingredients are well combined and will help the cookies bake evenly.
- Cream Butter and Sugar: In a large mixing bowl, use an electric mixer to cream the softened butter and granulated sugar together until light and fluffy. This process should take about 2-3 minutes.
- Add Wet Ingredients: Beat the egg into the butter and sugar mixture, followed by the vanilla extract and red food coloring. Mix until the ingredients are fully incorporated and the batter is evenly red.
- Combine Wet and Dry Ingredients: Gradually add the dry ingredient mixture into the wet ingredients, mixing on low speed until just combined. Avoid not to overmix to avoid tough cookies.
- Chill the Dough: Cover the bowl with plastic wrap and chill the dough in the refrigerator for at least 1 hour. This step is essential for achieving that classic crinkle effect.
- Shape the Cookies: Once chilled, use a tablespoon to scoop out the dough and roll it into balls. Roll each ball in powdered sugar until fully coated.
- Bake: Place the coated dough balls onto the prepared baking sheets, spacing them about 2 inches apart. Bake in the preheated oven for 10-12 minutes, or until the cookies have puffed up and the tops are crackled.
- Cool: Remove the cookies from the oven and allow them to cool on the baking sheet for about 5 minutes before transferring them to a wire rack to cool completely.
Extra Tips:
For a more intense red color, you can add more food coloring to the dough, but be cautious not to alter the taste by adding too much.
Make sure that the dough is sufficiently chilled before baking, as this helps the cookies maintain their shape and develop the characteristic crinkles.
If you prefer a less sweet variation, you can reduce the amount of granulated sugar slightly. Enjoy these cookies with a glass of milk or hot cocoa for an extra festive touch!
Red Velvet Thumbprint Cookies With Cream Cheese Filling
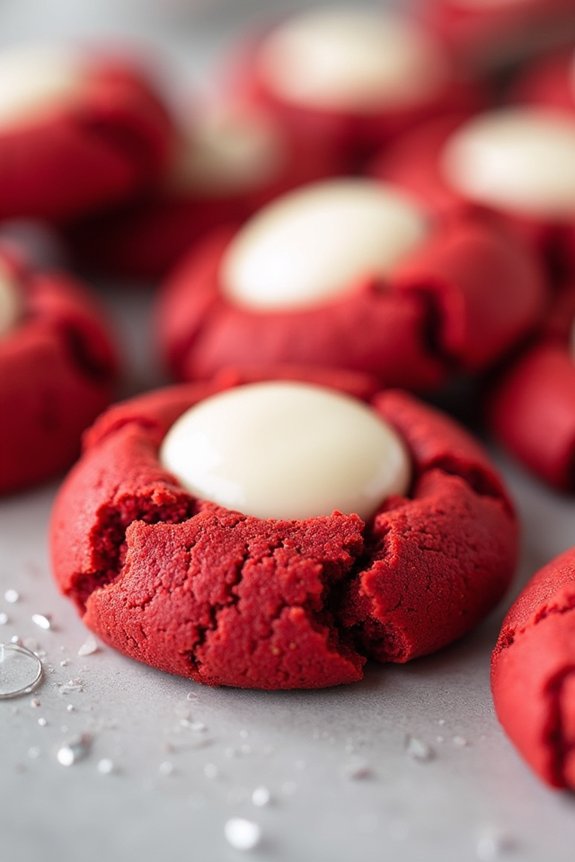
Red Velvet Thumbprint Cookies with Cream Cheese Filling are a delightful holiday treat that combines the rich flavors of red velvet cake with a creamy, tangy cream cheese filling. These cookies aren’t only visually stunning with their vibrant red hue and contrasting white filling, but they’re also incredibly delicious and a perfect addition to any holiday cookie platter.
The thumbprint design adds a fun, interactive element to the baking process, making it a perfect activity for families and friends to enjoy together. This recipe yields approximately 24 cookies, making it ideal for serving 4-6 people. The cookies are soft, chewy, and bursting with flavor, while the cream cheese filling adds a luscious, creamy texture that complements the slightly chocolatey taste of the red velvet base.
Whether you’re baking these for a holiday party, a cookie exchange, or simply to enjoy at home with a cup of hot cocoa, these Red Velvet Thumbprint Cookies with Cream Cheese Filling are sure to be a crowd-pleaser.
Ingredients:
- 1 ½ cups all-purpose flour
- ¼ cup unsweetened cocoa powder
- ½ teaspoon baking powder
- ¼ teaspoon salt
- ½ cup unsalted butter, softened
- ⅔ cup granulated sugar
- 1 large egg
- 1 teaspoon vanilla extract
- 1 tablespoon red food coloring
- 4 ounces cream cheese, softened
- 2 tablespoons unsalted butter, softened
- ½ cup powdered sugar
- ½ teaspoon vanilla extract
Cooking Instructions:
- Preheat the Oven: Preheat your oven to 350°F (175°C) and line two baking sheets with parchment paper.
- Mix Dry Ingredients: In a medium bowl, whisk together the flour, cocoa powder, baking powder, and salt. Set aside.
- Cream the Butter and Sugar: In a large mixing bowl, use an electric mixer to cream the softened butter and granulated sugar together until light and fluffy, approximately 2-3 minutes.
- Add Wet Ingredients: Beat in the egg, vanilla extract, and red food coloring, mixing until fully incorporated and the batter is evenly colored.
- Combine Wet and Dry Ingredients: Gradually add the dry ingredients to the wet ingredients, mixing on low speed until just combined and a dough forms.
- Shape the Cookies: Roll the dough into 1-inch balls and place them on the prepared baking sheets, spacing them about 2 inches apart.
- Create Thumbprints: Use your thumb or the back of a rounded teaspoon to gently press an indentation into the center of each cookie ball.
- Bake the Cookies: Bake in the preheated oven for 10-12 minutes, or until the edges are set and the centers are puffed. Allow cookies to cool on the baking sheet for a few minutes before transferring them to a wire rack to cool completely.
- Prepare the Filling: In a small bowl, beat the softened cream cheese and butter together until smooth. Gradually add the powdered sugar and vanilla extract, mixing until the filling is creamy and smooth.
- Fill the Cookies: Once the cookies are fully cooled, use a small spoon or piping bag to fill the thumbprints with the cream cheese mixture.
Extra Tips:
To guarantee your Red Velvet Thumbprint Cookies with Cream Cheese Filling turn out perfect every time, be sure to measure your flour correctly by spooning it into the measuring cup and leveling it off with a knife. This prevents the dough from becoming too dense.
If the dough is sticky, refrigerate it for 30 minutes before rolling it into balls. Additionally, feel free to adjust the amount of red food coloring to achieve your desired shade of red. Store any leftover cookies in an airtight container in the refrigerator to keep the cream cheese filling fresh. Enjoy these festive cookies with family and friends during the holiday season!
White Chocolate Dipped Red Velvet Biscotti
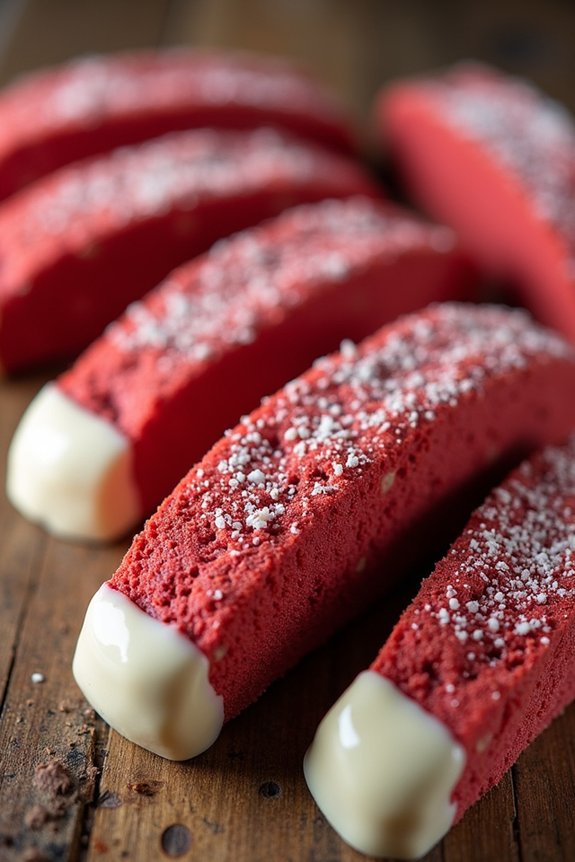
White Chocolate Dipped Red Velvet Biscotti is a perfect treat to add a festive touch to your holiday dessert spread. These biscotti are rich with the classic flavor of red velvet and boast a beautiful red hue that’s perfect for Christmas. The crispy texture of the biscotti pairs wonderfully with the creamy sweetness of white chocolate, making them an irresistible addition to your festive gatherings or as a thoughtful holiday gift.
Biscotti are twice-baked Italian cookies that are perfect for dunking in coffee or hot cocoa. The process of baking them twice gives them their characteristic crunch, and dipping them in white chocolate adds a luxurious finish. Not only do they taste delicious, but they also look impressive with their vibrant red color and elegant white chocolate coating. This recipe makes a batch that serves 4-6 people, perfect for sharing with family and friends during the holiday season.
Ingredients (serves 4-6 people):
- 1 ¾ cups all-purpose flour
- 1 tablespoon unsweetened cocoa powder
- 1 teaspoon baking powder
- ¼ teaspoon salt
- ½ cup unsalted butter, softened
- ¾ cup granulated sugar
- 2 large eggs
- 1 teaspoon vanilla extract
- 1 teaspoon red food coloring
- ¾ cup white chocolate chips
- 2 tablespoons vegetable oil (for melting chocolate)
Cooking Instructions:
- Preheat and Prepare: Preheat your oven to 350°F (175°C). Line a baking sheet with parchment paper and set aside.
- Mix Dry Ingredients: In a medium bowl, whisk together the flour, cocoa powder, baking powder, and salt. This guarantees that all dry ingredients are evenly distributed.
- Cream Butter and Sugar: In a large bowl, beat the softened butter and sugar together with an electric mixer on medium speed until light and fluffy, about 3 minutes.
- Add Eggs and Flavor: Add the eggs one at a time, beating well after each addition. Then, mix in the vanilla extract and red food coloring until the mixture is smooth and well-combined.
- Combine Wet and Dry: Gradually add the dry ingredients to the wet ingredients, mixing on low speed until a dough forms.
- Shape and Bake: Divide the dough in half. With floured hands, shape each half into a log, approximately 12 inches long and 2 inches wide. Place logs on the prepared baking sheet. Bake for 25-30 minutes or until the logs are firm to the touch. Allow them to cool for 10 minutes.
- Slice and Second Bake: Reduce oven temperature to 325°F (160°C). Using a sharp knife, cut the logs into ¾-inch slices. Lay slices cut-side down on the baking sheet. Bake for an additional 10-12 minutes, flip them over, and bake for another 10-12 minutes until crisp.
- Melt White Chocolate: While biscotti cool, melt the white chocolate chips with vegetable oil in the microwave in 30-second intervals, stirring in between, until smooth.
- Dip and Set: Dip the ends of each biscotti in the melted white chocolate and place them on a wire rack or parchment paper to set. Allow the chocolate to harden completely before serving.
Extra Tips: When making White Chocolate Dipped Red Velvet Biscotti, verify that the logs are firm to the touch before slicing to prevent crumbling. If you prefer a softer biscotti, you can reduce the second bake time slightly.
Adding a teaspoon of peppermint extract to the dough or sprinkling crushed candy canes over the dipped chocolate can infuse additional holiday flavors. Store biscotti in an airtight container at room temperature for up to two weeks, making them a convenient make-ahead treat for your holiday festivities.
Red Velvet Linzer Cookies With Raspberry Jam
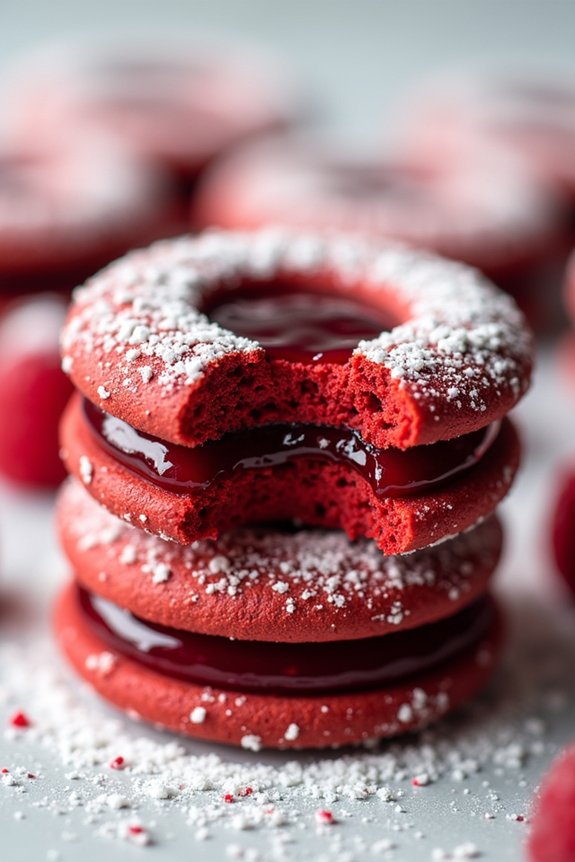
Red Velvet Linzer Cookies With Raspberry Jam are a festive treat perfect for the holiday season. These cookies are a delightful combination of rich cocoa and tangy raspberry jam, creating a beautiful contrast of flavors and colors. The red velvet cookie dough is rolled out and cut into delicate shapes, then sandwiched with a layer of raspberry jam that peeks through a small cut-out on the top cookie. This classic European cookie with a red velvet twist is sure to impress your friends and family with its taste and appearance.
The key to making these cookies stand out is in the quality of the red velvet dough and the choice of raspberry jam. The dough should be smooth and easy to work with, while the jam should be thick and bursting with raspberry flavor to complement the cocoa notes. These Red Velvet Linzer Cookies are perfect for gifting or as a sweet finish to your holiday dinner parties. They aren’t only delicious but also make for a stunning presentation on any dessert table.
Ingredients for 4-6 servings:
- 2 1/4 cups all-purpose flour
- 1/4 cup unsweetened cocoa powder
- 1/2 teaspoon baking powder
- 1/4 teaspoon salt
- 1/2 cup unsalted butter, softened
- 3/4 cup granulated sugar
- 1 large egg
- 1 teaspoon vanilla extract
- 1 tablespoon red food coloring
- 1/2 cup raspberry jam
- Powdered sugar, for dusting
Cooking Instructions:
- Prepare the dry ingredients: In a medium bowl, whisk together the flour, cocoa powder, baking powder, and salt. Set aside.
- Cream butter and sugar: In a large mixing bowl, beat the softened butter and granulated sugar together until light and fluffy, about 3 minutes.
- Add egg and vanilla: Beat in the egg, vanilla extract, and red food coloring until well combined and the mixture is a uniform red color.
- Combine wet and dry ingredients: Gradually add the dry ingredients to the wet mixture, mixing until just combined. Don’t overmix.
- Chill the dough: Divide the dough into two portions, wrap each in plastic wrap, and refrigerate for at least 1 hour to firm up.
- Preheat oven: Preheat your oven to 350°F (175°C) and line two baking sheets with parchment paper.
- Roll out the dough: On a lightly floured surface, roll out one portion of dough to about 1/8-inch thickness. Use a round or shaped cookie cutter to cut out cookies. Use a smaller cutter to cut out centers from half of the cookies for the tops.
- Bake: Place the cookies on the prepared baking sheets and bake for 8-10 minutes or until the edges are firm. Let them cool on a wire rack.
- Assemble the cookies: Once cooled, spread a thin layer of raspberry jam on the flat side of each whole cookie. Top with a cut-out cookie and press gently to adhere.
- Dust with powdered sugar: Before serving, dust the tops of the cookies with powdered sugar for a festive look.
Extra Tips:
For an even more decadent treat, try using a high-quality raspberry jam or even a homemade version if you have the time. You can also experiment with different shapes for a more personalized touch.
Be sure to work quickly when rolling out the dough, as it can become too soft if handled for too long. If the dough gets too sticky, simply return it to the refrigerator for a few minutes.
Finally, when dusting with powdered sugar, use a fine-mesh sieve to guarantee a light and even coating. Enjoy these cookies with a warm cup of tea or coffee for a truly cozy holiday experience.
Red Velvet Madeleines With Vanilla Glaze
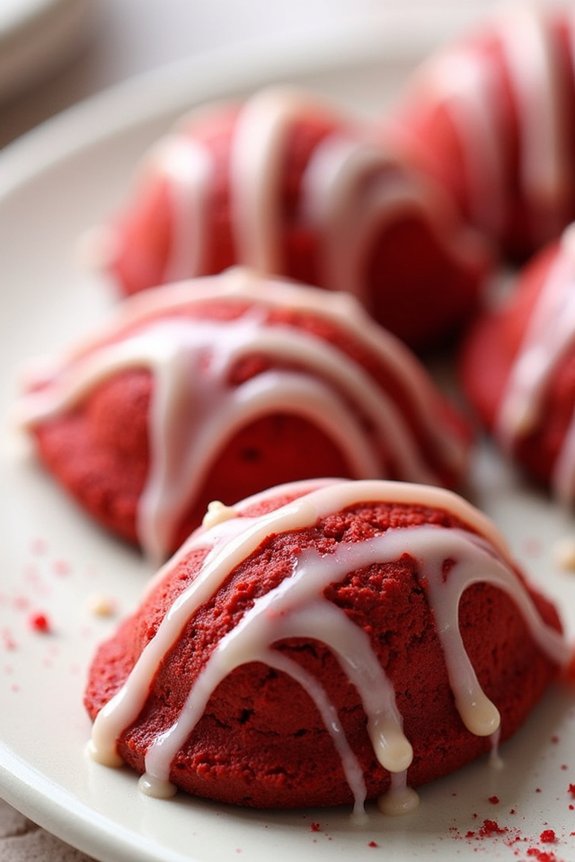
Red Velvet Madeleines are a delightful twist on the classic French sponge cake, combining the rich flavors of cocoa and the vibrant red hue that makes them a festive treat perfect for the holiday season.
These delicate, shell-shaped cookies are soft and tender on the inside with a slightly crisp edge, offering a luxurious melt-in-your-mouth experience. Topped with a luscious vanilla glaze, they aren’t only visually stunning but also irresistibly delicious, making them an ideal addition to any Christmas cookie platter.
Whether you’re an experienced baker or trying something new for the first time, these Red Velvet Madeleines are simple to make and sure to impress your family and friends. They’re perfect for a serving size of 4-6 people, allowing everyone to indulge in a few of these charming morsels.
The vanilla glaze adds the perfect finishing touch, enhancing the flavor and sweetness of the madeleines. Enjoy them with a warm cup of tea or coffee for a cozy holiday treat.
Ingredients:
- 3/4 cup all-purpose flour
- 2 tablespoons unsweetened cocoa powder
- 1/2 teaspoon baking powder
- 1/4 teaspoon salt
- 1/3 cup granulated sugar
- 1/4 cup unsalted butter, melted and cooled
- 2 large eggs, room temperature
- 1 teaspoon vanilla extract
- 1 tablespoon red food coloring
- 1/4 cup buttermilk
- For the glaze:
- 1 cup confectioners’ sugar
- 2 tablespoons milk
- 1 teaspoon vanilla extract
Instructions:
- Preheat and Prepare: Preheat your oven to 375°F (190°C). Lightly grease a madeleine pan with butter or non-stick spray and dust with flour to prevent the batter from sticking.
- Mix Dry Ingredients: In a medium bowl, whisk together the flour, cocoa powder, baking powder, and salt until well combined. Set aside.
- Combine Wet Ingredients: In a separate large bowl, beat the sugar, melted butter, and eggs together using an electric mixer on medium speed until light and fluffy, about 2-3 minutes. Add in the vanilla extract and red food coloring, mixing until the color is evenly incorporated.
- Incorporate Dry Ingredients: Gradually add the dry ingredients to the wet mixture, alternating with the buttermilk, beginning and ending with the dry ingredients. Mix until just combined, being careful not to overmix.
- Fill the Pan: Spoon the batter into the prepared madeleine pan, filling each mold about two-thirds full. Tap the pan gently on the counter to eliminate any air bubbles.
- Bake: Place the pan in the preheated oven and bake for 10-12 minutes, or until the edges are set and a toothpick inserted into the center of a madeleine comes out clean. Allow them to cool in the pan for a few minutes before transferring them to a wire rack to cool completely.
- Prepare the Glaze: In a small bowl, whisk together the confectioners’ sugar, milk, and vanilla extract until smooth and free of lumps. The glaze should be thick but pourable.
- Glaze the Madeleines: Once the madeleines are completely cooled, drizzle the vanilla glaze over the top. Allow the glaze to set before serving.
Extra Tips:
To achieve the perfect hump that madeleines are known for, it’s important to chill the batter for at least an hour before baking. This helps the batter firm up, which in turn encourages the characteristic rise when they hit the hot oven.
If you don’t have a madeleine pan, you can use a mini muffin tin as an alternative, though the shape will differ. Also, remember that the key to the perfect red velvet color is to use a good quality food coloring. Adjust the amount as needed to achieve the desired intensity.
Red Velvet Snowball Cookies

Red Velvet Snowball Cookies are a delightful holiday treat that combines the rich, velvety taste of red velvet with the classic buttery texture of snowball cookies. These cookies are perfect for adding a splash of color and a burst of flavor to your Christmas cookie platter. Their festive appearance and delicious taste make them a must-have for any holiday gathering.
Whether you’re baking them for a party or simply as a treat for your family, these cookies are sure to be a hit.
To make these Red Velvet Snowball Cookies, you’ll start by creating a simple dough infused with cocoa powder and red food coloring to mimic the classic red velvet flavor. Once baked, the cookies are rolled in powdered sugar, giving them the appearance of little snowballs. This recipe yields approximately 24-30 cookies, perfect for serving 4-6 people.
Gather your ingredients and get ready to bake these festive cookies that are as beautiful as they’re delicious.
Ingredients (Serves 4-6):
- 1 cup unsalted butter, softened
- 1/2 cup granulated sugar
- 2 teaspoons vanilla extract
- 1 tablespoon red food coloring
- 1 3/4 cups all-purpose flour
- 1/4 cup unsweetened cocoa powder
- 1/4 teaspoon salt
- 1 cup chopped pecans or walnuts (optional)
- 1 cup powdered sugar, for rolling
Instructions:
- Preheat and Prep: Preheat your oven to 350°F (175°C). Line a baking sheet with parchment paper or a silicone baking mat and set aside.
- Mix the Dough: In a large mixing bowl, cream together the softened butter and granulated sugar until light and fluffy. Add the vanilla extract and red food coloring, mixing until fully combined and the color is evenly distributed.
- Combine Dry Ingredients: In a separate bowl, whisk together the flour, cocoa powder, and salt. Gradually add the dry ingredients to the butter mixture, mixing until just combined. If using nuts, fold them into the dough at this point.
- Shape the Cookies: Using your hands or a small cookie scoop, shape the dough into 1-inch balls and place them on the prepared baking sheet, about 1 inch apart.
- Bake: Bake the cookies in the preheated oven for 12-15 minutes, or until the cookies are set and the bottoms are lightly browned. Be careful not to overbake, as these cookies should remain soft.
- Cool and Roll: Allow the cookies to cool on the baking sheet for a few minutes before transferring them to a wire rack to cool completely. Once cooled, roll each cookie in the powdered sugar until fully coated. For a thicker coating, roll the cookies a second time.
Extra Tips:
For the best results, verify your butter is softened to room temperature before mixing, as this will help achieve the perfect dough consistency.
If you find the dough too sticky, chill it for 30 minutes before shaping the cookies. For a pop of extra flavor, consider adding a teaspoon of almond extract or a pinch of cinnamon to the dough.
Finally, if you want to make the cookies extra festive, sprinkle a bit of edible glitter on top after rolling them in powdered sugar. Enjoy your Red Velvet Snowball Cookies with a nice cup of hot cocoa for the ultimate holiday treat.
Red Velvet Shortbread Cookies With Peppermint Drizzle
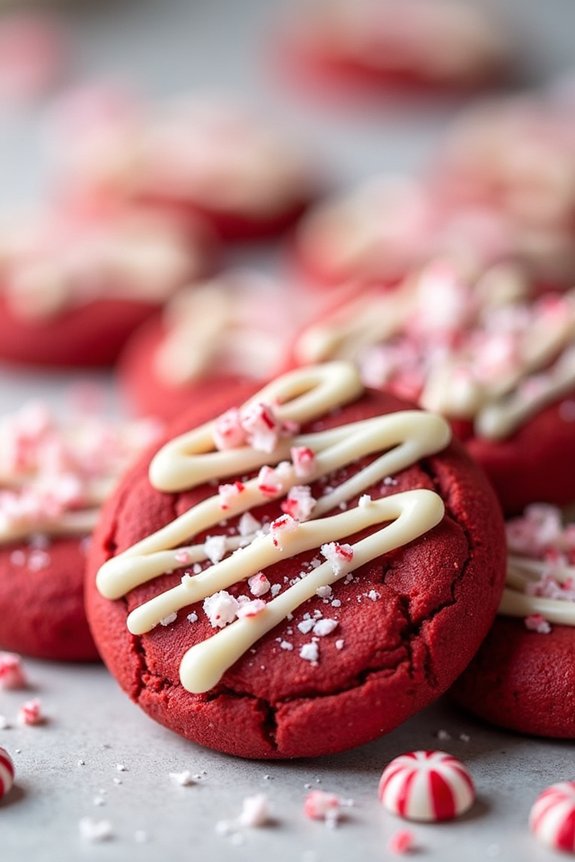
Red Velvet Shortbread Cookies With Peppermint Drizzle are a festive treat perfect for the holiday season. These cookies combine the rich, velvety texture of red velvet with the crispness of traditional shortbread. The peppermint drizzle adds a revitalizing and minty finish, making them a delightful addition to any Christmas cookie platter.
The vibrant red color of the cookies, contrasted with the white peppermint drizzle, also makes them visually striking and perfect for holiday gatherings. This recipe yields approximately 24 cookies, serving 4-6 people. The cookies are simple to prepare and require minimal ingredients, making them an excellent choice for both novice and experienced bakers.
Confirm you have all your ingredients ready and follow the instructions carefully to achieve the best results. These cookies are sure to be a hit with anyone who loves the classic combination of chocolate and mint.
Ingredients:
- 1 cup unsalted butter, softened
- 2/3 cup powdered sugar
- 1 teaspoon vanilla extract
- 2 tablespoons unsweetened cocoa powder
- 1 tablespoon red food coloring
- 2 cups all-purpose flour
- 1/4 teaspoon salt
- 1/2 cup crushed peppermint candies
- 1 cup white chocolate chips
- 1 teaspoon peppermint extract
Cooking Instructions:
- Prepare the Dough: In a large bowl, cream the softened butter and powdered sugar together until the mixture is light and fluffy. Add the vanilla extract, cocoa powder, and red food coloring, and mix until well combined.
- Combine Dry Ingredients: In a separate bowl, whisk together the all-purpose flour and salt. Gradually add the dry mixture to the butter mixture, mixing until the dough is smooth and all ingredients are well incorporated.
- Shape the Cookies: Divide the dough into two equal portions. Roll each portion into a log about 2 inches in diameter. Wrap each log in plastic wrap and refrigerate for at least 2 hours, or until firm.
- Preheat the Oven: Preheat your oven to 350°F (175°C). Line a baking sheet with parchment paper.
- Slice and Bake: Remove the dough logs from the refrigerator and slice into 1/4-inch thick rounds. Place the rounds on the prepared baking sheet, spaced about 1 inch apart.
- Bake the Cookies: Bake in the preheated oven for 10-12 minutes, or until the edges are set and the cookies are firm to the touch. Remove from the oven and allow to cool on the baking sheet for 5 minutes before transferring to a wire rack to cool completely.
- Prepare the Peppermint Drizzle: Melt the white chocolate chips in a microwave-safe bowl in 30-second intervals, stirring in between, until smooth. Stir in the peppermint extract.
- Drizzle and Decorate: Using a spoon, drizzle the melted white chocolate over the cooled cookies. Immediately sprinkle crushed peppermint candies over the top while the chocolate is still wet. Allow the drizzle to set before serving.
Extra Tips:
To confirm your Red Velvet Shortbread Cookies With Peppermint Drizzle keep their shape during baking, make sure the dough is well chilled before slicing. You can also freeze the dough logs for up to a month, making it convenient to prepare these cookies ahead of time.
When melting the white chocolate chips, be cautious not to overheat them, as chocolate can seize if overheated. If you prefer a stronger peppermint flavor, you can adjust the amount of peppermint extract in the drizzle to your liking. Enjoy these cookies as a festive treat or gift them to friends and family during the holiday season!
Red Velvet Whoopie Pies With Marshmallow Cream
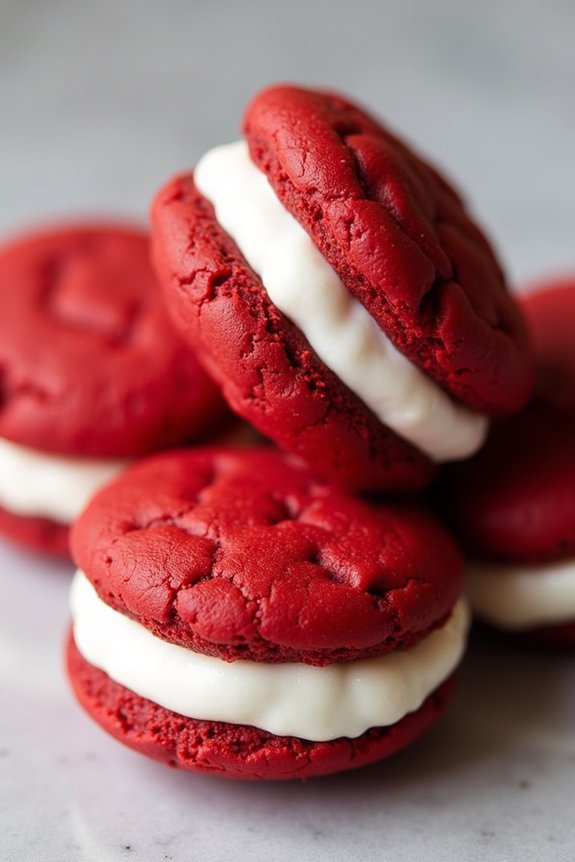
Red Velvet Whoopie Pies With Marshmallow Cream are a delightful treat that combines the smooth, rich flavors of red velvet with the fluffy sweetness of marshmallow cream. Perfect for the holiday season, these whoopie pies are a fun and festive way to celebrate with loved ones.
The vibrant red hue of the cookies pairs beautifully with the white marshmallow filling, creating an eye-catching and mouth-watering dessert that will impress any guest at your Christmas gathering.
These whoopie pies aren’t only delicious but also relatively easy to make, making them a great option for holiday baking. The recipe yields enough to serve 4-6 people, allowing everyone to indulge in this seasonal delight.
With the perfect balance of cocoa flavor and creamy filling, these Red Velvet Whoopie Pies With Marshmallow Cream are sure to become a holiday favorite.
Ingredients (Serves 4-6)
- 1 cup all-purpose flour
- 1 tablespoon cocoa powder
- 1/4 teaspoon baking soda
- 1/4 teaspoon salt
- 1/4 cup unsalted butter, softened
- 1/2 cup granulated sugar
- 1 large egg
- 1 teaspoon vanilla extract
- 1/4 cup buttermilk
- 1 tablespoon red food coloring
- 1/2 cup marshmallow cream
- 1/4 cup unsalted butter, softened (for filling)
- 1/2 cup powdered sugar
- 1 teaspoon vanilla extract (for filling)
Cooking Instructions
- Preheat and Prepare: Preheat your oven to 350°F (175°C). Line a baking sheet with parchment paper or a silicone baking mat.
- Mix Dry Ingredients: In a medium bowl, whisk together the flour, cocoa powder, baking soda, and salt. Set aside.
- Cream Butter and Sugar: In a large bowl, beat the softened butter and granulated sugar together until light and fluffy. This should take about 2-3 minutes using an electric mixer on medium speed.
- Add Egg and Vanilla: Mix in the egg and vanilla extract until well combined.
- Incorporate Buttermilk and Food Coloring: Gradually mix in the buttermilk and red food coloring, continuing to beat until the mixture is smooth and the color is evenly distributed.
- Combine Wet and Dry Ingredients: Slowly add the dry ingredient mixture to the wet ingredients, mixing on low speed until just combined. Be careful not to overmix.
- Scoop and Bake: Using a tablespoon or small cookie scoop, drop rounded spoonfuls of batter onto the prepared baking sheet, leaving about 2 inches between each. Bake for 8-10 minutes or until the cookies spring back when lightly touched. Allow to cool completely on a wire rack.
- Prepare Filling: In a medium bowl, beat together the softened butter, marshmallow cream, powdered sugar, and vanilla extract until smooth and creamy.
- Assemble Whoopie Pies: Once cookies are cool, spread or pipe a generous amount of marshmallow filling onto the flat side of half the cookies. Top with the remaining cookies to create sandwiches.
Extra Tips
To achieve the perfect red velvet color, adjust the amount of food coloring based on your preference, keeping in mind that different brands may produce varying shades.
When mixing the batter, avoid overmixing to prevent tough cookies; mix just until combined.
If you’re making the whoopie pies in advance, store them in an airtight container to maintain their freshness.
For a festive touch, consider rolling the edges of the whoopie pies in holiday-themed sprinkles before serving.
Red Velvet Sandwich Cookies With Espresso Buttercream
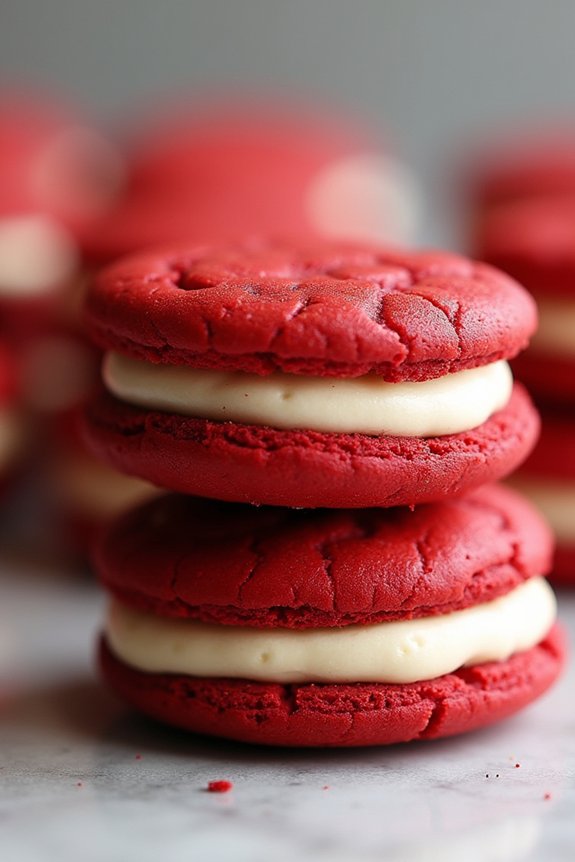
Red Velvet Sandwich Cookies With Espresso Buttercream are a delightful treat that combines the rich, velvety flavor of red velvet with a luscious espresso buttercream filling. These cookies are perfect for a Christmas celebration, as their striking red color and decadent taste make them a festive choice. The combination of cocoa and buttermilk in the cookies provides a soft texture and a subtle tang, while the espresso buttercream gives a bold, aromatic finish that coffee lovers will adore.
These sandwich cookies aren’t only visually stunning but also deliciously indulgent, making them a crowd-pleaser at any holiday gathering. Whether you’re hosting a Christmas party or simply want to treat your family to a special dessert, these cookies are sure to impress. The recipe below yields enough cookies to serve 4-6 people, making it ideal for small gatherings or as a part of a larger dessert spread.
Ingredients (for 4-6 servings):
- 1 1/4 cups all-purpose flour
- 1/4 cup unsweetened cocoa powder
- 1/2 teaspoon baking soda
- 1/4 teaspoon salt
- 1/2 cup unsalted butter, softened
- 3/4 cup granulated sugar
- 1 large egg
- 1 teaspoon vanilla extract
- 1 tablespoon red food coloring
- 1/2 cup buttermilk
- 1/2 cup unsalted butter, softened (for buttercream)
- 1 1/2 cups confectioners’ sugar
- 1 tablespoon espresso powder
- 1 teaspoon vanilla extract (for buttercream)
- 1-2 tablespoons heavy cream
Instructions:
- Preheat and Prepare: Preheat your oven to 350°F (175°C). Line two baking sheets with parchment paper or silicone baking mats.
- Mix Dry Ingredients: In a medium bowl, whisk together the flour, cocoa powder, baking soda, and salt. Set aside.
- Cream Butter and Sugar: In a large bowl, beat the softened butter and granulated sugar together using an electric mixer on medium speed until light and fluffy, about 3 minutes.
- Add Wet Ingredients: Add the egg, vanilla extract, and red food coloring to the butter mixture. Beat until fully combined and the color is evenly distributed.
- Combine with Buttermilk: Gradually add the dry ingredients to the wet ingredients, alternating with the buttermilk. Start and end with the dry ingredients. Mix until just combined to avoid overmixing.
- Shape and Bake: Drop rounded tablespoons of dough onto the prepared baking sheets, leaving about 2 inches between each cookie. Bake for 10-12 minutes or until the cookies are set and slightly firm to the touch. Allow them to cool completely on a wire rack.
- Prepare Espresso Buttercream: In a separate bowl, beat the softened butter until creamy. Gradually add the confectioners’ sugar and beat until smooth. Dissolve the espresso powder in a tablespoon of cream, then add it along with the vanilla extract to the butter mixture. Beat until fluffy, adding more cream if necessary to reach the desired consistency.
- Assemble Sandwich Cookies: Once the cookies have cooled, spread or pipe a generous amount of espresso buttercream onto the flat side of one cookie. Top with another cookie to create a sandwich. Repeat with the remaining cookies.
Extra Tips:
For the best results, verify all ingredients are at room temperature before you start. This will help them blend more easily and result in a smoother dough and buttercream.
If you find the buttercream too sweet, you can balance it by adding a pinch of salt. For a more intense red color, you can adjust the amount of food coloring according to your preference.
Finally, if you want to prepare these cookies in advance, they can be stored in an airtight container at room temperature for up to two days.
Red Velvet Macarons With Dark Chocolate Ganache
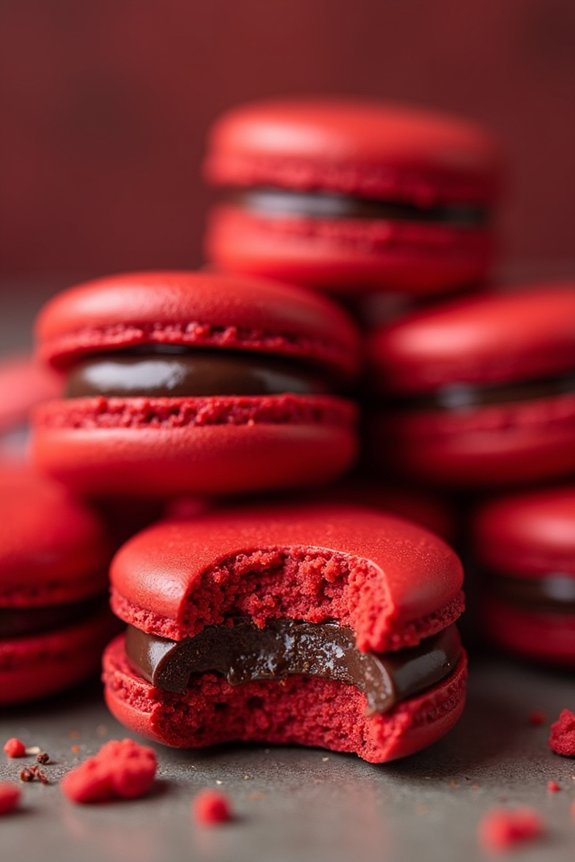
Red Velvet Macarons With Dark Chocolate Ganache are an elegant and festive treat perfect for holiday gatherings. These delicate French cookies are given a seasonal twist with the rich flavor of red velvet, paired beautifully with a creamy dark chocolate ganache filling. The bright red hue of the macarons makes them a visually striking addition to any dessert table, while the combination of flavors offers a sophisticated taste that will delight any palate.
Creating these Red Velvet Macarons requires precision and patience, but the results are well worth the effort. The key to a perfect macaron lies in achieving the right texture – a crisp shell with a chewy interior. The dark chocolate ganache, made with high-quality chocolate, adds a luxurious touch that elevates these cookies from ordinary to extraordinary.
Whether you’re a seasoned baker or a newcomer to the world of macarons, following this recipe will guide you to success.
Ingredients for 4-6 servings:
For the Macarons:
- 120g almond flour
- 200g powdered sugar
- 100g egg whites (about 3 large eggs)
- 50g granulated sugar
- 1 tsp vanilla extract
- 1 tbsp unsweetened cocoa powder
- 1 tsp red gel food coloring
For the Dark Chocolate Ganache:
- 150g dark chocolate, finely chopped
- 150ml heavy cream
- 1 tbsp unsalted butter
Cooking Instructions:
- Prepare the Macaron Batter:
- Sift the almond flour, powdered sugar, and cocoa powder into a large mixing bowl. This guarantees there are no lumps and the batter is smooth.
- In a separate bowl, beat the egg whites until they form soft peaks. Gradually add the granulated sugar while continuing to beat until you achieve stiff peaks and the mixture is glossy.
- Gently fold in the dry ingredients into the egg whites using a spatula. Add the vanilla extract and red gel food coloring during this step. Be careful not to overmix; the batter should flow like lava and form a figure-eight shape when dripped from the spatula.
- Pipe and Rest:
- Transfer the batter to a piping bag fitted with a round tip. Pipe small circles (about 1.5 inches in diameter) onto a baking sheet lined with parchment paper or a silicone mat.
- Once piped, tap the baking sheet on the counter a few times to release any air bubbles in the macarons. Let the macarons sit at room temperature for 30-60 minutes, or until a skin forms on their surface.
- Bake the Macarons:
- Preheat your oven to 300°F (150°C). Bake the macarons for 15-18 minutes, or until they’re firm and can be easily lifted off the baking sheet. Allow them to cool completely before filling.
- Prepare the Dark Chocolate Ganache:
- Heat the heavy cream in a small saucepan over medium heat until it just begins to simmer. Pour the hot cream over the chopped dark chocolate in a heatproof bowl. Let it sit for a minute, then stir until smooth.
- Stir in the unsalted butter until fully combined. Allow the ganache to cool and thicken to a spreadable consistency.
- Assemble the Macarons:
- Pair the macaron shells by size. Pipe or spoon a small amount of ganache onto the flat side of one shell and sandwich it with another. Repeat until all macarons are filled.
Extra Tips:
When making macarons, precision is key, so it’s important to measure your ingredients accurately using a kitchen scale. Humidity can affect the results, so if possible, make macarons on a dry day.
If the ganache seems too runny, allow it to cool further to reach the right consistency for filling. Finally, macarons taste best after they’ve matured for 24 hours in the refrigerator, allowing the flavors to meld together beautifully.