

With the holiday season just around the corner, it’s time to start thinking about those beloved Christmas cookie recipes. Classic sugar cookies with bright icing and spiced gingerbread men are always a hit. If you love rich flavors, peppermint chocolate chip cookies might just be your go-to. For something a bit different, oatmeal cranberry bites offer a delicious nutty touch. These cozy cookie options are sure to fill your home with warmth and cheer.
Classic Sugar Cookies

Classic Sugar Cookies are a staple in any holiday baking repertoire. They’re loved for their simplicity, buttery flavor, and versatility. These cookies are perfect for decorating with icing, sprinkles, or simply enjoying plain. They make a delightful addition to any Christmas cookie platter.
Whether you’re a seasoned baker or a beginner, these cookies are easy to make and hard to resist.
These sugar cookies have a crisp yet tender texture and a sweet, buttery taste. The dough is easy to work with, making it perfect for cutting into festive shapes. Once baked, they hold their shape beautifully, providing a perfect canvas for creative decorations.
This recipe yields a serving size of 4-6 people, making it perfect for sharing with family and friends during the holiday season.
Ingredients:
- 2 3/4 cups all-purpose flour
- 1 teaspoon baking soda
- 1/2 teaspoon baking powder
- 1 cup unsalted butter (softened)
- 1 1/2 cups granulated sugar
- 1 egg
- 1 teaspoon vanilla extract
- 1/2 teaspoon almond extract
- 3 tablespoons milk
Cooking Instructions:
- Preheat and Prepare Dough: Preheat your oven to 375°F (190°C). In a medium bowl, whisk together the flour, baking soda, and baking powder. Set aside.
- Cream the Butter and Sugar: In a large bowl, use an electric mixer to cream the softened butter and granulated sugar together until light and fluffy, about 2-3 minutes. This step helps to aerate the mixture, guaranteeing the cookies are tender.
- Add Wet Ingredients: Beat in the egg, vanilla extract, and almond extract until well combined. The extracts add depth of flavor to the cookies.
- Combine Dry and Wet Ingredients: Gradually add the dry ingredients to the wet mixture, alternating with the milk. Mix until just combined, being careful not to over-mix as this can make the cookies tough.
- Roll and Cut the Dough: On a lightly floured surface, roll out the dough to about 1/4-inch thickness. Use cookie cutters to cut into desired shapes. Transfer the shapes onto a baking sheet lined with parchment paper.
- Bake the Cookies: Bake in the preheated oven for 8-10 minutes, or until the edges are just beginning to turn golden brown. Remove from oven and let them cool on the baking sheet for a few minutes before transferring to a wire rack to cool completely.
- Decorate (Optional): Once completely cooled, you can decorate the cookies with icing, sprinkles, or any other desired toppings.
Extra Tips:
For the best results, make sure your butter is at room temperature before you start mixing. This will help you achieve a smooth and creamy texture.
If the dough becomes too sticky while rolling, chill it in the refrigerator for about 30 minutes to make it easier to handle.
When using cookie cutters, dip them in flour to prevent the dough from sticking.
Finally, keep an eye on the baking time; the cookies should be just lightly golden around the edges for the perfect texture. Enjoy your festive baking!
Gingerbread Men Cookies

Gingerbread Men Cookies are a classic holiday treat that brings warmth and cheer to any festive gathering. Their delightful aroma and charming shapes make them a favorite among both kids and adults. Perfect for a family baking activity, these cookies are as enjoyable to make as they’re to eat. With a combination of spices like ginger, cinnamon, and cloves, Gingerbread Men Cookies offer a tantalizing taste of the season.
Creating these delightful cookies at home is a wonderful way to celebrate the holiday spirit. The recipe is simple enough for beginners yet versatile enough for experienced bakers to experiment with decorations. Whether you prefer your Gingerbread Men Cookies with a simple icing or adorned with colorful candies, this recipe will guide you through each step to achieve the perfect batch.
Ingredients (Serves 4-6 people):
- 3 cups all-purpose flour
- 3/4 teaspoon baking soda
- 1 tablespoon ground ginger
- 1 tablespoon ground cinnamon
- 1/2 teaspoon ground cloves
- 1/2 teaspoon salt
- 1/2 cup unsalted butter, at room temperature
- 1/2 cup packed brown sugar
- 1 large egg
- 1/2 cup molasses
- 2 teaspoons vanilla extract
Instructions:
- Prepare the Dough: In a large bowl, whisk together the flour, baking soda, ginger, cinnamon, cloves, and salt. In a separate large bowl, beat the butter until smooth and creamy. Add the brown sugar and beat until light and fluffy. Mix in the egg, molasses, and vanilla extract until well combined.
- Combine Ingredients: Gradually add the dry ingredients to the wet ingredients, mixing until just combined. The dough should be soft but not sticky.
- Chill the Dough: Divide the dough into two discs, wrap each in plastic wrap, and refrigerate for at least 2 hours or until firm. This will make the dough easier to roll out and cut.
- Preheat and Prepare: Preheat your oven to 350°F (175°C) and line two baking sheets with parchment paper.
- Roll and Cut: On a lightly floured surface, roll out one disc of dough to about 1/4-inch thickness. Use gingerbread men cookie cutters to cut out shapes, and place them onto the prepared baking sheets about 1 inch apart.
- Bake: Bake in the preheated oven for 8-10 minutes, or until the edges are firm and the cookies are lightly browned. Remove from the oven and let cool on the baking sheets for 5 minutes before transferring to a wire rack to cool completely.
- Decorate: Once cooled, decorate your Gingerbread Men Cookies with icing, candies, or any desired decorations.
Extra Tips: For the best results, make sure that your butter is at room temperature before beginning the recipe, as this will help achieve a smooth and creamy texture.
When rolling out the dough, if it becomes too sticky, sprinkle it with a bit of flour to prevent sticking. Additionally, you can prepare the dough a day in advance and store it in the refrigerator, which allows the spices to develop more flavor.
For added fun, involve the whole family in decorating the cookies, making it a memorable holiday activity.
Peppermint Chocolate Chip Cookies
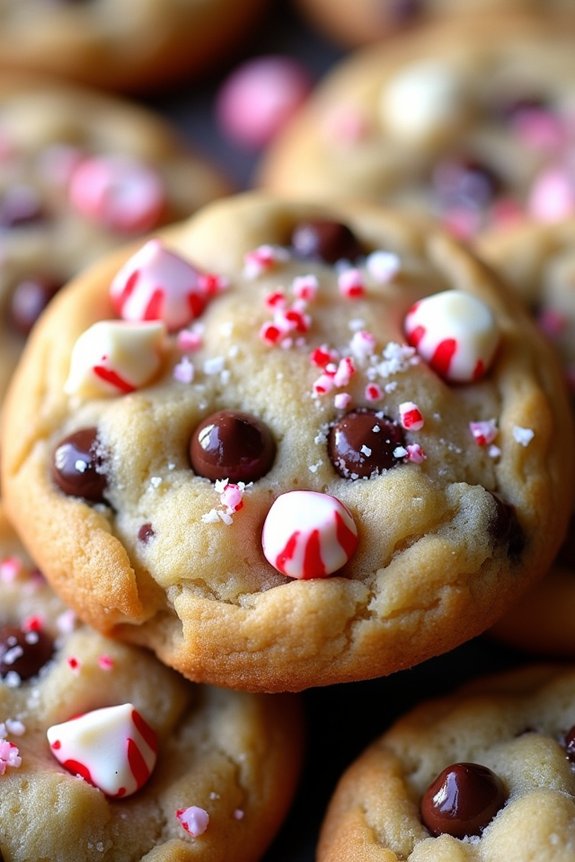
When the holiday season rolls around, there’s nothing quite like the delightful fusion of peppermint and chocolate to get you in the festive spirit. Peppermint Chocolate Chip Cookies are the perfect treat to enjoy with a cup of hot cocoa by the fireplace. The invigorating burst of peppermint combined with the rich, decadent flavor of chocolate chips makes these cookies a holiday favorite.
Whether you’re baking for a holiday party or simply enjoying a cozy day at home, these cookies are sure to bring joy and warmth to everyone who takes a bite.
These cookies aren’t only delicious but also incredibly easy to make. With a classic cookie base enhanced by the revitalizing zest of peppermint extract and crushed peppermint candies, they offer a unique twist on traditional chocolate chip cookies. The recipe caters to 4-6 people, making it perfect for small gatherings or family treats.
Gather your ingredients and prepare to fill your home with the irresistible aroma of freshly baked cookies.
Ingredients for 4-6 people:
- 2 1/4 cups all-purpose flour
- 1/2 teaspoon baking soda
- 1 cup unsalted butter, room temperature
- 1/2 cup granulated sugar
- 1 cup packed light-brown sugar
- 1 teaspoon salt
- 2 teaspoons pure vanilla extract
- 2 large eggs
- 2 cups semisweet and white chocolate chips, mixed
- 1 cup crushed peppermint candies
- 1 teaspoon peppermint extract
Cooking Instructions:
- Preheat the Oven: Start by preheating your oven to 350°F (175°C). Line two baking sheets with parchment paper to prevent the cookies from sticking and for easy cleanup.
- Mix Dry Ingredients: In a medium bowl, whisk together the all-purpose flour and baking soda. This guarantees that the baking soda is evenly distributed throughout the flour.
- Cream Butter and Sugars: In a large mixing bowl, using an electric mixer, beat the butter, granulated sugar, and brown sugar on medium speed until light and fluffy, about 2 minutes. This step is essential for the texture of the cookies.
- Add Eggs and Flavorings: Add the eggs, one at a time, beating well after each addition. Mix in the vanilla extract and peppermint extract until combined.
- Combine Dry and Wet Ingredients: Gradually add the flour mixture to the butter mixture, beating at a low speed until just combined. Avoid over-mixing to prevent the cookies from becoming tough.
- Stir in Chocolate and Peppermint: Using a spatula, fold in the chocolate chips and crushed peppermint candies until evenly distributed throughout the dough.
- Shape the Cookies: Scoop rounded tablespoons of dough and place them about 2 inches apart on the prepared baking sheets. This allows room for the cookies to spread while baking.
- Bake the Cookies: Bake in the preheated oven for 10-12 minutes, or until the edges are golden brown and the centers are set. Be careful not to overbake as the cookies will continue to cook on the baking sheet after being removed from the oven.
- Cool and Serve: Allow the cookies to cool on the baking sheets for 5 minutes before transferring them to wire racks to cool completely. Enjoy your Peppermint Chocolate Chip Cookies with a glass of milk or a hot beverage.
Extra Tips:
For an extra burst of peppermint flavor, consider sprinkling a few additional crushed peppermint candies on top of the cookies immediately after they come out of the oven. This won’t only enhance the minty taste but also add a touch of festive flair.
If you prefer a softer cookie, reduce the baking time slightly, keeping an eye on the edges to make sure they don’t burn. Additionally, if you want to prepare the dough in advance, it can be refrigerated for up to 3 days, allowing you to bake fresh cookies whenever the craving hits.
Snickerdoodle Cookies
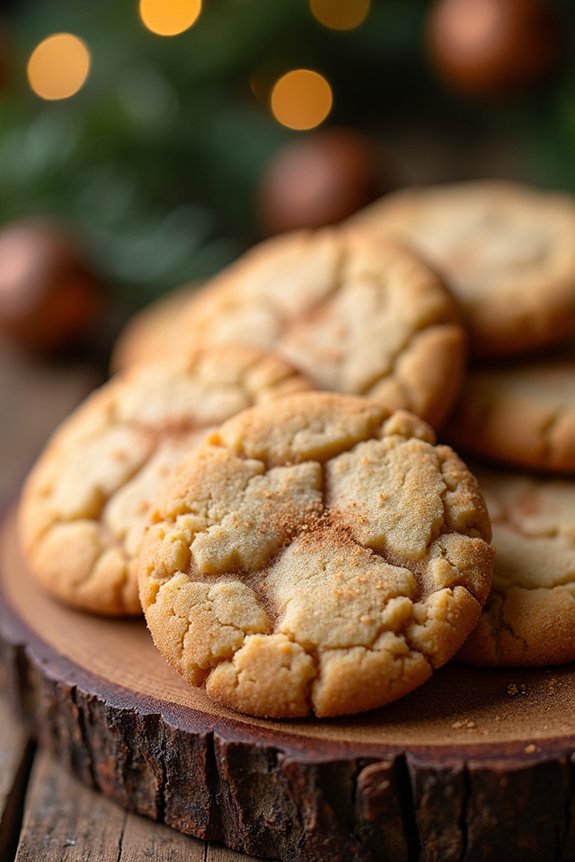
Snickerdoodle cookies are a classic holiday treat that bring a burst of cinnamon and sugar with every bite. These soft and chewy cookies are known for their signature tangy flavor, which is achieved by using cream of tartar in the dough. Perfect for festive gatherings or as a sweet gift, snickerdoodles are sure to evoke the nostalgic warmth and joy of the Christmas season.
Whether you’re a seasoned baker or a novice in the kitchen, this recipe is simple to follow and yields consistently delightful results.
Creating snickerdoodle cookies involves a few key ingredients and techniques that give them their unique texture and taste. The cookies are rolled in a cinnamon-sugar mixture before baking, which not only adds flavor but also gives them their classic crinkly appearance. The combination of butter, sugar, and spices makes for an irresistible cookie that pairs perfectly with a glass of milk or a cup of hot cocoa.
Let’s explore the recipe to make these beloved holiday cookies for a serving size of 4-6 people.
Ingredients:
- 1 cup unsalted butter, softened
- 1 1/2 cups granulated sugar
- 2 large eggs
- 1 teaspoon vanilla extract
- 2 3/4 cups all-purpose flour
- 2 teaspoons cream of tartar
- 1 teaspoon baking soda
- 1/4 teaspoon salt
- 3 tablespoons granulated sugar (for rolling)
- 3 teaspoons ground cinnamon (for rolling)
Instructions:
- Preheat and Prepare: Preheat your oven to 375°F (190°C) and line two baking sheets with parchment paper. This will guarantee an even baking surface and prevent the cookies from sticking.
- Cream the Butter and Sugar: In a large mixing bowl, cream together the softened butter and 1 1/2 cups of granulated sugar until light and fluffy, about 3 minutes. This step incorporates air into the mixture, which helps achieve a soft cookie texture.
- Add Wet Ingredients: Beat in the eggs one at a time, confirming each is fully incorporated before adding the next. Mix in the vanilla extract. This will enhance the flavor of the cookies.
- Combine Dry Ingredients: In a separate bowl, whisk together the flour, cream of tartar, baking soda, and salt. Gradually add the dry ingredients to the wet mixture, beating until just combined. Avoid overmixing to keep the cookies tender.
- Prepare Cinnamon-Sugar Mixture: In a small bowl, combine the 3 tablespoons of sugar and the ground cinnamon for rolling.
- Shape the Cookies: Using a tablespoon or a cookie scoop, form the dough into 1 1/2-inch balls. Roll each ball in the cinnamon-sugar mixture until fully coated.
- Bake the Cookies: Place the coated dough balls onto the prepared baking sheets, spacing them about 2 inches apart. Bake in the preheated oven for 9-11 minutes, or until the edges are set and the tops are slightly cracked.
- Cool the Cookies: Remove the cookies from the oven and allow them to cool on the baking sheets for about 5 minutes before transferring them to a wire rack to cool completely.
Extra Tips:
For the best results, make sure your butter is at room temperature before starting, as this will make it easier to cream with the sugar. If you prefer a slightly crispier cookie, bake them a minute or two longer, keeping a close eye on them to prevent over-browning.
You can also experiment with adding a pinch of nutmeg to the cinnamon-sugar mixture for an extra layer of flavor. Store the cookies in an airtight container to keep them fresh for several days. Enjoy your homemade snickerdoodles with family and friends this Christmas season!
Red Velvet Crinkle Cookies
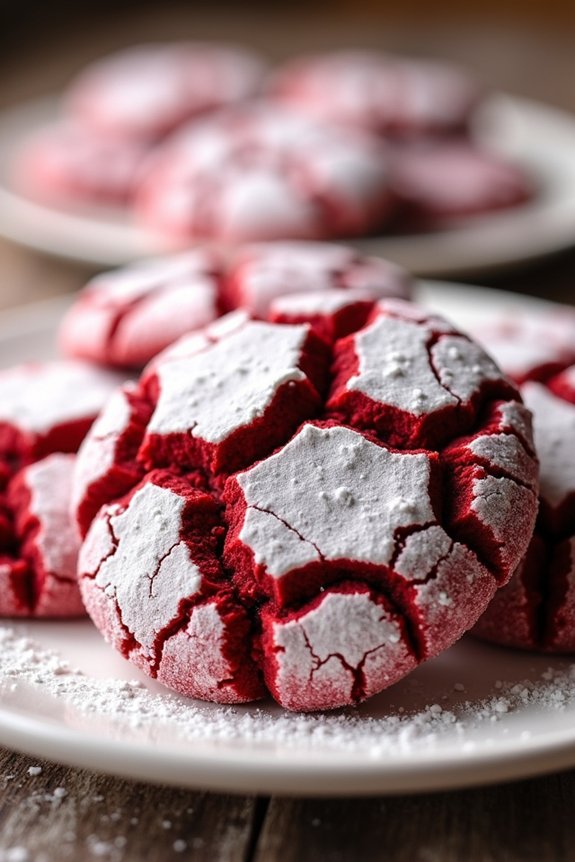
Red Velvet Crinkle Cookies are a delightful treat that combines the rich flavor of red velvet cake with the classic appeal of crinkle cookies. Perfect for the holiday season, these cookies aren’t only delicious but also visually striking with their deep red color and powdered sugar coating.
They’re ideal for cookie swaps, holiday parties, or simply enjoying with a cup of hot cocoa by the fireplace.
These cookies are soft and chewy on the inside, with a slightly crisp exterior. The key to achieving the perfect crinkle effect is allowing the dough to chill before baking, ensuring the cookies maintain their shape while forming beautiful cracks.
This recipe serves 4-6 people, providing enough cookies to share with family and friends during festive gatherings.
Ingredients for Red Velvet Crinkle Cookies:
- 1 ½ cups all-purpose flour
- ¼ cup unsweetened cocoa powder
- 1 teaspoon baking powder
- ¼ teaspoon salt
- ½ cup unsalted butter, softened
- 1 cup granulated sugar
- 2 large eggs
- 1 teaspoon vanilla extract
- 1 tablespoon red food coloring
- ½ cup powdered sugar
Cooking Instructions:
- Prepare the Dry Ingredients: In a medium bowl, whisk together the all-purpose flour, cocoa powder, baking powder, and salt. Set the dry mixture aside.
- Cream the Butter and Sugar: In a large mixing bowl, use an electric mixer to cream the softened butter and granulated sugar together until light and fluffy, about 2-3 minutes.
- Add Eggs and Flavoring: Beat in the eggs one at a time, followed by the vanilla extract and red food coloring. Mix until fully incorporated and the color is evenly distributed.
- Combine Wet and Dry Ingredients: Gradually add the dry ingredients to the wet mixture, mixing on low speed until just combined. Be careful not to overmix.
- Chill the Dough: Cover the dough with plastic wrap and refrigerate for at least 2 hours or until firm. This step is essential for creating the crinkle effect.
- Preheat the Oven: Preheat your oven to 350°F (175°C) and line baking sheets with parchment paper.
- Shape the Cookies: Scoop tablespoon-sized portions of dough and roll them into balls. Roll each ball in the powdered sugar until fully coated.
- Bake the Cookies: Place the sugar-coated dough balls onto the prepared baking sheets, spacing them about 2 inches apart. Bake for 10-12 minutes or until the cookies have spread and developed a crinkle effect.
- Cool the Cookies: Allow the cookies to cool on the baking sheets for a few minutes before transferring them to a wire rack to cool completely.
Extra Tips:
For the best results, make sure your butter is softened but not melted, as this helps achieve the right texture in the cookies.
If you find that the dough is too sticky to handle, you can return it to the refrigerator to chill further. Additionally, using gel food coloring can provide a more intense red hue without altering the dough’s consistency.
Enjoy your Red Velvet Crinkle Cookies fresh or store them in an airtight container for up to a week.
Oatmeal Cranberry Cookies
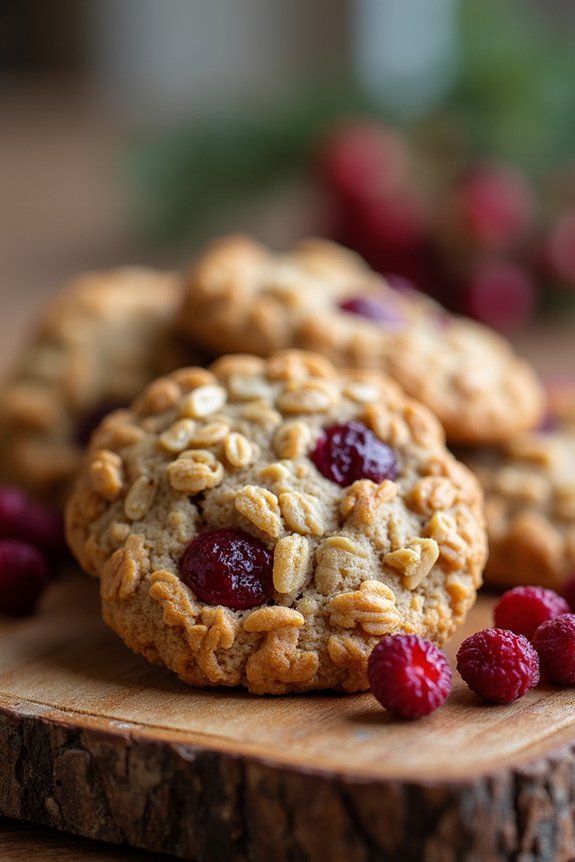
Oatmeal Cranberry Cookies are a delightful treat perfect for the holiday season. Combining the hearty texture of oats with the tartness of dried cranberries, these cookies offer a wonderful balance of flavors. They can be enjoyed with a cup of tea or coffee, making them a festive addition to any holiday gathering.
Whether you’re baking them for a cookie exchange or as a sweet gift, these cookies are sure to be a hit. These cookies aren’t just tasty but also easy to make. With a few simple ingredients and minimal baking time, you can whip up a batch in no time.
The recipe yields about 24-30 cookies, making it ideal for serving 4-6 people. The chewy texture of the oatmeal combined with the sweet and tangy cranberries creates a delightful experience in every bite. Let’s plunge into the ingredients and steps to create these delicious Oatmeal Cranberry Cookies.
Ingredients (Serves 4-6):
- 1 cup unsalted butter, softened
- 1 cup packed brown sugar
- 1/2 cup granulated sugar
- 2 large eggs
- 1 teaspoon vanilla extract
- 1 1/2 cups all-purpose flour
- 1 teaspoon baking soda
- 1 teaspoon ground cinnamon
- 1/2 teaspoon salt
- 3 cups old-fashioned rolled oats
- 1 cup dried cranberries
Cooking Instructions:
- Preheat the Oven: Begin by preheating your oven to 350°F (175°C). Line two baking sheets with parchment paper or lightly grease them.
- Cream the Butter and Sugars: In a large mixing bowl, cream together the softened butter, brown sugar, and granulated sugar until the mixture is light and fluffy. This should take about 3-4 minutes with an electric mixer.
- Add Eggs and Vanilla: Beat in the eggs one at a time, making certain each is well incorporated before adding the next. Stir in the vanilla extract.
- Mix Dry Ingredients: In a separate bowl, whisk together the flour, baking soda, ground cinnamon, and salt. Gradually add this dry mixture to the wet ingredients, mixing until just combined.
- Stir in Oats and Cranberries: Gently fold in the rolled oats and dried cranberries until evenly distributed throughout the dough.
- Shape the Cookies: Using a tablespoon or a cookie scoop, drop rounded balls of dough onto the prepared baking sheets, spacing them about 2 inches apart.
- Bake: Place the baking sheets in the preheated oven and bake for 10-12 minutes, or until the edges are golden brown. The centers might look slightly underbaked, but they’ll firm up as they cool.
- Cool: Allow the cookies to cool on the baking sheets for a few minutes before transferring them to wire racks to cool completely.
Extra Tips:
For the best results, make sure your butter is at room temperature before you start baking. This helps in achieving the right texture for creaming with sugars.
You can also add a handful of chopped nuts, like walnuts or pecans, for an extra crunch. If you prefer a softer cookie, slightly reduce the baking time and let them cool on the baking sheet longer.
Finally, store any leftover cookies in an airtight container to keep them fresh for several days. Enjoy your Oatmeal Cranberry Cookies with a cozy holiday atmosphere!
White Chocolate Macadamia Nut Cookies
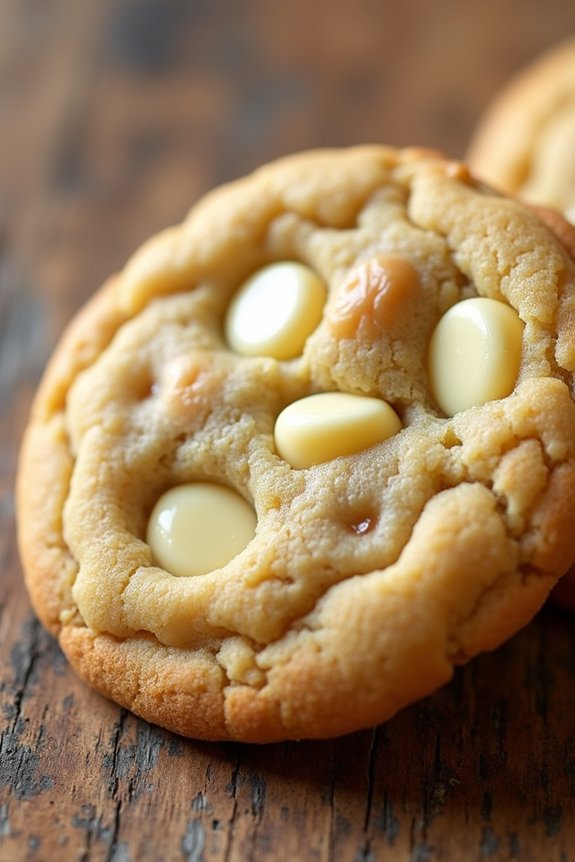
White Chocolate Macadamia Nut Cookies are a delightful treat that combines the creamy sweetness of white chocolate with the buttery crunch of macadamia nuts. Perfect for the holiday season, these cookies are bound to be a hit at any Christmas gathering. The rich flavors and textures make them irresistible, and they pair wonderfully with a warm cup of cocoa or coffee.
Whether you’re baking for a festive party or simply indulging in a cozy night at home, these cookies will add a touch of decadence to your celebrations.
To achieve the perfect White Chocolate Macadamia Nut Cookies, it’s crucial to use high-quality ingredients. The macadamia nuts should be fresh and unsalted to guarantee the best flavor, while the white chocolate chips should be creamy and rich. The dough is simple to prepare and bakes into a delicious, chewy cookie with a slightly crisp edge.
Ideal for a serving size of 4-6 people, this recipe makes enough to share with family and friends, spreading holiday cheer with every bite.
Ingredients (for 4-6 people):
- 1 cup unsalted butter, softened
- 1 cup granulated sugar
- 1 cup packed brown sugar
- 2 large eggs
- 1 teaspoon vanilla extract
- 2 1/2 cups all-purpose flour
- 1 teaspoon baking soda
- 1/2 teaspoon salt
- 1 cup white chocolate chips
- 1 cup macadamia nuts, roughly chopped
Instructions:
- Preheat Your Oven: Begin by preheating your oven to 350°F (175°C). Line a baking sheet with parchment paper or a silicone baking mat to prevent sticking.
- Cream the Butter and Sugars: In a large mixing bowl, cream together the softened butter, granulated sugar, and brown sugar until the mixture is light and fluffy. This should take about 3-4 minutes using an electric mixer on medium speed.
- Add Eggs and Vanilla: Beat in the eggs one at a time, confirming each egg is fully incorporated before adding the next. Mix in the vanilla extract until combined.
- Combine Dry Ingredients: In a separate bowl, whisk together the all-purpose flour, baking soda, and salt. Gradually add this dry mixture to the wet ingredients, mixing just until combined. Avoid overmixing to guarantee tender cookies.
- Fold in Chocolate and Nuts: Gently fold in the white chocolate chips and chopped macadamia nuts using a spatula, ensuring they’re evenly distributed throughout the dough.
- Shape the Cookies: Using a tablespoon or cookie scoop, drop rounded tablespoons of dough onto the prepared baking sheet, spacing them about 2 inches apart to allow for spreading.
- Bake the Cookies: Bake in the preheated oven for 10-12 minutes, or until the edges are golden brown and the centers are set. Keep an eye on them to prevent overbaking.
- Cool and Enjoy: Allow the cookies to cool on the baking sheet for 5 minutes before transferring them to a wire rack to cool completely. Enjoy warm or store in an airtight container for up to a week.
Extra Tips:
For an extra touch of holiday spirit, consider adding a pinch of cinnamon or nutmeg to the dough for a subtle spice. If you prefer a softer cookie, slightly underbake them by a minute or two, as they’ll continue to firm up while cooling on the baking sheet.
Additionally, toasting the macadamia nuts lightly before adding them to the dough can enhance their flavor, creating a more complex and delicious cookie. Happy baking, and enjoy your festive White Chocolate Macadamia Nut Cookies!
Almond Biscotti Cookies

Almond Biscotti Cookies are a delightful treat that perfectly pairs with a hot cup of coffee or tea, making them an ideal holiday indulgence. This Italian-inspired cookie is known for its crisp texture and nutty flavor, which comes from a generous helping of almonds. The cookies are twice-baked to achieve their signature crunch, and they’ve a long shelf life, which makes them perfect for gifting during the festive season.
The preparation of Almond Biscotti Cookies involves creating a dough that’s infused with almond extract and vanilla, giving it a rich and aromatic taste. After shaping the dough into logs and baking them, the logs are sliced and baked again to achieve that perfect crunchy texture. This recipe serves 4-6 people and will fill your home with a warm, inviting aroma that embodies the spirit of the holidays.
Ingredients:
- 2 cups all-purpose flour
- 1 cup granulated sugar
- 1 teaspoon baking powder
- 1/2 teaspoon salt
- 3 large eggs
- 1 teaspoon vanilla extract
- 1 teaspoon almond extract
- 1 cup whole almonds, toasted and coarsely chopped
- Optional: 1/2 cup sliced almonds for topping
Instructions:
- Preheat and Prepare: Preheat your oven to 350°F (175°C). Line a baking sheet with parchment paper or a silicone baking mat for easy removal of the cookies later.
- Mix Dry Ingredients: In a large bowl, whisk together the flour, sugar, baking powder, and salt until well combined. This guarantees that the baking powder is evenly distributed throughout the flour.
- Combine Wet Ingredients: In another bowl, beat the eggs, vanilla extract, and almond extract together until well mixed. This mixture will add moisture and flavor to the dry ingredients.
- Form the Dough: Gradually add the wet ingredients to the dry ingredients, mixing until a dough forms. It may be sticky, but this is normal. Stir in the chopped almonds until evenly distributed throughout the dough.
- Shape and Bake Logs: Divide the dough into two equal portions. On a floured surface, shape each portion into a log about 12 inches long and 2 inches wide. Place the logs onto the prepared baking sheet, leaving space between them as they’ll spread.
- First Bake: Bake in the preheated oven for 25-30 minutes until the logs are firm to the touch and lightly golden. Remove from the oven and let them cool on the baking sheet for 10 minutes.
- Slice the Logs: Once slightly cooled, transfer the logs to a cutting board. Using a sharp serrated knife, slice the logs diagonally into 1/2-inch thick slices.
- Second Bake: Place the slices back onto the baking sheet, cut side down. Bake for an additional 10-12 minutes, then flip and bake for another 10-12 minutes on the other side, until the biscotti are golden and crisp.
- Cool Completely: Remove from oven and let the biscotti cool completely on a wire rack. They’ll continue to harden as they cool.
Extra Tips:
When making Almond Biscotti Cookies, it’s crucial to keep an eye on the baking time during the second bake to prevent over-browning. If you prefer a softer biscotti, you can reduce the second bake time slightly.
For variation, try adding chocolate chips or dried cranberries to the dough for a festive twist. Storing the biscotti in an airtight container will help maintain their crispness for several weeks, making them an excellent make-ahead option for holiday gatherings or gifts.
Chocolate Hazelnut Thumbprint Cookies
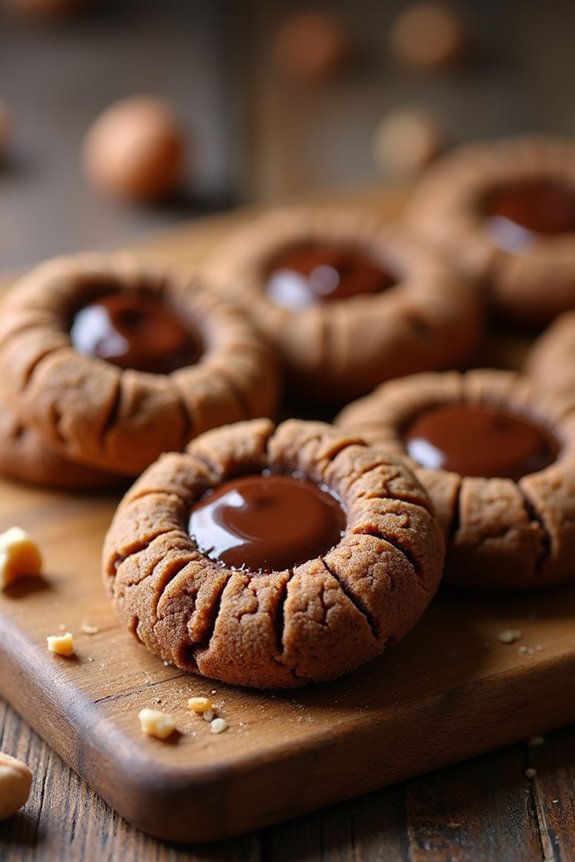
Chocolate Hazelnut Thumbprint Cookies are a delightful treat perfect for the holiday season. These cookies are a sweet twist on the classic thumbprint cookie, filled with rich chocolate and nutty hazelnut spread. Their melt-in-your-mouth texture and the irresistible combination of chocolate and hazelnuts make them a favorite at holiday gatherings.
Whether you’re baking for a festive party or simply indulging in a seasonal treat, these cookies are sure to please. These cookies aren’t only delicious but also make for a beautiful presentation on any cookie platter. The thumbprint in the center is filled with creamy chocolate hazelnut spread, creating a rich and decadent experience in every bite.
The dough itself is buttery and slightly crunchy, complementing the smooth filling perfectly. Easy to make and even easier to eat, Chocolate Hazelnut Thumbprint Cookies are a must-try for any cookie lover looking to add something special to their holiday baking repertoire.
Ingredients (serves 4-6 people):
- 1 cup unsalted butter, softened
- 1/2 cup granulated sugar
- 1 large egg yolk
- 1 teaspoon vanilla extract
- 2 cups all-purpose flour
- 1/4 teaspoon salt
- 1/2 cup finely chopped hazelnuts
- 3/4 cup chocolate hazelnut spread
Instructions:
- Prepare the Dough: In a large mixing bowl, cream together the softened butter and granulated sugar until light and fluffy. This should take about 2-3 minutes using an electric mixer. Add the egg yolk and vanilla extract, and continue to beat until well combined.
- Mix the Dry Ingredients: In a separate bowl, sift together the all-purpose flour and salt. Gradually add the dry ingredients to the butter mixture, mixing until just combined. Be careful not to overmix as this can make the cookies tough.
- Shape the Cookies: Preheat your oven to 350°F (175°C). Line a baking sheet with parchment paper. Roll the dough into 1-inch balls, then roll each ball in the finely chopped hazelnuts to coat. Place the balls on the prepared baking sheet, spacing them about 2 inches apart.
- Create the Thumbprints: Gently press down the center of each dough ball with your thumb to create a small indentation. This is where the chocolate hazelnut spread will go, so make sure the indent is deep enough without cracking the dough.
- Bake the Cookies: Bake the cookies in the preheated oven for 12-15 minutes, or until the edges are lightly golden. Remove from the oven and let them cool on the baking sheet for about 5 minutes, then transfer to a wire rack to cool completely.
- Fill the Cookies: Once the cookies are completely cool, spoon about 1 teaspoon of chocolate hazelnut spread into the center of each thumbprint. You can use a small spoon or a piping bag for more precision.
Extra Tips: To add an extra touch of flavor, you can lightly toast the hazelnuts before chopping them. This enhances their nutty aroma and adds a bit more crunch to the cookies.
If you find your dough is too sticky to handle, refrigerate it for 30 minutes before shaping the cookies. This will make it easier to form balls and will help the cookies hold their shape better during baking. Ultimately, if you’re feeling creative, try adding a sprinkle of sea salt on top of the chocolate hazelnut spread for a sweet and salty combination that elevates the flavor profile of these delightful cookies.
Eggnog Meltaway Cookies
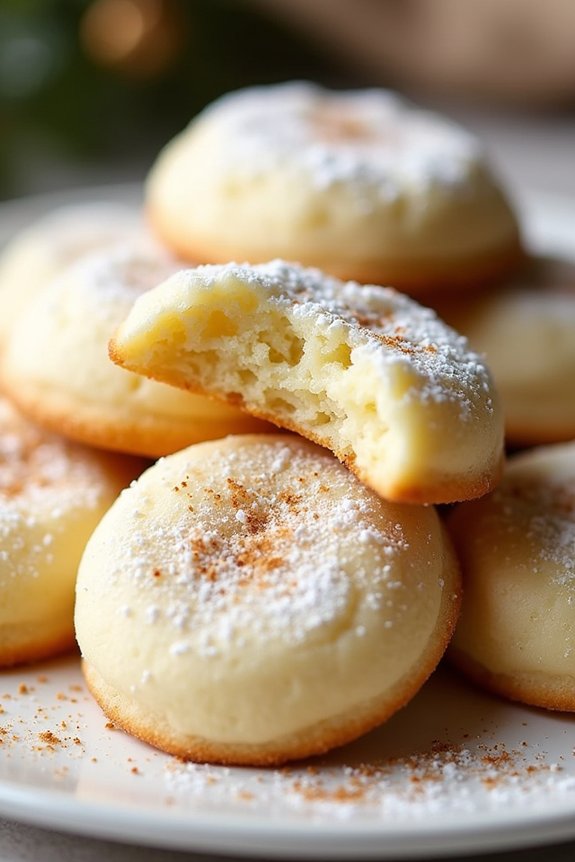
Eggnog Meltaway Cookies are a delightful treat that combine the festive flavors of eggnog with the delicate texture of meltaway cookies. Perfect for holiday gatherings or as a sweet gift for friends and family, these cookies capture the essence of the season in every bite.
With a hint of nutmeg and a tender crumb, they pair beautifully with a warm cup of eggnog or a cozy mug of hot chocolate.
These cookies aren’t only delicious but also easy to make, making them a great option for both novice and experienced bakers. The recipe yields around 24 to 30 cookies, making it ideal for serving 4-6 people or for sharing with a larger group.
Whether you’re looking to add a new cookie to your holiday baking repertoire or simply want to enjoy the comforting flavors of eggnog in a new form, these meltaways are certain to please.
Ingredients for Eggnog Meltaway Cookies (Serves 4-6):
- 1 cup unsalted butter, softened
- 1/2 cup powdered sugar
- 1 teaspoon vanilla extract
- 1/2 teaspoon rum extract
- 2 cups all-purpose flour
- 1/4 cup cornstarch
- 1/4 teaspoon ground nutmeg
- 1/4 teaspoon salt
- Additional powdered sugar for dusting
Cooking Instructions:
- Preheat and Prepare: Preheat your oven to 350°F (175°C). Line two baking sheets with parchment paper or silicone baking mats to prevent sticking.
- Cream Butter and Sugar: In a large mixing bowl, cream together the softened butter and powdered sugar until light and fluffy. This should take about 2-3 minutes using an electric mixer on medium speed.
- Add Extracts: Mix in the vanilla and rum extracts until well incorporated. These extracts provide the classic eggnog flavor to the cookies.
- Combine Dry Ingredients: In a separate bowl, whisk together the flour, cornstarch, ground nutmeg, and salt. This guarantees that the dry ingredients are evenly distributed.
- Mix Dough: Gradually add the dry ingredients to the butter and sugar mixture, mixing on low speed until a soft dough forms. Be careful not to overmix, as this can make the cookies tough rather than tender.
- Shape Cookies: Using a small cookie scoop or teaspoon, portion the dough and roll into 1-inch balls. Place the balls about 2 inches apart on the prepared baking sheets.
- Bake Cookies: Bake in the preheated oven for 12-14 minutes, or until the edges are just beginning to turn golden. The centers should remain pale for a soft texture.
- Cool and Dust: Allow the cookies to cool on the baking sheets for about 5 minutes before transferring them to a wire rack. Once cooled, dust generously with additional powdered sugar for a snowy finish.
Extra Tips:
For an even more pronounced eggnog flavor, consider adding a pinch of nutmeg to the powdered sugar before dusting the cookies.
If you prefer a slightly crispier texture, increase the baking time by 1-2 minutes, but be sure to watch them closely to prevent burning.
These cookies can be stored in an airtight container at room temperature for up to a week, making them a convenient make-ahead option for holiday parties. Enjoy them with your favorite holiday beverage for the ultimate festive experience!
Spiced Molasses Cookies
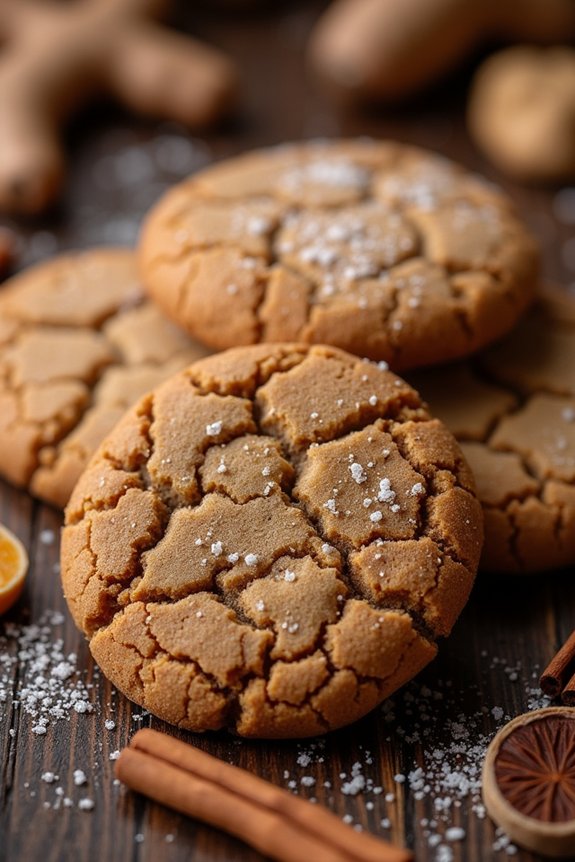
Spiced Molasses Cookies are a delightful treat that brings the warmth and aroma of holiday spices into your home. These cookies are perfect for the festive season, offering a rich molasses flavor complemented by a medley of spices such as cinnamon, ginger, and cloves. The chewy texture of these cookies makes them irresistible, and they’re sure to become a favorite addition to your Christmas cookie repertoire.
Whether you’re baking them for a holiday party or to enjoy with a cup of hot cocoa by the fire, these cookies promise to capture the essence of holiday cheer.
Traditionally, molasses cookies are enjoyed in many homes during Christmas time because of their comforting spices and deep, rich flavor. This recipe is designed to serve 4-6 people, making it ideal for a small gathering or family treat. The combination of molasses and spices creates a cookie that’s both sweet and slightly spicy, perfect for those cold winter days.
These cookies can be enjoyed on their own or paired with a dollop of whipped cream or vanilla ice cream for an extra indulgent treat.
Ingredients for Spiced Molasses Cookies (Serves 4-6):
- 2 cups all-purpose flour
- 1 teaspoon baking soda
- 1 teaspoon ground cinnamon
- 1 teaspoon ground ginger
- 1/2 teaspoon ground cloves
- 1/4 teaspoon ground nutmeg
- 1/4 teaspoon salt
- 3/4 cup unsalted butter, softened
- 1 cup packed brown sugar
- 1 large egg
- 1/4 cup molasses
- 1 teaspoon vanilla extract
- Granulated sugar for rolling
Cooking Instructions:
- Prepare the Oven and Baking Sheet: Preheat your oven to 350°F (175°C). Line a baking sheet with parchment paper or a silicone baking mat to prevent the cookies from sticking.
- Mix Dry Ingredients: In a medium bowl, whisk together the flour, baking soda, cinnamon, ginger, cloves, nutmeg, and salt. This guarantees that all the spices are evenly distributed throughout the cookie dough.
- Cream Butter and Sugar: In a large bowl, using an electric mixer, beat the softened butter and brown sugar together on medium speed until light and fluffy, about 2-3 minutes.
- Add Wet Ingredients: Beat in the egg, molasses, and vanilla extract until well combined. The mixture should be smooth and creamy.
- Combine Wet and Dry Ingredients: Gradually add the dry ingredients to the wet mixture, mixing on low speed until just combined. Be careful not to overmix the dough, as this can make the cookies tough.
- Shape the Cookies: Use a tablespoon or cookie scoop to portion out the dough and roll it into balls. Roll each ball in granulated sugar to coat the outside.
- Bake the Cookies: Place the sugar-coated dough balls onto the prepared baking sheet, spacing them about 2 inches apart. Bake in the preheated oven for 10-12 minutes, or until the edges are set and the tops begin to crack.
- Cool the Cookies: Allow the cookies to cool on the baking sheet for 5 minutes before transferring them to a wire rack to cool completely.
Extra Tips:
For the best flavor, use high-quality molasses, as this is the key ingredient in these cookies. If you prefer a softer cookie, reduce the baking time by a minute or two, keeping an eye on the edges to guarantee they don’t overbake.
You can also add a touch of black pepper to the spice mix for an extra kick. These cookies store well in an airtight container for up to a week and can be frozen for longer storage. Enjoy them fresh or pop them in the microwave for a few seconds to enjoy them warm.
Lemon Glazed Shortbread Cookies
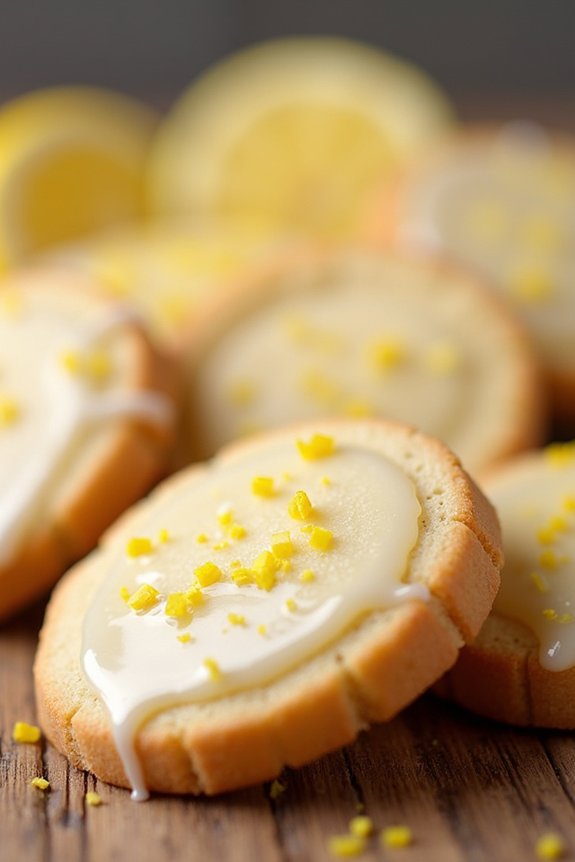
Lemon Glazed Shortbread Cookies are a perfect addition to your holiday baking repertoire. These cookies combine the classic buttery richness of shortbread with a revitalizing lemon glaze that adds a zesty touch to every bite. They’re ideal for those who enjoy a balance between sweet and tangy flavors. Not only do these cookies look delightful, with their glossy lemon glaze, but they also melt in your mouth, leaving a lingering citrusy note. Perfect for sharing with family and friends, these cookies can also be beautifully packaged as a thoughtful homemade gift.
The preparation of these cookies is straightforward, making them an excellent choice for both novice and experienced bakers. With a few simple ingredients, you can create a batch of delicious cookies that will fill your home with the comforting aroma of freshly baked goods. The lemon glaze is easy to make and provides an elegant finish. The recipe given below is designed to serve 4-6 people, allowing everyone to enjoy a generous portion of these delightful treats.
Ingredients:
- 1 cup unsalted butter, softened
- 1/2 cup granulated sugar
- 1 teaspoon vanilla extract
- 2 cups all-purpose flour
- 1/4 teaspoon salt
- Zest of 1 lemon
- 1 cup powdered sugar
- 2-3 tablespoons fresh lemon juice
Cooking Instructions:
- Prepare the Dough: In a large mixing bowl, cream together the softened butter and granulated sugar until light and fluffy. This should take about 2-3 minutes with an electric mixer on medium speed.
- Add Flavoring: Mix in the vanilla extract and lemon zest, making certain they’re evenly distributed throughout the butter and sugar mixture.
- Incorporate Dry Ingredients: Gradually add in the all-purpose flour and salt to the mixture, beating on low speed until just combined. Be careful not to overmix, as this can result in tough cookies.
- Chill the Dough: Form the dough into a disk, wrap it in plastic wrap, and refrigerate for at least 1 hour. This will make the dough easier to roll out and help the cookies hold their shape when baked.
- Preheat and Prepare Baking Sheet: Preheat your oven to 325°F (163°C). Line a baking sheet with parchment paper or a silicone baking mat.
- Roll and Cut the Cookies: On a lightly floured surface, roll out the chilled dough to about 1/4 inch thickness. Use a cookie cutter to cut out shapes and place them on the prepared baking sheet.
- Bake the Cookies: Bake the cookies in the preheated oven for 12-15 minutes, or until the edges are lightly golden. Remove from the oven and allow them to cool on the baking sheet for a few minutes before transferring to a wire rack to cool completely.
- Prepare the Lemon Glaze: In a small bowl, whisk together the powdered sugar and fresh lemon juice until smooth. Adjust the consistency by adding more lemon juice if needed.
- Glaze the Cookies: Once the cookies are completely cooled, use a spoon to drizzle the lemon glaze over each cookie, allowing it to set for at least 30 minutes before serving.
Extra Tips:
For the best results, make certain the butter is at room temperature before starting the recipe. This will help in achieving the perfect texture for your shortbread cookies.
When zesting the lemon, avoid the white pith as it can impart a bitter flavor. For an added decorative touch, consider sprinkling a small amount of lemon zest over the glaze before it sets.
These cookies can be stored in an airtight container at room temperature for up to a week, making them perfect for preparing in advance during the busy holiday season.