During the festive season, I’m always searching for desserts that taste amazing and impress my guests. This year, I’ve gathered a list of twelve sweet treats that promise to do just that. Whether you’re into rich Gingerbread Cheesecake or elegant Peppermint Chocolate Mousse, there’s a delightful surprise in every recipe. Which one will be the star of your holiday table?
Gingerbread Cheesecake
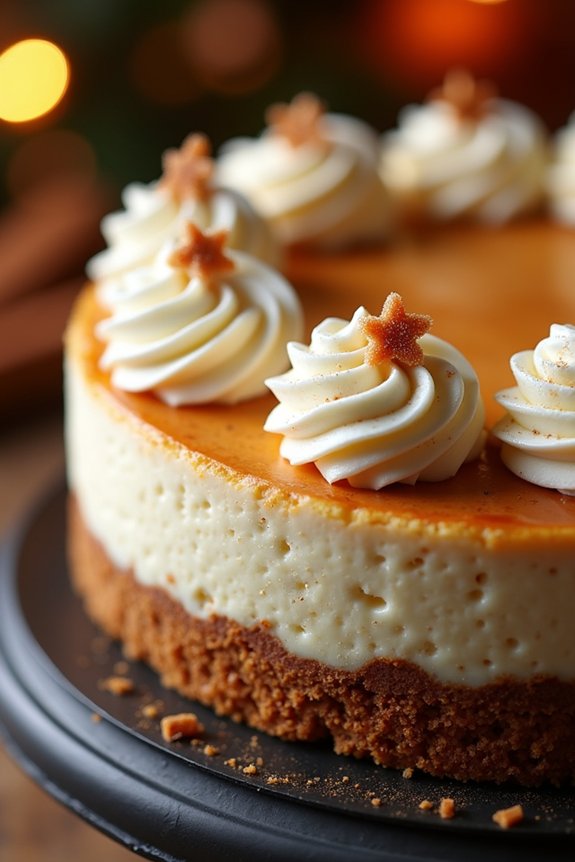
Gingerbread Cheesecake is a delightful holiday treat that combines the spicy warmth of gingerbread with the creamy richness of cheesecake. This dessert is perfect for festive gatherings, offering a unique twist on traditional holiday flavors. With its smooth texture and fragrant spices, Gingerbread Cheesecake is certain to become a holiday favorite among your family and friends.
The cheesecake features a gingerbread base, a creamy cheesecake filling infused with gingerbread spices, and a luscious topping that adds a finishing touch. It’s a wonderful way to celebrate the holiday season, and the aroma of spices like ginger, cinnamon, and nutmeg will fill your kitchen with festive cheer. This recipe serves 4-6 people, making it ideal for a small gathering or a family holiday meal.
Ingredients:
- 1 1/2 cups gingerbread cookie crumbs
- 1/4 cup unsalted butter, melted
- 16 ounces cream cheese, softened
- 1/2 cup granulated sugar
- 1/4 cup brown sugar
- 3 large eggs
- 1/4 cup sour cream
- 1 teaspoon vanilla extract
- 1 teaspoon ground cinnamon
- 1 teaspoon ground ginger
- 1/2 teaspoon ground nutmeg
- 1/4 teaspoon ground cloves
- 1/4 cup molasses
- Whipped cream, for serving (optional)
- Crystallized ginger, chopped, for garnish (optional)
Instructions:
- Prepare the Crust: Preheat your oven to 325°F (163°C). In a medium bowl, combine the gingerbread cookie crumbs and melted butter. Press the mixture firmly into the bottom of a 9-inch springform pan to form an even crust. Bake in the preheated oven for 8-10 minutes, then remove and let cool.
- Make the Cheesecake Filling: In a large mixing bowl, beat the cream cheese until smooth and creamy. Gradually add the granulated sugar and brown sugar, mixing until well combined. Add the eggs one at a time, mixing well after each addition. Mix in the sour cream, vanilla extract, cinnamon, ginger, nutmeg, cloves, and molasses until the batter is smooth and evenly combined.
- Assemble the Cheesecake: Pour the cheesecake filling over the cooled crust in the springform pan. Use a spatula to smooth the top, guaranteeing even distribution.
- Bake the Cheesecake: Place the springform pan on a baking sheet and bake in the preheated oven for 50-60 minutes, or until the edges are set and the center is slightly jiggly. Turn off the oven and leave the cheesecake inside with the door slightly ajar for an additional hour to cool gradually.
- Chill the Cheesecake: Remove the cheesecake from the oven and let it cool to room temperature. Cover and refrigerate for at least 4 hours or overnight to let the flavors meld and the cheesecake set completely.
- Serve: Before serving, remove the cheesecake from the springform pan. Optionally, garnish with whipped cream and chopped crystallized ginger. Slice and enjoy your Gingerbread Cheesecake!
Extra Tips: For the best results, verify all ingredients are at room temperature before starting, as this will help achieve a smoother cheesecake batter. When mixing the ingredients, be careful not to overbeat, as this can incorporate too much air and cause the cheesecake to crack. If you notice any cracks, don’t worry—toppings like whipped cream can easily cover them.
Finally, remember that a slow cooling process in the oven helps prevent cracks and results in a perfectly creamy texture.
Peppermint Chocolate Mousse

Indulge in the creamy and luxurious flavors of Peppermint Chocolate Mousse, a perfect dessert for your Christmas celebrations. This delightful treat blends the rich taste of chocolate with the invigorating zing of peppermint, creating a harmonious balance that will captivate your taste buds.
The smooth and velvety texture of the mousse is complemented by the subtle crunch of peppermint candies, making it an exquisite addition to your holiday dessert table. Ideal for serving 4-6 people, this Peppermint Chocolate Mousse isn’t only a feast for the palate but also a feast for the eyes.
Its elegant presentation will impress your guests, while its simplicity in preparation makes it a go-to recipe for any festive occasion. Whether you’re hosting a large gathering or enjoying an intimate family dinner, this mousse is sure to be a crowd-pleaser.
Ingredients (for 4-6 servings):
- 1 cup heavy cream
- 8 oz semi-sweet chocolate chips
- 3 large eggs, separated
- 1/4 cup granulated sugar
- 1 teaspoon peppermint extract
- 1/4 teaspoon cream of tartar
- Pinch of salt
- Crushed peppermint candies, for garnish
Cooking Instructions:
1. Melt the Chocolate:
In a heatproof bowl set over a pot of simmering water, melt the chocolate chips, stirring occasionally until smooth. Remove from heat and let cool slightly.
2. Prepare the Whipped Cream:
In a large mixing bowl, whip the heavy cream until soft peaks form. Gradually fold in the peppermint extract. Set aside in the refrigerator to keep it chilled.
3. Beat Egg Yolks:
In another bowl, whisk the egg yolks with the granulated sugar until the mixture is pale and thick. Slowly fold the cooled, melted chocolate into the egg yolk mixture until fully combined.
4. Beat Egg Whites:
In a clean bowl, whisk the egg whites with the cream of tartar and a pinch of salt until stiff peaks form. This will add airiness to the mousse.
5. Combine Ingredients:
Gently fold the egg whites into the chocolate mixture, being careful not to deflate the mixture. Once combined, fold in the whipped cream until the mousse is smooth and homogeneous.
6. Chill and Serve:
Spoon the mousse into individual serving glasses or bowls. Refrigerate for at least 2-3 hours, or until set. Before serving, garnish with crushed peppermint candies for an extra festive touch.
Extra Tips:
For the best results, make sure that all your ingredients are at room temperature before beginning the preparation. This will help in achieving a smooth and creamy consistency in the mousse.
Additionally, when folding in the whipped cream and egg whites, use a gentle motion to maintain the airiness of the mousse. If you prefer a stronger peppermint flavor, you can adjust the amount of peppermint extract according to your taste preference.
Eggnog Bread Pudding

Eggnog Bread Pudding is a delicious and festive dessert that brings the classic holiday flavor of eggnog into a comforting, warm, and satisfying dish. This dessert is perfect for a cozy family gathering or a holiday party, offering a sweet and creamy experience that’s sure to please. The rich taste of eggnog, combined with the texture of bread pudding, creates a delightful treat that captures the essence of the Christmas season.
This recipe for Eggnog Bread Pudding serves 4-6 people and is simple to prepare, making it an ideal choice for busy holiday schedules. Using day-old bread guarantees that the pudding has the perfect consistency, while the eggnog adds a luxurious flavor that’s both sweet and spiced. With a few simple ingredients and easy steps, you’ll have a homemade dessert that can be enjoyed by everyone around your holiday table.
Ingredients for 4-6 servings:
- 4 cups cubed day-old bread (preferably French or Italian bread)
- 2 cups eggnog
- 3 large eggs
- 1/2 cup granulated sugar
- 1 teaspoon vanilla extract
- 1/2 teaspoon ground cinnamon
- 1/4 teaspoon ground nutmeg
- 1/4 cup unsalted butter, melted
- 1/2 cup raisins (optional)
- Whipped cream or vanilla ice cream for serving (optional)
Cooking Instructions:
- Prepare the Bread: Preheat your oven to 350°F (175°C). Grease a 9×9-inch baking dish and set aside. Cut the day-old bread into 1-inch cubes and spread them evenly in the prepared baking dish.
- Make the Eggnog Mixture: In a large mixing bowl, whisk together the eggnog, eggs, sugar, vanilla extract, cinnamon, and nutmeg until well combined. Make sure the sugar is fully dissolved.
- Combine Ingredients: Pour the eggnog mixture over the cubed bread in the baking dish. Gently press down on the bread to confirm it absorbs the liquid evenly. If using raisins, sprinkle them over the top and gently mix them in.
- Add Butter: Drizzle the melted butter over the top of the bread pudding mixture. This will help create a rich and golden crust.
- Bake: Place the baking dish in the preheated oven and bake for 40-45 minutes, or until the top is golden brown and the center is set. You can test this by inserting a toothpick into the center; if it comes out clean, the pudding is done.
- Cool and Serve: Allow the bread pudding to cool for at least 10 minutes before serving. This will help it set further and make it easier to cut into portions. Serve warm with whipped cream or vanilla ice cream if desired.
Extra Tips:
For the best results, use bread that’s slightly stale, as it will soak up the eggnog mixture more effectively, resulting in a better texture.
Feel free to get creative with add-ins like chopped nuts or chocolate chips to enhance the flavor. If you’re looking for a less sweet version, you can reduce the sugar by a quarter cup.
Finally, if you prefer a more pronounced eggnog flavor, consider adding a splash of rum or bourbon to the eggnog mixture for an adult twist on this classic dessert.
Stollen Bites
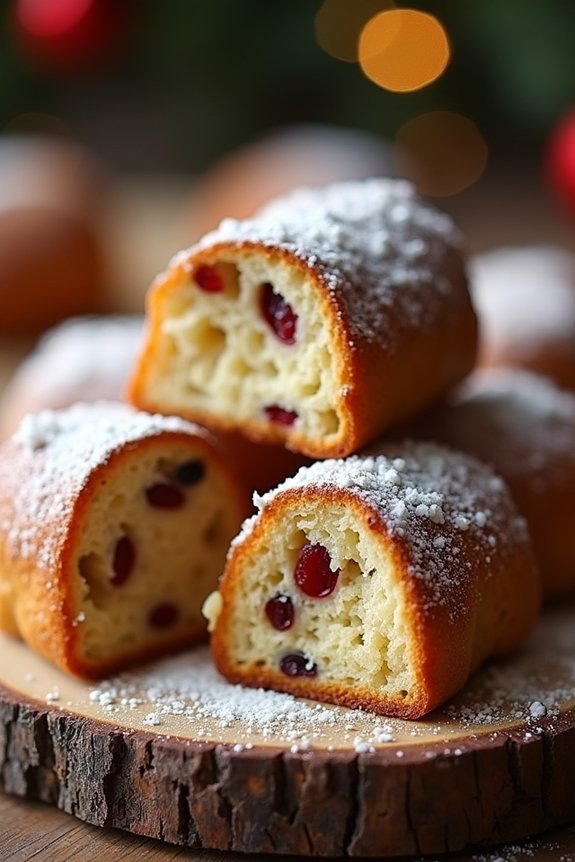
Stollen Bites are a delightful twist on the traditional German Christmas bread, Stollen. These bite-sized treats capture the essence of the holiday season with their rich flavors of dried fruits, nuts, and a hint of spice, all wrapped in a buttery, yeasted dough. Perfect for festive gatherings, these Stollen Bites are easy to share and serve, making them a wonderful addition to any holiday dessert spread.
With a dusting of powdered sugar, they look just as festive as they taste, bringing a touch of Old World tradition to your modern holiday table. Originating from Saxony in Germany, Stollen has been a holiday staple for centuries. This recipe for Stollen Bites combines the classic ingredients and flavors of traditional Stollen into a more manageable form, perfect for those who enjoy a smaller, more convenient dessert option.
With each bite, you’ll experience the perfect balance of sweet and savory, making these a favorite for both young and old alike. The following recipe makes enough for 4-6 people, guaranteeing everyone gets a taste of this festive treat.
Ingredients:
- 2 cups all-purpose flour
- 1/4 cup granulated sugar
- 1/2 teaspoon salt
- 1/2 teaspoon ground cinnamon
- 1/4 teaspoon ground nutmeg
- 1/4 teaspoon ground cardamom
- 1/4 cup unsalted butter, softened
- 3/4 cup warm milk
- 1 packet (2 1/4 teaspoons) active dry yeast
- 1/2 cup mixed dried fruits (such as raisins, currants, and candied citrus peel)
- 1/4 cup chopped almonds
- 1/2 teaspoon vanilla extract
- 1/2 teaspoon almond extract
- Powdered sugar, for dusting
Cooking Instructions:
- Prepare the Dough: In a large mixing bowl, combine the flour, sugar, salt, cinnamon, nutmeg, and cardamom. Mix well to make sure the spices are evenly distributed.
- Activate the Yeast: In a separate bowl, combine the warm milk and yeast. Let it sit for about 5 minutes, or until the mixture becomes frothy, indicating the yeast is active.
- Mix Wet and Dry Ingredients: Add the softened butter, vanilla extract, and almond extract to the yeast mixture. Gradually combine this mixture with the dry ingredients, stirring until a dough begins to form.
- Knead the Dough: Turn the dough out onto a lightly floured surface and knead for about 5-7 minutes, until smooth and elastic. If the dough is sticky, add a little more flour as needed.
- Incorporate Fruits and Nuts: Flatten the dough slightly and sprinkle the dried fruits and chopped almonds over it. Fold the dough over the additions and knead until they’re evenly distributed throughout the dough.
- First Rise: Place the dough in a lightly greased bowl, cover with a clean cloth, and let it rise in a warm place for about 1 to 1.5 hours, or until doubled in size.
- Shape the Bites: Punch down the risen dough and divide it into small, bite-sized portions. Roll each portion into a ball and place them on a baking sheet lined with parchment paper.
- Second Rise: Cover the shaped bites with a cloth and let them rise for another 30 minutes.
- Bake: Preheat your oven to 350°F (175°C). Bake the Stollen Bites in the preheated oven for 15-20 minutes, or until they’re golden brown and cooked through.
- Cool and Dust: Allow the Stollen Bites to cool on a wire rack. Once cooled, dust them generously with powdered sugar before serving.
Extra Tips:
For best results, make sure that your yeast is fresh and active, as this is vital for the dough to rise properly. You can experiment with different dried fruits and nuts to customize the flavor to your liking.
If you prefer a more traditional Stollen flavor, consider adding a tablespoon of rum or brandy to the dough for added depth. Remember to store any leftovers in an airtight container to maintain their freshness, and enjoy them within a few days for the best taste and texture.
Cranberry Orange Tart
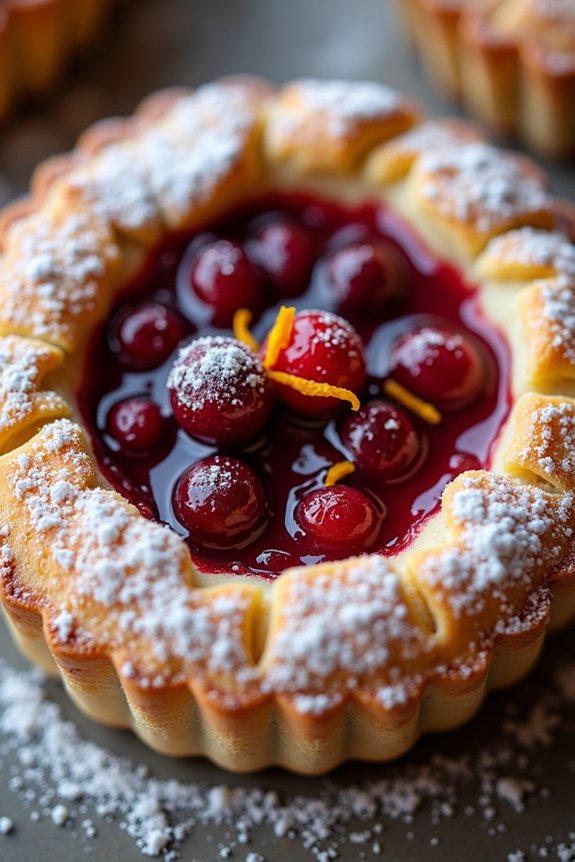
Cranberry Orange Tart is a festive dessert that perfectly combines the tartness of cranberries with the invigorating zest of oranges. This dessert isn’t only visually stunning with its vibrant colors but also offers a delightful balance of sweet and tangy flavors. Ideal for a Christmas gathering or any holiday celebration, this tart will surely be a hit with your guests.
The buttery crust complements the juicy filling, creating a harmonious blend of textures and tastes that will leave everyone craving more.
Preparing a Cranberry Orange Tart is a straightforward process that involves making a simple pastry crust from scratch and a flavorful filling. The crust provides a sturdy base that holds the cranberry and orange mixture beautifully. The filling is made by cooking cranberries with sugar, orange zest, and juice, resulting in a jam-like consistency that packs a punch of flavor. This recipe serves 4-6 people, making it perfect for a small festive gathering.
Ingredients for Cranberry Orange Tart (Serves 4-6):
- 1 1/2 cups all-purpose flour
- 1/2 cup unsalted butter, chilled and cubed
- 1/4 cup granulated sugar
- 1/4 teaspoon salt
- 3 tablespoons ice water
- 2 cups fresh cranberries
- 1/2 cup granulated sugar (for filling)
- 1/4 cup orange juice
- 1 tablespoon orange zest
- 1 teaspoon vanilla extract
- 1 tablespoon cornstarch
- 1 tablespoon water (for cornstarch slurry)
- Powdered sugar for dusting (optional)
Cooking Instructions:
- Prepare the Crust: In a large bowl, combine 1 1/2 cups of all-purpose flour, 1/4 cup of granulated sugar, and 1/4 teaspoon of salt. Add 1/2 cup of chilled, cubed unsalted butter. Use a pastry cutter or your fingers to blend the butter into the flour mixture until it resembles coarse crumbs.
- Form the Dough: Gradually add 3 tablespoons of ice water to the flour mixture, mixing gently until the dough comes together. Form the dough into a disk, wrap it in plastic wrap, and refrigerate for at least 30 minutes.
- Preheat Oven: Preheat your oven to 375°F (190°C).
- Roll Out the Dough: Once chilled, roll out the dough on a lightly floured surface to fit a 9-inch tart pan. Press the dough into the pan, trimming the excess. Prick the base with a fork to prevent bubbling.
- Blind Bake the Crust: Place parchment paper over the crust and fill with pie weights or dried beans. Bake in the preheated oven for 15 minutes. Remove the weights and parchment paper, and bake for an additional 5 minutes until the crust is lightly golden. Set aside to cool.
- Prepare the Filling: In a medium saucepan, combine 2 cups of fresh cranberries, 1/2 cup of granulated sugar, 1/4 cup of orange juice, 1 tablespoon of orange zest, and 1 teaspoon of vanilla extract. Cook over medium heat, stirring frequently, until the cranberries burst and the mixture thickens.
- Thicken the Filling: In a small bowl, mix 1 tablespoon of cornstarch with 1 tablespoon of water to create a slurry. Stir this into the cranberry mixture and cook for another 2-3 minutes until the filling is thickened.
- Assemble the Tart: Pour the cranberry filling into the pre-baked crust, spreading it evenly. Bake in the oven for an additional 10-15 minutes until the filling is set.
- Cool and Serve: Allow the tart to cool completely before removing it from the pan. Dust with powdered sugar if desired before serving.
Extra Tips:
For the best results, make certain that your butter is thoroughly chilled before incorporating it into the flour mixture for the crust. This will help achieve a flakier texture.
If fresh cranberries aren’t available, you can use frozen cranberries, but adjust the cooking time slightly to ensure they’re fully softened.
To enhance the flavor, consider adding a pinch of cinnamon or nutmeg to the cranberry filling. Finally, the tart can be prepared a day in advance, which allows the flavors to meld beautifully, making it even more delicious when served.
Spiced Pecan Snowballs
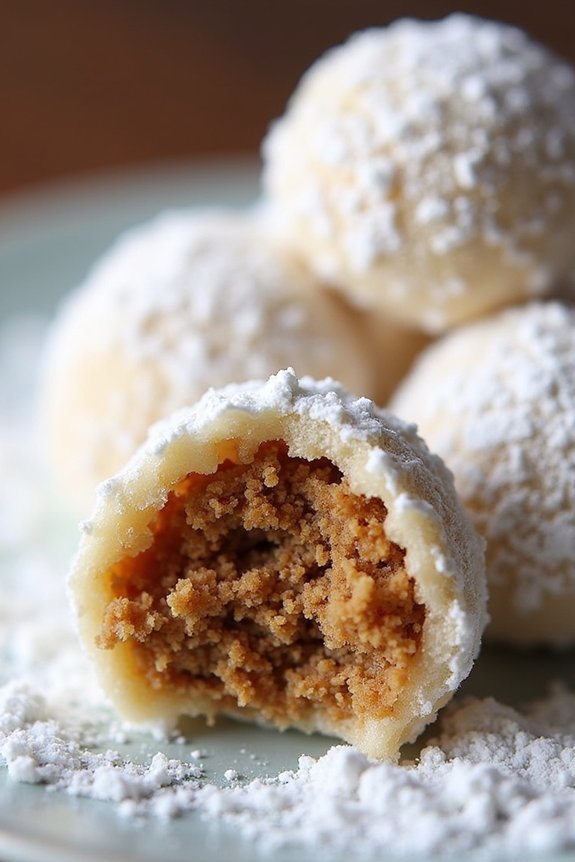
Spiced Pecan Snowballs are a delightful addition to any Christmas dessert table, offering a unique blend of nutty richness and aromatic spices. These little treats are perfect for the holiday season, with their melt-in-your-mouth texture and festive flavor profile.
The combination of toasted pecans, warm spices, and a dusting of powdered sugar creates a delightful confection that’s both comforting and indulgent. Perfect for gift-giving or as a sweet ending to a holiday meal, these Spiced Pecan Snowballs are bound to be a hit with friends and family.
The recipe is quite simple, making it an ideal choice for both novice and experienced bakers. The key to achieving the best flavor is to use fresh pecans and high-quality spices. These snowballs can be made in advance and stored, allowing you more time to enjoy the holiday festivities without worrying about last-minute baking.
With their charming, snow-like appearance, they also make a beautiful addition to any dessert spread or holiday cookie platter.
Ingredients for 4-6 servings:
- 1 cup unsalted butter, softened
- 1/2 cup powdered sugar, plus extra for dusting
- 1 teaspoon vanilla extract
- 1/4 teaspoon ground cinnamon
- 1/4 teaspoon ground nutmeg
- 1/4 teaspoon ground allspice
- 1/2 teaspoon salt
- 2 cups all-purpose flour
- 1 cup finely chopped pecans
Cooking Instructions:
- Preheat and Prepare: Preheat your oven to 350°F (175°C). Line a baking sheet with parchment paper or a silicone baking mat to guarantee the snowballs don’t stick.
- Cream Butter and Sugar: In a large mixing bowl, cream together the softened butter and 1/2 cup powdered sugar until light and fluffy. This usually takes about 3-4 minutes using an electric mixer.
- Add Vanilla and Spices: Mix in the vanilla extract, ground cinnamon, nutmeg, allspice, and salt. Blend well to guarantee that the spices are evenly distributed throughout the mixture.
- Incorporate Flour and Pecans: Gradually add the flour to the creamed mixture, mixing until just combined. Fold in the finely chopped pecans, ensuring they’re evenly distributed in the dough.
- Shape the Dough: Using a small cookie scoop or your hands, shape the dough into 1-inch balls. Place them on the prepared baking sheet, leaving about an inch of space between each ball.
- Bake: Bake in the preheated oven for 12-15 minutes or until the bottoms of the cookies are lightly golden. Be careful not to overbake as they can dry out easily.
- Cool and Dust: Allow the cookies to cool on the baking sheet for about 5 minutes. While still warm, roll the snowballs in additional powdered sugar until fully coated. Let them cool completely on a wire rack.
Extra Tips:
For the best texture, confirm your butter is at room temperature before starting the recipe. This helps in achieving a smooth, creamy mixture.
When chopping the pecans, aim for a fine consistency but avoid turning them into a paste. If you’d like a more pronounced nutty flavor, consider toasting the pecans lightly before adding them to the dough.
These snowballs can be stored in an airtight container for up to a week, making them a great make-ahead option for busy holiday seasons.
Chocolate Hazelnut Yule Log
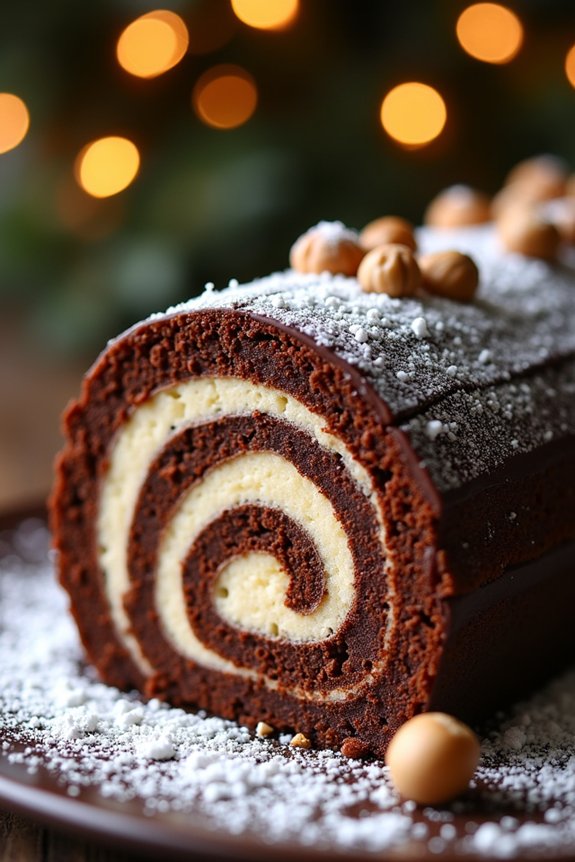
The Chocolate Hazelnut Yule Log is a classic festive dessert that combines the rich flavors of chocolate and hazelnut to create an indulgent treat perfect for the holiday season. This dessert, also known as Bûche de Noël, is made of a light and fluffy chocolate sponge cake rolled with a creamy hazelnut filling and finished with a decadent chocolate ganache.
Its log-like appearance, often decorated with festive touches such as powdered sugar to mimic snow, makes it a stunning centerpiece for any Christmas table. The flavors of the Chocolate Hazelnut Yule Log are both comforting and sophisticated, with the nutty essence of hazelnuts complementing the deep notes of chocolate beautifully.
This recipe is designed to serve 4-6 people, making it an ideal choice for a small family gathering or intimate holiday celebration. With a little patience and attention to detail, you’ll be able to craft a dessert that’s not only delicious but also visually impressive, embodying the festive spirit of Christmas.
Ingredients:
- 4 large eggs
- 100g granulated sugar
- 75g all-purpose flour
- 25g cocoa powder
- 1/4 tsp salt
- 100g hazelnut spread (such as Nutella)
- 150ml heavy cream
- 150g dark chocolate, chopped
- 50g butter
- Powdered sugar, for dusting
- 50g chopped hazelnuts, toasted
Cooking Instructions:
- Preheat and Prepare: Preheat your oven to 180°C (350°F). Line a 10″x15″ jelly roll pan with parchment paper, making sure it covers the sides as well.
- Make the Sponge Cake: In a large bowl, whisk the eggs and granulated sugar together until pale and fluffy, about 5 minutes. Sift in the flour, cocoa powder, and salt, and gently fold them into the egg mixture with a spatula, being careful not to deflate the batter.
- Bake the Sponge: Pour the batter into the prepared pan and spread it evenly. Bake in the preheated oven for 10-12 minutes, or until the cake springs back when lightly touched. Remove from the oven and let it cool for 5 minutes.
- Roll the Cake: While still warm, carefully invert the cake onto a clean kitchen towel dusted with powdered sugar. Peel off the parchment paper. Starting from a short end, gently roll the cake up with the towel and let it cool completely while rolled.
- Prepare the Filling: In a medium bowl, whip the heavy cream until soft peaks form. Gently fold in the hazelnut spread until fully combined and smooth.
- Unroll and Fill: Once the cake has cooled, unroll it carefully. Spread the hazelnut cream evenly over the surface, then re-roll the cake without the towel this time.
- Make the Ganache: In a saucepan, heat the chopped dark chocolate and butter over low heat, stirring until melted and smooth. Allow it to cool slightly.
- Decorate the Log: Spread the chocolate ganache over the rolled cake, smoothing it with a spatula. Use a fork to create a log-like texture. Sprinkle with toasted hazelnuts and dust with powdered sugar.
- Chill and Serve: Refrigerate the Yule Log for at least 1 hour before serving. Slice and enjoy!
Extra Tips: When making the sponge cake, confirm that the eggs are at room temperature to achieve the best volume when whisking. Be gentle when folding the dry ingredients into the egg mixture to maintain the cake’s lightness.
If the sponge cracks slightly while rolling, don’t worry—these can be covered by the ganache. For a more intense hazelnut flavor, consider adding a few drops of hazelnut extract to the filling.
Coconut Macaroon Trees
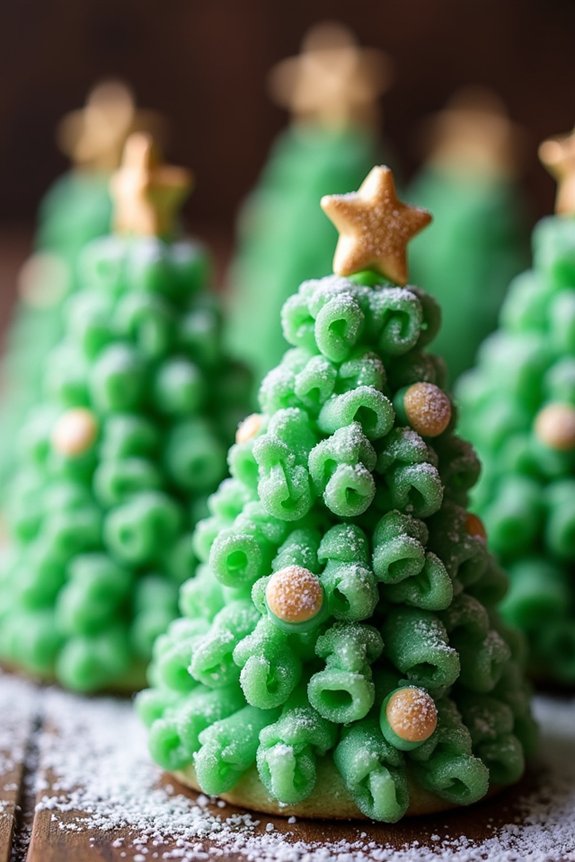
Coconut Macaroon Trees are a delightful and festive dessert perfect for celebrating the holiday season. These charming treats aren’t only visually appealing but also deliciously sweet and chewy, combining the tropical flavor of coconut with a hint of vanilla.
Shaped like miniature Christmas trees, they’re a fun and creative addition to any holiday dessert table. Whether you’re hosting a festive gathering or simply want to indulge in a holiday-themed treat, these Coconut Macaroon Trees are bound to impress.
The recipe is straightforward and requires minimal ingredients, making it a great option for both novice and experienced bakers. With a preparation time of about 20 minutes and a baking time of 15 minutes, these sweet treats can be whipped up in no time. The recipe yields enough to serve 4-6 people, making it perfect for small get-togethers or family gatherings.
Ingredients for 4-6 servings:
- 2 ½ cups sweetened shredded coconut
- ⅔ cup sweetened condensed milk
- 1 teaspoon vanilla extract
- 2 large egg whites
- ¼ teaspoon salt
- Green food coloring
- Star-shaped sprinkles or candies (optional, for decoration)
- Powdered sugar (optional, for dusting)
Cooking Instructions:
- Preheat the Oven: Start by preheating your oven to 325°F (165°C). Line a baking sheet with parchment paper to prevent the macaroons from sticking.
- Mix the Ingredients: In a large mixing bowl, combine the shredded coconut, sweetened condensed milk, and vanilla extract. Mix until all the ingredients are well combined and the coconut is evenly coated.
- Prepare the Egg Whites: In a separate bowl, whisk the egg whites and salt until stiff peaks form. This will give the macaroons a light and airy texture.
- Combine Mixtures: Carefully fold the beaten egg whites into the coconut mixture. Be gentle to maintain the volume of the egg whites, guaranteeing your macaroons are light and fluffy.
- Add Color: Add a few drops of green food coloring to the mixture and gently fold until the color is evenly distributed, resembling a Christmas tree green.
- Shape the Trees: Using your hands or a small ice cream scoop, form the mixture into small mounds or tree shapes on the prepared baking sheet. If desired, gently press a star-shaped sprinkle or candy onto the top of each tree for decoration.
- Bake the Macaroons: Place the baking sheet in the preheated oven and bake for 15-20 minutes, or until the edges of the macaroons are golden brown.
- Cool and Serve: Allow the macaroons to cool on the baking sheet for a few minutes before transferring them to a wire rack to cool completely. Dust with powdered sugar for a snowy effect before serving, if desired.
Extra Tips:
For best results, confirm your egg whites are at room temperature before beating; they’ll whip up to a greater volume. If you prefer a less sweet version, you can use unsweetened shredded coconut and adjust the sweetness with additional sweetened condensed milk to your liking.
Be sure to monitor the macaroons closely during baking, as the edges can turn brown quickly. If you find the macaroons browning too fast, you can tent them with aluminum foil to prevent over-browning.
Enjoy these adorable and delicious Coconut Macaroon Trees as a festive treat during your holiday celebrations!
Mulled Wine Poached Pears
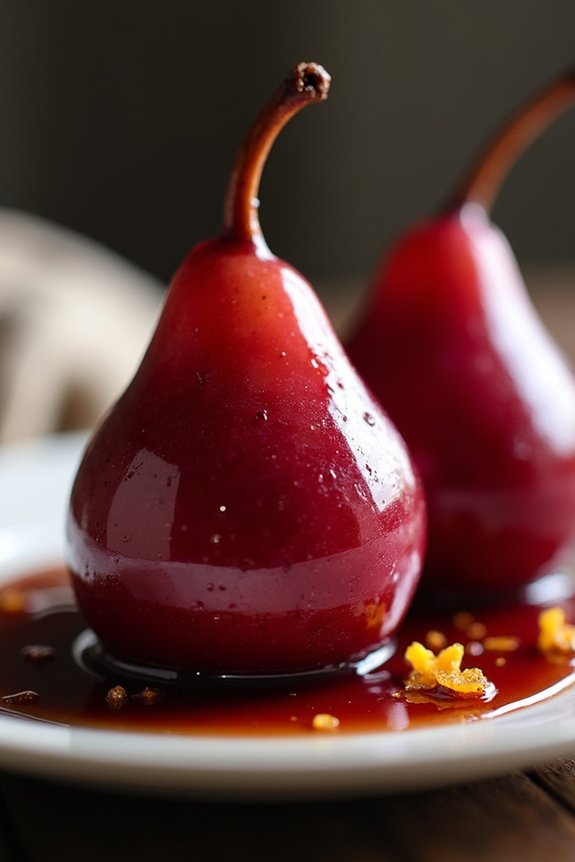
Mulled Wine Poached Pears are a delightful and elegant dessert perfect for the holiday season. They offer a sophisticated balance of sweet and spicy flavors, combining the richness of red wine with the aromatic spices usually found in mulled wine.
This dish isn’t only visually stunning, with the deep red hue of the wine infusing the pears, but also a treat for the senses with its warming spices and tender, juicy texture. Ideal for a holiday gathering or a cozy dinner party, this dessert is surprisingly simple to prepare.
The pears are gently poached in a mixture of red wine, sugar, and spices, allowing them to absorb the rich flavors and transform into a festive treat. The result is a dessert that isn’t only delicious but also a beautiful centerpiece on any holiday table.
Ingredients for 4-6 servings:
- 4-6 ripe but firm pears, peeled, stems intact
- 1 bottle (750ml) red wine (Merlot or Cabernet Sauvignon)
- 1 cup granulated sugar
- 1 cinnamon stick
- 2 star anise
- 4 whole cloves
- 1 vanilla bean, split and seeds scraped
- Zest of 1 orange
- 1 cup water
Cooking Instructions:
- Prepare the pears: Peel the pears, leaving the stems intact. Trim the base slightly if needed to allow them to stand upright.
- Make the poaching liquid: In a large saucepan, combine the red wine, sugar, cinnamon stick, star anise, cloves, vanilla bean and seeds, orange zest, and water. Stir over medium heat until the sugar is fully dissolved.
- Poach the pears: Gently add the pears to the saucepan, guaranteeing they’re mostly submerged in the liquid. Bring the mixture to a simmer. Reduce the heat to low and cover the saucepan with a lid. Allow the pears to poach for 20-30 minutes, turning occasionally, until they’re tender when pierced with a knife.
- Reduce the liquid: Once the pears are tender, carefully remove them from the saucepan and set them aside on a plate. Increase the heat to medium-high and let the poaching liquid simmer uncovered until it reduces by about half and thickens into a syrupy consistency.
- Serve: Arrange the pears upright on serving plates and drizzle with the reduced syrup. Optionally, serve with a scoop of vanilla ice cream or a dollop of whipped cream for added indulgence.
Extra Tips:
When selecting pears for this recipe, choose ones that are ripe but firm to guarantee they hold their shape during poaching. Bosc or Anjou pears work particularly well.
If the pears don’t stand upright naturally, you can gently trim the bottoms to create a flat base. For an added touch of flavor, consider adding a splash of brandy or orange liqueur to the poaching liquid.
Finally, the poached pears can be made a day in advance; simply store them in the refrigerator in the poaching liquid and reheat gently before serving.
Pistachio and Raspberry Pavlova

Pistachio and Raspberry Pavlova is a delightful dessert that combines the crunchy sweetness of a classic pavlova with the nutty flavor of pistachios and the tartness of fresh raspberries. This dessert is perfect for Christmas as it resembles a festive wreath and offers a revitalizing end to a holiday meal.
The meringue base is crisp on the outside and soft and chewy on the inside, providing a perfect contrast to the creamy topping and fresh fruit. This dessert isn’t only delicious but also visually stunning, making it a centerpiece worthy of any festive table.
The combination of colors from the green pistachios and red raspberries against the white meringue creates a beautiful contrast that’s sure to impress your guests. Whether you’re a seasoned baker or a novice, this recipe is straightforward enough for anyone to master, ensuring that you can bring a touch of elegance to your Christmas celebrations.
Ingredients (serves 4-6):
- 4 large egg whites
- 1 cup granulated sugar
- 1 teaspoon white vinegar
- 1 teaspoon cornstarch
- 1 teaspoon vanilla extract
- 1 cup heavy cream
- 2 tablespoons powdered sugar
- 1 teaspoon vanilla extract (for cream)
- 1 cup fresh raspberries
- 1/2 cup shelled unsalted pistachios, roughly chopped
- Mint leaves, for garnish (optional)
Instructions:
- Preheat the Oven: Preheat your oven to 300°F (150°C). Line a baking sheet with parchment paper and trace a 9-inch circle on it as a guide for shaping your pavlova.
- Prepare the Meringue: In a large, clean bowl, beat the egg whites on medium speed until soft peaks form. Gradually add the granulated sugar, one tablespoon at a time, while continuing to beat. Increase the speed to high and beat until stiff, glossy peaks form.
- Add Stabilizers: Sprinkle the vinegar, cornstarch, and vanilla extract over the meringue. Gently fold them in using a spatula. This step helps to stabilize the meringue and gives it a marshmallow-like texture inside.
- Shape the Pavlova: Spoon the meringue onto the parchment paper, spreading it within the traced circle. Use a spatula to create a shallow well in the center, which will later hold the cream and toppings.
- Bake the Pavlova: Reduce the oven temperature to 250°F (120°C) and bake for 60-70 minutes. The pavlova should be crisp on the outside and slightly soft in the center. Turn off the oven and let the pavlova cool completely inside the oven with the door ajar.
- Prepare the Cream: In a medium bowl, beat the heavy cream, powdered sugar, and vanilla extract until soft peaks form.
- Assemble the Pavlova: Once the pavlova is completely cool, transfer it to a serving plate. Spread the whipped cream generously over the center of the pavlova.
- Add Toppings: Scatter the fresh raspberries and chopped pistachios over the cream. Garnish with mint leaves if desired.
Extra Tips: Ensure that your mixing bowl and beaters are completely clean and dry before whipping the egg whites, as any grease or moisture can prevent the meringue from reaching the desired stiff peaks.
If you don’t have fresh raspberries, you can use a combination of seasonal berries or even a raspberry coulis for added flavor. Allow the pavlova to cool completely in the oven to prevent it from cracking due to sudden temperature changes.
This dessert can be prepared a day in advance; just assemble it with the cream and toppings right before serving to keep the meringue crisp.
Salted Caramel Truffles
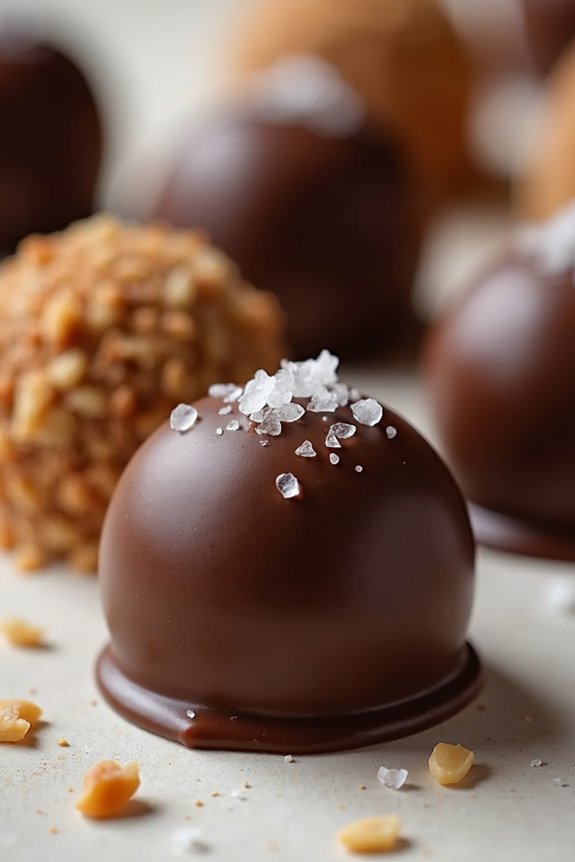
Salted Caramel Truffles are a delightful treat that perfectly balance the rich, buttery sweetness of caramel with a hint of sea salt. These bite-sized indulgences are perfect for holiday gatherings, making them an elegant and delicious addition to any Christmas dessert spread. Their smooth, creamy texture and the contrast of flavors make them a favorite among truffle lovers and a wonderful homemade gift option for friends and family during the festive season.
These truffles aren’t only a joy to eat but also a fun and rewarding project to make at home. With a bit of patience and some simple ingredients, you can create these luxurious treats. The process involves making a luscious caramel, combining it with chocolate, and forming them into perfect little spheres of decadence. Whether you’re an experienced home cook or a beginner, these Salted Caramel Truffles will be a hit at your holiday gatherings.
Ingredients (serves 4-6):
- 1 cup granulated sugar
- 6 tablespoons unsalted butter, at room temperature
- 1/2 cup heavy cream
- 1 teaspoon sea salt
- 8 ounces semisweet chocolate, finely chopped
- 1 teaspoon vanilla extract
- Cocoa powder or finely crushed nuts, for coating
Instructions:
- Prepare the Caramel: In a medium saucepan over medium heat, melt the sugar, stirring constantly with a wooden spoon or heat-resistant spatula. Be patient as the sugar will clump and eventually melt into a thick amber liquid. Once all the sugar has melted, add the butter and stir until fully incorporated.
- Add Cream and Salt: Slowly pour in the heavy cream while continuing to stir. The mixture will bubble vigorously, so be careful. Let the mixture boil for about 1 minute, then remove from heat and stir in the sea salt. Allow the caramel to cool slightly.
- Combine with Chocolate: Place the chopped chocolate in a heatproof bowl. Pour the slightly cooled caramel over the chocolate and let it sit for a minute to allow the chocolate to start melting. Stir until the mixture is smooth and glossy. Stir in the vanilla extract.
- Chill the Mixture: Cover the bowl with plastic wrap and refrigerate for about 2 hours, or until the mixture is firm enough to scoop.
- Form the Truffles: Using a small cookie scoop or a spoon, scoop out small amounts of the mixture and roll them into balls between your palms. If the mixture becomes too sticky to handle, return it to the refrigerator to firm up.
- Coat the Truffles: Roll each truffle in cocoa powder or crushed nuts until they’re evenly coated. Place them on a baking sheet lined with parchment paper.
- Serve or Store: Let the truffles set at room temperature for about 30 minutes before serving. Store any leftovers in an airtight container in the refrigerator for up to a week.
Extra Tips:
When making the caramel, it’s important to pay close attention to the sugar as it melts to prevent it from burning. If you’re new to making caramel, use a light-colored saucepan so you can monitor the color changes more easily.
Also, make sure your cream is at room temperature before adding it to the caramel to prevent it from seizing. If you find rolling the truffles too messy, dusting your hands with cocoa powder can help minimize sticking.
Enjoy your homemade Salted Caramel Truffles as a delightful holiday treat or a special gift!
White Chocolate Cranberry Fudge
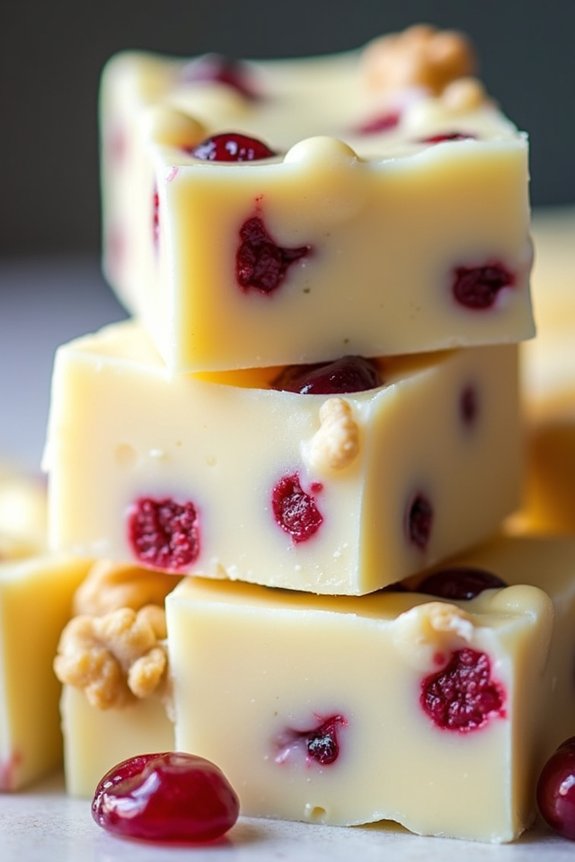
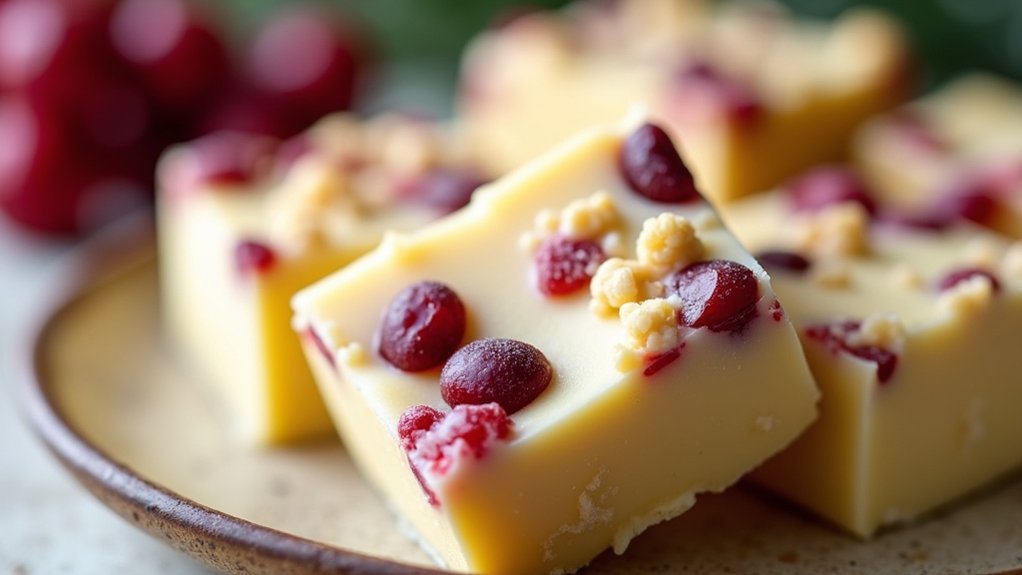
Indulge in the festive spirit with a delightful batch of White Chocolate Cranberry Fudge, a delectable treat perfect for your Christmas celebrations. This luxurious fudge combines the creamy sweetness of white chocolate with the tangy burst of dried cranberries, resulting in a harmonious blend of flavors that will impress your family and friends.
With its smooth texture and vibrant appearance, this fudge makes for an appealing addition to any holiday dessert spread. Easy to prepare and even easier to enjoy, this recipe yields enough fudge to serve 4-6 people, making it an ideal choice for intimate gatherings or as a thoughtful homemade gift.
The combination of the rich white chocolate and the tart cranberries creates a balanced sweetness that’s sure to be a hit. Whether you’re a seasoned baker or a novice in the kitchen, this recipe will guide you through each step to create a mouthwatering treat everyone will love.
Ingredients (serving size: 4-6 people):
- 2 cups white chocolate chips
- 14 oz can sweetened condensed milk
- 1 teaspoon vanilla extract
- 1/2 cup dried cranberries
- 1/4 cup chopped walnuts (optional)
- 1 tablespoon butter
Cooking Instructions:
- Prepare the Pan: Line an 8×8-inch baking dish with parchment paper, allowing some excess paper to hang over the edges. This will help you lift the fudge out easily once it’s set.
- Melt the Chocolate: In a medium-sized saucepan, combine the white chocolate chips and sweetened condensed milk. Set the saucepan over low heat, stirring constantly until the chocolate chips are fully melted and the mixture is smooth.
- Add Flavorings: Remove the saucepan from heat and stir in the vanilla extract. Mix until it’s thoroughly incorporated into the fudge base.
- Fold in Cranberries and Nuts: Gently fold in the dried cranberries and chopped walnuts (if using), making certain they’re evenly distributed throughout the fudge mixture.
- Transfer to Baking Dish: Pour the fudge mixture into the prepared baking dish, spreading it evenly with a spatula. Press down gently to guarantee an even layer.
- Chill and Set: Refrigerate the fudge for at least 2 hours or until it’s firm to the touch. For best results, let it chill overnight.
- Cut and Serve: Once set, use the parchment paper to lift the fudge out of the baking dish. Cut into small squares and serve.
Extra Tips:
To ascertain your White Chocolate Cranberry Fudge sets properly, make sure the chocolate chips are completely melted and the mixture is well-blended before adding the cranberries and nuts.
If you prefer a smoother texture, you can omit the walnuts or replace them with another nut of your choice. Additionally, for a festive look, you can sprinkle extra dried cranberries on top before chilling.
Store any leftovers in an airtight container in the refrigerator for up to two weeks, guaranteeing you have a delicious treat ready whenever you need it.

