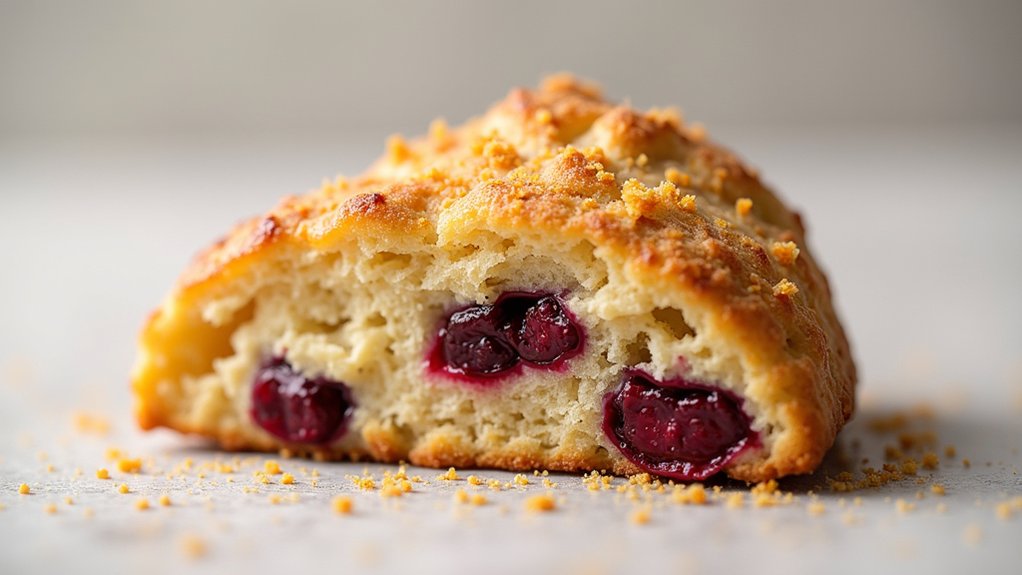
When it comes to Christmas baking, the aroma of gingerbread cookies fresh from the oven always warms my heart. Spices and molasses blend perfectly to bring back sweet childhood memories. Gingerbread is just the start of our holiday treat journey. Picture the buttery crumble of shortbread or the rich, fruity decadence of a classic fruitcake. Let’s explore these beloved recipes that can make your holiday baking extra special.
Classic Gingerbread Cookies

Classic Gingerbread Cookies are a time-honored treat that bring the festive spirit to life with their warm spices and delightful aroma. These cookies are perfect for the holiday season, offering a comforting blend of ginger, cinnamon, and molasses that evoke cherished memories and create new ones with each bite.
The crispy edges and soft, chewy centers are a demonstration of the perfect gingerbread cookie, making them an essential part of any Christmas baking repertoire.
The beauty of Classic Gingerbread Cookies lies in their versatility; they can be beautifully decorated with royal icing, turned into charming gingerbread men, or cut into shapes that reflect the spirit of the season.
Whether you’re a seasoned baker or a novice in the kitchen, this recipe provides a straightforward guide to creating a batch of cookies that will fill your home with the nostalgic scent of Christmas. This recipe serves 4-6 people, guaranteeing there’s enough to share with family and friends.
Ingredients:
- 3 cups all-purpose flour
- 3/4 teaspoon baking soda
- 1 tablespoon ground ginger
- 1 tablespoon ground cinnamon
- 1/2 teaspoon ground cloves
- 1/2 teaspoon salt
- 1/4 teaspoon ground nutmeg
- 3/4 cup (1 1/2 sticks) unsalted butter, softened
- 3/4 cup packed dark-brown sugar
- 1 large egg
- 1/2 cup unsulfured molasses
- 1 teaspoon pure vanilla extract
Cooking Instructions:
1. Prepare the Dough: In a large mixing bowl, whisk together the flour, baking soda, ginger, cinnamon, cloves, salt, and nutmeg. In another bowl, beat the softened butter and dark-brown sugar together using an electric mixer on medium speed until the mixture is light and fluffy.
Add the egg, molasses, and vanilla extract, and continue to mix until fully combined.
2. Combine Ingredients: Gradually add the dry ingredients to the wet ingredients, mixing on low speed until the dough is smooth and well incorporated. Once the dough is ready, divide it in half, flatten each half into a disk, wrap in plastic wrap, and refrigerate for at least 1 hour or until firm.
3. Preheat and Prepare: Preheat the oven to 350°F (175°C). Line baking sheets with parchment paper. On a lightly floured surface, roll out one disk of dough to about 1/4-inch thickness. Use desired cookie cutters to cut out shapes, placing them about 1 inch apart on the prepared baking sheets.
4. Bake the Cookies: Bake the cookies in the preheated oven for 8-10 minutes or until the edges are firm and the centers are set. Remove from the oven and let the cookies cool on the baking sheets for a few minutes before transferring them to a wire rack to cool completely.
5. Decorate: Once the cookies are completely cool, decorate them with royal icing, sprinkles, or any other preferred decorations.
Extra Tips:
When preparing Classic Gingerbread Cookies, make sure that your butter is at room temperature for easy creaming with the sugar. This will help achieve a light and fluffy texture in the dough.
If you find the dough too sticky to handle after chilling, sprinkle a little more flour on your rolling surface and rolling pin. Remember, the dough can be prepared a day in advance and refrigerated overnight, making it a convenient option for busy holiday schedules.
Ultimately, have fun with the decorating process – it’s a great opportunity to get creative and even involve family members in the festive fun!
Traditional Shortbread
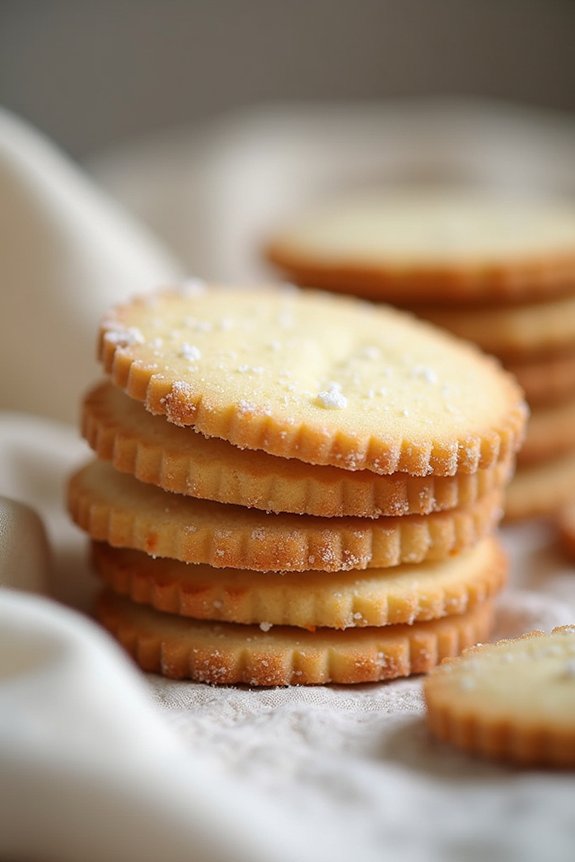
Traditional shortbread is a classic holiday treat that has been cherished for generations. Its buttery, crumbly texture and subtle sweetness make it a perfect indulgence during the festive season. Originating from Scotland, this simple yet delicious cookie is made with just a few ingredients, emphasizing the quality of the butter used.
Shortbread’s versatility allows it to be shaped into rounds, fingers, or festive shapes, making it a delightful addition to any Christmas cookie platter. This recipe yields a batch suitable for serving 4-6 people, making it ideal for small gatherings or as a personal family treat. The key to a perfect traditional shortbread lies in the balance of its components and the gentle handling of the dough.
With the right technique, you’ll achieve that signature melt-in-your-mouth experience that makes shortbread so irresistible.
Ingredients:
- 1 cup (2 sticks) unsalted butter, softened
- 1/2 cup granulated sugar
- 2 cups all-purpose flour
- 1/4 teaspoon salt
- Optional: granulated sugar for sprinkling
Instructions:
1. Preheat the Oven:
Preheat your oven to 325°F (165°C). This guarantees that the oven reaches the correct temperature by the time you’re ready to bake, which is essential for the even cooking of your shortbread.
2. Cream the Butter and Sugar:
In a large mixing bowl, cream together the softened butter and granulated sugar until the mixture is light and fluffy. This process aerates the butter, giving the shortbread its signature light texture.
3. Mix in the Dry Ingredients:
Gradually add the all-purpose flour and salt to the butter mixture. Stir until just combined, being careful not to overmix, as this can make the shortbread tough.
4. Form the Dough:
Gather the dough into a ball and gently knead it a few times on a lightly floured surface. The dough should be smooth and cohesive but not sticky.
5. Shape the Shortbread:
Roll out the dough to about 1/2-inch thickness. Use a cookie cutter or knife to cut the dough into your desired shapes. Traditional shortbread is often cut into rectangles or rounds.
6. Prepare for Baking:
Place the shaped dough onto a baking sheet lined with parchment paper. If desired, sprinkle granulated sugar over the top of each piece for added sweetness and texture.
7. Bake:
Bake in the preheated oven for 20-25 minutes, or until the edges are lightly golden. Be careful not to overbake, as shortbread should remain pale in color.
8. Cool and Serve:
Allow the shortbread to cool on the baking sheet for a few minutes before transferring to a wire rack to cool completely. Once cooled, serve or store in an airtight container.
Extra Tips:
For the best results, verify that your butter is at room temperature before you start. This will make it easier to cream with the sugar, resulting in a better texture.
If you find the dough too crumbly, you can add a teaspoon of cold water to help it come together. To enhance the flavor, consider adding a teaspoon of vanilla extract or a pinch of cinnamon to the dough.
Finally, shortbread can be stored for up to a week in an airtight container, making it a convenient make-ahead option during the busy holiday season.
Rich Christmas Pudding
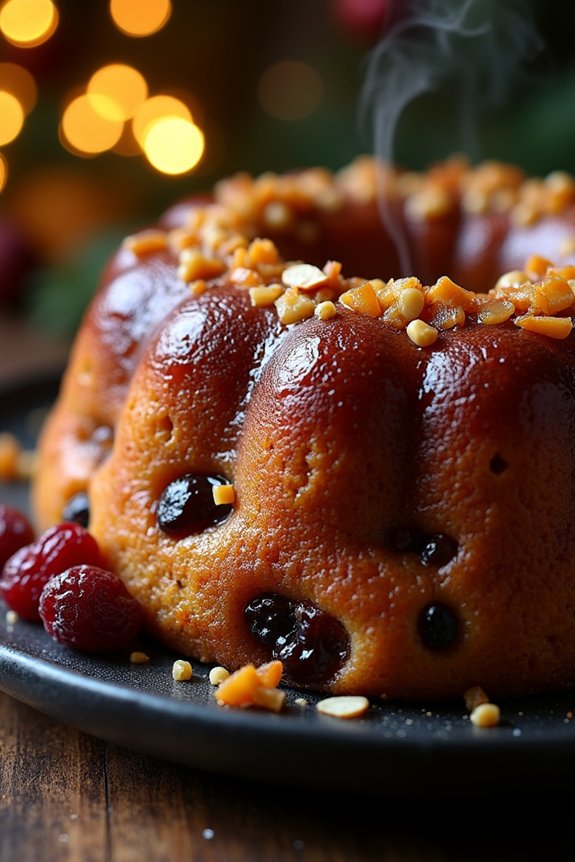
Rich Christmas Pudding is a classic holiday dessert that brings warmth and festive spirit to any gathering. This traditional British treat is a dense, fruit-laden pudding that’s often aged to enhance its flavors. Prepared weeks in advance, it’s made with a mixture of dried fruits, spices, and spirits, then steamed to perfection. The rich, sweet, and slightly spicy taste of a well-made Christmas pudding is a highlight of the holiday season, and its preparation is a cherished tradition in many households.
The process of making a Rich Christmas Pudding is a labor of love, requiring both time and patience. The pudding is typically made with suet, a type of animal fat, which gives it a distinct richness and texture. However, vegetarian versions using butter or vegetable shortening are also popular.
Once mixed, the pudding is steamed and then stored in a cool, dark place to allow the flavors to mature. On Christmas Day, it’s traditionally reheated, doused with brandy, and set alight before serving, creating a dramatic and festive presentation.
Ingredients for Rich Christmas Pudding (Serves 4-6):
- 150g suet or butter (for vegetarian option)
- 150g dark brown sugar
- 250g raisins
- 250g currants
- 100g mixed peel
- 1 small apple, peeled and grated
- Zest and juice of 1 lemon
- Zest and juice of 1 orange
- 50g chopped almonds
- 100g breadcrumbs
- 75g plain flour
- 1 tsp mixed spice
- 1 tsp ground cinnamon
- 1/2 tsp ground nutmeg
- 3 large eggs, beaten
- 150ml stout or dark beer
- 50ml brandy or rum
Cooking Instructions:
- Prepare the Ingredients: In a large mixing bowl, combine the suet or butter, dark brown sugar, raisins, currants, mixed peel, grated apple, lemon zest, lemon juice, orange zest, orange juice, and chopped almonds. Mix well to guarantee all ingredients are evenly distributed.
- Add Dry Ingredients: Stir in the breadcrumbs, plain flour, mixed spice, ground cinnamon, and ground nutmeg. Confirm the dry ingredients are thoroughly mixed with the fruit and suet mixture.
- Incorporate Wet Ingredients: Gradually add the beaten eggs, stout, and brandy to the mixture. Stir thoroughly until all the ingredients are well combined and the mixture has a consistent texture.
- Prepare for Steaming: Grease a 1.2-liter pudding basin with butter or oil. Spoon the pudding mixture into the basin, pressing it down firmly to eliminate any air pockets.
- Cover the Basin: Cover the pudding basin with a double layer of baking parchment and foil, tied securely with string around the rim. This will keep the pudding moist during steaming.
- Steam the Pudding: Place the basin in a large saucepan with a tight-fitting lid. Fill the saucepan with boiling water to come halfway up the sides of the basin. Cover and steam for 6 hours, ensuring the water is topped up as necessary to maintain the level.
- Cool and Store: Once steamed, remove the pudding from the water and allow it to cool completely. Replace the parchment and foil with fresh layers and store in a cool, dark place for up to six weeks.
- Reheat for Serving: On the day of serving, steam the pudding again for 2 hours to reheat. Once warmed, remove it from the basin and place it on a serving plate.
- Flame the Pudding: Just before serving, warm some additional brandy in a small pan, then pour it over the pudding and light it with a match for a spectacular flaming presentation.
Extra Tips: For the best flavor, prepare your Rich Christmas Pudding several weeks in advance. This allows the spices and fruits to meld beautifully, creating a deeper, more complex taste.
If you prefer a more traditional approach, you can use a combination of different spirits, such as sherry or port, to soak the fruits before mixing. Always confirm the pudding remains moist during steaming by regularly checking the water level.
If you’re planning to flame the pudding, use caution and keep a fire extinguisher or damp cloth nearby as a safety precaution.
Spiced Cinnamon Rolls
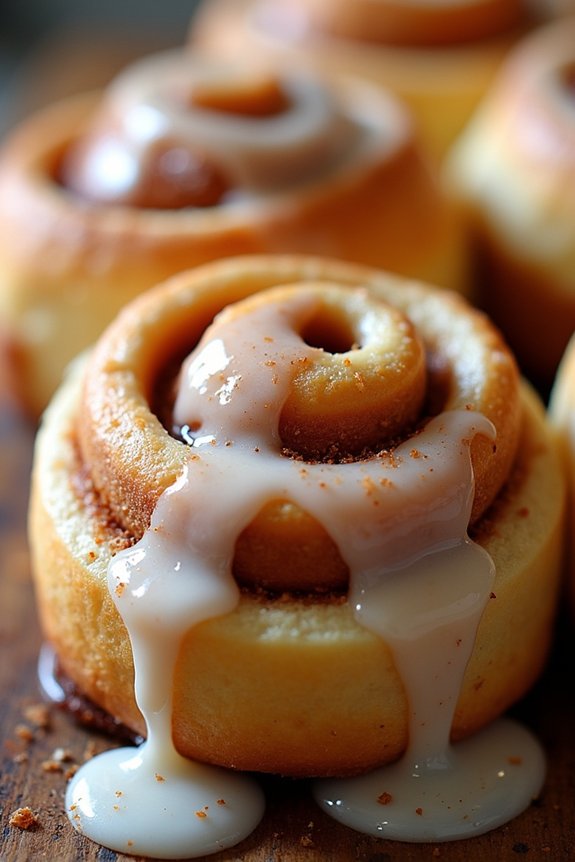
There’s nothing quite like the warm, comforting aroma of freshly baked cinnamon rolls filling your home during the holiday season. These Spiced Cinnamon Rolls are an indulgent treat, perfect for sharing with family and friends.
With a soft, fluffy dough enveloping a sweet and spicy cinnamon filling, these rolls are sure to become a holiday favorite. The addition of spices such as nutmeg and cloves adds a festive twist, making them a delightful accompaniment to your festive gatherings.
Making these cinnamon rolls from scratch is a rewarding experience. The process of kneading the dough, watching it rise, and then filling and rolling it up with the spiced mixture is soothing and satisfying. Topped with a creamy glaze, these rolls are best enjoyed fresh from the oven, although they can also be made ahead and gently warmed before serving.
Whether for breakfast, a snack, or dessert, these spiced cinnamon rolls are a delicious way to celebrate the season.
Ingredients (Serves 4-6):
- 2 1/4 teaspoons active dry yeast
- 1/4 cup warm water
- 1/2 cup milk
- 1/4 cup granulated sugar
- 1/4 cup unsalted butter, melted
- 1 teaspoon salt
- 2 large eggs
- 4 cups all-purpose flour
- 1/4 cup unsalted butter, softened (for filling)
- 1/2 cup brown sugar, packed
- 2 tablespoons ground cinnamon
- 1/2 teaspoon ground nutmeg
- 1/4 teaspoon ground cloves
- 1 cup powdered sugar
- 2 tablespoons cream cheese, softened
- 1 teaspoon vanilla extract
- 2-3 tablespoons milk (for glaze)
Instructions:
- Activate the Yeast: In a small bowl, dissolve the yeast in warm water and let it sit for about 5 minutes until it becomes frothy. This indicates that the yeast is active.
- Prepare the Dough: In a large mixing bowl, combine the milk, granulated sugar, melted butter, salt, and eggs. Add the yeast mixture and stir to combine. Gradually add the flour, one cup at a time, until a dough forms.
- Knead the Dough: Turn the dough onto a floured surface and knead for about 8-10 minutes, until it becomes smooth and elastic. Place the dough in a greased bowl, cover it with a damp cloth, and let it rise in a warm place for about 1 to 1.5 hours, or until it has doubled in size.
- Prepare the Filling: While the dough is rising, mix the softened butter, brown sugar, cinnamon, nutmeg, and cloves in a small bowl to create the filling.
- Roll Out the Dough: Once the dough has risen, punch it down and roll it out on a floured surface into a large rectangle, approximately 16×12 inches.
- Add the Filling: Spread the spiced filling evenly over the rolled-out dough, leaving a small border around the edges.
- Roll and Cut the Dough: Starting from the longer side, tightly roll the dough into a log. Cut the log into 12 equal slices and place them in a greased baking dish, leaving space between each roll.
- Second Rise: Cover the rolls with a cloth and let them rise for another 30 minutes until they’ve puffed up.
- Bake the Rolls: Preheat your oven to 375°F (190°C). Bake the rolls for 20-25 minutes, or until they’re golden brown.
- Prepare the Glaze: While the rolls are baking, whisk together the powdered sugar, cream cheese, vanilla extract, and milk until smooth. Adjust the consistency with more milk or powdered sugar as needed.
- Glaze the Rolls: Once the rolls are out of the oven, allow them to cool slightly before drizzling the glaze over the top. Serve warm.
Extra Tips:
For best results, verify all your ingredients are at room temperature before you begin. This helps the dough rise more efficiently.
If you’re short on time, you can prepare the rolls the night before, let them rise in the refrigerator overnight, and bake them fresh in the morning.
Remember to tightly wrap any leftovers and store them at room temperature for up to 2 days, or freeze them for longer storage. When reheating, a quick zap in the microwave will refresh their softness.
Festive Fruitcake
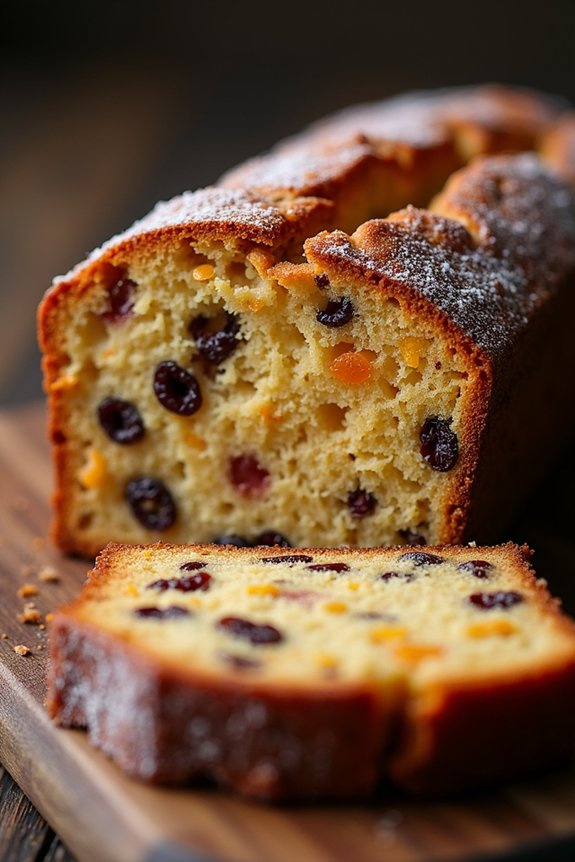
The Festive Fruitcake is a quintessential holiday treat that brings warmth and nostalgia to any celebration. This traditional Christmas baking recipe is packed with a medley of dried fruits, nuts, and spices, creating a rich and flavorful cake that’s both indulgent and satisfying.
Often enjoyed with a cup of tea or a glass of mulled wine, the fruitcake’s dense and moist texture, combined with its aromatic ingredients, makes it a delightful centerpiece for any festive gathering.
Making a classic Festive Fruitcake involves a bit of preparation, but the results are well worth the effort. The key to a perfect fruitcake lies in allowing the flavors to meld and mature over time, turning this cake into a deliciously complex dessert.
Whether you’re a seasoned baker or trying your hand at this traditional recipe for the first time, this guide will help you create a fruitcake that your family and friends will love.
Ingredients for 4-6 servings:
- 1 cup unsalted butter, softened
- 1 cup brown sugar
- 4 large eggs
- 1 1/2 cups all-purpose flour
- 1/2 teaspoon baking powder
- 1/2 teaspoon ground cinnamon
- 1/4 teaspoon ground nutmeg
- 1/4 teaspoon ground cloves
- 1/4 teaspoon salt
- 1 cup mixed dried fruits (such as raisins, currants, and chopped dates)
- 1/2 cup chopped nuts (such as walnuts or pecans)
- 1/4 cup brandy or orange juice
- 1 teaspoon vanilla extract
- Zest of 1 orange
Cooking Instructions:
- Prepare the Oven and Pan: Preheat your oven to 325°F (160°C). Grease and line a 9-inch round cake pan with parchment paper to prevent sticking.
- Soak the Fruits: In a small bowl, combine the mixed dried fruits with the brandy or orange juice. Let them soak for at least 30 minutes to plump up and absorb the liquid.
- Mix the Dry Ingredients: In a medium bowl, whisk together the all-purpose flour, baking powder, cinnamon, nutmeg, cloves, and salt. Set aside.
- Cream the Butter and Sugar: In a large mixing bowl, cream the softened butter and brown sugar together until light and fluffy, about 3-4 minutes.
- Add Eggs and Flavorings: Beat in the eggs, one at a time, ensuring each egg is fully incorporated before adding the next. Stir in the vanilla extract and orange zest.
- Combine the Mixtures: Gradually add the dry ingredients to the wet mixture, mixing until just combined. Avoid overmixing to keep the cake tender.
- Incorporate Fruits and Nuts: Fold in the soaked fruits (with any remaining liquid) and chopped nuts until evenly distributed in the batter.
- Bake the Cake: Pour the batter into the prepared cake pan and smooth the top with a spatula. Bake for 60-70 minutes, or until a toothpick inserted into the center comes out clean.
- Cool and Store: Allow the cake to cool in the pan for 10 minutes before transferring it to a wire rack to cool completely. For best results, wrap the cooled cake tightly in plastic wrap and let it sit for at least a day to allow the flavors to develop.
Extra Tips:
For an added touch of holiday cheer, consider brushing the cooled cake with additional brandy or orange juice every few days to keep it moist and enhance its flavor.
This cake can also be made well in advance; fruitcakes are known for their longevity and often taste better with time. Additionally, feel free to customize the fruit and nut mixture to your liking, incorporating your favorite dried fruits or nuts to make it uniquely yours.
Enjoy your Festive Fruitcake with a dollop of whipped cream or a scoop of ice cream for a truly decadent holiday dessert!
Holiday Yule Log
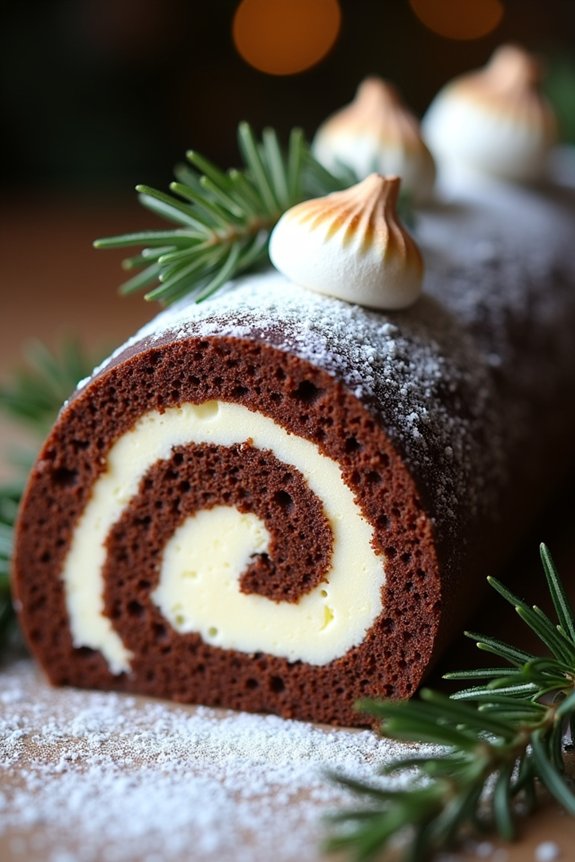
The Holiday Yule Log, also known as Bûche de Noël, is a classic Christmas dessert that embodies the warmth and joy of the festive season. Originating from France, this elegant confection is designed to resemble a wooden log and is typically made with a tender, rolled sponge cake filled with rich, creamy frosting, and covered with luscious chocolate ganache.
Not only is it a feast for the taste buds, but it also makes for a stunning centerpiece on your holiday table. The process of making a Yule Log can be a rewarding experience that brings a touch of tradition and creativity to your Christmas celebrations.
To create a Yule Log that serves 4-6 people, you’ll need to prepare a light sponge cake, a decadent filling, and a smooth chocolate ganache. This dessert isn’t only about taste but also about presentation. A gentle dusting of powdered sugar mimics freshly fallen snow, while decorative touches like meringue mushrooms and sprigs of rosemary can transform your Yule Log into a visual masterpiece.
Although it may seem complex, this recipe is broken down into manageable steps to guide you through crafting a beautiful and delicious holiday treat.
Ingredients:
*For the Sponge Cake:*
- 4 large eggs
- 1/2 cup granulated sugar
- 1 teaspoon vanilla extract
- 1/2 cup all-purpose flour
- 2 tablespoons unsweetened cocoa powder
- 1/4 teaspoon salt
For the Filling:
- 1 cup heavy cream
- 2 tablespoons powdered sugar
- 1 teaspoon vanilla extract
For the Chocolate Ganache:
- 1 cup semi-sweet chocolate chips
- 1/2 cup heavy cream
Optional Decorations:
- Powdered sugar for dusting
- Meringue mushrooms
- Fresh rosemary sprigs
Instructions:
- Preheat the Oven and Prepare the Baking Sheet: Preheat your oven to 350°F (175°C). Line a 15×10-inch jelly roll pan with parchment paper, making certain the paper edges extend over the sides for easy removal.
- Make the Sponge Cake: In a large mixing bowl, beat the eggs and sugar together on high speed for about 5 minutes until thick and pale. Add vanilla extract and mix briefly. Sift in the flour, cocoa powder, and salt, then gently fold into the egg mixture with a spatula until just combined.
- Bake the Cake: Spread the batter evenly into the prepared pan. Bake for 10-12 minutes, or until the cake springs back when lightly touched. While the cake bakes, lay a clean kitchen towel on the counter and dust it generously with powdered sugar.
- Roll the Cake: Once baked, immediately invert the hot cake onto the prepared towel. Carefully peel off the parchment paper. Starting from a short side, roll the cake and towel together into a log. Cool the rolled cake on a wire rack.
- Prepare the Filling: In a medium bowl, whip the heavy cream, powdered sugar, and vanilla extract until stiff peaks form. Unroll the cooled cake and spread the whipped cream filling evenly over the surface.
- Re-Roll the Cake: Gently re-roll the cake without the towel, ensuring it stays tight. Transfer to a serving platter, seam side down.
- Make the Chocolate Ganache: Heat the heavy cream in a small saucepan until it begins to simmer. Remove from heat and pour over chocolate chips in a bowl. Allow to sit for 5 minutes, then stir until smooth.
- Frost the Yule Log: Spread the ganache over the cake, using a spatula to create a bark-like texture. Chill in the refrigerator until set.
- Decorate the Yule Log: Dust with powdered sugar and decorate with meringue mushrooms and rosemary sprigs for a festive appearance.
Extra Tips:
When making the sponge cake, be gentle when folding in the dry ingredients to maintain the airiness of the batter. This will guarantee a light and fluffy cake.
If any cracks appear during rolling, don’t worry too much, as they can be concealed by the ganache. For the best flavor and texture, allow the Yule Log to chill in the refrigerator for at least an hour before serving; this will also make slicing easier.
Finally, get creative with decorations to add a personal touch to your Yule Log!
Nutty Pecan Pie
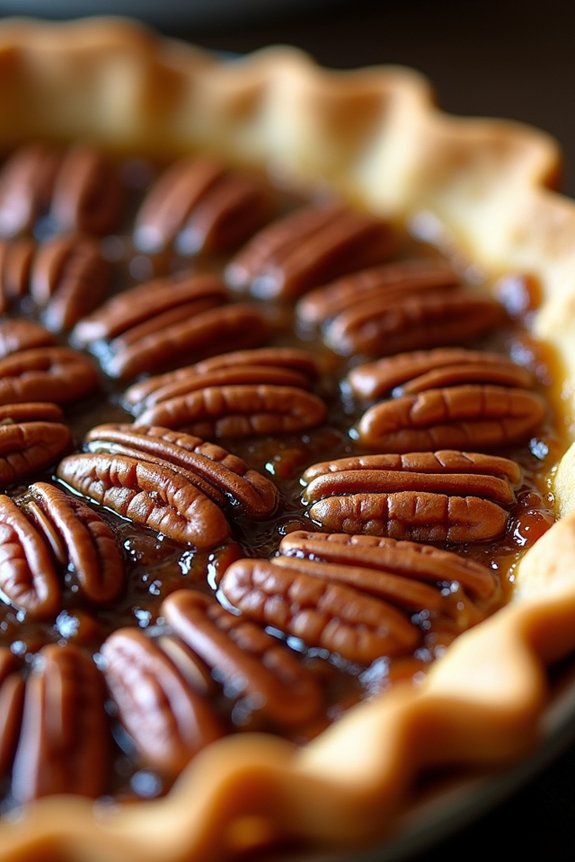
Nutty Pecan Pie is a classic holiday dessert that’s cherished for its rich, buttery, and nutty flavors. It’s a staple at Christmas gatherings, offering a perfect combination of a flaky crust and a sweet, gooey pecan filling.
Whether you’re a seasoned baker or trying your hand at pie-making for the first time, this recipe will guide you through creating a delicious pie that will impress your family and friends. The warm flavors of vanilla and brown sugar, combined with the satisfying crunch of pecans, make this dessert truly irresistible.
This Nutty Pecan Pie serves 4-6 people, making it ideal for intimate family gatherings or holiday dinners. It’s a straightforward recipe that requires a few simple ingredients and about an hour of your time. The result is a beautifully golden pie that’s sure to be a hit at any festive occasion. Serve it with a scoop of vanilla ice cream or a dollop of whipped cream for an extra indulgent treat.
Ingredients:
- 1 9-inch pre-made pie crust (or homemade if preferred)
- 1 cup light corn syrup
- 1 cup packed light brown sugar
- 3 large eggs
- 1/3 cup unsalted butter, melted
- 1 teaspoon vanilla extract
- 1/2 teaspoon salt
- 1 1/2 cups pecan halves
Cooking Instructions:
- Preheat the Oven: Begin by preheating your oven to 350°F (175°C). This guarantees the pie cooks evenly and achieves the perfect texture.
- Prepare the Pie Crust: Place your pre-made pie crust into a 9-inch pie plate. If using homemade crust, roll it out to fit the plate, trimming any excess dough from the edges.
- Mix the Filling: In a large mixing bowl, combine the corn syrup, brown sugar, eggs, melted butter, vanilla extract, and salt. Whisk the ingredients together until smooth and fully incorporated.
- Add the Pecans: Stir the pecan halves into the filling mixture, guaranteeing they’re well-coated with the sugary syrup.
- Assemble the Pie: Pour the pecan mixture into the prepared pie crust, spreading it evenly. The pecans will naturally float to the top, creating a beautiful topping as the pie bakes.
- Bake the Pie: Place the pie on the middle rack of the preheated oven. Bake for 50 to 60 minutes, or until the filling is set and the crust is golden brown. To check the doneness, insert a knife into the center; it should come out clean.
- Cool the Pie: Once baked, remove the pie from the oven and let it cool on a wire rack for at least 2 hours. This allows the filling to firm up and makes slicing easier.
Extra Tips:
For the best results, use fresh pecans to guarantee maximum flavor and crunch. If your pie crust edges start to brown too quickly, cover them with aluminum foil to prevent burning.
Additionally, consider experimenting with different types of nuts, such as walnuts or almonds, for a unique twist on this traditional recipe. Remember, the pie can be made a day in advance, allowing the flavors to meld together beautifully overnight.
Stollen Bread
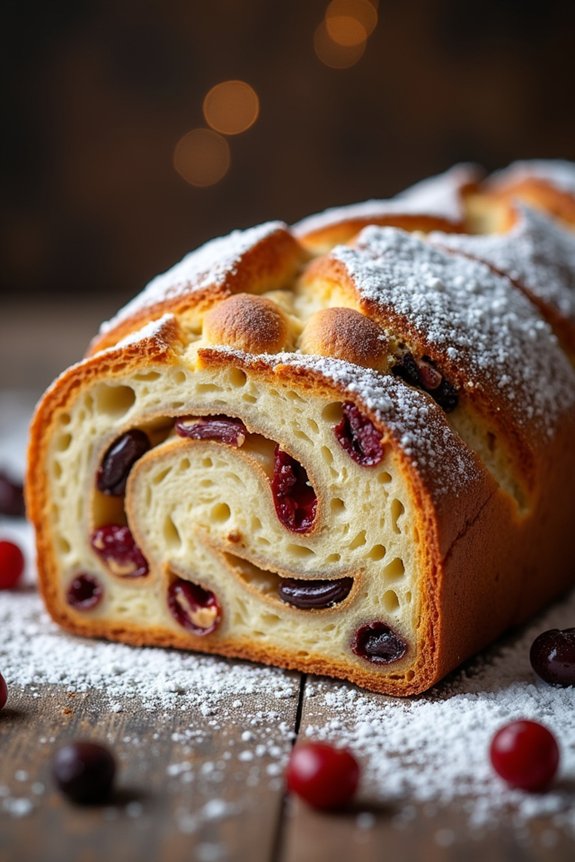
Stollen Bread is a delightful traditional German Christmas bread that’s filled with rich flavors and spices, perfect for the holiday season. This fruit-studded bread is dusted with powdered sugar, giving it a snowy appearance reminiscent of a wintry landscape. Often enjoyed with a warm cup of coffee or tea, Stollen Bread is a festive treat that brings warmth and joy to family gatherings during the holidays.
The origins of Stollen Bread date back to the 15th century in Dresden, Germany, and it has since become a beloved Christmas staple around the world. Its unique combination of dried fruits, nuts, and spices, along with a buttery dough, makes it an irresistible holiday indulgence. This recipe will guide you through creating a traditional Stollen Bread that serves 4-6 people, perfect for sharing with loved ones.
Ingredients for Stollen Bread (serves 4-6):
- 3 1/2 cups all-purpose flour
- 1/2 cup granulated sugar
- 1/2 teaspoon salt
- 1 teaspoon ground cinnamon
- 1/2 teaspoon ground cardamom
- 2 1/4 teaspoons active dry yeast
- 3/4 cup warm milk (110°F/45°C)
- 1/2 cup unsalted butter, softened
- 1 large egg
- 1 teaspoon vanilla extract
- 1 teaspoon almond extract
- 1 cup mixed dried fruits (such as raisins, currants, and candied citrus peel)
- 1/2 cup chopped nuts (such as almonds or walnuts)
- 1/3 cup rum or orange juice
- 1/2 cup marzipan or almond paste
- Powdered sugar, for dusting
Instructions to Make Stollen Bread:
- Prepare the Fruit Mixture: In a small bowl, combine the mixed dried fruits and chopped nuts with the rum or orange juice. Let this mixture soak for at least 1 hour, allowing the fruits to absorb the liquid and become plump and flavorful.
- Activate the Yeast: In a large mixing bowl, dissolve the active dry yeast in the warm milk. Let it sit for about 5 minutes, or until it becomes frothy. This step guarantees that the yeast is active and ready to leaven the dough.
- Make the Dough: To the yeast mixture, add the softened butter, granulated sugar, egg, vanilla extract, almond extract, salt, ground cinnamon, and ground cardamom. Mix until combined. Gradually add the flour, one cup at a time, mixing until a soft dough forms.
- Knead the Dough: Turn the dough out onto a floured surface and knead for about 8-10 minutes, or until the dough is smooth and elastic. If the dough is too sticky, add a little more flour as needed.
- First Rise: Place the dough in a lightly oiled bowl, cover it with a damp cloth, and let it rise in a warm area until doubled in size, about 1 to 1 1/2 hours.
- Incorporate the Fruits and Nuts: Once the dough has risen, punch it down to release the air. Drain the soaked fruit mixture and knead it into the dough until evenly distributed.
- Shape the Stollen: Roll the dough into a rectangle about 10×8 inches. Roll the marzipan or almond paste into a log and place it along one edge of the rectangle. Roll the dough up, enclosing the marzipan, and shape it into a loaf.
- Second Rise: Place the shaped loaf on a baking sheet lined with parchment paper. Cover it again with a damp cloth and let it rise for about 30-45 minutes, until slightly puffy.
- Bake the Stollen: Preheat the oven to 350°F (175°C). Bake the Stollen for 30-35 minutes, or until golden brown and cooked through. If it browns too quickly, cover it with aluminum foil during the last 10 minutes of baking.
- Cool and Dust with Sugar: Allow the Stollen to cool on a wire rack. Once completely cool, dust it generously with powdered sugar before serving.
Extra Tips:
For a more intense flavor, let the fruit mixture soak overnight. Always verify that your yeast is fresh and active to achieve the best results. If you prefer a sweeter Stollen, you can increase the amount of sugar slightly.
Remember that the dough will be sticky due to the butter and fruits, so don’t worry if you need to add a bit more flour while kneading. Finally, Stollen Bread can be made a few days in advance, as the flavors will continue to develop, making it even more delicious. Store it wrapped in foil and in an airtight container to maintain freshness.
Delightful Mince Pies
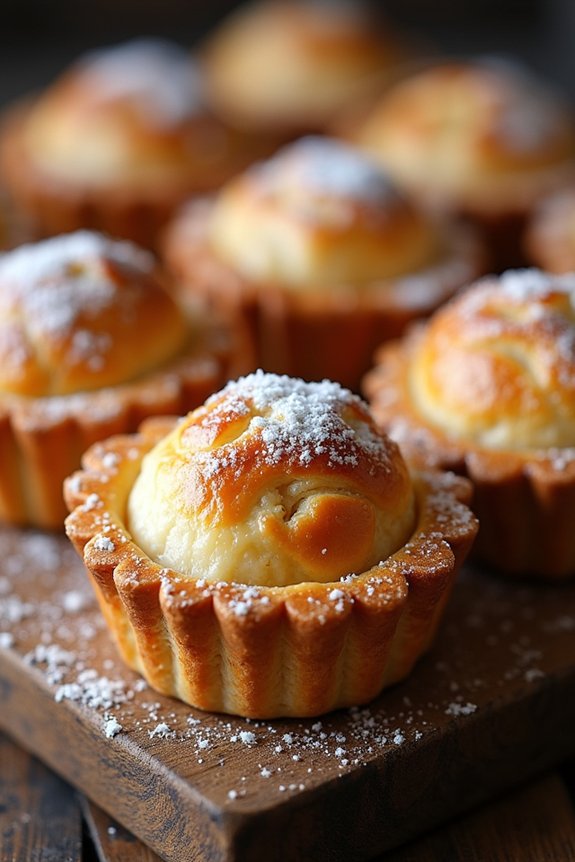
As the festive season approaches, the aroma of freshly baked mince pies fills the air, evoking memories of family gatherings and joyous celebrations. Mince pies, a staple of traditional Christmas baking, are a delightful treat made with a rich, spiced fruit filling encased in a buttery pastry. This classic recipe for mince pies guarantees that you can bring a touch of yuletide joy to your holiday celebrations, whether you’re hosting a cozy family gathering or attending a festive party.
Originating from the United Kingdom, mince pies have been a favorite during the Christmas season for centuries. Traditionally filled with a mixture of dried fruits, spices, and sometimes a touch of brandy, these pies encapsulate the warm and comforting flavors of Christmas. This recipe is designed to serve 4-6 people, making it perfect for a small gathering or a cozy family treat. Follow the steps below to create your own batch of delightful mince pies that are sure to impress your loved ones.
Ingredients (Serves 4-6):
- 250g plain flour
- 125g unsalted butter (cubed and chilled)
- 2-3 tablespoons cold water
- 300g mincemeat (store-bought or homemade)
- 1 small egg (beaten, for glazing)
- Icing sugar (for dusting)
Cooking Instructions:
1. Prepare the Dough:
Begin by sifting the plain flour into a large mixing bowl. Add the cubed unsalted butter to the flour. Using your fingertips, rub the butter into the flour until the mixture resembles breadcrumbs. This process helps to guarantee a flaky pastry.
2. Form the Pastry:
Add 2-3 tablespoons of cold water to the breadcrumb mixture, one tablespoon at a time, mixing gently until the dough starts to come together. Gather the dough into a ball, wrap it in cling film, and refrigerate for at least 30 minutes to rest.
3. Preheat the Oven:
While the dough is chilling, preheat your oven to 200°C (400°F) or 180°C (350°F) for a fan oven. This guarantees an even bake for your mince pies.
4. Roll Out the Dough:
Lightly flour a clean surface and roll out the chilled dough to about 3mm thickness. Use a round cutter (approximately 7.5cm in diameter) to cut out discs for the pie bases and a smaller cutter (about 6cm in diameter) for the tops.
5. Assemble the Pies:
Grease a 12-hole pie or muffin tin and carefully line each hole with the larger pastry discs. Fill each pastry case with a spoonful of mincemeat, ensuring not to overfill. Place the smaller pastry discs on top and gently press the edges to seal.
6. Glaze and Bake:
Brush the tops of each pie with the beaten egg for a golden finish. Bake in the preheated oven for 15-20 minutes or until the pastry is golden brown and cooked through.
7. Cool and Serve:
Allow the mince pies to cool slightly in the tin before transferring them to a wire rack. Once cool, dust with icing sugar for a festive touch. Serve warm or at room temperature.
Extra Tips:
For an extra festive touch, try adding a few chopped nuts or a splash of brandy to your mincemeat filling for added depth of flavor. If you’re short on time, ready-made pastry can be a convenient alternative. Guarantee your pastry isn’t rolled too thin to prevent the filling from leaking during baking.
Finally, mince pies can be made in advance and frozen; simply reheat them in the oven before serving to enjoy them freshly warmed.
Sugar-Coated Snowball Cookies
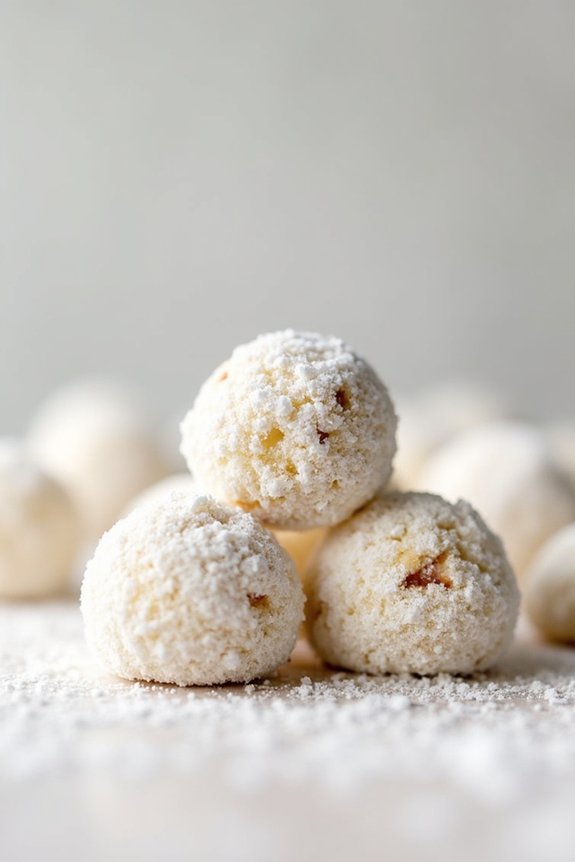
Sugar-Coated Snowball Cookies are a delightful treat that perfectly capture the essence of a traditional Christmas dessert. These buttery, melt-in-your-mouth cookies are rolled in powdered sugar, giving them the appearance of little snowballs—hence the name. They’re often a favorite during the festive season, not only for their delicious taste but also for their charming appearance on a holiday cookie platter. The recipe is quite simple, making it a fun baking activity to share with family or friends.
These cookies are rich in flavor, thanks to the combination of butter, vanilla, and finely chopped nuts. Pecans or walnuts are traditionally used, adding a nutty contrast to the sweet, sugary coating. The recipe yields a batch perfect for sharing, providing enough cookies for 4-6 people to enjoy. Whether you’re an experienced baker or a novice in the kitchen, these cookies are sure to be a hit, leaving everyone enthusiastically awaiting the next batch.
Ingredients (Serving Size: 4-6 people):
- 1 cup unsalted butter, softened
- 1/2 cup powdered sugar (plus more for rolling)
- 1 teaspoon vanilla extract
- 2 cups all-purpose flour
- 1/4 teaspoon salt
- 1 cup finely chopped pecans or walnuts
Cooking Instructions:
- Preheat the Oven: Preheat your oven to 350°F (175°C). Line two baking sheets with parchment paper or silicone baking mats to prevent the cookies from sticking.
- Cream the Butter and Sugar: In a large mixing bowl, cream the softened butter and 1/2 cup powdered sugar together until light and fluffy. This should take about 2-3 minutes using an electric mixer on medium speed.
- Add Vanilla: Mix in the vanilla extract until well combined. This adds a delightful aroma and flavor to the cookies.
- Combine Dry Ingredients: In a separate bowl, whisk together the all-purpose flour and salt. Gradually add this to the butter mixture, mixing until just combined. Avoid over-mixing to keep the cookies tender.
- Incorporate Nuts: Stir in the finely chopped pecans or walnuts until evenly distributed throughout the dough. The nuts should be chopped finely to guarantee they’re well incorporated into the cookies.
- Shape the Cookies: Using a small cookie scoop or your hands, shape the dough into 1-inch balls. Place them on the prepared baking sheets about 1 inch apart.
- Bake: Bake in the preheated oven for 15-18 minutes or until the edges are lightly golden. The cookies should be firm to the touch but not browned.
- Cool and Roll in Sugar: Allow the cookies to cool on the baking sheets for about 5 minutes. While still warm, roll them in powdered sugar to coat completely. Transfer to a wire rack to cool completely. Once cooled, you can roll them in powdered sugar again for an extra snowy appearance.
Extra Tips:
For the best results, verify your butter is at room temperature to allow for easy creaming. When chopping the nuts, it’s important they’re fine enough not to disrupt the structure of the dough, but still provide a nice nutty bite.
If you’re making these cookies in advance, they can be stored in an airtight container for up to a week. For a fun variation, try adding a hint of cinnamon or nutmeg to the dough for added warmth and spice. Enjoy your baking and happy holidays!
Rum-Infused Eggnog Cake
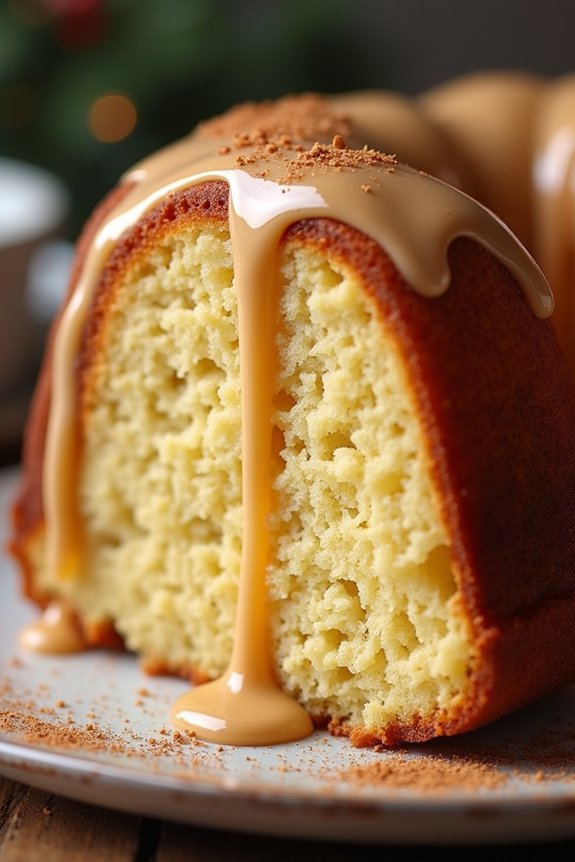
Rum-Infused Eggnog Cake is a delightful holiday treat that brings together the warm, festive flavors of eggnog and rum into a moist, spongy cake that will be the star of your Christmas dessert table.
This cake not only captures the essence of traditional Christmas baking but also adds a modern twist with its rich, boozy undertones. Perfect as a centerpiece dessert for your family gatherings or holiday parties, this cake is sure to impress your guests with its unique flavor profile and elegant presentation.
The preparation of a Rum-Infused Eggnog Cake involves creating a luscious batter that incorporates the creamy, aromatic notes of eggnog and the subtle warmth of rum. Baked to golden perfection, the cake is then topped with a smooth, rum-infused glaze that elevates its flavor, making it a memorable indulgence.
Whether you’re an experienced baker or a novice, this recipe is designed to be approachable yet sophisticated, guaranteeing a successful and enjoyable baking experience. This recipe serves 4-6 people, making it ideal for intimate gatherings or family dinners.
Ingredients:
- 1 ¾ cups all-purpose flour
- 1 teaspoon baking powder
- ½ teaspoon baking soda
- ½ teaspoon ground nutmeg
- ¼ teaspoon salt
- ½ cup (1 stick) unsalted butter, softened
- 1 cup granulated sugar
- 2 large eggs
- 1 cup eggnog
- ¼ cup dark rum
- 1 teaspoon vanilla extract
For the Rum Glaze:
- 1 cup powdered sugar
- 2 tablespoons dark rum
- 1 tablespoon eggnog
Cooking Instructions:
- Preheat the Oven and Prepare the Pan: Preheat your oven to 350°F (175°C). Grease and flour a bundt pan or a 9×5 inch loaf pan to prevent the cake from sticking.
- Mix Dry Ingredients: In a medium bowl, whisk together the flour, baking powder, baking soda, ground nutmeg, and salt. This guarantees even distribution of the leavening agents and spices.
- Cream Butter and Sugar: In a large mixing bowl, beat the softened butter and sugar together with an electric mixer on medium speed until light and fluffy, about 3-4 minutes. This step incorporates air, which is essential for a light cake texture.
- Add Eggs: Add the eggs one at a time, beating well after each addition. This helps to emulsify the mixture, creating a stable batter.
- Incorporate Wet Ingredients: Gradually add in the eggnog, dark rum, and vanilla extract, mixing until just combined.
- Combine Wet and Dry Mixtures: Slowly add the dry ingredients to the wet mixture, beating on low speed until just combined. Be careful not to overmix, as this can result in a dense cake.
- Pour and Bake: Pour the batter into the prepared pan, smoothing the top with a spatula. Bake for 40-45 minutes or until a toothpick inserted into the center comes out clean.
- Cool the Cake: Allow the cake to cool in the pan for 10 minutes, then invert it onto a wire rack to cool completely.
- Prepare the Rum Glaze: In a small bowl, whisk together the powdered sugar, dark rum, and eggnog until smooth. Adjust the consistency as needed with more powdered sugar or liquid.
- Glaze the Cake: Once the cake is completely cooled, drizzle the rum glaze over the top, letting it cascade down the sides.
Extra Tips:
For an extra touch of holiday cheer, consider garnishing the cake with a sprinkle of freshly grated nutmeg or a dusting of cinnamon.
If you’re looking to intensify the rum flavor, you can brush the cake with a little extra rum before applying the glaze. This cake can be made a day in advance and stored in an airtight container, allowing the flavors to meld beautifully.
Adjust the amount of rum to your preference, keeping in mind that a balance of flavors is key to maintaining the cake’s festive appeal.
Chewy Chocolate Crinkle Cookies
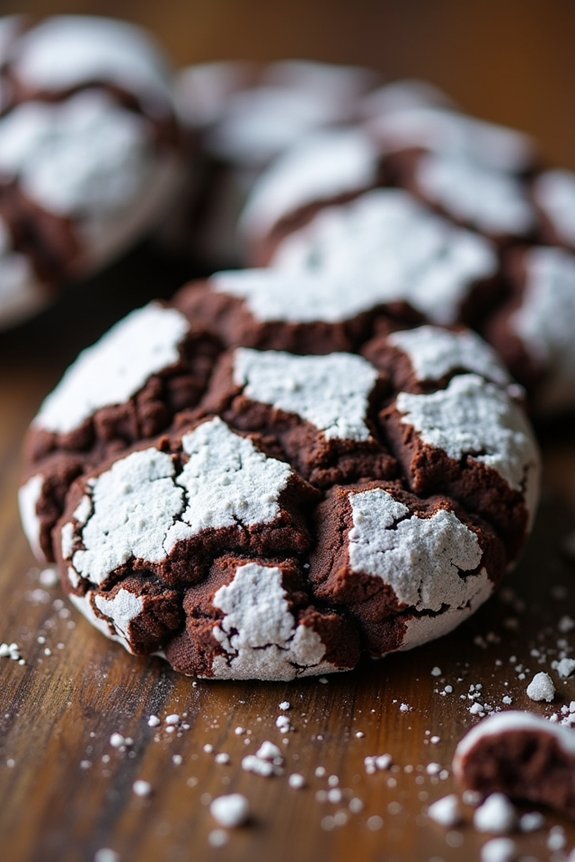
Chewy Chocolate Crinkle Cookies are a delightful addition to any traditional Christmas baking spread. Their distinctive crackled appearance and rich, fudgy interior make them a favorite among chocolate lovers.
These cookies are perfect for sharing with family and friends during the holiday season, and their deep chocolate flavor is sure to satisfy any sweet tooth. Plus, they’re incredibly easy to make, requiring just a few simple ingredients that come together beautifully to create a festive treat.
To achieve the signature crinkle effect, the cookie dough is rolled in powdered sugar before baking, which gives the cookies their unique appearance as they expand and crack in the oven. This recipe is designed to serve 4-6 people, making it ideal for small gatherings or as part of a larger dessert spread.
Whether you’re an experienced baker or a novice in the kitchen, these chewy chocolate crinkle cookies are a must-try during the holiday season.
Ingredients (serves 4-6):
- 1 cup all-purpose flour
- 1/2 cup unsweetened cocoa powder
- 1 teaspoon baking powder
- 1/4 teaspoon salt
- 1 cup granulated sugar
- 1/4 cup vegetable oil
- 2 large eggs
- 1 teaspoon vanilla extract
- 1/2 cup powdered sugar (for rolling)
Cooking Instructions:
- Prepare the Dough:
- In a medium-sized bowl, whisk together the all-purpose flour, unsweetened cocoa powder, baking powder, and salt. Set the dry mixture aside.
- In a large mixing bowl, combine the granulated sugar and vegetable oil. Use an electric mixer or whisk to blend until well combined, then add the eggs one at a time, mixing well after each addition. Stir in the vanilla extract.
- Combine Wet and Dry Ingredients:
- Gradually add the dry ingredients to the wet mixture, mixing until a thick dough forms. Ascertain that all the ingredients are fully incorporated and the dough is smooth.
- Chill the Dough:
- Cover the bowl with plastic wrap and refrigerate the dough for at least 2 hours. Chilling the dough is vital as it makes it easier to handle and helps the cookies maintain their shape while baking.
- Preheat the Oven:
- Preheat your oven to 350°F (175°C) and line a baking sheet with parchment paper.
- Shape the Cookies:
- Remove the chilled dough from the refrigerator. Scoop tablespoon-sized portions of the dough and roll them into balls using your hands.
- Roll each ball generously in powdered sugar until fully coated.
- Bake the Cookies:
- Arrange the coated dough balls on the prepared baking sheet, making sure to space them about 2 inches apart to allow for spreading.
- Bake in the preheated oven for 10-12 minutes, or until the cookies have spread, and the tops have a crackled appearance.
- Cool the Cookies:
- Remove the baking sheet from the oven and allow the cookies to cool on the sheet for about 5 minutes before transferring them to a wire rack to cool completely.
Extra Tips:
For the best results, ascertain that your dough is well-chilled before rolling it into balls. This prevents the cookies from spreading too much in the oven, assuring a chewy texture.
Additionally, to achieve a more pronounced crinkle effect, you can roll the dough balls in granulated sugar first before coating them in powdered sugar. This extra step helps the powdered sugar adhere better and enhances the contrast of the crinkles.
Finally, if you want to add a festive touch, consider mixing in some holiday sprinkles or a pinch of cinnamon to the dough for an extra layer of flavor.
Fluffy Panettone
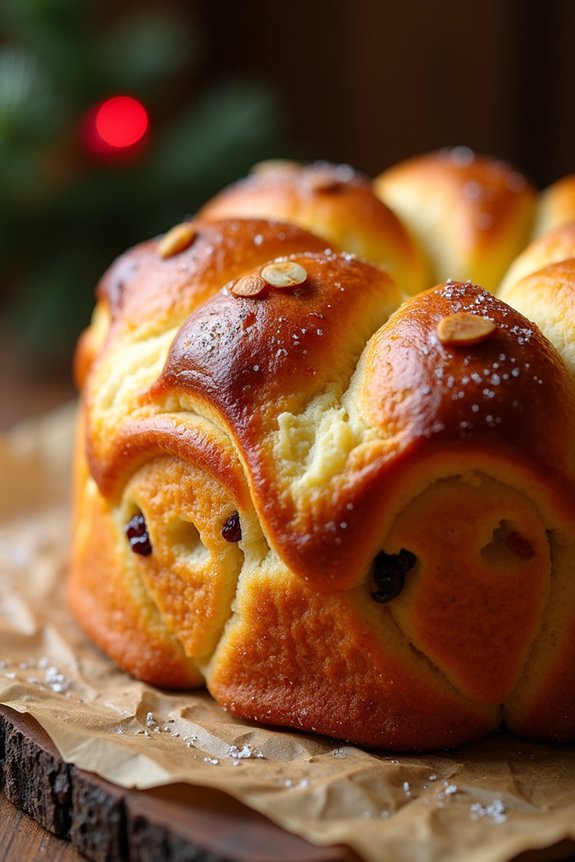
Fluffy Panettone is a classic Italian Christmas bread that’s rich in flavor and steeped in tradition. Originating from Milan, this sweet bread is known for its light, airy texture and delectable combination of dried fruits and citrus zest. It’s a festive treat that’s perfect for sharing with family and friends during the holiday season.
The process of making a traditional Panettone is a labor of love, requiring time and patience to allow the dough to rise to its full potential, resulting in a soft, buttery delight that’s sure to become a cherished holiday staple.
To create an authentic, Fluffy Panettone, you’ll need to invest some time in the preparation and baking process. The key to achieving the perfect texture lies in allowing the dough to rise slowly and using high-quality ingredients. This recipe is designed to serve 4-6 people, making it ideal for a small gathering or family celebration.
Gather your ingredients and get ready to initiate a baking adventure that will fill your home with the irresistible aroma of freshly baked bread.
Ingredients:
- 4 cups all-purpose flour
- 1/2 cup granulated sugar
- 1/2 teaspoon salt
- 2 teaspoons active dry yeast
- 1/2 cup warm milk (110°F/45°C)
- 4 large eggs, at room temperature
- 1 teaspoon pure vanilla extract
- 1 teaspoon lemon zest
- 1 teaspoon orange zest
- 1/2 cup unsalted butter, softened
- 1/2 cup golden raisins
- 1/2 cup candied citrus peel
- 1/4 cup slivered almonds (optional)
Instructions:
- Prepare the Dough: In a small bowl, dissolve the active dry yeast in warm milk and let it sit for about 5-10 minutes until bubbly. In a large mixing bowl, combine the flour, sugar, and salt. Make a well in the center and add the yeast mixture, eggs, vanilla extract, lemon zest, and orange zest. Mix until the ingredients are just combined.
- Knead the Dough: Transfer the dough to a lightly floured surface and knead for about 10 minutes, or until it becomes smooth and elastic. Gradually add the softened butter, a tablespoon at a time, kneading continuously until fully incorporated.
- First Rise: Place the dough in a lightly greased bowl, cover with a clean kitchen towel, and let it rise in a warm place for about 2 hours, or until it has doubled in size.
- Add Fruits and Nuts: Once the dough has risen, gently deflate it and knead in the golden raisins, candied citrus peel, and almonds (if using) until they’re evenly distributed throughout the dough.
- Shape and Second Rise: Form the dough into a ball and place it in a Panettone paper mold or a greased high-sided baking dish. Cover with a towel and let it rise again for 1-2 hours, or until it has risen to the top of the mold.
- Bake: Preheat your oven to 350°F (175°C). Bake the Panettone for 35-40 minutes, or until the top is golden brown and a skewer inserted into the center comes out clean. If the top browns too quickly, cover with aluminum foil halfway through baking.
- Cool: Remove the Panettone from the oven and let it cool in the mold for at least 30 minutes before slicing and serving.
Extra Tips:
To guarantee your Panettone is perfectly fluffy, make sure all ingredients are at room temperature before starting. This will help the dough to rise more effectively.
Additionally, the dough can be quite sticky, so don’t hesitate to flour your hands and work surface as needed during kneading. If you prefer a more enriched flavor, consider soaking the raisins in a bit of rum or brandy before adding them to the dough.
Finally, if you don’t have a Panettone mold, a tall, greased cake tin will work as well, though it may affect the traditional shape slightly. Enjoy your homemade Panettone with a warm cup of coffee or tea for the ultimate holiday treat!
Cranberry Orange Scones
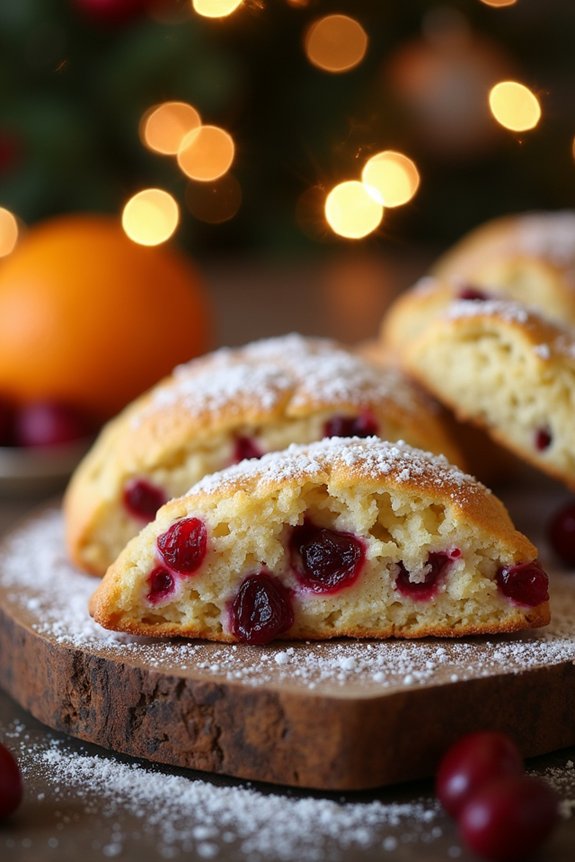
Cranberry Orange Scones are a delightful addition to any Christmas breakfast or brunch table. These scones combine the tartness of cranberries with the zesty flavor of fresh oranges, making them a revitalizing treat that perfectly complements the holiday season. The flaky, buttery texture of the scones pairs well with a warm cup of tea or coffee, providing a comforting and festive start to the day.
Originating from British tea-time traditions, scones have become a popular item in many cultures, especially around the holidays. The addition of cranberries and oranges gives these scones a modern twist, infusing them with vibrant colors and flavors that are reminiscent of festive decorations and winter fruit harvests.
Whether you’re a seasoned baker or a beginner, this recipe is straightforward and rewarding, yielding 8-12 scones perfect for serving a group of 4-6 people.
Ingredients:
- 2 cups all-purpose flour
- 1/3 cup granulated sugar
- 1 tablespoon baking powder
- 1/2 teaspoon salt
- Zest of 1 large orange
- 1/2 cup unsalted butter, cold and cubed
- 2/3 cup fresh or frozen cranberries, roughly chopped
- 1 large egg
- 1/2 cup heavy cream
- 1 teaspoon vanilla extract
- Additional heavy cream for brushing
- Turbinado sugar for sprinkling
Instructions:
- Preheat the Oven: Begin by preheating your oven to 400°F (200°C). Line a baking sheet with parchment paper or a silicone baking mat to prevent the scones from sticking.
- Mix Dry Ingredients: In a large mixing bowl, whisk together the all-purpose flour, granulated sugar, baking powder, and salt. Add the orange zest and mix until evenly distributed.
- Incorporate Butter: Add the cold, cubed butter to the dry ingredients. Using a pastry cutter or your fingertips, work the butter into the flour mixture until it resembles coarse crumbs.
- Add Cranberries: Fold in the roughly chopped cranberries, making sure they’re evenly distributed throughout the dough.
- Combine Wet Ingredients: In a separate bowl, beat the egg, then mix in the heavy cream and vanilla extract. Pour this wet mixture into the dry ingredients and stir until just combined. Be careful not to overmix.
- Shape the Dough: Turn the dough out onto a lightly floured surface. Gently knead the dough a few times until it comes together. Pat it into a disc approximately 1-inch thick and 8 inches in diameter.
- Cut the Scones: Using a sharp knife or a pastry cutter, divide the disc into 8-12 wedges, depending on your preferred size. Place the wedges on the prepared baking sheet.
- Prepare for Baking: Brush the tops of the scones with a little heavy cream and sprinkle with turbinado sugar for added crunch and sweetness.
- Bake: Bake the scones in the preheated oven for 15-18 minutes, or until the tops are golden brown and a toothpick inserted into the center comes out clean.
- Cool and Serve: Allow the scones to cool on the baking sheet for a few minutes before transferring them to a wire rack to cool completely. Serve warm or at room temperature with butter or clotted cream.
Extra Tips:
To maintain the best texture, use cold ingredients, particularly the butter and cream, as this helps achieve that flaky consistency. If you’re using frozen cranberries, there’s no need to thaw them first; simply chop them and mix them into the dough.
For an extra citrusy flavor, consider adding a tablespoon of fresh orange juice to the wet ingredients. These scones are best enjoyed fresh but can be stored in an airtight container for up to two days. Reheat them in a low oven before serving to restore their delightful texture.

