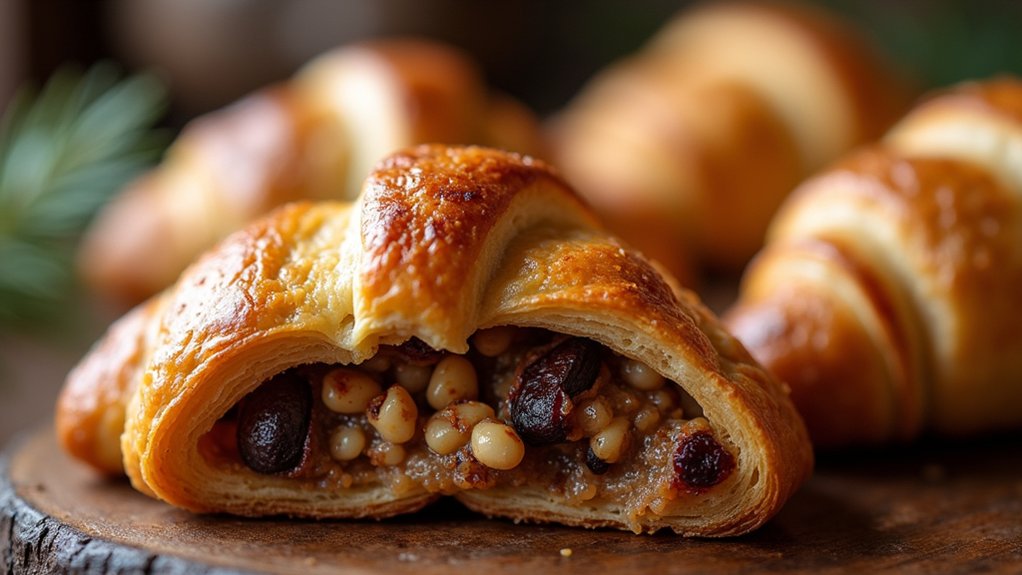
As the holiday season approaches, I’m excited to share some unique Christmas baking recipes that will make your celebrations extra special. Combining festive flavors in unexpected ways can truly make your treats stand out. Think cranberries and pistachios in a spiced biscotti or mulled wine poached pears in a tart. These delightful combinations are perfect for adding a touch of magic to your holiday table. Let’s explore these unique treats that promise to elevate your holiday celebrations.
Spiced Cranberry Pistachio Biscotti
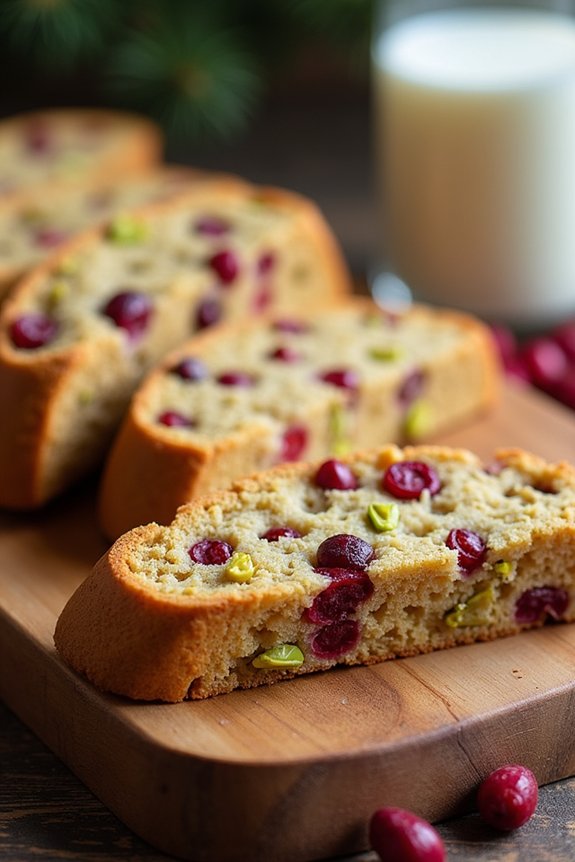
Spiced Cranberry Pistachio Biscotti is a delightful holiday treat that combines the festive flavors of cranberries, pistachios, and warm spices. These twice-baked Italian cookies are perfect for dipping into coffee or hot chocolate, making them an ideal addition to your Christmas baking repertoire. The combination of tart cranberries and crunchy pistachios, enhanced with aromatic spices, creates a biscotti that’s both flavorful and satisfying.
The biscotti are relatively simple to make and can be prepared in advance, making them a convenient choice for holiday gatherings or as homemade gifts. The key to perfect biscotti is in the twice-baking process, which gives them their characteristic crisp texture. Follow this recipe to make a batch of Spiced Cranberry Pistachio Biscotti that serves 4-6 people, guaranteeing a festive and delicious treat for everyone to enjoy.
Ingredients (Serves 4-6):
- 2 cups all-purpose flour
- 1 teaspoon baking powder
- 1/4 teaspoon ground cinnamon
- 1/4 teaspoon ground nutmeg
- 1/2 teaspoon salt
- 3/4 cup granulated sugar
- 1/2 cup unsalted butter, softened
- 2 large eggs
- 1 teaspoon vanilla extract
- 1 cup dried cranberries
- 1 cup shelled pistachios
Cooking Instructions:
- Preheat the Oven: Start by preheating your oven to 350°F (175°C). Line a large baking sheet with parchment paper to prevent the biscotti from sticking.
- Mix Dry Ingredients: In a medium bowl, whisk together the flour, baking powder, ground cinnamon, ground nutmeg, and salt. This will guarantee the spices are evenly distributed throughout the dough.
- Cream Butter and Sugar: In a large mixing bowl, cream the softened butter and sugar together until light and fluffy. This should take about 2-3 minutes using an electric mixer on medium speed.
- Add Eggs and Vanilla: Beat in the eggs, one at a time, mixing well after each addition. Stir in the vanilla extract to combine.
- Combine Ingredients: Gradually add the dry ingredients to the wet mixture, mixing until just combined. Fold in the dried cranberries and pistachios using a spatula or wooden spoon.
- Shape the Dough: Divide the dough in half and shape each half into a log about 12 inches long and 2 inches wide. Place the logs on the prepared baking sheet, leaving space between them.
- First Bake: Bake the logs in the preheated oven for 25-30 minutes, or until they’re lightly golden and firm to the touch. Remove from the oven and let them cool for about 10 minutes.
- Slice and Second Bake: Once cool enough to handle, use a serrated knife to slice the logs diagonally into 1/2-inch thick slices. Place the slices cut side down back on the baking sheet.
- Final Bake: Return the slices to the oven and bake for an additional 10-12 minutes, flipping them halfway through, until the biscotti are crisp and golden brown. Cool completely on a wire rack before serving or storing.
Extra Tips: For an extra festive touch, consider drizzling melted white chocolate over the cooled biscotti or dipping the ends in chocolate for added flavor and presentation. If you prefer softer biscotti, reduce the second baking time slightly. Biscotti can be stored in an airtight container for up to two weeks, making them a great make-ahead option for holiday gatherings. Enjoy these delightful treats with a hot cup of your favorite holiday beverage!
Eggnog Snickerdoodle Bars
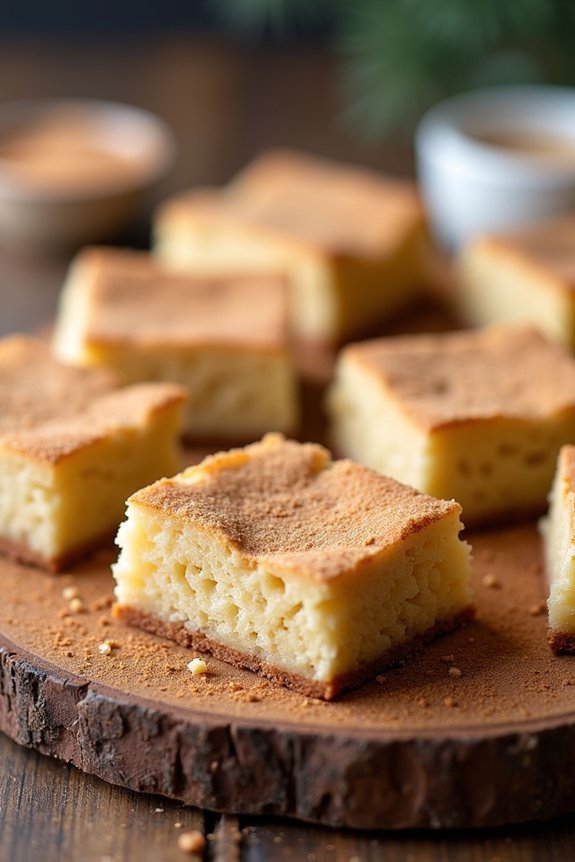
Eggnog Snickerdoodle Bars are the perfect holiday treat, infusing the classic flavors of eggnog into the beloved snickerdoodle cookie. These bars are soft, chewy, and topped with a delightful cinnamon-sugar crust, making them a festive addition to any Christmas gathering. The rich, creamy taste of eggnog complements the warm spices beautifully, creating a unique dessert that embodies the comforting essence of the holiday season.
These bars aren’t only delicious but also easy to make, requiring just a few simple steps to achieve holiday perfection. They’re ideal for serving at holiday parties, giving as gifts, or enjoying with a warm cup of coffee or hot cocoa on a chilly winter evening. This recipe serves 4-6 people, guaranteeing there’s enough to share or to keep all to yourself!
Ingredients:
- 1 cup unsalted butter, softened
- 2 cups granulated sugar
- 1/2 cup eggnog
- 1 teaspoon vanilla extract
- 2 large eggs
- 3 cups all-purpose flour
- 2 teaspoons cream of tartar
- 1 teaspoon baking soda
- 1/2 teaspoon salt
- 2 teaspoons ground cinnamon
- 1/2 teaspoon nutmeg
Instructions:
- Preheat the Oven: Begin by preheating your oven to 350°F (175°C). Line a 9×13-inch baking dish with parchment paper or lightly grease it to prevent sticking.
- Cream the Butter and Sugar: In a large mixing bowl, cream together the softened butter and 1 1/2 cups of the granulated sugar until light and fluffy. This should take about 3-4 minutes with an electric mixer on medium speed.
- Add Wet Ingredients: Gradually mix in the eggnog, vanilla extract, and eggs, making sure each ingredient is well incorporated before adding the next. The mixture may look slightly curdled due to the eggnog, but this is normal.
- Combine Dry Ingredients: In a separate bowl, whisk together the flour, cream of tartar, baking soda, and salt. Slowly add the dry ingredients to the wet mixture, mixing until just combined. Don’t overmix, as this can lead to tough bars.
- Prepare Cinnamon-Sugar Topping: In a small bowl, combine the remaining 1/2 cup of sugar, ground cinnamon, and nutmeg. Stir until evenly mixed.
- Assemble the Bars: Spread the dough evenly into the prepared baking dish. Sprinkle the cinnamon-sugar mixture generously over the top of the dough, covering it completely.
- Bake: Place the dish in the preheated oven and bake for 20-25 minutes, or until the edges are golden and a toothpick inserted into the center comes out clean.
- Cool and Serve: Allow the bars to cool in the dish for at least 15 minutes before slicing into squares. Serve warm or at room temperature for the best flavor.
Extra Tips:
When making Eggnog Snickerdoodle Bars, verify that your butter is properly softened to achieve the best texture in your bars. Cold butter won’t cream well with the sugar, leading to denser bars.
Additionally, if you prefer a more pronounced eggnog flavor, you can increase the eggnog quantity slightly or add a pinch more nutmeg to enhance the spice profile.
These bars store well at room temperature in an airtight container for up to three days, making them a convenient make-ahead option for holiday festivities.
Chocolate Peppermint Bark Cheesecake
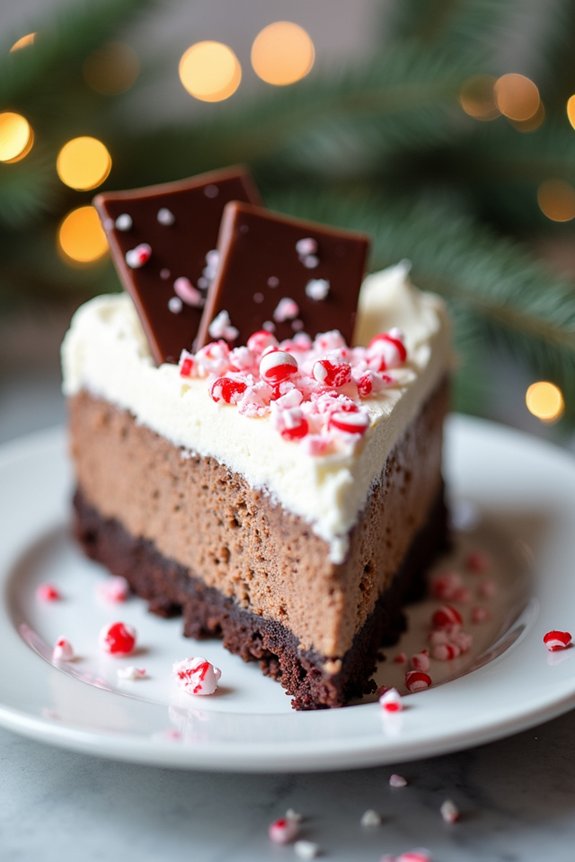
Indulge in the festive spirit with a delightful Chocolate Peppermint Bark Cheesecake, a perfect centerpiece for your holiday gatherings. This decadent dessert combines the rich, creamy texture of cheesecake with the invigorating taste of peppermint and the crunch of chocolate bark. Ideal for serving 4-6 people, this recipe won’t only satisfy your sweet tooth but also impress your guests with its elegant presentation and harmonious blend of flavors.
This cheesecake features a chocolate cookie crust, a creamy peppermint-infused filling, and a topping of homemade peppermint bark. The layers come together to create a symphony of taste and texture, making every bite a holiday treat. Whether you’re a seasoned baker or trying your hand at creating a holiday masterpiece for the first time, this recipe is bound to become a favorite in your Christmas baking repertoire.
Ingredients:
- 1 ½ cups chocolate sandwich cookie crumbs
- ¼ cup unsalted butter, melted
- 16 oz cream cheese, softened
- ½ cup granulated sugar
- 2 large eggs
- 1 tsp vanilla extract
- ½ tsp peppermint extract
- ½ cup sour cream
- 1 cup heavy cream
- 8 oz semi-sweet chocolate, chopped
- ½ cup crushed peppermint candies
- 1 tsp vegetable oil
Cooking Instructions:
- Prepare the Crust: Preheat your oven to 325°F (163°C). In a medium bowl, combine the chocolate sandwich cookie crumbs and melted butter until the mixture resembles wet sand. Press the mixture firmly into the bottom of a 9-inch springform pan to form an even layer. Bake the crust for 10 minutes, then remove from the oven and let it cool.
- Make the Cheesecake Filling: In a large bowl, beat the softened cream cheese and granulated sugar together until smooth and creamy. Add the eggs one at a time, mixing well after each addition. Stir in the vanilla extract, peppermint extract, and sour cream, mixing until all ingredients are fully combined and the batter is smooth.
- Bake the Cheesecake: Pour the cheesecake batter over the cooled crust and smooth the top with a spatula. Place the springform pan on a baking sheet and bake in the preheated oven for 45-50 minutes, or until the edges are set and the center is slightly jiggly. Turn off the oven, crack the door open slightly, and let the cheesecake cool in the oven for 1 hour to prevent cracking.
- Prepare the Peppermint Bark: While the cheesecake is cooling, melt the semi-sweet chocolate in a heatproof bowl set over a pot of simmering water, or in the microwave in 30-second intervals. Stir in the vegetable oil until the chocolate is smooth. Spread the melted chocolate onto a parchment-lined baking sheet and sprinkle with crushed peppermint candies. Chill in the refrigerator until set, then break into pieces.
- Assemble the Cheesecake: Once the cheesecake is completely cooled, remove it from the springform pan and transfer it to a serving plate. Whip the heavy cream until stiff peaks form, then spread it over the top of the cheesecake. Decorate with pieces of peppermint bark, gently pressing them into the whipped cream.
Extra Tips:
For the best results, verify all your ingredients, especially the cream cheese, are at room temperature before you start. This will help prevent lumps in the cheesecake batter.
When melting chocolate, be cautious not to overheat it, as this can cause the chocolate to seize. If you prefer a stronger peppermint flavor, you can adjust the amount of peppermint extract to taste.
Finally, when cutting the cheesecake, use a hot knife (warmed under hot water and then dried) to achieve clean slices. Enjoy your festive creation!
Gingerbread Whoopie Pies With Lemon Cream
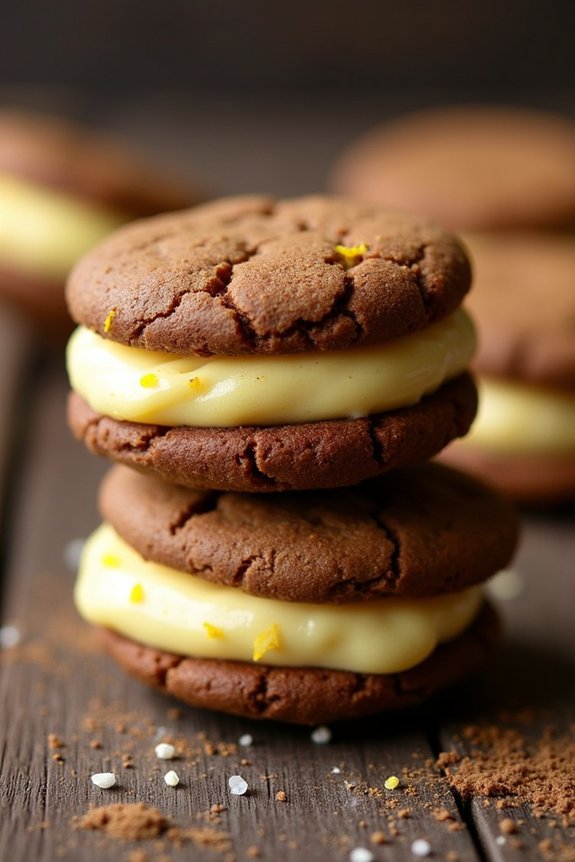
Gingerbread Whoopie Pies with Lemon Cream is a delightful holiday treat that combines the rich, spiced flavors of gingerbread with a revitalizing lemon cream filling. The chewy gingerbread cookies are perfectly balanced by the tangy and sweet lemon cream, making them an irresistible addition to your Christmas baking lineup.
These whoopie pies offer a modern twist on classic gingerbread, bringing a burst of festive flavors to your dessert table that will surely impress your guests. Perfect for serving at holiday gatherings or as a delightful gift, this recipe yields enough to serve 4-6 people, making it ideal for sharing with family and friends.
The combination of warm spices and zesty lemon is sure to become a seasonal favorite. Follow this simple recipe to create a batch of these delectable treats.
Ingredients for 4-6 servings:
- For the Gingerbread Cookies:
- 2 1/4 cups all-purpose flour
- 1 teaspoon baking soda
- 2 teaspoons ground ginger
- 1 teaspoon ground cinnamon
- 1/2 teaspoon ground cloves
- 1/2 teaspoon ground nutmeg
- 1/4 teaspoon salt
- 1/2 cup unsalted butter, softened
- 1/2 cup brown sugar
- 1/4 cup molasses
- 1 large egg
- 1 teaspoon vanilla extract
- For the Lemon Cream Filling:
- 1/2 cup unsalted butter, softened
- 1 1/2 cups powdered sugar
- 2 tablespoons lemon juice
- 1 tablespoon lemon zest
- 1 teaspoon vanilla extract
Instructions:
- Prepare the Gingerbread Dough:
- Preheat your oven to 350°F (175°C) and line two baking sheets with parchment paper.
- In a medium bowl, whisk together the all-purpose flour, baking soda, ground ginger, cinnamon, cloves, nutmeg, and salt. Set aside.
- In a large bowl, cream the softened butter and brown sugar together using an electric mixer until light and fluffy. Add the molasses, egg, and vanilla extract, beating until well combined.
- Gradually add the dry ingredients to the wet ingredients, mixing until just combined. Don’t overmix.
- Bake the Cookies:
- Using a tablespoon or cookie scoop, drop rounded tablespoons of dough onto the prepared baking sheets, spacing them about 2 inches apart.
- Bake in the preheated oven for 8-10 minutes, or until the cookies are set around the edges but still soft in the center.
- Remove from the oven and allow the cookies to cool on the baking sheets for 5 minutes before transferring them to a wire rack to cool completely.
- Prepare the Lemon Cream Filling:
- In a medium bowl, beat the softened butter with an electric mixer until smooth.
- Gradually add the powdered sugar, beating until the mixture is creamy and smooth.
- Add the lemon juice, lemon zest, and vanilla extract, beating until the ingredients are fully incorporated and the cream is fluffy.
- Assemble the Whoopie Pies:
- Once the gingerbread cookies have cooled completely, spread or pipe the lemon cream filling onto the flat side of half of the cookies.
- Top with the remaining cookies to form sandwich-like whoopie pies.
- Serve immediately or store in an airtight container at room temperature for up to 3 days.
Extra Tips:
When making the gingerbread dough, verify that all ingredients are at room temperature to help them mix more evenly and prevent the butter from solidifying.
For a more pronounced lemon flavor in the cream filling, consider adding a bit more lemon zest. Additionally, allowing the cookies to cool completely before assembling the whoopie pies will help the filling stay firm and prevent it from melting.
If you want to make the whoopie pies ahead of time, store them in the refrigerator and bring them to room temperature before serving for the best texture and flavor.
Cranberry Orange Upside-Down Cake
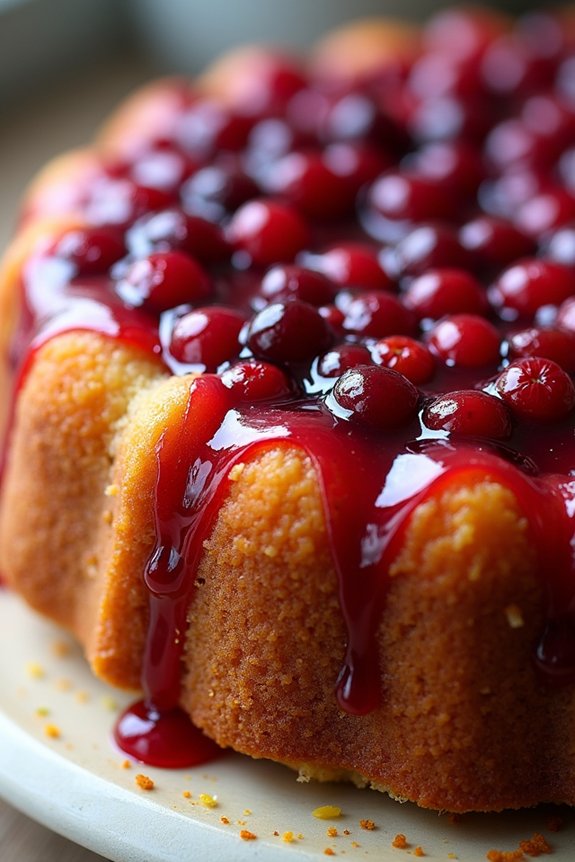
Cranberry Orange Upside-Down Cake is a delightful holiday treat that combines the tartness of cranberries with the invigorating citrus flavor of oranges. This cake not only tastes delectable, but it also makes for a stunning presentation with its vibrant cranberry topping. Perfect for Christmas gatherings, this cake is sure to impress your family and friends with its moist texture and festive flavors.
The beauty of an upside-down cake lies in its simplicity and elegance. With cranberries creating a jewel-like top once inverted, this cake is as visually appealing as it’s delicious. The citrusy orange zest and juice add a revitalizing contrast to the sweet and tart cranberry topping, while the cake itself is rich and buttery. Let’s plunge into the recipe to create this show-stopping holiday dessert.
Ingredients (Serving Size: 4-6 people):
- 1/2 cup unsalted butter, divided
- 1 cup granulated sugar, divided
- Zest of 1 orange
- 1/2 cup fresh orange juice
- 1/4 cup brown sugar
- 2 cups fresh cranberries
- 1 1/4 cups all-purpose flour
- 1 tsp baking powder
- 1/4 tsp salt
- 2 large eggs
- 1 tsp vanilla extract
- 1/2 cup sour cream
Cooking Instructions:
1. Preheat the Oven:
Preheat your oven to 350°F (175°C). Grease a 9-inch round cake pan generously with butter to guarantee easy removal later.
2. Prepare the Cranberry Layer:
In a small saucepan over low heat, melt 1/4 cup of the butter with the brown sugar. Stir until the sugar is dissolved and the mixture is smooth. Pour this mixture evenly into the bottom of the prepared cake pan. Spread the cranberries on top in an even layer.
3. Mix the Dry Ingredients:
In a medium-sized bowl, whisk together the flour, baking powder, and salt. Set aside.
4. Create the Cake Batter:
In a large bowl, beat the remaining 1/4 cup of butter with 1 cup granulated sugar until light and fluffy. Add the eggs one at a time, beating well after each addition. Mix in the orange zest and vanilla extract.
5. Combine the Ingredients:
Gradually add the flour mixture to the butter mixture, alternating with the orange juice and sour cream, beginning and ending with the flour mixture. Mix until just combined.
6. Assemble the Cake:
Carefully spoon the batter over the cranberries in the cake pan, smoothing the top with a spatula.
7. Bake:
Bake in the preheated oven for 35-40 minutes, or until a toothpick inserted in the center comes out clean. Let the cake cool in the pan for about 10 minutes.
8. Invert the Cake:
Run a knife around the edges of the pan to loosen the cake. Place a serving plate over the pan and invert the cake onto the plate. Let it sit for a minute, allowing the cranberry layer to release from the pan.
Extra Tips:
When working with fresh cranberries, confirm they’re plump and firm for the best results. If fresh cranberries are unavailable, frozen ones can be used without thawing.
For a more intense orange flavor, consider adding a teaspoon of orange extract to the batter. This cake pairs beautifully with a dollop of whipped cream or a scoop of vanilla ice cream, adding an extra layer of indulgence to each serving.
Enjoy your Cranberry Orange Upside-Down Cake fresh from the oven for the most delightful holiday experience!
Pomegranate Molasses Thumbprint Cookies
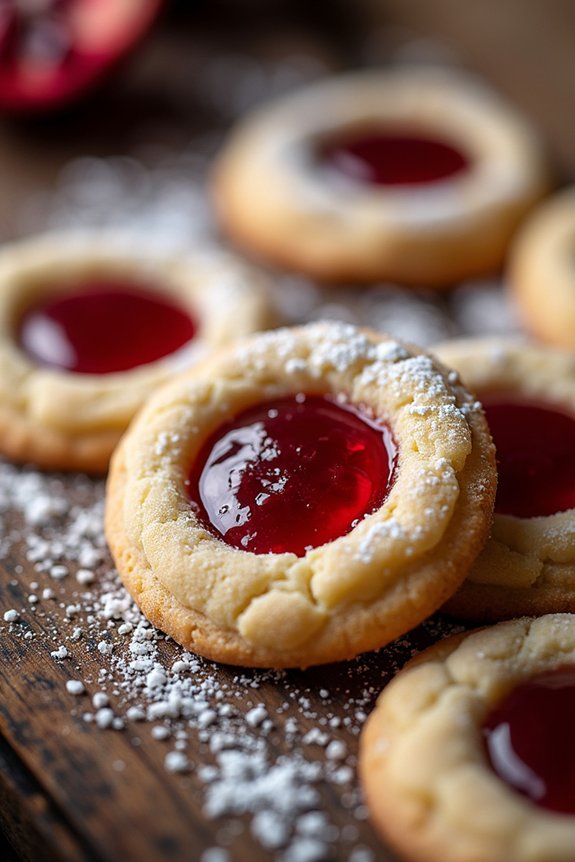
Pomegranate Molasses Thumbprint Cookies are a delightful treat perfect for adding a touch of festive elegance to your holiday baking. These cookies combine the rich, tangy flavor of pomegranate molasses with the buttery goodness of a classic thumbprint cookie, resulting in a unique and delicious dessert. Their vibrant red filling and elegant presentation make them an eye-catching addition to any Christmas cookie platter.
These cookies aren’t only beautiful but also simple to make, making them a great option for both novice and experienced bakers. The dough is easy to work with and requires just a handful of ingredients, while the pomegranate molasses adds a sophisticated depth of flavor that’s certain to impress your guests.
Whether you’re baking for a holiday party or simply looking to try something new this Christmas, Pomegranate Molasses Thumbprint Cookies are certain to be a hit.
Ingredients (serves 4-6 people):
- 1 cup unsalted butter, softened
- 1/2 cup granulated sugar
- 1 teaspoon vanilla extract
- 2 cups all-purpose flour
- 1/4 teaspoon salt
- 1/2 cup pomegranate molasses
- 1/4 cup powdered sugar, for dusting
Cooking Instructions:
- Preheat the Oven: Start by preheating your oven to 350°F (175°C). Line a baking sheet with parchment paper to prevent the cookies from sticking.
- Prepare the Cookie Dough: In a large mixing bowl, cream together the softened butter and granulated sugar until light and fluffy. Add the vanilla extract and mix until well combined.
- Mix in Dry Ingredients: Gradually add the all-purpose flour and salt to the butter mixture, stirring until a soft dough forms. The dough should be smooth and not sticky.
- Shape the Cookies: Roll the dough into 1-inch balls and place them on the prepared baking sheet, spacing them about 2 inches apart. Use your thumb or the back of a small spoon to create an indentation in the center of each ball.
- Fill the Thumbprints: Spoon about 1/2 teaspoon of pomegranate molasses into each indentation. Be careful not to overfill, as the filling may bubble over during baking.
- Bake the Cookies: Place the baking sheet in the preheated oven and bake for 12-15 minutes, or until the edges of the cookies are lightly golden. Remove from the oven and let them cool on the baking sheet for a few minutes before transferring to a wire rack to cool completely.
- Dust with Powdered Sugar: Once the cookies are completely cooled, lightly dust them with powdered sugar for an extra touch of sweetness and a festive look.
Extra Tips: For the best results, verify your butter is softened to room temperature, as this makes it easier to cream with the sugar. If you don’t have pomegranate molasses on hand, you can make your own by reducing pomegranate juice with sugar and a bit of lemon juice until it reaches a syrupy consistency.
Store the cookies in an airtight container to maintain their freshness, and consider doubling the recipe if you’re expecting a large crowd, as these cookies are sure to disappear quickly!
Maple Pecan Shortbread Bites
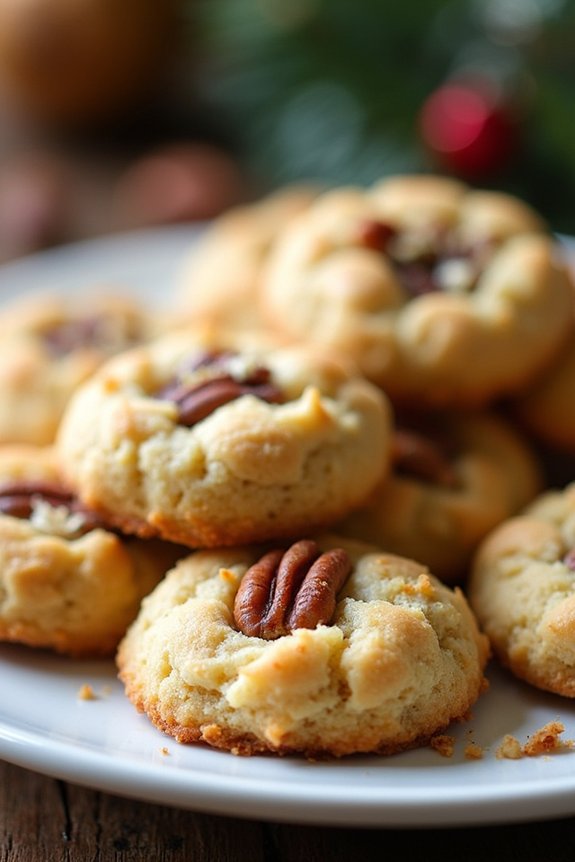
Maple Pecan Shortbread Bites are a delightful holiday treat that combines the rich flavors of maple syrup and toasted pecans with the buttery goodness of shortbread.
These bite-sized morsels are perfect for holiday gatherings, cookie swaps, or as a festive gift for friends and family. The warm, nutty aroma that fills your kitchen while baking these will make your home feel wonderfully cozy and inviting during the winter season.
This recipe yields 4-6 servings of Maple Pecan Shortbread Bites, guaranteeing there’s enough to share with loved ones or to indulge in yourself. The preparation involves creating a simple shortbread dough, enhancing it with pure maple syrup and chopped pecans, and then baking them to golden perfection.
The result is a tender, crumbly cookie with a satisfying crunch from the pecans and a hint of sweetness from the maple syrup.
Ingredients:
- 1 cup unsalted butter, softened
- 1/2 cup pure maple syrup
- 1/2 teaspoon vanilla extract
- 2 cups all-purpose flour
- 1/2 teaspoon salt
- 1 cup pecans, toasted and finely chopped
Instructions:
- Preheat the Oven: Begin by preheating your oven to 350°F (175°C). This guarantees that your oven reaches the correct temperature by the time your dough is ready to bake.
- Cream the Butter and Maple Syrup: In a large mixing bowl, cream together the softened butter and maple syrup until the mixture is smooth and creamy. Add the vanilla extract and mix well. The butter should be at room temperature to blend easily with the syrup.
- Mix the Dry Ingredients: In a separate bowl, whisk together the all-purpose flour and salt. This guarantees the salt is evenly distributed throughout the flour.
- Combine Wet and Dry Ingredients: Gradually add the flour mixture to the butter mixture, stirring until just combined. Be careful not to overmix, as this can make the cookies tough.
- Incorporate the Pecans: Gently fold in the toasted, chopped pecans until they’re evenly distributed throughout the dough.
- Shape the Dough: Roll the dough into 1-inch balls and place them on a baking sheet lined with parchment paper. Make sure to space them about 2 inches apart to allow for spreading.
- Bake: Place the baking sheet in the preheated oven and bake for 12-15 minutes, or until the edges are lightly golden. Keep an eye on them to prevent over-browning.
- Cool and Serve: Once baked, remove the cookies from the oven and allow them to cool on the baking sheet for a few minutes before transferring them to a wire rack to cool completely. Serve the cookies at room temperature.
Extra Tips:
To guarantee the best results, use high-quality pure maple syrup, as it provides the most authentic flavor.
Toasting the pecans enhances their natural nuttiness and adds depth to the cookies. If you prefer a slightly sweeter cookie, you can sprinkle a little sugar on top of each dough ball before baking.
The dough can be prepared in advance and stored in the refrigerator for up to 2 days or frozen for up to a month, allowing you to bake fresh cookies whenever the mood strikes.
Chai-Spiced Sugar Cookie Trees

Chai-Spiced Sugar Cookie Trees are a delightful twist on the classic holiday treat, infusing the warm, aromatic flavors of chai tea into your traditional sugar cookies. These cookies not only taste amazing, but their festive tree shapes make them a perfect centerpiece for your holiday dessert table. The combination of spices like cinnamon, cardamom, and ginger mimic the comforting flavor profile of chai, while the sugar cookie base provides the perfect canvas for decorating with icing and sprinkles.
Perfect for a family baking activity or a holiday party treat, these Chai-Spiced Sugar Cookie Trees will surely bring joy and warmth to your gatherings. The recipe yields approximately 24-30 cookies, making it ideal for serving 4-6 people, allowing each person to enjoy several cookies. With a few simple ingredients and some creativity, you can create a batch of cookies that not only taste wonderful but look festive and inviting as well.
Ingredients:
- 2 1/2 cups all-purpose flour
- 1/2 teaspoon baking powder
- 1/4 teaspoon salt
- 1 teaspoon ground cinnamon
- 1/2 teaspoon ground ginger
- 1/2 teaspoon ground cardamom
- 1/2 cup unsalted butter, softened
- 1 cup granulated sugar
- 1 large egg
- 1 teaspoon vanilla extract
- 1 tablespoon chai tea concentrate or brewed chai tea, cooled
- Icing (for decorating)
- Sprinkles (optional, for decorating)
Instructions:
- Preheat the Oven: Begin by preheating your oven to 350°F (175°C). Line two baking sheets with parchment paper and set aside.
- Mix Dry Ingredients: In a medium bowl, whisk together the all-purpose flour, baking powder, salt, ground cinnamon, ground ginger, and ground cardamom. This guarantees that the spices are evenly distributed throughout the flour mixture.
- Cream Butter and Sugar: In a large mixing bowl, use an electric mixer to cream the softened butter and granulated sugar together until light and fluffy, about 3 minutes. This step incorporates air into the mixture, resulting in lighter, more tender cookies.
- Add Wet Ingredients: Beat in the egg, vanilla extract, and chai tea concentrate (or brewed chai tea) until well combined. This will infuse the dough with the chai flavor.
- Combine Ingredients: Gradually add the dry ingredients to the wet ingredients, mixing on low speed until just combined. Be careful not to overmix, as this can result in tough cookies.
- Chill the Dough: Divide the dough in half, shape each half into a disk, wrap in plastic wrap, and refrigerate for at least 1 hour. Chilling the dough makes it easier to roll out and helps prevent the cookies from spreading too much during baking.
- Roll and Cut: On a lightly floured surface, roll out the dough to about 1/4-inch thickness. Use tree-shaped cookie cutters to cut out shapes, and transfer them to the prepared baking sheets.
- Bake: Bake in the preheated oven for 8-10 minutes, or until the edges are just starting to turn golden. Remove from the oven and allow the cookies to cool on the baking sheets for 5 minutes, then transfer to a wire rack to cool completely.
- Decorate: Once the cookies are completely cool, decorate them with icing and sprinkles as desired. Let the icing set before serving or storing.
Extra Tips: When baking these cookies, make sure to keep an eye on them towards the end of the baking time to verify they don’t overbake, as this can result in dry cookies. If you prefer a more pronounced chai flavor, you can increase the amount of chai tea concentrate slightly or add a pinch more of each spice.
Also, for even baking, try to roll the dough to a consistent thickness and rotate your baking sheets halfway through the baking time.
White Chocolate and Matcha Swirl Fudge
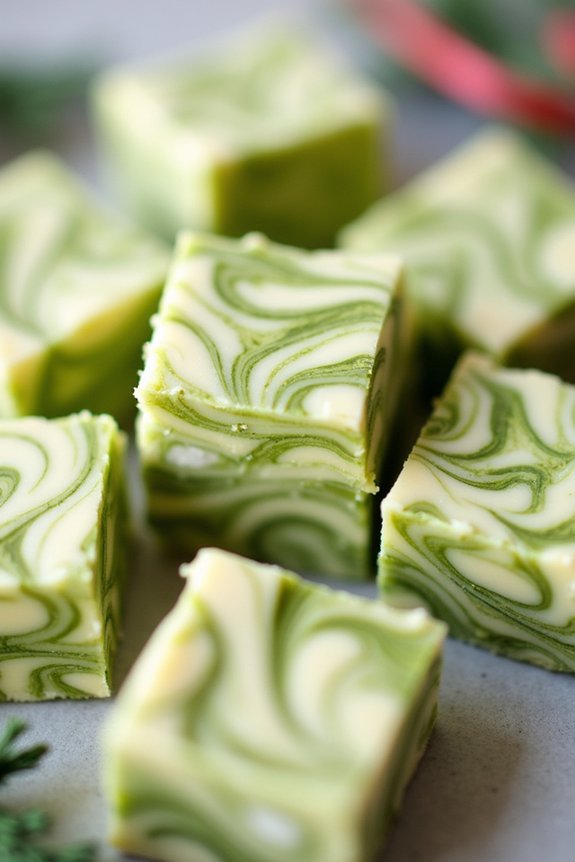
White Chocolate and Matcha Swirl Fudge is an indulgent treat that combines the creamy sweetness of white chocolate with the earthy, slightly bitter flavor of matcha. This unique combination creates a visually stunning and delicious fudge that’s perfect for the holiday season.
The vibrant green of the matcha swirled through the white chocolate creates a striking contrast in both appearance and taste, making this fudge not only a delightful treat to eat but also a beautiful addition to any festive dessert table.
This recipe is straightforward and doesn’t require any baking, making it a great option for those looking to whip up a quick and impressive holiday treat. The key to achieving the perfect swirl is to work quickly before the fudge sets, guaranteeing the matcha is evenly distributed throughout the white chocolate.
With the use of a few simple ingredients and some patience, you can create a luxurious fudge that will impress your family and friends.
Ingredients (serves 4-6):
- 2 cups white chocolate chips
- 1/2 cup sweetened condensed milk
- 1 teaspoon vanilla extract
- 2 tablespoons unsalted butter
- 1 tablespoon matcha powder
- 1 tablespoon hot water
Cooking Instructions:
- Prepare the Matcha Mixture: In a small bowl, combine the matcha powder and hot water. Stir until the matcha is fully dissolved and forms a smooth paste. Set aside.
- Melt the White Chocolate: In a medium saucepan over low heat, combine the white chocolate chips, sweetened condensed milk, and butter. Stir continuously until the chocolate is completely melted and the mixture is smooth and creamy. Be careful not to overheat, as this can cause the chocolate to seize.
- Add Vanilla Extract: Once the white chocolate mixture is fully melted, remove the saucepan from heat and stir in the vanilla extract. Mix well to guarantee the vanilla is evenly distributed throughout the fudge base.
- Create the Swirl: Pour half of the melted white chocolate mixture into a parchment-lined 8×8 inch baking dish. Reserve the other half in the saucepan. Drizzle the matcha paste over the white chocolate layer in the dish. Use a toothpick or a skewer to gently swirl the matcha through the white chocolate, creating a marbled effect.
- Complete the Fudge Layer: Pour the remaining white chocolate mixture over the matcha-swirled layer. Use a spatula to smooth the top and guarantee it’s evenly spread. If desired, add additional swirls of matcha on the surface.
- Chill and Set: Place the baking dish in the refrigerator for at least 2 hours or until the fudge is firm. Once set, remove from the fridge and lift the fudge out using the parchment paper. Cut into squares using a sharp knife.
Extra Tips: When creating the matcha swirl, work quickly to guarantee the fudge doesn’t start to set before you’ve achieved your desired pattern. If you’re new to swirling, practice the technique with a small amount of fudge first.
Additionally, using high-quality white chocolate and matcha will notably enhance the flavor and presentation of your fudge. Store any leftovers in an airtight container in the refrigerator to maintain freshness.
Mulled Wine Poached Pear Tart
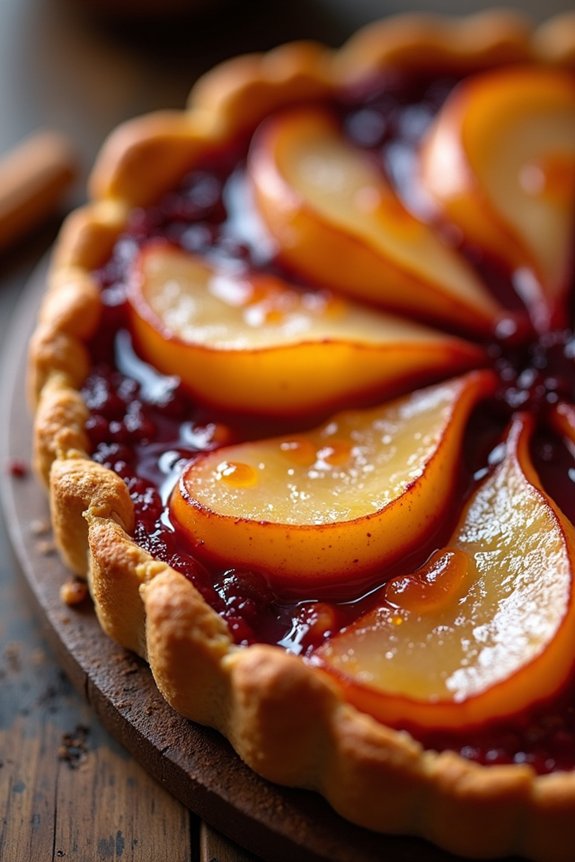
Indulge in the festive spirit with a delightful Mulled Wine Poached Pear Tart, a perfect dessert for your holiday gatherings. This elegant tart combines the aromatic flavors of mulled wine with the natural sweetness of pears, all encased in a buttery pastry crust.
The rich, spiced wine infuses the pears with warmth and depth of flavor, making this tart a show-stopping centerpiece for your Christmas table. Each bite of this decadent dessert will transport you and your guests to a winter wonderland, filled with the comforting notes of cinnamon, cloves, and citrus.
This recipe serves 4-6 people, making it ideal for a family gathering or a cozy dinner party with friends. The tart isn’t only beautiful to look at but also delightful in taste. You’ll find that the combination of silky poached pears and a crisp tart shell is irresistible. Get ready to impress your guests with a dessert that looks as good as it tastes!
Ingredients:
- 4 ripe pears, peeled and cored
- 750 ml red wine (like Merlot or Shiraz)
- 200 g granulated sugar
- 1 cinnamon stick
- 3 whole cloves
- 1 star anise
- Zest of 1 orange
- 1 pre-made tart shell (9-inch)
- 100 g ground almonds
- 100 g unsalted butter, softened
- 100 g caster sugar
- 2 large eggs
- 1 teaspoon vanilla extract
- 2 tablespoons apricot jam (for glazing)
Instructions:
- Prepare the Mulled Wine: In a large saucepan, combine red wine, granulated sugar, cinnamon stick, cloves, star anise, and orange zest. Stir well to dissolve the sugar and bring the mixture to a gentle simmer over medium heat.
- Poach the Pears: Add the peeled and cored pears to the simmering mulled wine. Confirm that the pears are fully submerged in the liquid. Cover the saucepan and let the pears poach for about 20-25 minutes or until they’re tender. Use a slotted spoon to remove the pears and let them cool slightly.
- Preheat the Oven: While the pears are cooling, preheat your oven to 180°C (350°F).
- Prepare the Almond Filling: In a mixing bowl, cream together the softened butter and caster sugar until light and fluffy. Gradually add the eggs, one at a time, mixing well after each addition. Stir in the vanilla extract and ground almonds until the mixture is smooth.
- Assemble the Tart: Spread the almond filling evenly over the pre-made tart shell. Slice the poached pears in half and arrange them in a decorative pattern on top of the almond filling.
- Bake the Tart: Place the assembled tart on a baking sheet and bake in the preheated oven for 25-30 minutes, or until the almond filling is set and the tart is golden brown.
- Glaze the Tart: In a small saucepan, gently heat the apricot jam until it becomes liquid. Use a pastry brush to apply a thin layer of the apricot glaze over the warm tart to give it a beautiful, glossy finish.
- Cool and Serve: Allow the tart to cool to room temperature before serving. This will help the flavors to meld together beautifully.
Extra Tips: When choosing pears for this recipe, opt for varieties that hold their shape well during poaching, such as Bosc or Anjou. If you don’t have a pre-made tart shell, you can make your own pastry crust from scratch for an extra touch of homemade goodness.
Additionally, the poaching liquid can be reduced further to create a delicious syrup to drizzle over the tart just before serving, adding an extra layer of flavor.
Cardamom Vanilla Bean Bundt Cake
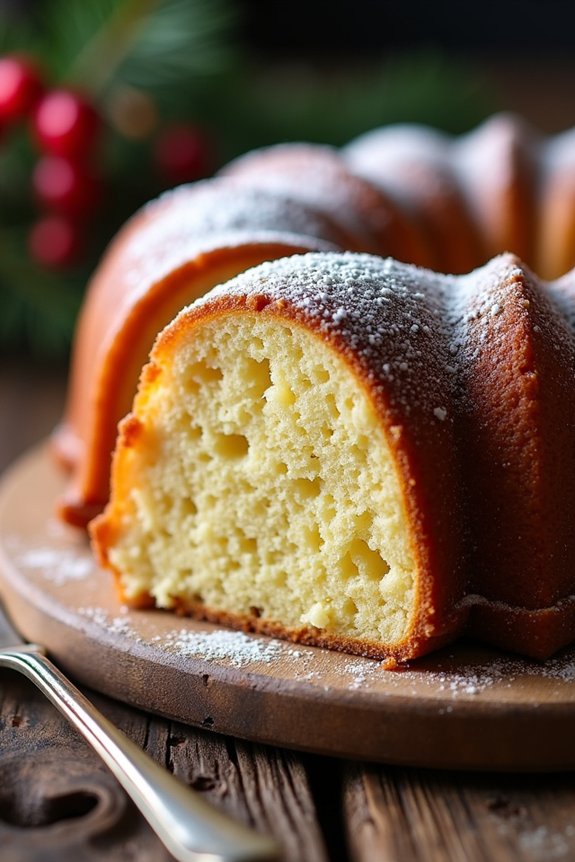
Cardamom Vanilla Bean Bundt Cake is a delightful and aromatic dessert perfect for the holiday season. This cake combines the warm, spicy notes of cardamom with the rich and inviting flavor of vanilla bean. The result is a beautifully moist and fragrant cake that not only tastes delicious but also looks stunning on any festive table.
The unique blend of flavors makes it an ideal centerpiece for Christmas gatherings, offering a sophisticated twist on traditional holiday treats. The preparation of this cake involves using high-quality ingredients to guarantee that each bite is packed with flavor. The cardamom provides a slightly spicy undertone, while the vanilla bean adds a creamy and sweet aroma.
This combination is enhanced by the cake’s tender crumb, achieved through careful mixing and baking techniques. Whether you’re an experienced baker or a novice in the kitchen, this recipe is straightforward and yields impressive results, bringing warmth and joy to your holiday celebrations.
Ingredients (Serving Size: 4-6 people):
- 2 1/2 cups all-purpose flour
- 1 1/2 teaspoons baking powder
- 1/2 teaspoon baking soda
- 1/2 teaspoon salt
- 1 teaspoon ground cardamom
- 1 cup unsalted butter, softened
- 2 cups granulated sugar
- 4 large eggs
- 1 tablespoon vanilla bean paste
- 1 cup sour cream
- 1/4 cup whole milk
- Powdered sugar for dusting (optional)
Cooking Instructions:
- Preheat and Prepare the Pan: Preheat your oven to 350°F (175°C). Generously grease a Bundt pan with butter or non-stick spray and lightly dust it with flour. This guarantees that the cake will release easily after baking.
- Mix Dry Ingredients: In a medium-sized bowl, whisk together the flour, baking powder, baking soda, salt, and ground cardamom. Set aside.
- Cream Butter and Sugar: In a large mixing bowl, cream the softened butter and granulated sugar together using an electric mixer on medium speed until light and fluffy, about 3-4 minutes.
- Add Eggs and Vanilla: Beat in the eggs one at a time, ensuring each egg is fully incorporated before adding the next. Stir in the vanilla bean paste until evenly distributed.
- Combine Wet and Dry Ingredients: Gradually add the dry ingredients to the creamed mixture, alternating with the sour cream and milk. Begin and end with the dry ingredients, mixing just until combined. Be careful not to overmix to maintain a tender crumb.
- Pour and Bake: Pour the batter into the prepared Bundt pan, spreading it evenly with a spatula. Tap the pan gently on the counter to remove any air bubbles. Bake in the preheated oven for 50-60 minutes, or until a toothpick inserted into the center comes out clean.
- Cool and Serve: Allow the cake to cool in the pan on a wire rack for 15 minutes. Carefully invert the cake onto the rack and let it cool completely. Dust with powdered sugar before serving if desired.
Extra Tips:
To enhance the flavor of your Cardamom Vanilla Bean Bundt Cake, consider toasting the cardamom seeds lightly before grinding them. This can intensify the spice’s flavor, adding depth to the cake.
If you don’t have vanilla bean paste, you can substitute it with vanilla extract, but the paste provides a richer vanilla flavor and those lovely specks of real vanilla bean. For an extra festive touch, consider garnishing the cake with sugared cranberries or a simple glaze made from powdered sugar and milk.
Always guarantee that your Bundt pan is well-greased and floured to avoid any sticking, which can disrupt the beautiful shape of your cake.
Roasted Chestnut and Chocolate Brioche
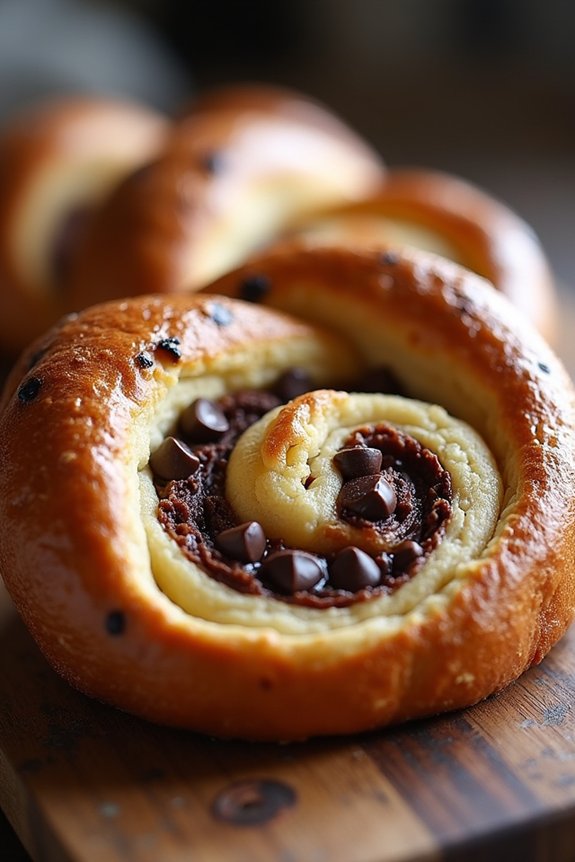
Roasted Chestnut and Chocolate Brioche is a delightful holiday treat that combines the rich flavors of roasted chestnuts with the creamy decadence of chocolate, all wrapped in a soft, buttery brioche dough. This festive bread is perfect for sharing with family and friends during the Christmas season.
The brioche is light and fluffy, providing the perfect canvas for the sweet and nutty filling, making it an irresistible addition to your holiday baking repertoire. The warm, nutty aroma of roasted chestnuts mingled with the sweet scent of chocolate wafting through your kitchen will surely evoke the spirit of the season.
Preparing this bread does require a bit of patience, as brioche dough needs time to rise, but the result is well worth the effort. Serve it as a special breakfast treat, a delightful dessert, or even a comforting afternoon snack with a hot cup of cocoa or coffee.
Ingredients (Serves 4-6):
- 3 1/2 cups all-purpose flour
- 1/4 cup granulated sugar
- 1 packet (2 1/4 teaspoons) active dry yeast
- 1 teaspoon salt
- 4 large eggs
- 1/2 cup unsalted butter, at room temperature
- 1 cup roasted chestnuts, chopped
- 1/2 cup dark chocolate chips
- 1/4 cup milk
- 1 egg yolk (for egg wash)
- 1 tablespoon water
Instructions:
- Prepare the Dough: In a large mixing bowl, combine the flour, sugar, yeast, and salt. In a separate bowl, beat the eggs and gradually add them to the dry ingredients, mixing until well combined. Knead the dough for about 5 minutes until it’s smooth.
- Incorporate the Butter: Gradually add the room-temperature butter to the dough, one tablespoon at a time, making certain each piece is fully incorporated before adding the next. Continue kneading the dough until it becomes smooth, glossy, and elastic.
- First Rise: Place the dough in a lightly greased bowl, cover with a damp cloth, and let it rise in a warm place until it doubles in size, about 1-2 hours.
- Prepare the Filling: While the dough is rising, chop the roasted chestnuts and mix them with the dark chocolate chips in a small bowl.
- Shape the Brioche: Once the dough has risen, punch it down to release the air. Roll it out on a floured surface into a large rectangle. Sprinkle the chestnut and chocolate mixture evenly over the dough.
- Roll and Shape: Roll the dough into a log, starting from one of the long sides. Pinch the edges to seal. Shape the log into a ring and place it on a parchment-lined baking sheet.
- Second Rise: Cover the shaped brioche with a towel and let it rise again for about 1 hour until it has doubled in size.
- Preheat and Egg Wash: Preheat your oven to 350°F (175°C). Mix the egg yolk with a tablespoon of water and brush it over the brioche to give it a golden, glossy finish.
- Bake: Bake the brioche in the preheated oven for 25-30 minutes, or until it’s golden brown and sounds hollow when tapped on the bottom. Allow it to cool on a wire rack before serving.
Extra Tips:
For the best results, make certain that all your ingredients are at room temperature before starting. This will help the dough come together more smoothly.
If your kitchen is cool, you can create a warm environment for the dough to rise by placing it in the oven with just the oven light on. To prevent the chocolate from seeping out during baking, make sure to seal the edges of the dough well after rolling.
Enjoy this brioche slightly warm for the ultimate experience, allowing the chocolate to remain a little melty and gooey.
Fig and Walnut Rugelach
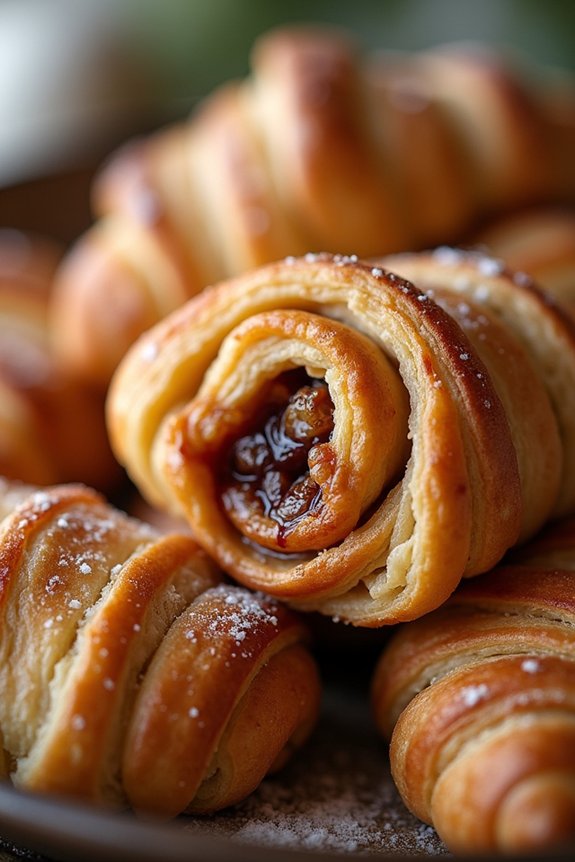
Fig and Walnut Rugelach is a delightful pastry that combines the rich, sweet flavors of figs with the earthy crunch of walnuts, all wrapped in a tender, buttery dough. This treat is perfect for holiday gatherings or a special Christmas morning breakfast. The combination of dried figs and walnuts provides a delightful contrast in texture, while the cinnamon and sugar add a touch of spice and sweetness that makes each bite irresistible.
The dough for Rugelach is traditionally made with cream cheese, which gives it a rich, tangy flavor and a wonderfully flaky texture. This recipe is perfect for serving 4-6 people, making it an ideal choice for a cozy family gathering. Whether you’re a seasoned baker or just starting, this recipe is easy to follow and yields delicious results that are bound to impress your guests.
Ingredients:
- 2 cups all-purpose flour
- 1/4 teaspoon salt
- 1 cup unsalted butter, softened
- 8 oz cream cheese, softened
- 1/4 cup granulated sugar
- 1 teaspoon vanilla extract
- 1 cup dried figs, finely chopped
- 1 cup walnuts, finely chopped
- 1/4 cup brown sugar
- 1 teaspoon ground cinnamon
- 1/4 cup honey
- 1 egg, beaten
- 2 tablespoons milk
Cooking Instructions:
1. Prepare the Dough: In a medium bowl, whisk together the flour and salt. In a larger bowl, cream together the butter and cream cheese until smooth. Add the granulated sugar and vanilla extract, and continue to mix until fully incorporated. Gradually add the flour mixture to the wet ingredients, mixing just until a dough forms.
Divide the dough into two equal portions, wrap each in plastic wrap, and refrigerate for at least 2 hours or until firm.
2. Prepare the Filling****: In a small bowl, combine the chopped figs, walnuts, brown sugar, and cinnamon. Stir in the honey until the mixture is well combined and sticky.
3. Roll Out the Dough: Preheat your oven to 350°F (175°C). Remove one portion of dough from the refrigerator and roll it out on a lightly floured surface into a circle about 1/8-inch thick.
4. Fill and Shape the Rugelach: Spread half of the fig and walnut mixture evenly over the rolled-out dough, leaving a small border around the edges. Using a pizza cutter or sharp knife, cut the dough into 12 wedges (like slicing a pizza).
Starting from the wide end, roll each wedge towards the center to form a crescent shape. Repeat with the second portion of dough and remaining filling.
5. Bake the Rugelach: Place the Rugelach on a baking sheet lined with parchment paper. In a small bowl, whisk together the egg and milk, then brush this egg wash over the tops of the Rugelach. Bake in the preheated oven for 20-25 minutes, or until golden brown.
6. Cool and Serve: Allow the Rugelach to cool on a wire rack for a few minutes before serving. Enjoy them warm or at room temperature.
Extra Tips:
To guarantee that your Fig and Walnut Rugelach have a flaky texture, be sure not to overwork the dough when mixing and rolling it out. Chilling the dough is essential, as it helps maintain its structure when baking.
If you prefer, you can prepare the dough and filling a day in advance and assemble the Rugelach right before baking. This will save time on busy days and allow the flavors to meld wonderfully. Additionally, feel free to experiment with other fillings like apricot jam or chocolate chips for a different twist on this classic recipe.

