

Busy evenings often need meals that come together without much fuss. Here are twelve recipes that focus on simple steps and familiar ingredients. They are meant to help you serve comforting food without adding extra stress. You can choose from options that work for different schedules and family tastes.
Helpful Tips Before You Start
These tips will help you keep weeknight cooking simple and focused on time together.
Prep What You Can Ahead
Chop vegetables or mix sauces in the morning or the night before. This cuts down on evening work so you can relax sooner.
Cook One Pot Meals Often
Many comforting recipes come together in a single skillet or Dutch oven. Fewer dishes mean more time at the table instead of at the sink.
Double the Recipe When It Makes Sense
Make extra portions of soups, casseroles, or stews. Leftovers reheat well and give you an easy dinner later in the week.
Set the Table Early
Put out plates, glasses, and napkins before you start cooking. A ready table helps everyone shift into dinner mode with less rush.
Creamy Chicken Alfredo Lasagna
This lasagna layers tender chicken with a rich Alfredo sauce between soft noodles and melted cheese. It turns a classic pasta favorite into a baked dish that feels special yet simple enough for weeknight dinners with the family.
The result is creamy and hearty with a golden top that holds together well when sliced. It works nicely for relaxed evenings when everyone wants something warm and filling at the table.


Equipment
- Large pot
- 9×9 inch baking dish
- Mixing bowl
Ingredients
- 9 lasagna noodles
- 2 cups shredded cooked chicken
- 3 cups Alfredo sauce
- 1 cup ricotta cheese
- 2 cups shredded mozzarella cheese
- 1/2 cup grated Parmesan cheese
- 1/2 teaspoon salt
- 1/4 teaspoon black pepper
Instructions
- Preheat the oven to 375 degrees and lightly grease a 9×9 inch baking dish.
- Cook the lasagna noodles in a large pot of boiling water until just tender. Drain and set aside.
- Stir the salt and pepper into the ricotta cheese in a small bowl.
- Spread 1 cup of Alfredo sauce across the bottom of the baking dish.
- Layer three noodles over the sauce, then half the chicken, half the ricotta mixture, and 1/2 cup mozzarella.
- Repeat the layers once more with another cup of sauce, three noodles, the remaining chicken and ricotta, and another 1/2 cup mozzarella.
- Top with the final three noodles, the remaining Alfredo sauce, the rest of the mozzarella, and all the Parmesan.
- Cover with foil and bake for 25 minutes. Remove the foil and bake 10 minutes more until the top is lightly browned.
- Let the lasagna rest 10 minutes before slicing and serving.
Notes
Cuisine: Italian
Equipment: Large pot, 9×9 inch baking dish, Mixing bowl
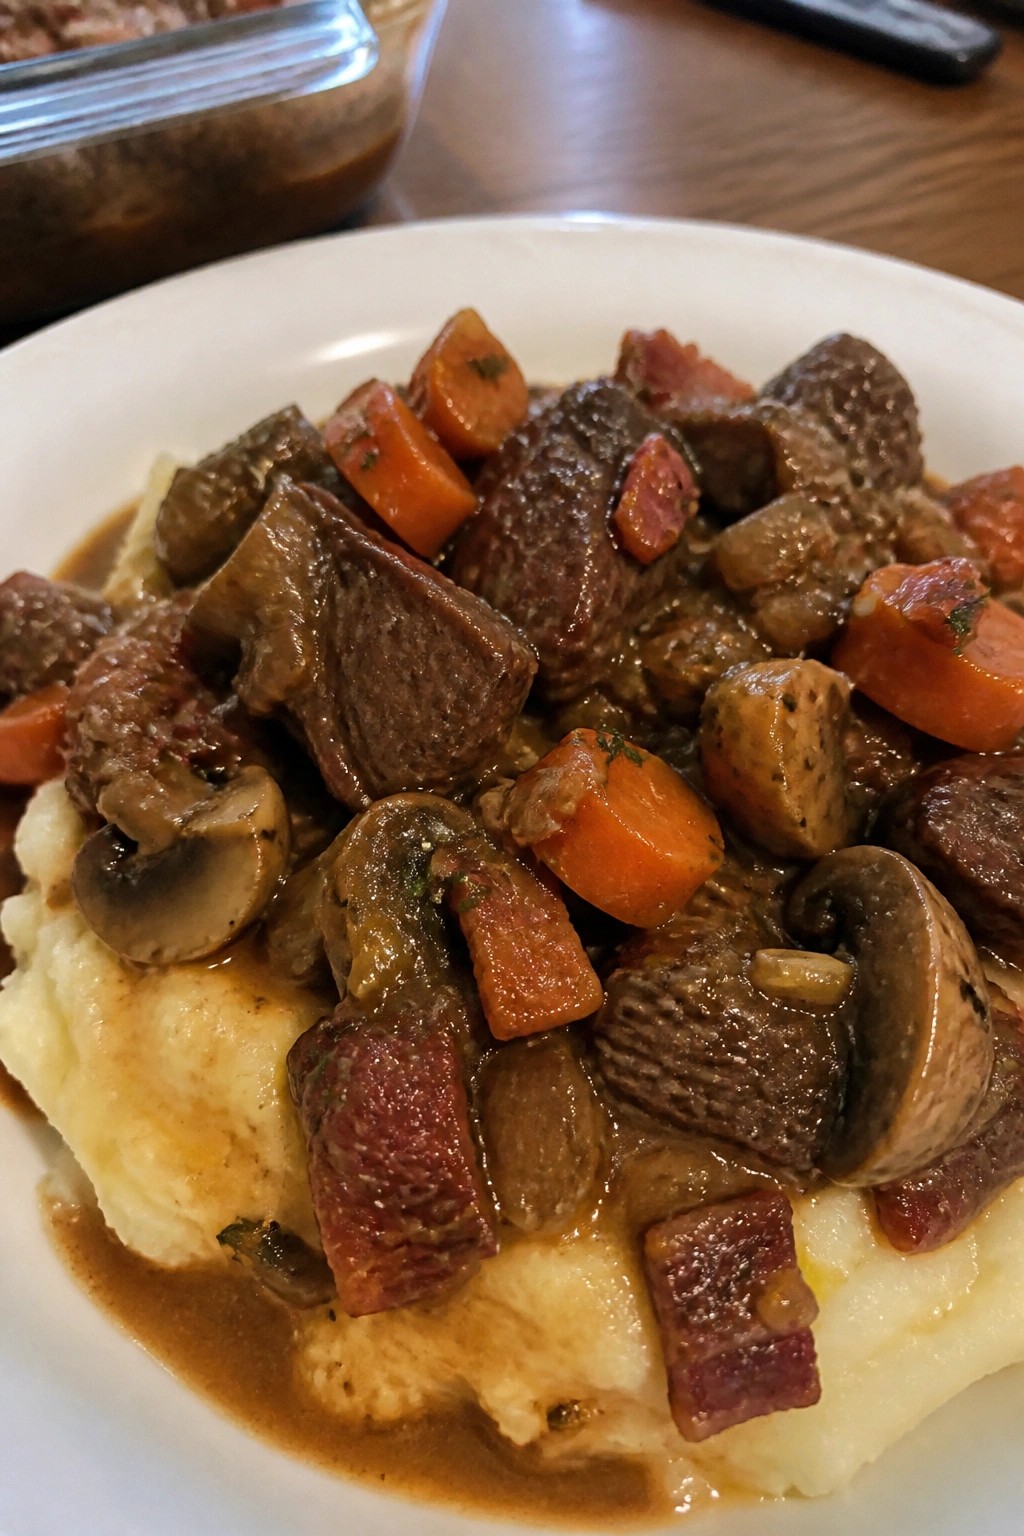
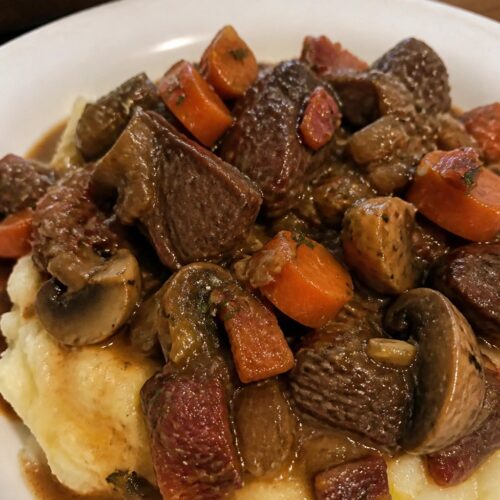
Slow Cooker Beef Bourguignon with Buttery Mashed Potatoes
This slow cooker meal turns simple ingredients into a hearty dinner that feels special without much effort. The beef simmers until tender in a rich wine sauce while the mashed potatoes come together on the stove for a creamy base that catches every drop of gravy. It works well for weeknights when you want something warm and filling on the table.
The dish combines savory beef, vegetables, and mushrooms with buttery potatoes for a balanced plate. Families enjoy it because the slow cooker does most of the work and the flavors develop nicely over time.
Equipment
- Slow Cooker
- Large Skillet
- Large Pot
- Potato Masher
Ingredients
- 2 lbs beef chuck, cut into 1-inch cubes
- 4 slices bacon, chopped
- 3 carrots, sliced into rounds
- 1 large onion, diced
- 3 garlic cloves, minced
- 1 cup red wine
- 1 cup beef broth
- 2 tbsp tomato paste
- 2 tbsp flour
- 8 oz mushrooms, quartered
- 2 sprigs fresh thyme
- 2 bay leaves
- 2 lbs Yukon gold potatoes, peeled and quartered
- 4 tbsp butter
- 1/2 cup milk
- Salt and black pepper
Instructions
- Cook the chopped bacon in a large skillet over medium heat until crisp. Remove the bacon and set it aside, leaving the drippings in the pan.
- Season the beef cubes with salt and pepper, then brown them in the same skillet in batches. Transfer the browned beef to the slow cooker.
- Add the carrots, onion, and garlic to the skillet and cook for 3 minutes. Stir in the flour and tomato paste, then pour in the red wine and beef broth. Bring the mixture to a simmer.
- Transfer the skillet contents to the slow cooker along with the cooked bacon, mushrooms, thyme, and bay leaves. Stir to combine.
- Cover and cook on low for 8 hours until the beef is very tender.
- About 30 minutes before serving, place the potatoes in a large pot of salted water. Boil until fork-tender, then drain.
- Mash the potatoes with the butter and milk until smooth. Season with salt and pepper to taste.
- Remove the thyme sprigs and bay leaves from the slow cooker. Serve the beef bourguignon over the mashed potatoes.
Notes
Cuisine: French
Equipment: Slow Cooker, Large Skillet, Large Pot, Potato Masher
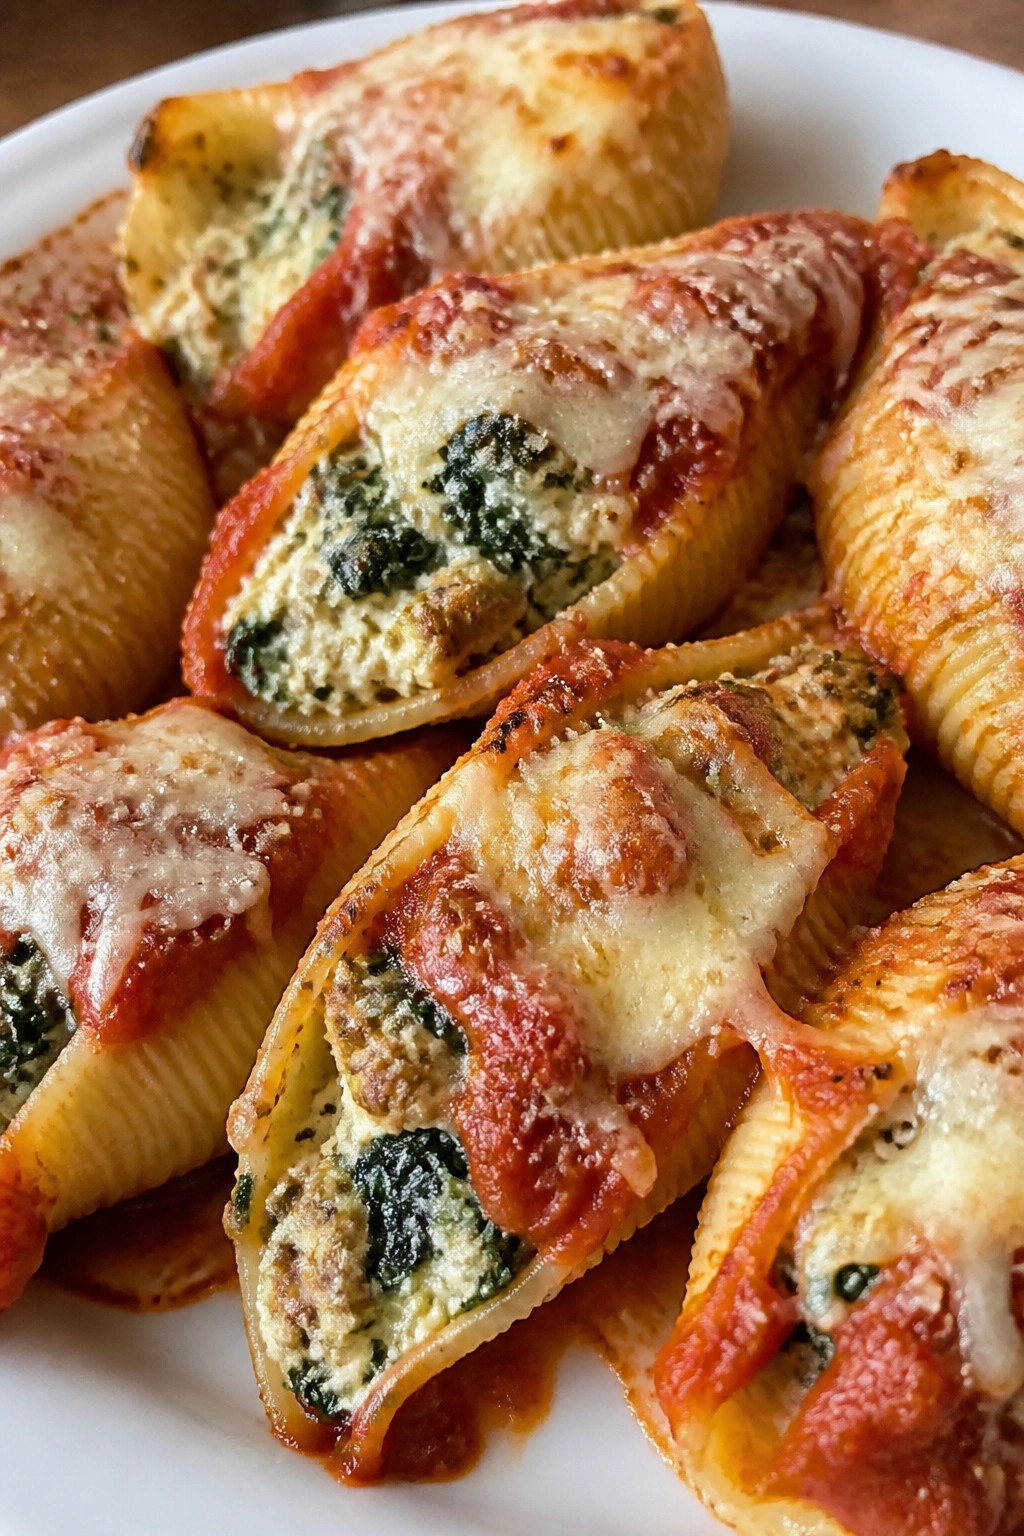
Cheesy Spinach and Sausage Stuffed Shells
This recipe brings together savory sausage, fresh spinach, and plenty of melted cheese inside tender pasta shells. It works well for weeknight family meals when you want something filling that still feels special enough for everyone to gather around the table.
The finished dish has a creamy interior with a light tomato sauce layer on top and a golden cheese crust. It stays simple to prepare while delivering the kind of hearty flavors that suit relaxed evenings.

Equipment
- Large pot
- Large skillet
- Mixing bowl
- Baking dish
Ingredients
- 16 jumbo pasta shells
- 1/2 pound Italian sausage, casings removed
- 2 cups fresh spinach, chopped
- 1 cup ricotta cheese
- 1 1/2 cups shredded mozzarella cheese, divided
- 1/4 cup grated Parmesan cheese
- 2 cups marinara sauce
- 2 cloves garlic, minced
- 1 small onion, diced
- 1 teaspoon Italian seasoning
- Salt and pepper to taste
Instructions
- Bring a large pot of salted water to a boil and cook the jumbo pasta shells according to package directions until just al dente. Drain and set aside to cool slightly.
- In a large skillet over medium heat, cook the Italian sausage with the diced onion until the sausage is browned and the onion is soft. Add the minced garlic and cook for one more minute.
- Stir the chopped spinach into the skillet and cook until wilted. Remove the skillet from heat and let the mixture cool for a few minutes.
- In a mixing bowl, combine the ricotta cheese, 1 cup of mozzarella, Parmesan cheese, Italian seasoning, salt, and pepper. Add the cooled sausage and spinach mixture and stir until evenly mixed.
- Spread 1 cup of marinara sauce in the bottom of a baking dish. Spoon the filling into each cooked shell and arrange them in the dish. Pour the remaining marinara sauce over the top and sprinkle with the remaining 1/2 cup of mozzarella.
- Bake at 375°F for 20 to 25 minutes until the cheese is melted and bubbly. Let the shells rest for 5 minutes before serving.
Notes
Cuisine: Italian
Equipment: Large pot, Large skillet, Mixing bowl, Baking dish
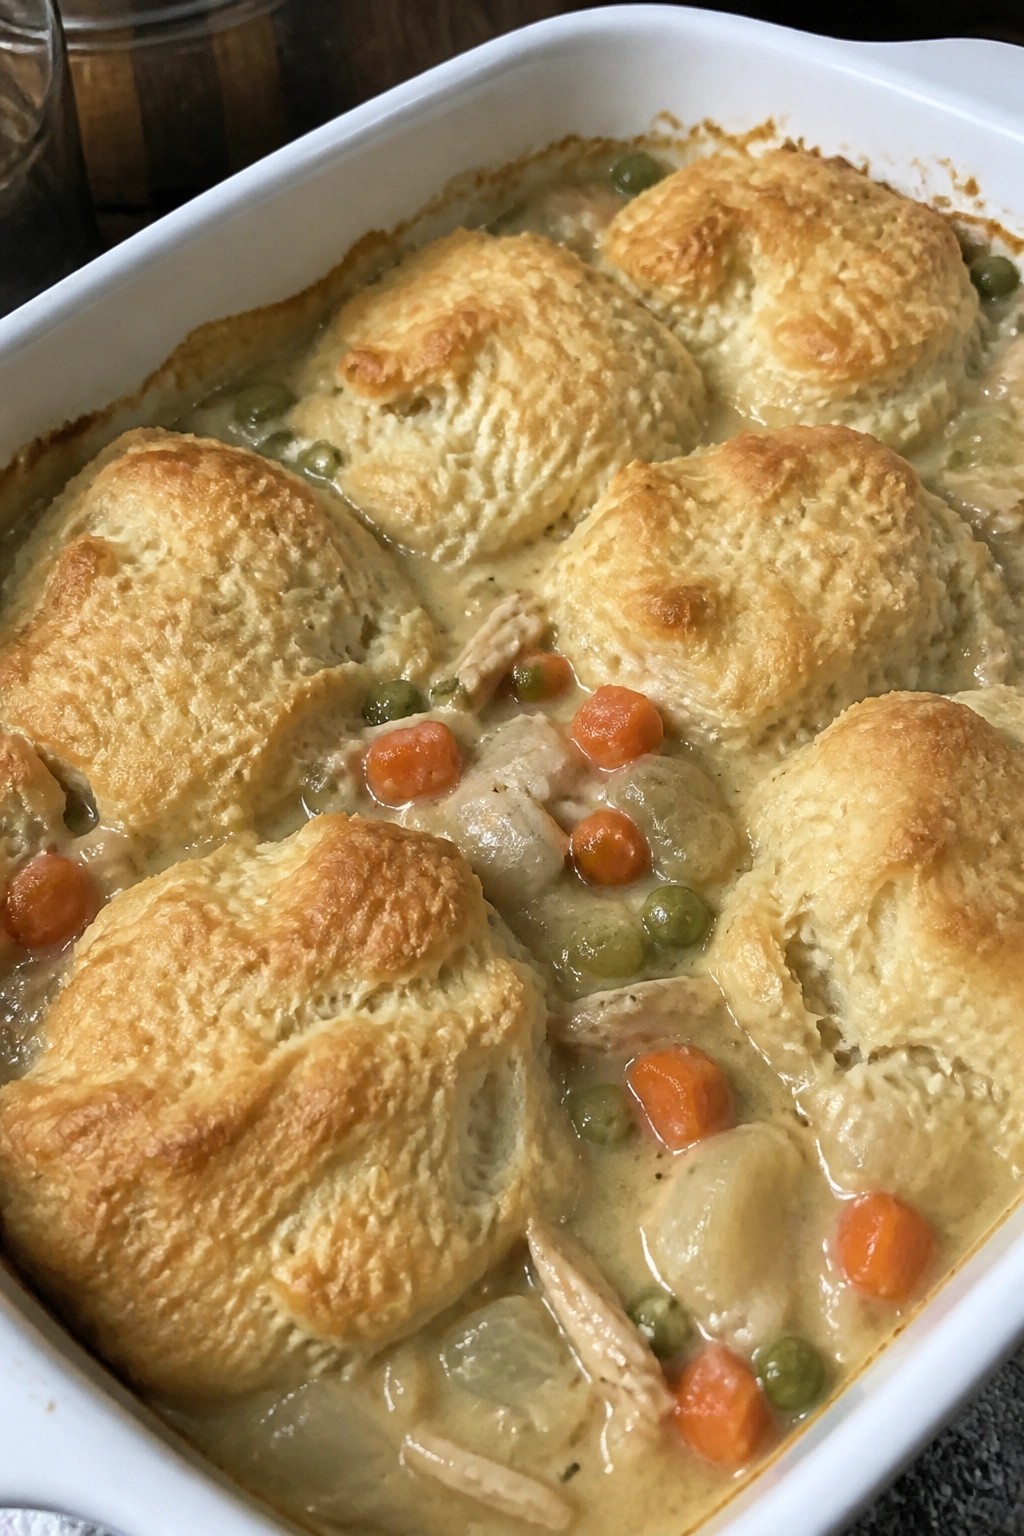
Cozy Chicken Pot Pie with Flaky Biscuit Topping
This chicken pot pie brings a creamy, savory filling together with a golden biscuit topping that bakes right on top. It works well for weeknights when you want a full meal that feels hearty without much fuss. The texture combines tender vegetables and chicken in a thick sauce with crisp, layered biscuits on the surface.
The flavors stay mild and familiar, with herbs that round out the filling without overpowering it. Families can gather around this dish straight from the oven, and leftovers reheat nicely for the next day.

Equipment
- Large skillet
- 9-inch baking dish
- Mixing bowl
- Oven
Ingredients
- 2 cups cooked chicken, shredded or diced
- 1 medium onion, diced
- 2 carrots, diced
- 2 celery stalks, diced
- 1 cup frozen peas
- 3 tablespoons butter
- 3 tablespoons all-purpose flour
- 2 cups chicken broth
- 1/2 cup milk
- 1/2 teaspoon dried thyme
- 1/2 teaspoon salt
- 1/4 teaspoon black pepper
- For the biscuit topping:
- 2 cups all-purpose flour
- 1 tablespoon baking powder
- 1/2 teaspoon salt
- 1/2 cup cold butter, cubed
- 3/4 cup milk
Instructions
- Preheat the oven to 400 degrees Fahrenheit. Melt 3 tablespoons of butter in a large skillet over medium heat.
- Add the onion, carrots, and celery to the skillet. Cook for 5 minutes until the vegetables soften slightly.
- Stir in the flour and cook for 1 minute. Slowly whisk in the chicken broth and milk until the mixture thickens.
- Add the cooked chicken, frozen peas, thyme, salt, and pepper. Stir everything together and remove the skillet from the heat.
- Transfer the filling to a 9-inch baking dish and spread it evenly.
- In a mixing bowl, combine 2 cups flour, baking powder, and salt. Cut in the cold butter until the mixture looks like coarse crumbs.
- Pour in 3/4 cup milk and stir just until a dough forms. Drop spoonfuls of the dough over the filling.
- Bake for 25 minutes until the biscuits turn golden and the filling bubbles at the edges. Let it rest for 5 minutes before serving.
Notes
Cuisine: American
Equipment: Large skillet, 9-inch baking dish, Mixing bowl, Oven
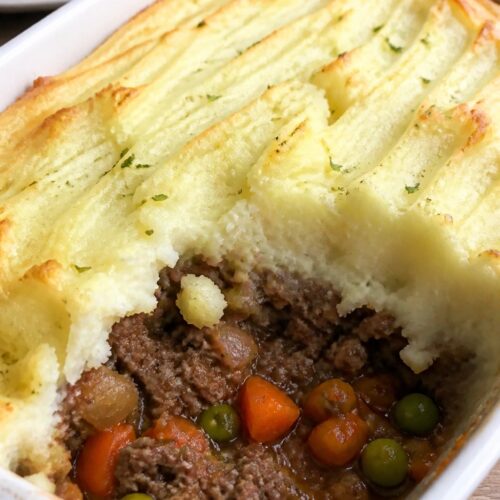
Hearty Beef and Vegetable Shepherd’s Pie
This shepherd’s pie brings together seasoned ground beef and a mix of vegetables under a layer of creamy mashed potatoes. It is the kind of meal that feels filling and familiar on busy weeknights when everyone gathers at the table.
The beef simmers with carrots, peas, and a light gravy, while the potato topping bakes until the edges turn golden. Each bite gives a balance of savory meat and soft vegetables with a smooth, buttery finish.

Equipment
- Large skillet
- Saucepan
- Potato masher
- Baking dish
Ingredients
- 1 lb ground beef
- 1 medium onion, diced
- 2 carrots, diced
- 2 cloves garlic, minced
- 1 cup frozen peas
- 2 tbsp tomato paste
- 1 cup beef broth
- 1 tsp dried thyme
- 4 large russet potatoes, peeled and cubed
- 2 tbsp butter
- 1/4 cup milk
- 1/2 tsp salt
- 1/4 tsp black pepper
Instructions
- Place the cubed potatoes in a saucepan, cover with water, and bring to a boil. Cook until tender, about 15 minutes. Drain and return to the pan.
- Add the butter, milk, salt, and pepper to the potatoes. Mash until smooth and set aside.
- Heat a large skillet over medium heat. Add the ground beef and cook until browned, breaking it up as it cooks.
- Stir in the onion, carrots, and garlic. Cook for 5 minutes until the vegetables soften.
- Mix in the tomato paste, beef broth, thyme, and frozen peas. Simmer for 8 minutes until the mixture thickens slightly.
- Transfer the beef and vegetable mixture to a baking dish. Spread the mashed potatoes evenly over the top.
- Bake at 400°F for 20 minutes until the potato topping is lightly golden.
Notes
Cuisine: British
Equipment: Large skillet, Saucepan, Potato masher, Baking dish
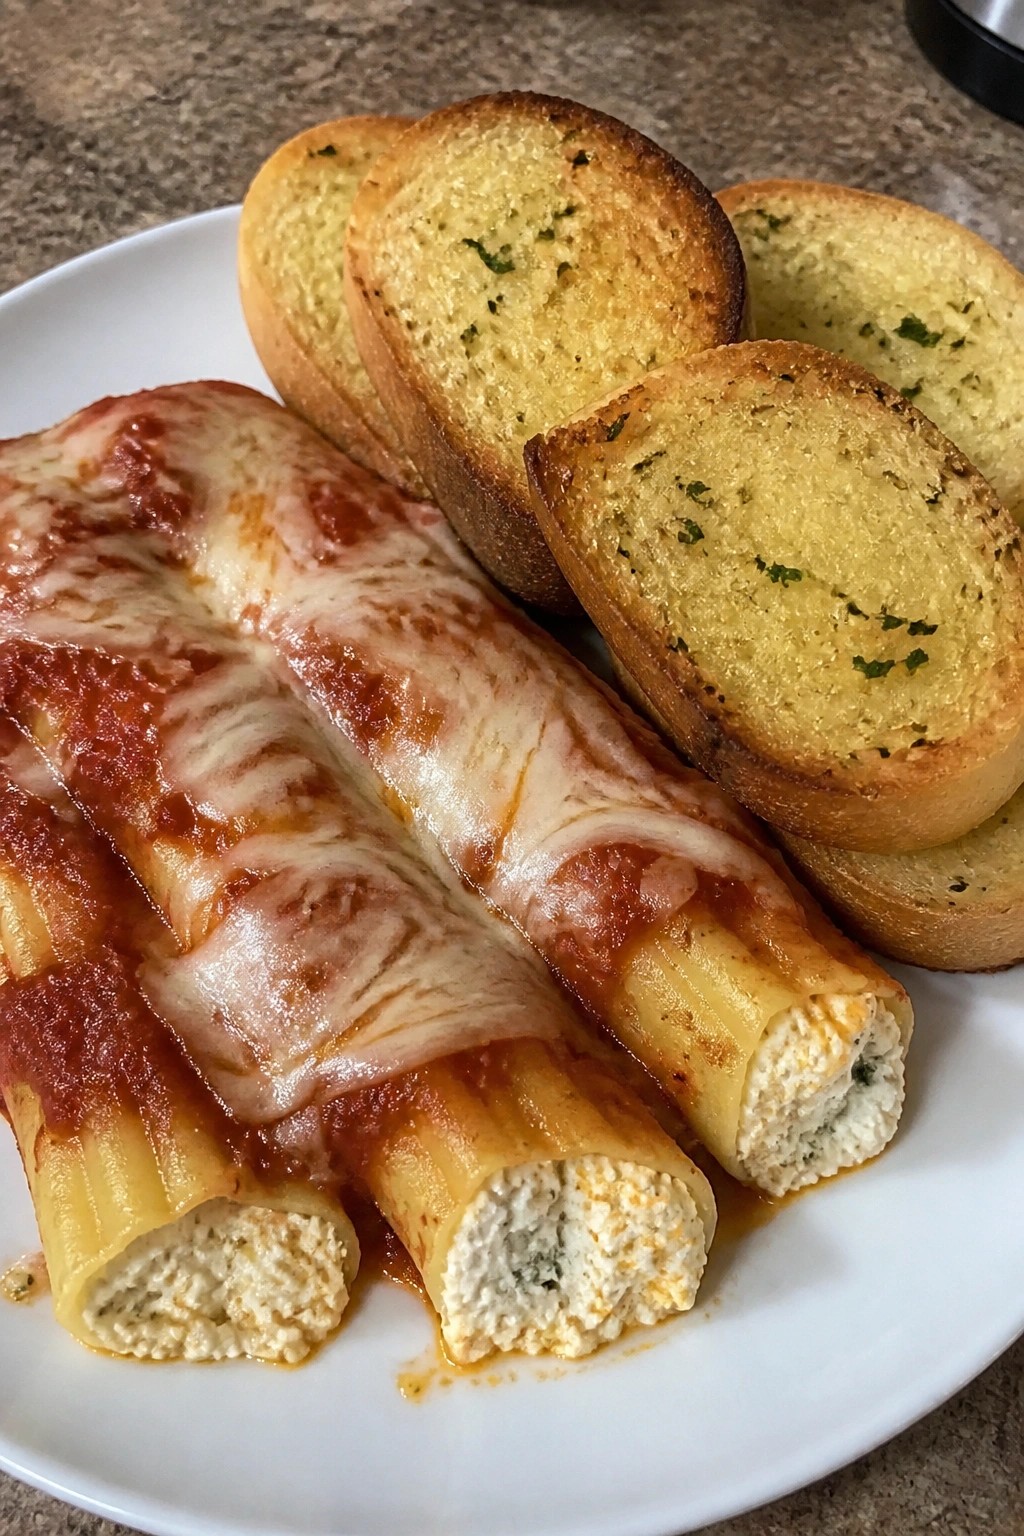
Baked Three-Cheese Manicotti with Garlic Bread
This baked manicotti brings a creamy cheese filling and tender pasta together under a layer of marinara. It pairs naturally with warm garlic bread for a simple dinner that feels special without extra effort. Families enjoy it on weeknights when everyone wants something hearty and familiar to share at the table.
The three cheeses create a rich, smooth center while the garlic bread adds a crisp, buttery edge. The whole meal stays straightforward to prepare and serves well for relaxed evenings with little cleanup.

Equipment
- Baking Dish
- Mixing Bowl
- Oven
- Baking Sheet
Ingredients
- 8 manicotti shells
- 15 oz ricotta cheese
- 1 cup shredded mozzarella cheese
- 1/2 cup grated Parmesan cheese
- 1 large egg
- 2 cups marinara sauce
- 1 small loaf French bread
- 4 tbsp butter, softened
- 2 garlic cloves, minced
- 1 tbsp chopped fresh parsley
- 1/2 tsp salt
- 1/4 tsp black pepper
Instructions
- Preheat the oven to 375°F. Bring a large pot of salted water to a boil and cook the manicotti shells for 6 minutes until just tender. Drain and set aside to cool slightly.
- In a mixing bowl, combine the ricotta, 1/2 cup mozzarella, 1/4 cup Parmesan, egg, salt, and pepper. Stir until the mixture is smooth and evenly blended.
- Spread 1 cup of marinara sauce across the bottom of a 9×13 baking dish. Spoon the cheese filling into each manicotti shell using a small spoon or piping bag, then arrange the filled shells in a single layer in the dish.
- Pour the remaining marinara sauce over the tops of the shells. Sprinkle with the remaining mozzarella and Parmesan.
- Cover the dish with foil and bake for 25 minutes. Remove the foil and bake 10 minutes more until the cheese is melted and lightly browned.
- While the manicotti bakes, mix the softened butter with minced garlic and parsley. Slice the French bread, spread the garlic butter on each piece, and place on a baking sheet.
- During the last 10 minutes of baking, add the bread to the oven and toast until golden at the edges.
Notes
Cuisine: Italian
Equipment: Baking Dish, Mixing Bowl, Oven, Baking Sheet
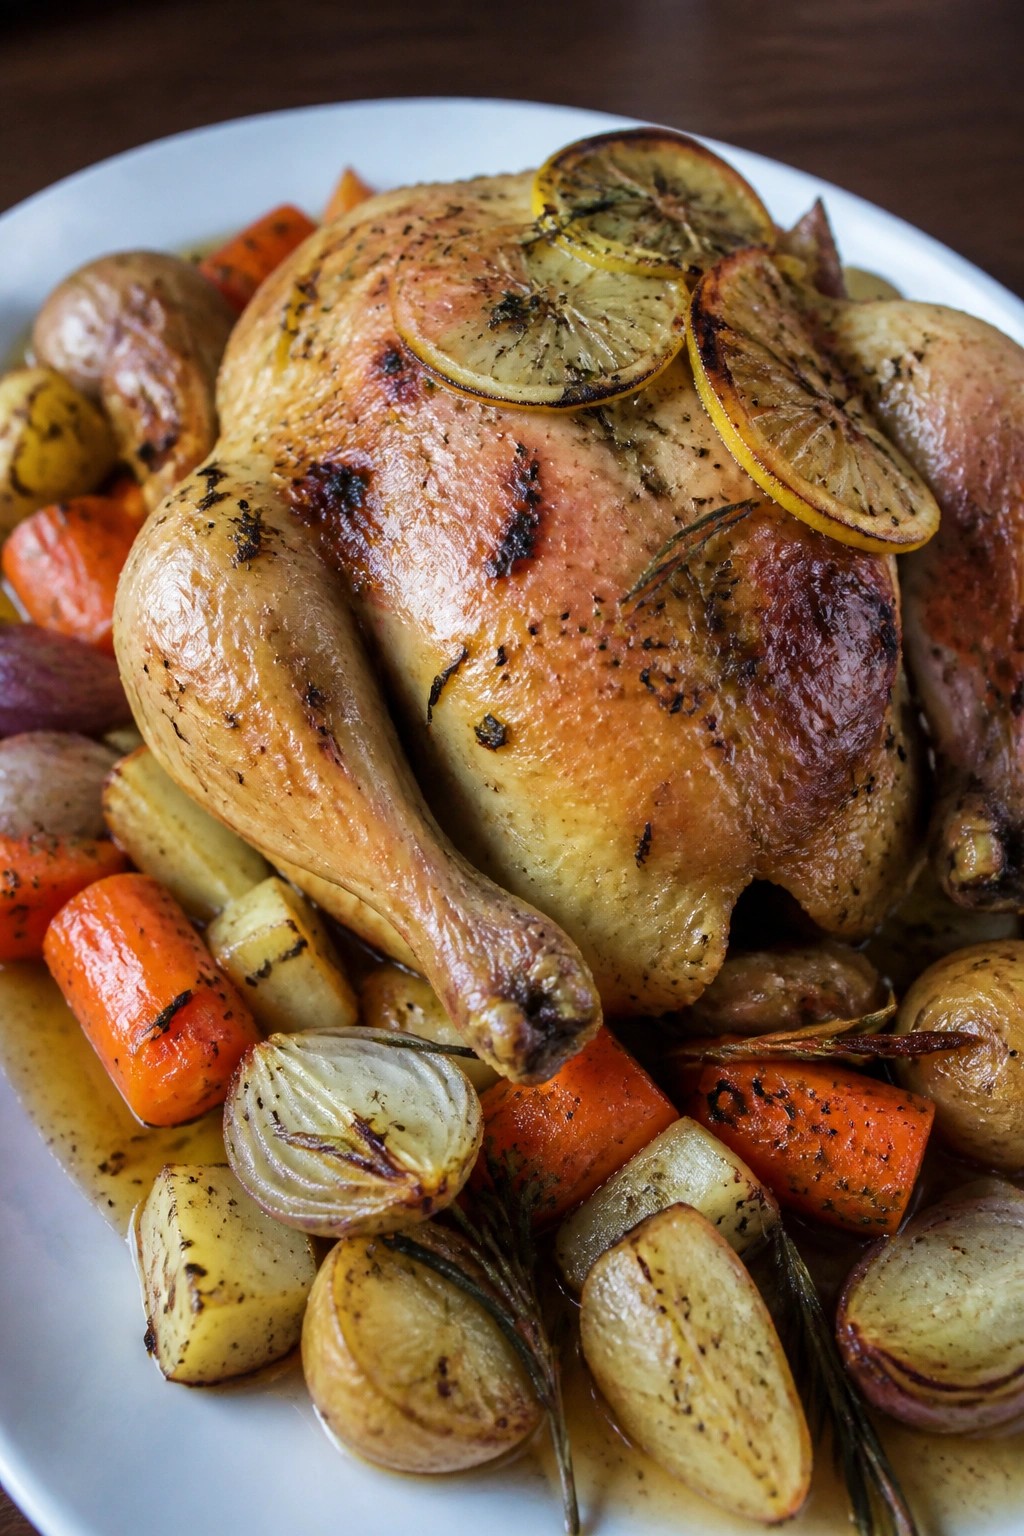
Lemon-Herb Roasted Chicken with Root Vegetables
This one-pan meal brings tender chicken and caramelized root vegetables to the table with minimal effort. The bright lemon and fresh herbs keep the flavors lively while the roasting process creates a comforting, home-cooked meal that suits busy weeknights or casual family gatherings.
The chicken turns out juicy inside with golden skin, and the vegetables soak up the herby pan juices for a balanced plate that feels both hearty and fresh.

Equipment
- Large Roasting Pan
- Mixing Bowl
- Meat Thermometer
Ingredients
- 1 whole chicken (4 to 5 pounds)
- 2 lemons
- 3 tablespoons olive oil
- 4 garlic cloves, minced
- 2 teaspoons chopped fresh rosemary
- 2 teaspoons chopped fresh thyme
- 1 teaspoon salt
- 1/2 teaspoon black pepper
- 4 carrots, peeled and cut into 2-inch pieces
- 3 parsnips, peeled and cut into 2-inch pieces
- 1 pound baby potatoes, halved
- 1 large onion, cut into wedges
Instructions
- Heat the oven to 425 degrees. Pat the chicken dry with paper towels and place it in a large roasting pan.
- Zest one lemon and juice both lemons. In a small bowl, mix the lemon zest, lemon juice, olive oil, garlic, rosemary, thyme, salt, and pepper.
- Rub half of the lemon-herb mixture all over the chicken, including under the skin where possible. Set the rest of the mixture aside.
- In a large bowl, toss the carrots, parsnips, potatoes, and onion with the remaining lemon-herb mixture until evenly coated.
- Arrange the vegetables around the chicken in the roasting pan.
- Roast for 60 to 75 minutes, until the chicken reaches 165 degrees in the thickest part of the thigh and the vegetables are tender and browned at the edges.
- Remove the pan from the oven and let the chicken rest for 10 minutes before carving. Serve the vegetables alongside the chicken slices.
Notes
Cuisine: American
Equipment: Large Roasting Pan, Mixing Bowl, Meat Thermometer
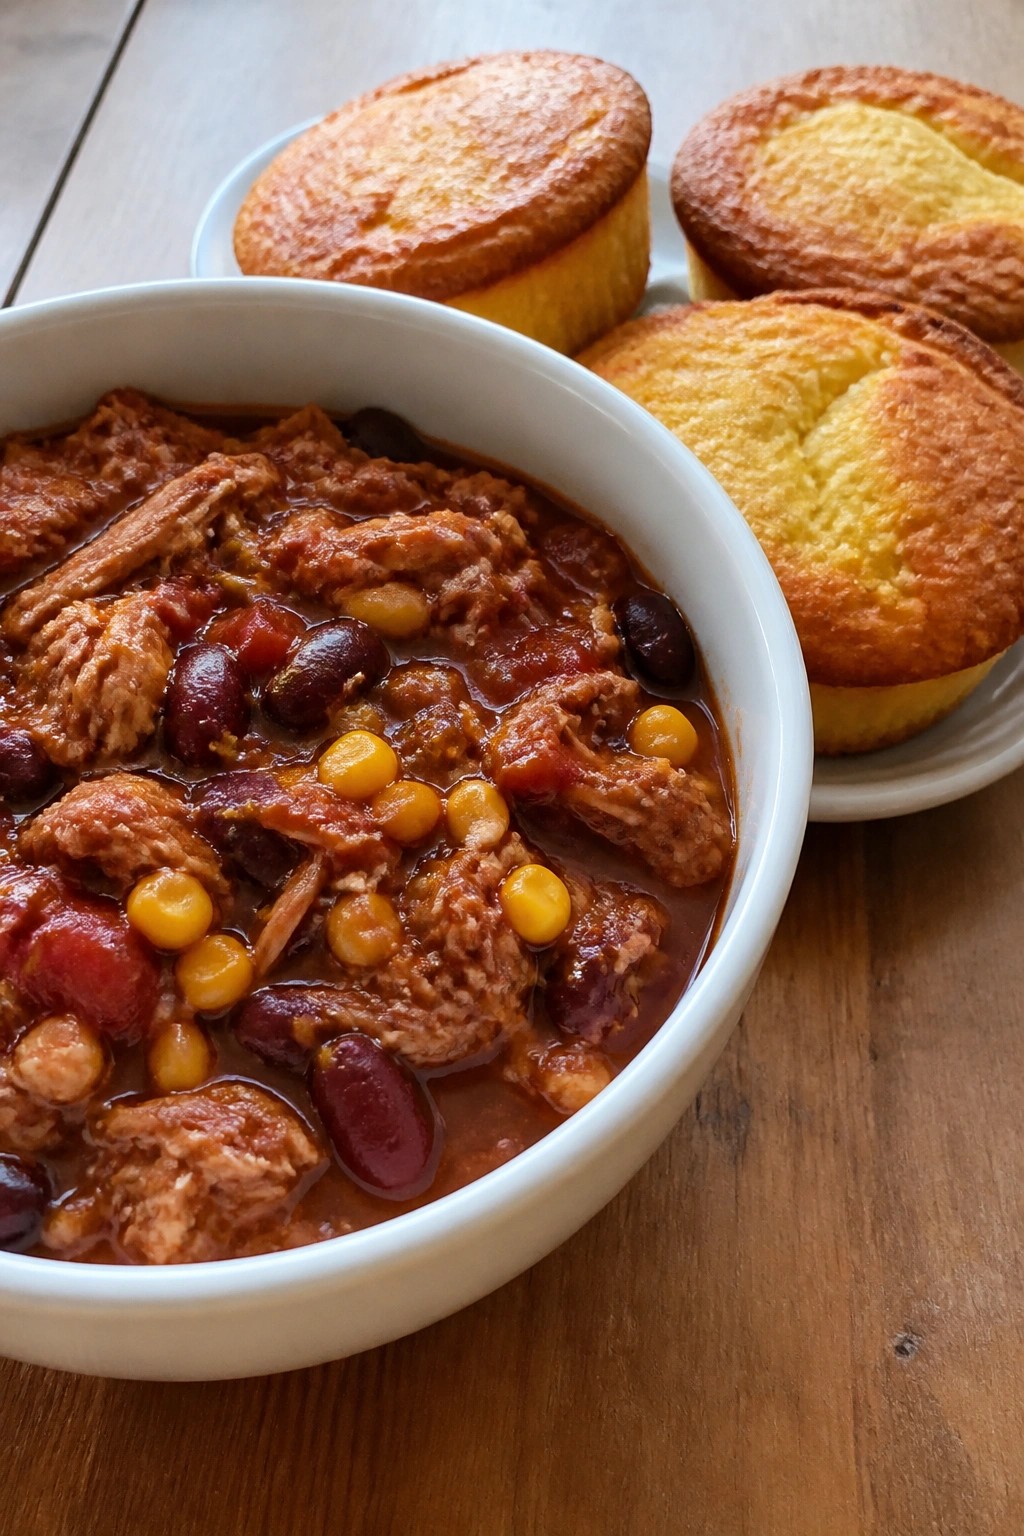
Smoky Pulled Pork Chili with Cornbread Muffins
This chili combines tender pulled pork with smoky spices for a hearty bowl that feels special but comes together with little hands-on time. It works well on weeknights when the family needs a filling meal that can sit warm until everyone gathers. The cornbread muffins bake alongside to offer a sweet, crumbly side that balances the rich chili.
The finished dish has thick, savory chili with soft pork shreds and a touch of sweetness from the corn. Muffins come out tender inside with crisp tops.

Equipment
- Large pot
- Muffin tin
- Mixing bowls
Ingredients
- 3 cups cooked pulled pork
- 1 onion, diced
- 2 garlic cloves, minced
- 2 tbsp smoked paprika
- 2 tbsp chili powder
- 1 tsp cumin
- 1 can (15 oz) kidney beans, drained
- 1 can (15 oz) diced tomatoes
- 2 cups chicken broth
- 1 cup corn kernels
- 1 cup cornmeal
- 3/4 cup all-purpose flour
- 1 tbsp baking powder
- 2 tbsp sugar
- 1/2 tsp salt
- 1 cup milk
- 1 egg
- 1/4 cup melted butter
Instructions
- Heat a large pot over medium heat and add the onion with a splash of the broth. Cook until the onion softens, then stir in the garlic, smoked paprika, chili powder, and cumin.
- Add the pulled pork, kidney beans, diced tomatoes, remaining broth, and corn kernels. Stir well and bring to a simmer. Reduce heat to low and cook for 20 minutes, stirring occasionally.
- While the chili simmers, heat the oven to 400°F and line a muffin tin with paper liners. In a bowl, whisk the cornmeal, flour, baking powder, sugar, and salt.
- In another bowl, mix the milk, egg, and melted butter. Pour the wet mixture into the dry ingredients and stir just until combined.
- Spoon the batter into the muffin cups, filling each about three-quarters full. Bake for 15 minutes until the tops are golden and a toothpick comes out clean.
- Ladle the chili into bowls and serve with warm muffins on the side.
Notes
Cuisine: American
Equipment: Large pot, Muffin tin, Mixing bowls
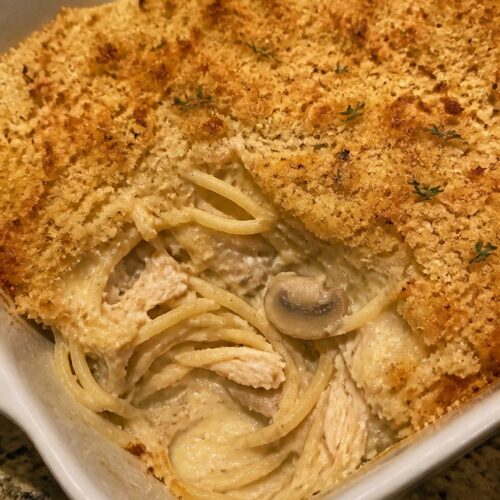
Turkey Tetrazzini with Crispy Breadcrumb Topping
This turkey tetrazzini turns simple ingredients into a warm baked pasta dish that feels special enough for company yet easy enough for weeknights. Tender turkey and mushrooms sit in a light creamy sauce beneath a golden layer of crunchy breadcrumbs.
It works especially well when you have cooked turkey on hand and want a reliable meal that pleases both kids and adults. The contrast between the soft pasta and crisp topping makes each serving feel balanced and comforting.

Equipment
- Large pot
- Large skillet
- Whisk
- Baking dish
Ingredients
- 8 ounces spaghetti
- 2 cups cooked turkey, shredded
- 8 ounces button mushrooms, sliced
- 1 small onion, finely chopped
- 2 garlic cloves, minced
- 4 tablespoons butter, divided
- 3 tablespoons all-purpose flour
- 2 cups chicken broth
- 1 cup milk
- 1/2 cup grated Parmesan cheese, divided
- 1 cup panko breadcrumbs
- 1 teaspoon dried thyme
- Salt and black pepper to taste
Instructions
- Preheat the oven to 375°F. Cook the spaghetti in a large pot of salted water until al dente, then drain and set aside.
- Melt 2 tablespoons of butter in a large skillet over medium heat. Add the onion and mushrooms and cook until the vegetables soften, about 5 minutes. Stir in the garlic and thyme and cook for 1 minute longer.
- Sprinkle the flour over the vegetables and stir to combine. Slowly whisk in the chicken broth and milk. Continue cooking, stirring often, until the sauce thickens.
- Add the shredded turkey, cooked spaghetti, and half the Parmesan to the skillet. Season with salt and pepper and stir until everything is evenly coated.
- Transfer the mixture to a greased baking dish. In a small bowl, toss the panko breadcrumbs with the remaining 2 tablespoons of butter and remaining Parmesan, then sprinkle the mixture evenly over the top.
- Bake for 20 to 25 minutes, or until the topping turns golden and the sauce bubbles around the edges.
Notes
Cuisine: American
Equipment: Large pot, Large skillet, Whisk, Baking dish
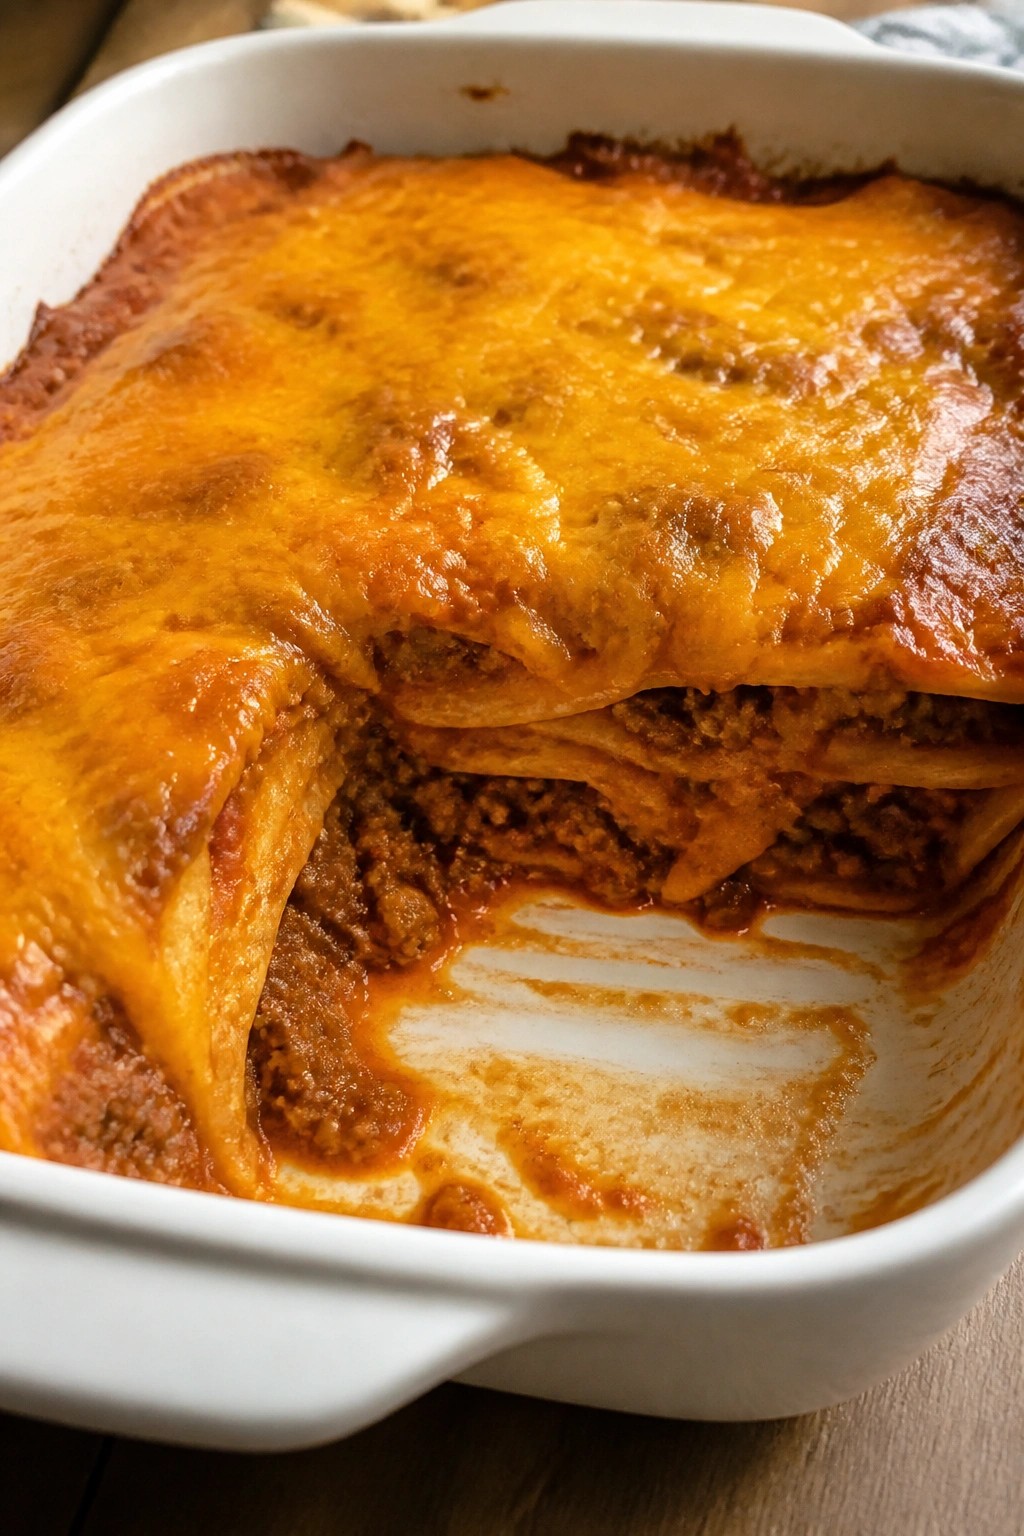
Beef Enchilada Casserole with Melted Cheese
This casserole layers seasoned beef and corn tortillas with plenty of red enchilada sauce. The top finishes with a thick layer of cheddar that melts into a golden crust. It gives you the familiar taste of enchiladas in one easy pan.
It works well for weeknights when you want a filling meal without much hands-on work. The dish stays warm on the table and holds up if dinner runs a little late.

Equipment
- Large skillet
- 8×8 baking dish
- Oven
Ingredients
- 1 pound ground beef
- 1 small onion, diced
- 2 cloves garlic, minced
- 1 tablespoon chili powder
- 1 teaspoon ground cumin
- 1/2 teaspoon salt
- 1 can (10 ounces) red enchilada sauce
- 8 corn tortillas
- 2 cups shredded cheddar cheese
Instructions
- Preheat the oven to 375 degrees. Lightly grease an 8×8 baking dish and set it aside.
- In a large skillet over medium heat, cook the ground beef with the diced onion and minced garlic until the beef is browned and the onion is soft. Drain any excess fat.
- Stir in the chili powder, cumin, and salt. Pour in half the enchilada sauce and simmer for two minutes so the flavors combine.
- Cut the tortillas into quarters. Spread a few tablespoons of the remaining enchilada sauce in the bottom of the baking dish.
- Layer half the tortilla pieces over the sauce, followed by half the beef mixture and 1 cup of the shredded cheddar. Repeat the layers with the rest of the tortillas, beef, and sauce.
- Finish with the remaining cup of cheddar cheese spread evenly across the top.
- Bake uncovered for 20 minutes, or until the cheese is fully melted and the edges are bubbling. Let the casserole rest for five minutes before serving.
Notes
Cuisine: Mexican
Equipment: Large skillet, 8×8 baking dish, Oven
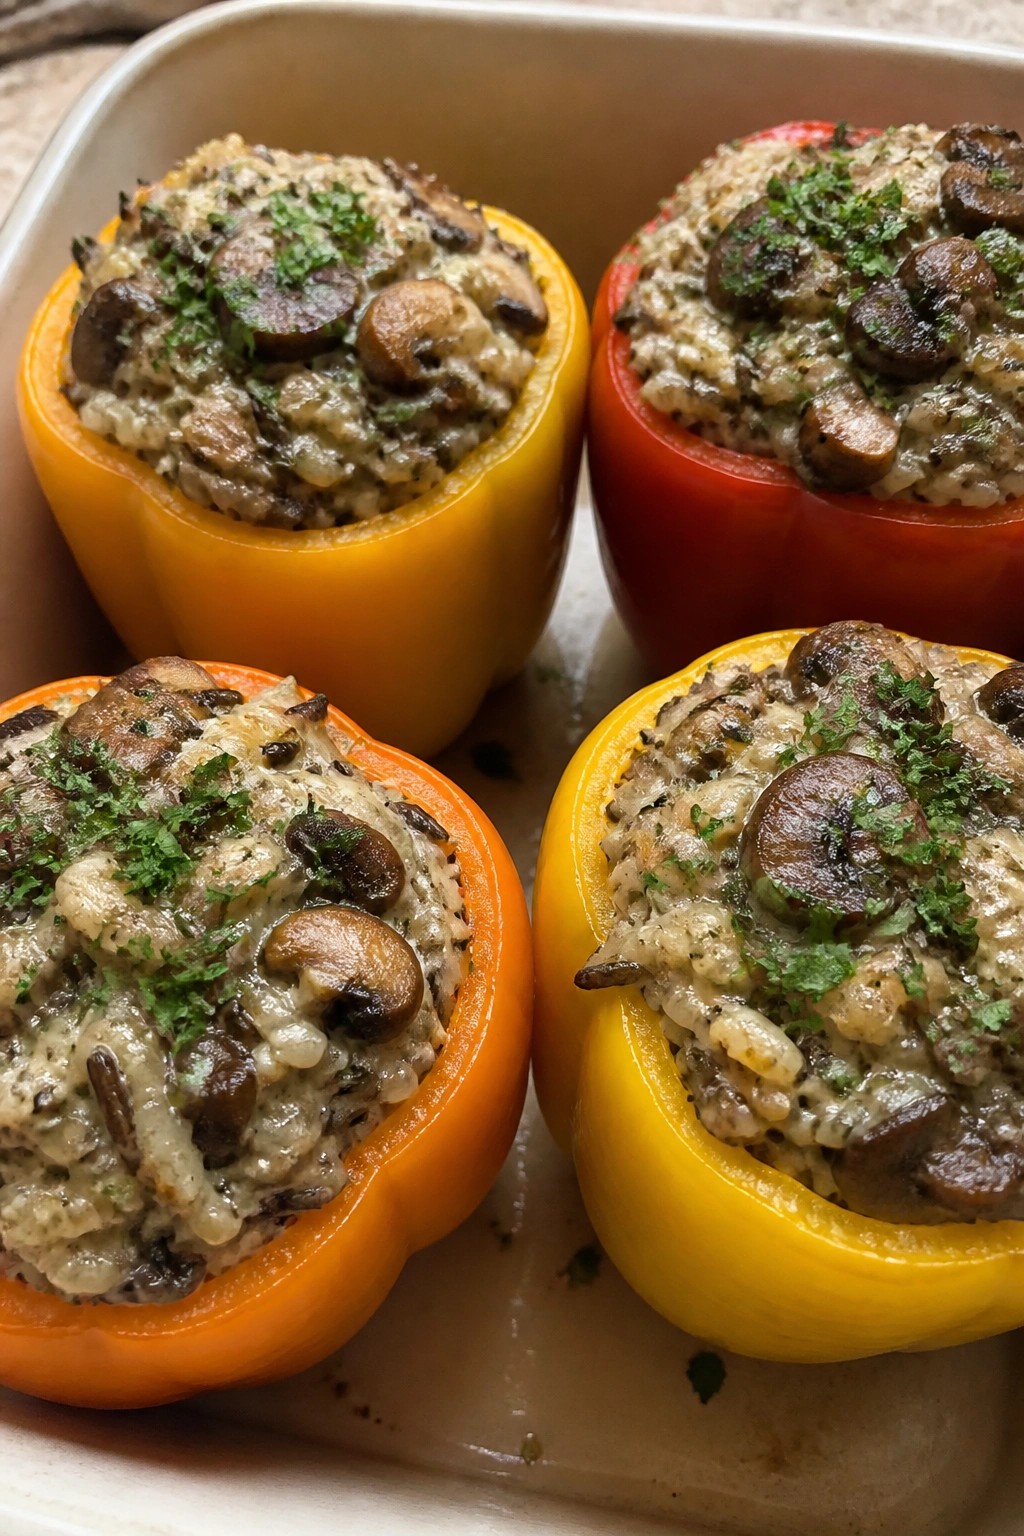
Creamy Mushroom and Wild Rice Stuffed Peppers
These stuffed peppers bring a hearty mix of nutty wild rice and earthy mushrooms together in a creamy sauce. They make a satisfying main dish for family dinners when you want something warm and filling without much fuss. The peppers soften just enough to hold their shape while the filling stays rich and textured.
The flavors lean savory with a touch of thyme and Parmesan. Each bite offers tender rice, soft mushrooms, and a light creaminess that feels comforting on cooler evenings.

Equipment
- Large skillet
- Saucepan
- Baking dish
Ingredients
- 4 large bell peppers, tops removed and seeds cleaned out
- 1 cup wild rice
- 8 ounces cremini mushrooms, chopped
- 1 small onion, finely chopped
- 3 cloves garlic, minced
- 1 cup vegetable broth
- 1/2 cup heavy cream
- 1/2 cup grated Parmesan cheese
- 2 tablespoons olive oil
- 1 teaspoon dried thyme
- Salt and pepper to taste
- 2 tablespoons chopped fresh parsley
Instructions
- Cook the wild rice in a saucepan according to package directions until tender, then set it aside.
- Heat the olive oil in a large skillet over medium heat. Add the onion and cook until softened.
- Stir in the garlic and mushrooms. Cook until the mushrooms release their liquid and begin to brown.
- Add the cooked wild rice, vegetable broth, heavy cream, Parmesan cheese, thyme, salt, and pepper to the skillet. Stir well and simmer for a few minutes until the mixture thickens slightly.
- Spoon the filling evenly into the prepared bell peppers and place them upright in a baking dish.
- Bake at 375 degrees Fahrenheit for 25 to 30 minutes until the peppers are tender.
- Remove from the oven and sprinkle with fresh parsley before serving.
Notes
Cuisine: American
Equipment: Large skillet, Saucepan, Baking dish
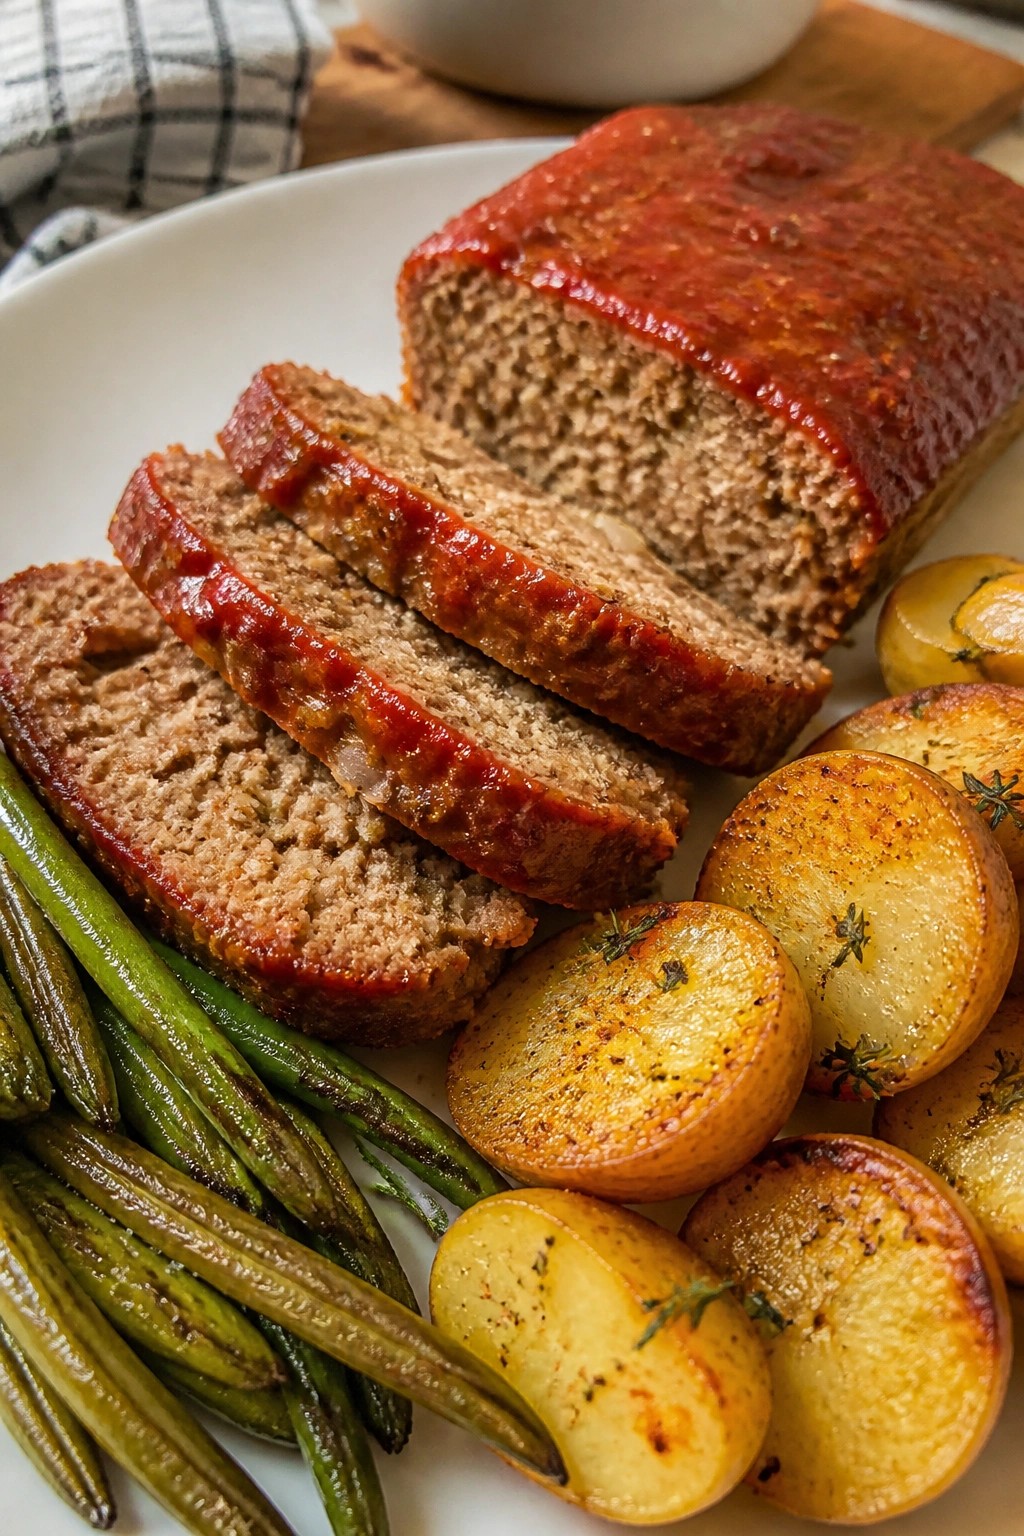
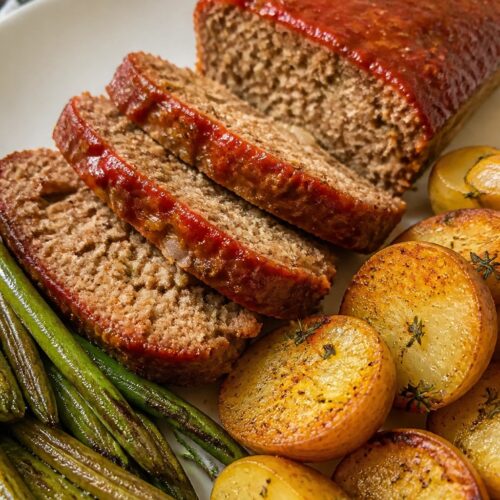
Classic Meatloaf with Roasted Potatoes and Green Beans
This meatloaf dinner brings together a savory beef loaf and two simple roasted sides for an easy weeknight meal. It works well on cooler evenings when you want a filling plate that feels familiar without much fuss. The meatloaf stays moist inside with a light tomato glaze on top, while the potatoes turn golden at the edges and the green beans stay tender with a little bite.
Equipment
- Mixing Bowl
- Baking Sheet
- Knife
Ingredients
- 1 pound ground beef
- 1/2 cup breadcrumbs
- 1 large egg
- 1/4 cup milk
- 1 small onion, finely chopped
- 2 cloves garlic, minced
- 3 tablespoons ketchup, divided
- 1 teaspoon Worcestershire sauce
- 1/2 teaspoon salt
- 1/4 teaspoon black pepper
- 1 pound baby potatoes, halved
- 8 ounces fresh green beans, trimmed
- 2 tablespoons olive oil
- 1 teaspoon dried thyme
- 1/2 teaspoon paprika
Instructions
- Heat the oven to 375 degrees and line a large baking sheet with parchment paper.
- In a mixing bowl, combine the ground beef, breadcrumbs, egg, milk, onion, garlic, 2 tablespoons ketchup, Worcestershire sauce, salt, and pepper. Mix until just combined, then shape into a loaf and place it in the center of the baking sheet.
- Spread the remaining tablespoon of ketchup over the top of the meatloaf.
- In the same bowl, toss the halved potatoes and green beans with olive oil, thyme, and paprika until evenly coated.
- Arrange the vegetables around the meatloaf on the baking sheet in a single layer.
- Bake for 45 to 50 minutes until the meatloaf reaches 160 degrees inside and the potatoes are golden at the edges.
- Remove from the oven and let the meatloaf rest for 5 minutes before slicing.
Notes
Cuisine: American
Equipment: Mixing Bowl, Baking Sheet, Knife