

I’ve been painting rocks with my kids for a few years now and it has become one of our go to activities when we want to spend time outside.
The garden always needs a bit of color and these painted rocks add that without much effort.
I picked out some ideas that are easy enough for beginners so no one gets frustrated trying to make something complicated.
My own kids have tried most of these and they usually end up with something they like to place among the plants.
We keep a box of supplies ready so we can start whenever the mood strikes.
Painted Ladybug Rocks for Garden Beds

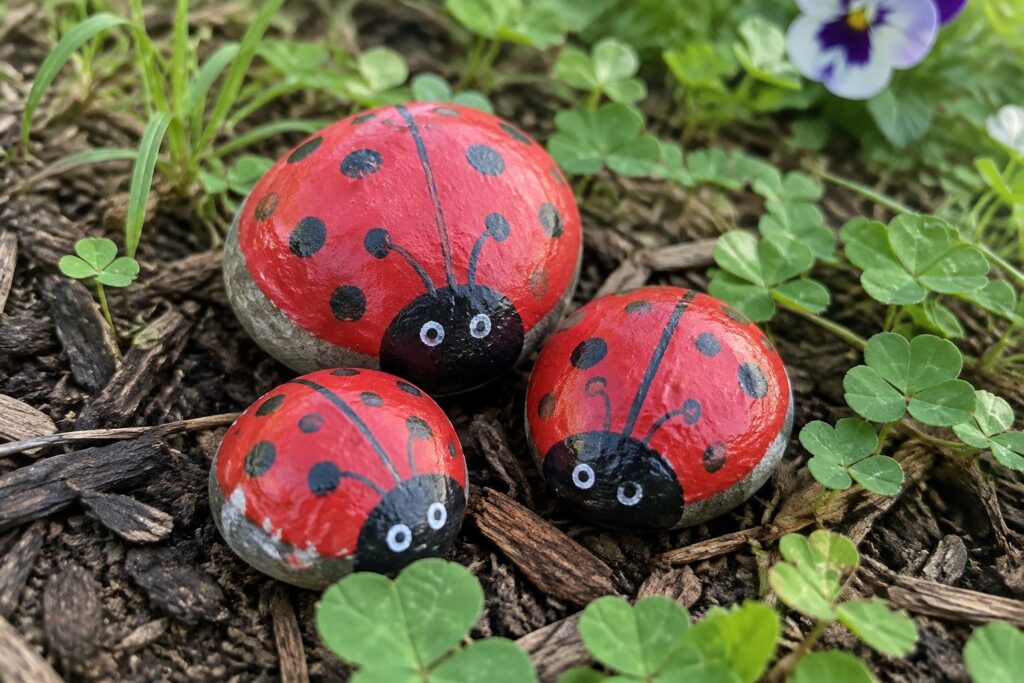
Ladybug painted rocks use rounded garden stones or smooth river rocks as the base for simple bug shapes. Cover the stone in red paint for the body, add a black section at one end for the head, and place black dots across the back with basic white eye dots and short antennae lines. The natural curve of the rock gives the ladybug its rounded form without needing extra shaping.
What makes this idea useful is how the rounded stone shape does most of the work for the body outline. These painted rocks fit well tucked into flower beds, mulch, or around potted plants where kids can spot them during play. The same design works on smaller pebbles or larger stones, and the spot pattern can be adjusted to match whatever rock size is available.
Strawberry Painted Rock for Planter Decor
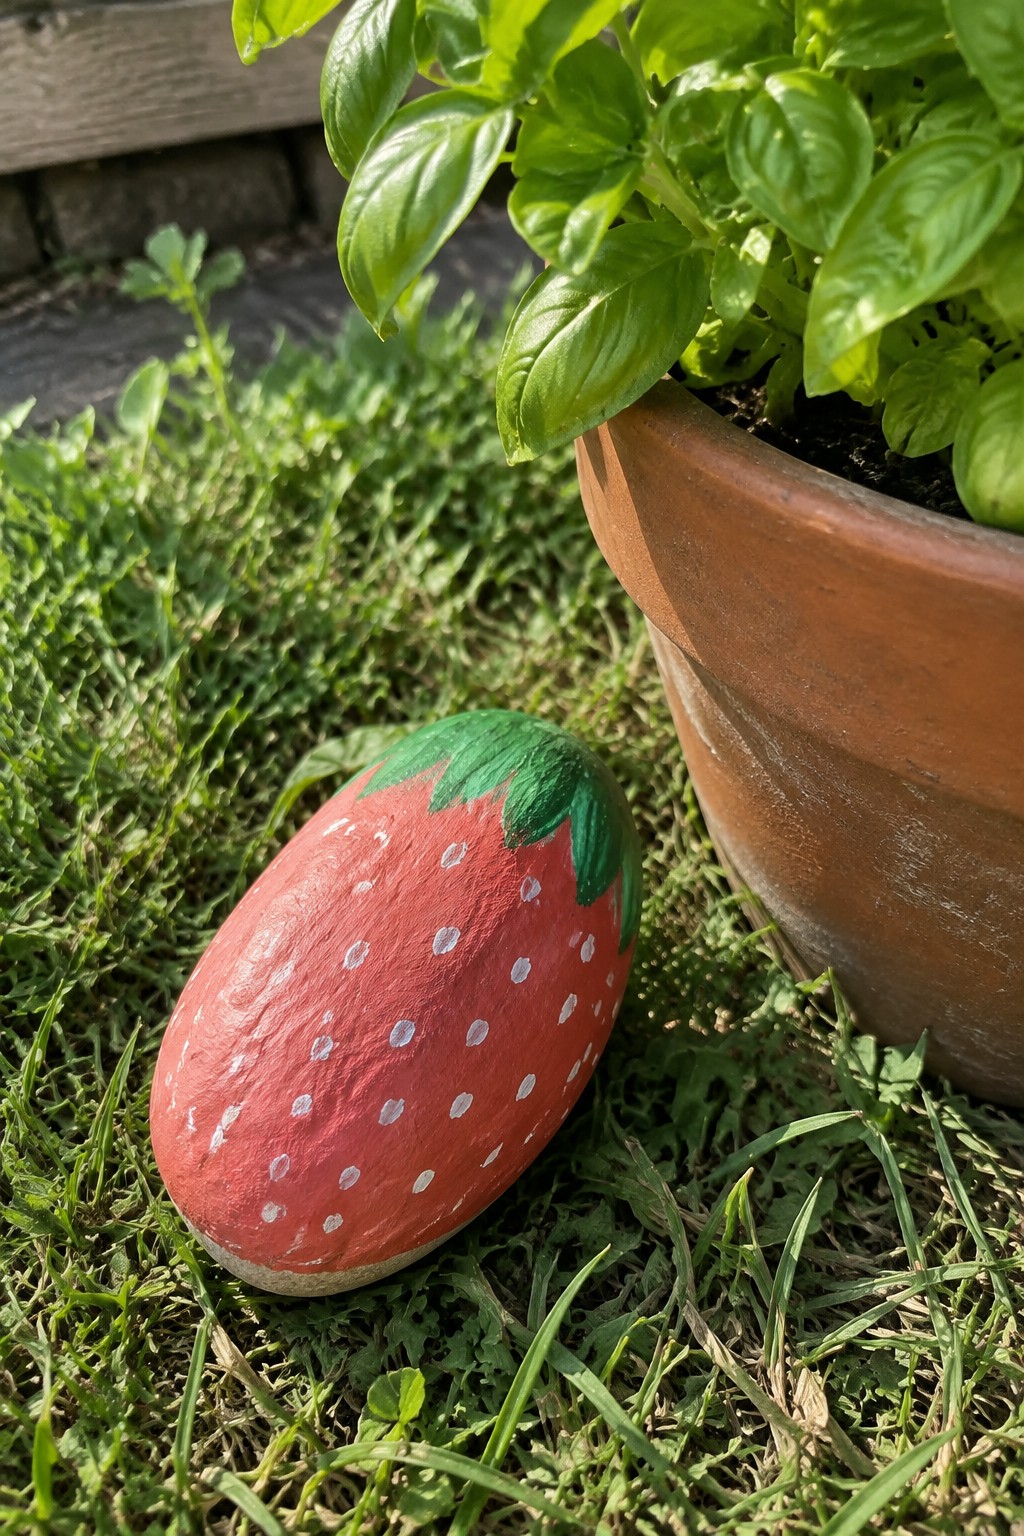
An oval garden stone painted as a strawberry makes a simple fruit-themed accent that fits right into outdoor pots or beds. The main body gets a solid red coat, white dots are added across the surface to stand in for seeds, and green paint covers the upper curve to create the leafy top. The rounded shape of the stone already suggests the fruit form, so the design stays easy to read even from a short distance.
This kind of painted rock works especially well tucked beside a terracotta pot or along the edge of a raised bed where the red shows up against green leaves. You can repeat the same color blocking and dot pattern on stones of different sizes to create a small cluster or switch the motif to other fruits like blueberries if you want variety. The straightforward areas of color and basic seed dots keep the project quick for kids while still producing something that looks intentional in a garden setting.
Daisy Painted Rocks for Flower Beds
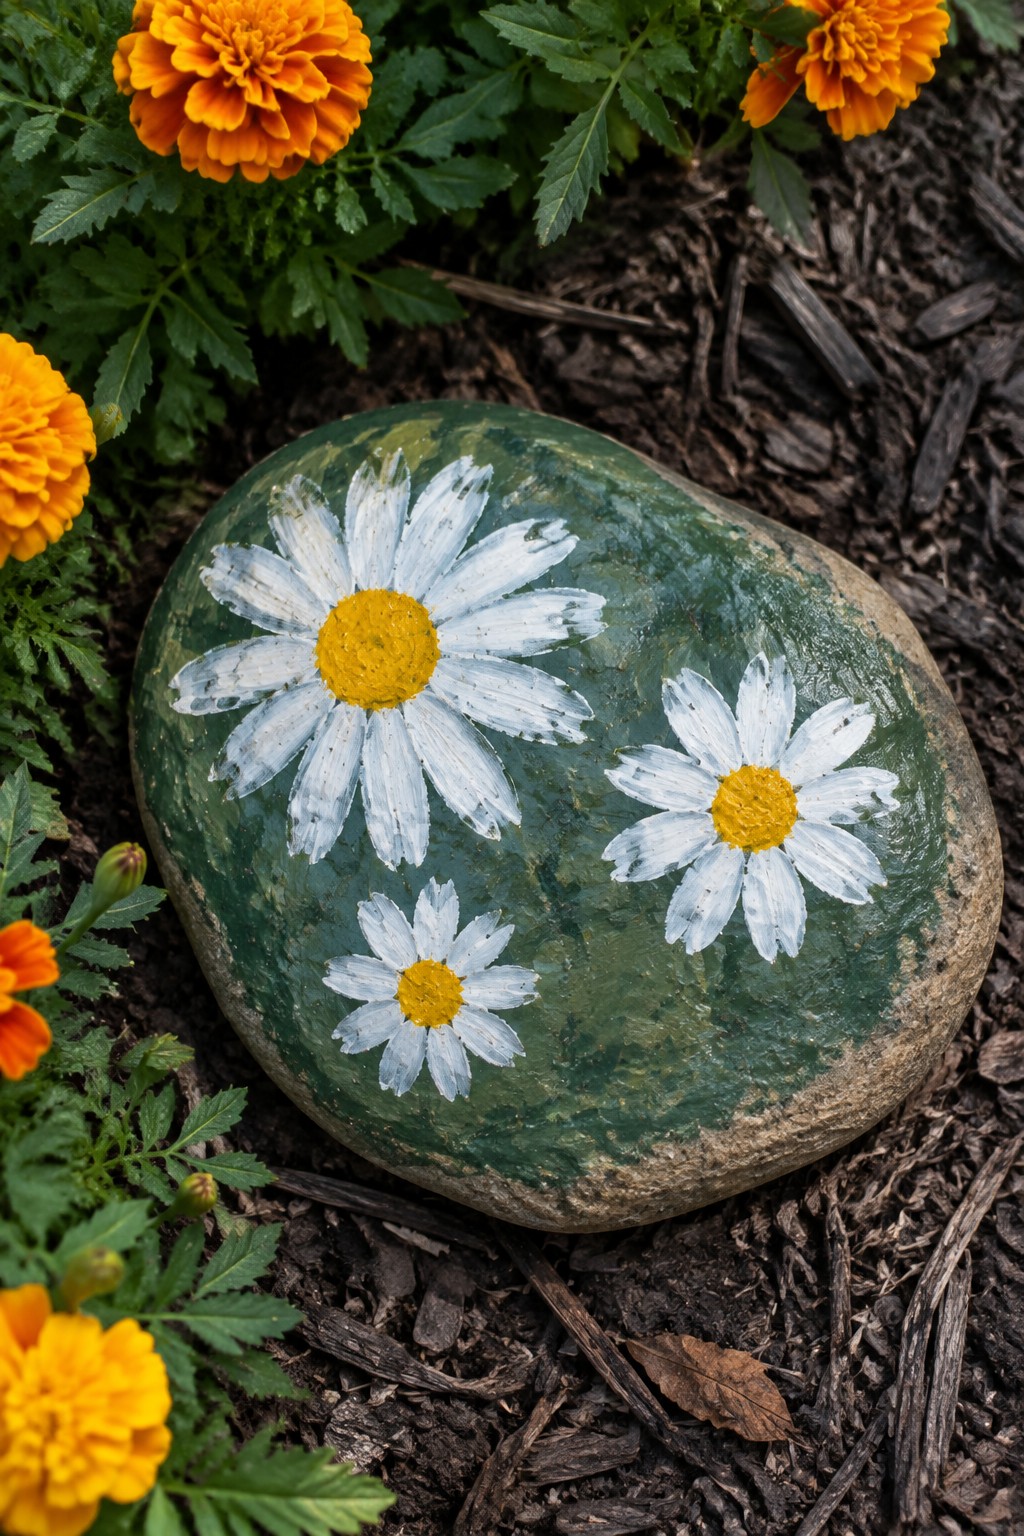
A smooth rounded garden stone gets a green base coat first, then several white daisies with yellow centers are painted across the surface in different sizes. The largest daisy sits near the top while two smaller ones fill the remaining space, keeping the overall layout balanced on the curved form. This creates a simple flower rock that works as garden decor rather than a standalone craft piece.
What makes this idea useful is how the green base lets the rock sit naturally in mulch or among plants without standing out as artificial. The daisy motif can be copied onto smaller stones for path edging or repeated on flat rocks to mark planter corners. Kids can start with just two or three flowers and adjust spacing as needed since the design does not require perfect symmetry. The same approach also works on lighter colored stones if a full base coat feels like too much work.
Mushroom Painted Rocks for Garden Planters

Rocks painted as mushrooms create a simple garden accent when placed along the rim of a planter or flower pot. Rounded stones provide the curved surface needed for the cap while the lower part becomes the stem. Red and pink caps with white dots and brown stems use basic color blocking and dot patterns that read clearly from a short distance. This approach fits the painted pebble set style for outdoor decor.
The small scale makes this easy to adapt by using whatever rounded stones are on hand and adjusting the number of dots to fit each rock. For garden decor this kind of painted rock works well tucked into mulch or around potted plants where it adds color without taking up much space. The same idea could be reworked with different cap colors or fewer details for younger kids. A painted rock like this stands out on Pinterest because the motif is recognizable even in a quick photo.
Frog Face Painted Rock for Garden Beds

A smooth rounded stone painted solid green works as a simple frog face project. White circles with black centers form the eyes while a curved black line creates the mouth and small pink patches mark the cheeks. The oval rock shape naturally supports the face layout and keeps the design compact enough for outdoor use. This approach falls into the animal rock category and suits beginner garden crafts.
What makes this idea useful is how the large color areas let kids cover the stone fast without fine detail work. The rounded form helps the finished rock sit steady in flower beds or mulch around plants. You could swap the green for other colors or adjust the eye placement to create different animals on similar stones. For garden decor this type of painted rock fits well in planters or along stepping stones where the simple shapes stay visible.
Bumblebee Rock for Flower Beds

An oval stone painted bright yellow forms the body of a bumblebee. Thick black bands wrap around the center while white dots grouped on each side create simple wings. The rounded shape lets the stripes follow the curve naturally and keeps the whole design compact.
The rock shape does a lot of the work here because most smooth oval stones already suggest a bee body. A painted rock like this works especially well tucked into mulch or beside herb pots where the yellow shows up against soil. The same stripes and dots can be simplified with fewer bands or tried on smaller pebbles for a quick variation.
Bright Solid-Color Pebbles for Garden Beds

Smooth, oval stones take solid blocks of color well because their rounded surfaces let the paint sit evenly without much prep. Each pebble gets one main hue across the top while the lower edge stays natural stone, which creates a simple border that keeps the design from looking too finished or flat. This approach works as a painted pebble set that kids can make in batches and place among plants or mulch.
The rock shape does a lot of the work here since the natural curve already gives each piece a finished edge once painted. A painted rock like this works especially well as a border along a small flower bed or inside a clear planter where the colors can show against soil or greenery. You can adapt the same idea by switching to larger stones and adding a second color on the opposite side for more variety without extra tools.
Sunflower Rock for Garden Beds
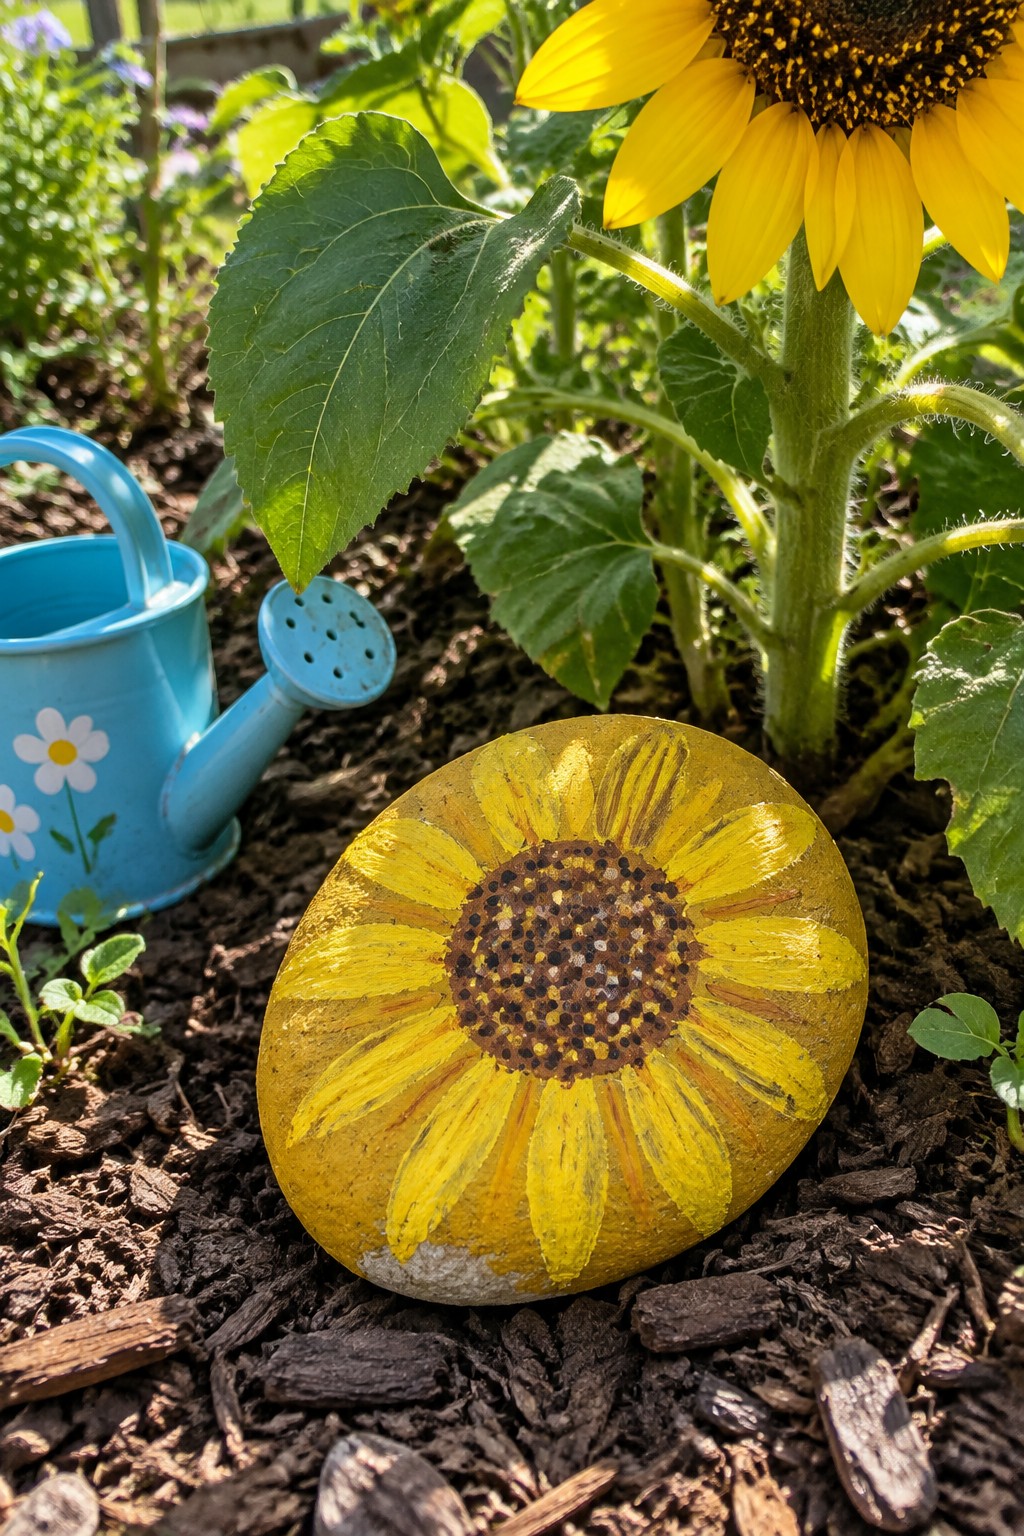
A round garden stone painted with a sunflower uses simple yellow petals that radiate from a brown dotted center to match the rock’s curved shape. The design relies on basic color blocking and short brush strokes for the petals, with small dots filling the middle to create the flower head. This flower rock fits the garden decor category and stays clearly recognizable as a painted physical stone even when placed among real plants and mulch.
What makes this idea useful is how the round stone shape already suggests a bloom so you only need to add the petals and center. The same motif can be adapted to smaller pebbles for lining a path or larger stones for bigger flower beds. In a planter this type of painted rock adds a permanent flower accent that does not need watering and can be moved around seasonally. The basic outlines and color areas make it easy to repeat with different shades of yellow or to simplify further for younger painters.
Painted Bird Rocks for Garden Accents

Smooth oval stones work well for bird shapes because their rounded form already suggests a body and head. Paint the rocks in soft pastel colors, then add a curved wing outline, a small beak shape, a dot eye, and two cheek dots to complete each bird. The simple linework and color blocking keep the design easy for kids while the natural stone texture shows through for an organic look. These painted rocks fit the category of animal rock garden decor.
What makes this idea useful is that the rock shape does most of the work, so only basic outlines and dots are needed. A painted rock like this works especially well tucked into flower beds, along path edges, or inside large planters as small accents. The small scale makes this easy to adapt by using different stone sizes to create a group of birds. The simple color blocking makes this easy to reuse as a template for other animal shapes on new rocks.
Ladybug Rock for Kids Garden Projects

A rounded garden stone painted bright red with a black center stripe and scattered black dots creates a simple ladybug design. The black area at one end serves as the head, where two white eyes with black centers are added using basic brushwork. This bug rock idea uses the stone’s natural curve to shape the body without extra carving or cutting. It fits the category of garden decor rocks that can be placed directly in soil or mulch.
What makes this idea useful is how the round form already suggests the ladybug body, so kids only need to handle color blocking and dots. A painted rock like this works especially well tucked along flower bed edges or inside large planters where it adds a small surprise without taking up space. The same design could be simplified further by using fewer dots or reworked onto a flatter stone for a different bug shape such as a beetle. The small scale and clear color areas make it easy to repeat for a whole set of garden insects.
Smiling Sun Rock for Planter Accents
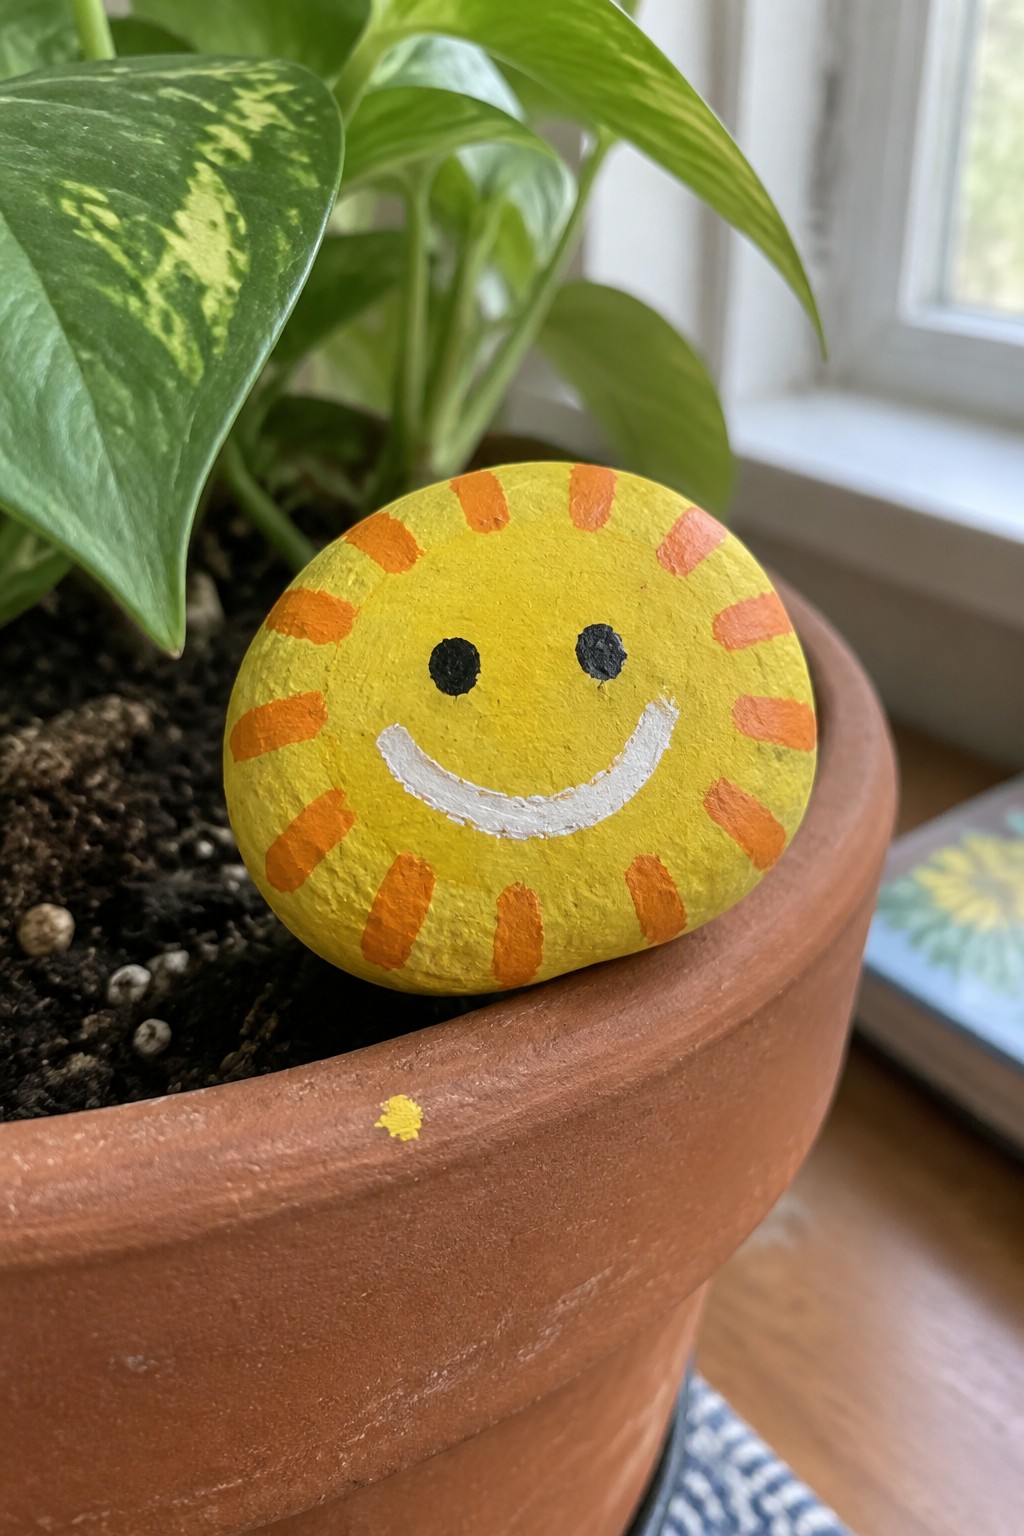
A smooth rounded stone painted solid yellow forms the base for this sun design. Orange stripes extend from the edges to suggest rays, while two black dots stand in for eyes and a single white curve creates the smile. The idea falls into the garden decor rock category because the natural curve of the stone supports the circular motif without extra borders or frames. The painted surface stays clearly visible against soil or foliage once placed in a pot.
What makes this idea useful is how the simple stripe pattern adapts to rocks of different sizes without losing the sun shape. The same yellow base and orange rays can be scaled down for smaller pebbles or repeated across a few stones to create a set for lining a flower bed edge. In a planter this type of painted rock sits well on the rim or tucked into mulch, and kids can change the number of rays to match the rock’s width. The basic color areas make it easy to paint quickly and still read clearly from a short distance.
Caterpillar Painted Rocks for Garden Projects

Three rounded stones painted in shades of green can be arranged in a line to create a simple caterpillar for garden use. The smallest front rock gets a basic smiley face using black dots for eyes and a curved line for the mouth, while the two larger rocks behind it form the body with loose green brushwork that lets some of the original stone show through. This bug rock idea takes advantage of the natural oval shapes and sizes to suggest segmented sections without extra carving or pieces. It works as a lightweight garden accent that kids can tuck into moss, mulch, or potted plants.
The rock shapes do most of the work here since the oval forms already suggest a body once lined up. You can adapt the idea by using fewer or more stones depending on what you find, or switch the greens for brighter colors to match other garden themes. This painted rock idea photographs clearly against soil and leaves, which makes it easy to share on Pinterest boards for kids projects. In a planter or along a path edge, the small scale keeps it from feeling bulky while still giving a clear bug shape that stands out from plain stones.
Painted Ladybug Rock for Garden Beds

A smooth rounded stone painted as a ladybug creates a simple bug rock project suited to garden settings. The design uses a solid red body with black spots, a black head area at one end, and basic white circle eyes with a small curved line for the mouth. This approach relies on clear color blocking and dot shapes that sit well on the curved surface of the stone.
What makes this idea useful is how the small scale lets the rock tuck into mulch, planters, or along the edges of raised beds. The same ladybug motif can be repeated on several stones or changed to different spot patterns without needing new colors. For garden decor, this type of painted rock works as a quick accent that kids can place themselves once the paint dries. The rounded shape helps the design stay balanced even when the rock sits unevenly in soil.
Apple Painted Rock for Garden Beds
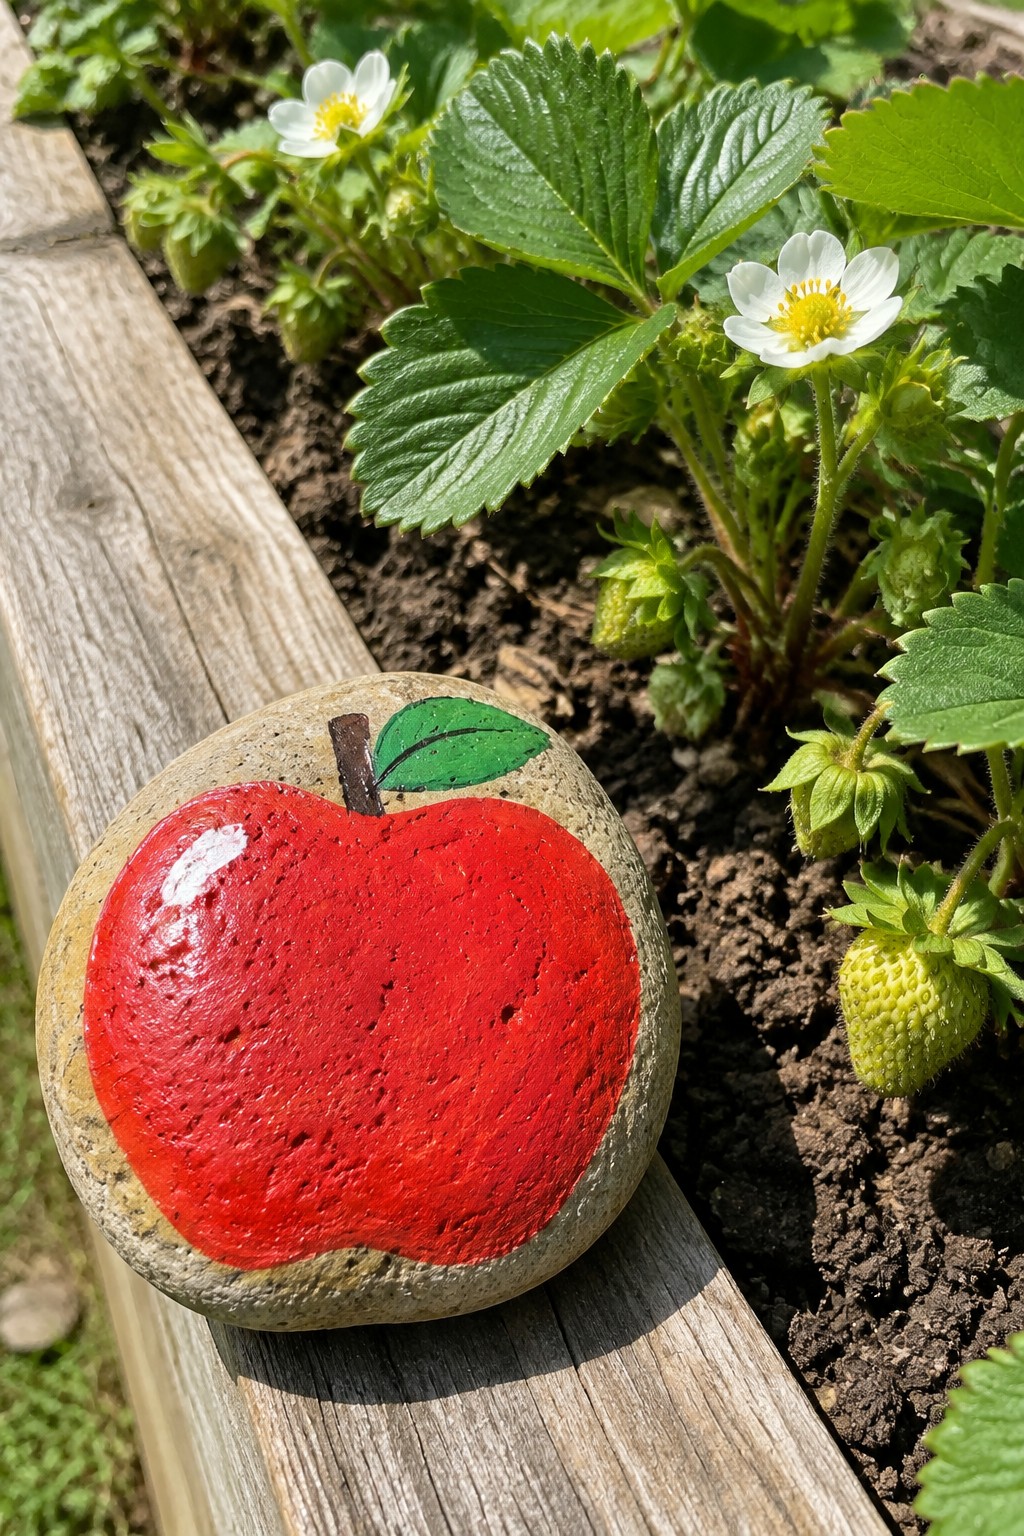
A smooth, rounded stone painted solid red creates a simple apple rock that fits garden projects well. The natural oval shape of the stone forms the apple body, with a short brown stem and single green leaf added at the top using basic color blocking. This fruit rock idea works on any medium-sized garden stone and stays clearly recognizable as a painted physical rock rather than a ceramic or plastic accent.
What makes this idea useful is how the rounded stone shape does most of the work, so only three paint colors are needed. The same apple design can be adapted to smaller pebbles for a set of fruit rocks or changed to strawberries by switching the red to a deeper tone and adding seed dots. For garden decor, this kind of painted rock sits nicely along flower bed edges or near berry plants without requiring any text or fine details.
Mushroom and Heart Painted Stones for Garden Displays

Small rounded stones make a good base for mushroom designs when the top half gets painted teal with white dots and a white section marks the stem area along the natural curve. Matching heart shapes painted solid pink on similar stones create a simple paired set. The designs rely on basic color blocking and dots that follow the rock surface without needing fine detail work. This approach fits garden decor rock projects that use everyday stones collected from outdoors.
What makes this idea useful is how the small scale lets the finished pieces tuck into planters, mulch beds, or along path edges without crowding plants. The mushroom motif could be adapted by swapping the teal for other colors to match seasonal flowers or by skipping the dots for a quicker version. A painted rock like this works especially well as a starter project because the rock shape already suggests the mushroom cap and the hearts need only one color fill. The same idea scales easily to a larger collection for consistent accents across multiple pots or garden corners.
Painted Snail Rock for Garden Beds
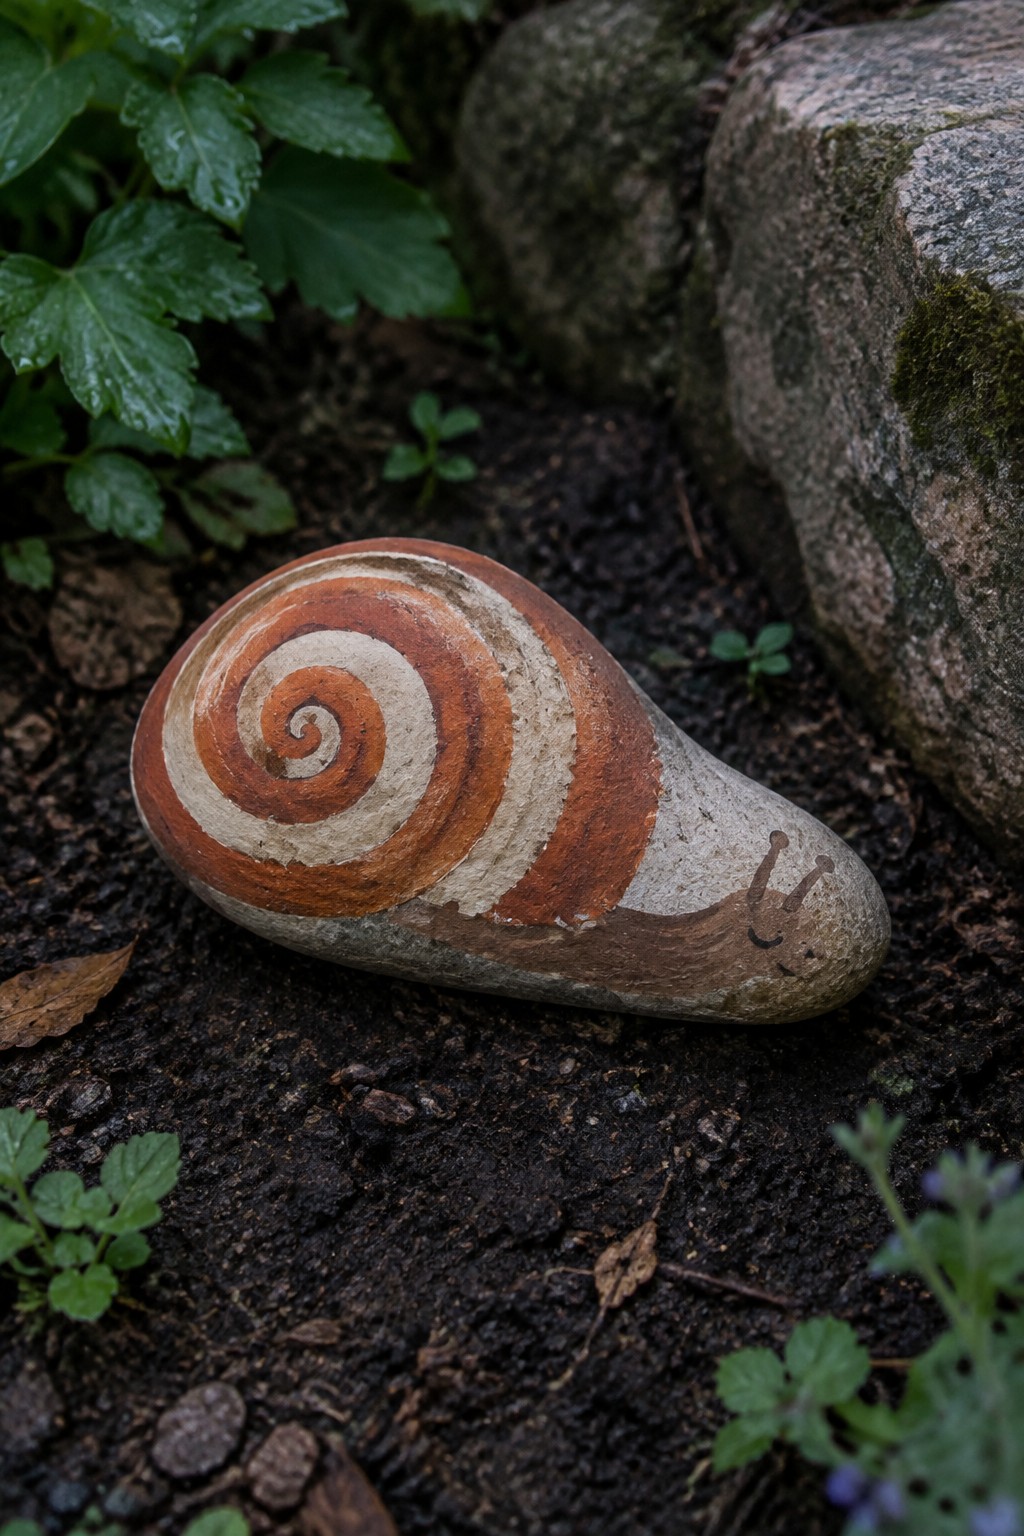
A smooth oval rock works as the base for this snail by following its natural tapered shape with a spiraling shell design in orange and cream. The shell uses simple concentric bands that wrap around the curve of the stone, while the body section gets a basic face with short lines for antennae. This fits the bug rock category and makes a clear painted physical rock for outdoor use.
What makes this idea useful is how the rock shape already suggests the snail body, so only basic color blocking and a few outlines are needed. A painted rock like this works especially well tucked into soil at the edge of a flower bed or along a path. The same spiral pattern could be reworked on a rounder stone to make a different bug or even a plain shell without the face. For kids garden projects, the large areas of paint and limited detail keep the steps straightforward.
Rainbow Striped Butterfly Rock

A rounded garden stone painted with wide horizontal stripes in pink, orange, yellow, teal, light blue, purple, and pink creates a simple colorful accent. The stripes cover most of the flat surface, leaving room for a small black butterfly outline and two gold dots near one edge. This turns an ordinary smooth rock into a decorative piece meant for outdoor display. The basic color blocking and single motif keep the project straightforward on a rounded stone shape.
A painted rock like this works especially well placed inside a planter or along the rim of a flower bed. The stripes are easy to adjust by using fewer colors or wider bands on a smaller stone. The butterfly can be swapped for another basic shape like a leaf or bee to match different plants. For kids garden projects, the flat surface helps the stripes stay even without needing precise tools.
Painted Flower and Bee Stones for Garden Accents
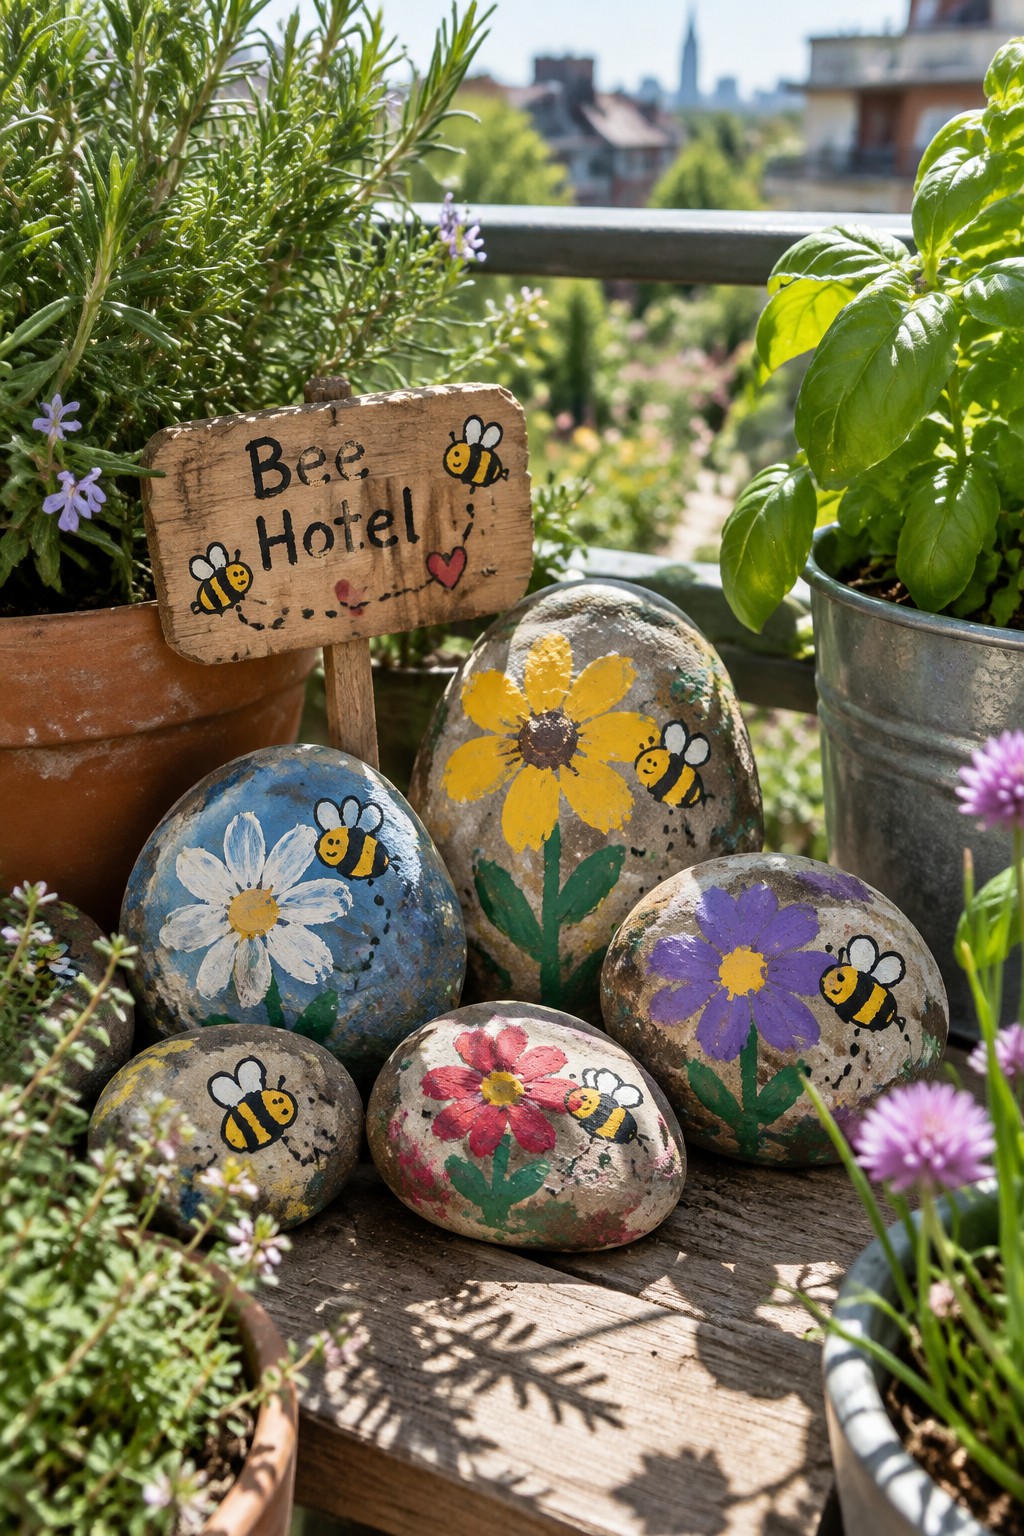
These garden stones are painted with simple flower shapes in yellow, white, red, and purple, each paired with a small bee using black and yellow stripes. The rocks are rounded and medium-sized with natural texture that shows through the paint, letting the motifs sit clearly on the curved surfaces. The designs use solid color blocks for the petals and wings plus thin dotted lines for the bee trails, keeping the whole look clean enough for outdoor use among pots and plants.
What makes this idea useful is how well the rounded stone shape supports a single flower and bee per rock without crowding the surface. You can place them directly in mulch, line them along planter edges, or group several together near herbs. The motif adapts easily by changing flower colors to match nearby blooms or swapping in different bug outlines if bees feel too specific. For kids garden projects the basic shapes and limited palette keep the steps simple while still producing something that reads as finished decor.
Frequently Asked Questions
What materials do I need to start rock painting with kids? Gather smooth rocks from your yard or a local craft store. Use acrylic paints in bright colors along with paintbrushes of different sizes. Keep paper towels and water nearby for quick cleanups. Finish with a clear outdoor sealant to protect the finished pieces.
How do I prepare rocks before painting them? Wash the rocks in soapy water to remove dirt and let them dry fully. If the surface feels rough, lightly sand it for better paint adhesion. This step helps colors stay vibrant on beginner designs like ladybugs or flowers.
How can I protect painted rocks for outdoor garden use? Apply two thin coats of waterproof sealant after the paint dries completely. Allow 24 hours for curing before placing them outside. Position the rocks in sheltered spots to reduce direct rain exposure and extend their life.
What safety tips should I follow when kids paint rocks? Choose nontoxic paints and work in a well ventilated area. Provide smocks to protect clothing and supervise younger children with small brushes. Encourage hand washing right after the project ends.
How can painted rocks add educational value to a garden? Use them to label plant rows with names or numbers. Create simple counting games by painting dots on stones. Kids can also mark paths or hide inspirational messages among the plants for ongoing garden fun.
