

Potluck mains need to work for both vegetarians and meat eaters without extra stress. These recipes use familiar ingredients and straightforward steps that hold up well on a buffet table. Each one focuses on hearty textures and flavors that keep people coming back for seconds. You can make most of them ahead of time so the day of the event stays simple. The list below gives you practical options that travel well and reheat nicely.
Helpful Tips Before You Start
These steps help your vegetarian mains travel well and appeal to guests who eat meat too.
Pick Substantial Ingredients
Use mushrooms, lentils, or roasted vegetables as the base. They create a filling texture that feels like a main dish rather than a side.
Focus on Room Temperature Serving
Choose recipes that taste good cold or at room temperature. This avoids last minute reheating at the potluck table.
Season Generously
Add extra herbs, spices, and sauces during cooking. Bold flavor helps the dish compete with richer meat options on the spread.
Prep Components Ahead
Cook grains or sauces the day before and assemble on site. This keeps textures fresh during transport.
Include a Familiar Element
Base the recipe on pasta, tacos, or casseroles that most people recognize. Familiar formats encourage everyone to try a serving.
Creamy Spinach Artichoke Lasagna
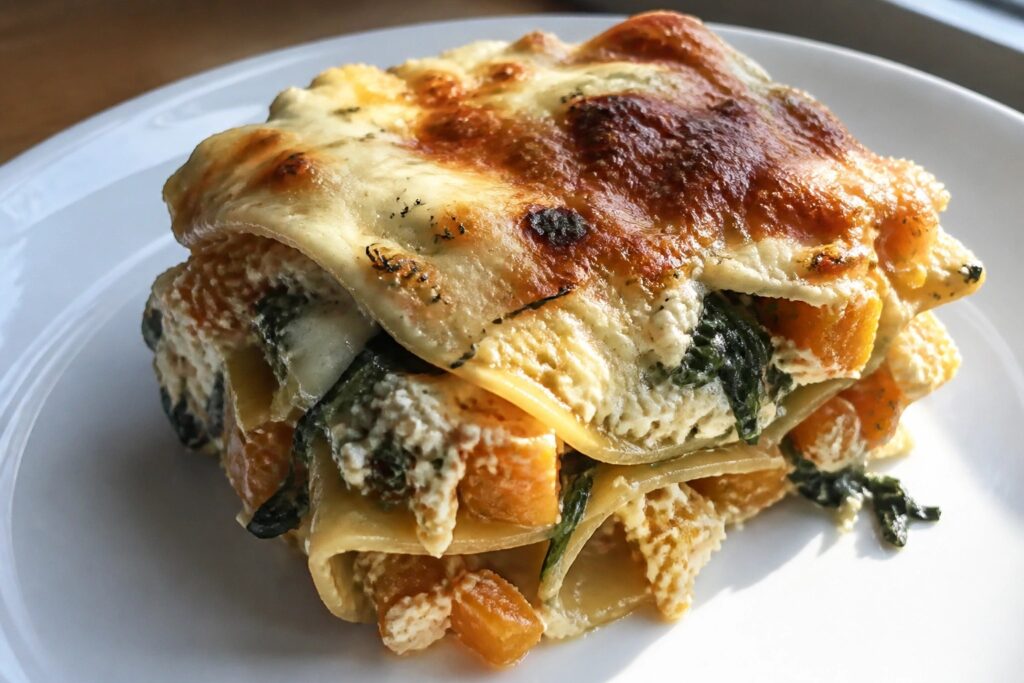
This lasagna brings the familiar flavors of spinach artichoke dip into a layered pasta dish. It works well for potlucks because it holds up during transport and reheats nicely without losing its creamy texture.
The dish combines tender noodles with a rich filling of spinach, artichokes, and three cheeses. Each bite delivers a balance of savory, garlicky notes and melted cheese that appeals to a mixed group.


Equipment
- Large Skillet
- Mixing Bowl
- 8×8 Inch Baking Dish
Ingredients
- 8 no-boil lasagna noodles
- 1 tablespoon olive oil
- 4 cloves garlic, minced
- 5 cups fresh spinach
- 1 (14-ounce) can artichoke hearts, drained and quartered
- 15 ounces ricotta cheese
- 8 ounces cream cheese, softened
- 2 cups shredded mozzarella cheese, divided
- 1/2 cup grated Parmesan cheese
- 1 teaspoon dried Italian seasoning
- Salt and black pepper to taste
Instructions
- Preheat the oven to 375°F. Lightly grease an 8×8 inch baking dish.
- Heat the olive oil in a large skillet over medium heat. Add the minced garlic and cook for 1 minute until fragrant.
- Add the spinach to the skillet and cook until wilted, about 3 minutes. Remove from heat and let cool slightly.
- In a mixing bowl, combine the ricotta cheese, cream cheese, Italian seasoning, salt, and pepper. Stir in the cooked spinach mixture, artichoke hearts, and 1 cup of mozzarella until evenly mixed.
- Spread a thin layer of the cheese mixture in the bottom of the baking dish. Place 2 noodles on top. Repeat layers with the cheese mixture and noodles until all ingredients are used, ending with a cheese layer.
- Sprinkle the remaining 1 cup of mozzarella and the Parmesan cheese over the top.
- Cover with foil and bake for 30 minutes. Remove the foil and bake for 10 more minutes until the cheese is bubbly and lightly browned. Let rest 10 minutes before slicing.
Notes
Cuisine: Italian
Equipment: Large Skillet, Mixing Bowl, 8×8 Inch Baking Dish
Chickpea Tikka Masala with Basmati Rice
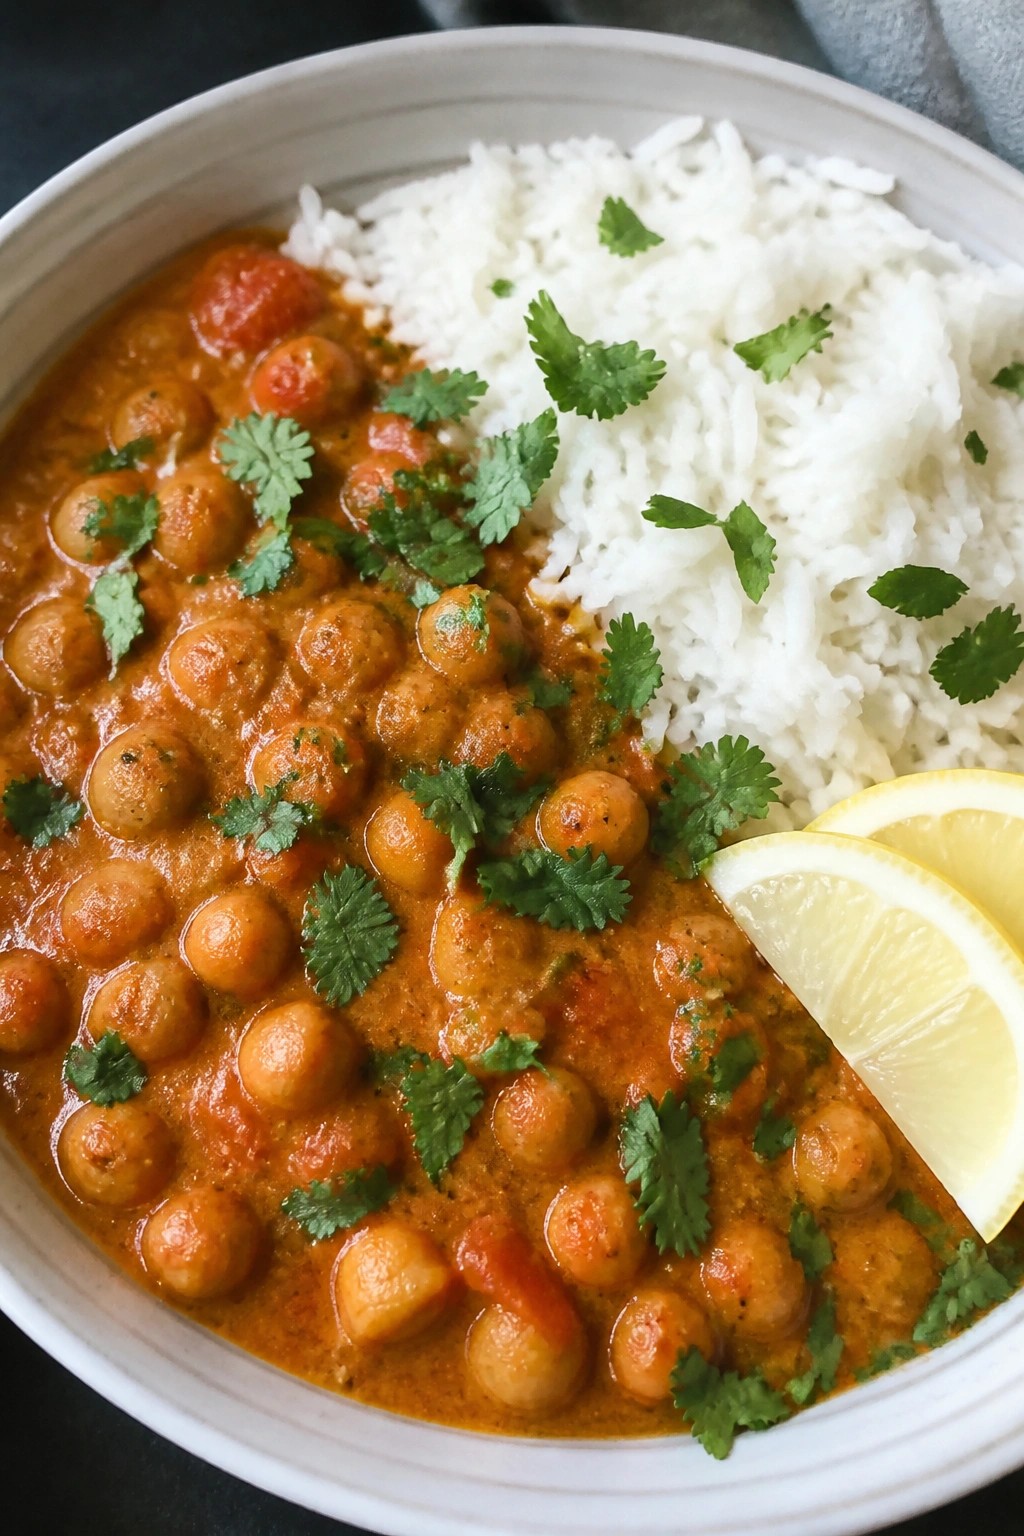
This dish brings a creamy, spiced tomato sauce together with tender chickpeas and fluffy rice. It travels well to potlucks and holds up nicely on a buffet table, giving both vegetarians and meat eaters something hearty to fill their plates.
The sauce tastes rich without being heavy, while the basmati rice keeps everything balanced. Chickpeas add a slight bite that stands out against the smooth gravy.

Equipment
- Large skillet
- Medium saucepan
Ingredients
- 1 ½ cups basmati rice
- 2 tablespoons olive oil
- 1 large yellow onion, diced
- 3 cloves garlic, minced
- 1 tablespoon grated fresh ginger
- 2 teaspoons garam masala
- 1 teaspoon ground cumin
- 1 teaspoon paprika
- ½ teaspoon turmeric
- 1 can (15 oz) crushed tomatoes
- 2 cans (15 oz each) chickpeas, drained and rinsed
- 1 cup full-fat coconut milk
- ½ teaspoon salt
- Fresh cilantro, chopped (for garnish)
- Lemon wedges (for serving)
Instructions
- Rinse the basmati rice under cold water until the water runs clear. Place it in a medium saucepan with 3 cups of water and a pinch of salt. Bring to a boil, then reduce heat to low, cover, and simmer for 15 minutes. Remove from heat and let it sit covered for 5 minutes before fluffing with a fork.
- Heat the olive oil in a large skillet over medium heat. Add the diced onion and cook for 5 minutes until it softens and turns light brown.
- Stir in the minced garlic and grated ginger. Cook for 1 minute until fragrant.
- Add the garam masala, cumin, paprika, and turmeric. Stir for 30 seconds to toast the spices.
- Pour in the crushed tomatoes and bring the mixture to a gentle simmer. Cook for 5 minutes, stirring occasionally.
- Add the drained chickpeas, coconut milk, and salt. Stir well and simmer for 10 minutes until the sauce thickens slightly and the chickpeas are heated through.
- Spoon the rice onto plates or a serving dish. Top with the chickpea tikka masala. Scatter chopped cilantro over the top and serve with lemon wedges on the side.
Notes
Cuisine: Indian
Equipment: Large skillet, Medium saucepan
Black Bean Sweet Potato Enchiladas
These enchiladas combine roasted sweet potatoes with black beans for a filling vegetarian main that holds up well at potlucks. The natural sweetness of the potatoes balances the savory beans and tangy sauce, making the dish appealing to a range of eaters without being too spicy or unusual.
The recipe bakes in one dish, so it is easy to transport and serve. Corn tortillas keep the texture sturdy after reheating, and a light cheese topping adds creaminess without overpowering the vegetables.


Equipment
- Baking dish
- Skillet
- Baking sheet
- Mixing bowl
Ingredients
- 2 medium sweet potatoes, peeled and cubed
- 1 tablespoon olive oil
- 1 small onion, diced
- 2 cloves garlic, minced
- 1 teaspoon ground cumin
- 1 can (15 oz) black beans, drained and rinsed
- 1 1/2 cups enchilada sauce, divided
- 8 small corn tortillas
- 1 cup shredded cheddar cheese
- Salt and pepper to taste
Instructions
- Preheat the oven to 400°F. Toss the cubed sweet potatoes with the olive oil, salt, and pepper on a baking sheet. Roast for 20 minutes until tender.
- While the potatoes roast, heat a skillet over medium heat. Add the diced onion and cook for 5 minutes until softened. Stir in the garlic and cumin and cook for 1 minute more.
- In a large bowl, combine the roasted sweet potatoes, onion mixture, and black beans. Mix gently and season with additional salt and pepper if needed.
- Spread 1/2 cup of enchilada sauce in the bottom of a 9×13 baking dish. Warm the tortillas briefly so they are flexible.
- Spoon the filling into each tortilla, roll them up, and place them seam-side down in the baking dish. Pour the remaining cup of enchilada sauce over the top and sprinkle with the cheddar cheese.
- Bake for 20 minutes until the cheese is melted and the edges are lightly browned. Let the dish rest for 5 minutes before serving.
Notes
Cuisine: Mexican
Equipment: Baking dish, Skillet, Baking sheet, Mixing bowl
Mediterranean Quinoa Salad with Roasted Vegetables
This Mediterranean quinoa salad works well for potlucks because it travels easily and stays satisfying at room temperature. Roasted vegetables add depth and heartiness while the quinoa keeps it filling for a mixed crowd.
The dish combines tender roasted pieces with bright lemon and herbs for a balanced bite that feels fresh without being light.


Equipment
- Baking sheet
- Saucepan
- Large bowl
Ingredients
- 1 cup quinoa
- 2 medium zucchinis, cubed
- 1 medium eggplant, cubed
- 1 red bell pepper, chopped
- 1 pint cherry tomatoes
- 1 can (15 oz) chickpeas, drained and rinsed
- 4 tablespoons olive oil
- 2 teaspoons dried oregano
- 1/2 teaspoon salt
- 1/4 teaspoon black pepper
- Juice of 1 lemon
- 1/2 cup crumbled feta cheese
- 1/4 cup chopped fresh parsley
- 1/4 cup pitted kalamata olives
Instructions
- Preheat the oven to 425 degrees. Spread the zucchini, eggplant, red bell pepper, and cherry tomatoes on a baking sheet. Drizzle with 2 tablespoons olive oil, then sprinkle with oregano, salt, and black pepper. Toss to coat evenly and roast for 25 minutes until the vegetables soften and start to brown.
- While the vegetables roast, rinse the quinoa under cold water. Place it in a saucepan with 2 cups water and bring to a boil. Reduce heat to low, cover, and simmer for 15 minutes until the water absorbs. Remove from heat and let it sit covered for 5 minutes, then fluff with a fork.
- In a large bowl, combine the cooked quinoa with the roasted vegetables and chickpeas. Add the remaining 2 tablespoons olive oil and the lemon juice. Stir gently to mix.
- Fold in the feta cheese, parsley, and kalamata olives just before serving.
Notes
Cuisine: Mediterranean
Equipment: Baking sheet, Saucepan, Large bowl
Eggplant Parmesan Casserole
This eggplant parmesan casserole layers tender slices of eggplant with rich tomato sauce and two kinds of cheese. It turns out hearty enough to please both vegetarians and meat eaters at a potluck table. The top gets lightly crisp while the inside stays saucy and creamy.
It works well for gatherings because it travels in one dish and holds up during a buffet. The flavor stays bright from the marinara and balanced by the mild eggplant and melted mozzarella.


Equipment
- Baking sheet
- 9-by-9-inch baking dish
- Colander
Ingredients
- 2 large eggplants, sliced into 1/2-inch rounds
- 1 teaspoon salt
- 3 tablespoons olive oil
- 3 cups marinara sauce
- 2 cups shredded mozzarella cheese
- 1/2 cup grated Parmesan cheese
- 1/4 cup fresh basil leaves, torn
Instructions
- Place the eggplant slices in a colander, sprinkle with salt, and let them sit for 20 minutes to draw out moisture. Rinse and pat dry with a clean towel.
- Preheat the oven to 400°F. Brush both sides of the eggplant slices with olive oil and arrange them in a single layer on a baking sheet. Roast for 20 minutes, flipping once, until the slices are soft and lightly golden.
- Spread 1 cup of marinara sauce in the bottom of a 9-by-9-inch baking dish. Add half the roasted eggplant slices in a single layer.
- Spoon another cup of marinara over the eggplant, then scatter 1 cup of mozzarella and 1/4 cup of Parmesan on top. Repeat the layers with the remaining eggplant, marinara, mozzarella, and Parmesan.
- Bake uncovered for 25 minutes until the cheese is bubbly and starting to brown. Remove from the oven and let the casserole rest for 10 minutes before sprinkling with torn basil.
Notes
Cuisine: Italian
Equipment: Baking sheet, 9-by-9-inch baking dish, Colander
Thai Red Curry with Tofu and Vegetables
This Thai red curry brings creamy coconut sauce together with crisp vegetables and golden tofu cubes. It travels well to potlucks and reheats without losing texture, so both vegetarians and meat eaters reach for seconds.
The dish balances mild heat with bright lime and fresh herbs. Serve it over rice and it becomes a complete, filling main that feels special without much fuss.


Equipment
- Large Skillet
- Cutting Board
- Knife
Ingredients
- 1 block (14 oz) firm tofu, cut into 1-inch cubes
- 2 tablespoons vegetable oil
- 1 small onion, sliced
- 3 cloves garlic, minced
- 1 tablespoon fresh ginger, minced
- 3 tablespoons Thai red curry paste
- 1 can (14 oz) full-fat coconut milk
- 1 cup vegetable broth
- 1 red bell pepper, sliced
- 1 cup broccoli florets
- 1 large carrot, sliced into thin rounds
- 2 tablespoons soy sauce
- Juice of 1 lime
- 1/4 cup fresh basil leaves
- Cooked jasmine rice, for serving
Instructions
- Press the tofu between paper towels for 10 minutes to remove excess water, then cut it into cubes. Heat 1 tablespoon of oil in a large skillet over medium heat and cook the tofu until lightly browned on all sides. Remove the tofu and set it aside.
- Add the remaining tablespoon of oil to the same skillet. Cook the onion, garlic, and ginger for 2 minutes until the onion softens.
- Stir in the red curry paste and cook for 1 minute to release its aroma.
- Pour in the coconut milk and vegetable broth. Stir well to combine everything.
- Add the bell pepper, broccoli, and carrot. Simmer for 8 to 10 minutes until the vegetables are tender but still bright.
- Return the tofu to the skillet. Stir in the soy sauce and lime juice. Cook for 2 more minutes to warm the tofu through.
- Remove the skillet from heat and scatter the basil leaves over the curry. Serve over bowls of jasmine rice.
Notes
Cuisine: Thai
Equipment: Large Skillet, Cutting Board, Knife
Three-Bean Chili with Cornbread Topping
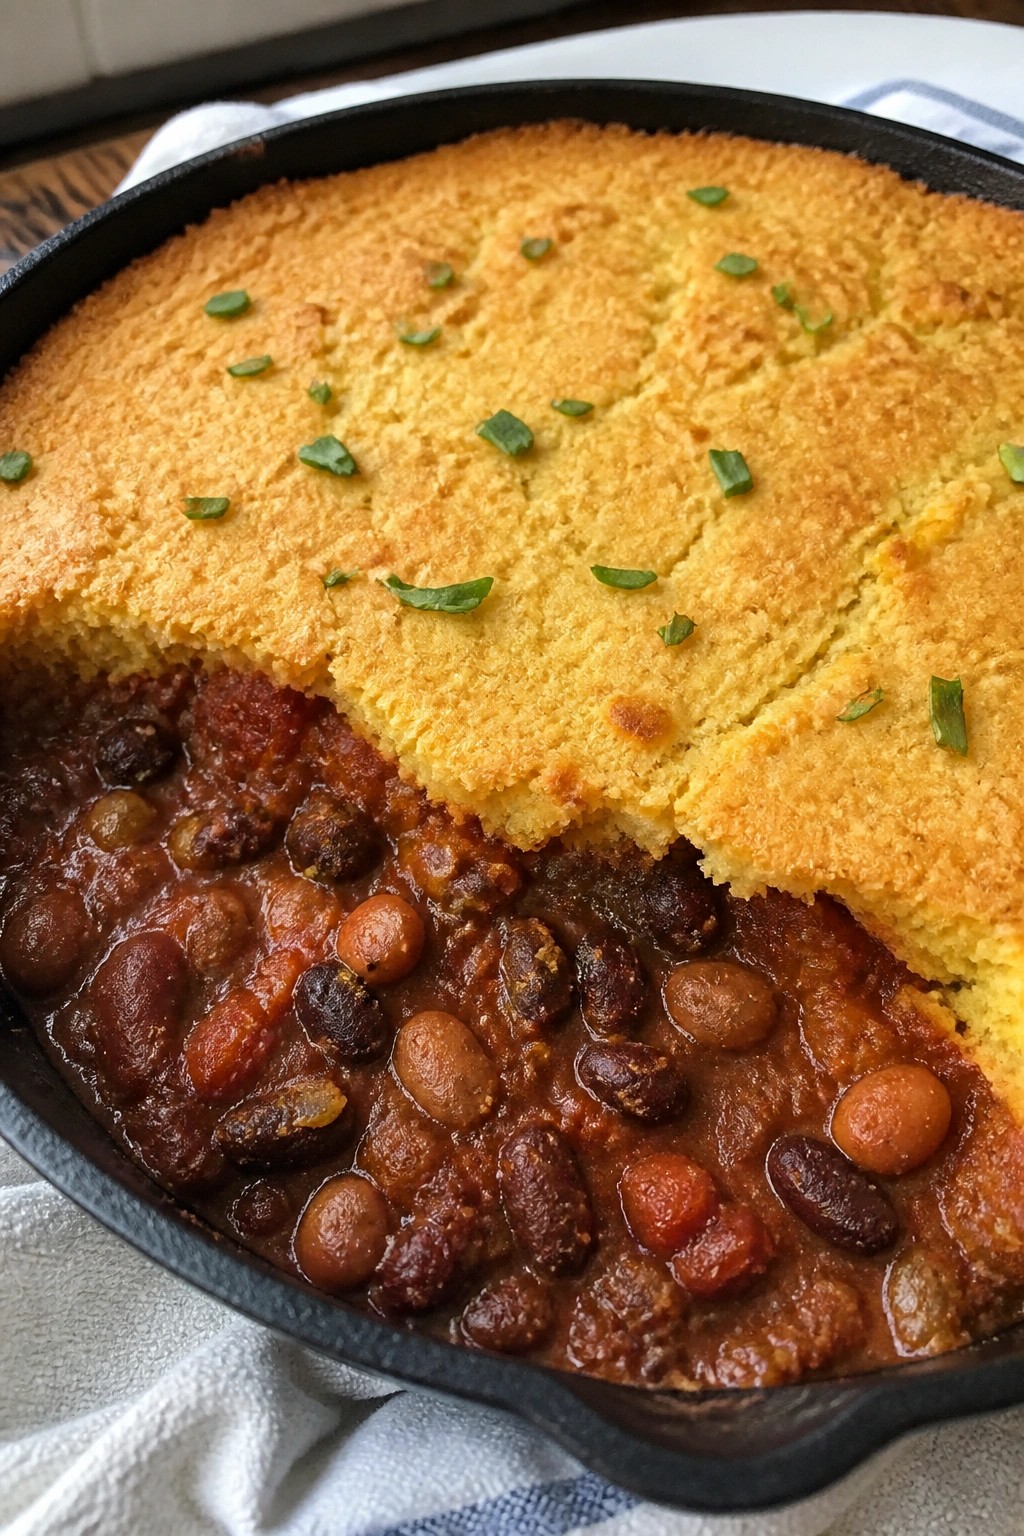
This three-bean chili builds a thick, spiced base with black, kidney, and pinto beans simmered in tomatoes. The cornbread topping bakes directly on top to create a golden crust that contrasts with the hearty filling below. It travels well to potlucks and holds up on a buffet without needing constant attention.
The dish gives a complete meal in one pan, with protein from the beans and a comforting bread element that appeals to both vegetarians and meat eaters. Flavors stay balanced with mild heat and a touch of sweetness from the cornbread.

Equipment
- Large oven-safe skillet
- Mixing bowl
- Baking dish
Ingredients
- 1 tablespoon olive oil
- 1 medium onion, diced
- 2 cloves garlic, minced
- 1 red bell pepper, diced
- 1 can (15 oz) black beans, drained and rinsed
- 1 can (15 oz) kidney beans, drained and rinsed
- 1 can (15 oz) pinto beans, drained and rinsed
- 1 can (14.5 oz) diced tomatoes
- 2 tablespoons chili powder
- 1 teaspoon ground cumin
- 1/2 teaspoon salt
- 1 cup cornmeal
- 1 cup all-purpose flour
- 1 tablespoon baking powder
- 1 cup milk
- 1 large egg
- 1/4 cup vegetable oil
Instructions
- Heat the olive oil in a large oven-safe skillet over medium heat. Add the onion, garlic, and bell pepper. Cook until the vegetables soften.
- Stir in the black beans, kidney beans, pinto beans, diced tomatoes, chili powder, cumin, and salt. Simmer the mixture for 10 minutes to thicken slightly.
- In a mixing bowl, combine the cornmeal, flour, and baking powder. Add the milk, egg, and vegetable oil. Stir until a thick batter forms.
- Pour the batter evenly over the chili in the skillet. Transfer the skillet to a 400°F oven and bake for 20 minutes until the topping is golden and a toothpick inserted in the center comes out clean.
- Remove from the oven and let it rest for 5 minutes before serving.
Notes
Cuisine: American
Equipment: Large oven-safe skillet, Mixing bowl, Baking dish
Mushroom Stroganoff with Wide Egg Noodles
This creamy stroganoff highlights meaty mushrooms in a simple sauce that clings to wide noodles. It travels well to potlucks and gives both vegetarians and meat eaters a filling main they will reach for again.
The dish tastes earthy and savory with a light tang from sour cream. Wide noodles add chew while the mushrooms provide the main texture. It feels like comfort food without needing meat.


Equipment
- Large pot
- Large skillet
- Wooden spoon
Ingredients
- 12 ounces wide egg noodles
- 1 pound cremini mushrooms, sliced
- 1 yellow onion, finely chopped
- 3 garlic cloves, minced
- 2 tablespoons unsalted butter
- 2 tablespoons all-purpose flour
- 1 ½ cups vegetable broth
- 1 teaspoon smoked paprika
- 1 tablespoon Dijon mustard
- ½ cup sour cream
- Salt and black pepper, to taste
- ¼ cup chopped fresh parsley
Instructions
- Bring a large pot of salted water to a boil. Cook the egg noodles according to package directions until al dente. Drain and set aside.
- Melt the butter in a large skillet over medium heat. Add the sliced mushrooms and cook until they release their liquid and start to brown, about 6 minutes.
- Add the chopped onion and minced garlic to the skillet. Cook until the onion softens, about 4 minutes.
- Sprinkle the flour and smoked paprika over the mushroom mixture. Stir for 1 minute to coat everything evenly.
- Slowly pour in the vegetable broth while stirring. Add the Dijon mustard, salt, and pepper. Simmer until the sauce thickens, about 3 minutes.
- Remove the skillet from heat. Stir in the sour cream until fully combined and smooth.
- Add the drained noodles to the skillet and toss to coat. Sprinkle with chopped parsley before serving.
Notes
Cuisine: American
Equipment: Large pot, Large skillet, Wooden spoon
Greek Spanakopita with Phyllo Crust
This spinach and feta pie wrapped in crisp phyllo layers brings a savory, herby filling that holds up well at room temperature. It travels easily to potlucks and gives both vegetarians and meat eaters a hearty option they can enjoy as a main dish.
The golden, flaky crust contrasts with the creamy spinach center. It works especially well when you need a make-ahead dish that still feels fresh on the table.


Equipment
- Large skillet
- Mixing bowl
- 8×8 baking dish
- Pastry brush
Ingredients
- 10 sheets phyllo dough
- 1 pound fresh spinach
- 8 ounces feta cheese, crumbled
- 1 medium onion, finely chopped
- 2 garlic cloves, minced
- 2 large eggs
- 1/4 cup olive oil
- 2 tablespoons chopped fresh dill
- 1/2 teaspoon salt
- 1/4 teaspoon black pepper
Instructions
- Preheat the oven to 375 degrees F and lightly oil an 8 by 8 inch baking dish.
- Heat 1 tablespoon of the olive oil in a large skillet over medium heat. Add the onion and cook until soft, about 5 minutes.
- Stir in the garlic and cook for 1 minute more. Add the spinach in batches and cook until wilted. Remove from heat and let cool slightly.
- In a mixing bowl, beat the eggs. Stir in the crumbled feta, dill, salt, and pepper. Mix in the cooled spinach.
- Lay one phyllo sheet in the baking dish and brush lightly with olive oil. Repeat with four more sheets, brushing each layer.
- Spread the spinach filling evenly over the phyllo base.
- Top with the remaining five phyllo sheets, brushing each with olive oil. Tuck the edges down around the sides.
- Score the top layers into squares with a sharp knife. Bake for 35 to 40 minutes until the crust is golden and crisp. Cool for 10 minutes before slicing.
Notes
Cuisine: Mediterranean
Equipment: Large skillet, Mixing bowl, 8×8 baking dish, Pastry brush
Butternut Squash Risotto with Crispy Sage
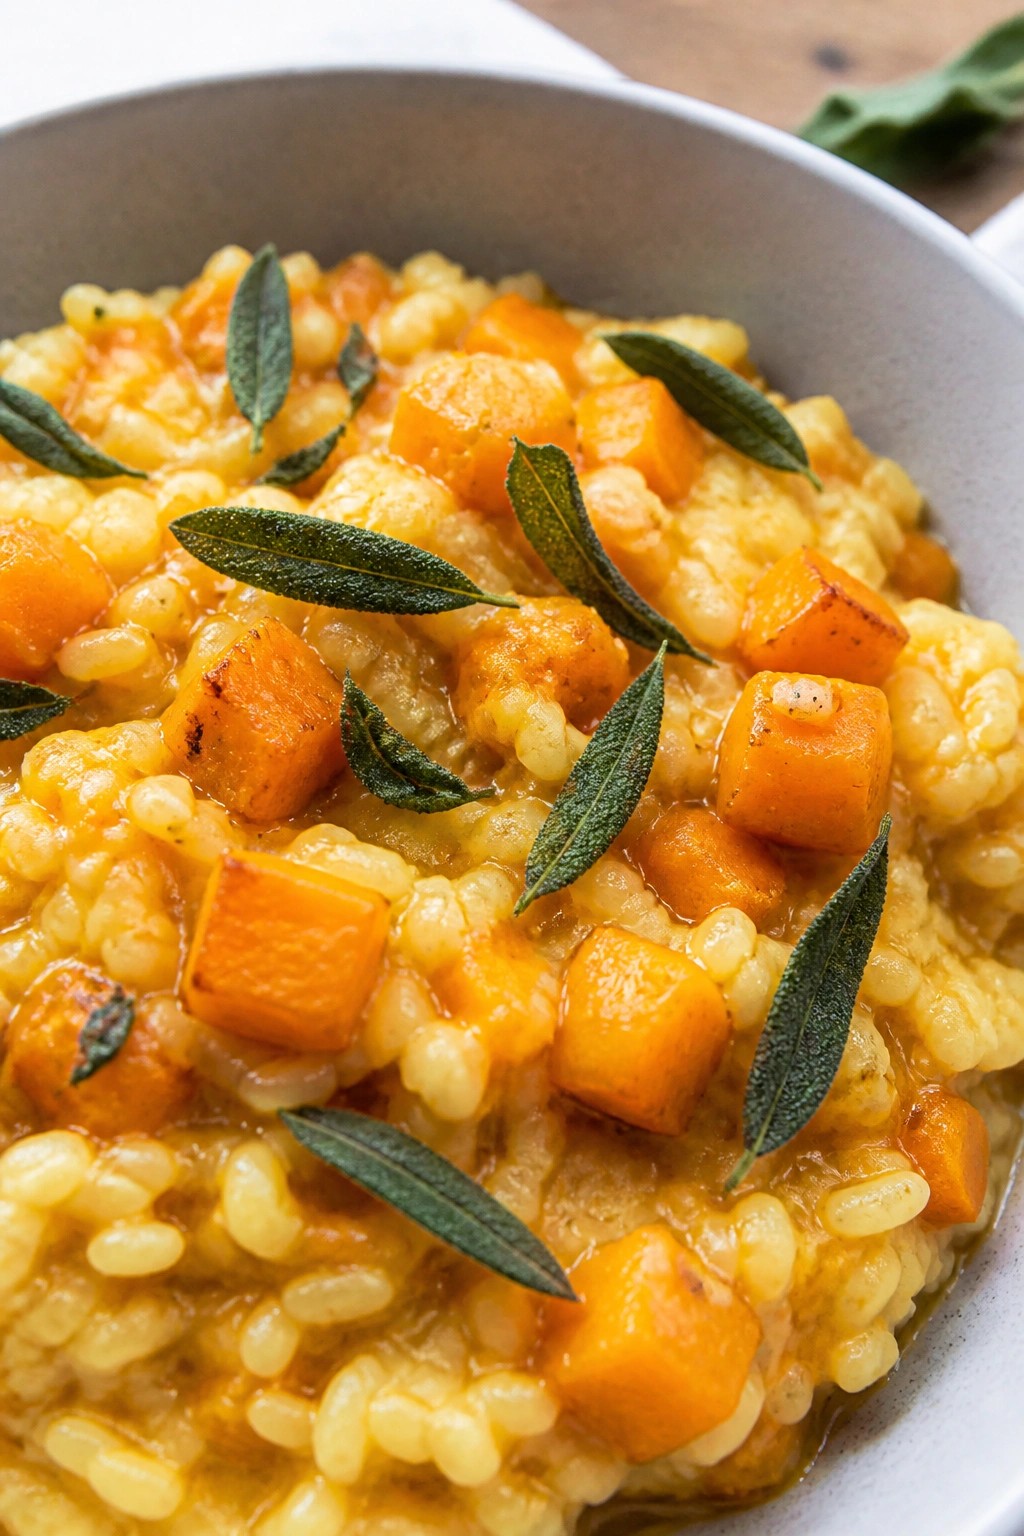
This risotto brings together sweet roasted squash and creamy rice in one pan. It travels well to potlucks and holds up on a buffet table without losing its appeal. The crispy sage on top adds a savory crunch that balances the soft texture of the rice.
The dish feels comforting yet a bit special. Mixed groups tend to go back for seconds because the flavors are familiar but the presentation stands out.

Equipment
- Baking Sheet
- Large Pot
- Small Skillet
- Saucepan
Ingredients
- 1 medium butternut squash, peeled and cut into 1/2-inch cubes
- 1 1/2 cups Arborio rice
- 4 cups vegetable broth
- 1 small onion, finely diced
- 2 garlic cloves, minced
- 12 fresh sage leaves
- 1/2 cup grated vegetarian Parmesan cheese
- 3 tablespoons olive oil, divided
- 2 tablespoons butter
- 1/2 teaspoon salt
- 1/4 teaspoon black pepper
Instructions
- Heat the oven to 400°F. Toss the cubed squash with 1 tablespoon olive oil, salt, and pepper. Spread on a baking sheet and roast for 25 minutes until tender and lightly browned.
- Warm the vegetable broth in a saucepan over low heat.
- In a large pot, heat 1 tablespoon olive oil and the butter over medium heat. Add the onion and cook until soft. Stir in the garlic for one minute.
- Add the Arborio rice and stir for two minutes until the grains look slightly toasted.
- Ladle in one cup of warm broth and stir until mostly absorbed. Continue adding broth one cup at a time, stirring often, until the rice is creamy and tender. This takes about 20 minutes.
- Stir the roasted squash and Parmesan into the finished risotto. Taste and add more salt if needed.
- In a small skillet, heat the remaining tablespoon of olive oil over medium heat. Fry the sage leaves for 30 to 45 seconds until crisp. Drain on a paper towel.
- Spoon the risotto into a serving dish and scatter the crispy sage on top.
Notes
Cuisine: Italian
Equipment: Baking Sheet, Large Pot, Small Skillet, Saucepan
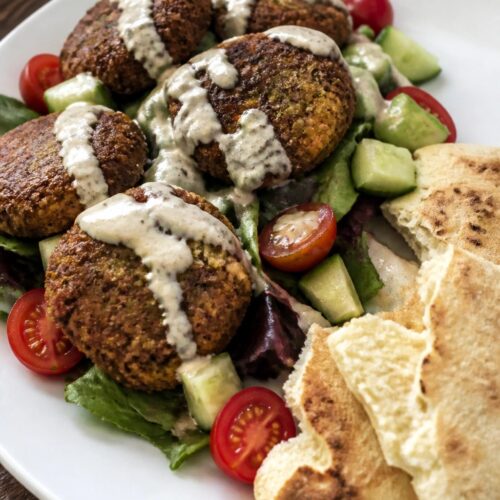
Falafel Bowls with Tahini Sauce and Pita
These falafel bowls combine crispy chickpea patties with a creamy tahini sauce, fresh vegetables, and warm pita on the side. They travel well to potlucks and let guests assemble their own portions, which keeps everything fresh until serving time.
The flavor comes from herbs and warm spices in the falafel, balanced by bright lemon in the sauce. Each bowl offers a mix of crunchy, creamy, and soft textures that hold up even after sitting on a buffet table.

Equipment
- Food processor
- Baking sheet
- Mixing bowl
- Whisk
Ingredients
- 2 (15-oz) cans chickpeas, drained and rinsed
- 1/2 cup fresh parsley leaves
- 1/4 cup fresh cilantro leaves
- 3 garlic cloves, peeled
- 1 small onion, roughly chopped
- 1 tsp ground cumin
- 1 tsp salt
- 1/2 tsp black pepper
- 1/4 cup all-purpose flour
- 3 tbsp tahini
- 2 tbsp lemon juice
- 1/4 cup water
- 4 pita breads
- 4 cups mixed greens
- 1 cup cherry tomatoes, halved
- 1 cucumber, diced
- 2 tbsp olive oil
Instructions
- Preheat the oven to 400°F and line a baking sheet with parchment paper.
- Add the chickpeas, parsley, cilantro, garlic, onion, cumin, salt, pepper, and flour to a food processor. Pulse until the mixture holds together when pressed but still has some texture.
- Scoop the mixture into 12 portions and shape each into a patty. Place the patties on the prepared baking sheet and brush both sides with olive oil.
- Bake for 20 minutes, flipping halfway through, until the falafel are golden and firm.
- While the falafel bake, whisk the tahini, lemon juice, and water in a small bowl until smooth. Add a little extra water if needed to reach a pourable consistency.
- Warm the pita breads in the oven for the last 3 minutes of baking time.
- Divide the mixed greens, cherry tomatoes, and cucumber among four bowls. Top each with three falafel patties, drizzle with tahini sauce, and serve with warm pita on the side.
Notes
Cuisine: Mediterranean
Equipment: Food processor, Baking sheet, Mixing bowl, Whisk
Pesto Pasta Primavera with Cherry Tomatoes
This pasta dish combines al dente noodles with a colorful mix of sautéed vegetables and a bright pesto coating. It travels easily to potlucks and stays appealing even after sitting out for a while.
The cherry tomatoes add bursts of sweetness while the other vegetables keep a light crunch. The overall result is fresh and balanced without feeling heavy.


Equipment
- Large pot
- Large skillet
- Colander
Ingredients
- 12 oz penne pasta
- 2 tbsp olive oil
- 1 medium zucchini, sliced into half-moons
- 1 red bell pepper, sliced
- 8 oz broccoli florets
- 1 pint cherry tomatoes, halved
- 3/4 cup basil pesto
- Salt and black pepper to taste
- Fresh basil leaves for garnish
Instructions
- Bring a large pot of salted water to a boil and cook the penne until al dente. Drain the pasta in a colander and set it aside.
- Heat the olive oil in a large skillet over medium heat. Add the zucchini, red bell pepper, and broccoli florets. Cook for 5 to 6 minutes, stirring occasionally, until the vegetables are crisp-tender.
- Stir the halved cherry tomatoes into the skillet and cook for 1 minute more, just until they start to soften.
- Add the drained pasta to the skillet along with the basil pesto. Toss everything together until the pasta and vegetables are evenly coated.
- Season with salt and black pepper to taste. Remove from heat, transfer to a serving dish, and scatter fresh basil leaves over the top.
Notes
Cuisine: Italian
Equipment: Large pot, Large skillet, Colander
Lentil Shepherd’s Pie with Potato Topping
This lentil shepherd’s pie brings a hearty, vegetable-packed filling under a layer of creamy mashed potatoes. It works well for potlucks because it holds up during transport and reheats without losing texture. The lentils give the dish a savory, meaty bite while the potato topping stays light and golden.
The flavors come from slow-simmered vegetables and herbs in a light tomato broth. It feels familiar enough for meat eaters yet stays fully vegetarian. The result is a one-dish meal that slices cleanly and travels easily.


Equipment
- Large skillet
- Large pot
- Potato masher
- 8-inch baking dish
- Oven
Ingredients
- 1 cup green lentils, rinsed
- 4 large russet potatoes, peeled and quartered
- 1 yellow onion, diced
- 2 carrots, diced
- 2 celery stalks, diced
- 3 garlic cloves, minced
- 2 tablespoons tomato paste
- 2 cups vegetable broth
- 1 teaspoon dried thyme
- 1/2 cup milk
- 3 tablespoons butter
- 1/2 teaspoon salt
- 1/4 teaspoon black pepper
Instructions
- Place the lentils, onion, carrots, celery, garlic, tomato paste, vegetable broth, thyme, salt, and pepper in a large skillet. Bring to a simmer over medium heat.
- Cook the lentil mixture for 25 minutes, stirring occasionally, until the lentils are tender and most of the liquid has been absorbed.
- While the filling simmers, boil the potatoes in a large pot of salted water for 15 minutes until fork-tender. Drain well.
- Return the potatoes to the pot. Add the milk and 2 tablespoons of the butter, then mash until smooth. Season with a pinch of salt if needed.
- Preheat the oven to 400°F. Spread the lentil filling evenly in an 8-inch baking dish.
- Spoon the mashed potatoes over the filling and spread to cover completely. Dot the surface with the remaining tablespoon of butter.
- Bake for 20 minutes until the potato topping is lightly browned on top. Let rest 5 minutes before serving.
Notes
Cuisine: British
Equipment: Large skillet, Large pot, Potato masher, 8-inch baking dish, Oven
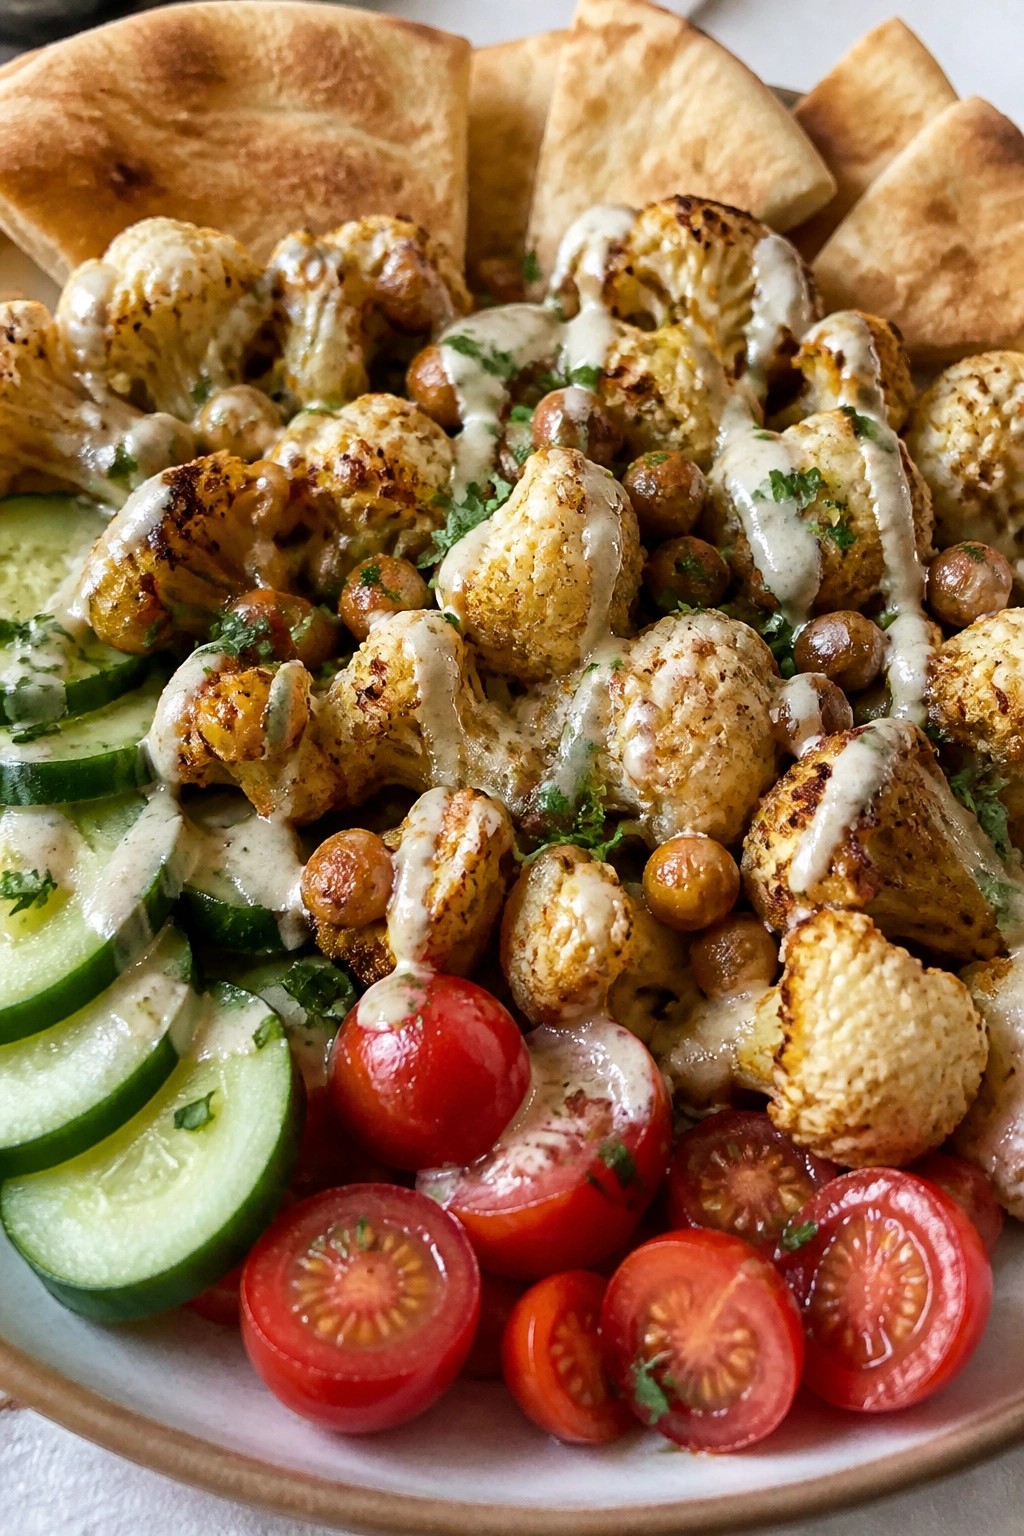
Roasted Cauliflower and Chickpea Shawarma Platter
This platter turns simple roasted vegetables into a spiced, filling main that stands out at any potluck. The shawarma seasoning gives the cauliflower and chickpeas a warm, savory depth that appeals to both vegetarians and meat eaters.
The dish works well because it can be made ahead and served at room temperature. Roasted edges on the cauliflower add crunch, while the chickpeas stay tender inside and the fresh toppings keep everything bright.

Equipment
- Baking sheets
- Large bowl
- Small bowl
Ingredients
- 1 large head cauliflower, cut into florets
- 2 (15-ounce) cans chickpeas, drained and rinsed
- 3 tablespoons olive oil
- 2 teaspoons ground cumin
- 1 teaspoon smoked paprika
- 1/2 teaspoon ground turmeric
- 1/2 teaspoon ground cinnamon
- 1 teaspoon garlic powder
- 1/2 teaspoon salt
- 1/4 teaspoon black pepper
- 1/4 cup tahini
- 2 tablespoons lemon juice
- 1/4 cup chopped fresh parsley
- 1 cucumber, sliced
- 1 cup cherry tomatoes, halved
- 4 pita breads, warmed
Instructions
- Preheat the oven to 425 degrees. Line two baking sheets with parchment paper.
- In a large bowl, toss the cauliflower florets and chickpeas with the olive oil, cumin, smoked paprika, turmeric, cinnamon, garlic powder, salt, and black pepper until evenly coated.
- Spread the mixture in a single layer across the two baking sheets. Roast for 25 to 30 minutes, stirring once halfway through, until the cauliflower edges are browned and the chickpeas are crisp.
- While the vegetables roast, stir the tahini and lemon juice together in a small bowl to make a thin sauce. Add a tablespoon of water if needed to reach a drizzling consistency.
- Arrange the roasted cauliflower and chickpeas on a large platter. Top with sliced cucumber, halved cherry tomatoes, and chopped parsley. Drizzle with the tahini sauce and serve with the warmed pita breads on the side.
Notes
Cuisine: Mediterranean
Equipment: Baking sheets, Large bowl, Small bowl
